Beginning asp net 2.0 with c phần 9 pptx
Bạn đang xem bản rút gọn của tài liệu. Xem và tải ngay bản đầy đủ của tài liệu tại đây (2.04 MB, 77 trang )
Using ASP.NET Tracing
You first looked at tracing in Chapter 14. It is the technique of adding code to your pages, for a few rea-
sons: for debugging purposes, to output values of variables, or simply to find out where in your code
certain things happen. The great thing about ASP.NET tracing is that not only is it extremely simple to
do, but it’s also easily configurable and doesn’t require tracing code to be removed if you don’t want the
trace information shown. What’s also great is that you get a wealth of additional information about the
page, which can be useful for both debugging purposes and for learning about ASP.NET.
Tracing Individual Pages
Tracing can be turned on for individual pages by adding the Trace attribute to the Page directive:
<%@ Page Trace=”true” %>
On its own, this outputs a great deal of information about the page, but you can also add your own out-
put using the
Trace class, which has methods to write output to the trace log:
Trace.Write(“my information”)
The following Try It Out shows tracing in action.
Try It Out Page-Level Tracing
1.
In the Wrox United application for the chapter, open Checkout.aspx in Source View.
2. Add the Trace attribute to the Page directive:
<%@ Page Trace=”True” %>
3. Save the file and run the application.
4. Add some items from the shop to your shopping cart and navigate to the Checkout page, where
you’ll see that the bottom of the page has lots of information added. You might have to scroll
down the page to see all of the information.
5. Switch back to VWD and open the code file for the Checkout page.
6. At the top of the Page_Load event, add the following line of code:
Trace.Write(“In Page_Load”);
7. Before the check to see if the user is authenticated, add the following:
Trace.Write(“In page_Load”, User.Identity.IsAuthenticated.ToString());
if (User.Identity.IsAuthenticated)
8. Save the page and run the application, again navigating to the Checkout page.
9. Scroll the page down so you can see the Trace Information section, as shown in Figure 15-6.
10. Here you can see that the output from the Trace.Write statements is mixed with the output
that ASP.NET puts into the trace. Take a look at how this works and what information the trace
output produces.
584
Chapter 15
18_042583 ch15.qxd 4/4/06 2:52 PM Page 584
Figure 15-6
11. Edit Checkout.aspx again and set the Trace attribute to False:
<%@ Page Trace=”False” %>
12. Save the page and run the application, again navigating to the Checkout page. Notice that the
trace information is gone from the page, even though the
Trace.Write statements are still in
the code.
How It Works
The first thing to look at is what all of this trace information is, and what it is useful for. There are many
sections, as detailed in the following table.
Section Contains
Request Details Details of the request, such as the status code.
Trace Information The flow of page events, showing the category, message, and
time from the first to last byte of information sent to the browser.
Control Tree The hierarchy of controls in the page.
Session State Any session variables in use.
Application State Any application variables in use.
Request Cookies Collection The cookies stored for the current site.
Response Cookies Collection Any cookies set during the page processing.
Headers Collection The HTTP headers.
Response Headers Collection Any headers set during the page processing.
Form Collection Contents of the form.
QueryString Collection Any querystring parameters for the request.
Server Variables The HTTP server variables.
585
Dealing with Errors
18_042583 ch15.qxd 4/4/06 2:52 PM Page 585
All of this information is useful, although some sections are more useful than others. The Control Tree,
for example, clearly shows the hierarchy of controls. You saw this in Chapter 14 when you looked at per-
formance, but it’s also useful for understanding how the page is made up from the hierarchy of controls.
At the top is the
Page object, beneath that the Master page, and then controls within the Master page.
This continues with all of the page objects, and shows the unique name of the control as well as its type.
The Trace Information section shows the events in the order in which they are raised, so it is great for
seeing exactly when things happen. Without any trace information of your own, the standard page
events are shown, and anything you write is slotted into its correct space. So take a look what you
actually did:
protected void Page_Load(object sender, System.EventArgs e)
{
Trace.Write(“In Page_Load”);
if (!Page.IsPostBack)
{
if (Profile.Cart == null)
{
NoCartlabel.Visible = true;
Wizard1.Visible = false;
}
Trace.Write(“In Page_Load”, User.Identity.IsAuthenticated.ToString());
if (User.Identity.IsAuthenticated)
Wizard1.ActiveStepIndex = 1;
else
Wizard1.ActiveStepIndex = 0;
}
In the first statement, you used Trace.Write to output a single string, which is displayed in the
Message column. With the second
Trace.Write, you passed in two parameters, and in this case, the
first becomes the Category and the second becomes the Message. You can put trace statements anywhere
within your code, and the output will be displayed in the Trace Information section, so it’s a great way
to simply see what’s happening in your code. There is a also a
Warn method of the Trace class, which
outputs in the same way as
Write, but the content is in red. This is useful for picking out statements
within the trace output.
The other thing you may have noticed is that by changing the value of the
Trace attribute at the top of
page to
False, no trace output is displayed. You didn’t have to remove the Trace.Write statements
from the code, because these are simply ignored if tracing isn’t enabled. This is great during develop-
ment, because you can liberally sprinkle
Trace.Write statements throughout your code to give you a
good understanding of the program flow, and you can turn on or off the tracing without having to
remove or comment out these statements.
Tracing All Pages
Although tracing in individual pages is useful, what’s great is being able to control tracing for the entire
application. This is done with a configuration setting in
Web.config, within the <system.web> section:
<trace enabled=”True” />
586
Chapter 15
18_042583 ch15.qxd 4/4/06 2:52 PM Page 586
When the enabled attribute is set to True, tracing is enabled for the application, but the output isn’t
shown in the pages. Instead, it is stored for viewing by way of a special URL—
Trace.axd — which
doesn’t point to a physical file, but is instead interpreted by ASP.NET. You give application tracing a go
in the next Try It Out.
Try It Out Application-Level Tracing
1.
In Source View in Checkout.aspx, remove the Trace attribute from the Page directive at the
top of the page.
2. Open Web.config and add the following within the <system.web> section:
<trace enabled=”True” />
3. Save the file and run the application, navigating to the Checkout page.
4. Within Internet Explorer, select File➪New➪Window (or press Control+N) to launch a new win-
dow from the same site.
5. In the address bar, change Checkout.aspx to Trace.axd and press Enter. You should see some-
thing like Figure 15-7.
Figure 15-7
6. Click the View Details link on the Checkout.aspx line, and you will see the trace page you’ve
already seen. Notice that it contains the two pieces of data that were added to
Checkout.aspx
in the Page_Load event.
587
Dealing with Errors
18_042583 ch15.qxd 4/4/06 2:52 PM Page 587
How It Works
The working of this is simple: by enabling the trace element in Web.config, you are instructing
ASP.NET to keep track of the trace information, but not to show it in the page. When you navigate to
Trace.axd, ASP.NET recognizes this special URL, and instead of returning the standard 404 error page
(or a custom page if you have one configured), it returns a list of pages that have been accessed in the
application. Clicking the View Details link displays the trace information for that page.
The
<trace> element has several attributes in Web.config, as described in the following table.
Attribute Description
enabled Indicates whether or not application tracing is enabled. The default value
is False.
localOnly When set to True, this ensures that Trace.axd is only accessible from the
local machine.
True is the default value, and stops remote users of the
site from accessing the trace information.
mostRecent Indicates whether or not the most recent trace requests are kept. The
default is
False, which keeps the first n items, where n is determined by
the
requestLimit attribute. If this is True, then the most recent n items
are kept.
pageOutput When this is set to True, the trace output is shown in the actual page, as
well as being stored for show by
Trace.axd. The default is False,
although this doesn’t affect pages that have tracing enabled on them
directly.
requestLimit The number of trace requests to store.
traceMode Indicates the order in which the trace requests are shown. The default is
SortByTime, where the order is time-based, but this can also be SortBy
Category, where the requests are shown alphabetically.
The greatest thing about application tracing is that it can be invaluable in finding bugs in a running sys-
tem. You can edit pages to add
Trace.Write and turn on application tracing — the trace information
will be stored, but the users won’t see any of it. You can then examine the trace details to help diagnose
any problems.
Using the Debugger
The tracing features of ASP.NET 2.0 provide a great way to trace the flow of the application, but probably
the most important weapon in your coding arsenal is the debugger. This allows you to halt the application
while it is running, examine variables, and step through the code line by line. The debugger is built into
Visual Web Developer and Visual Studio 2005, so you don’t have to run a separate application — you sim-
ply run the application from the development tool. The best way to learn debugging is to actually use it,
as you do in the following Try It Out.
588
Chapter 15
18_042583 ch15.qxd 4/4/06 2:52 PM Page 588
Try It Out Debugging
1.
In the Wrox United application for the chapter, open Checkout.aspx.cs.
2. In the Page_Load event, place the cursor on the line that checks to see if the cart has a value:
if (Profile.Cart == null)
3. Set a breakpoint on this line. You can do this in one of three ways. The first is by selecting the
Toggle Breakpoint option from the Debug menu. The next is by pressing F9, and the last is by
clicking the gray border at the left of the line of code:
4. Whichever method you use, this is a toggle, so performing the same action again removes the
breakpoint. When a breakpoint is set, the gray border will show a red circle and the line will be
highlighted, as shown in Figure 15-8.
Figure 15-8
5. Scroll down to the Wizard1_FinishButtonClick event, and place a breakpoint on the follow-
ing line:
foreach (CartItem item in Profile.Cart.Items)
6. Run the application from VWD or VS and navigate to the Checkout page. The page will not
display — you’ll see that you are stopped in the debugger (see Figure 15-9).
7. Press F5, or select Continue from the Debug menu. The page now appears.
8. Add some items to the shopping cart and then navigate to the end of the Checkout page again.
When the breakpoint is reached, press F5, and you’ll see the error message shown in Figure 15-10.
You’ve hit an exception so the debugger halts. This is because of a change to the checkout code
you did earlier, where you had an incorrect SQL statement so that you could force an exception.
589
Dealing with Errors
18_042583 ch15.qxd 4/4/06 2:52 PM Page 589
Figure 15-9
Figure 15-10
9. Click the View Detail link to show the details of the exception. Click the plus sign (+) to expand
the details (see Figure 15-11), and you’ll see that the exception shows your custom text and that
there is an InnerException.
10. Click this open to show the original exception, in that there isn’t a table called no_Orders.
This isn’t something that can be corrected while running the application, so you need to stop
debugging.
11. From the Debug menu, select Stop Debugging, or press Shift+F5.
590
Chapter 15
18_042583 ch15.qxd 4/4/06 2:52 PM Page 590
Figure 15-11
12. Edit the code to correct the error, changing no_Orders back to Orders:
cmd.CommandText = “INSERT INTO ORDERS(MemberName ”;
13. Run the application again, and navigate to the Checkout page again, making sure you have
logged in and there are at least three items in your shopping cart.
14. When the breakpoint is reached in Page_Load, press F5 to continue.
15. Continue through the checkout process, noticing that the breakpoint doesn’t get hit when you
click the Next button. The breakpoint in
Page_Load will only be reached the first time the page
is loaded because the code block in which the breakpoint is set is only when
IsPostBack is
false.
16. When you get to the end of the checkout process, click Finish, and another breakpoint will be
reached, as shown in Figure 15-12.
17. From the Debug menu, select Step Over, or press F10. Notice that execution moves to the
next line.
18. Keep pressing F10 until you get to the line that sets the @Quantity parameter. Notice how exe-
cution moves to the next line each time you step.
19. Hover the cursor over the item of item.Quantity, and you’ll see the tooltip showing the value
of the variable.
20. Without moving the currently active line, hover the cursor over the item of the foreach line.
You’ll see another tooltip, but this time there isn’t a value. That’s because this is a complex type,
a
CartItem, but notice that there is a little plus sign on the left.
591
Dealing with Errors
18_042583 ch15.qxd 4/4/06 2:52 PM Page 591
Figure 15-12
21. Hover over or click the +, and the properties (both public and private) are shown for the item
(see Figure 15-13).
Figure 15-13
22. From the Debug menu, select Step Into, or press F11. This will step into the line of code, opening
up the code for the shopping cart, in the property
get, as depicted in Figure 15-14.
Figure 15-14
23. Keep pressing F11 until you are back into the checkout code.
24. Right-click the trans.Commit() line, and select the Run To Cursor option. Notice how all inter-
mediate code is run, but that the next line is the
trans.Commit() line.
592
Chapter 15
18_042583 ch15.qxd 4/4/06 2:52 PM Page 592
25. From the Debug menu, select Delete All Breakpoints, or select Control+Shift+F9.
26. Press F5 to continue the code, and you’ll be back in the browser.
How It Works
Debugging works because VWD controls the interaction of code. Normally the code runs without inter-
ruption, but a breakpoint tells VWD to suspend code at the appropriate line. And because VWD is in
control, its debugging capabilities enable you to view variables, step through code line by line, and so
on. Stepping through code is further enhanced by the fact that you can step into code called from the
current routine. In this example, you stepped from the code in
Checkout.aspx.cs into Shopping.cs,
enabling you to follow the program flow line by line.
Debugging is extremely useful for not only tracking down problems in code, but also for understanding
the flow of code. You can use it to understand which methods are called, the order in which they are
called, and what code does in those methods. It’s a practical skill that will make you a good program-
mer, so it’s worthwhile spending time getting used to the debugger.
It’s worth pointing out the difference between the various actions of the debug toolbar. These are sum-
marized in the following table. An empty entry for the shortcut key means that there is no default key
for that action.
Toolbar Icon Shortcut Key Description
F5 Run the application if it currently isn’t running, or con-
tinue running the application if it is currently paused at a
breakpoint.
Pause the running of the application.
Shift+F5 Stop debugging the application.
Ctrl+Shift+F5 Restart the application.
Show the next statement, which highlights the next state-
ment to be executed.
F11 Step into a method. If the current line contains a method
or property from another class, then stepping into that
method will load the code file for the class and allow
stepping through the code for the method or property.
F10 Step over a method. If the current line contains a method
or property from another class, then stepping over will
execute the line without allowing stepping through the
code for the method or property.
Table continued on following page
593
Dealing with Errors
18_042583 ch15.qxd 4/4/06 2:52 PM Page 593
Toolbar Icon Shortcut Key Description
Shift+F11 Step out, which steps out of the current method or prop-
erty. This is useful if you have stepped into a method but
don’t want to continue stepping though the lines. Step-
ping out will take you back to the calling routine.
Hex display, which displays the output in hexadecimal.
Show the output window, which shows the actions VWD
or VS take during debugging.
It’s worth getting used to using both the buttons and the shortcut keys because it makes debugging
quicker.
During the debugging exercise, you saw how you could hover the cursor over a variable to see the con-
tents of that variable. But the viewing of variables is not just restricted to hovering the cursor over them,
because there are special debugging windows that help with this. One of these is the Locals window (see
Figure 15-15), which shows the local variables for the current procedure.
Figure 15-15
Here you have all of the local variables, and those that are complex types can be expanded to show the
properties.
The Watch window allows you to watch variables. When in Debug mode, you can highlight a variable,
right-click it and select Add Watch from the menu. The use of the Watch window is the same as the
Locals window, the only difference being that the Watch window only shows variables that you choose.
The Call Stack shows the current stack trace, which is the hierarchy of methods — which methods have
been called from other methods. You can see the Call Stack at the bottom right of the screen when you
are debugging. For example, in the shopping cart code, the stack trace displayed in Figure 15-16 might
be shown.
Here the highlighted line is the current line of code, and you can see that it is the
Quantity property of
the
CartItem (get_Quantity is shown because this is actually how the underlying code works; show-
ing it is the
Get part of the property). The second line shows the method that called this Quantity prop-
erty, and this is
Wizard1_FinishButtonClick.
594
Chapter 15
18_042583 ch15.qxd 4/4/06 2:52 PM Page 594
Figure 15-16
There are other windows, but Locals, Watch, and Call Stack aree the most common, and to get the best
from the debugger you really have to practice. It’s worth experimenting just to get a feel for how the
debugger works, and the sort of things that are possible.
Summary
It may seem odd that we’ve had a whole chapter on the negative aspects of building web sites, but ulti-
mately this will make you a better developer. After all, possessing knowledge is all well and good, but
knowing how to cope with problems that arise is just as important. So this chapter looked at defensive
coding, where you must take a pessimistic attitude. This takes the view that your code should be as
robust as possible, not making assumptions about anything, such as parameters passed into methods.
This is especially true when you’re dealing with SQL statements that take data from the user, so you
looked at how to replace the building of a SQL statement using concatenation with
SqlParameter
objects to prevent hacking attacks.
Another part of defensive coding is the use of validation controls, which provide a simple way to ensure
that data entered by users is correct. Because these controls give both client- and server-side validation,
users get a great experience because the validation notifies them of problems before posting back to the
server.
Additionally, this chapter discussed the following topics:
❑ Exceptions, where you learned how to cope with the unexpected (cue the inquisition leaping in
from off frame — ”Nobody expects the exception” — apologies to the Monty Python team)
Dealing with exceptions is a tricky business, and should be limited to those situations where
you can gracefully recover from the problem. One of the key tenets is that you should always
leave the application in a stable state when recovering from exceptions.
❑ Handling exceptions globally or at least how to manage their details globally, with the
global.asax file. You saw that for both trapped and untrapped exceptions, the details can be
centrally logged, ensuring that you always know of errors wherever they happen with the
application.
595
Dealing with Errors
18_042583 ch15.qxd 4/4/06 2:52 PM Page 595
❑ Tracing and debugging, and how you can track down problems within code. Tracing gives the
capability to write the status of the running code, with the capability to switch the trace output
on and off without affecting the trace statements themselves. Debugging delves into the code in
more detail, enabling you to step through the code as it runs. These are the key techniques of
learning how to find errors.
You’re very nearly at the end of the book, and a lot of material has been covered. The final chapter looks
at topics that will lead you from the book content to further learning and at topics of how to move for-
ward with the knowledge you have. It also covers how to deploy your application so that it can be
hosted by an ISP, allowing your great code to be seen by the whole world.
Exercises
1. Add defensive coding to the GenerateThumbnail method of the ImageHandling class stored
in the
App_Code directory.
2. Add validation controls to the Checkout page, the part that accepts the delivery address. There
is a check box to copy the address from the membership details of the user, but there is nothing
to ensure that all of the fields are filled in.
3. Use the debugger.
596
Chapter 15
18_042583 ch15.qxd 4/4/06 2:52 PM Page 596
16
Deployment, Builds,
and Finishing Up
It’s been a long journey since you started this book by building a quick example web site, and then
starting to build your full-fledged Wrox United application. You now have a web site that uses
e-commerce to take customer details and credit card numbers, displays up-to-the-minute content,
allows users to view (and listen to) multimedia, and references a multitude of data sources, all
within the course of 15 chapters. This is the kind of thing that could have taken six months in the
past and a whole team of developers. However, it doesn’t end here. I’m often tempted at the end
of a project to put my feet up and say, well I’ve done all the hard work, it’s all smooth sailing now.
However, I have been painfully disabused of this notion on more than one occasion. Even if you’re
confident of the extremely unlikely scenario of your application having no bugs and being simple
to maintain, and your client never having any further questions to ask or features to add, you still
have to deploy your site. Visual Web Developer has a feature that allows you to copy your web
site from a local folder to a remote location, and you’ll make use of that in this chapter.
After you’ve deployed your site, what next? If you succeed in becoming a professional developer,
you will undoubtedly talk to plenty of companies who will set the final deadline as the day you
deliver the working code to them. If you pencil in another project the day after this deadline, you
might end up getting into trouble when you find yourself required back on site at your old project
because something breaks down or doesn’t work in the way it was intended. Testing is often com-
pletely overlooked by both companies and developers. Chapters 14 and 15 talked about various
ways for testing your code as you create it, but testing your code after you’ve deployed the site
should also feature in your timeline. If possible, you should also test it alongside your proposed
user base. Even if everything goes fine, you should be prepared to maintain this site, make adjust-
ments, and make sure that the site owners can run it in your absence.
And lastly, what should you do next after reading this book? Do you run out and apply for a set of
developer jobs? Or do you have to go out and buy another book? You’ll get a thorough grounding
in what you should be looking to do next.
19_042583 ch16.qxd 4/4/06 2:52 PM Page 597
This chapter discusses the following topics:
❑ Deploying your site
❑ Testing and maintaining your site
❑ Where to now?
Site Deployment
Site deployment is the process of installing your site on the customer’s machine and making your site
available and accessible to the outside world — in other words, broadcasting it to the masses. In the first
versions of ASP, and indeed with any pure HTML site, the idea of deployment went little beyond “parcel
up all your files in a zip file, and unzip them to the correct folder on the site.” For simple sites, this
approach still works, but for more complex ones, you’re asking for trouble if you follow this method and
expect no problems.
One of the weaknesses of Visual Web Developer is that, unlike Visual Studio.NET, there isn’t a special
deployment wizard that can wrap all the different bits and pieces into a single installation file. However,
there is an option in VWD that allows you to take your existing web site and publish the web site on a
remote machine. There is also a second method that can be used if you prefer, which you learn about
later in the chapter.
Before you do that, you should make sure you have everything necessary to ensure your site will work
on another machine by compiling a checklist.
Checklist
Here’s a simple checklist of common things you would normally expect to feature in a typical
deployment:
❑ HTML and CSS files: Your design and structure.
❑ ASPX files: Your main pages.
❑ ASPX.VB or ASPX.CS files: The code-behind files.
❑ ASCX and ASCX.VB/.CS files: The user controls.
❑ Database files (.MDB or .MDF): The back end of the site.
❑ Image files (.JPG, .GIF, .PNG): Easily forgotten but vital to the sites working.
❑ Multimedia files: Includes both video and audio files.
❑ XML files: .XML and .XSD files.
❑ Third-party components or controls: ActiveX controls, Java applets, or such like.
❑ License files: Required to make your components work.
598
Chapter 16
19_042583 ch16.qxd 4/4/06 2:52 PM Page 598
Quite often you will find that despite your best intentions, files can become spread out across folders all
over your machine. It’s a great idea to centralize them first and even try to deploy them on another local
machine of your own if you have one.
Compiling and Running Your Application
The next step is to make sure that your site actually compiles and runs. In Chapter 15, you looked at
simple reasons why a site might not compile, and there is no point in deploying a site that doesn’t com-
pile. Also be aware that even if your site happily compiles on your machine, it might not compile or run
on your host’s or client’s machine. You must make sure that things like local references are changed so
that file references are specific to the new machine and that the requisite components are installed. This
is the most likely reason for your code failing on your host’s machine. The best way to do this is to place
any machine-specific information within the
Web.config file and then reference it from inside the
appSettings, as discussed in Chapter 2. Then you can change any information in the Web.config file
without affecting your application.
Say, for example, you put a reference to a folder in the
<appSettings> section of Web.config and add
a
key and a value attribute as follows:
<appSettings>
<add key=”WroxUnited” value=”C:\Program Files\Wrox United” />
</appSettings>
You can then access these values from your code as follows:
string WroxULocation =
System.ConfigurationManager.Configuration.AppSettings[“WroxUnited”];
Of course, you will probably be faced with a scenario where you want to have a reference to a local file
and also a reference to that same file in a location on your remote server. In this case, you can place a ref-
erence to both locations in
Web.config. Here LOCALHOST is the active file location:
<appSettings>
<! LOCALHOST >
<add key=”WroxUnited” value=”C:\Program Files\Wrox United” />
<! REMOTE
<add key=”WroxUnited” value=”D:\Websites\Wrox United” />
>
</appSettings>
All you need to do then is uncomment the REMOTE settings and comment out the LOCALHOST settings
instead. In this way, no code needs to change. Make sure you comment which of the locations is local
and which is remote, because it might not be entirely obvious to anyone else who uses the code. If you
have reason to change the location of the file, you only have to change it once in
Web.config and not
every time it is mentioned within your code.
599
Deployment, Builds, and Finishing Up
19_042583 ch16.qxd 4/4/06 2:52 PM Page 599
This doesn’t just stop with remote file locations, but also with connection strings. If you are using a local
database to test your code, you will have to change the connection settings as well. Your local database
might use SQL Express, but your main server might be SQL Server 2005 — once again, no extra code is
needed, it can just be worked by commenting the line out:
<ConnectionStrings>
<! LOCALHOST >
<add key=”WroxUnitedConnectionString” value=”Data
Source=.\SQLEXPRESS;AttachDbFileName=|Data Directory|\WroxUnited.mdf;Integrated
Security=True;User Instance=True;” providername=”System.Data.SqlDataClient”/>
<! REMOTE
<add key=”WroxUnitedConnectionString” value=” Data
Source=MainSQLServer;AttachDbFileName=|Data Directory|\WroxUnited.mdf;Integrated
Security=True;User Instance=True;User ID=auser;Password=56gTR4£s “
providername=”System.Data.SqlDataClient” />
>
</ConnectionStrings >
LOCALHOST in this example is the active string. If you changed the provider name, you could pass con-
nection strings to other databases such as Access or MySQL or even Oracle.
Publishing the Site
After you’re sure that everything is ready and everything compiles, you can use Visual Web Developer
to publish your web site for you. There isn’t much more to say on the subject — it’s literally easier to go
ahead and do it.
Try It Out Publishing the Wrox United Web Site
1.
Open the chapter copy of WroxUnited (C:\BegASPNET2\Begin\Chapter16\WroxUnited) and
select the Web Site➪Copy Web Site option (see Figure 16-1).
Figure 16-1
600
Chapter 16
19_042583 ch16.qxd 4/4/06 2:52 PM Page 600
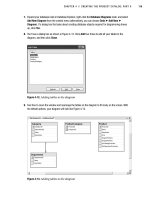
2. Click the Connections: Connect To box and enter WroxUnited2 into the text box, as shown in
Figure 16-2.
Figure 16-2
Notice that to actually deploy to a remote site, you need to select the Remote Site icon on the
left-hand menu and then supply the URL or IP address of the location of the site, possibly enter-
ing relevant user ID and password details in along the way. It is unfortunately not possible to
supply test web space for readers to deploy their sites to.
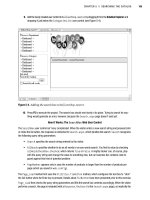
3. Click Open and click Yes when asked whether you would like to create a new folder.
4. Select all the files, as shown in Figure 16-3.
Figure 16-3
601
Deployment, Builds, and Finishing Up
19_042583 ch16.qxd 4/4/06 2:52 PM Page 601
5. Click the blue single right-arrow button to copy the files across (see Figure 16-4).
Figure 16-4
6. Close the web site down, by selecting Close Project from the File menu.
7. Select Open➪Web Site and select WroxUnited2.
8. Run the new web site. It should look like the old one (see Figure 16-5).
Figure 16-5
602
Chapter 16
19_042583 ch16.qxd 4/4/06 2:52 PM Page 602
How It Works
In this Try It Out, you used the Copy Web Site option of Visual Web Developer to produce a complete,
identical copy of the Wrox United site on your local machine. This mirrors the way in which you would
go about deploying a web site to a remote location. In fact, if you have a remote machine that is also run-
ning ASP.NET 2.0, try deploying the Wrox United site on it yourself.
There really is very little to the physical act of deployment. The problems you may encounter are either
caused by elements in your application that are locked in to your current setup (such as referencing files
on a C:\ drive, when the host uses E:\ instead) or if you attempt to copy files into a folder or location
where some files already exist. In this case, a blue question mark will appear next to the offending file in
the left-hand dialog box, and you will get a dialog box (see Figure 16-6) that asks you whether you want
to copy over the existing file.
Figure 16-6
Before .NET, if you needed to install a component or control, this would require copying your compo-
nent to the appropriate folder and registering that component via some ugly low-level tools we don’t
want to talk about here. In .NET, to install the component all you had to do was to copy the component’s
file into the bin folder of your application, which occasionally had some unexpected and unpleasant
side-effects; however, in .NET 2.0 dropping components into the App_Code folder is all you need to do
to be able to start using the component immediately. If you use third-party components (that is, separate
executables), these should be installed separately.
XCOPY Deployment
There is a second way to deploy applications in .NET, if you don’t have Visual Studio.NET. This is
known as XCOPY deployment. This is a command-line tool that can be used to copy your site from one
location to another. It takes a number of options, as detailed here:
❑ / E copies folders, subfolders, and files, including empty ones.
❑ / H copies both hidden files and system files in addition to the unhidden and non-system files.
❑ / I specifies that the destination is a folder and to create the folder if it does not already exist.
603
Deployment, Builds, and Finishing Up
19_042583 ch16.qxd 4/4/06 2:52 PM Page 603
❑ / K keeps all of the existing file and folder attributes such as read-only, which would otherwise
be lost.
❑ / O retains all of the security-related permission ACLs (Access Control Lists — rules for who
gets access to a particular resource) of the file and folders.
❑ / R overwrites files marked as read-only.
All you need to do is provide the location of where you want to copy the web site from and where you
need to copy the web site to, and along with the relevant options, it will copy everything that you need.
So typing in the following command would copy all files and folders to the WroxUnited3 folder:
XCOPY C:\BegASPNET2\Begin\Chapter16\WroxUnited
C:\BegASPNET2\Begin\Chapter16\WroxUnited3 /E
You can see how this works in the following Try It Out.
Try It Out Publishing Wrox United Using XCOPY
1.
Click Start➪Run and type CMD to bring up the command prompt.
2. Type the following command and press Enter:
XCOPY C:\BegASPNET2\Begin\Chapter16\WroxUnited
C:\BegASPNET2\Begin\Chapter16\WroxUnited3 /E
3. You are presented with the screen shown in Figure 16-7, and asked whether the target is a file
name or directory. Press d because it is a directory. XCOPY will now copy all the files over.
Figure 16-7
4. Close the command prompt.
5. Open Visual Web Developer, choose File➪Open➪Web Site, and select WroxUnited3.
6. Run the new web site. It should look just like the last one (see Figure 16-8).
604
Chapter 16
19_042583 ch16.qxd 4/4/06 2:52 PM Page 604
Figure 16-8
How It Works
The XCOPY option works in the same way as the Copy Web Site option in Visual Web Developer. It
copies all of the files from one location to another. There are two main differences, however. The first
difference is that you don’t need Visual Web Developer installed, which is useful if you have been for-
warded a web site from someone else in a zip file and want to, say, install it locally, test it, and then
deploy it. The second difference is that because it is a command-line tool, it gives you more options on
which files to copy and which files not to copy, with settings like /R to overwrite existing files that are
marked as read-only.
Common Problems Encountered When Deploying a Site
You shouldn’t have any problems with the physical act of deployment itself. However, what happens if
you correctly copy all of the files over, install all of the relevant components, and install the third-party
ones, and deployment still doesn’t work?
With a fairly new technology, it’s harder to compile a definitive list of problems, bugs, and glitches the
user might experience — these things were put together from years of user frustrations. However, on our
travels in the beta versions of ASP.NET 2.0, we came across a couple of gotchas that could break your
site, which are worth talking about now.
605
Deployment, Builds, and Finishing Up
19_042583 ch16.qxd 4/4/06 2:52 PM Page 605
Enabling App Data Permissions
If you are getting errors whenever the user runs a page that accesses a database, then suspect permis-
sions problems immediately. Every time you move a database to a new server that uses SQL Server, you
have to set up the relevant permissions for the NETWORK SERVICE for the
App_Data folder. The rea-
son you have to do this is ASP.NET 2.0 runs under this particular service, and so if ASP.NET 2.0 wants to
access the database, a request to access it will come from this particular service.
You can enable these permissions in two ways, either via Windows Explorer or via SQL Server
Enterprise Manager.
Enabling Permissions via Windows Explorer
Go to the folder of your web application in Windows Explorer, right-click your application, select the
Properties, and click the Security tab, which is shown in Figure 16-9.
Figure 16-9
In ASP.NET 1.1, you would add permissions for the ASPNET account to do this. In
ASP.NET 2.0, the NETWORK SERVICE account does the same. However, there have
been occasions in the beta where enabling NETWORK SERVICE didn’t work and
ASPNET permissions had to be enabled as well. If, after enabling permissions for
NETWORK SERVICE, things still don’t work in the way intended, you might want to
enable permissions for the ASPNET account, in the same way as outlined next for the
NETWORK SERVICE account. You can find more details about this in Appendix B.
606
Chapter 16
19_042583 ch16.qxd 4/4/06 2:52 PM Page 606
Click the Add button to bring up the Select Users or Groups dialog box (see Figure 16-10). Type
Network Service and click Check Names. (If you don’t type in the correct case, it will capitalize the
name for you.)
Figure 16-10
Click OK. In the Properties dialog box (refer to Figure 16-9), make sure the Write check box is checked (it
is unchecked by default) and click Apply. It’s as simple as that.
If the machine is joined to a domain, the user must select the Locations button and pick the current
machine, rather than the domain. That’s because NETWORK SERVICE is an account on your machine.
By default, the dialog will attempt to add the domain name, rather than the machine name.
Enabling Permissions via SQL Server Enterprise Manager
This method will only work if you have SQL Server installed. If you bring up SQL Query Analyzer, you
can run the following script (just type in the following code to SQL Analyzer), substituting in the name
of the database you want to grant access to (note that you will need to log in to the database as an
administrator first):
sp_grantlogin ‘NT AUTHORITY\Network Service’
USE aspnetdb
GO
sp_grantdbaccess ‘NT AUTHORITY\Network Service’, ‘Network Service’
Here’s an important note for Windows XP Home Edition users: There is no Security
tab visible because something called Simple File Sharing is enabled by default. To
turn off Simple File Sharing, you need to restart your PC in Safe Mode (by pressing
F8 before XP starts) and then log in as Administrator. You’ll get a warning about run-
ning in Safe Mode. Click Yes to accept it and then turn off Simple File Sharing. To
do this, double-click My Computer, click Tools➪Folder Options, click the View tab,
and then select the Use Simple File Sharing (Recommended) check box. Then you
can locate the folder whose permissions you want to change, right-click that folder,
select Properties, and change the permissions.
607
Deployment, Builds, and Finishing Up
19_042583 ch16.qxd 4/4/06 2:52 PM Page 607
USE aspnetdb
GO
sp_addrolemember ‘database_you_wish_to_grant_access_to, ‘Network Service’
Click Run to run the query, and this will have the same effect as the previous instructions.
Is Your Application Offline? (Using App_Offline.htm)
This is one of those things that I saw in the beta that really tripped me up; on one occasion I ran my
Wrox United application to test it and was staggered to find that every single page returned an HTTP
404 error. Even stranger, I was browsing them from within Visual Web Developer at the time. It took me
a few hours and help from the other people on the book to figure out what had happened. It actually
turned out to be a really useful feature.
If you need to take your site offline very quickly, you can place a file called
app_offline.htm in your
main application folder. This makes your web site unavailable to everybody. You can place in the HTML
file the text that you want your users to be able to view for the duration of the site’s downtime. The
advantage is that ASP.NET is working throughout this downtime, and you are able to test the site with-
out having to worry about what users can see in the outside world. However, there are times when this
file is created for you, which led to the problems I had.
Apparently during some operations, the
app_offline.htm file is temporarily copied to your applica-
tion folder and then, in theory, it should be removed when the operation is completed. A crash during an
operation can leave the file behind. Unfortunately, this was a zero-length file in beta 2, and this provided
no clue to the user as to what occurred. The user was just left with every page in their site returning 404
errors. Normally, the
app_offline.htm file should not be left behind, but unfortunately in some cases,
it gets left over. In the final release of ASP.NET 2.0, there is a message that informs users of what hap-
pened so they know to remove the offending item (see Figure 16-11).
Figure 16-11
This can turn up quite a few times if your application is being unruly, so be warned. It will turn up in the
root folder of your application folder. In Figure 16-11, you see the version of it that comes with Visual
Web Developer by default.
608
Chapter 16
19_042583 ch16.qxd 4/4/06 2:52 PM Page 608