HƯỚNG DẪN SỬ DỤNG PHẦN MỀM TÍNH TOÁN THIẾT KẾ MẠNG ĐIỆN HẠ ÁP (PHẦN MỀM DOCWIN 3.0 CỦA ABB)
Bạn đang xem bản rút gọn của tài liệu. Xem và tải ngay bản đầy đủ của tài liệu tại đây (5.18 MB, 118 trang )
1/15
ABB
H−íng dÉn sö dông phÇn mÒm
tÝnh to¸n thiÕt kÕ m¹ng ®iÖn h¹ ¸p
design optimisation on computer
docwin3.0
TÀI LIỆU HƯỚNG DẪN NÀY GỒM CẢ NGỒN NGỮ TIẾNG VIỆT VÀ TIẾNG ANH
LINK Download phần mềm xin liên hệ qua Đ/C Email:
2/15
ABB
Phần I: Tổng quan về phần mềm
DOCWin3.0
Ngày nay, với sự yêu cầu cao trong thiết kế mạng điện hạ áp cùng với sự trợ giúp của công nghệ
thông tin, ABB đã thành công trong việc phát triển phần mềm DOCWin3.0 nhằm giúp các kỹ s thiết
kế tính toán mạng điện hạ áp một cách nhanh chóng, tin cậy, chính xác và kinh tế.
DOCWin3.0 là một giải pháp phần mềm hoàn chỉnh, một phần mềm chuyên nghiệp dùng cho
việc thiết kế, tính toán và mô phỏng mạng điện hạ áp.
DOCWin3.0 là phần mềm hỗ trợ mạnh và dễ sử dụng, một công cụ phần mềm đợc nhiều
các nhà chuyên môn, các kỹ s thiết kế đánh giá cao và tín nhiệm lựa chọn trong thiết kế tính
toán mạng điện hạ áp.
DOCWin3.0 là công cụ lý tởng cho việc:
-Tính toán dòng ngắn mạch lớn nhất và nhỏ nhất
-Tính toán độ sụt áp
-Bảo vệ phối hợp và chọn lọc
-Tự động lựa chọn thiết bị bảo vệ
-Mô phỏng đờng cong đặc tính dòng-thời gian
DOCWin3.0 thiết kế tính toán theo các tiêu chuẩn sau:
-Điện áp từ 220VAC-690VAC
-Tần số từ 50Hz-60Hz
-Hệ thống nối đất: TT, TNC, TNS và IT
-IEC 60909-1(dòng điện xoay chiều 3 pha trung, hạ áp)
-IEC 61363-1(tính toán dòng ngắn mạch trên boong tàu cố định hay đang di chuyển trên mặt biển)
-Phơng pháp các thành phần đối xứng
Các chức năng tính toán của DOCWin3.0:
-Xây dựng sơ đồ một sợi.
-Tính toán dòng ngắn mạch lớn nhất và nhỏ nhất
-Tính toán độ sụt áp d(V).
-Lựa chọn kích thuớc dây dẫn.
-Lựa chọn Circuit Breaker, cầu chì và các thiết bị đóng cắt
-Kiểm tra sự bảo vệ chọn lọc giữa các thiết bị bảo vệ
-ứng dụng tính năng cascading tăng cờng khả năng cắt cua CB ở hạ nguồn nhờ phối hợp với
CB ở thợng nguồn.
-In báo cáo các kết quả tính toán ra giấy
eBook for You
3/15
ABB
Các nguyên tắc tính toán cơ bản của DOCWin3.0:
-Dựa trên đặc tính của tảI đợc bảo vệ nh: Loại tảI, dòng điện tảI, công suất tảI yêu cầu để lựa chọn thiết bị
bảo vệ phù hợp nhất cho tải.
-DOCWin3.0 xác định tiết diện và chiều dài cáp để tính toán dòng ngắn mạch lớn nhất và nhỏ nhất
-DOCWin3.0 kiểm tra tính nhất quán của các thông số đợc nhập vào. Trong quá trình tính toán,
DOCWin3.0 sẽ thông báo tới ngời thiết kế bất kỳ sai sót nào gặp phảI và yêu cầu ngời thiết kế hoàn thiện
và chỉnh sửa.
Phần iI: mn hình lm việc của
DOCWin3.0
1-Khởi động DOCWin3.0: Chọn biểu tợng (Hình) sau khi cài đặt
Hình : Biểu tợng của DOCWin3.0
2-
Màn hình khởi động của DOCWin3.0:
Khi khởi động DOCWin3.0 sẽ xuất hiện
màn hình Select prototype chọn bản vẽ mẫu
thiết kế cho ngời dùng lựa chọn gồm các
dữ liệu về khổ giấy, loại dự án. Nếu chấp
nhận lựa chọn thì nhấn nút OK, nếu huỷ bỏ
nhấn Cancel, cần trợ giúp tại đây thì nhấn
Help.
eBook for You
4/15
ABB
3-Màn hình làm việc của DOCWin3.0:
Màn hình làm việc của DOCWin3.0
4-Lệnh file
:
Trong lệnh File thì
ngoài những lệnh cơ
bản, DOCWin3.0
cung cấp cho ngời
dùng các lệnh xuất file
từ DOCWin3.0 sang
các dạng file khác, đặc
biệt là lệnh Export
DWG-DXF, một dạng
file của AutoCAD.
eBook for You
5/15
ABB
5-Lệnh Edit:
Bao gồm các lệnh
chính:
-Duplicate: Sao chép từ
một phần tử thành nhiều
phần tử, có biểu tợng
trên thanh công cụ là:
-Move: Di chuyển một
đối tợng, có biểu
tợng trên thanh công
cụ là:
-Rotate: Quay một đối tợng góc 90 độ, có biểu tợng trên thanh công cụ là:
-Attributes edit: Soạn thảo các thuộc tính của đối tợng
-Edit objects data: Soạn thảo các dữ liệu của đối tợng, có biểu tợng trên thanh công cụ là:
-Move objects data: Di chuyển dữ liệu của đối tợng, có biểu tợng trên thanh công cụ là:
6-Lệnh Object
: Bao gồm các lệnh đối tợng dùng để thiết kế sơ đồ một sợi:
-Utility: Nguồn cấp chung , có biểu tợng trên thanh công cụ là:
-Gennerator: Nguồn máy phát, có biểu tợng trên thanh công cụ là:
-Transformer 2 windings: Máy biến áp 2 cuộn dây, có biểu tợng trên thanh công cụ là:
-Transformer 3 windings: Máy biến áp 3 cuộn dây, có biểu tợng trên thanh công cụ là:
-Generic impedance: Tổng trở chung, có biểu tợng trên thanh công cụ là:
eBook for You
6/15
ABB
-LV cables: C¸p h¹ thÕ
-Busway: Hép thanh c¸i
-Busbar : Thanh c¸i
-Multilmeter : Thanh c¸i
-LV TMD circuit breaker : ACB,
MCCB, MCB tõ nhiÖt kÕt hîp chèng
dßng rß:
-LV TM circuit breaker : ACB, MCCB, MCB lo¹i tõ
nhiÖt:
-LV M circuit breaker : MCCB, MCB lo¹i tõ :
-LV M circuit breaker : MCCB, MCB lo¹i tõ kÕt hîp dßng rß:
-Pure residual current relay : MCB chèng dßng rß:
-LV Fuse: CÇu ch× h¹ thÕ:
-LV Switch-Fuse: Dao c¾t kÕt hîp cÇu ch× h¹ thÕ:
-LV Disconnector: Dao c¸ch ly h¹ thÕ:
eBook for You
7/15
ABB
-Contactor: Công tắc tơ:
-Generic load: Tải chung:
-Motor: Tải động cơ:
-Lights load: Tải đèn:
-Multibranch cable: Cáp rẽ nhánh:
-Distribution busway: Hộp thanh cái phân phối:
-Capacitor bank: Tụ điện:
-Connection: Dây nối:
-Line departure: Dây nối đầu ra:
-Line arrival: Dây nối đầu vào:
7-Lệnh Page
: Bao gồm các lệnh chính sau:
-Sheet management: Quản lý trang bản vẽ, sau khi sử dụng hết không gian của trang bản vẽ thứ nhất, sử dụng
lệnh này để chuyển sang các trang bản vẽ tiếp theo.
eBook for You
8/15
ABB
8-Lệnh Tools
: Bao
gồm các lệnh chính
sau:
-Text: Soạn thảo dạng
chữ trên bản vẽ
-Text style: Chọn kiểu phông
chữ
-Circuit analysis and
dimensioning: Tính
toán mạch điện:
Sau khi vẽ sơ đồ một sợi, thực
hiện tính toán ngắn mạch và định kích
thớc dây cáp bằng cách sử dụng lệnh này, trong quá trình tính toán, DOCWin3.0 sẽ yêu cầu ngời thiết kế
hoàn thiện các thông số về đối tợng và thông báo những lỗi trong sơ đồ mạch thiết kế.
eBook for You
9/15
ABB
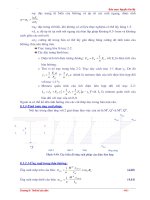
-Lệnh Curve: Hiển thị
đờng cong đặc tính dòng-
thời gian I(t) và dòng-năng
lợng truyền qua I-I
2
t. Dựa vào đờng
cong này ta có thể kiểm tra sự bảo vệ
chọn lọc giữa các thiết bị bảo vệ.
9-Lệnh Settings
: Bao gồm các lệnh
chính
-Plant general properties: Hiển thị
thông số chung về hệ thống của dự án,
các thông số này có thể đợc thay đổi tuỳ vào yêu cầu thiết kế.
- Lệnh Settings of objects data:
Thiết đặt các dữ liệu về đối tợng nh
trạng thái hoạt động, dòng làm việc, mã
hiệuCác dữ liệu này có thể đợc lựa
chọn để hiển thị hoặc không tuỳ thuộc
vào ngời thiết kế bằng việc nhấp vào
những mục trong cột Lables.
eBook for You
10/15
ABB
10-Lệnh Help:
Trong lệnh Help có lệnh
DOC Academy, có 11 bài
học giúp ngời thiết kế tự
học khi mới làm quen với
DOCWin3.0
Phần 3: Các bớc tính toán của DocWin3.0
1-Giải pháp của ABB cho việc thiết kế mạng điện hạ áp:
eBook for You
11/15
ABB
2-Lu đồ tính toán của Doc Win3.0:
3-Vẽ sơ đồ đơn tuyến và thực hiện tính toán mạch điện cơ bản
:
Dùng các lệnh trên thanh công cụ đã mô tả ở phần trên để vẽ sơ đồ một sợi cho dự án đơn giản nh sau:
*Khởi động DOCWin3.0.
*Chọn khổ giấy MV delivery A4
*Chọn nguồn cấp cho hệ thống là Utility
sẽ hiển thị ra cửa sổ cho phép ngời dùng
có thể lựa chọn các thông số chính cho
hệ thống mạng nh:
+Hệ thống nối đất là TN-S, TN-C, TT, IT
+Điện áp, tần số hệ thống
+Tiêu chuẩn áp dụng
+Nhiệt độ môi trờng
Sau đó nhấp OK và tiến hành vẽ sơ đồ
một sợi trên vùng làm việc của
DOCWin3.0
*Nhập các thông số về tải Motor:Kích
đúp vào đối tợng là động cơ
+Ngời thiết kế có thể chọn động cơ trong Browse Data Base về động cơ của ABB hoặc có thể tự nhập thông
số cho động theo yêu nh công suất định mức Pr(kW), điện áp làm việc Vr(V), hiệu suất, hệ số công suất
eBook for You
12/15
ABB
+Để chọn thiết bị bảo vệ cho động cơ, kích vào lựa chọn Co-ordination and protection.Trong cửa sổ này
ngời dùng có thể chọn:
-Loại bảo vệ Protection type nh: CB, CB và Fuse, CB cho động cơ
-Starter type: Trực tiếp/bình thờng, sao/tam giác/bình thờng
Trong sơ đồ một sợi sẽ hiển thị những thiết bị bảo vệ và đóng cắt đợc kết hợp nh CB, công tắc tơ, rơ le nhiệt.
*Nhập các thông số về
tải chiếu sáng: Kích
đúp vào đối tợng là tải
chiếu sáng
+Lựa chọn các loại đèn
trong Type
+Lựa chọn công suất
đèn định mức (W)
+Số lợng đèn
+Chiều dài cáp từ đầu ra tủ phân phối đến
đèn đầu tiên Starting length (L)m
+Chiều dài các phân đoạn tiếp theo Partial
length (l)m
+Điện trở nối đất Ohm
+Loại cáp (Cable)
+Phơng pháp lắp đặt cáp Method of
Installation
+Độ sụt áp Maxium allowed voltage drop
(%)
+ DOCWin3.0 sẽ hiện ra các thông số về tải chiếu
sáng tại sơ đồ một sợi
*Nhập các thông số về tải chung-Generic Load:
+Kích đúp vào đối tợng là tải chung
+Nhập thông số cho tải chung nh : Công suất
S(KVA), công suất P(kW), dòng định mức I(A)
eBook for You
13/15
ABB
*Nhập thông số tụ bù:
+Nhập công suất phản kháng
Q(kVAr) cho tụ cần bù.
Để biết công suất cần bù thì kích đúp
vào nguồn Utility, sau đó kích vào nút
Correction sẽ xuất hiện cửa sổ sau:
+Nhập hệ số công suất theo yêu cầu, DOCWin3.0 sẽ tự động tính toán công suất cần bù cho hệ thống. Ngời
thiết kế sẽ dùng công suất phản kháng cần bù này để gán cho tụ cần bù.
Sau k hi hoàn thiện việc nhập thông số cho tải, thực hiện tính toán mạng điện. Nếu DOCWin3.0 không báo lỗi
gì tức là quá trình tính toán hoàn tất. Các thông số của tải, cáp, thiết bị đóng cắt và bảo vệ đợc hiển thị trên sơ
đồ một sợi. Các thiết bị đóng cắt và bảo vệ đợc DOCWin3.0 chọn theo th viện thiết bị của Hãng ABB. Nếu
ngời thiết kế muốn nhập thông số của thiết bị bảo vệ và đóng cắt của các hãng khác thì kích đúp vào các thiết
bị bảo vệ đó và nhập vào các thông số theo yêu cầu, những thông số này đợc dựa trên những thông số đã đợc
tính toán bằng thiết bị của ABB.
*Hiển thị đờng cong đặc tính I-t :
Sử dụng lệnh đã hớng dẫn ở trên để
hiển thị đờng cong đặc tính I-t. Lựa
chọn các thiết bị bảo vệ trong vùng
Objects bên trái. Lựa chọn dạng đờng
cong hiển thị nh: I-t LLL, I-t LL
hoặc I-I
2
t LLLQua đờng cong này
cho biết tính chọn lọc của bảo vệ giữa
thiết bị bảo vệ tổng và các thiết bị bảo
vệ phía hạ nguồn.
eBook for You
14/15
ABB
*Báo cáo kết quả tính toán ra các dạng file khác nhau:
Dùng lệnh Print Report có biểu tợng là:
DOCWin3.0 sẽ hiển thi ra cửa sổ Caculations Report
Tại đây có thể chọn các dạng file để in báo cáo nh sau:
+Dạng file trong DocWin 3.0 và RTF:
+Dạng file trong PDF và DWG (AutoCAD):
eBook for You
15/15
ABB
-Đây là phần mềm đợc cung cấp miễn phí cho khách hàng. Mọi chi tiết xin liên hệ với văn phòng đại diện
ABB Việt Nam
+Tại Hà Nội: Mr Lê Quang Việt
Kỹ s bán hàng thiết bị hạ thế
Ban thiết bị tự động hoá
Km9, Quốc lộ 1A, Phờng Hoàng Liệt, Quận Hoàng Mại, Hà Nội, Việt Nam
Tel:+84 4-8617244 Fax: +84 4-861 7316 Email:
Mobile: 0904 258 146
+Tại T.P HCM: Mr Nguyễn Hữu Lâm
Kỹ s bán hàng thiết bị hạ thế
Ban thiết bị tự động hoá
Tầng 6, Toà nhà Central Plaza, 17 Lê Duẩn, Quận 1, HCM City, Việt Nam
Tel:+84 8-8237972 Fax: +84 8-823 7970 Email:
Mobile: 0903 156 098
eBook for You
)**
USER MANUAL
eBook for You
I
CONTENTS
GENERAL APPEARANCE 1
General appearance 1
Commands and menus 1
Toolbars 2
Command area and command line 3
Online help and ToolTips 3
General information 3
Warnings 3
Colours 3
Advanced settings 3
STARTING TO WORK WITH DOCWin 4
Start DOCWin 4
Defining a prototype 4
Saving a prototype 5
Starting a new project 6
Opening an existing project 6
Exporting 6
Exporting a drawing in AutoCAD DWG / DXF format 6
Exporting the data of the project in DMB or C.A.T.s format 8
Saving a project 8
Exiting DOCWin 9
PAGES 10
Sheets Management 10
SELECTION 12
Selecting an object: Selection groups 12
Select 13
EDIT 14
Cut, Copy, Paste 14
Duplicate 14
Move 14
Rotate 15
Erase 15
Undo step 15
Redo step 15
Move object data 16
Edit object data 16
Renumbering 16
Smart modify 17
VIEW 17
Zoom / In / Out 17
Pan 18
Redraw 18
TEXT MANAGEMENT 19
Text 19
Modify or Edit Text 19
Text style 19
MACROS 21
Saving a macro 21
Inserting a macro 21
OBJECTS 22
Utility 23
Generator 24
Two windings transformer 25
eBook for You
II
Three windings transformer 27
Generic impedance 28
Cable 29
Cable dimensioning 29
Methods used to dimension phase conductors 29
Optimization of neutral or PEN conductors 31
Dimensioning of PE conductors 32
Parameters used for dimensioning 32
Results of dimensioning 35
Verification 36
Busway 36
Busbar 37
Connection 39
Incoming feeder 39
Outgoing feeder 40
Circuit-breaker 40
General 40
Circuit-breaker selection 40
Plant properties 46
Short-circuit currents 47
Fuse 47
General 47
Fuse selection 48
Disconnector 51
General 51
Select disconnector 52
Plant data 54
Pure residual current relay 55
Selecting a pure residual current relay 55
Plant data 57
Generic load 59
Generic load 59
Circuit 60
Motor 61
Motor 61
Circuit 63
Co-ordination and protection 64
Multibranch cable 66
Distribution busway 67
Capacitor bank 70
Capacitor bank 70
Circuit 71
MV Cable 71
MV Circuit-breaker 72
MV Disconnector 72
MV Fuse 73
OBJECT PROPERTIES 74
Properties command 74
Modifying the properties of several objects at the same time 74
Setting of object data 74
CALCULATION OF SHORT-CIRCUIT CURRENT 76
Symmetrical components method 76
Standard IEC 60909-1 76
Standard IEC 61363-1 76
Calculation of short-circuit currents 76
Display of short-circuit currents 78
eBook for You
III
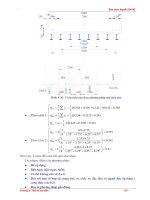
DRAWING CURVES 82
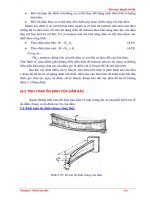
SWITCHBOARDS THERMAL ANALISYS 86
Switchboards thermal analisys 86
PRINTING 90
Print project 90
Print report 93
Modifying report printing 93
eBook for You
1
GENERAL APPEARANCE
GENERAL APPEARANCE
The DOCWin workspace consists of the elements shown on the screen, i.e. the drawing area, title bar,
menu bar, tool bar and command area, together with the scrollbars and the status bar.
The appearance of DOCWin varies according to the screen resolution and the graphics adapter
installed in the PC.
The DOCWin workspace is shown below.
*
COMMANDS AND MENUS
You interact with the program by using commands. A command is an instruction to the program to
perform a specific operation. Some commands perform the operation associated with them
immediately, while others bring up options or a dialogue box. The operation of any command may be
interrupted by pressing ESC.
All commands can be initiated by typing the name in the command line, or by selecting the appropriate
menu item.
Menus are divided into drop-down menus and toolbar menus with icons, and contain the following
groups of commands:
menu name contains commands for
File file management
Edit editing and modifying entities
Objects inserting electrical symbols
Pages page layout
Tools utilities
View screen management
Settings defining system data
Help online help and suggestions
eBook for You
2
To initiate a command from the drop-down menus
• Point to the name of the menu and left-click.
• A menu item followed by an arrow brings up a nested menu; select the menu item and left-click
to access the items it contains.
Frequently-used commands are also available in the form of icons (buttons) on toolbars. These
toolbars can be freely positioned, either anchored to the edges of the drawing area, or left floating. To
initiate a command from an icon, single-click on the icon itself. A description of each DOCWin icon
appears when the pointer pauses over them. The Toolbars command allows you to choose whether or
not to display the toolbar.
TOOLBARS
SETTINGS menu: Toolbars
To display or hide a toolbar
• Initiate the command.
• Click on the check boxes next to the toolbars that you want to display: an x in the check box
means that that toolbar will be displayed, while if there is no x, the toolbar will be hidden.
• Check the ToolTips box to display ToolTips when the pointer pauses near an icon. These tips
make it easier to understand what icons mean.
• Confirm your selection by pressing DONE.
Selected toolbars are located in the position they were in before they were hidden. If a toolbar is being
displayed for the first time, it is automatically positioned in the upper part of the work area. All toolbars
can be moved, and they can be dragged and anchored to any point of the screen.
To call up a command from an icon
• Click on the button you want.
eBook for You
3
COMMAND AREA AND COMMAND LINE
The command area is the horizontal strip where the dialogue between program and user is displayed.
By default, this strip appears in the upper part of the display area, but it can be moved anywhere in the
window. It consists of 3 lines, the last of which is called the command line.
In the command line, you type the various commands and options for initiating the commands
themselves. DOCWin displays the last command used between < > signs, allowing you to confirm it
again by pressing ENTER or by right-clicking. Commands can be initiated by typing the capital letter
that distinguishes them, typing the whole word or selecting the word with the mouse.
ONLINE HELP AND TOOLTIPS
The HELP command displays the hypertext DOCWin hypertext help file DOCWin.PDF.
HELP menu: Help
Function key F1
A description of each DOCWin icon appears when the pointer pauses over each button, to help you
understand the icon menus. These tips can be removed when you are configuring the toolbar.
GENERAL INFORMATION
The command brings up a screen containing information about the product licence.
HELP menu: About
WARNINGS
The command brings up a screen containing information about warnings and instructions
HELP menu: Warnings
COLOURS
This command allows you to change the background colour of the display area and the colour that
DOCWin associates to the objects before and after the calculation.
SETTINGS menu: Colours
To change the background colour and the colours of the objects
• Initiate the command.
• When the Windows colour map appears, select one of the standard colours or define a custom
colour.
• Press OK to confirm.
ADVANCED SETTINGS
This command allows you to set:
- Load-flow parameters (precision, number of iteration, etc.).
- Multiple insertion; this commands allows you to insert again an object after its insertion.
- Numbering object and its step.
SETTINGS menu: Advanced settings
To change the Load-flow parameters and the object insertion method:
Initiate the command.
• When the advanced setting window appears, set the data.
• Press 'OK' to confirm.
eBook for You
4
STARTING TO WORK WITH DOCWin
START DOCWin
• Select start button then Programs, ABB TCT, ABB DOCWin
• Double-click on the DOCWin icon.
The workspace appears, i.e. the space used to create a drawing (see GENERAL APPEARANCE).
When COMMAND < _NEW > appears in the command line (see COMMAND LINE AREA), DOCWin is
ready.
In most cases, DOCWin asks you for further information in order to carry out a command successfully;
a function has always been carried out correctly when COMMAND < _NEW > appears.
To cancel a command
• Press ESC.
To repeat the previous command
• Press ENTER when COMMAND < previous > appears.
To select an option
Left-click on the option to select it, or type the letter shown in capitals and press ENTER, or type the
whole word and press ENTER
DEFINING A PROTOTYPE
A prototype corresponds to a model to be used to start a new drawing. It contains the default values,
such as precision and unit of measure, organisation of layers, text and so on, and parameters relating
to objects.
DOCWin allows you to create different prototypes and display them when a new drawing is created.
If there are no customized prototypes, DOCWin opens the generic prototype file PROTOTYP.ILE.
FILE menu: Set prototypes
To create a new prototype
• Start DOCWin.
• Initiate the Set prototype command.
eBook for You
5
The window displayed has three sections:
1. A tree containing a list of objects or project settings.
2. A specific panel containing variables and settings relating to the object selected in the tree Each of
these configuration panels is described in detail in the sections relating to those objects or settings.
3. A panel that allows you to select whether or not you want to use the default values::
Do not use default values
The program ignores the values set as default; if this option is selected, specific data must be
entered for each object or variable used in the project.
Use default values
The program displays and uses the values set as default.
Use last values set as default
The program displays the last values used.
The configuration so obtained can be saved in a specific prototype file.
SAVING A PROTOTYPE
FILE menu: Save prototypes
To save a new prototype
• Initiate the command Save prototypes.
• When the dialogue box appears, type the name in the Name field
• Check the option Invoke paper settings dialog when loaded to bring up the PAGE SETUP
command when a file is created.
• Check the option Open last opened drawing when JPCAD starts so that DOCWin will
automatically open the last file saved.
• Press Add to confirm and save the prototype file. The file is immediately included in the
alphabetical list in the box above the Name field, and described in the Description box; a
descriptive text can be added in this box. Close the dialogue box by pressing OK.
Each time the NEW command is initiated, DOCWin will display a list of existing prototypes:
eBook for You
6
STARTING A NEW PROJECT
To start a new project, initiate the command NEW, which allows you to create a new drawing based on
a prototype. The drawing is automatically named ANONIMO.ILE. When it is saved for the first time,
you can assign a name of your choosing to the file (see SAVE and SAVE AS commands).
FILE menu: New
Function keyCTRL+N
To start a new drawing
• Initiate the command.
• If DOCWin is already running and the current drawing has not yet been saved, a dialogue box
appears so you can save it.
• Define the drawing sheet using the appropriate dialogue box and confirm with OK.
OPENING AN EXISTING PROJECT
The command OPEN allows you to open existing drawings in *.ILE or *.AMB formats (DOCWin native
formats).
FILE menu: Open
Function keyCTRL+O
To open an existing drawing
• Initiate the command.
• The standard Windows file-opening window is displayed; select the file you want and confirm
with OK.
EXPORTING
The export commands allow you to save a drawing in a format other than *.ILE.
EXPORTING A DIAGRAM IN AUTOCAD DWG/DXF FORMAT
The DWG and DXF formats are the de facto standard in the world of computer-aided design, so you
will often find you have to open a *.DWG or *.DXF drawing, and equally often you will have to save a
DOCWin drawing in one of those two formats.
When performing these operations, you should take into consideration that:
1. in AutoCAD drawings, text is drawn with a font used only by this program; when importing,
DOCWin automatically creates a style with the same name as the AutoCAD drawing, but using the
system font of your computer, which is typically Arial. This is because the fonts used by AutoCAD
do not correspond to Windows TrueType fonts. It is recommended that you reduce this problem by
eBook for You