McGraw.Hill PIC Robotics A Beginners Guide to Robotics Projects Using the PIC Micro eBook-LiB Part 10 ppsx
Bạn đang xem bản rút gọn của tài liệu. Xem và tải ngay bản đầy đủ của tài liệu tại đây (1.34 MB, 20 trang )
Speech Recognition 167
Applications
Applications of command and control of appliances and equipment include
these:
Telephone assistance systems
Data entry
Speech-controlled toys
Speech and voice recognition security systems
Robotics
Software Approach
Currently most speech recognition systems available today are software pro-
grams that run on personal computers. The software requires a compatible
sound card be installed in the computer. Once activated, this software runs
continuously in the background of the computer’s operating system (Windows,
OS/2, etc.) and any other application program.
While this speech software is impressive, it is not economically viable for
manufacturers to add personal computer systems to control a washing
machine or VCR. The speech recognition software steals processing power
from the operating system and adds to the computer’s processing tasks.
Typically there is a noticeable slowdown in the operation and function of the
computer when voice recognition is enabled.
Learning to Listen
We take our ability to listen for granted. For instance, we are capable of lis-
tening to one person speak among several at a party. We subconsciously filter
out the extraneous conversations and sound. This filtering ability is beyond
the capabilities of today’s speech recognition systems.
Speech recognition is not speech understanding. Understanding the meaning
of words is a higher intellectual function. The fact that a computer can respond
to a vocal command does not mean it understands the command spoken. Voice
recognition systems will one day have the ability to distinguish linguistic
nuances and the meaning of words
,
to “Do what I mean, not what I say!”
Speaker-Dependent and Speaker-Independent
Recognition
Speech recognition is classified into two categories, speaker-dependent and
speaker-independent.
Speaker
-dependent systems are trained by the individual who will be using
the system. These systems are capable of achieving a high command count and
better than 95 percent accuracy for word recognition.
The drawback to this
168 Chapter Eleven
approach is that the system only responds accurately to the individual who
trained the system. This is the most common approach employed in software
for personal computers.
Speaker-independent systems are trained to respond to a word regardless of
who speaks. Therefore the system must respond to a large variety of speech
patterns, inflections, and enunciations of the target word. The command word
count is usually lower than that of the speaker-dependent system; however,
high accuracy can still be maintained within processing limits. Industrial
requirements more often require speaker-independent voice systems, such as
the AT&T system used in the telephone systems.
Recognition Style
Speech recognition systems have another constraint concerning the style of
speech they can recognize. They are three styles of speech: isolated, connected,
and continuous.
Isolated speech recognition systems can just handle words that are spoken
separately. This is the most common speech recognition system available
today. The user must pause between each word or command spoken. The
speech recognition circuit is set up to identify isolated words of 0.96-s length.
Connected speech recognition system is a halfway point between isolated
word and continuous speech recognition. It allows users to speak multiple
words. The HM2007 can be set up to identify words or phrases 1.92 s in length.
This reduces the word recognition vocabulary number to 20.
Continuous speech is the natural conversational speech we are used to in
everyday life. It is extremely difficult for a recognizer to sift through the text
as the words tend to merge together. For instance, “Hi, how are you doing?”
sounds like “Hi, howyadoin.” Continuous speech recognition systems are on
the market and are under continual development.
Speech Recognition Circuit
The speech recognition circuit is available as a kit from Images SI Inc. You can
purchase the main components
, HM2007, SRAM, and printed-circuit boards
separately if you like and build from scratch. The kit takes a modular approach
and uses three separate printed-circuit (PC) boards. The three PC boards are
the main circuit board containing the speech recognition circuit, digital display
board, and keypad (see Fig. 11.3). The keypad and digital display are removable
from the main circuit board. They are needed to communicate with and pro-
gram the main speech recognition circuit. After the programming is accom-
plished, the digital display and keyboard can be removed, and the main circuit
embedded into another circuit to add speech control.
Circuit construction
The schematic is shown in Fig. 11.4. You can hardwire this circuit to a bread-
board if you like. I would recommend purchasing the three PCB boards that
Speech Recognition 169
Keypad Display Board
Main Circuit Board
Figure 11.3 Three modular circuit boards.
are available for this project; see Parts List. When you use the PC board, the
components are mounted on the top silkscreen side of the board. Begin con-
struction by soldering the IC sockets onto the PC boards. Next mount and sol-
der all the resistors. Now mount and solder the 3.57-MHz crystal and red LED.
The long lead of the LED is positive. Next solder the capacitors and 7805 volt-
age regulator. Solder the seven position headers on the keypad to the main cir-
cuit board. Next solder the 10 position headers on the display board and main
circuit board.
Keypad
The keypad is made up of 12 normally open (N.O.) pushbutton switches (see
Fig. 11.5).
1 2 3
4 5 6
7 8 9
* 0 #
Clear Train
To train
To train the circuit, first attach the keypad and digital display to the main cir-
cuit board (see Fig. 11.6). Next select your word length. Place a jumper on the
two pin WD header on the main circuit board to select a 20-word vocabulary,
each with a 2-s word length. Leave the jumper off to select a 40-word vocab-
ulary, each with a 1-s word length. Plug in the headset microphone. When
power is applied, the HM2007 checks the static RAM, outputs “00” on the dig-
ital display, and lights the red LED (READY). The circuit is in the ready
7805
VDC In
Vcc +5V
Vcc +5V
LED
XTAL
3.57 MHz
R3
22K
R2 6.8K
.1 µF
C2
Microphone
Keypad (See Switch Matrix)
1 2 3
4 5 6
7 8 9
CLR 0 TRN
HM 2007
46
15
47
44
7
3
2
11
10
9
8
6
5
4 36
37
38
39
40
41
42
43
31
30
29
28
27
24
23
22
21
20
19
18
17
16
26121
35
34
25
16-Pin Dip
Resistor
220 Ω
16-Pin Dip
Resistor
220 Ω
Vcc +5V Vcc +5V
C3
100 µF
7448
7448
8K x 8
SRAM
74LS373
2
3
4
5
6
7
8
9
10
27 22 20
23
11
11
14
13
8
18
17
4
3
7
12
13
15
15
12
9
6
2
5
16
19
16
17
18
19
28
26
21
24
25
R1 100K
.0047 µF
C1
+3V
Backup
Vcc
Header
7
1
2
6
5
4
3
13
13
8
7
6
1
2
14
13
8
7
6
1
2
14 12
4
12
4
12
11
10
9
15
14
13
12
11
10
9
15
14
7
1
2
6
5
4
3
Figure 11.4 Schematic of speech recognition circuit.
170
Speech Recognition 171
Figure 11.5 Keypad wiring.
Figure 11.6 Modular components
put together for training.
mode. In the ready mode the circuit is listening for a verbal command or wait-
ing to be trained.
T
o train the circuit,
begin by pressing the word number you want to train on
the keypad. In this exercise I am assuming you choose the 20-word vocabulary.
In this mode the circuit can be trained to recognize up to 20 words. Use any
172 Chapter Eleven
numbers between 1 and 20. For example, press the number 1 to train word
number 1. When you press the number(s) on the keypad, the red LED will turn
off. The number pressed on the keypad is shown on the digital display. Next
press the # key for train. When the # key is pressed, it signals the chip to lis-
ten for a training word, and the red LED turns back on. Now speak the word
you want the circuit to recognize into the headphone microphone clearly. The
LED should blink off momentarily; this is a signal that the word has been
accepted.
Continue training new words in the circuit, using the procedure outlined
above. Press the 2 key, then the # key to train the second word, and so on. The
circuit will accept up to either 20 or 40 words, depending on the lengths of the
words. You do not have to enter 20 words into memory to use the circuit. If you
want, you can use as few word spaces as you require.
The procedure for training 40 words is identical, except that you can choose
word numbers between 1 and 40.
Testing Recognition
The circuit is continually listening. Repeat a trained word into the micro-
phone. The number of the word should be displayed on the digital display. For
instance, if the word
directory was trained as word number 5, then saying the
word directory into the microphone will cause the number 5 to be displayed.
Error codes
The chip provides the following error codes.
55 �
word too long
66 � word too short
77 �
word no match
Clearing the trained word memory
To erase all the words in the SRAM memory (training), press 99 on the keypad
and then press the * key. The display will scroll through the numbers 1
through 20 (or 1 through 40 if in 1-s word length mode) quickly, clearing out
the memory
.
To erase a single word space, press the number of the word you want to clear
and then press the * key
.
Independent Recognition System
In addition to speech commands
,
this circuit allows you to experiment with oth-
er facets of speech recognition technology. For instance, you can experiment
Speech Recognition 173
with speaker-independent systems. This system is inherently speaker-depen-
dent, meaning that the voice that trained the circuit also uses it. To experiment
with speaker-independent recognition (multiuser), try the following technique.
Set the WD jumper on the main circuit board to the 40-word vocabulary with a
0.96-s word length. Now we will use four word spaces for each command word.
We will arrange the words so that the command words will be recognized by
just decoding the least significant digit (number) on the digital display.
This is accomplished by allocating the word spaces 01, 11, 21, and 31 to the
first target or command word. When the circuit is in recognition mode, we only
decode the least significant digit number, in this case X1 (where X is any num-
ber from 0 to 3) to recognize the target word.
We do this for the remaining word spaces. For instance, the second target
word will use word spaces 02, 12, 22, and 32. We continue in this manner until
all the words are programmed.
If possible, use a different person to speak the word. This will enable the sys-
tem to recognize different voices, inflections, and enunciations of the target
word. The more system resources that are allocated for independent recogni-
tion, the more robust the circuit will become.
There are certain caveats to be aware of. First you are trading off word
vocabulary number for speaker independence. The effective vocabulary drops
from 40 words to 10 words.
The speech interface control circuit shown later may be used in this speaker-
independent experimental capacity.
Voice Security System
This HM2007 wasn’t designed for use in a voice security system. But this
doesn’t prevent you from experimenting with it for that purpose. You may
want to use three or four keywords that must be spoken and recognized in
sequence in order to activate a circuit that opens a lock or allows entry.
Speech Interface Control Circuit
Okay,
you have a functioning speech recognition circuit, so now what? You
need a method of allowing those voice commands to activate other electrical
devices or functions. To do this, we need to build a universal speech interface
circuit.
When designing this interface, I weighed options that I thought would make
this interface useful to as many different users as possible. The first parame-
ter I considered was how many outputs the interface should have. I decided
upon 10 outputs. The second consideration was the type of output that the
interface board should provide. Here was a tough choice. I had the option to
make the output an active high signal that the user could use to activate or be
detected. This output could be used on a TTL logic line or CMOS logic line, or
to turn on a transistor switch or power relay in their circuitry.
174 Chapter Eleven
The other option I thought of was to put 10 miniature SPDT relays on the
interface board. This way the interface board could switch electric power on
and off directly from the board.
The advantage of the active high output signal is cost. This board would cost
much less than the interface board containing 10 relays. The advantage of the
relay board is that the miniature power relays have enough current capacity
to directly control small dc motors and other electric circuits.
I couldn’t decide between the two approaches, so I have included both
designs. You can choose which interface circuit suits you. The front ends of
both circuits are identical and function in the same manner. The outputs are
different and are explained separately.
Since we are controlling 10 outputs, we only need 11 commands—10 com-
mands for active on/off switches and 1 command to turn everything off. In gen-
eral, it is better if the main speech recognition board jumper (WD) is set to the
20 two-second word length option. The 20 two-second word mode has a better
word recognition accuracy than the 40 one-second setting. However, the inter-
face board will work with both modes. This makes it possible to experiment
with the speaker-independent system described earlier.
The speech interface circuit needs to perform a couple of jobs. First it needs
to determine when the speech recognition circuit has detected a spoken word.
After a word has been detected, it must distinguish whether the word detected
is a recognized command word or an unrecognized word. If the word is a recog-
nized command word, it passes the binary information to the output. If the
detected word is not a command word, it must block any change to the output.
How the circuit works
Before we can get into the nuts and bolts of how the interface circuit functions,
we must look at the binary information output by the speech recognition cir-
cuit. The output of the speech recognition circuit consists of two 4-bit binary-
coded decimal (BCD) numbers. This binary (BCD) information is shown on the
speech circuit’s two-digit digital display. Whenever a word is detected, the cir-
cuit uses the digital display to output the word number it has recognized, or
else it outputs its unrecognized/error code. If the word detected is not recog-
nized, the circuit will display one of the following error codes:
55 �
word too long
66 �
word too short
77 �
word no match
Our interface design incorporates a PIC microcontroller (see Fig. 11.7 or
11.8).
A preprogrammed microcontroller’s (16F84) first job is to determine if a
word has been spoken. To do this, we use an LM339 comparator. A reference
voltage for the comparator is generated using a voltage divider made up of
Speech Recognition 175
Vcc
R4
5.6KΩ
R5
15KΩ
R3
10KΩ
LED Input
U3
LM339
U4a
4011
U4b
4011
U4c
4011
U4d
4011
+
–
4
5
3
3
4
1
2
6
5
8
9
2
12
14
10
11
11
14
16
15
4
9
8
7
6
5
18
17
10
3
2
1
12
13
Vcc
A
B
C
D
A
B
C
D
GND
PIC16F84
RB4
RB5
RA4
RA3
RA2
RA1
RB3
RB2
RB1
RA0 RB0/INT
VSS
VDD
U5
MCLR'
OSC1
OSC2
X1
4MHz
R11
4.7KΩ
Vcc
Vcc
24
11
12
18
19
10
9
8
7
6
5
4
3
2
1
20
21
22
23
A
B
C
D
Q10
Q9
Q8
Q7
Q6
Q5
Q4
Q3
Q2
Q1
Q0
32
54
76
910
11 12
14 15
32
54
76
910
U6a
4049
U6b
4049
U6c
4049
U6d
4049
U6e
4049
U6f
4049
U7a
4049
U7b
4049
U7c
4049
U7d
4049
1
2
3
4
5
6
7
8
9
10
Output
74154
Figure 11.7 Speech recognition interface (active high outputs) SRI-03.
resistors R4 and R5. The reference voltage is placed on pin 5 of the comparator.
Pin 4 of the comparator is connected to the LED lead on the speech recognition
circuit. Whenever a word is detected, the LED blinks off momentarily. The out-
put of the comparator (pin 2) is connected to pin 10 (RB4) of the 16F84 micro-
controller
. The output of the comparator (pin 2) is usually high (
�5
V). When a
176 Chapter Eleven
word is detected, the output (pin 2) drops to ground momentarily. The micro-
controller monitors this line to determine when a word has been detected.
Once a word has been detected, it is necessary for the interface to read the
BCD output from the speech recognition circuit. By using the high- and low-
digit BCD nibbles, it’s possible to distinguish trained target words. To do so,
the interface must distinguish the error codes 55, 66, and 77 from trained
words numbered 5, 6, and 7. To accomplish this, the interface circuit uses four
NAND gates off the 4011 integrated circuit. The NAND gates are connected to
the high-digit nibble. If the high-digit BCD nibble has the equivalent word
numbers of 5, 6, or 7, the output from the four NAND gates is low. The output
from the four NAND gates is connected to pin 11 (RB5) of the 16F84. The
16F84 reads this pin to determine if the high-digit nibble is a 5, 6, or 7 (0 V or
ground). If these numbers are not displayed, the output of the NAND gates is
high (�5 V).
So far our circuit can tell when a word has been detected and if the result-
ing word is an error code. If the output of the speech recognition circuit is an
error code, nothing else happens; the microcontroller loops back to the begin-
ning of the program, waiting for another word detection. On the other hand, if
a word is detected and it is not an error code, the microcontroller passes the
low-digit number through to the 74HC154 (4- to 16-line decoder) IC. The
74HCT154 decoder reads the binary number passed to it and brings the cor-
responding pin equivalent to that number low.
PIC 16F84 microcontroller program
The PIC 16F84 used in both interface circuits contains the following PicBasic
program:
‘Speech recognition interface program
symbol porta = 5
symbol trisa = 133
symbol portb = 6
symbol trisb = 134
poke trisa, 255
poke trisb, 240
start:
peek portb, b0
if bit4 = 0 then trigger ‘Trigger enabled, read speech recognition
circuit
goto start ‘Repeat
trigger:
pause 500 ‘Wait .5 second
peek portb, b0
‘Read bcd number
if bit5 = 1 then send
‘Output number
goto start ‘Repeat
send:
peek porta, b0
‘Read port a
if bit4 = 1 then eleven ‘Is the number 11
poke portb, b0
‘Output number
Speech Recognition 177
goto start ‘Repeat
eleven:
if bit0 = 0 then ten
poke portb, 11
goto start ‘Repeat
ten:
poke portb, 10
goto start ‘Repeat
end
Active high output
The outputs from the 74HCT154 each pass through a 4049 inverting buffer to
supply a 15-Vdc active high output signal.
SPDT relay output
In Fig. 11.8, the front end of the circuit is identical to Fig. 11.7. The changes
are seen in the back end of the circuit. The active low output signals from the
74HCT154 each connect to one of the 10 PNP transistors, each of which con-
trols a corresponding relay. Each relay has a normally open (N.O.) switch and
normally closed (N.C.) switch. The relay switches are rated at 124 V ac at 0.5
A or 24 V dc at 1 A. The relay itself consumes approximately 30 mA of current
when it is turned on.
Circuit Construction
There is nothing critical about the circuit construction. The circuit may be
wired point to point on a breadboard, if you like. Printed-circuit boards make
the construction easier and are available as kits from Images SI Inc.
The only component that needs special notice is the 10-pin female header. If
you are not using the PC boards from the kit, you must follow the schematic
and wire the 10-pin female header exactly; or else the interface will not be
receiving the signals it expects, and the unit will fail.
Programming the Speech Recognition Circuit:
Training, Testing, and Retraining
Program the speech recognition circuit per the directions given previously
.
Choose
the words you want to use to control the 10 electrical relays or outputs
.
T
o turn off
all electrical outputs on the interface, train word number 11 as
stop, end, or quit.
Before you connect the interface to any circuit,
repeat all the trained
words into the microphone
.
The corresponding word number will be dis
-
played on the digital display. You should achieve recognition accuracy of bet-
ter than 95 percent.
If the circuit continually confuses two training words
,
try retraining one of the words
.
T
o retrain a word,
press the word number
,
using the keypad; the word number will be displayed on the digital display.
178 Chapter Eleven
Vcc
R4
5.6KΩ
R5
15KΩ
R3
10KΩ
LED Input
U3
LM339
U4a
4011
U4b
4011
U4c
4011
U4d
4011
+
–
4
5
3
3
4
1
2
6
5
8
9
2
12
14
10
11
11
14
16
15
4
9
8
7
6
5
18
17
10
3
2
1
12
13
Vcc
A
B
C
D
A
B
C
D
GND
PIC16F84
RB4
RB5
RA4
RA3
RA2
RA1
RB3
RB2
RB1
RA0 RB0/INT
VSS
VDD
U5
MCLR'
OSC1
OSC2
X1
4MHz
R11
4.7KΩ
Vcc
Vcc
24
11
12
18
19
10
9
8
7
6
5
4
3
2
1
20
21
22
23
A
B
C
D
Q10
Q9
Q8
Q7
Q6
Q5
Q4
Q3
Q2
Q1
Q0
74154
Relay
Vcc
2N3906
1N4002
100KΩ
Relay
Vcc
2N3906
1N4002
100KΩ
Relay
Vcc
2N3906
1N4002
100KΩ
Relay
Vcc
2N3906
1N4002
100KΩ
Relay
Vcc
2N3906
1N4002
100KΩ
Relay
Vcc
2N3906
1N4002
100KΩ
Relay
Vcc
2N3906
1N4002
100KΩ
Relay
Vcc
2N3906
1N4002
100KΩ
Relay
Vcc
2N3906
1N4002
100KΩ
Relay
Vcc
2N3906
1N4002
100KΩ
Figure 11.8 Speech recognition interface (relay switch outputs) SRI-02.
Press the T (training) key, and say the word into the microphone. If the cir-
cuit still confuses the two words, you may have to change one of the sug-
gested words.
Once you are satisfied with the accuracy, remove the digital display board
and the keypad. Next connect the speech interface board to the 10-pin header
used for the digital display, and you’re ready to go.
Speech Recognition 179
Figure 11.9 Finished speech recognition board SRI-02.
Figure 11.10 Finished speech recognition board SRI-03.
180 Chapter Eleven
SRI-02 and SRI-03 Interfaces
The SRI-02 and SRI-03 built from kits available from Images SI Inc. are
shown in Figs. 11.9 and 11.10, respectively. Once the speech recognition
circuit is programmed, the speech recognition interfaces may be plugged
into the display board output on the main speech recognition board and
used. Figure 11.11 shows the SRI-02 connected to the speech recognition
board, and Fig. 11.12 shows the SRI-03 connected to the speech recognition
board.
Robot Control
The speech recognition circuit uses a headphone microphone. For mobile oper-
ation one needs to add a wireless microphone. There are a number of methods
of implementing wireless control.
The simplest method is to add a suitable microphone to the main circuit
board and acoustically couple it to the output of a radio receiver or walkie-
talkie. You would use the matching walkie-talkie to give voice commands.
When using this method, you should train the circuit by using your walkie-
talkies and acoustic coupling.
Figure 11.11 SRI-02 connected to speech recognition circuit.
Speech Recognition 181
Figure 11.12 SRI-03 connected to speech recognition circuit.
Parts List
Speech recognition kit (SR-06)
(1) Speech recognition IC (HM2007)
(1) 8K static RAM (6264)
(1) Octal latch (74LS373)
(1) Display chip (74LS48)
(1) 3.57-MHz crystal
(12) PC-mounted N.O. switches
(2) Seven-segmented displays (MAN74)
(1) Headset microphone
(1) 9-V battery clip
(1) Coin battery holder (2032)
(1) PC-mounted microphone jack
(1) 22-k
�,
1
/ -W resistor
4
(1) 6.8-k�,
1
/ -W resistor
4
182 Chapter Eleven
(1) 330-,
1
/ -W resistor
4
(8) 220-,
1
/ -W resistor
4
(1) 100-k,
1
/ -W resistor
4
(1) 0.1-f capacitor
(1) 100-f capacitor
(1) 0.0047-
f capacitor
(2) 10- to 22-pF capacitor
(1) Voltage regulator (7805)
(1) LED
(2) 1N914 diode
Miscellaneous items needed include PC boards, IC sockets, headers (male and
female), two- and three-pin connectors, jumpers.
Speech interface kit (SRI-02)
(1) 5.6-k,
1
/ -W resistor
4
(1) 15-k,
1
/ -W resistor
4
(1) 10-k,
1
/ -W resistor
4
(10) 100-k,
1
/ -W resistor
4
(10) Diodes (1N4002)
(1) Comparator (LM339)
(1) 4011 CMOS NAND
(1) 74154 IC
(1) PIC 16F84 microcontroller*
(10) Omron G5V-1 relays
Miscellaneous items needed include PC board, 10-pin female header, 9-V bat-
tery clips, and a 7805 regulator.
Speech interface kit (SRI-03)
(1) 5.6-k,
1
/ -W resistor
4
(1) 15-k,
1
/ -W resistor
4
(1) 10-k,
1
/ -W resistor
4
(10) 100-k,
1
/ -W resistor
4
*Preprogrammed 16F84 available separately for $10.00 from Images SI Inc.
Speech Recognition 183
(10) Diodes (1N4002)
(1) Comparator (LM339)
(1) 4011 CMOS NAND
(1) 74154 IC
(1) PIC 16F84 microcontroller*
(2) Inverting buffers (4049)
Miscellaneous items needed include PC board, 10-pin female header, 9-V bat-
tery clips, and a 7805 regulator.
Speech recognition and interface kits (all components including prepro-
grammed 16F84 and PCB) available from Images SI Inc. (see Suppliers at end
of book):
Speech recognition kit (SR-06) $79.95
Speech interface kit (SRI-03) $89.95
Speech interface kit (relay) (SRI-02) $159.95
*Preprogrammed 16F84 available separately for $10.00 from Images SI Inc
.
This page intentionally left blank.
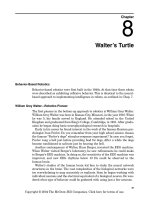
Chapter
12
Robotic Arm
Servomotor Building Blocks for Robotics
The servomotor brackets discussed in this chapter will allow you to create
various servomotor robots and projects.
Servomotors are ideal for powering robots. They are readily available in
many sizes, are inexpensive, provide powerful torque for their size and
weight, and are positional. The output shafts on most hobby servomotors are
guaranteed positional between 0° and 90°. Most servomotors’ output shaft
range extends past 90°, coming close to 180°.
The servomotor bracket components are shown in Fig. 12.1. Each of the alu-
minum U brackets that make up the assembly has multiple holes for con-
necting a standard HiTec servomotor horn as well as bottom and top holes for
connecting U brackets and assemblies to one another.
The servomotor horns used on these servomotor brackets are included with
all the compatible HiTec servomotors, such as HS-322, HS-425, HS-475, and
HS-35645. These brackets may also be used with similar-size Futaba servo-
motors, but you may have to purchase the horns separately.
Each servomotor bracket assembly consists of the following components: two
aluminum U brackets, labeled A and B, one binding head post screw, four 6-32
plastic machine screws with nuts, and four sheet metal screws for mounting a
servomotor horn. When assembled with a compatible servomotor (see Fig.
12.2), the bracket becomes a modular component that may be attached to oth-
er brackets and components. The bracket allows the top and bottom compo-
nents to swivel along the axis of the servomotor’s shaft (see Fig. 12.3).
By connecting multiple servomotors using the brackets
,
you can create a
variety of robotic designs. In this chapter we will use the brackets to create a
Copyright © 2004 The McGraw-Hill Companies. Click here for terms of use.
185
186 Chapter Twelve
B
A
Figure 12.1 Servomotor bracket kit.
Tilts
Front View
Side View
Figure 12.2 Front and side views of servomotor bracket.
five-servomotor robotic arm.
In Chap
.
13 we use these same brackets to cre-
ate a bipedal walker robot.
The bottom and top have multiple holes for attaching other brackets or ser-
vomotor horns (see F
ig. 12.4).
Basic Servomotor Bracket Assembly
To assemble a servomotor bracket, begin by placing the binding post through
the back hole on part a (see Fig. 12.5). Next place servomotor into the A brack-
et,
as shown in Fig. 12.6. Attach the servomotor using 6-32
�
3
/
8
-in-long
machine screws and nuts (see Fig. 12.7). Notice the servomotor’s horn has been