windows vista secrets april 2007 phần 8 pptx
Bạn đang xem bản rút gọn của tài liệu. Xem và tải ngay bản đầy đủ của tài liệu tại đây (3.74 MB, 68 trang )
Windows Journal
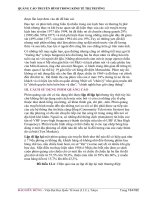
Windows Journal is a simple note-taking application that debuted in the first version of
Windows XP Tablet PC Edition. Shown in Figure 16-17, Windows Journal works only with
handwriting and cannot be used to take notes with the keyboard. It remains an excellent
way to get accustomed to Tablet PC usage, if you’re a beginner.
Figure 16-17: Windows Journal is designed for anyone who wants to take handwritten notes.
Windows Journal starts off with a college-ruled notebook look and feel, but you can change
the style using Journal’s stationary and template features. Stationary is a combination of
paper size (like 8.5" by 11"), line style (college ruled, wide ruled, and so on), and other
characteristics. Or, you can choose from preset templates like Blank, Dotted Line, Memo,
and others. To define the default look and feel of your notes, visit Tools
➪Options➪Note
Format.
Curiously, you can draw in Windows Journal using the mouse if you want, although the
results are rarely inspiring.
Microsoft sells an excellent note-taking application called OneNote, which you can also
purchase as part of the inexpensive Microsoft Office Home and Student Edition 2007.
OneNote supports both pen- and keyboard-based note taking, as well as audio and
video recording that can be synchronized with notes. It is much more sophisticated
than Windows Journal and has been updated far more frequently.
tip
note
ࡗ
452
Part V: Mobility
ࡗ ࡗ ࡗ
25_577048 ch16.qxp 11/29/06 8:20 PM Page 452
Sticky Notes
Shown in Figure 16-18, Sticky Notes is a new Windows Vista accessory that any user can
use to create short handwritten or voice notes. The application resembles a small stack of
yellow notes, just like the paper-based sticky notes they’re meant to represent. Sticky
Notes is designed for a Tablet PC, and indeed, you’d need such a device for the hand-
written note portion. But anyone can use Sticky Notes to create voice notes.
Figure 16-18: Sticky Notes is meant to emulate paper-based sticky notes.
Summary
As with Windows Media Center, Microsoft has taken the Tablet PC functionality it devel-
oped during the lifetime of Windows XP, enhanced it, and made it available to far more
users in Windows Vista. Whether you have a traditional Tablet PC, a convertible laptop, a
PC with a touch-based screen, or even a normal desktop or notebook computer, there’s a
Tablet PC feature in Windows Vista that’s sure to delight. Hopefully, as this technology
goes more mainstream, more people will become comfortable with an alternative form of
computing that could yet change the world.
ࡗ ࡗ ࡗ
Chapter 16: New Tablet PC Features
ࡗ
453
25_577048 ch16.qxp 11/29/06 8:20 PM Page 453
25_577048 ch16.qxp 11/29/06 8:20 PM Page 454
Part VI
Internet and Networking
Chapter 17: Browsing the Web with Internet Explorer 7
Chapter 18: Windows Mail and Contacts
Chapter 19: Using and Understanding Windows Live Services
26_577048 pt06.qxp 11/29/06 8:21 PM Page 455
26_577048 pt06.qxp 11/29/06 8:21 PM Page 456
Browsing
the Web with
Internet
Explorer 7
ࡗ ࡗ ࡗ ࡗ ࡗ ࡗ ࡗ ࡗ ࡗ ࡗ ࡗ ࡗ ࡗ ࡗ ࡗ ࡗ ࡗ ࡗ ࡗ ࡗ ࡗ ࡗ ࡗ ࡗࡗ ࡗ ࡗ
In This Chapter
Figuring out the new Internet Explorer 7 user interface
Working with tabbed browsing and Quick Tabs
Searching the Internet
Optimizing the Internet Explorer 7 display
Printing information you find on the Web
Become more efficient with Internet Explorer 7’s keyboard
shortcuts
Discovering and mastering the new RSS features
ࡗ ࡗ ࡗ ࡗ ࡗ ࡗࡗ ࡗ ࡗ ࡗ ࡗ ࡗ ࡗ ࡗ ࡗ ࡗ ࡗ ࡗ ࡗ ࡗ ࡗ ࡗ ࡗ ࡗ ࡗ ࡗ ࡗ
Chapter
17
27_577048 ch17.qxp 11/29/06 8:21 PM Page 457
ࡗ
458
Part VI: Internet and Networking
ࡗ ࡗ ࡗ
W
indows Vista features a brand-new and much-improved version of the Internet
Explorer Web browser called Internet Explorer 7. As with previous Windows ver-
sions, Internet Explorer 7 is integrated into Windows Vista, although Microsoft offers a free
download of Internet Explorer 7 for Windows XP as well. But here’s one reason to upgrade to
Windows Vista: The version of Internet Explorer 7 found in Microsoft’s latest operating sys-
tem is actually much more secure than the XP version and even offers a few unique features.
What Happened
To say that Internet Explorer has an ignoble history is perhaps an understatement.
Originally conceived as a minor add-on for Windows 95 and one that did not ship in the
initial version of that Windows release, Internet Explorer later became the linchpin of
Microsoft’s strategy for competing in the dot-com era and, not surprisingly, the subject of
antitrust legal battles that continue to this day.
Inexplicably, Microsoft melded Internet Explorer into Windows beginning with Windows
98, and designed the system in such a way that Internet Explorer could not be easily
removed from the operating system (OS). This intermingling of web browser and OS code
led to years and years of security problems, some of which eventually forced Microsoft to
delay the release of Windows Vista simply so that it could ensure that its Internet Explorer–
riddled operating systems were shored up with additional defenses.
Worst of all, after Microsoft won the browser wars in the early 2000s, displacing competitors
such as Netscape and Opera, the company lost interest in Internet Explorer and stopped
active development of the browser. It even briefly considered removing Internet Explorer
from Windows Vista altogether, relegating its web browsing duties to the Explorer shell,
which as you probably know is simply based on Internet Explorer code anyway.
Then a wonderful thing happened. A scrappy group of upstarts from The Mozilla
Foundation (since renamed to The Mozilla Corporation) took the vestiges of the software
code from Netscape’s browser and reconstituted it as a small, lean, and powerful browser
named Firefox. Roaring out of the gates in 2004, Firefox quickly began seizing market
share from Internet Explorer, thanks to its unique new features and functionality. And
suddenly, Microsoft was interested in updating Internet Explorer once again. It’s amazing
what a little competition can do.
Starting with the Service Pack 2 (SP2) version of Windows XP, Microsoft re-established its
Internet Explorer team and began working actively on new features. Although the ver-
sion of Internet Explorer 6 that appeared in Windows XP SP2 was focused largely on
security features, a future version, Internet Explorer 7, would include a huge number of
functional improvements, aimed at closing the gap with Firefox and giving Microsoft’s
customers reasons not to switch. For the first time in several years, Internet Explorer is a
compelling web browser again, and it’s likely that most Windows Vista users will want to
use this product to browse the Web and access other web-based content.
Truth be told, we both prefer and recommend Mozilla Firefox over Internet Explorer,
although we admit that the latest Internet Explorer version does indeed include a
number of new and interesting features. You can find out more about Firefox from
the Mozilla Web site (
www.mozilla.com/).
Secret
27_577048 ch17.qxp 11/29/06 8:21 PM Page 458
ࡗ ࡗ ࡗ
Chapter 17: Browsing the Web with Internet Explorer 7
ࡗ
459
Basic Internet Explorer Usage
Although it’s unlikely that Windows Secrets readers are unaware of basic Internet
Explorer features, many of you may have moved along to Mozilla Firefox or other
browsers over the past few years. If that’s the case, this section will serve as a nice
refresher.
Starting Internet Explorer
Click the Internet Explorer icon in your Start Menu to start Internet Explorer. You can also
start the Internet Explorer by clicking the Internet Explorer icon in the Quick Start toolbar.
In previous version of Windows, you could type a web address (a URL) in the
Address bar of any Explorer window and press Enter to change the Explorer win-
dow into an instance of Internet Explorer. This no longer works in Windows Vista:
Now, when you type a web address into an Explorer address bar and tap Enter, a
new Internet Explorer window opens.
Secret
You can display the Internet Explorer icon on your desktop, although the process has
changed. To do so, right-click an empty area of the desktop and choose Personalize.
Then, in the Personalization window, select the Change Desktop Icons link on the left
side of the window. In the Desktop Icon Settings window that appears, check Internet
Explorer and click OK.
Secret
New Link, New Window
If you want to open a new window when you jump to a new site, hold down the Shift key
when you click the link. (If you prefer, you can right-click the link and then click Open In
New Window to do the same thing without using the keyboard.) You’ll then be able to see
both the target site and the source page in different Internet Explorer windows. You can
also choose to use Internet Explorer’s new tabbed browsing feature instead. We describe
this feature later in the chapter.
Managing Downloads from the Internet
Like previous versions of Internet Explorer, Internet Explorer 7 does not provide a down-
load manager. Instead, it provides only basic functions for downloading files from Internet
servers. Each time you click a link to download a file with Internet Explorer, you get a
new download dialog.
27_577048 ch17.qxp 11/29/06 8:21 PM Page 459
Edit on the Internet Explorer Toolbar
Unlike previous Internet Explorer versions, Internet Explorer 7 doesn’t include an Edit
button on its command bar by default. If you don’t have the Edit button and wish you did,
here’s how to get it:
1. Click the Tools button in the Internet Explorer toolbar.
2. Scroll down to Toolbars and then select Customize.
3. In the Customize Toolbar dialog box, select Edit from the Available Toolbar
Buttons field and then click the Add button.
4. Click Close.
The Complete AutoComplete
Internet Explorer has a feature called AutoComplete that helps you complete your entry in
the address bar as soon as you type in the first few letters. For example, type
www.appl,
pause for a few seconds, and you’ll get a drop-down list of sites you have previously visited
that start with
www.appl, including www.apple.com/. Even if there is a long list of URLs that
start with the same letters that you’ve typed, you can easily use your mouse or arrow keys
to scroll to and highlight an entry in the list, and then press Enter or Tab to jump to the site.
If you press Alt+down arrow or F4 when the address bar is active, Internet Explorer dis-
plays a drop-down list of complete addresses you’ve recently typed in the address bar.
This is a totally different list than the AutoComplete drop-down list; it is the same list that
appears when you click the down arrow at the right end of the address bar.
To enable or disable AutoComplete, choose Tools
➪Internet Options, click the Content
tab, and click the Settings button in the AutoComplete section. In the AutoComplete
Settings dialog box, you can choose whether to use AutoComplete for Web addresses,
forms, or user names and passwords.
You can save time when typing Web addresses by making Internet Explorer automati-
cally preface your entry with
www. and end it with the suffix .com. Just type the domain
name in the address bar and then press Ctrl+Enter. For example, type
windowssecrets,
press Ctrl+Enter, and you get
www.WindowsSecrets.com. This is different from actually
searching on the Internet for the address; see the “Autosearch for a Web Address” section
later in this chapter for more on that.
Finding Web Sites
Do you want to find a specific web site, or text from a specific web page?
In an Internet Explorer window, click the address bar, type
find, search, or ?, type a space,
and then type the name of the company or organization whose site you want to find. If the
name has a space in it, forget typing the
find, search, or ?, and just put double quote
marks around the name. You can also just type in any word, and the search function will
be started.
This will automatically start a search for the company, word in a Web page, or organiza-
tion on Live.com. We discuss changing your search options later in this chapter.
tip
ࡗ
460
Part VI: Internet and Networking
ࡗ ࡗ ࡗ
27_577048 ch17.qxp 11/29/06 8:21 PM Page 460
Autosearch for a Web Address
Internet Explorer will automatically search on the Internet for a Web address if you ask it
to. Type a fragment of an address in the Address bar, press Enter, and Internet Explorer
will treat the fragment as a search term. After a minute or two, you’ll see a list of URLs
containing the text you typed.
You can choose to turn this feature off or change how it functions by taking these steps:
1. Click Tools➪Internet Options.
2. Click the Advanced tab and scroll down to Search From The Address Bar.
3. Select the option that you prefer — Do Not Search From The Address Bar or Just
Display The Results In The Main Window — and then click OK.
It isn’t the default, so you might miss it. Internet Explorer will not put in placeholder bor-
ders for images yet to be downloaded. If you want this feature turned on so that the text
can wrap around the images as yet unseen, you can turn it on in your Internet Options
dialog box. Choose Tools
➪Internet Options, click the Advanced tab, and scroll down to
Multimedia. Mark the Show Image Download Placeholders check box. Click OK.
Copy and Paste Links
Wherever there’s a hot link, there’s a way to cut and paste it. If you receive an e-mail mes-
sage in Windows Mail that contains a link, you can of course just click it to invoke an
Internet Explorer window (if it’s a link to a web site or an FTP address).
You can right-click a link and click Copy Shortcut. Then paste this URL into the address
bar, into a text file, onto the Desktop — whatever you like. You can also click Add To
Favorites instead of Copy Shortcut.
Right-click a web page name in your History Explorer bar, and you can click Copy or Add
To Favorites. You can do the same with a web page name in search results displayed in
the Search Explorer bar.
Toggle Internet Explorer between
Full-Screen Mode and Restore
Open up Internet Explorer and press the F11 key. If you weren’t before, you are now in
full-screen mode. If you were maximized before, pressing F11 again will get you back
there.
Favorites and Offline Web Pages
A URL (Uniform Resource Locator) is a unique identifier for a web page or other resource
on the Internet. Windows maintains a list of the URLs for your favorite sites. Your
favorites
are actually shortcuts stored in the Favorites folder.
You can store whatever you like in the Favorites subfolders, but we suggest limiting what
you put in these folders to shortcuts (either to URLs or to other folders or documents). You
can put copies of URL shortcuts on your Desktop and start your Internet Explorer by click-
ing a shortcut’s icon.
tip
ࡗ ࡗ ࡗ
Chapter 17: Browsing the Web with Internet Explorer 7
ࡗ
461
27_577048 ch17.qxp 11/29/06 8:21 PM Page 461
To create a shortcut to your favorites, open an Explorer window and navigate to Favorites
in your Home folder. Right-drag and drop your Favorites folder onto your Desktop.
Choose Create Shortcut(s) Here.
You can get to your favorites from the new Favorites Center as well, which we discuss
later in the chapter.
URL Shortcuts
Internet Explorer keeps track of web sites using shortcuts to URLs. These shortcuts have
an extension of
url instead of the standard lnk extension for Windows shortcuts.
URL shortcuts store more information about the URLs than just their values. Internet
Explorer uses this additional information to help you manage your shortcuts as well as to
enable you to view web sites offline. You can see this information by right-clicking a URL
shortcut in Windows Explorer and choosing Properties.
You can create a URL shortcut to a web site just by displaying the site in an Internet
Explorer window, and clicking the new Add To Favorites button. We discuss this new
functionality later in this chapter.
If you would rather put the shortcut directly on the Desktop, right-click an area on the
web page that doesn’t include a graphic or a link to another location and choose Create
Shortcut from the context menu. You can also drag the icon at the left end of the address
bar to the desktop to create a shortcut to the web page.
To create a shortcut to a link (a jump to another URL) in a web page, drag the link to
the desktop. You can later click this shortcut to open an Internet Explorer window and
go to the indicated location on the Web.
You don’t have to put URL shortcuts in the Favorites folder or one of its subfolders. If
you do, then the shortcuts are accessible from the Favorites Center. But you are free to
put them wherever you like. You can create many folders of URL shortcuts, and place
shortcuts to these folders on your desktop.
Saving Graphics off the Internet
Do you want to save a web-based graphic that you are viewing in Internet Explorer?
Right-click it, choose Save Picture As (sometimes you will see Save Background As as
well), and then give it a path and a name. If you don’t save a graphics file as you’re view-
ing it, you can save it later from the cache. When Internet Explorer first downloads a
graphics file, it automatically caches (saves) it in the Temporary Internet Files folder. You
can find the file in this folder and save it permanently by copying it to another location.
If you want to turn a graphic in a web page into wallpaper on your desktop, right-click the
graphic and choose Set As Wallpaper.
Saving Complete Web Pages
Saving a web page as an HTML file in Internet Explorer usually saves only the text and
layout of the page — the graphics are saved separately as links. However, Internet
tip
tip
ࡗ
462
Part VI: Internet and Networking
ࡗ ࡗ ࡗ
27_577048 ch17.qxp 11/29/06 8:21 PM Page 462
Explorer does have the ability to save a web page as a single document. The MIME
HTML (
.mht) file format incorporates both the graphics and the HTML text on a web page
into one file. The graphics are encoded using MIME (and Uuencoding), so everything is
stored in e-mail-capable, 7-bit ASCII text characters. But Internet Explorer can decode
the file on the fly and display the graphics.
This feature greatly expands the power of the Internet. If a document is displayed as one
web page, you can download it and all of its associated graphic files, and save everything
in one very convenient document. If you do this, you don’t have to save the document as
an offline page to keep it readily available.
All you do to save a web page in this format is tap the Alt key to enable the Internet
Explorer menu, and then click File
➪Save As, and choose Web Archive, Single File in the
Save As Type field. This secret isn’t hidden, but it sure is powerful. It turns the Web into
something that you can actually use as a publishing arena.
ࡗ ࡗ ࡗ
Chapter 17: Browsing the Web with Internet Explorer 7
ࡗ
463
You can see the entire underlying text file if you open a file with an mht extension
in WordPad. If you click View
➪Source in Internet Explorer when viewing an mht
file, you’ll only see the HTML code and not the encoded graphics that are in fact
there in the file.
Secret
Internet Explorer also enables you to save a document as a complete web page (click
File
➪Save As, and choose Web Page➪Complete in the Save As Type field). In this case,
the graphic files are not included in the HTML source text. Instead, Internet Explorer cre-
ates a subfolder in which it saves the downloaded graphics files. It rewrites the saved web
page to reference the graphics files in this subfolder, and enters the Web page’s URL as a
comment at the top of the page. We wish Save As
➪Web Archive for Email saved the web
page’s URL as a comment.
Finally, you can also save web pages as a Webpage type, which includes only the text of
the page along with links to the online graphics. If you choose this option and view a
saved page while offline, you’ll see just the text. However, if you are online, the graphics
will load as normal.
Turning Your Favorites into a Web Page
The Favorites menu and submenus are fine for starters, but sometimes it is a bit of a drag
to search repeatedly through all these menus. How about creating a single web page of
all your favorites? Or separate web pages for different subsets of favorites?
Internet Explorer includes the Import/Export Wizard, which can export your favorites or
cookies. It writes them to your disk in a format that Netscape, Mozilla Firefox, and other
browsers can read. You can also use the wizard to import cookies and favorites from
other browsers. The wizard writes out your favorites as an HTML file. This makes it easy
to look through your favorites with Notepad and edit them if you like. You can also use
the HTML file as a page in Internet Explorer, from which you can easily jump to any site
on your list.
Choose File
➪Import and Export to run the wizard.
27_577048 ch17.qxp 11/29/06 8:21 PM Page 463
Internet Explorer 7 Is Not
Your Father’s Web Browser
If you’re familiar with Internet Explorer 6 or previous Internet Explorer versions, you
might be in for a shock when you first start Internet Explorer 7: Gone is the simplicity of
the Internet Explorer you know, replaced with a more complicated user interface that
mimics the look and feel of the Windows Explorer shell while providing onscreen real
estate for all its new features. As shown in Figure 17-1, Internet Explorer 7 is quite a bit
busier looking than its predecessors.
Figure 17-1: Something old, something new: Internet Explorer 7 is clearly a new Internet
Explorer, but you may find it difficult to find features you were once used to.
So what’s changed in the Internet Explorer 7 user interface? First, the menu bar is hidden
and renamed to Classic Menu, similar to what happened with the menu bar in the
Explorer shell. Microsoft says that it disabled the Classic Menu to reduce the clutter, but
we think you’ll agree that the Internet Explorer 7 user interface is still quite a bit more
cluttered than that of Internet Explorer 6.
If you don’t like this design decision, you can temporarily cause the Internet Explorer 7
Classic Menu to appear by pressing the ALT key once. Or, you can simply click the new
Tools toolbar icon and select Toolbars and then Classic Menus to enable this menu all
the time.
tip
ࡗ
464
Part VI: Internet and Networking
ࡗ ࡗ ࡗ
27_577048 ch17.qxp 11/29/06 8:21 PM Page 464
Various user interface elements have also been moved around to conform to the new
Windows Vista common user interface style. The Back and Forward buttons are promi-
nently featured in the upper left corner of the window next to the top-mounted address
bar, for example. The main toolbar, now called the
command bar, is now located way over
to the far right of the window, causing the Home button to be located quite a ways from its
previous location, which is sure to frustrate those who have committed the location of this
commonly needed button to memory.
You can easily resize the size of the command bar if you want to ensure that you can
see all of its buttons. First, ensure that the toolbars are not locked by navigating to
Tools
➪Toolbars and unchecking Lock Bands (this option is unchecked by default).
Then, you can drag the command bar left and right to resize it. If you make the com-
mand bar too short, a double chevron will appear at the right, indicating that you can
reach the rest of its options via a drop-down menu, as shown in Figure 17-2.
Figure 17-2: Hidden command bar options can be accessed via this handy drop-down menu.
The Command Bar
Love it or hate it, the new command bar houses some of Internet Explorer’s most com-
monly needed functionality. Table 17-1 explores the options you’ll see, from left to right,
in this toolbar. All of these features are described in more detail later in this chapter.
tip
ࡗ ࡗ ࡗ
Chapter 17: Browsing the Web with Internet Explorer 7
ࡗ
465
27_577048 ch17.qxp 11/29/06 8:21 PM Page 465
Table 17-1: Default Internet Explorer 7.0 Command Bar Buttons
Command What It Does
Bar Button
Home Navigates the browser back to your home page (or home pages, as the case may
be). This button includes an optional drop-down menu as well, which enables you
to change your home page(s) and add and remove home page(s).
Feeds Provides a handy front end to the new support of RSS feeds in Internet Explorer.
Print Provides printing facilities that are dramatically improved when compared to
previous Internet Explorer versions.
Page This button launches a drop-down menu that provides access to options related to
web pages, such as zoom and text size.
Tools This button launches a drop-down menu that provides access to options related to
the web browser itself, including security feature configuration, Internet Options,
and which toolbars are displayed. Tools is similar to the Tools menu in the Classic
Menu, but lacks certain options, such as Windows Update.
Help This button launches a drop-down menu that is similar to the Help menu item in
the Classic Menu.
You can also customize which buttons appear in the Internet Explorer 7.0 command bar.
To customize this toolbar, right-click one of the visible toolbar buttons and choose
Customize. This will display the Customize Toolbar dialog box shown in Figure 17-3.
Figure 17-3: The Customize Toolbar dialog lets you configure which buttons appear in the
Internet Explorer 7 command bar.
You might use this dialog box to remove existing toolbar buttons you don’t want, or you
can add optional buttons that don’t appear by default. Table 17-2 summarizes the optional
buttons you can add to the Internet Explorer 7.0 command bar. Additionally, you can add
one or more separators, which visually separate command bar buttons. Most of these fea-
tures will be described later in this chapter.
ࡗ
466
Part VI: Internet and Networking
ࡗ ࡗ ࡗ
27_577048 ch17.qxp 11/29/06 8:21 PM Page 466
Table 17-2: Optional Internet Explorer 7.0 Command Bar Buttons
Command What It Does
Bar Button
Size Toggles the font size of the text in the current browser window between preset
sizes, including Largest, Larger, Medium (the default), Smaller, and Smallest.
Read Mail Adds a button to launch Windows Mail, or your default e-mail application.
Encoding Provides a drop-down menu that enables you to select from the various language
and locale display modes that are available on your system. Typically, you will leave
this at its default value, Unicode (UTF-8), unless you are browsing the Web in an
area of the world that uses right-to-left text or other text encoding methods.
Edit Opens the currently displayed web page in your default web page editor
application.
Cut Cuts the currently selected text from the address bar and places it in the Windows
Clipboard.
Copy Copies the currently selected text from the address bar or web page and places it
in the Windows Clipboard.
Paste Pastes the contents of the Windows Clipboard at the cursor position.
Full Screen Toggles the Internet Explorer 7.0 Full Screen mode.
If you install software that adds a button to the Internet Explorer toolbar, that button
will be added to the right side of the command bar now. For example, Windows Live
Messenger installs a Messenger button, and Microsoft Office (2003 and newer) installs
a Research button (and, if you’ve installed OneNote, a Send to OneNote button). You
might see other similar buttons, depending on which software you’ve installed. Likewise,
if you upgrade from Windows XP to Windows Vista, any buttons that were added to
Internet Explorer 6 will show up in the Internet Explorer 7 command bar as well. You
can remove these buttons via the Customize Toolbar dialog box described previously.
Where Is It Now?
Hundreds of millions of people used to Internet Explorer 6 may be asking this question.
Despite IE’s widespread use, Microsoft made some startling changes to the way Internet
Explorer 7 works. With that in mind, Table 17-3 should help Internet Explorer 6–savvy
users find their way around the new interface.
tip
ࡗ ࡗ ࡗ
Chapter 17: Browsing the Web with Internet Explorer 7
ࡗ
467
27_577048 ch17.qxp 11/29/06 8:21 PM Page 467
Table 17-3: Where Common Internet Explorer Features Moved in Internet
Explorer 7
Feature Where It Is Now
File menu Now called the Classic Menu and hidden by default. Tap the Alt key to display
this menu.
Back button Now located in the upper-left corner of the browser window.
Forward button Now located in the upper-left corner of the browser window to the right of the
Back button.
Stop button Moved to the right of the Refresh button.
Refresh button Moved to the right of the address bar.
Home button Moved to the command bar.
Search button Replaced by a new Search box found in the top right of the browser window.
Favorites button Replaced by the Favorites Center. The icon for Favorites Center is a yellow star
and is found below the Back button.
History button Missing in action. You can access the browser history by displaying the
Favorites Center, however.
Mail button Replaced by the optional Read Mail command bar button and the Send This
Page option on the Page button’s pull-down menu.
Print button Now located in the command bar.
Edit button Missing in action. To edit a web page, enable the Classic Menu by tapping Alt
and then choose Edit from the File menu.
Go button Missing in action. To load a web page whose address you’ve typed into the
address bar, simply press the Enter key.
Status icon In previous versions of Internet Explorer, an Internet Explorer E logo or
(“throbber”) Windows logo in the upper right corner of the browser indicated progress
while a web page was loading. In Internet Explorer 7, this has been replaced
by a standard progress bar, which is located in the middle of the status bar at
the bottom of the browser window.
Address bar Now located in the top row of controls in the browser window to the right of
the Forward button.
Information bar Hidden by default, but still located at the top of the web page display area.
Status bar Still located at the bottom of the browser window. The status bar in Internet
Explorer 7 behaves similarly to the status bar in previous Internet Explorer
versions.
New Internet Explorer 7
Features and Functionality
After you get over the new look of Internet Explorer you will discover that Microsoft has
added a lot of new functionality to this release. Indeed, Internet Explorer is arguably the
ࡗ
468
Part VI: Internet and Networking
ࡗ ࡗ ࡗ
27_577048 ch17.qxp 11/29/06 8:21 PM Page 468
most dramatic upgrade in the history of Microsoft’s web browser. In this section, we’ll
examine the biggest changes.
Manage Your Favorite Web Sites with Favorites Center
In previous versions of Internet Explorer, the Favorites folder provided a place in the sys-
tem where you could save links, or shortcuts, to your favorite web sites. Favorites were
typically accessed in Internet Explorer via the Favorites menu. This tradition has changed
somewhat in Internet Explorer 7. Now, Favorites are accessed via a new Favorites Center,
which is basically an Explorer bar that can be triggered to appear on the left side of the
browser window. You trigger the Favorites Center by clicking the yellow star icon, as
shown in Figure 17-4.
Figure 17-4: The new Favorites Center provides a holding pen for your Favorites, browser
history, and subscribed RSS feeds.
The Favorites menu still exists in Internet Explorer 7, but you’ll have to display (or per-
manently enable) the Classic Menu in order to see it. To do so, tap the Alt key and
choose Favorites.
By default, Favorites Center appears in Favorites view, which displays your favorite web
sites in a menu-like list. But don’t be concerned that Microsoft simply duplicated the func-
tionality of the old Favorites menu and moved it to a new location in order to fool you. The
Favorites Center includes far more functionality than the old Favorites menu.
tip
ࡗ ࡗ ࡗ
Chapter 17: Browsing the Web with Internet Explorer 7
ࡗ
469
27_577048 ch17.qxp 11/29/06 8:21 PM Page 469
Favorites Center appears as a floating panel of sorts by default, but you can attach, or
pin, it to the browser window by clicking the Pin button, which looks like a small door
with a green arrow on it. Curiously, to close the Favorites Center when pinned, you
need to click the Close Favorites Center button, which looks like a small black x and is
found above, not within, the Favorites Center panel.
To see what this means, enable the Favorites Center and mouse over the various folders
and shortcuts you see in the list. If you mouse over a folder, a small blue arrow appears. If
you click this arrow, you will open all of the shortcuts in that folder in their own tabs. (See
the next section for more information about tabbed browsing if you don’t understand
what this means.) Conversely, if you mouse over a shortcut, you’ll see a small red x
appear. If you click this red x, the selected shortcut will be permanently deleted, with no
warning dialog box. Naturally, if you click a shortcut, that shortcut will open in the current
browser window. And if you click a folder, the view will expand to show you the contents
of that folder, as shown in Figure 17-5.
Figure 17-5: Favorites Center provides a more full-featured hub for your favorite web sites.
tip
ࡗ
470
Part VI: Internet and Networking
ࡗ ࡗ ࡗ
27_577048 ch17.qxp 11/29/06 8:21 PM Page 470
In addition to containing links to your favorite web sites, the Favorites Center also
includes views for History (your browser history) and something called Feeds. In this way,
you might think of Favorites Center as the front end to the memory of Internet Explorer 7.
Here’s how these two new buttons work:
ࡗ
Feeds: Contains RSS feeds to which you’ve subscribed. (We examine RSS feeds
in detail later in this chapter.)
ࡗ
History: Shows you the web pages you visited in the past. When you click this
button, a drop-down menu enables you to organize the list by various criteria
and search your history for a previously viewed page.
Navigate the Web with Tabbed Browsing
While opinions differ on which web browser first offered tabbed browsing, a feature that
optionally lets the user open new web pages within the frame of a single browser window,
and access each individual page via a series of visible tabs, one thing is very clear:
Internet Explorer was the last major browser to get the feature. Now that Microsoft has
finally caught up and added this crucial bit of browsing functionality to Internet Explorer
7, Internet Explorer is no longer a second-class web citizen.
If you haven’t had the opportunity to use tabbed browsing, chances are you’ll appreciate
the feature, especially if you tend to open a lot of web documents in different windows.
Because you can now optionally open new web documents in a tab contained within a
single browser window, you’ll have fewer windows to manage and less clutter on your
desktop.
Here’s how tabbed browsing works. By default, Internet Explorer opens with a single doc-
ument loaded, as before. But now, each document Internet Explorer displays is contained
within a tab. The top of the tab — the part that looks like an actual tabbed file folder — is
found at the top of the browser window, below the address bar and to the right of the
Favorites Center and Add/Subscribe buttons. If you choose to never deal with tabs per se,
Internet Explorer will essentially act as it did before, except that you will see that single
tab there near the top of the window.
The beauty of tabbed browsing, however, is that you can open multiple tabs, which are
essentially child windows of the main browser window. To open a new tab, click the New
Tab button, which is the gray squared-shaped object to the right of the rightmost tab, as
shown in Figure 17-6.
ࡗ ࡗ ࡗ
Chapter 17: Browsing the Web with Internet Explorer 7
ࡗ
471
Although this isn’t documented, you can also open a new tab by double-clicking the
blank area to the right of the New Tab button.
Secret
27_577048 ch17.qxp 11/29/06 8:21 PM Page 471
Figure 17-6: To open a new tab, click the New Tab button.
By default, the new tab will open to a blank page and you’re good to go: You can enter a
web address and navigate there, go directly to your home page, or perform any other sim-
ilar navigational tasks. But there are better ways to open a new tab. You can use the
Ctrl+T keyboard shortcut, for starters. This will open a new tab in a manner similar to
clicking the New Tab button.
But say you’re doing a Google search and you want to open links to certain search results
in new tabs. (This, frankly, is a great use for tabbed browsing.) To open a link in a new
tab, you can right-click the link and choose Open In New Tab, or Ctrl-click the link (that
is, hold down the Ctrl key on your keyboard while you click it). Alternatively, you can
click the middle mouse button to open a new tab as well.
This method is particularly effective when you have a list of hyperlinks that you want to
open, all at the same time. You can simply move down the list, Ctrl-clicking as you go,
and then casually examine each tab in order.
That last bit brings up an interesting issue. How do you navigate between tabs? You may
recall that you can navigate between open windows in Windows using the Alt+Tab key
combination (or, starting in Windows Vista, the new 3D view, which is toggled by using
the Windows Key+Tab key combination). In Internet Explorer 7, you can select an indi-
vidual tab by clicking its tab button. But you can also use various key combinations to
select tabs. To cycle through the available tabs, use the Ctrl+Tab key combination. Or, to
move in reverse order, try Ctrl+Shift+Tab.
To close a tab, click the Close Tab button—which appears as a small x on the tab button
of each tab. Or, use the Ctrl+W keyboard shortcut. Note that Internet Explorer will prompt
ࡗ
472
Part VI: Internet and Networking
ࡗ ࡗ ࡗ
27_577048 ch17.qxp 11/29/06 8:21 PM Page 472
you now if you attempt to close the entire browser window if two or more tabs are open:
As shown in Figure 17-7, closing down multiple tabs (that is, open documents) with a sin-
gle mouse click could be disastrous, so this is a nice feature.
Figure 17-7: Internet Explorer 7 will warn you if you attempt to shut down a browser window
with two or more open tabs.
Quick Tabs
Although other browsers have had tabbed browsing functionality for years, Internet
Explorer 7 is the first to utilize an innovative new tabbed browsing feature called Quick
Tabs. Quick Tabs are a visual way of managing the open tabs you have in any Internet
Explorer 7 window, and it’s likely that you’ll be quite taken with it.
To understand why Quick Tabs is so cool, you’ll have to open a number of web pages in dif-
ferent tabs in Internet Explorer 7. When you are displaying two or more tabs in an Internet
Explorer browser window, you’ll notice that a new icon appears next to the Favorites Center
and Add to Favorites icons. This icon enables you to use Quick Tabs; it resembles four
squares. When you click the Quick Tabs icon, the document contained in each tab will be
tiled in a thumbnail view within the main browser window as shown in Figure 17-8.
To select a particular tab from this display, simply click any of the thumbnails. That page
will jump to the front and Internet Explorer will return to its normal display.
The Quick Tab icon also provides a drop-down menu. When you select this menu, you’ll
see a list of the available documents. You can jump to a particular tab by selecting any of
the choices, and the currently displayed tab is displayed in bold type.
ࡗ ࡗ ࡗ
Chapter 17: Browsing the Web with Internet Explorer 7
ࡗ
473
27_577048 ch17.qxp 11/29/06 8:21 PM Page 473
Figure 17-8: Quick Tabs let you quickly and visually determine which documents are loaded in
each tab.
Using Multiple Home Pages
You may recall that previous Internet Explorer versions enabled you to specify any web
document as your home page, which is displayed when the browser is launched. In
Internet Explorer 7, you can assign multiple documents as your home page. Each docu-
ment opens in its own tab. This concept is similar to that of a
tab group, which is portrayed
in the Favorites menu or Favorites view of the Favorites Center as a folder full of links. So
your home page can be a single page, like before, or it can be a folder full of links, or a tab
group.
To assign multiple web documents as your home page, you must first load each of the
documents you want into Internet Explorer. Then, click the Tools button and select
Internet Options to display the Internet Options dialog box. In the Home page section at
the top of the General tab, click the Use Current button. You’ll see that all of the open
documents in the current browser window are added to the list.
You can also come back later and add or remove documents from the list. To add a docu-
ment while keeping all of the other documents, first load the document you want to add.
Then, select all of the web address in the browser’s address bar and copy it to the Clipboard
(by clicking Ctrl+C or right-clicking and choosing Copy). Then, select Tools and then
Options, and click inside the list of web addresses you see in the Home Page section of the
General tab. As shown in Figure 17-9, you can edit this list as if it were any text file. Paste
the contents of the Clipboard into a new line of the list to add it to the list of home pages.
You can delete particular home pages in a similar fashion. Simply open the Internet
Options dialog and edit the list, removing the pages you no longer want.
ࡗ
474
Part VI: Internet and Networking
ࡗ ࡗ ࡗ
27_577048 ch17.qxp 11/29/06 8:21 PM Page 474
Figure 17-9: You can easily add and remove web documents from your list of home pages.
Integrated Web Search
In previous versions of Internet Explorer, Microsoft built in very basic web search features,
but the company has been busy advancing the state of the art in web search in other prod-
ucts since Internet Explorer 6, including a variety of MSN and Windows Live toolbars, its
MSN Search and Windows Live Search services, and its index-based desktop search tech-
nologies, which are included in Windows Vista. In Internet Explorer 7, Microsoft has finally
added integrated web search functionality to its browser. It’s pretty obvious, too: A search
box sits prominently in the top-right corner of the browser window, to the right of the
address bar and Refresh and Stop buttons. What’s not obvious is how powerful this feature
is and how easily it can be configured to your needs.
Before getting to that, think about how web search worked in Internet Explorer 6. Basically,
you could navigate to a web search engine, such as Google (
www.google.com) or, if you
were savvy enough, you could utilize the autosearch feature in Internet Explorer 6 to search
the Web directly from the address bar. This functionality still works in Internet Explorer 7: If
you click the browser’s address bar and enter text that can’t be resolved as a URL, or
prepend the text with a question mark (the ? character), Internet Explorer will search the
Web for the text you entered. By default, it uses MSN Search, but you can configure the
browser to use different search providers.
In Internet Explorer 7, you don’t have to know about this secret because the search box is
built right into the browser and is displayed by default. To search in Internet Explorer 7,
simply select the search box, type a search query, and tap Enter (or press the Search but-
ton, which resembles a magnifying glass). The search box displays the name of the
default search provider — again, MSN Search by default — in light gray text just so you
know what it will use.
ࡗ ࡗ ࡗ
Chapter 17: Browsing the Web with Internet Explorer 7
ࡗ
475
27_577048 ch17.qxp 11/29/06 8:21 PM Page 475
Specifying a Different Search Provider
But you don’t have to use Microsoft’s search engine. If you’re a Google fan, for example,
you can use Google instead. To select Google as the default search provider, click the
Search Options button (the small arrow to the right of Search) and select Search Google.
Now, all of your searches—including autosearch from the Internet Explorer address bar—
will use Google instead of MSN Search, as shown in Figure 17-10.
Figure 17-10: A Microsoft browser with built-in support for a competing web search service?
Say it isn’t so, Bill.
Microsoft also built in a way for users and other search engines to add their own providers
into Internet Explorer 7 so you can use any web search service you’d like. To select from a
list of search providers, click Search Options and then select Find More Providers. This
will launch a Microsoft web page called the Windows Search that includes a list of search
providers, including popular favorites like AOL and Yahoo!, as well as topic searches such
as Amazon.com, ESPN, Wal-Mart, and even Weather.com. There’s something for every-
one. You can even add other providers to the site if you’d like.
Using Find in Page
In addition to searching the Web, the Internet Explorer 7.0 search functionality also
enables you to search the text within a currently loaded document. This is handy when
you search the Web for a specific term and then load a page that contains the text, but is
quite long. Instead of reading the entire document, you can search within the document
for your search string. This feature is called Find in Page.
To access Find in Page, you must first load a web document. This can be something you
searched for, or it can be any web page anywhere on the Web. Then, enter a search string
ࡗ
476
Part VI: Internet and Networking
ࡗ ࡗ ࡗ
27_577048 ch17.qxp 11/29/06 8:21 PM Page 476