C#Your visual blueprint for building .NET applications phần 8 potx
Bạn đang xem bản rút gọn của tài liệu. Xem và tải ngay bản đầy đủ của tài liệu tại đây (902.94 KB, 32 trang )
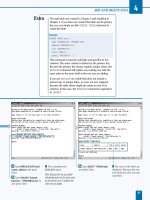
° Click to select
CenterScreen from
the drop-down list.
■ The StartPosition property
now displays CenterScreen
for its value.
BUILDING FORMS
10
You can position your form in code if it is more
convenient for you to do so. You position your
form in code by entering the this.Location
argument that includes the built-in Point
structure. The Point structure identifies the x and
y values of the upper corner of your form. Type
the following code within the public class
Form:System.Windows.Forms.Form class.
211
TYPE THIS:
private void InitializeComponent()
{
this.components = new System.ComponentModel.Container()
this.Size = new System.Drawing.Size(100,100);
this.Text = "MyForm";
this.Location = new System.Drawing.Point(15,15);
}
RESULT:
The upper-left corner
of the form is placed at
15 pixels from the left
and 15 pixels from the
top of the screen,
respectively.
113601-X Ch10.F 10/18/01 12:02 PM Page 211
⁄ Click Start ➪ Programs ➪
Microsoft Visual Studio .NET
7.0 ➪ Microsoft Visual Studio
.NET 7.0.
¤ Click New Project. ■ The New Project window
appears.
‹ Click the Windows
Application icon in the
Templates pane.
› Type a name for the file.
ˇ Click OK.
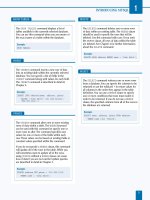
W
hen you create a new form, the Properties
window contains a list of properties in a table that
you can use to change the form properties.
Changing form properties let you customize the form to
your liking.
If you add a control or other feature to a form and click that
control or feature, then the Properties window will display
the properties for that control or feature. The Properties
window displays all sorts of information that you can either
change or view depending on the property.
The Properties window organizes the information into
various categories, such as Appearance for different
appearance attributes such as background color. Those
category names can open and close if you click the small
expansion/retraction button to the left of the category
name just as you do when you open directory information
in Windows Explorer.
Some attributes contain expansion buttons that indicate
that you can set attributes within that attribute. When you
click the expansion button, the subattributes will appear in
the table. When you click one of the attributes, you can
select from a drop-down menu list or enter the value in the
table. After you enter the value, the table will reflect your
changes.
CHANGE FORM PROPERTIES
C#
212
CHANGE FORM PROPERTIES
113601-X Ch10.F 10/18/01 12:02 PM Page 212
Á Click the Properties
window.
‡ Scroll down the property
list until you reach the Text
field.
° Double-click the Form1
text to the right of the Text
field.
· Type NewForm.
‚ Press Enter.
■ Your new form name
appears in the form title bar.
Text
BUILDING FORMS
10
You can set the maximum and minimum sizes of
your form so when the user shrinks or enlarges
the form it will only shrink and enlarge to a
certain size. For example, you may want the user
to shrink a form only to the width of its widest
text box. Type the following code with the public
class Form:System.Windows.Forms.Form.
213
TYPE THIS:
private void InitializeComponent()
{
this.components = new System.ComponentModel.Container()
this.Size = new System.Drawing.Size(100,100);
this.Text = "MyForm";
this.MaximumSize = new System.Drawing.Size(400,400);
}
RESULT:
This code can
maximize the form size
to as high as 400 pixels
wide by 400 pixels
high.
113601-X Ch10.F 10/18/01 12:02 PM Page 213
⁄ Click Start ➪ Programs ➪
Microsoft Visual Studio .NET
7.0 ➪ Microsoft Visual Studio
.NET 7.0.
¤ Click New Project.
■ The New Project window
appears.
‹ Click the Windows
Application icon in the
Templates pane.
› Type a name for the file.
ˇ Click OK.
Á Click the Properties
window.
‡ Scroll down to the
Opacity property in the list.
I
f you design a C# program for use with Windows 2000
Server or Professional, then you can control the opacity
of the form. Windows 2000 lets you determine how
transparent or how solid the form appears on your screen.
A less opaque, or solid, form on your screen is very useful if
you want to have a form that is not currently selected in the
background so users will know that they cannot use that
form. You may also want to keep a form completely
transparent to the user so you can keep the form within
that space so other elements do not infringe upon that
space.
You set the form opacity level by setting the Opacity
property in the Properties window. The opacity level ranges
from 0% completely transparent to 100% completely
opaque. The two digits after the decimal point represent
the percentage of form opacity. After you set the opacity
property, the form becomes more or less opaque
depending on your setting. The default opacity setting is
100%.
If your program users do not use a version of Windows
2000, then the Opacity property will not apply, and the
form will appear on the user’s screen as completely
opaque.
CREATE A TRANSPARENT FORM
C#
214
CREATE A TRANSPARENT FORM
113601-X Ch10.F 10/18/01 12:02 PM Page 214
Opacity
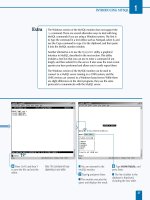
° Type the Opacity
percentage and press Enter.
■ The new Opacity
percentage appears in
bold type.
■ If you run your program in
Windows 2000, the form
appears at 80 percent
opacity.
· Save the program as the
filename.
BUILDING FORMS
10
If your run you program on a computer
running Windows 2000 or later, you can set the
opacity of your form to make the form more
transparent. Making your form less opaque
can let the user know that the form is inactive,
or you can hide the form from the user by
making the form completely transparent. Type
the following code with the public class
Form:System.Windows.Forms.Form.
215
TYPE THIS:
private void InitializeComponent()
{
this.components = new System.ComponentModel.Container()
this.Size = new System.Drawing.Size(100,100);
this.Text = "MyForm";
this.Opacity = 0.8;
}
RESULT:
The form opacity is set
to 80 percent — a 100
percent opacity level is
1 — which results in a
somewhat faded form
on the screen.
113601-X Ch10.F 10/18/01 12:02 PM Page 215
216
AN INTRODUCTION TO WEB
FORMS AND CONTROLS
216
The Net Platform
The .NET platform provides the ASP.NET Framework for
building user interfaces for Web applications. Even
though ASP.NET is a totally new framework, you may
find ASP.NET applications easy to develop due to many
of the transferable skills that come from development
with ASP applications. ASP.NET runs on the same
platform that ASP applications run on today, Windows
2000 and Internet Information Server (IIS) 5.0. ASP.NET
applications uses Web Forms as the primary file type,
which have an extension of .aspx. IIS processes this
file type through a special Internet Server Application
Program Interface (ISAPI) filter that handles the
requested Web Form. Web Forms are a close relative to
ASP (Active Server Page) pages. The server-side
processing in ASP.NET applications exposes to you a
vast amount of information that ASP hides and makes
available only if you program in C++ for ISAPI
extensions and filters. Even though the information is
exposed, you are able to use some of the shortcuts that
are available with ASP applications.
Web Form Controls
When building Web Forms, you choose from two
classifications of controls: The Web Server Controls,
which resides in the System.Web.UI.WebControls
namespace, and the HTML Controls, which are in the
namespace System.Web.UI.HtmlControls. The
HTML Controls directly map to standard HTML tags,
which all browsers support. For example, the
HTMLButton class maps to a button html tag. The Web
Server Controls are more abstract classes whose object
model does not necessarily reflect HTML syntax. They
include most standard HTML tags and extend them with
controls that implement the use of multiple HTML tags
to render the control. For example, the DataGrid Class
can generate table tags, anchor tags, and/or button tags,
depending on how it is configured in design time. Using
Web Server Controls requires you to use the asp
namespace inside of the Web Form. For example, the
Button Web server control has the following syntax
inside of the Web Form: <ASP:BUTTON
ID="cmdContinue" TEXT="Continue"
onClick="Button_OnClick"
RUNAT="Server"/>. Compare this to the definition
the equivalent HTML control has as well as to the
equivalent standard HTML tag:
HTML Control: <input type=submit
value="Enter"ID="cmd Continue
OnServerClick="Submit_Click"
runat=server>.
Standard HTML tag: <input type=submit
value="Enter" ID="cmdContinue
OnServerClick="Submit_Click">.
The main difference between the Web Server and
HTML Controls is that the element on the Web Form
has a runat="server" attribute. This attribute allows
for capabilities that are present in server-side code. The
main difference between the Web Server Controls and
HTML Controls is the namespace provided for the Web
Server Controls (asp:).
This chapter gives you a quick overview of ASP.NET
programming. You can read the book ASP.NET: Your
visual blueprint for creating Web applications on the
.NET framework (Hungry Minds, Inc., 2001), if you want
to dig into further details of Web development with
ASP.NET.
C#
123601-X Ch11.F 10/18/01 12:02 PM Page 216
PROGRAMMING WEB APPLICATIONS
11
217
Separation of User Interface and User Services
ASP.NET applications give you the ability to separate
user interface code and your user services code. The
user interface code, which is your HTML tags, typically
requires different skills than a developer that is
responsible for user services code, the code that
supports your user interface and runs on the Web
server. This separation of code is a welcomed change to
development of Web applications on the Microsoft
platform; having this code seperation promotes more of
the service-based model that Microsoft supports. This
code separation also yields a programming style in
ASP.NET applications that is better-structured code
compared to the ASP style of programming.
The standard type of page that you develop on an
ASP.NET application is a Web Form. Web Forms in
ASP.NET applications consist of two files. One file holds
the HTML, or presentation, and has the .aspx extension.
The other file, which contains the user services code, is
the code-behind page. If you program in C# for the
code-behind page, your page has an extension of .cs
(but if you are developing in Visual Studio .NET, the
extension is aspx.cs). This code-behind page holds
the code that needs to run on the Web server or
application server. The language that runs in the code-
behind page needs to be a compliant .NET language,
such as C#. The following page directive at the top of
the .aspx page associates these two pages, where
WebFormName is the name of the .aspx page and
ApplicationName is the name of the virtual directory:
<%@ Page language="c#"
Codebehind=" WebFormName.aspx.cs"
AutoEventWireup="false"
Inherits="ApplicationName.WebFormName" %>
The code in a code-behind page follows object-
oriented programming (OOP) concepts, where code is
implemented within an event handler and the code
within this handler accesses objects through their
properties, fields, and methods. These objects can be
elements on the Web Form or class libraries. In ASP
code, programmers are responsible for all of this,
except the event handling is not there. With the
absence of event handling, the style of server-side ASP
was procedural coding versus OOP.
In current ASP development, you are limited to VBScript
and JScript for server-side code. Using these scripting
languages for server-side code has its limitations (such
as error handling, data types, and event handling).
Having first-class languages such as VB and C#, as the
server-side code for an .aspx page yields more
programming power and better structured code. To
interact with the .aspx page, you can inherite the Page
class of the System.Web.UI namespace on the code-
behind page. The Page class exposes some familiar
objects that are common in ASP development today
(such as Response, Request, Application,
Session, and Server) and implements some common
events that VB programmers are accustomed to using
(such as Page_Load, Page_Unload, and Page_Init).
Web Forms
Web Forms are the primary file type used in ASP.NET to
create Web pages. Web Forms have an extension of .aspx.
These pages are the next generation pages to ASP pages
that are created in ASP applications. Web Forms are more
sophisticated than the earlier asp pages found in ASP
applications. Web Forms offer new capabilities such as
separation of code from presentaion, the availability of a
vast array of controls that are provided by the framework,
and the capability of creating your own controls.
123601-X Ch11.F 10/18/01 12:02 PM Page 217
⁄ Open Visual Studio. ¤ Click File ➪ New ➪
Project.
■ The New Project window
appears.
‹ Click Visual C# Projects
for the Project Type.
› Click the Empty Web
Project icon for the Templates
pane.
ˇ Type a name for your
Web application.
Á Click to select
http://localhost for
your location.
‡ Click OK.
A
SP.NET applications can run on the same platform as
ASP applications. ASP.NET applications are supported
on the IIS Web server. ASP.NET pages require
preprocessing by the aspnet_iaspi.dll.
Similar to creating an ASP site, when you create a Web site
for ASP.NET, you need a virtual directory configured as an
application. ASP.NET applications are supported on
Windows 2000 and Windows NT 4 with Service Pack 6a,
with the exception of using Web Services. Web Services are
supported on all platforms supported by the Microsoft .NET
Framework SDK, except Windows 95. The Microsoft .NET
Framework SDK is supported on Windows 2000,
Windows NT 4 with Service Pack 6a, Windows Me,
Windows 98, Windows 98 SE, and Windows 95.
All ASP.NET applications that you configure in a virtual
directory have a special icon that is assigned in the IIS
Microsoft Management Console, or MMC. This icon is
different than the standard icon for a virtual directory that is
not an application or just a subdirectory of the root Web site.
An icon that is configured as a virtual directory looks like an
open package versus a standard folder icon that you see in
Windows Explorer. You can go into the IIS MMC to configure
the site or just let VS .NET take care of this for you.
CREATE AN ASP.NET WEB SITE
C#
218
CREATE AN ASP.NET WEB SITE
123601-X Ch11.F 10/18/01 12:02 PM Page 218
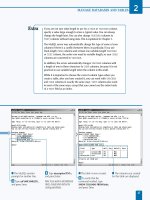
■ The Create New Web
dialog box indicates that the
new Web application is being
created.
■ The project is created on
http://localhost. You
can use this project to create
a Web site.
VisualCSharpBlueprint
Solution Explorer - VisualCSharpBlue
PROGRAMMING WEB APPLICATIONS
11
You can easily trace the
execution of code in ASP.NET
by placing the Trace attribute
in the @Page directive. If you
desire to trace the entire
application, you can change the
web.config file. You search for
the trace tag in the web.config
file. Make sure both enabled
and pageOutput attributes are
set to true. The output tracing
gives details on the page
request, execution time for
page process, control
sequence, cookie information,
headers, and server variables.
219
TYPE THIS:
<%@ Page Trace="true" %>
RESULT:
The Request Details, Trace
Information, Cookies
Collection, Headers
Collection, and Server
Variables are displayed at the
bottom of your aspx page in
the form of tables.
123601-X Ch11.F 10/18/01 12:02 PM Page 219
⁄ Open a new Web project. ¤ Add an ASP.NET Web
page by clicking File ➪ Add
New Item from the Visual
Studio Menu.
‹ Click Web Project Items
to select a Category.
› Click Web Form to select
a Template.
ˇ Type a name for the Web
Form with an
.aspx extension.
Á Click Open.
■ A Web page with a Web
Form appears in Design
mode.
VisualCSharpBlueprint
Solution Explorer - VisualCSharpBlue
T
he majority of your ASP.NET application consists of
Web Forms and their corresponding code-behind files.
Web Forms give you the flexibility of separating code
from presentation, which promotes better structured code
that is easier to develop and maintain.
To create a Web Form, you add an .aspx page to an
existing site. See page 218 for details on creating a new
Web site. When you implement server-side code for the
.aspx page, you create an aspx.cs page to house the
code-behind page. The extension of this file ends with .cs,
which indicates that you programmed the code in the
code-behind page in C#. If you implemented the page with
Visual Basic, the extension is aspx.vb. Note that the aspx
part of the extension is optional.
Implementing the server-side code that supports your Web
page can be done either with <script> blocks in your
HTML or with code-behind pages. Using code-behind
pages allows for cleaner separation of code. Either way, you
will create event handlers that contain the implementation
of the code necessary to make your page functional. For
example, you can use the Page_Load event to initialize
controls on your Web Form. This is similar to the
Form_Load event that is used in VB forms development.
CREATE A WEB FORM
C#
220
CREATE A WEB FORM
123601-X Ch11.F 10/18/01 12:02 PM Page 220
‡ Click View ➪ Toolbox to
open the Toolbox panel.
° Click the HTML tab to
display the HTML controls.
· Double-click the Label
button in the Toolbox.
■ A label control appears.
■ If your Solution Explorer
panel is not open, click
View ➪ Solution Explorer
to open it.
‚ Right-click the filename
in the Solutions Explorer
window and choose Build
and Browse.
■ The Web page appears
with a label control in the
Preview window.
CreateWebForm.aspx
Solution Explorer - VisualCSh
PROGRAMMING WEB APPLICATIONS
11
When developing Web Forms, you can implement server-side code in two ways. The first
implementation, well supported in VS .NET, involves creating an additional code-behind page containing
an extension of .cs. The second implementation is embedding a server-side <script> tag.
Example:
<html>
<script language="C#" runat="server">
void Submit_Click(object sender, EventArgs e) {
if (txtName.Value == "RobertPhillips" &
txtPwd.Value == "pharmacist")
spnMessage.InnerHtml = "You are authenticated!";
else
spnMessage.InnerHtml = "Login Failed!";
}
</script>
<body> <form method=post runat=server>
<h3>Enter Name: <input id="txtName" type=text size=40 runat=server>
<h3>Enter Password: <input id="txtPwd" type=password size=40 runat=server>
<input type=submit value="Enter" OnServerClick="Submit_Click" runat=server>
<h1><span id="spnMessage" runat=server> </span></h1>
</form></body></html>
221
123601-X Ch11.F 10/18/01 12:02 PM Page 221
⁄ Add a new Web Form to
your Web project.
Note: See page 220 for more
information on adding a Web Form.
¤ Click View ➪ Toolbox to
view the Toolbox panel.
‹ Click the Web Forms tab
to display the server controls.
› Double-click Button in
the Toolbox.
■ A button appears on the
form.
ˇ Right-click the Button
control and select Properties.
Toolbox
T
he power of Web Forms comes into play when you
start leveraging the built-in capabilities of server
controls. Server controls have rich capabilities that are
typically available only in Win32-based applications or what
would be available in ActiveX controls.
For rich user interfaces, you can either write very
complicated DHTML or use ActiveX controls. Natively, only
Internet Explorer is an ActiveX container; therefore, it is not
widely accepted in Web development, leaving a wide gap in
capabilities between the user interface richness in Win32
applications versus Web applications. To address this gap,
ASP.NET applications provide Web server controls. Server
controls send standard HTML to the client versus an
embeded object that requires special browser or operating
system runtime capabilities to host the object. You can
configure server controls through their attributes or server-
side code.
After you add a server control to a Web Form, you have
several ways to configure the control. With the simplest
standard input controls — for example, the TextBox, Button,
and CheckBox — you use the Properties window typically
docked in the lower-right hand side of your VS integrated
development environment (IDE). For more sophisticated
server-side controls, you can configure advanced options in
the Property Builder or Auto Format dialog boxes.
ADD SERVER CONTROLS TO A WEB FORM
C#
222
ADD SERVER CONTROLS TO A WEB FORM
123601-X Ch11.F 10/18/01 12:02 PM Page 222
■ The Properties window
appears.
Á Change the Text value
for the button to
Click Me.
‡ Build and browse the
Web page.
Note: See page 220 for more
information on building and
browsing a Web page.
■ The Web page appears
with the Button server control
in the Preview window.
Properties
Tex t
PROGRAMMING WEB APPLICATIONS
11
The following example demonstrates the use of the Panel
Web server control, which is useful for pages that view
different content based on the state of the page. To get
the full code sample, see the companion CD-ROM.
223
TYPE THIS:
<SCRIPT LANGUAGE="C#" RUNAT="Server">
void cmdDescription_Click(object Source, EventArgs e)
{
if (pnlDescription.Visible == true)
{
pnlDescription.Visible = false;
cmdDescription.Text = "Show Photo Description";
}
else
{
pnlDescription.Visible = true;
cmdDescription.Text = "Hide Photo Description";
}
}
</SCRIPT>
RESULT:
The resulting panel that is
show is rendered in the
following <div> tag:
<div id="pnlDescription"
style="background-
color:SkyBlue;height:
50px;width:300px;">
Here is where the description
displays:
</div>
123601-X Ch11.F 10/18/01 12:02 PM Page 223
⁄ Add a new Web Form to
your Web project.
Note: See page 220 for more
information on adding a Web Form.
¤ Add a TextBox control to
the Web page.
Note: See page 222 for more
information on adding server
controls to a Web Form.
‹ Add a Button control to
the Web page.
› Double-click the Button
server control.
Y
ou can implement event handlers to respond to user
interaction with your Web Form. Some common
events available to program are mouse clicks on
buttons, or the mouse moving over text. Using event
handlers, a common object-oriented programming practice,
creates a more efficient programming model. This model
only executes code when the corresponding event fires for
the handler. Without this model, you must use procedural
style coding, which evaluates code from top to bottom and
requires you to run code to determine if you should call a
procedure.
You can implement event handlers in the code-behind
pages. To create an event handler in the code-behind page,
you need to assign a programmatic id to the server-side
control. You do this giving a value for the id attribute on
the HTML tag for the server-side control.
ASP.NET uses the id for the control with the event name to
construct the event handler. For example, a server control
with id = "cmdTest" needs an event handler called
cmdTest_Click() to respond to a user clicking a Button
server control. Inside this handler or procedure,
you implement code that needs to run in response to the
event firing.
RESPOND TO AN EVENT IN
SERVER-SIDE CONTROLS
C#
224
RESPOND TO AN EVENT IN SERVER-SIDE CONTROLS
123601-X Ch11.F 10/18/01 12:02 PM Page 224
■ The Button1_Click
function is created.
ˇ Type Label1.Text =
"Click event fired" in the
Button1_Click function
to update the label when the
button is clicked.
Á Build and browse the
Web page.
Note: See page 220 for more
information on building and
browsing a Web page.
■ The Web page appears
with the TextBox and Button
controls in the Preview
window.
‡ Click the button.
■ The text box is updated to
indicate that the Click event
was fired.
PROGRAMMING WEB APPLICATIONS
11
You can create a code-behind page that responds to an event using the following bare bones of
implementation. This is hand-crafted code and not the automatically generated code that comes from
the VS .NET environment. You first create the .aspx page RespondToEvent_ai.aspx with the first
block of code. Next, you create the supporting code-behind page, RespondToEvent_ai.aspx.cs.
You then place both of these files into an existing ASP.NET site to receive the results into the Web page.
225
TYPE THIS:
<%@ Page Inherits="RespondToEvent_ai" Src="RespondToEvent_ai.aspx.cs" %>
<html>
<head>
</head>
<body>
<form runat="Server">
<P/>
<asp:labelID="lblGreeting" runat="Server" />
</form>
</body>
</html>
RESULT:
A page that displays
the following:
Welcome to
MySharePhotoAlbum.
com
TYPE THIS:
using System;
using System.Web.UI;
using System.Web.UI.WebControls;
public class RespondToEvent_ai : Page {
public Label lblGreeting;
public void Page_Load(object Source, EventArgs e) {
lblGreeting.Text="Welcome to MySharePhotoAlbum.com";
}
}
123601-X Ch11.F 10/18/01 12:02 PM Page 225
⁄ Add a new Web Form to
your Web project.
Note: See page 220 for more
information on adding a Web Form.
¤ Add a DropDownList
control to the Web page.
‹ Add a Button control to
the Web page.
› Add an image control to
the Web page.
Note: See page 222 for more
information on adding server
controls to a Web Form.
ˇ Click the HTML page tab
to view the HTML.
Á Add the ImageUrl attribute
to the Image control and set
the attribute equal to the
picture you want to initially
display.
Note: You may need to copy the
images directory from the CD-ROM
to the working directory.
‡ Add several <ListItem>
tags to add options for the
DropDownList control.
° In Design view, double-
click the Button control.
T
o make a Web Form interactive, you must take input
from a user and send a custom response back to the
user based on their interaction. To create custom
responses on Web Forms, you can write code that produces
a response based on accessing the properties of the
controls on your Web Form. To construct code that
leverages object properties, you need an event handler. See
page 224 for how to create event handlers. Inside that
procedure, you have the ability to read and write to an
object property that is in the scope of the event hander
procedure.
Use of a property requires knowing the id of the tag that
describes the control. For example, a server-side button
control’s tag may look like <asp:TextBox id=
"txtFirstName" runat="server"></asp:TextBox>.
For this server-side control, you must program with the id
set to "txtFirstName". To write to a property on this
control, you create an expression with the form
object.property = value;. For example, you can set
a value for what displays in the text box with the expression
txtFirstName.Value = "Donna";.
To read a property from a control, you use the form
string sFirstName = txtFirstName.Value;. Note,
however, that sFirstName is a variable that holds the value
of the Value property of the TextBox control.
READ AND CHANGE PROPERTIES
FROM OBJECTS ON A WEB FORM
C#
226
READ AND CHANGE PROPERTIES FROM OBJECTS ON A WEB FORM
123601-X Ch11.F 10/18/01 12:02 PM Page 226
■ The Click event handler
for the button is created for
you.
· Set the ImageUrl
property for image control to
the selected item’s value in
the drop-down list box.
Note: Server.MapPath is used here
to translate the physical path to the
images directory (for example,
c:\inetpub\wwwroot\VisualCSharp
Blueprint\images\).
‚ Build and browse the
Web page.
■ The preview page opens
displaying the initial image.
— Click to select another
image from the drop-down
list.
± Click the button.
■ The preview page appears
with the selected image.
PROGRAMMING WEB APPLICATIONS
11
You can read properties on one control to determine what the
value on another control should be. This code reads the Checked
property on a radio button to determine what the SelectionMode
property should be on a calendar Web server control. To get the full
code sample, see the companion CD-ROM.
227
TYPE THIS:
<SCRIPT LANGUAGE="C#" RUNAT="Server">
void SubmitBtn_Click(Object Sender, EventArgs e)
{
if (Day.Checked) {
calPhoto.SelectionMode = CalendarSelectionMode.Day;}
else if (DayWeek.Checked) {
calPhoto.SelectionMode = CalendarSelectionMode.DayWeek; }
else if (DayWeekMonth.Checked) {
calPhoto.SelectionMode = CalendarSelectionMode.DayWeekMonth; }
else if (None.Checked) {
calPhoto.SelectionMode = CalendarSelectionMode.None; }
}
</SCRIPT>
RESULT:
A calendar control that
you can change the
selection mode with,
making the desired
selection and
resubmitting the page.
123601-X Ch11.F 10/18/01 12:02 PM Page 227
⁄ Add a new Web Form to
your Web project.
Note: See page 220 for more
information on adding a Web Form.
¤ Add a ListBox control to
the Web page.
‹ Add a button control to
the Web page.
Note: See page 222 for more
information on adding server
controls to a Web Form.
› Double-click the Button
server control.
■ The Click event handler
for the button is created for
you.
ˇ Create a variable of
DirectoryInfo type and
initialize it with the location
of the images directory.
Note: You may need to copy the
images directory from the CD-ROM
to the working directory.
Á Use a foreach loop to
loop through all of the JPEG
files.
‡ Read the name, size, and
creation time properties of the
file into variables.
Toolbox
S
ever-side components can provide solutions to
common programing problems that are needed to
enable your ASP.NET applications. If you do not
leverage the server-side components, you will either write
your own custom server-side components or buy a third-
party component.
Server-side components enable you to extend the
capabilities of ASP.NET Web Forms to utilize any services
that run on the .NET platform. These services can include
asynchronous messaging (System.Messaging), file sytem
I/O and browsing (System.IO), using and creating XML
documents (System.XML), accessing data (System.Data),
and troubleshooting your application
(System.Diagnostics). This list only gives a few
capabilities of the .NET Framework Class Library, which
contains hundreds of classes.
To leverage a server-side component that is part of the .NET
Framework, you need to access the namespace that
contains the .NET Framework class. For example, the
Framework class that allows file access is Sytem.IO.To
programmatically access this, you place the following at the
top of the code-behind page: using System.IO;. After
you import this namespace, you can create objects from
classes that are part of this namespace. For example, you
can create a DirectoryInfo object with the code
DirectoryInfo dir = new DirectoryInfo(".");
and retrieve a list of all files in a specified directory using
the GetFiles method.
USING SERVER-SIDE COMPONENTS
ON WEB FORMS
C#
228
USING SERVER-SIDE COMPONENTS ON WEB FORMS
123601-X Ch11.F 10/18/01 12:02 PM Page 228
° Create a new list item
variable and set the text and
value properties with the
properties of the file.
· Add the file to the
ListBox.
‚ Build and browse the
Web page.
Note: See page 220 for more
information on building and
browsing a Web page.
■ The preview page opens.
— Click the button.
■ The JPEG filenames appear
in the list box.
PROGRAMMING WEB APPLICATIONS
11
You can use the HTTPRequest object from
ASP.NET’s Framework to get to information from
a user request.
229
TYPE THIS:
<%@ Page language="c#"%>
<html>
<head>
</head>
<body>
<form method="post" runat="server">
<%
HttpRequest oRequest;
oRequest = this.Request;
foreach (string sRequest in oRequest.ServerVariables)
{
Response.Write(sRequest + " = " +
oRequest.ServerVariables[sRequest] + "<br>");
}
%>
</form>
</body>
</html>
RESULT:
A page lists all the
details of the Server
Variables in the
HTTPRequest object.
123601-X Ch11.F 10/18/01 12:02 PM Page 229
M
ost production-grade applications need some form
of data access. Data access in the .NET Framework
is simplified for you through the ADO.NET
Framework classes. These classes are found in
System.Data namespace, which has two major
namespaces: one for SQL Server data stores and another
for data stores that can be accessed through OLE DB.
The SQL Server .NET Data Provider classes come from the
System.Data.SqlClient namespace. The SQL Server
.NET Data Provider uses its own protocol to communicate
with SQL Server. The provider is lightweight and performs
well, accessing a SQL Server data source directly without
adding an OLE DB or Open Database Connectivity (ODBC)
layer. When you need to work with other database besides
Microsoft SQL Server, you should use the OLE DB .NET
Data Provider, which you can find in the
System.Data.OleDb namespace.
If you are familiar with ADO, you may notice some
similaries when accessing data in C# with ADO.NET. The
Connection and Command objects, for example, have
almost identical properties and methods. The brand new
part in ADO.NET is in the area of reading and persisting
records of data. In the days of ADO, Recordsets transported
returned data from a SQL database; however, in ADO.NET,
the Recordset is gone, replaced by things like the DataSet,
DataReader, DataTables, and DataViews.
To orient you to ADO.NET’s new object model, these pages
outline a few key members of the ADO.NET classes
(System.Data namespace). Because both the
System.Data.SqlClient and System.Data.OleDb
implement most of the same base classes, the examples
reflect the perspective of only one of the providers,
SqlClient.
INTRODUCING DATA ACCESS WITH ADO.NET
230
C#
CONNECTION
Connections are the starting point to your data access and determine how you connect to the data store. You need
to set properties, like ConnectionString, to establish communications to your data store.
SQLCONNECTION KEY PROPERTIES AND METHODS
PROPERTY DESCRIPTION
ConnectionString (read/write) string used to open a SQL Server database
ConnectionTimeout (read) maximum time allowed for a connection attempt
Database (read) name of the current (or soon to be) connected database
DataSource (read) name of SQL Server instance to connect to
ServerVersion (read) string that identifies version of the connected SQL Server instance
State (read) current state of the connection
METHOD DESCRIPTION
BeginTransaction (overloaded) begins a database transaction
ChangeDatabase changes the current database for an open SqlConnection
Close closes the connection to the database
CreateCommand creates and returns a SqlCommand object associated with the
SqlConnection
Open
opens a database connection with the property settings specified by the
ConnectionString
133601-X Ch12.F 10/18/01 12:02 PM Page 230
DATA ADAPTER
A DataAdapter is the object that bridges between the source data and the DataSet object so retrieve and
updates can occur.
DATAADAPTER KEY PROPERTIES AND METHODS
PROPERTY DESCRIPTION
AcceptChangesDuringFill
(read/write) a value indicating whether AcceptChanges is called on a DataRow
after it is added to the DataTable
TableMappings
(read) a collection that provides the master mapping between a source table and a
DataTable
METHOD DESCRIPTION
Fill
adds or refreshes rows in the DataSet to match those in the data source using
the DataSet name, and creates a DataTable named "Table"
FillSchema adds a DataTable named "Table" to the specified DataSet and configures the
schema to match that in the data source based on the specified SchemaType
GetFillParameters retrieves the parameters set by the user when executing a SQL select statement
Update Calls the respective insert, update, or delete statements for respective action
in the specified DataSet from a DataTable named "Table"
ACCESSING DATA WITH C# AND ADO.NET
12
231
COMMAND
ADO.NET commands are important for stored procedures and running SQL Statements.
SQLCOMMAND KEY PROPERTIES AND METHODS
PROPERTY DESCRIPTION
CommandText (read/write) the T-SQL statement or stored procedure to execute at the data source
CommandTimeout (read/write) maximum time allowed for a command execution attempt
CommandType (read/write) a value indicating how the CommandText property is to be interpreted
Connection (read/write) the SqlConnection used by this instance of the SqlCommand
Parameters (read) the SqlParameterCollection
Transaction (read/write) the transaction in which the SqlCommand executes
METHOD DESCRIPTION
Cancel cancels the execution of a SqlCommand
CreateParameter creates a new instance of a SqlParameter object
ExecuteNonQuery executes a T-SQL statement against the connection and returns the number of
rows affected
ExecuteReader (overloaded) sends the CommandText to the connection and builds a SqlDataReader
ExecuteScalar
executes the query, and returns the first column of the first row in the resultset
returned by the query
ExecuteXmlReader sends the CommandText to the connection and builds an XmlReader object
Prepare creates a prepared version of the command on an instance of SQL Server
133601-X Ch12.F 10/18/01 12:02 PM Page 231
⁄ Add a new Web form to
your Web project.
Note: See page 220 for more
information on adding a Web
form.
¤ Add a DataGrid control
to the Web page.
Note: See page 222 for more
information on adding server
controls to a Web form.
‹ Double-click on the page.
■ The form's code-behind
page appears with the
Page_Load event handler.
› Add a SqlConnection
variable and initialize with a
valid connection string to
your database.
ˇ Add a SqlDataAdapter
variable and initialize with a
valid select statement.
Y
ou can use the DataGrid Web Server Control to
build tables containing data. One of the advantages of
using the DataGrid Web Server Control is not having
to manually construct the table. Because you will bind
DataGrid control to data, you do not have to
programmatically loop through DataSets and other data
structure types, nor write out table tags, formatting, and
data field values as you hit each record in the data storage.
The process of binding to a DataGrid is quite simple. First
you must retrieve a data source. Then you assign that data
source to the DataSource property of the DataGrid
control. Lastly, you call the DataBind method of the
DataGrid control.
The data source for the DataGrid control will most likely
be a database, but the control is not restricted to binding to
only traditional database stores. For example, ADO.NET
data structures can be built from other providers like
Exchange, WebDav, and Active Directory. Also, any lists
derived from ICollection can also be used as a data
source.
DISPLAY DATA WITH THE
DATAGRID CONTROL
C#
232
DISPLAY DATA WITH THE DATAGRID CONTROL
133601-X Ch12.F 10/18/01 12:02 PM Page 232
Á Add a DataSet variable
and use the Fill method of
the DataAdapter to
populate the DataSet.
‡ Set the DataSource
property for the data grid to
the DataSet created and
use the DataBind method to
bind the DataGrid.
° Build and browse the
Web page.
Note: See page 220 for more
information on building and
browsing a Web page.
■ The data returned from the
select statement is
displayed in the DataGrid.
ACCESSING DATA WITH C# AND ADO.NET
12
233
The DataGrid Web Server Control has paging capabilities that
are used to display a result into multiple navigable pages.
When the page index changes, the CurrentPageIndex
attribute on the DataGrid needs to be set.
RESULT:
An HTML page with an
HTML table containing
all rows in the titles
table for the specified
columns.
TYPE THIS:
<SCRIPT language="C#" runat="server">
void Page_Load(object sender, System.EventArgs e){
if (!IsPostBack)
BindData(); }
void Grid_Change(Object sender,
DataGridPageChangedEventArgs e){
dgdTitles.CurrentPageIndex = e.NewPageIndex;
BindData(); }
void BindData() {
SqlConnection cnPubs = new SqlConnection(
"server=(local);uid=sa;pwd=;database=pubs");
SqlDataAdapter daTitles = new SqlDataAdapter(
"select title, notes, price, pubdate "
+ "from titles", cnPubs);
DataSet dsTitles = new DataSet();
daTitles.Fill(dsTitles, "titles");
dgdTitles.DataSource=
dsTitles.Tables["titles"].DefaultView;
dgdTitles.DataBind(); }
</SCRIPT>
133601-X Ch12.F 10/18/01 12:02 PM Page 233
Autoformat
⁄ Add a new Web form to
your Web project.
Note: See page 220 for more
information on adding a Web
form.
¤ Add a DataGrid control
to the Web page.
Note: See page 222 for more
information on adding server
controls to a Web form.
‹ Bind the DataGrid
control to a data set.
Note: See page 232 for more
information on binding a data
grid to a data set.
› Right-click the data grid
and select AutoFormat from
the pop-up menu that
appears.
3601-X fg1205_06.eps
T
he DataGrid control is one of the richest Web Server
Controls that you have available in the ASP.NET
framework.
To access the majority of the DataGrid control’s features,
open the Property Builder dialog box. You can choose from
among five views: General, Columns, Paging, Format, and
Borders. The Property Builder dialog box is essentially a
fancy user interface to the Properties dialog box, which is
used for configuring all controls. Due to the DataGrid
control having so many built-in features, the Property
Builder dialog box comes in handy for quick configurations.
Another way you can configure the DataGrid control is
the AutoFormat dialog box. The AutoFormat dialog window
is very similar to the auto format capabilities found for
tables in Microsoft Word and Excel. The AutoFormat dialog
box is a very quick way to format the grid, but you are stuck
with a predetermined list of styles.
Both the Property Builder and Auto Format dialog boxes
are available in the pop-up menu for the DataGrid;
you can access the pop-up menu by right-clicking the
DataGrid. To familiarize yourself with the DataGrid
control’s capabilities, use both of these dialog boxes
and make changes to the settings provided. After
you make these changes, go to the HTML for the Web
form and notice the changes made to the asp:DataGrid
element in your Web form.
CONFIGURE THE DATAGRID CONTROL
C#
234
CONFIGURE THE DATAGRID CONTROL
133601-X Ch12.F 10/18/01 12:02 PM Page 234
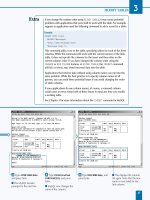
■ The AutoFormat dialog box
appears.
ˇ Click to select a scheme
for your data grid.
Á Click the OK button.
‡ Build and browse the
Web page.
Note: See page 220 for more
information on building and
browsing a Web page.
■ The data grid appears in
the preview window
formatted with the scheme
selected.
Professional 1
ACCESSING DATA WITH C# AND ADO.NET
12
You can take the code from the Apply It on
page 233 one step further by adding sorting
to the columns. To implement sorting, set the
AllowSorting attribute on the DataGrid tag
equal to true and map the OnSortCommand to
an event handler. When a sort request is made, a
page level variable (SortExpression) is updated
based on the column that was selected.
235
Example:
string SortExpression = "";
void Grid_Change(Object sender,
DataGridPageChangedEventArgs e) {
dgdTitles.CurrentPageIndex = e.NewPageIndex;
BindData(); }
void Sort_Grid(Object sender,
DataGridSortCommandEventArgs e) {
SortExpression = e.SortExpression.ToString();
BindData(); }
void BindData() {
if (SortExpression == "")
SortExpression = "title";
SqlConnection cnPubs = new SqlConnection(
"server=(local);uid=sa;pwd=;database=pubs");
SqlDataAdapter daTitles = new SqlDataAdapter(
"select title, notes, price, pubdate from "
+ "titles order by " + SortExpression,
cnPubs);
// Use this Data Adapter for rebinding. }
133601-X Ch12.F 10/18/01 12:02 PM Page 235