ASP.NET 4.0 in Practice phần 5 pps
Bạn đang xem bản rút gọn của tài liệu. Xem và tải ngay bản đầy đủ của tài liệu tại đây (15.48 MB, 50 trang )
175TECHNIQUE 43 Build a table-less control adapter for the DataList
VB:
If ((index + 1) Mod RepeatColumns) = 0 Then
writer.Indent -= 1
writer.WriteLine()
writer.WriteEndTag("div")
End If
Next
As you can see, the code isn’t complex, but it requires that you understand how the
DataList
(and template controls) works. To complete the scenario, we need to show
you how to render the header (and footer). The following listing contains the code.
C#:
private void RenderHeader(HtmlTextWriter writer, DataList dataList)
{
writer.WriteBeginTag("div");
CssStyleCollection style = GetStyleFromTemplate(dataList,
dataList.HeaderStyle);
if (!String.IsNullOrEmpty(style.Value))
writer.WriteAttribute("style", style.Value);
writer.Write(HtmlTextWriter.TagRightChar);
PlaceHolder container = new PlaceHolder();
dataList.HeaderTemplate.InstantiateIn(container);
container.DataBind();
if ((container.Controls.Count == 1) &&
typeof(LiteralControl)
.IsInstanceOfType(container.Controls[0])) {
writer.WriteLine();
LiteralControl literalControl =
container.Controls[0] as LiteralControl;
writer.Write(literalControl.Text.Trim());
}
else
{
container.RenderControl(writer);
}
writer.WriteEndTag("div");
}
VB:
Private Sub RenderHeader(ByVal writer As HtmlTextWriter,
ByVal dataList As DataList)
writer.WriteBeginTag("div")
Dim style As CssStyleCollection = GetStyleFromTemplate(dataList,
dataList.HeaderStyle)
If Not String.IsNullOrEmpty(style.Value) Then
writer.WriteAttribute("style", style.Value)
Listing 7.6 Rendering the header with a special function
Preserve style,
if specified
B
Instantiate and
bind template
C
Specific to text-
only controls
D
Preserve style,
if specified
B
176 CHAPTER 7 Taking control of markup
End If
writer.Write(HtmlTextWriter.TagRightChar)
Dim container As New PlaceHolder()
dataList.HeaderTemplate.InstantiateIn(container)
container.DataBind()
If (container.Controls.Count = 1) AndAlso
GetType(LiteralControl)
.IsInstanceOfType(container.Controls(0)) Then
writer.WriteLine()
Dim literalControl As LiteralControl =
TryCast(container.Controls(0), LiteralControl)
writer.Write(literalControl.Text.Trim())
Else
container.RenderControl(writer)
End If
writer.WriteEndTag("div")
End Sub
The interesting part in this code listing is how the styles are restored (which is per-
formed for the
ItemTemplate
, too). This code lets you specify a CSS style using the
ItemStyle
B
or
HeaderStyle
properties, so you won’t lose any features from the stan-
dard
DataList
. Data binding
C
is also supported, as well as
Literal
-only controls
D
.
The
RenderFooter
method is similar to
RenderHeader
, so we’ve omitted it from the
code (you can find it in the downloadable samples). Just as with the header, the footer
is rendered if a template is specified.
If you register this control adapter (as we did in the previous scenario), you can
adapt the
DataList
rendering to be more standard-friendly. Figure 7.3 shows you the
result. This layout is identical to what you would get if you didn’t use the adapter.
To produce this result, both the
RenderBeginTag
and
RenderEndTab
methods are
overridden to generate a container <
div
/>
tag, instead of the original
<table
/>
tag.
In this way, you can replace all the tags with your own.
Instantiate and
bind template
C
Specific to
text-only
controls
D
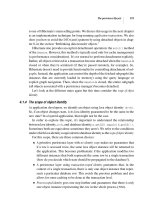
Products (Vertical)
Yogurt
Beef
Cheese
Bread
Biscuits
Fish
Peanuts
Pasta
Pork
Soy
Other
Products (Horizontal)
Yogurt
Bread
Peanuts
Soy
Beef
Biscuits
Pasta
Other
Cheese
Fish
Pork
Figure 7.3 The layout generated for the DataList control remains the same as the original. You
can use control adapters to enhance the visual results without changing the control declaration.
177TECHNIQUE 43 ASP.NET 4.0 browser capabilities
DISCUSSION
Control adapters are incredibly powerful, as you might have noticed by examining the
two scenarios we covered in this chapter. Because you can also write page adapters—
after all, a page is a control, so this makes sense—the sky’s the limit when it comes to
what control adapters can do for you.
You can use adaptive rendering to selectively adapt the control rendering to differ-
ent devices or to globally change its behavior if you need to. Even though the focus of
ASP.NET 4.0 is to be friendlier to web standards, old controls like
DataList
might ben-
efit from a little makeup.
7.1.1 Mobile controls and the Control Adapter Toolkit
Mobile controls were the first example of adaptive rendering. Introduced in
ASP.NET 1.0, they were intended to provide the right markup for different kinds of
mobile devices automatically. At the time, mobile devices were quite different from
each other: there was c
HTML, XHTML, WML, and so on.
Right now, it’s clear that the mobile web is composed of smart devices capable of
rendering complex layouts, and these original control adapters (and their respective
controls) aren’t needed any more. For that reason, mobile controls are deprecated in
ASP.NET 4.0.
If you need to maintain a solution based on this technology, you can update the
browser definitions on this page: (Note that the informa-
tion on this website is no longer updated or supported.) From
mobile/, you can browse for more content and access the original controls source code.
CSS Friendly Control Adapters, also known as the CSS Control Adapter Toolkit, is a
pack of control adapters shipped after ASP.NET 2.0 that increases adherence to web
standards for controls like
Login
,
Menu
, and so on. They were intended to provide
more CSS-friendly controls, with a cleaner markup structure.
At the time of this writing, a Control Adapter Toolkit equivalent doesn’t exist for
ASP.NET 4.0, which actually makes sense if you think about it. In chapter 6, we explained
the new features of ASP.NET web controls, and the short story is that they now embed
a set of adapters to produce better markup without adding external classes.
At you can download the original implementa-
tion. We’re recommending that you download this implementation because you can
look at it to understand how to implement control adapters. The download contains
great examples of how to deal with adaptive rendering.
Now that we’re done with adaptive rendering, the next part of the chapter is dedi-
cated to how you can influence this feature by specifying the browser capabilities.
Some new features in
ASP.NET 4.0 make this area more interesting than ever.
7.2 ASP.NET 4.0 browser capabilities
We’ve talked about ASP.NET browser capabilities before. They work in conjunction with
adaptive rendering. To be more precise, browser capabilities influence the way control
adapters are used by
ASP.NET for rendering infrastructure, for both pages and controls.
178 CHAPTER 7 Taking control of markup
This feature is innate in ASP.NET and is based on a set of file definitions that include the
most common user agents, from both stand-alone and mobile device browsers.
Time has proven that it’s practically impossible for Microsoft to maintain this list
and keep it updated, so new alternatives have emerged. To maintain updated defini-
tions before
ASP.NET 4.0, you had to do it manually. Now several different sources pro-
vide the definitions, and one of the most authoritative is the definition distributed at
/> In the current version of
ASP.NET, the following browsers and platforms are
directly supported:
Plus, there’s a generic profile, a profile for search engine crawlers/spiders, and a
default profile to cover the other platforms and browsers.
Even though the file definitions represent a useful way to instruct browser capabil-
ities and adaptive rendering, it’s sometimes better to control the way the capabilities
are provided via code. Even if .browser files (and everything else in
ASP.NET) are con-
verted in objects, having complete control over the process can produce simpler
results than editing or updating those
XML files. That’s why ASP.NET 4.0 introduces
the concept of browser capabilities providers.
Building a custom browser capabilities provider
You can use ASP.NET browser capabilities providers to totally replace the standard
capabilities definition mechanism or to expand it by adding new functionalities. By
replacing the standard definition, you can alter the way
ASP.NET produces output.
PROBLEM
One of the problems of the default file definitions is that they’re not updated regu-
larly. We want to bypass the standard mechanism and provide a new one that will pro-
duce, for every request, the best markup possible.
SOLUTION
ASP.NET 4.0 introduces a new class, named
HttpCapabilitiesProvider
. This feature
implements the Provider Model pattern, which we’ll explain in chapter 11. Basically, it
works the same way as the Membership Provider pattern: you can define a provider to
implement a specific behavior, using a base class as the interface to implement. The
providers are guaranteed to have the same identical structure, so they can be defined
in the configuration. The advantage is that you don’t need to write specific adapters
or define file configurations, but you can express your own rules in code.
To implement a custom engine, you have to overwrite the
GetBrowserCapabili-
ties
method and provide a new instance of
HttpBrowserCapabilities
. Because this
■
RIM’s Blackberry
■
Internet Explorer Mobile
■
Google Chrome
■
Apple’s iPhone
■
Mozilla FireFox
■
Opera
■
Internet Explorer
■
Apple’s Safari
TECHNIQUE 44
179TECHNIQUE 44 Building a custom browser capabilities provider
method will be called several times during the page lifecycle, you need to specify a
caching pattern. (If you don’t know how cache works, you can find more information
in chapter 14.)
The following listing shows a basic implementation of a provider.
C#:
public class MyBrowserProvider : HttpCapabilitiesProvider
{
public override HttpBrowserCapabilities GetBrowserCapabilities(HttpRequest
request)
{
string cacheKey = "MyBrowserProvider_"+
request.UserAgent??"empty";
int cacheTimeout = 360;
HttpBrowserCapabilities browserCaps = HttpContext.Current.Cache[cacheKey]
as HttpBrowserCapabilities;
if (browserCaps == null)
{
browserCaps = new HttpBrowserCapabilities();
Hashtable values = new Hashtable(20, StringComparer.OrdinalIgnoreCase);
values["browser"] = request.UserAgent;
values["tables"] = "true";
values["supportsRedirectWithCookie"] = "true";
values["cookies"] = "true";
values["ecmascriptversion"] = "3.0";
values["w3cdomversion"] = "1.0";
values["jscriptversion"] = "6.0";
values["tagwriter"] = "System.Web.UI.HtmlTextWriter";
values["IsIPhone"] = ((request.UserAgent ??
string.Empty).IndexOf("iphone") > -1).ToString();
browserCaps.Capabilities = values;
HttpRuntime.Cache.Add(cacheKey,
browserCaps,
null,
DateTime.Now.AddSeconds(cacheTimeout),
TimeSpan.Zero,
CacheItemPriority.Low,
null);
}
return browserCaps;
}
}
VB:
Public Class MyBrowserProvider
Inherits HttpCapabilitiesProvider
Public Overloads Overrides Function GetBrowserCapabilities(
ByVal request As HttpRequest) As HttpBrowserCapabilities
Dim cacheKey As String = If("MyBrowserProvider_" &
Listing 7.7 The custom browser capabilities provider
Unique key for
user agent
Standard
capabilities
Custom
capabilities
180 CHAPTER 7 Taking control of markup
request.UserAgent, "empty")
Dim cacheTimeout As Integer = 360
Dim browserCaps As HttpBrowserCapabilities =
TryCast(HttpContext.Current.Cache(cacheKey),
HttpBrowserCapabilities)
If browserCaps Is Nothing Then
browserCaps = New HttpBrowserCapabilities()
Dim values As New Hashtable(20, StringComparer.OrdinalIgnoreCase)
values("browser") = request.UserAgent
values("tables") = "true"
values("supportsRedirectWithCookie") = "true"
values("cookies") = "true"
values("ecmascriptversion") = "3.0"
values("w3cdomversion") = "1.0"
values("jscriptversion") = "6.0"
values("tagwriter") = "System.Web.UI.HtmlTextWriter"
values("IsIPhone") = (
( If(request.UserAgent,
String.Empty)).IndexOf("iphone") > -1)
.ToString()
browserCaps.Capabilities = values
HttpRuntime.Cache.Add(cacheKey,
browserCaps,
Nothing,
DateTime.Now.AddSeconds(cacheTimeout),
TimeSpan.Zero,
CacheItemPriority.Low,
Nothing)
End If
Return browserCaps
End Function
End Class
As you see in this listing, we’re defining a set of capabilities. The ones we’ve defined
are the minimum you need to make the page work. They’ll instruct the server controls
to use the most advanced markup and JavaScript code. Figure 7.4 contains the results
of the default provider and of our custom provider.
Unique
key for
user
agent
Standard
capabilities
Custom
capabilities
Figure 7.4 The new provider populates the properties according to its code. You can see the default
provider using IE 8.0 on the left and the custom provider on the right.
181TECHNIQUE 44 Building a custom browser capabilities provider
You can specify the provider you want to use in web.config, using this code:
<configuration>
<system.web>
<browserCaps
provider="ASPNET4InPractice.MyBrowserProvider, App_Code" />
</system.web>
</configuration>
Or, if you prefer, you can define the provider programmatically in global.asax, using
the
Application_Start
event (or using an equivalent
HttpModule
):
C#:
void Application_Start(object sender, EventArgs e)
{
HttpCapabilitiesBase.BrowserCapabilitiesProvider =
new MyBrowserProvider();
}
VB:
Private Sub Application_Start(ByVal sender As Object, ByVal e As EventArgs)
HttpCapabilitiesBase.BrowserCapabilitiesProvider =
New MyBrowserProvider()
End Sub
You can define both standard and non-standard capabilities in your definition, and
you can query them using a similar syntax:
<ul>
<li>IsMobile device: <%=Request.Browser.IsMobileDevice %></li>
<li>Platform: <%=Request.Browser.Platform %></li>
<li>IsIPhone: <%=(Request.Browser["IsIPhone"] as string)%></li>
</ul>
As we already noted, you can see the result of all this code in figure 7.4. Note that you
should express the values as strings, even if the capabilities are then exposed as a
boolean
. This behavior is probably caused by the first implementation in ASP.NET 1.0,
where text is mandatory (because it was based on XML tags), and you need to address
this problem if you want to make the code work.
DISCUSSION
Browser capabilities providers are super useful when you want to add new properties
or provide a new way to define the default capabilities. In its simplest form, a provider
is composed of few lines of code, but, as you might have noticed in the case of the new
IsIPhone
property, you can also define new properties based on code evaluation.
This solution has no drawbacks, because even the XML definition files are com-
piled. You don’t need to worry about performance impacts—there aren’t any!
Speaking of browser capabilities, the last scenario of this chapter addresses a com-
mon problem: how to validate your markup against the World Wide Web Consortium
(
W3C) Markup Validation Service.
182 CHAPTER 7 Taking control of markup
Validating ASP.NET pages with the W3C validator
Adaptive rendering can be both a joy and a pain. An example of the latter is certainly
the absence of the W3C validator user agent from the default, recognized browsers.
The W3C validator is a service from W3C (an international community that develops
web standards) that aims to help web developers verify that their pages are using the
right markup.
The fact that this validator isn’t included can be a problem if you want to validate
your page’s markup, mainly because the output generated for an unknown browser is
a conservative
HTML 3.2.
PROBLEM
If you try to validate the markup generated by an ASP.NET page with the W3C valida-
tor, you’ll probably have trouble. ASP.NET doesn’t recognize the user agent and serves
the least advanced markup that it can handle—HTML 3.2. This outcome isn’t a prob-
lem per se, but it can become annoying if you want to validate the markup that’s likely
to be served to most of the browsers.
SOLUTION
As we’ve mentioned before, ASP.NET uses the browser capabilities to produce specific
output for specific browsers. If you need to produce better markup by default, you can
use the example in technique 44, where a unique behavior is applied to all the requests.
If you don’t want to override the default provider, you can define a custom file def-
inition. The W3C validator user agent contains
W3C_Validator
in the sent string. To
identify it, all you need is to produce a rule, which is shown in the following listing.
<browsers>
<browser id="W3C_Validator" parentID="default">
<identification>
<userAgent match="^W3C_Validator" />
</identification>
<capabilities>
<capability name="browser" value="W3C Validator" />
<capability name="ecmaScriptVersion" value="1.2" />
<capability name="javascript" value="true" />
<capability name="supportsCss" value="true" />
<capability name="tables" value="true" />
<capability name="w3cdomversion" value="1.0" />
<capability name="tagWriter"
value="System.Web.UI.HtmlTextWriter" />
</capabilities>
</browser>
</browsers>
As you can see in this listing, by specifying
HtmlTextWriter
instead of
Html32TextWriter
, you can produce XHTML/HTML 4.01 markup, instead of HTML 3.2.
The other properties will do the rest to enable DOM, JavaScript, and CSS support.
Listing 7.8 The .browser file to support WC3 validator user agent
TECHNIQUE 45
RegEx intercepts
browser
Tag
writer
183Summary
You can register the adapter globally or locally by saving this file as w3c.browser in
your \App_Browsers\ folder.
DISCUSSION
ASP.NET 4.0 provides great flexibility in terms of markup generation and browser
capabilities. You can leverage the new features to enrich your applications with less
effort than in the past.
This last scenario is a great example of how you can add more features by simply
understanding how the infrastructure works. Even if these scenarios don’t fit in every
application you’ll build, they can help you when you need a bit more control.
7.3 Summary
Adaptive rendering and control adapters aren’t entirely new to ASP.NET 4.0, but
they’re great examples of flexibility. You can control virtually any server control and
alter the markup.
As you learned in this chapter, generating a new markup and substituting the orig-
inal one is pain-free. All you need to do is write a control adapter, register it, and then
ASP.NET automatically performs the choice. Sometimes this isn’t easy (it depends on
how complex the original control is), but the results are always interesting and worth
the effort.
On the other hand, browser capabilities do have new features in version 4.0. Now
you can completely substitute the entire engine to define your own set of definitions.
When you want to force a particular feature in your output, this capability is priceless.
ASP.NET uses the browser capabilities to drive adaptive rendering, and to provide bet-
ter output when the user agent is recognized and a specific markup profile is loaded.
By controlling both adaptive rendering and browser capabilities, you can’t only
produce better markup. You can also help put into practice a better web by imple-
menting correct support for web standards and at the same time promoting accessibil-
ity. You can even boost your old, existing applications by moving them to
ASP.NET 4.0
Now that the story behind ASP.NET Web Forms is almost complete, we can take a
look at how ASP.NET MVC lets you build the user interface in a way that’s quite differ-
ent. The next chapter will focus on how you can use ASP.NET MVC even if you’re a nov-
ice developer, by leveraging your ASP.NET Web Forms skills.
Part 3
ASP.NET MVC
In part 2, we took a look at ASP.NET Web Forms. You might not know it, but
using ASP.NET Web Forms isn’t the only way to produce the UI; in part 3, we’re
going to investigate the option of building your UI with ASP.NET MVC.
ASP.NET MVC is a new option added in ASP.NET 3.5 SP1 and directly inte-
grated into ASP.NET 4.0 as ASP.NET MVC 2.0. It’s not the new Web Forms, but a
completely different approach to solving the same problems. ASP.NET MVC lets
you use the Model-View-Controller (MVC) pattern and is built with testability
and great markup control in mind.
Chapter 8 gives you an introduction to
ASP.NET MVC and shows the potential
that this new toolkit offers when you’re building the UI. You’ll learn how to per-
form the basic actions that you’re already acquainted with in ASP.NET Web Forms.
Chapter 9 covers customizing and extending ASP.NET MVC to unlock its full
potential.
187
Introducing
ASP.NET MVC
ASP.NET, and specifically Web Forms, is an awesome technology for building soft-
ware for the World Wide Web. When Microsoft introduced it back in 2002, it repre-
sented an absolute break from the past. It became possible to program for the web
platform with a high-level infrastructure that provided abstractions typical of a
smart client environment, like holding state across multiple requests or adopting
an event-driven approach to handle what was going on with the
UI.
ASP.NET grew in popularity in the developer community until some people
began asking for more control over markup and the possibility of effectively testing
web apps. These demands are the reason Microsoft began thinking about a new
incarnation of
ASP.NET technology, based on a simpler model that leverages a
This chapter covers
■
Anatomy of the Model-View-Controller pattern
■
Building your first page with ASP.NET MVC
■
The routing infrastructure
■
How to receive user input and validate it
188 CHAPTER 8 Introducing ASP.NET MVC
widely known pattern for the UI layer, called Model-View-Controller (MVC). This
vision led to the birth of ASP.NET MVC.
Although ASP.NET MVC is still ASP.NET, its programming model is different than that
of Web Forms, so it deserves its own chapter to introduce its basic concepts. We’ll start
with a simple project and then move toward more complex requirements and features.
This chapter will get you comfortable with
ASP.NET MVC. You’ll learn how to
design your first pages and how the code you write fits into the overall MVC architec-
ture. The last part of the chapter will look at handling user input, which involves
building forms that get posted to the server and applying validation logic to the data
coming from the browser. To better understand how all these concepts relate to a real-
world scenario, we’re going to use a real application, specifically a blog engine, as our
practice field.
8.1 A new way to build web applications
ASP.NET uses a revolutionary, event-based model to program web applications. Build-
ing a page based on Web Forms is similar to building forms for desktop and client-
server scenarios. These processes are similar because the framework tends to hide a
lot of details that are intrinsic to the web platform from the developer, who can con-
centrate on the business problem his software is supposed to solve. Unfortunately, all
these comforts have their drawbacks.
When you build enterprise applications, the only way to deal with a high level of
complexity is to adopt a layered architecture, similar to the schema shown in figure 8.1.
The complexity is spread across multiple, simpler components, separating
UI concerns
from business logic or data access strategies.
Even if you rigorously follow this path, what
often happens is that handling user interactions
quickly becomes tricky, and the
UI code becomes
cumbersome and difficult to maintain. ASP.NET
Web Forms are no exception: despite the awe-
some stateful and event-driven programming
model it provides, the risk of ending up having
monolithic pages with methods running for
hundreds lines of code is quite high.
During the last few years, the need for writing
automated tests has gained popularity in the
software industry. Developers want a test suite
that ensures their code is correct and will do its
job. Writing unit tests for the
UI layer is unfortu-
nately a tricky task if you have a Web Forms
application because, as figure 8.2 shows, its logic
is (usually) tightly coupled with the overall infra-
structure and is sometimes embedded in the
server controls.
Presentation
Layer
Business
Layer
Data Access
Layer
Object
Model
Database
Figure 8.1 A typical 3-layer partition-
ing schema. The Presentation, Busi-
ness Logic, and Data Access Layers
have their own responsibilities and
communicate with each other using
a shared object model.
189A new way to build web applications
ASP.NET Web Forms deliberately hide the details of markup generation from the
developer, who’s just supposed to add a
GridView
control to obtain a tabular represen-
tation of the data without worrying about how the markup is rendered. It’s a valuable
feature, although interactions with graphic designers, who speak in terms of
HTML
nodes and CSS styles, tend to become more difficult.
This state of affairs recently pushed Microsoft in the direction of creating another
platform, parallel to Web Forms. This platform proposes a different model to develop
web applications, but still shares the same
ASP.NET infrastructure. The platform is
ASP.NET MVC.
8.1.1 The Model-View-Controller pattern
Model-View-Controller—we’ll refer to it
using its acronym MVC from now on—is a
common and widely known pattern for
designing the
UI layer. It was first intro-
duced in Smalltalk during the late 70s.
Since then, it’s gained a lot of popularity,
becoming the pillar upon which web devel-
opment platforms such as Ruby on Rails
(and MonoRail, its unofficial porting for
the .
NET world), JavaServer Pages and, of
course, ASP.NET MVC, are based. Figure 8.3
shows its conceptual schema.
The
MVC pattern aims to reduce UI
code complexity by splitting it into three
New Author
Author
invalidmail
New Author
Author
Email invalidmail
Errors!
Application code
Page.IsValid
System.Web.Page
ASP .NET validators
.NET Framework code
Figure 8.2 How form validation works in Web Forms. The user code checks only
whether the page is valid; everything else is handled by .NET Framework code, based
on validators on the page. Entry points for plugging in unit test code don’t exist.
Controller
Model View
Builds the model Selects the view
Renders the model
Figure 8.3 The Model-View-Controller
pattern’s conceptual schema. The controller
handles a user request: first, it builds the model,
which represents the data being shown on the
UI, and then it forwards it to a view, which
knows how to represent it.
190 CHAPTER 8 Introducing ASP.NET MVC
components, in the same way a layered architecture does for the whole application logic.
Each component has its own goals and responsibilities, which are described in table 8.1.
For the rest of this chapter, we’re going to deeply explore all these concepts and try to
help you understand how you can take advantage of
ASP.NET MVC to build a simple
application. You’ll learn how to simplify and rationalize the UI logic in a more struc-
tured design to keep code simple, maintainable, and testable.
8.2 Your first experience with ASP.NET MVC
The first release of ASP.NET MVC was available only as a separate download. Today,
ASP.NET MVC 2 is officially part of ASP.NET 4.0. The corresponding project template is
natively available in Visual Studio 2010, as figure 8.4 shows.
Table 8.1 Components of the MVC pattern
Name Description
Model This component acts as a data container and represents all the information you want to
send back to the user. This information often comes in the form of plain .NET classes,
exposing only properties and containing almost no logic at all. This form doesn’t have to be
strictly enforced, although it’s a best practice when applications already have a business
layer that encompasses the business logic.
View The view is responsible for rendering the model and translating it into HTML. It contains
only the specific logic needed to accomplish this task. For example, if the model contains a
list of items, the associated view will probably have the logic to loop over them and repeat a
particular HTML template for each one.
Controller The controller acts as a bridge between the other two components. It inspects and vali-
dates the request coming from the browser, builds the model (perhaps leveraging BLL ser-
vices), and forwards it to the appropriate view to generate the response.
Figure 8.4 Creating a new ASP.NET MVC 2 application project from Visual Studio 2010
191TECHNIQUE 46 The model
To give you a better understanding of how ASP.NET MVC works, we’re going to show
you how to build a simple blog engine called CoolMVCBlog. The first feature you’re
going to deal with is its homepage, whose mockup is shown in figure 8.5. To simplify
all the explanations, let’s suppose that you already have an object model available,
along with its
ADO.NET Entity Framework data context.
Let’s start examining the page components from the MVC pattern point of view.
The model
Generally speaking, a model in ASP.NET MVC is a series of classes, preferably simple and
possibly, without any logic, whose purpose is to hold all the data that’s going to be on
the page. It’s probably the simplest part of the
MVC pattern. Although ASP.NET MVC
doesn’t impose any specific rules on how to design it, neither does Visual Studio 2010
provide facilities to guide you while building it. Let’s take a look at how to build a model
for Cool
MVCBlog’s homepage.
PROBLEM
We need to build a proper model for CoolMVCBlog’s homepage, reusing our applica-
tion’s object model whenever possible.
SOLUTION
When developers build layered applications, they often use an object model to repre-
sent the various business entities. This model might be generated using ADO.NET
Entity Framework’s designer, as you learned in chapter 3.
Figure 8.5 CoolMVCBlog’s homepage mockup. You’re going to achieve this
result when you build your first ASP.NET MVC page.
TECHNIQUE 46
192 CHAPTER 8 Introducing ASP.NET MVC
The model in the MVC pattern has a slightly different meaning. An application object
model is made of entities that have a business purpose, like customers, bills, or orders.
On the other hand, an
MVC’s model strictly relates to what you’re going to show to the
UI, which often results in a composition of both business entities and interface-
specific objects. In figure 8.6, we’ll consider once again the homepage mockup that
you saw in figure 8.5.
This time we’ve highlighted the components that contribute to our page. Putting
it all together, we can represent them with a
HomepageModel
class like the one shown
in the following listing and store it in the Models subfolder.
C#:
public class HomepageModel
{
public List<Post> Posts { get; set; }
public List<TagCloudItem> TagCloudItems { get; set; }
}
public class TagCloudItem
{
public int CategoryId { get; set; }
public string Description { get; set; }
public string Size { get; set; }
}
Listing 8.1 Homepage model
Tag cloud
Posts
Figure 8.6 CoolMVCBlog homepage revisited. Notice how every dynamic homepage component
maps to a distinct model object.
Model class
for homepage
B
Item belonging
to TagCloud
C
193TECHNIQUE 46 The model
public class TagCloudService
{
public List<TagCloudItem> GetTagCloudItems()
{
List<TagCloudItem> res =
from p in context.PostSet // more Linq code here
return res;
}
}
VB:
Public Class HomepageModel
Public Property Posts As List(Of Post)
Public Property TagCloudItems As List(Of TagCloudItem)
End Class
Public Class TagCloudItem
Public Property CategoryId As Integer
Public Property Description As String
Public Property Size As String
End Class
Public Class TagCloudService
Public Function GetTagCloudItems() As List(Of TagCloudItem)
Dim res as List(Of TagCloudItem) =
From p In context.PostSets ' more Linq code here
Return res
End Function
End Class
As you can see, we used our domain model’s
Post
entity
B
. We did that because it
exactly matches what we’re going to show on the page. Our model also contains a new
class, named
TagCloudItem
C
, which is a concept that belongs strictly to our Presen-
tation Layer. This class isn’t part of our domain model, and it doesn’t have a corre-
sponding table on the database, but it’s created using an ad-hoc
LINQ To Entities
query in
TagCloudService
D
, which is also part of our MVC model.
DISCUSSION
In the last example, you built a model for CoolMVCBlog’s homepage, which holds a list
of posts and a tag cloud. Your model also contains a service that queries the database to
Service to calculate
TagCloud
D
Model class
for homepage
B
Item belonging
to TagCloud
C
Service to calculate
TagCloud
D
Wasn’t our model supposed to just hold data?
The model we just introduced isn’t as anemic as we previously indicated it would be.
It exposes a service and executes a query to retrieve the
TagCloudItems
. You need
to do this every time you have to deal with classes that belong only to the Presenta-
tion Layer or when the application is simple and doesn’t have a BLL on its own. In
these scenarios, exposing services at the model level results in code that’s central-
ized in a single place and that’s easily reusable.
194 CHAPTER 8 Introducing ASP.NET MVC
retrieve and calculate the tag cloud composition, with the purpose of having this UI
logic centralized in a single specific location.
When you’re building a page in ASP.NET MVC, the first thing you should take care
of is creating a model for it, which is a bunch of classes that represent the information
you’re going to show the user. This process is significantly different from what you do
with
ASP.NET Web Forms. When you’re using Web Forms, you’re pushed to think in
terms of controls (grids, buttons, textboxes), but ASP.NET MVC takes into greater
account the nature of the data that will populate the page.
The model is also the preferred entry point for storing high-level services that
respond to
UI-specific needs. As you just saw in this example of building the tag cloud,
when you need to introduce additional logic to what is already provided by the BLL
(or if there isn’t a BLL at all) the best way to proceed is to create a service class at the
model level.
In the next section, you’ll see how these classes and services are involved in the
process of handling a browser request. This process introduces the next component
of the
MVC pattern: the controller.
The controller
When an ASP.NET MVC application receives an HTTP request, the framework must
execute some code to generate the response. This concept is better expressed in the
MVC idiom by saying that the framework handles the request by selecting the proper
controller. The logic that does this is contained within an action method, which the
runtime automatically invokes based on the particular
URL the user requested.
To be able to show our blog’s homepage to the user, we have to build a controller
class. The controller class will take care of generating a valid instance for the model
we designed in the previous section and forwarding it to a view.
PROBLEM
We want to build a controller to handle all the requests that come to our application’s
homepage.
SOLUTION
Our blog engine still lacks a controller that can handle homepage visualization. To fill
this gap, you can create a new one. Right-click the Controllers folder (the location
where all the application controllers conventionally reside) and select the Add Con-
troller option; the dialog box shown in figure 8.7 opens. When you choose the con-
troller name, you should follow the
ASP.NET MVC naming convention and always
terminate it with the -Controller suffix.
TECHNIQUE 47
Figure 8.7 The Add Controller
dialog box in Visual Studio 2010.
Notice how the proposed name
follows the controller naming
convention. This dialog box can
optionally generate methods for
typical controller actions.
195TECHNIQUE 47 The controller
When you click the Add button, Visual Studio creates a class that inherits from the
Controller
base class and contains an empty method named
Index
. This method is
called an action method and represents the actual handler of a request. In fact, as
you’ll see shortly,
ASP.NET MVC associates a URL to a controller/action pair that then
executes to generate the response; this process happens via the routing infrastructure.
The code you need to show the homepage is in the following listing.
C#:
public class HomeController : Controller
{
public ActionResult Index()
{
using (var ctx = new BlogModelContainer())
{
var model = new HomepageModel();
model.Posts = ctx.PostSet
.OrderByDescending(p => p.DatePublished)
.Take(3)
.ToList();
var service = new TagCloudService(ctx);
model.TagCloudItems = service.GetTagCloudItems();
return View(model);
}
}
}
VB:
Public Class HomeController
Inherits Controller
Public Function Index() As ActionResult
Using ctx As New BlogModelContainer
Dim model As New HomepageModel()
model.Posts = ctx.PostSets.
OrderBy(Function(p) p.DatePublished).
Take(3).
ToList()
Dim service = New TagCloudService(ctx)
model.TagCloudItems = service.GetTagCloudItems()
Return View(model)
End Using
End Function
End Class
This method is pretty straightforward. It does nothing more than build a new
Homepa-
geModel
instance and populate its two properties,
Posts
and
TagCloudItems
. The
method populates the first property by executing a LINQ to Entities query
B
(which
retrieves the last three posts) and the second one by using
TagCloudService
C
.
Listing 8.2 HomeController and its Index action
Fetch latest
posts
B
TagCloud composition
via TagCloudService
C
Fetch latest
posts
B
TagCloud composition
via TagCloudService
C
196 CHAPTER 8 Introducing ASP.NET MVC
The
Index
action ends by invoking the
View
method, passing the model as a parame-
ter. In turn, the
View
method generates a
ViewResult
return value.
DISCUSSION
In this example, we built a controller, along with its action, to create a new instance of
a
Homepage
class and then send it to a view, using the
View
method. An action doesn’t
always end with this kind of result. ASP.NET MVC doesn’t impose any restriction on
actions signatures, and the controller base class itself provides several helper methods
to generate different response types. The possible results are listed in table 8.2.
We’ve managed to build an object model for the data that we want to show in the
homepage. We’ve also added some logic to load it from a database in response to a
request coming from a browser. If we stopped here, you wouldn’t be able to see any-
thing in the browser because there’s still one component missing for our applica-
tion to actually produce
HTML. That component is the view, which is the topic of the
next section.
Table 8.2 Results that an action can return
Name Description
ContentResult
Represents a user-defined content result. This class allows
you to manually specify the content encoding and type.
FileResult
The base class for sending a binary file to the browser. Its
three inherited classes identify this file starting from a path
(FilePathResult), a stream (FileStreamResult),
or a byte array (FileContentResult).
JavaScriptResult
Represents JavaScript code sent back to the browser.
JsonResult
Uses a JavaScript Object Notation (JSON) serializer to serialize
an object and send its representation as a response.
RedirectResult
Redirects the browser to the given URL.
RedirectToRouteResult
Builds a URL using the route settings and redirects the browser to it.
ViewResult
Uses a view to render a model and sends the HTML to the browser.
Web application code made simple
Although the controller we just made is part of a simple example, it highlights a fun-
damental peculiarity of ASP.NET MVC: the application code is intrinsically simpler
than in Web Forms and is absolutely decoupled from any infrastructure. Our controller
is a plain .NET class that exposes a method; the controller base class just provides
some helpers. For this reason, we can create a console application and manually in-
voke an action to check whether it works as expected (or, better yet, we can easily
create unit tests to validate our UI features).
197TECHNIQUE 48 The view
The view
The view is the MVC component that’s respon-
sible for building the actual HTML and send-
ing it to the browser. In the default ASP.NET
MVC implementation, view data is stored in
.aspx or .ascx files similar to the Web Form’s
files. They’re contained inside a particular
folder structure, which has a Views folder as
the root and a list of subfolders, similar to the
one shown in figure 8.8.
Each subfolder has a name that matches
the name of a controller and contains all the
views owned by that controller. Besides that,
there’s a Shared folder to which all the views
shared by two or more controllers and the
application master pages belong.
PROBLEM
We must build a view to render CoolMVCBlog’s
homepage that will accept an instance of
HomepageModel
and render the HTML. It must be the default view for the
Homepage-
Controller
’s
Index
action.
SOLUTION
As we stated in technique 47, a
ViewResult
isn’t the sole kind of response an action
can return, but it’s the most common one. Visual Studio provides a facility to automat-
ically create a view from within an action code. All you have to do is right-click its code
and select the Add View option from the contextual menu (see figure 8.9).
TECHNIQUE 48
Figure 8.9 Adding a new view
to the project is made easy by
this dialog box provided by
Visual Studio 2010.
Figure 8.8 Views folder structure. The
Views folder has a subfolder for each
controller that stores its views, plus a
Shared subfolder to contain all the
shared views.
198 CHAPTER 8 Introducing ASP.NET MVC
The dialog box in figure 8.9 provides the following options to customize how the view
is created:
■
The master page you might want to use
■
Whether the new view must be a partial view (more on this shortly)
■
The model class the new view must be based on, if you want to create a strongly
typed view
The following listing contains the code needed to properly render an instance of
HomepageModel
.
C#:
<asp:Content ContentPlaceHolderID="MainContent"
runat="server">
<div class="content">
<% foreach (var i in this.Model.Posts) { %>
<h2>
<%: Html.ActionLink(i.Title, "Post",
new { Id = i.Id }) %>
</h2>
<div><%: i.Text %></div>
<% } %>
</div>
<% Html.RenderPartial("TagCloud", this.Model.TagCloudItems); %>
</asp:Content>
VB:
<asp:Content ContentPlaceHolderID="MainContent"
runat="server">
<div class="content">
<% For Each i in me.Model.Posts %>
<h2>
<%: Html.ActionLink(i.Title, "Post",
New With {.id = i.Id})%>
</h2>
<div>
<%: i.Text %>
</div>
<% Next%>
</div>
<% Html.RenderPartial("TagCloud", this.Model.TagCloudItems) %>
</asp:Content>
For those of you with experience building ASP or PHP applications, this code might
seem familiar because it’s mostly HTML markup mixed with C# or VB.NET. This simi-
larity is apparent only because the view code contains just the logic needed to render
the model. For example, the code repeats a specific template using a
foreach
block,
which accesses the model using the
Model
property and iterates on every post it con-
tains. You have absolute control over the generated markup (as opposed to what you
have with Web Forms), without hiding it behind the server controls abstraction.
Listing 8.3 Homepage view code
Link to post’s
page
B
Show post
content
C
Link to post’s
page
B
Show post
content
C
199TECHNIQUE 48 The view
In our design, every post title must be a link to open the specific post page point-
ing to a URL that follows the /Home/Post/postId pattern. Although it’s obviously possi-
ble to manually construct that link, the code in
B
uses the
ActionLink
HTML helper
and dynamically composes the link based on routing settings (we’ll cover this topic in
section 8.3).
Last of all, the
<%:
%>
syntax used in
C
allows us to show that any special char-
acters that the post body contains are automatically encoded, thus avoiding cross-site
scripting (
XSS) attacks. The view engine leverages the provider-based encoding archi-
tecture of ASP.NET that you saw in chapter 4.
The tag cloud is part of the UI that will likely be part of many pages of our blog appli-
cation, so it’s worth building as a reusable component. In this case, we can render
it via the
RenderPartial
method, which invokes a
TagCloud
view and passes the list
of
TagCloudItems
.
TagCloud
is a partial view, which is a componentized version of a particular
markup. You can create a partial view by selecting Create A Partial View in the Add
View dialog box shown in figure 8.9. The
TagCloud
code is in the following listing.
C#:
<%@ Control Language="C#"
Inherits="ViewUserControl<IEnumerable<TagCloudItem>>" %>
<div class="cloud">
<div class="cloud_title">
Tag cloud
</div>
<% foreach (var i in this.Model) { %>
<%= Html.ActionLink(i.Description, "Tag",
new { Id = i.CategoryId },
new { style = "font-size: " + i.Size,
@class = "cloud_item" }) %>
<% } %>
</div>
VB:
<%@ Control Language="VB"
Inherits="ViewUserControl(Of IEnumerable (Of TagCloudItem))" %>
Listing 8.4 Content of TagCloud.ascx partial view
Am I allowed to add Web Forms server controls?
As you’ve already seen, ASP.NET MVC and Web Forms share the same ASP.NET in-
frastructure as their basis; in fact, we’ve been able to reuse a lot of ASP.NET con-
cepts, like pages to build the views, master pages, and
ContentPlaceHolders
.
When you’re creating a view, you can also use Web Forms server controls, as you’ll
see in the next chapter, although generally speaking this isn’t an advisable approach.
You lose absolute control over the generated markup, which is one key point in favor
of ASP.NET MVC.