PHP for Absolute Beginners PHẦN 6 doc
Bạn đang xem bản rút gọn của tài liệu. Xem và tải ngay bản đầy đủ của tài liệu tại đây (1.1 MB, 41 trang )
CHAPTER 6 ADDING SUPPORT FOR MULTIPLE PAGES
186
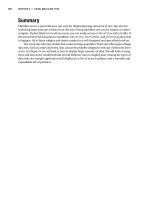
Figure 6-11. The full “About the Author” entry display
Summary
In this chapter, you’ve learned a ton of information. Some of it was pretty advanced, so congratulate
yourself! You can now:
• Support multiple pages in your application
• Create custom URLs using regular expressions and .htaccess
• Differentiate between multi-entry and single-entry pages
In the next chapter, you’ll learn how to update entries that have already been created, bringing
you one step closer to having a fully customizable blogging application.
Download at WoweBook.Com
C H A P T E R 7
187
Updating and Deleting Entries
In this chapter, you’ll learn how to modify and delete an existing entry. To accomplish this, you need to
do the following in your application:
• Create administrative links (edit and delete)
• Display the administrative links in index.php
• Populate the admin form with entry information if you’re editing
• Modify .htaccess to pass a URL to admin.php
• Check whether submitted form values are edits or new entries
• Update entries in the entries table
• Check whether an entry is marked for deletion
• Remove deleted entries from the entries table
Creating Administrative Links
Your first task is to create links that will allow you to edit and delete entries. You’ll eventually want this to
be available to administrators only (see Chapter 11 for more information on this topic), so you’re going
to build these links inside a function, rather than inline in index.php.
Name your function adminLinks() and have it accept two arguments: the current page ($page)
and the URL of the entry you’re working with ($url).
To start, open up functions.inc.php and declare your new function just below
retrieveEntries():
function adminLinks($page, $url)
{
// Build admin links here
}
The first step in your function is to build the addresses for your links. For your editing link, this
address simply appends the entry’s URL to the end, which you’ll use later to identify the entry being
edited. The path for the link follows this format:
/simple_blog/admin/page/url
Download at WoweBook.Com
CHAPTER 7 UPDATING AND DELETING ENTRIES
188
The delete link works a little differently; rather than using the page, you use the word “delete”
in the address, signifying that the entry is to be deleted. The delete link follows this format:
/simple_blog/admin/delete/url
Now it’s time to add these paths to adminLinks() in functions.inc.php. Do so by inserting the
lines in bold, as shown:
function adminLinks($page, $url)
{
// Format the link to be followed for each option
$editURL = "/simple_blog/admin/$page/$url";
$deleteURL = "/simple_blog/admin/delete/$url";
// Finish the admin links here
}
Finally you need to create the hyperlinks from your URLs and return them so they can be used
in index.php. You need to place your links in an array, so that both the edit and delete links can be
returned by your function. Add the bold lines to functions.inc.php:
function adminLinks($page, $url)
{
// Format the link to be followed for each option
$editURL = "/simple_blog/admin/$page/$url";
$deleteURL = "/simple_blog/admin/delete/$url";
// Make a hyperlink and add it to an array
$admin['edit'] = "<a href=\"$editURL\">edit</a>";
$admin['delete'] = "<a href=\"$deleteURL\">delete</a>";
return $admin;
}
Now you can generate custom edit and delete links quickly for any entry with a URL (which, in
your application, is all of them). Next, you need to display those links, as well as their corresponding
entries, in index.php.
Displaying Administrative Links
Your application can generate administrative links at this point; next you need to load those links into
index.php. You place your administrative links only on the full display of an entry, so you must place the
call to load information from adminLinks() within a conditional statement that fires only if $fulldisp == 1.
Download at WoweBook.Com
CHAPTER 7 UPDATING AND DELETING ENTRIES
189
In index.php, at line 69, insert the code shown in bold:
<?php
// If the full display flag is set, show the entry
if($fulldisp==1)
{
// Get the URL if one wasn't passed
$url = (isset($url)) ? $url : $e['url'];
// Build the admin links
$admin = adminLinks($page, $url);
?>
Now you have an array with your edit and delete links as individual array elements. This
means you can insert the links in your layout by adding the code shown in bold:
// Build the admin links
$admin = adminLinks($page, $url);
?>
<h2> <?php echo $e['title'] ?> </h2>
<p> <?php echo $e['entry'] ?> </p>
<p>
<?php echo $admin['edit'] ?>
<?php if($page=='blog') echo $admin['delete'] ?>
</p>
<?php if($page=='blog'): ?>
<p class="backlink">
<a href="./">Back to Latest Entries</a>
</p>
<?php endif; ?>
Note You’re checking whether $page=='blog' before you display the delete link. This is because you don’t
want to delete your “About the Author” entry; doing that would leave you without any entry for that page. Instead,
you want your users to edit the existing entry.
Now loading index.php in a browser and selecting an entry displays your administrative links
(see Figure 7-1).
Download at WoweBook.Com
CHAPTER 7 UPDATING AND DELETING ENTRIES
190
Figure 7-1. Your administrative links for a blog entry
Passing URL Values to admin.php with .htaccess
As your application stands right now, the URLs in your administrative links won’t mean anything to
admin.php. To remedy this, you need to modify .htaccess with an additional rule that handles URLs
passed in a link to admin.php.
Modifying the Original Admin Rule
When you write this rule, you need to keep in mind that new entries are passed to admin.php without a
URL, so you need to allow for scenarios where a URL is passed to admin.php, as well as for scenarios
where it isn’t. To do this, you’ll modify your original admin rule to ensure that the path ends with the
page name, followed by either a forward slash or nothing at all. With these modifications, your rule in
.htaccess should look like this:
RewriteRule ^admin/(\w+)(
(|/)$ admin.php?page=$1 [NC,L]
You modify this rule in your addition of (|/)$, which tells the server to ensure that the end of
the path must be encountered after one or more word characters, whether that occurs at the end of the
word characters or after one occurrence of a forward slash.
The (|/) tells the server to match
either
nothing
or
a forward slash. The vertical pipe character
(|) is the regular expression equivalent of “or”.
Adding a dollar sign ($) to the end of the rule lets you signify the end of the string, so nothing
can come after the pattern you define.
Download at WoweBook.Com
CHAPTER 7 UPDATING AND DELETING ENTRIES
191
Thus, both of the following examples match your new rule:
http://localhost/simple_blog/admin/blog
http://localhost/simple_blog/admin/blog/
However, this example does not match your rule:
http://localhost/simple_blog/admin/blog/entry
The New Admin Rule
The next step is to set up a rule that catches information in the URL after the page and passes it to
admin.php as a URL variable; this enables you to signify which entry is being edited. Accomplishing this
requires that you add an additional backreference for the URL of the entry you want to edit. This
backreference needs to catch the entire URL, so the word character shorthand (\w) won’t be enough,
since your URLs contain hyphens. To add hyphens as a matchable character, you’ll have to create a
character class using square brackets.
Note Backreferences are named matches that you can use in the replacement. For a refresher on
backreferences, see the section on .htaccess in Chapter 6.
You pass the first backreference in the URL query string as a page, just like your original rule.
You pass the second backreference as a URL, to let admin.php know which entry is being edited.
To implement this rule in .htaccess, add the bold line to your .htaccess file:
RewriteEngine on
RewriteBase /simple_blog/
RewriteRule \.(gif|jpg|png|css|ico|swf|js|inc\.php)$ - [L]
RewriteRule ^admin/(\w+)(|/)$ admin.php?page=$1 [NC,L]
RewriteRule ^admin/(\w+)/([\w-]+) admin.php?page=$1&url=$2 [NC,L]
RewriteRule ^(\w+)(|/)$ index.php?page=$1
RewriteRule ^(\w+)/([\w-]+) index.php?page=$1&url=$2
Your second backreference, ([\w-]+), will match one or more word characters and/or
hyphens—which is what your custom entry URLs consist of—and pass their value to admin.php. Now
you’re ready to modify admin.php to load entries for editing.
Populating Your Form with the Entry to Be Edited
admin.php is receiving entry URLs when a user clicks the edit link is clicked; next you need to write a
script that identifies that URL and loads the appropriate entry. You also need to add the entry’s values to
the administrative form to enable editing.
Download at WoweBook.Com
CHAPTER 7 UPDATING AND DELETING ENTRIES
192
Your first step is to check whether $_GET['url'] is set, which determines whether you’re editing
an entry or creating a new one. If an entry is being edited, you need to load the existing entry data and
save each piece in a variable. Fortunately, you’ve already written the function to load an entry using the
URL—retreiveEntries()—so you can use that to load the entry to be edited.
To use retrieveEntries() in your script, you must include the necessary files and open a
database connection.
You want to avoid the possibility of having undefined variables, so you should also add an else
to your conditional that will declare your entry data variables as NULL if no entry is passed.
Also, you can enhance your form’s friendliness by changing the legend to indicate whether
you’re editing an existing entry or creating a new one. You can store this information in a variable
($legend).
To do this, open admin.php and add the lines of code in bold:
<?php
/*
* Include the necessary files
*/
include_once 'inc/functions.inc.php';
include_once 'inc/db.inc.php';
// Open a database connection
$db = new PDO(DB_INFO, DB_USER, DB_PASS);
$page = isset($_GET['page']) ? htmlentities(strip_tags($_GET['page'])) : 'blog';
if(isset($_GET['url']))
{
// Do basic sanitization of the url variable
$url = htmlentities(strip_tags($_GET['url']));
// Set the legend of the form
$legend = "Edit This Entry";
// Load the entry to be edited
$e = retrieveEntries($db, $page, $url);
// Save each entry field as individual variables
$id = $e['id'];
$title = $e['title'];
$entry = $e['entry'];
}
Download at WoweBook.Com
CHAPTER 7 UPDATING AND DELETING ENTRIES
193
else
{
// Set the legend
$legend = "New Entry Submission";
// Set variables to NULL if not editing
$id = NULL;
$title = NULL;
$entry = NULL;
}
?>
To add these values into your form, you need to set the value attribute in your inputs and place
the $entry variable between the opening and closing <textarea> tags. Also, you need to add a new
hidden input named id to contain the entry ID, which will help you in your next step, when you save
your changes.
You can add the values into your form by modifying admin.php with the lines of code in bold, as
shown:
<form method="post" action="/simple_blog/inc/update.inc.php">
<fieldset>
<legend><?php echo $legend ?></legend>
<label>Title
<input type="text" name="title" maxlength="150"
value="<?php echo htmlentities($title) ?>" />
</label>
<label>Entry
<textarea name="entry" cols="45"
rows="10"><?php echo sanitizeData($entry) ?></textarea>
</label>
<input type="hidden" name="id"
value="<?php echo $id ?>" />
<input type="hidden" name="page"
value="<?php echo $page ?>" />
<input type="submit" name="submit" value="Save Entry" />
<input type="submit" name="submit" value="Cancel" />
</fieldset>
</form>
Clicking the edit link on one of your entries now loads and displays the contents of that entry
into the form (see Figure 7-2).
Download at WoweBook.Com
CHAPTER 7 UPDATING AND DELETING ENTRIES
194
Figure 7-2. Clicking a link loads that entry into the form for editing
Next you need to modify update.inc.php so it recognizes that an entry is being edited and
updates the proper entry, as opposed to creating a new entry in the database.
Updating Entries in the Database
In your form, you added a hidden input to store the entry’s ID. This hidden input is what you use to
determine whether a form submission is an edit or a new entry.
To make this distinction, you need to check whether $_GET['id'] is empty. If so, the entry is
new, and you can proceed as usual. If $_GET['id'] has a value, however, you’re editing an entry, and you
must use a different query.
You update an entry in the entries table by specifying which fields are being set to which value.
Your ID won’t change, but the title, url, and entry fields all might, so your query needs to look like this:
UPDATE entries
SET title=?, entry=?, url=?
WHERE id=?
LIMIT 1
Download at WoweBook.Com
CHAPTER 7 UPDATING AND DELETING ENTRIES
195
This query updates a maximum of one entry in the entries table by matching the supplied ID
with the submitted title, entry, and url values.
You can check whether $_GET['id'] contains a value and update an entry by inserting the code
highlighted in bold in update.inc.php:
<?php
// Include the functions so you can create a URL
include_once 'functions.inc.php';
if($_SERVER['REQUEST_METHOD']=='POST'
&& $_POST['submit']=='Save Entry'
&& !empty($_POST['page'])
&& !empty($_POST['title'])
&& !empty($_POST['entry']))
{
// Create a URL to save in the database
$url = makeUrl($_POST['title']);
// Include database credentials and connect to the database
include_once 'db.inc.php';
$db = new PDO(DB_INFO, DB_USER, DB_PASS);
// Edit an existing entry
if(!empty($_POST['id']))
{
$sql = "UPDATE entries
SET title=?, entry=?, url=?
WHERE id=?
LIMIT 1";
$stmt = $db->prepare($sql);
$stmt->execute(
array(
$_POST['title'],
$_POST['entry'],
$url,
$_POST['id']
)
);
$stmt->closeCursor();
}
Download at WoweBook.Com
CHAPTER 7 UPDATING AND DELETING ENTRIES
196
// Create a new entry
else
{
// Save the entry into the database
$sql = "INSERT INTO entries (page, title, entry, url)
VALUES (?, ?, ?, ?)";
$stmt = $db->prepare($sql);
$stmt->execute(
array(
$_POST['page'],
$_POST['title'],
$_POST['entry'],
$url
)
);
$stmt->closeCursor();
}
// Sanitize the page information for use in the success URL
$page = htmlentities(strip_tags($_POST['page']));
// Send the user to the new entry
header('Location: /simple_blog/'.$page.'/'.$url);
exit;
}
else
{
header('Location: /');
exit;
}
?>
Note Make sure you add the closing curly brace for the else statement (just after $stmt->closeCursor();) to
avoid a parsing error.
Now you can update entries in your database. To test this ability, open your application in a
browser and click the edit link on one of your entries and add some new text. Click the Save Entry button
to see the edited entry (see Figure 7-3).
Download at WoweBook.Com
CHAPTER 7 UPDATING AND DELETING ENTRIES
197
Figure 7-3. An edited entry
Handling Entry Deletion
You’ve almost completed your administrative controls. All that’s left is to add the ability to delete entries.
This is fairly straightforward, due to the way that you’ve constructed the delete link.
The link passes delete as $_GET['page'], so it’s easy to identify entries marked for deletion. In
admin.php, you check whether $_GET['page'] == 'delete', then pass the entry URL to be deleted to a
function called confirmDelete()—you’ll write this function in the next section. This function asks the
user to confirm that she does in fact wish to delete the entry.
Do this by adding the following code in bold to admin.php:
<?php
/*
* Include the necessary files
*/
include_once 'inc/functions.inc.php';
include_once 'inc/db.inc.php';
// Open a database connection
$db = new PDO(DB_INFO, DB_USER, DB_PASS);
Download at WoweBook.Com
CHAPTER 7 UPDATING AND DELETING ENTRIES
198
$page = htmlentities(strip_tags($_GET['page']));
if(isset($_GET['url']))
{
$url = htmlentities(strip_tags($_GET['url']));
// Check if the entry should be deleted
if($page == 'delete')
{
$confirm = confirmDelete($db, $url);
}
// Set the legend of the form
$legend = "Edit This Entry";
$e = retrieveEntries($db, $page, $url);
$id = $e['id'];
$title = $e['title'];
$entry = $e['entry'];
}
else
{
// Set the legend
$legend = "New Entry Submission";
// Set the variables to null if not editing
$id = NULL;
$title = NULL;
$entry = NULL;
}
?>
confirmDelete() is called when the user clicks the delete link, and its return value is stored in
the $confirm variable. This function returns an HTML form asking the user to confirm that she wishes to
delete the entry in question. To display this form, you need to add a conditional statement in the body of
admin.php that displays the confirmation form if the value of $page is delete.
Add the code in bold to admin.php to display your confirmation page:
<!DOCTYPE html
PUBLIC "-//W3C//DTD XHTML 1.0 Strict//EN"
"
<html xmlns=" xml:lang="en" lang="en">
Download at WoweBook.Com
CHAPTER 7 UPDATING AND DELETING ENTRIES
199
<head>
<meta http-equiv="Content-Type" content="text/html;charset=utf-8" />
<link rel="stylesheet" href="/simple_blog/css/default.css" type="text/css" />
<title> Simple Blog </title>
</head>
<body>
<h1> Simple Blog Application </h1>
<?php
if($page == 'delete'):
{
echo $confirm;
}
else:
?>
<form method="post"
action="/simple_blog/inc/update.inc.php"
enctype="multipart/form-data">
<fieldset>
<legend><?php echo $legend ?></legend>
<label>Title
<input type="text" name="title" maxlength="150"
value="<?php echo $title ?>" />
</label>
<label>Image
<input type="file" name="image" />
</label>
<label>Entry
<textarea name="entry" cols="45"
rows="10"><?php echo $entry ?></textarea>
</label>
<input type="hidden" name="id"
value="<?php echo $id ?>" />
<input type="hidden" name="page"
value="<?php echo $page ?>" />
<input type="submit" name="submit" value="Save Entry" />
<input type="submit" name="submit" value="Cancel" />
</fieldset>
</form>
<?php endif; ?>
</body>
</html>
Download at WoweBook.Com
CHAPTER 7 UPDATING AND DELETING ENTRIES
200
Note Don’t forget to close the else statement by inserting <?php endif; ?> just above the closing </body>
tag.
Confirming Your Choice to Delete an Entry
Clicking the delete link now causes the return value of confirmDelete() to be displayed; your next step is
to define confirmDelete(). This function accepts two arguments: a database object and the URL of the
entry to be deleted.
The function uses the entry’s URL to load the entry’s information, which pops up and displays a
form to the user that asks whether a given entry should be deleted. This form contains hidden inputs
that store the action you want carried out by the form (delete), and the URL of the entry that will be
deleted if the user confirms that he wants to delete the entry.
Add the following code to functions.inc.php to declare the function confirmDelete():
function confirmDelete($db, $url)
{
$e = retrieveEntries($db, '', $url);
return <<<FORM
<form action="/simple_blog/admin.php" method="post">
<fieldset>
<legend>Are You Sure?</legend>
<p>Are you sure you want to delete the entry "$e[title]"?</p>
<input type="submit" name="submit" value="Yes" />
<input type="submit" name="submit" value="No" />
<input type="hidden" name="action" value="delete" />
<input type="hidden" name="url" value="$url" />
</fieldset>
</form>
FORM;
}
You’re using the heredoc syntax to make passing formatted HTML containing PHP variables as
easy as possible.
Now if you click the delete link next to an entry, you’re taken to a confirmation screen to verify
that you really wish to delete the entry (see Figure 7-4).
Download at WoweBook.Com
CHAPTER 7 UPDATING AND DELETING ENTRIES
201
Figure 7-4. The confirmation screen displays when the
delete
link is clicked
Your confirmation form submits your choice, via the POST method, to admin.php. To process
this, you need to add an additional block of code to the top of admin.php that determines what choices
you’ve made and act accordingly.
Handling Your Submitted Confirmation Form
In admin.php, you need to identify whether the user reached the page from the confirmation form; you
do this by checking whether the $_POST superglobal contains an
action
variable. You also need to check
whether the variable value is delete. If the Yes button was clicked, you submit the entry’s URL to the
deleteEntry()function (which you’ll write in a moment) for deletion.
If the No button was clicked, you return the user to the entry she was viewing when the delete
link was clicked originally.
You can accomplish this by adding the following code in bold to the top of admin.php:
<?php
/*
* Include the necessary files
*/
include_once 'inc/functions.inc.php';
include_once 'inc/db.inc.php';
// Open a database connection
$db = new PDO(DB_INFO, DB_USER, DB_PASS);
Download at WoweBook.Com
CHAPTER 7 UPDATING AND DELETING ENTRIES
202
$page = isset($_GET['page']) ? htmlentities(strip_tags($_GET['page'])) : 'blog';
if(isset($_POST['action']) && $_POST['action'] == 'delete')
{
if($_POST['submit'] == 'Yes')
{
$url = htmlentities(strip_tags($_POST['url']));
if(deleteEntry($db, $url))
{
header("Location: /simple_blog/");
exit;
}
else
{
exit("Error deleting the entry!");
}
}
else
{
header("Location: /simple_blog/blog/$url");
exit; }
}
if(isset($_GET['url']))
{
$url = htmlentities(strip_tags($_GET['url']));
// Check if the entry should be deleted
if($page == 'delete')
{
$confirm = confirmDelete($db, $url);
}
// Set the legend of the form
$legend = "Edit This Entry";
$e = retrieveEntries($db, $page, $url);
$id = $e['id'];
$title = $e['title'];
$entry = $e['entry'];
}
Download at WoweBook.Com
CHAPTER 7 UPDATING AND DELETING ENTRIES
203
else
{
// Set the legend
$legend = "New Entry Submission";
// Set the variables to null if not editing
$id = NULL;
$title = NULL;
$entry = NULL;
}
?>
When a user confirms that he wishes to delete an entry, that entry’s URL is passed to the yet-to-
be-written deleteEntry() function, which removes the entry from the database. If the function is
successful, you send the user to the main page. If it fails, you stop execution of the script and display an
error, letting the user know that something went wrong.
You can complete this process by defining deleteEntry().
Removing Deleted Entries from the Database
You need to write your deleteEntry() function in functions.inc.php. This function needs to accept the
entry URL as an argument, then place that URL into a DELETE query that removes a maximum of one
entry from the entries table.
Your MySQL query should read like this:
DELETE FROM entries
WHERE url=?
LIMIT 1
After you prepare the statement for execution, you use your supplied URL to execute the
argument. You can make sure that the function executes successfully by returning the value of
$stmt->execute() as the return value of your function.
Add your deleteEntry() function below retrieveEntries() in functions.inc.php:
function deleteEntry($db, $url)
{
$sql = "DELETE FROM entries
WHERE url=?
LIMIT 1";
$stmt = $db->prepare($sql);
return $stmt->execute(array($url));
}
You can now delete entries from the database. You can test this by creating a temporary entry
(see Figure 7-5), then deleting it to see whether it is removed from the database and, therefore, from your
entry list (see Figure 7-6).
Download at WoweBook.Com
CHAPTER 7 UPDATING AND DELETING ENTRIES
204
Figure 7-5. A temporary entry created using the
Post a New Entry
link
Figure 7-6. The temporary entry has been deleted, so it is no longer available in the title summary
Download at WoweBook.Com
CHAPTER 7 UPDATING AND DELETING ENTRIES
205
Summary
This chapter was short, but it covered a lot of ground. In it, you learned how to create administrative
links, as well as how to use those links to edit and delete entries from the database.
In the next chapter, you’ll dive into new territory and learn how to upload and manipulate
images using PHP’s
GD library
. This section will be much longer and will present you with a great deal of
new material, so get ready!
Download at WoweBook.Com
Download at WoweBook.Com
C H A P T E R 8
207
Adding the Ability to
Upload Images
Up to this point, you’ve been dealing exclusively with text on your blog. However, you can make your
blog much more interesting by incorporating images.
I’ll cover a lot of information in this chapter. For example, I’ll explain how to use PHP’s GD
library (in the section on resizing images), as well as functions that manipulate the file system. I’ll even
begin to cover the relatively advanced topic of your object-oriented programming.
By the end of this chapter, your blog should be able to:
• Accept image uploads
• Save uploaded images in a folder of your choosing
• Save the uploaded image’s path in the database
• Display images to your blog’s users
• Resize images to fit into your layout
• Delete images when necessary
Adding a File Input to the Admin Form
Before you can start processing images with PHP, you must first add the ability to upload images to your
administrative form on admin.php. To do this, you’ need to add a file upload input to your administrative
form.
When using file inputs, you also have to change the
enctype
, or content type, of the form. By
default, HTML forms are set to application/x-www-form-urlencoded. However, this won’t work when
you’re uploading files; instead, you need to set the enctype of the form to multipart/form-data, which
can accept files
and
standard form values.
Download at WoweBook.Com
CHAPTER 8 ADDING THE ABILITY TO UPLOAD IMAGES
208
Modify the form in admin.php to include the code in bold:
<form method="post"
action="/simple_blog/inc/update.inc.php"
enctype="multipart/form-data">
<fieldset>
<legend><?php echo $legend ?></legend>
<label>Title
<input type="text" name="title" maxlength="150"
value="<?php echo $title ?>" />
</label>
<label>Image
<input type="file" name="image" />
</label>
<label>Entry
<textarea name="entry" cols="45"
rows="10"><?php echo $entry ?></textarea>
</label>
<input type="hidden" name="id"
value="<?php echo $id ?>" />
<input type="hidden" name="page"
value="<?php echo $page ?>" />
<input type="submit" name="submit" value="Save Entry" />
<input type="submit" name="submit" value="Cancel" />
</fieldset>
</form>
Load admin.php in a browser to see the added file input.
Accessing the Uploaded File
File uploads work differently than standard inputs, which means you must handle them a little
differently. In this case, you must modify update.inc.php to deal with uploaded images.
You don’t want to force your users to upload an image to post a new entry, so you need to check
whether a file was uploaded
after
you verify that the rest of the entry form was filled out. To check whether
a file was uploaded, you look in the $_FILES superglobal array.
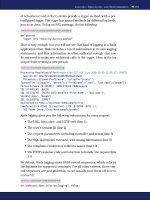
A Quick Refresher on the $_FILES Superglobal Array
You learned about the $_FILES superglobal in Chapter 3, but it might be helpful to review what it does
before moving on.
Download at WoweBook.Com
CHAPTER 8 ADDING THE ABILITY TO UPLOAD IMAGES
209
Whenever a file is uploaded via an HTML form, that file is stored in temporary memory and
information about the file is passed in the $_FILES superglobal. You can see this in action by taking a
look at what’s being passed to your update.inc.php script. To do this, add the code in bold to the top of
the file:
<?php
// Include the functions so you can create a URL
include_once 'functions.inc.php';
if($_SERVER['REQUEST_METHOD']=='POST'
&& $_POST['submit']=='Save Entry'
&& !empty($_POST['page'])
&& !empty($_POST['title'])
&& !empty($_POST['entry']))
{
// Create a URL to save in the database
$url = makeUrl($_POST['title']);
// Output the contents of $_FILES
echo "<pre>"; // <pre> tags make the output easy to read
print_r($_FILES);
echo "</pre>";
/*
* You don't want to save this test, so you exit the script to
* prevent further execution.
*/
exit;
After you save this file, you can navigate to create a new entry and try uploading an image by
pointing your browser to http://localhost/simple_blog/admin/blog.
Click the Browse button on the file input and select any image off your computer. You can fill
in the Title and Entry fields with any information you want because this information won’t be saved (see
Figure 8-1).
Download at WoweBook.Com
CHAPTER 8 ADDING THE ABILITY TO UPLOAD IMAGES
210
Figure 8-1. An image selected in the new file input in
admin.php
Click the Save Entry buttonto send this information to update.inc.php, which will display the
contents of $_FILES and stop execution. The output will look similar to this:
Array
(
[image] => Array
(
[name] => IMG001.jpg
[type] => image/jpeg
[tmp_name] => /Applications/XAMPP/xamppfiles/temp/phpHQLHjt
[error] => 0
[size] => 226452
)
)
Download at WoweBook.Com