Learn htML and Css with w3schools phần 5 pps
Bạn đang xem bản rút gọn của tài liệu. Xem và tải ngay bản đầy đủ của tài liệu tại đây (383.13 KB, 24 trang )
Learn HTML and CSS with w3schools
86
<td>First</td>
<td>Row</td>
</tr>
<tr>
<td>Second</td>
<td>Row</td>
</tr>
</table>
<h4>With frame="hsides":</h4>
<table frame="hsides">
<tr>
<td>First</td>
<td>Row</td>
</tr>
<tr>
<td>Second</td>
<td>Row</td>
</tr>
</table>
</body>
</html>
Figure 11.17
(continued)
Chapter 11: HTML Tables
87
Try it yourself >>
<html>
<body>
<h4>With frame="vsides":</h4>
<table frame="vsides">
<tr>
<td>First</td>
<td>Row</td>
</tr>
<tr>
<td>Second</td>
<td>Row</td>
</tr>
</table>
<h4>With frame="lhs":</h4>
<table frame="lhs">
<tr>
<td>First</td>
<td>Row</td>
</tr>
<tr>
<td>Second</td>
<td>Row</td>
</tr>
</table>
<h4>With frame="rhs":</h4>
<table frame="rhs">
<tr>
<td>First</td>
<td>Row</td>
</tr>
<tr>
<td>Second</td>
<td>Row</td>
</tr>
</table>
(continued)
Downloa d f r o m W o w ! e B o o k < w w w.woweb o o k . c o m >
Learn HTML and CSS with w3schools
88
</body>
</html>
Figure 11.18
Using frame and border to Control
Table Borders
You can use the frame and border attributes to control the borders around the
table. If you see no frames around the tables in these examples, your browser does
not support the frame attribute.
Try it yourself >>
<html>
<body>
<table frame="hsides" border="3">
<tr>
<td>First row</td>
</tr>
</table>
<br />
<table frame="vsides" border="3">
(continued)
Chapter 11: HTML Tables
89
<tr>
<td>First row</td>
</tr>
</table>
</body>
</html>
Figure 11.19
Table Tags
TAG DESCRIPTION
<table> Defines a table
<th> Defines a table header
<tr> Defines a table row
<td> Defines a table cell
<caption> Defines a table caption
<colgroup> Defines groups of table columns
<col> Defines the attribute values for one or
more columns in a table
<thead> Defines a table head
<tbody> Defines a table body
<tfoot> Defines a table footer
90
CHAPTER 12
HTML LISTS
In This Chapter
❑ Unordered Lists
❑ Ordered Lists
❑ Definition Lists
❑ Nested Lists
Unordered Lists
HTML supports ordered, unordered, and definition lists. You can also nest one list
within another.
An unordered list is a list of items. The list items are marked with bullets (typically
small black circles), as shown in Figure 12.1.
Figure 12.1
Chapter 12: HTML Lists
91
An unordered list starts with the <ul> tag. Each list item starts with the <li> tag.
Figure 12.2 displays how it looks in a browser.
Try it yourself >>
<html>
<body>
<h4>An Unordered List:</h4>
<ul>
<li>Coffee</li>
<li>Tea</li>
<li>Milk</li>
</ul>
</body>
</html>
Figure 12.2
Inside a list item, you can put paragraphs, line breaks, images, links, other lists, and
so on.
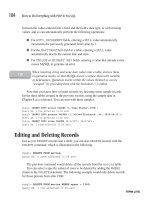
You can display different kinds of bullets in an unordered list by using the type
attribute. Figure 12.3 shows lists marked with discs, circles, and squares.
Try it yourself >>
<html>
<body>
<h4>Disc bullets list:</h4>
<ul type="disc">
<li>Apples</li>
<li>Bananas</li>
<li>Lemons</li>
</ul>
(continued)
Learn HTML and CSS with w3schools
92
<h4>Circle bullets list:</h4>
<ul type="circle">
<li>Apples</li>
<li>Bananas</li>
<li>Lemons</li>
</ul>
<h4>Square bullets list:</h4>
<ul type="square">
<li>Apples</li>
<li>Bananas</li>
<li>Lemons</li>
</ul>
</body>
</html>
Figure 12.3
(continued)
Chapter 12: HTML Lists
93
Ordered Lists
An ordered list is also a list of items; the list items are numbered sequentially rather
than bulleted.
An ordered list starts with the <ol> tag. Each list item starts with the <li> tag.
Figure 12.4 shows how the ordered list appears in the browser.
Try it yourself >>
<html>
<body>
<h4>An Ordered List:</h4>
<ol>
<li>Coffee</li>
<li>Tea</li>
<li>Milk</li>
</ol>
</body>
</html>
Figure 12.4
Different Types of Ordering
You can display different kinds of ordered lists by using the type attribute. Figure
12.5 shows lists marked with uppercase and lowercase letters; Figure 12.6 shows
lists with uppercase and lowercase Roman numerals.
Try it yourself >>
<html>
<body>
(continued)
Learn HTML and CSS with w3schools
94
<h4>Letters list:</h4>
<ol type="A">
<li>Apples</li>
<li>Bananas</li>
<li>Lemons</li>
</ol>
<h4>Lowercase letters list:</h4>
<ol type="a">
<li>Apples</li>
<li>Bananas</li>
<li>Lemons</li>
</ol>
</body>
</html>
Figure 12.5
Try it yourself >>
<html>
<body>
<h4>Roman numbers list:</h4>
<ol type="I">
<li>Apples</li>
<li>Bananas</li>
<li>Lemons</li>
(continued)
Chapter 12: HTML Lists
95
</ol>
<h4>Lowercase Roman numbers list:</h4>
<ol type="i">
<li>Apples</li>
<li>Bananas</li>
<li>Lemons</li>
</ol>
</body>
</html>
Figure 12.6
Definition Lists
A definition list is not a list of single items. It is a list of items (terms), together with
a description of each item (term).
A definition list starts with a <dl> tag (definition list).
Each term starts with a <dt> tag (definition term).
Each description starts with a <dd> tag (definition description).
Figure 12.7 shows how the definition list in the following example appears in a
browser.
Learn HTML and CSS with w3schools
96
Try it yourself >>
<html>
<body>
<h4>A Denition List:</h4>
<dl>
<dt>Coffee</dt>
<dd>Black hot drink</dd>
<dt>Milk</dt>
<dd>White cold drink</dd>
</dl>
</body>
</html>
Figure 12.7
Inside the <dd> tag you can put paragraphs, line breaks, images, links, other lists,
and so on.
Nested Lists
A nested list is a list within another list. Usually the second list is indented another
level and the item markers will appear differently than the original list, as shown in
Figure 12.8.
Try it yourself >>
<html>
<body>
<h4>A nested List:</h4>
<ul>
<li>Coffee</li>
Chapter 12: HTML Lists
97
<li>Tea
<ul>
<li>Black tea</li>
<li>Green tea</li>
</ul>
</li>
<li>Milk</li>
</ul>
</body>
</html>
Figure 12.8
Nested lists can be several levels deep, as shown in Figure 12.9.
Try it yourself >>
<html>
<body>
<h4>A nested List:</h4>
<ul>
<li>Coffee</li>
<li>Tea
<ul>
<li>Black tea</li>
<li>Green tea
<ul>
<li>China</li>
<li>Africa</li>
</ul>
</li>
</ul>
(continued)
Downloa d f r o m W o w ! e B o o k < w w w.woweb o o k . c o m >
Learn HTML and CSS with w3schools
98
</li>
<li>Milk</li>
</ul>
</body>
</html>
Figure 12.9
List Tags
TAG DESCRIPTION
<ol> Defines an ordered list
<ul> Defines an unordered list
<li> Defines a list item
<dl> Defines a definition list
<dt> Defines a term (an item) in a defini-
tion list
<dd> Defines a description of a term in a
definition list
<dir> Deprecated. Use <ul> instead
<menu> Deprecated. Use <ul> instead
(continued)
99
CHAPTER 13
HTML FORMS
& INPUT
In This Chapter
❑ Forms
❑ input Tag and Attributes
❑ action Attribute
❑ Form Examples
Forms
HTML forms are used to collect different kinds of user input. A form is an area that
can contain form elements.
Form elements are elements that allow the user to enter information in a form (like
text fields, text area fields, drop-down menus, radio buttons, check boxes, and so
on).
A simple form example appears in Figure 13.1.
Figure 13.1
Learn HTML and CSS with w3schools
100
A form is defined with the <form> tag:
<form>
.
inputelements
.
</form>
input Tag and Attributes
The most used form tag is the <input> tag. The type of input is specified with
the type attribute. The following types are the most commonly used input types.
Text Fields
Text fields are used when you want the user to type letters, numbers, and so on in
a form. The form appears as shown in Figure 13.2. Note that the form itself is not
visible.
Try it yourself >>
<html>
<body>
<formaction="">
Firstname:
<inputtype="text"name="rstname"/>
<br/>
Lastname:
<inputtype="text"name="lastname"/>
</form>
</body>
</html>
Figure 13.2
Chapter 13: HTML Forms & Input
101
Check Boxes
This example demonstrates how to create check boxes on an HTML page like the
ones shown in Figure 13.3. A user can select or deselect a check box.
Try it yourself >>
<html>
<body>
<formaction="">
Ihaveabike:
<inputtype="checkbox"name="vehicle"value="Bike">
<br/>
Ihaveacar:
<inputtype="checkbox"name="vehicle"value="Car">
<br/>
Ihaveanairplane:
<inputtype="checkbox"name="vehicle"value="Airplane">
</form>
</body>
</html>
Figure 13.3
In most browsers, the width of the text field is 20 characters by default.
T I P
Learn HTML and CSS with w3schools
102
Radio Buttons
The example demonstrated in Figure 13.4 shows how to create radio buttons on an
HTML form. When a user clicks a radio button, that button becomes selected, and
all other buttons in the same group become deselected.
Try it yourself >>
<html>
<body>
<formaction="">
Male:
<inputtype="radio"checked="checked"
name="Sex"value="male">
<br>
Female:
<inputtype="radio"
name="Sex"value="female">
</form>
</body>
</html>
Figure 13.4
Drop-Down List
The next example shows how to create a simple drop-down list on an HTML page.
A drop-down list is a selectable list.
Try it yourself >>
<html>
<body>
<formaction="">
<selectname="cars">
Chapter 13: HTML Forms & Input
103
<optionvalue="volvo">Volvo</option>
<optionvalue="saab">Saab</option>
<optionvalue="at">Fiat</option>
<optionvalue="audi">Audi</option>
</select>
</form>
</body>
</html>
Figure 13.5
You can also display a simple drop-down list with a value preselected on the list, as
shown in Figure 13.6.
Try it yourself >>
<html>
<body>
<formaction="">
<selectname="cars">
<optionvalue="volvo">Volvo</option>
<optionvalue="saab">Saab</option>
<optionvalue="at"selected="selected">Fiat</option>
<optionvalue="audi">Audi</option>
</select>
</form>
</body>
</html>
Figure 13.6
Learn HTML and CSS with w3schools
104
Text Area
Using a textarea (a multiline text input control) like the one in Figure 13.7, you can
write an unlimited number of characters. A textarea can be in a form or elsewhere
on a page.
Try it yourself >>
<html>
<body>
<textarearows="10"cols="30">Thecatwasplayinginthe
garden.</textarea>
</body>
</html>
Figure 13.7
Buttons
Buttons are common items on a form. This example demonstrates how to create a
button. You can define your own text on the face of the button. The results of this
code appear in Figure 13.8.
Try it yourself >>
<html>
<body>
<formaction="">
<inputtype="button"value="Helloworld!">
</form>
Chapter 13: HTML Forms & Input
105
</body>
</html>
Figure 13.8
Fieldset
A fieldset is a grouping of data fields. This example demonstrates how to draw a
border with a caption around your data, as shown in Figure 13.9.
Try it yourself >>
<html>
<body>
<eldset>
<legend>
Healthinformation:
</legend>
<formaction="">
Height<inputtype="text"size="3">
Weight<inputtype="text"size="3">
</form>
</eldset>
<p>
Ifthereisnoborderaroundtheinputform,yourbrowseris
tooold.
</p>
</body>
</html>
Figure 13.9
Learn HTML and CSS with w3schools
106
action Attribute
When the user clicks the Submit button, the content of the form is sent to the
server. The form’s action attribute defines the name of the file to send the con-
tent to. The file defined in the action attribute usually does something with the
received input.
<formname="input"action="html_form_submit.asp"
method="get">
Username:
<inputtype="text"name="user"/>
<inputtype="submit"value="Submit"/>
</form>
Figure 13.10 shows how it looks in a browser. If you type some characters in the
text field and click the Submit button, the browser sends your input to a page called
"html_form_submit.asp". The page will show you the received input.
Figure 13.10
Form Examples
This example demonstrates how to add a form to a page. The form contains two
input fields and a Submit button. The resulting form appears in Figure 13.11.
Try it yourself >>
<html>
<body>
<formname="input"action="html_form_action.asp"
method="get">
Typeyourrstname:
<inputtype="text"name="FirstName"value="Mickey"size="20">
<br>Typeyourlastname:
<inputtype="text"name="LastName"value="Mouse"size="20">
<br>
<inputtype="submit"value="Submit">
Chapter 13: HTML Forms & Input
107
</form>
<p>
Ifyouclickthe"Submit"button,youwillsendyourinput
toanewpagecalledhtml_form_action.asp.
</p>
</body>
</html>
Figure 13.11
Form with Check Boxes
The following form contains three check boxes and a Submit button. The results of
the code appear in Figure 13.12.
Try it yourself >>
<html>
<body>
<formname="input"action="html_form_action.asp"
method="get">
Ihaveabike:
<inputtype="checkbox"name="vehicle"value="Bike"
checked="checked"/>
<br/>
Ihaveacar:
<inputtype="checkbox"name="vehicle"value="Car"/>
<br/>
Ihaveanairplane:
<inputtype="checkbox"name="vehicle"value="Airplane"/>
<br/><br/>
<inputtype="submit"value="Submit"/>
</form>
(continued)
Learn HTML and CSS with w3schools
108
<p>
Ifyouclickthe"Submit"button,yousendyourinputtoa
newpagecalledhtml_form_action.asp.
</p>
</body>
</html>
Figure 13.12
Form with Radio Buttons
Figure 13.13 displays a form with two radio buttons and a Submit button.
Try it yourself >>
<html>
<body>
<formname="input"action="html_form_action.asp"
method="get">
Male:
<inputtype="radio"name="Sex"value="Male"
checked="checked">
<br>
Female:
<inputtype="radio"name="Sex"value="Female">
<br>
<inputtype="submit"value="Submit">
</form>
<p>
Ifyouclickthe"Submit"button,youwillsendyourinput
(continued)
Downloa d f r o m W o w ! e B o o k < w w w.woweb o o k . c o m >
Chapter 13: HTML Forms & Input
109
toanewpagecalledhtml_form_action.asp.
</p>
</body>
</html>
Figure 13.13
Send E-Mail from a Form
The next example demonstrates how to send e-mail from a form. The results of the
code appear in Figure 13.14.
Try it yourself >>
<html>
<body>
<formaction="MAILTO:"method="post"
enctype="text/plain">
<h3>Thisformsendsane-mailtoW3Schools.</h3>
Name:<br>
<inputtype="text"name="name"
value="yourname"size="20">
<br>
Mail:<br>
<inputtype="text"name="mail"
value="yourmail"size="20">
<br>
Comment:<br>
<inputtype="text"name="comment"
value="yourcomment"size="40">
<br><br>
<inputtype="submit"value="Send">
<inputtype="reset"value="Reset">
(continued)


