.NET Framework Solution In Search of the Lost Win32 API phần 2 ppsx
Bạn đang xem bản rút gọn của tài liệu. Xem và tải ngay bản đầy đủ của tài liệu tại đây (627.6 KB, 43 trang )
Working with Pointers
As you’ve already seen in other areas of this chapter, pointers can present problems for both Visual Basic and
C# developers. However, this is one area where C# developers have a decided advantage and you might find
that it’s better to use C# whenever you have a lot of pointers to work with. Even if Visual Basic is the main
language for your application, you can write a wrapper DLL in C# to meet the requirements of the Win32 API
call portion of the code. Generally, anywhere you need to use a UInt value or an odd pointer, you’ll also need
to use C#.
The IntPtr is the developer’s best friend when it comes to pointers. However, remember that an IntPtr contains
a void*, not the specialized pointers that Win32 API calls rely on. As shown in Listing 2.2, the use of a void*
normally means some type of data conversion later in the process. The whole concept of a void* is to
represent a pointer of an unknown type. In sum, an IntPtr enables you to create generic pointers, but not
specific pointers.
C# developers also have access to standard C−like pointers. However, to use this feature you must declare the
affected method as unsafe. As discussed in the “Understanding the Effects of Unsafe Code” section of
Chapter 1, you want to minimize unsafe code sections for a number of reasons. The most important reason is
that unsafe code sections don’t receive the same level of error checking that normal code sections do, which
means that your code is more likely to contain hidden (and difficult to debug) errors. Here are some general
rules for using normal pointers.
Use an IntPtr whenever possible.•
Keep sections with standard pointers small.•
Perform more error checking than normal.•
Include range checks of all data to ensure that it remains within limits.•
Isolate unsafe code sections from the main application whenever possible.•
Consider using Visual C++ for large numbers of pointers.•
Avoid using pointers by substituting managed alternatives.•
Working with Enumerations
Windows relies extensively on enumerated data types. These data types normally begin with the enum
keyword. However, as you’ll notice in Listing 2.1, duplicating a Windows enumerated type with a managed
enumeration is difficult. You can always use an enumeration for return values from a Windows API call, but
you can’t always use it as input. The exception is when the enumerated type will appear singly and not as part
of an or−ed or and−ed input.
The MessageBoxEx() function provides a perfect example of the enumerated type problem because you can’t
use an enumeration to create the input required by the function. In these cases, you need to create a class
consisting entirely of constants. Note that there are differences between Visual Basic and C# when working
with the class form of an enumeration. When you work with C#, you can declare the type of the constant. For
example, in the MessageBoxEx() example, all of the constants are of the UInt32 type because that’s what the
function requires. Visual Basic doesn’t allow this distinction and it can cause problems. For example, here’s
_the Visual Basic version of the MBButton class.
‘ Create a list of buttons.
Public Class MBButton
Public Const MB_OK = &H0
Public Const MB_OKCANCEL = &H1
Working with Pointers
32
Public Const MB_ABORTRETRYIGNORE = &H2
Public Const MB_YESNOCANCEL = &H3
Public Const MB_YESNO = &H4
Public Const MB_RETRYCANCEL = &H5
Public Const MB_CANCELTRYCONTINUE = &H6
Public Const MB_HELP = &H4000
End Class
Tip Notice the use of hexadecimal numbers in the MBButton class. It’s usually easier to present the numbers
in this form than use decimal equivalents. The Win32 API documentation normally relies on hexadecimal
number input, rather than decimal numbers, so using hexadecimal numbers makes your code easier to
debug.
In some cases, working with enumerations and classes becomes so difficult that you might want to define the
enumeration as a series of defines or constant values. In fact, the C header files often use this technique when
creating an enumeration would prove too complex. Looking into the C header file will often provide you with
clues as to the correct enumeration representation in your own code.
Enumerations become even more difficult when working with wrapper DLLs—a topic we’ll discuss at length
in Chapter 3. The most important reason is that the enum will never appear in the Object Browser and the
wrapper DLL user won’t be able to access it. Consequently, you need an alternative for creating enumerated
types. In most cases, using a class is the best answer because you have good control over how the class will
appear to the end user. However, many situations will call for use of defines or constants in wrapper DLLs.
Importing Resources
Resource usage is an important part of any development project. You manage memory, disk space, and other
physical resource elements as part of the development project. In addition, most developers are used to finding
icons and other graphic resources embedded within DLLs found in the Windows directory. Finally, resources
can be code—the embodiment of executable code within an external DLL is a type of resource that most
developers are used to having.
We’ll discuss resources in a number of places in the book. This section discusses three main issues. First, it
tells you how the .NET Framework can help you manage resources located in external files, such as the
graphic images located in the Shell32.DLL file. Second, we discuss the issue of using external DLLs from
your managed code. Finally, we’ll take a quick look at some of the issues involved in using resources with the
Win32 API.
Understanding .NET Framework Functionality
While this book isn’t about general C# or Visual Basic programming, it’s important to remember that the
.NET Framework does provide the functionality required to display basic graphics. For example, you can
embed a bitmap within your application and display it on screen as needed. You’ll find such an application in
the \Chapter 02\C#\NETBitmap and the \Chapter 02\VB\NETBitmap folders of the CD. Here’s the basic code
needed to perform the task.
private void btnTest_Click(object sender, System.EventArgs e)
{
// Retrieve an embedded bitmap from the current assembly.
Assembly Asm = Assembly.GetExecutingAssembly();
Stream Strm = Asm.GetManifestResourceStream("NETBitmap.Main.bmp");
Bitmap Temp = new Bitmap(Strm);
Importing Resources
33
// Display the bitmap on screen.
pbMain.Image = (Image)Temp;
}
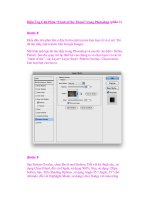
As you can see, this example relies on reflection to get the job done. You must set the Build Action property
of the bitmap or other resource to Embedded Resource to use this technique. Figure 2.7 shows the output from
this example.
Figure 2.7: Displaying an embedded bitmap within your .NET application is fine for the managed
environment.
The resulting bitmap works fine within the managed environment but won’t work within the Win32 API,
which means you have to use a different technique when making a Win32 API call. The Win32 API doesn’t
understand the managed resources created by reflection. Fortunately, you can use the special GetHbitmap()
call to answer many Win32 API call needs.
The hBitmap this call returns is Windows compatible. You must make a call to the Win32 API DeleteObject()
function to deallocate the handle when you finish using it. Here’s the declaration for the DeleteObject()
function.
[DllImport("gdi32.dll")]
public static extern int DeleteObject(IntPtr hObject);
Using the IDE Features
You’ll find that you need to use wrapper DLLs regularly when creating connections between the .NET
Framework and the Win32 API. Using wrapper DLLs enhances code reuse and enables you to use other
languages as needed. Of course, this means adding a reference to the external DLL so that you can access the
code it contains from within your application. The following steps tell how to add such a reference (the same
procedure works whether you use Visual Basic or C#).
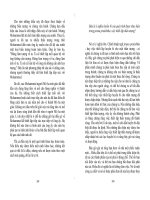
Right−click the References folder in Solution Explorer and choose Add Reference from the context
menu. You’ll see an Add Reference dialog box similar to the one shown in Figure 2.8. Notice that
there are separate tabs for .NET, COM, and Project related references. Generally, you won’t find
custom DLLs on any of these tabs, but it always pays to look.
1.
Using the IDE Features
34
Figure 2.8: The Add Reference dialog box enables you to add custom _references to your application.
Locate and select the reference you want to add to your application. Add the reference to the Selected
Components list by highlighting it and clicking Select. If you don’t see the DLL, you’ll need to add it
manually as described in Step 3. Otherwise, you can skip Step 3 and proceed to Step 4.
2.
Click Browse and you’ll see a Select Component dialog box. Use this dialog box as you would any
file open dialog box to locate the file containing the executable code. Once you locate the file,
highlight it and click Open.
3.
Click OK. You should see the new reference added to the Reference folder.4.
Add a statement to use the new reference to your application. For C# developers this means adding a
using statement to the beginning of the file. For Visual Basic developers this means adding an Imports
statement to the beginning of the file.
5.
Working with the Win32 API
Working directly with the Win32 API means locating the various functions you need—they’re not all in the
same DLL. In many cases, you’ll need to perform esoteric tasks such as gaining access to the current
application instance using the Marshal.GetHINSTANCE() method. You’ll also need to know how to gain
access to the current application handle using this.Handle. However, in many cases, it’s a matter of
performing straight coding as shown here.
[DllImport("user32.dll")]
public static extern IntPtr LoadBitmap(IntPtr hInstance,
[MarshalAs(UnmanagedType.LPStr)]String lpBitmapName);
[DllImport("gdi32.dll")]
public static extern int DeleteObject(IntPtr hObject);
private void btnTest_Click(object sender, System.EventArgs e)
{
IntPtr HBitmap; // A handle to a bitmap.
// Load the bitmap using a Windows call.
HBitmap = LoadBitmap(IntPtr.Zero, "D:\\Main.bmp");
// Display the bitmap on screen.
pbMain.Image = Image.FromHbitmap(HBitmap);
// Delete the hBitmap.
DeleteObject(HBitmap);
Working with the Win32 API
35
}
This code represents an alternative way to load a bitmap from disk. Essentially all you need to do is load the
bitmap, convert it to an image, and then release memory used by the bitmap. The tricky part is setting
everything up so that Windows understands what you want to do. Once you have the required function calls in
place, using the Win32 API calls is about as difficult as using their .NET Framework equivalents. We’ll
explore the various elements of working with graphics as the book progresses—especially when it comes time
to create the MMC snap−in example.
Where Do You Go from Here?
This chapter has demonstrated one of the basic principles of using the Win32 API from the managed
environment—data translation. The managed and unmanaged environments only work together when the data
they share is formatted correctly. In some situations, you can perform a direct data transfer; but, in other cases,
you have to marshal the data or get creative and construct the data using other techniques.
At this point, you have seen enough examples to begin writing some code yourself. You should try creating a
few examples that translate data that you need to work with to and from the unmanaged environment. It’s
important to start small, as we did with the MessageBoxEx() example. You’ll find that the debugger is lacking
when it comes to this type of application programming, so you have to know how a data translation will affect
your application and the Win32 API calls that it makes.
In Chapter 3, we’ll move on to more complex topics. We’ll discuss various types of Win32 API access. For
example, that chapter is the first place you’ll learn about using wrapper DLLs to access some Win32 API
functions. You’ll also learn how to access and interpret Win32 API function call return values. Finally, this
chapter looks at some important tools that you’ll need to develop robust applications. Some tools like Spy++
are indispensable when researching the actual behavior of some poorly documented Win32 API functions or
diagnosing errors in a function call.
Where Do You Go from Here?
36
Chapter 3: Accessing the Win32 API
Overview
So far we’ve discussed the perimeter of Win32 API development. You’ve learned about some of the
functionality that the Win32 API can provide, and we’ve considered various aspects of data manipulation.
However, we haven’t really discussed access techniques for the Win32 API. That’s what you’ll learn in this
chapter.
There are four topics of interest for developers in this chapter. First, you need to know where to find the
Win32 API calls because they don’t all reside in the same DLL and some don’t reside properly in DLLs at
all—they appear as part of C LIB files. Second, you need to know what you’re giving up by using the Win32
API calls. We’ve already talked about a few of these issues in previous chapters. Third, you need to know
which tools are available to help you locate and observe the effects of Win32 API calls. Finally, you need to
know how to obtain error information when working with Win32 API calls and how to interpret the error
codes.
Consider this chapter your doorway to the technology−specific chapters that begin with Chapter 6. This
chapter contains the generic techniques that we’ll use in later chapters to answer specific technology
needs—the holes left in the .NET Framework’s coverage of the Win32 API. When you complete this chapter,
you’ll have the basic skills for locating functions, analyzing how they work, and calling them from your
managed application. However, anyone who’s worked with the Win32 API directly in the past knows that it’s
anything but consistent, which is why these technology−specific chapters are so important. This chapter tells
you the basic rules—the remaining chapters tell you how Microsoft broke them. They’ll also show you
techniques for getting around some of the anomalies in the Win32 API when viewed from the managed
environment.
An Overview of the DLLs
The Windows operating system is composed of more than a few DLLs. If you look in the System32 folder of
any Windows installation, you’ll see a wealth of DLLs, many with strange−looking names. Most of these
DLLs perform special tasks, and you won’t need to worry about them unless you need to perform that special
task in your application. For example, my System32 folder contains a VJOY.DLL file that I’d only need to
use when working with a joystick—something I’m probably not going to do any time soon. Some of the DLLs
are also device specific, so you don’t need to do anything with them unless you want to work with that device
in a very specific way (which usually isn’t a good idea).
This excess of DLLs leaves the question of which DLLs you need to consider open to interpretation. There are
some DLLs that you’ll never use simply because you don’t write applications that require their services or the
services they provide are found somewhere in the .NET Framework. It’s important to know which DLLs to
look for in your search of a specific function.
Note The help file provided with Visual Studio .NET lacks some of the documentation you’ll need to
understand the Win32 API. Unfortunately, this means you’ll need to download a copy of the Platform
SDK to gain access to the required help files. Fortunately, Visual Studio .NET does include a complete
set of C header files and all of the tools you need to work with the Win32 API. You can obtain a copy of
the latest Platform SDK at
You
37
can also obtain the required information from the help files that are provided with an MSDN
subscription.
There are three main DLLs you’ll need to use for general functions: USER32.DLL, KERNEL32.DLL, and
GDI32.DLL. In general, USER32.DLL contains user−specific functions such as message boxes. You’ll find
low−level functions such as those used for memory allocation and thread management in KERNEL32.DLL.
Most graphics functions appear in GDI32.DLL. Unfortunately, Microsoft didn’t strictly adhere to these
boundaries. For example, you’ll find the Beep() function in KERNEL32.DLL, not USER32.DLL as you
might expect. Because the Platform SDK documentation is written with C/C++ developers in mind, it doesn’t
always list the DLL where you can find a particular function—making the search akin to an egg hunt.
Some DLLs fall into the common category, but the .NET Framework already provides good coverage of the
functionality they provide. For example, the COMCTL32.DLL and COMDLG32.DLL files contain functions
that developers use frequently, but most of these functions have .NET Framework equivalents. The question
for most developers will be whether the .NET Framework equivalents are robust enough to meet application
development needs. As shown in the MessageBoxEx() example in Chapter 2, Microsoft tends to leave out
special features in .NET Framework equivalents. For example, the MessageBox.Show() function doesn’t
include the Help button. Likewise, you might find some special feature COMCTL32.DLL and
COMDLG32.DLL files that the .NET Framework doesn’t implement.
Many of the DLLs you’ll use fall into the esoteric category. For example, you’ll find the BATMETER.DLL
and POWRPROF.DLL files helpful when writing power management code. While the .NET Framework
provides access to common needs such as power events, you might find some of the DLL functions useful for
power monitoring needs. Of course, most applications that do provide power management support do so by
monitoring the events and leaving the grunt work to the operating system, so these functions, while useful, are
also esoteric.
We’ll discuss many other DLLs as the book progresses. The purpose of this section is to help you understand
where these Win32 API functions are coming from—they don’t appear out of the air as some developers
might suspect. Even if you restrict your programming efforts to the functions found in the three main DLLs,
you’ll find that you can patch quite a few of the obvious support holes in the .NET Framework.
Types of Win32 Access
There are two ways to access the Win32 API functions. All of the examples we’ve looked at so far in the book
use a single type of access, the direct DLL approach. In most cases, you’ll want to use this approach because
it’s the simplest method to use. However, in other situations, you’ll need to use the C LIB file approach due to
a lack of documentation of other factors. Sometimes even C# can’t bridge the gap between the managed and
unmanaged environments, making Visual C++ the language of choice. The following sections describe these
two methods of Win32 API access in more detail.
Tip Working with the Win32 API often means you’ll need to access low−level details about your application
such as the window handle or the device context. Visual Basic hides this information by default. To see
low−level details about your application within the development environment, use the Tools Ø Options
command to display the Options dialog box. Select the Text Editor\Basic folder. Clear the Hide Advanced
Members option and click OK. You’ll now see features such as Me.Handle (the handle for the current
window). The C# text editor also has the Hide Advanced Members option, but it’s usually cleared by
default.
Types of Win32 Access
38
Direct DLL Access
As previously mentioned, you’ll generally want to use direct DLL access when using Win32 API functions.
This technique enjoys the greatest level of support from the .NET Framework. For example, you can use the
[DllImport] attribute to gain access to the required function. We haven’t looked at all of the features of the
[DllImport] attribute yet, so you’ll gain a better appreciation of just how valuable this attribute is as the book
progresses. We’ve also looked at other attributes, such as the [StructLayout] attribute, that helps make DLL
access easy.
Of course, the use of DLL access assumes that you know which DLL to access and have documentation about
function arguments. The arguments could be anything from pointers to data structures. Learning the names of
functions within a DLL isn’t hard (we’ll see how this works in the “Dependency Walker” section of the
chapter), but learning the details can prove frustrating.
There’s a hidden problem with the DLL access method. Every time your application makes a transition from
the managed to unmanaged environment, CLR has to marshal the variables in the background (this is in
addition to any marshaling you perform manually within the application). Consequently, there’s a
performance hit your application will experience when using the Win32 API. Sometimes it’s more efficient to
use a wrapper DLL or a function substitute, rather than incur the performance penalty.
Direct DLL access can present other problems as well. For example, some of the structures used to access
Win32 API functions include unions, odd variable types, and other data translation problems. Because C# and
Visual Basic don’t understand these concepts, you’ll end up ripping your hair out trying to replicate the data
structure. In these cases, it’s often easier to bypass the data translation problem by using a C/C++ wrapper
DLL. Since managed Visual C++ .NET understands the unmanaged environment completely, you’ll
experience less frustration in the data translation process. Be warned, though, that Visual C++ presents other
challenges such as a more complex programming environment.
Even if you can replicate a data structure, it often bears little resemblance to the original. For example,
consider the following unmanaged data structure.
struct MyStruct
{
int data[16];
}
This looks like an easy structure to replicate, and in some ways it is. However, the resulting data structure
doesn’t look like the original and could cause problems for other developers trying to learn about your code.
Here’s the C# equivalent of the data structure in question.
[StructLayout(LayoutKind.Sequential)]
public struct MyStruct
{
[MarshalAs(UnmanagedType.ByValArray, SizeConst=64)]
public int[] myField;
}
While the two data structures are equivalent, the C# version requires two attributes to accomplish the same
task that the Visual C++ version does without any attributes at all. In short, the C# version is actually more
complicated. When you consider that this structure is actually very simple, it’s not too hard to image how
some of the complex data structures will appear within managed code. The realities of developing Win32 API
code in a managed environment include added complexity because the managed environment makes
Direct DLL Access
39
assumptions that the Win32 API environment doesn’t make.
A final direct DLL access concern is the problem of error handling. You must also import and use the rather
strange error−handling functions employed by the Win32 API if you want to provide error feedback to the
user. While you still have to figure out which method of error handling to use with working with Visual C++,
the actual process of retrieving the error information is easier. Fortunately, error handling isn’t so difficult that
it prevents you from using the direct DLL method.
C LIB Access
For some developers, the concept of DLL versus LIB function access might prove confusing at first, but the
differences between the two methods are distinct and easy to understand. A C/C++ library is a set of
precompiled routines that are only accessible from a C/C++ environment. As such, the files have a LIB
extension and usually reside in a separate LIB folder on the hard drive.
When you view the documentation for the Win32 API and see a reference for a LIB rather than a DLL file,
you’re seeing Microsoft’s choice of C/C++ as the base language for Windows. The presence of a LIB file
reference in the documentation doesn’t necessarily mean there’s no access from a DLL, but you’ll have to do
some research to find the name of the associated DLL (when there’s a single DLL that implements the
required function). In some cases, the answer to the question of which DLL to use is quite simple. For
example, the MessageBoxEx() function we used in Chapter 2 relies on User32.LIB in the documentation and
User32.DLL in the example.
The following sections discuss two forms of C library access. You’ll find examples of these two techniques in
the “A C LIB Wrappers Access Example” and “A C LIB Substitute Functions Example” sections of the
chapter. You’ll rely on both forms of C library access from time to time. Of the two, the wrapper technique is
the most common, so we discuss it first. The substitute technique is actually better when you can implement it
without loss of functionality.
Using Wrappers
The most common use of a wrapper is when a managed application can’t fully duplicate the inputs required by
a C library routine or when the output from such a routine contains elements the managed application can’t
understand. A common example of this problem is when a data structure contains unions or other elements
that are difficult to recreate in the managed environment. In some cases, it’s possible to create the data
structure but not locate the required call within a DLL. If a function exists only within a C library, then you
must use a wrapper to access it.
It’s important to use a wrapper DLL with care for several reasons. The most important reason is that you’re
adding another layer to the calling mechanism, which increases the probability of error and increases the
complexity of debugging the resulting application. Another good reason to avoid using wrapper DLLs is the
complexity of using multiple languages within the application. Low−level programming with Visual C++
requires a good understanding of both C++ and the Win32 API. Many developers will want to use C# or
Visual Basic as their main programming language—using Visual C++ to create a wrapper DLL might require
more time than a project allows.
A few developers have also complained of language compatibility problems when working with Visual C++.
In many cases, the problem is one of not understanding how the interfaces should work, rather than an actual
flaw in the interface. However, these errors only serve to point out the complexity of the problem—many of
these developers are seasoned programmers who have worked with Visual C++ for several years. We’ll
discuss some of these interoperability problems as the book progresses, especially when we discuss the MMC
C LIB Access
40
snap−in example.
For all of the problems of using the wrapper DLL technique, there are quite a few advantages. The best
advantage is that you’re working with the Win32 API using a language that’s designed to interact with it. All
of the documentation Microsoft provides assumes that you’re going to use Visual C++ for this type of coding.
Another advantage is speed. Performing all Win32 API calls in an unmanaged black box and simply sending
the result to the managed application results in fewer housekeeping tasks such as marshaling data. In addition,
Visual C++ tends to provide an efficient coding environment—one where you can closely monitor the use of
resources and decrease the number of steps required to perform any given task. While you might not always
notice the speed difference in a small application, using a wrapper DLL does include a performance advantage
in most cases.
Using Substitute Functions
It isn’t very often that you can find a substitute for a Win32 API call if that substitute doesn’t appear within
the .NET Framework. However, there are times when it’s possible to duplicate a behavior if you’re willing to
accept a few compromises. For example, there’s a way to add the Windows XP theme appearance to your
application without making special Win32 API calls. However, the substitute technique leaves some vestiges
of older programming techniques in place, such as any owner−drawn icons. The only way to make your
application completely compatible with Windows XP is to use Win32 API calls.
Of course, the biggest problem with the substitute function technique is finding it. A substitute function is
normally a non−obvious way of performing a task. These are the types of techniques that developers share
only with friends. In some cases, you’ll find the techniques on the pages of higher−end magazines that only
expert developers would attempt to read. In short, the substitute function technique is of limited help. Yes,
you should always look for a way to avoid using a wrapper DLL, but it simply isn’t possible to do so in all
situations.
Hidden Functions
Sometimes a function that’s relatively easy to learn about for the Win32 API is hidden within the .NET
Framework. One such example is the GetDC() function, which retrieves the device context for the current
window. This call is used fairly often in the unmanaged world because it represents the only way to draw
something on screen. Visual Studio .NET provides rudimentary graphics in an easy−to−use package that
doesn’t rely on the developer to provide a device context, so knowing how to obtain the device context would
seem superfluous until you need it to make a Win32 API call. Here’s what you need to do to obtain the device
context using managed code.
IntPtr hDC; // A handle for the device context.
Graphics g; // A graphics object.
// Create a graphic object from the form.
g = this.CreateGraphics();
// Obtain the device context from the graphics object.
hDC = g.GetHdc();
As you can see, this technique isn’t nearly as easy as making a simple GetDC() function call from the Win32
API. However, it does avoid some of the performance penalties of making the GetDC() call. The right choice
of technique for your application depends on how you plan to use the device context once you have it. If you
C LIB Access
41
plan to make calls using the Win32 API anyway, it might be just as easy to pass the window handle to the
Win32 API call routine and ask it to grab the device context. However, if you’re planning on staying mainly
in the managed environment, then the technique shown here will work best.
A Direct DLL Access Example
We’ve already viewed a number of direct DLL examples in the book. All of the examples so far are for
function calls that stand alone—they produce some final result on their own. However, there are a number of
useful Win32 API functions that aren’t really stand−alone—they’re an intermediary for some other task. For
example, the SendMessage() function found in User32 .DLL falls into this category. You use SendMessage()
to ask some other part of the system (including other parts of your application) to do something. We’ll cover
this topic in a lot more detail in Chapter 4, so consider the example in this section a taste of things to come.
Note When working with most Win32 API structures and COM interfaces, you need to consider the level of
exposure. All structure and interface elements are public by default. Consequently, attempting to create a
private structure or interface element can have strange side effects—if the code works at all.
Every part of Windows relies on messages. In fact, the message forms the basis of all communication and
your application must know how to both send and receive messages. For the most part, the mechanics of
sending and receiving messages are hidden within various event handlers. The message processing occurs at a
lower level.
The screensaver also relies on messages to perform various tasks. For example, you can create an application
that outputs a message to the screensaver and tells it to start hiding the screen. While the .NET Framework
provides access to the screensaver settings through the Microsoft.Win32.UserPreferenceCategory
enumeration, it doesn’t provide any means for turning the screensaver on or off. The example in this section
shows how to perform that task. You’ll find the source code for this example in the \Chapter
03\C#\ScreenSaver and \Chapter 03\VB\ScreenSaver folders of the CD. Listing 3.1 shows the code you’ll
need.
Listing 3.1: Use SendMessage() to Turn the Screensaver On or Off
// Used to send a message that starts the screen saver.
[DllImport("User32.DLL")]
public static extern int SendMessage(IntPtr hWnd,
UInt32 Msg,
Int32 wParam,
Int32 lParam);
// Two constants we need to activate the screensaver:
// message type and message content.
public const Int32 WM_SYSCOMMAND = 0x112;
public const Int32 SC_SCREENSAVE = 0xF140;
private void btnTest_Click(object sender, System.EventArgs e)
{
// Start the screen saver.
SendMessage(this.Handle, WM_SYSCOMMAND, SC_SCREENSAVE, 0);
}
A Direct DLL Access Example
42
The example code relies on the SendMessage() function to send a system command to the screensaver. As
shown in the call, you need to provide a handle to the current application as part of the input. The
WM_SYSCOMMAND constant is the message—it tells Windows that you’re sending a system command. The
SC_SCREENSAVE constant is the act that you want the system to perform—turn on the screensaver.
Some of you might wonder how the Visual Basic application handles the UInt32 Msg argument. If you’ll
remember from previous discussions that unsigned integers aren’t part of the specification, the requirement to
use a UInt32 in this case could cause problems. Fortunately, you can get around this problem by using the
System.Convert.ToUInt32() method. Here’s the Visual Basic version of the SendMessage() call.
SendMessage(Me.Handle,
Convert.ToUInt32(WM_SYSCOMMAND),
SC_SCREENSAVE,
0)
While this technique does work, it’s still better to use integers whenever possible to eliminate the overhead of
the conversion. The use of the System.Convert.ToUInt32() method depends on whether the purity of the call
or performance requirements takes precedence. In many cases, you’ll find that you can use an integer without
ill effect.
Tip You can avoid a myriad of .NET to unmanaged DLL memory problems by writing the DLL in such a way
that it allocates and frees its own memory whenever possible. In some cases, this means writing a separate
function to free the unmanaged memory. If you can’t avoid allocating memory within the managed client,
make sure you marshal the affected variables properly so that the unmanaged DLL receives a pointer to
the managed memory. Otherwise, the call will fail with odd error messages (when the failure allows you
to access the error message—sometimes it will simply cause Windows to stop application execution).
A C LIB Wrappers Access Example
There are many times when you’ll need to write a wrapper DLL to gain access to a Win32 API call. We’ve
discussed many of the scenarios for using this technique earlier in the chapter, so let’s look at the example.
You’ll run into more than a few situations when you must gain access to one or more types of security
information that the .NET Framework doesn’t provide. For example, you might need to know the security
information for the local user. Unfortunately, the functions required to access those security features reside in
one or more C libraries such as ADVAPI32.LIB. This file is only accessible from within a C application.
The example application shows how to get around this problem. You need to build a separate managed Visual
C++ DLL that handles access to the library in question, then access the DLL function from within your
application. The first step is to create the required projects. Make sure you add a reference to the Visual C++
DLL in your C# or Visual Basic project’s References folder. You’ll also need to add a using statement for the
Visual C++ DLL at the beginning of your C# or Visual Basic application. The example found in the \Chapter
03\ C#\AccessToken and \Chapter 03\VB\AccessToken folders of the source code CD will provide you with
the details of this setup.
Note The examples in this section assume a familiarity with underlying security
concepts such as the use of the Security Access Control List (SACL) and
Discretionary Access Control List (DACL). We’ll discuss issues regarding the
Access Control Entries (ACEs) and you’ll learn how to manage access tokens. If
you aren’t familiar with these topics, make sure you read the security theory
A C LIB Wrappers Access Example
43
sections of the help files starting with “Windows NT Security in Theory and
Practice”
(ms−help://MS.VSCC/MS.MSDNVS/dnwbgen/html/msdn_seccpp.htm). The
help file has a four−part theory section that will tell you everything you need to
understand the examples.
There are a number of ways to create a connection between a C library and your C# application. In some
cases, you can create a one−for−one set of function calls. For example, this works well when you want to call
the console library routines because they don’t exchange pointers—just data. However, the security API calls
are a little more complicated, so you’ll find that you need to perform a little more work to create the interface.
Listing 3.2 shows the Visual C++ DLL code. Remember, this is a managed DLL, so you have access to both
managed and unmanaged functionality—a real plus in this situation. You’ll find the source code for the
wrapper DLL in the \Chapter 03\C#\AccessToken\SecurityAPI of the CD.
Listing 3.2: The Visual C++ DLL Code for User Security Access
// Obtain the size of the data structure for a particular
// token information class.
int GetTokenSize(TOKEN_INFORMATION_CLASS TIC,
IntPtr *ReturnLength)
{
HANDLE TokenHandle = NULL; // Handle to the process token.
DWORD RL = 0; // Return Length.
HRESULT hr = 0; // Operation Result Value.
// Obtain a handle for the current process token.
hr = OpenProcessToken(GetCurrentProcess(),
TOKEN_QUERY,
&TokenHandle);
// Obtain the size of the token for the desired
// token information class.
hr = GetTokenInformation(TokenHandle,
TIC,
NULL,
0,
&RL);
// Return the size of the token information.
*ReturnLength = IntPtr((int)RL);
// Free the token handle.
CloseHandle(TokenHandle);
return hr;
}
// Obtain the date for a particular token information
// class. The calling application must provide a properly
// sized buffer.
int GetTokenData(TOKEN_INFORMATION_CLASS TIC,
IntPtr *TokenData,
IntPtr TokenDataLength,
IntPtr *ReturnLength)
{
HANDLE TokenHandle = NULL; // Handle to the process token.
DWORD RL = 0; // Return Length.
HRESULT hr = 0; // Operation Result Value.
A C LIB Wrappers Access Example
44
VOID* lpTokenData; // Token Data Holder.
// Obtain a handle for the current process token.
hr = OpenProcessToken(GetCurrentProcess(),
TOKEN_QUERY,
&TokenHandle);
// Allocate memory for the return data.
lpTokenData = malloc(TokenDataLength.ToInt32());
// Obtain the size of the token for the desired
// token information class.
hr = GetTokenInformation(TokenHandle,
TIC,
lpTokenData,
(DWORD)TokenDataLength.ToInt32(),
&RL);
// Return the size of the token information.
*ReturnLength = IntPtr((int)RL);
// Return the token data.
*TokenData = IntPtr(lpTokenData);
// Free the data holder.
//free(lpTokenData);
// Free the token handle.
CloseHandle(TokenHandle);
return hr;
}
// Convert the TOKEN_USER structure to a SID string.
int ConvertTokenUserToSidString(IntPtr TokenData,
String **SIDString)
{
HRESULT hr = 0; // Operation Result Value.
TOKEN_USER *TU; // Token user data structure.
LPTSTR SIDValue; // The string version of the SID.
VOID *Temp; // A temporary pointer.
// Convert the IntPtr to a TOKEN_USER structure.
Temp = TokenData.ToPointer();
TU = (TOKEN_USER*)Temp;
// Convert the SID to a string.
hr = ConvertSidToStringSid(TU−>User.Sid, &SIDValue);
// Return the string value of the SID.
*SIDString = new String(SIDValue);
// Free the memory used by SIDValue.
LocalFree(SIDValue);
return hr;
}
// Convert a TOKEN_USER structure to user account information.
int ConvertTokenUserToUserData(IntPtr TokenData,
String **UserName,
A C LIB Wrappers Access Example
45
String **Domain)
{
HRESULT hr = 0; // Operation Result Value.
TOKEN_USER *TU; // Token user data structure.
VOID *Temp; // A temporary pointer.
LPTSTR lpUserName; // The user name value.
LPTSTR lpDomain; // The user’s domain.
SID_NAME_USE SNU; // Use of the SID Name.
// Length of the data return values.
DWORD UserNameLength = 40;
DWORD DomainLength = 40;
// Convert the IntPtr to a TOKEN_USER structure.
Temp = TokenData.ToPointer();
TU = (TOKEN_USER*)Temp;
// Allocate memory for the return values.
lpUserName = (LPTSTR)malloc(40);
lpDomain = (LPTSTR)malloc(40);
// Find the user account information.
hr = LookupAccountSid(NULL,
TU−>User.Sid,
lpUserName,
&UserNameLength,
lpDomain,
&DomainLength,
&SNU);
// Return the user account information.
*UserName = new String(lpUserName);
*Domain = new String(lpDomain);
// Free the local variables.
free(lpUserName);
free(lpDomain);
return hr;
}
// Free unmanaged memory used by the application.
void FreePointer(IntPtr Pointer)
{
free(Pointer.ToPointer());
}
One of the features of this example is that it uses as many generic function calls as possible to reduce the
amount of Visual C++ code required to handle any given task. The GetTokenSize() and GetTokenData() both
fall into this category. You can use them to obtain any of a number of token types. The example concentrates
on the user token—the one that contains security information for the current user, but you can use these two
functions to gain access to any other supported token as well.
The GetTokenSize() function begins by using the OpenProcessToken() function to retrieve the token for the
current process. Every process the user opens contains a copy of the user’s token. However, the system and
other external processes can also open processes, so the only certain way to retrieve a copy of the user’s token
is to look at the current process. Notice that we’ve opened the token for query purposes only and that we
A C LIB Wrappers Access Example
46
obtain a handle to the current process using the GetCurrentProcess() function.
Once the code obtains a token handle, it can retrieve information about the token. The purpose of the
GetTokenSize() function is to tell the caller how much memory to allocate for the token information, not to
actually retrieve the information. The caller must provide one of several TOKEN_INFORMATION_CLASS
enumeration values as input to the GetTokenSize() function. We’ll visit these values later. For now, the
enumeration is used as input to the GetTokenInformation() function, which also requires the token handle and
a variable to return the length. If this were an information retrieval call, the code would also need to supply a
pointer to a buffer to receive the information and the length of that buffer.
Warning Always close all handles and free all allocated memory when working with unmanaged code. Every
call you make to the Win32 API, including the security API, is a call to unmanaged code. Notice the
call to CloseHandle() in the example code. This call frees the token handle before the
GetTokenSize() function returns.
The GetTokenData() function works much like the GetTokenSize(). In this case, the caller must provide a
pointer to a buffer used to store the data. However, you need to consider how the GetTokenInformation()
function works before you proceed. The GetTokenInformation() is general purpose—it returns more than one
type of data depending on the kind of token you request. As a result, it returns a VOID* that the application
must typecast to another kind of information. We’ll see how this works later. The point, for now, is that
GetTokenData() must allocate the memory for the GetTokenInformation() call and that you can’t free this
memory within the function as you would normally (notice the commented free(lpTokenData) call within the
code that shows where you’d normally free the buffer).
The data buffer returned by GetTokenInformation() contains a TOKEN_USER data structure. This data
structure contains a security identifier (SID) that we’ll use to obtain three pieces of information about the user.
The ConvertTokenUserToSidString() function accepts the buffer as input, typecasts it to a TOKEN_USER
data structure, then uses the data structure to make a ConvertSidToStringSid() call. The resulting LPTSTR,
SIDValue, is used to create a String value (SIDString). Notice that the code requires a double pointer (**) to
SIDString to create a reference to it. This is an idiosyncrasy of Visual C++ that you need to consider when
creating wrapper functions such as this one. Also notice that the function uses LocalFree() to free the memory
used by SIDValue. That’s because the memory for SIDValue is actually allocated by the
ConvertSidToStringSid() function. We’ll see later that locally allocated memory is freed using the free()
function.
The final wrapper function, ConvertTokenUserToUserData(), retrieves the user name and domain using the
SID. In this case, the code relies on the LookupAccountSid() function, which requires two locally allocated
buffers. Notice the use of the malloc() function with appropriate typecasting and the use of the free() function
calls to free the memory later.
The example does show one instance where there’s a direct correlation between a Win32 API function and the
wrapper function. The FreePointer() function simply calls the free() function used earlier to free memory
signified by a pointer.
The C# and Visual Basic code required to use all of these wrapper functions is almost mundane compared to
the wrapper code. The code calls the various wrappers to obtain a user token, use it to access the user’s SID,
name, and domain, and then display that information in a message box. Listing 3.3 shows the code to perform
these tasks.
Listing 3.3: Obtaining the User SID, Domain, and Name
A C LIB Wrappers Access Example
47
public enum TOKEN_INFORMATION_CLASS
{
TokenUser = 1,
TokenGroups,
TokenPrivileges,
TokenOwner,
TokenPrimaryGroup,
TokenDefaultDacl,
TokenSource,
TokenType,
TokenImpersonationLevel,
TokenStatistics,
TokenRestrictedSids,
TokenSessionId,
TokenGroupsAndPrivileges,
TokenSessionReference,
TokenSandBoxInert
}
private void btnTest_Click(object sender, System.EventArgs e)
{
int Result;
SecurityWrapper SW = new SecurityWrapper();
IntPtr TokenSize = new IntPtr(0);
IntPtr TokenData = new IntPtr(0);
String SIDString = null;
String UserName = null;
String Domain = null;
// Get the size of the data structure. The return value of
// this call is always 0. The call has actually failed because
// it didn’t retrieve the user information token.
Result = SW.GetTokenSize((int)TOKEN_INFORMATION_CLASS.TokenUser,
ref TokenSize);
// Get the token data. The return value of this call should always
// be 1. The call has succeeded in returning the user token.
Result = SW.GetTokenData((int)TOKEN_INFORMATION_CLASS.TokenUser,
ref TokenData,
TokenSize,
ref TokenSize);
// Obtain the SID String.
Result = SW.ConvertTokenUserToSidString(TokenData, ref SIDString);
// Obtain the user account information.
Result = SW.ConvertTokenUserToUserData(TokenData,
ref UserName,
ref Domain);
// Free the memory used by the token data.
SW.FreePointer(TokenData);
// Display the output.
MessageBox.Show("User Name:\t" + UserName +
"\r\nDomain:\t\t" + Domain +
"\r\nSID:\t\t" + SIDString,
"Local Account Information",
MessageBoxButtons.OK,
MessageBoxIcon.Information);
}
A C LIB Wrappers Access Example
48
The TOKEN_INFORMATION_CLASS enumeration shows the types of data you can request using the
GetTokenSize() and GetTokenData() methods. The example code uses TokenUser. However, you can also
gain access to the process privileges, owner, group association, statistics, and other kind of information. In
short, the technique shown in this section is the tip of a much larger iceberg.
The btnTest_Click() method is straightforward. The GetTokenSize() and GetTokenData() methods work
together to obtain the TokenData pointer—which is a pointer to the TOKEN_USER data structure discussed
earlier. However, as far as C# is concerned, TokenData is simply a pointer to some data. It could point to any
of the data structures used by any of the TOKEN_INFORMATION_CLASS enumeration members. It’s only
during the call to the ConvertTokenUserToSidString() and ConvertTokenUserToUserData() functions that the
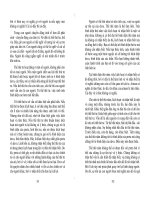
code becomes specific to the TOKEN_USER data structure. Figure 3.1 shows the output of this example.
Warning The code must free the memory the TokenData variable points to before it exits. Otherwise, the
application will leak memory. The Visual C++ DLL contains a special function, FreePointer(), for
this purpose. Any DLL you create should contain a special function that accomplishes this same
task.
Figure 3.1: The output of the example program is simple, but demonstrates token access.
A C LIB Substitute Functions Example
There are times when you can get around using the Win32 API by using a substitute of some type. For
example, many developers will want to add Windows XP programming effects to their application so that
application uses the themes that Windows XP supports. Normally, this would mean writing code that changes
the owner draw functions for the associated application. However, if you’re willing to get most but not all of
the Windows XP look, you can get around using the Win32 API.
Note The technique shown in this section relies on a relatively new Windows feature called
side−by−side DLLs. This new technology enables two versions of the same DLL to exist
on the same machine. That’s how Windows XP keeps an older version of the common
controls DLL and the new 6.0 version on the same machine. You’ll find the side−by−side
files in the \WINDOWS\WinSxS folder of the affected system. In fact, you can use this
information to determine if the client machine supports side−by−side functionality.
Windows uses the default DLL for applications that don’t request special functionality.
In the case of this example, the manifest requests the special functionality found in the
6.0 version of the common controls.
This technique involves making a minor change to the design of your application and creating a special
manifest. The minor change won’t affect application operation under other versions of Windows, yet will
allow you to see the themes supported by Windows XP. The source code for this example appears in the
\Chapter 03\C#\ShowMessage and the \Chapter 03\VB\Show−Message folders of the CD. This is the same
example from Chapter 2 with one difference—the FlatStyle property for all of the controls is set to System,
rather than Flat as usual.
A C LIB Substitute Functions Example
49
Simply changing the FlatStyle property won’t change the appearance of the application. You also need to
create a manifest file that tells Windows XP to use the 6.0 version of the common controls DLL. The
following code shows the XML file you’ll need to create. Note that the important part of this file is the
content of the <dependentAssembly> tag.
<?xml version="1.0" encoding="UTF−8" standalone="yes"?>
<assembly xmlns="urn:schemas−microsoft−com:asm.v1" manifestVersion="1.0">
<assemblyIdentity type="win32"
name="ShowMessage"
version="1.0.0.0"
processorArchitecture="x86"
/>
<dependency>
<dependentAssembly>
<assemblyIdentity type="win32"
name="Microsoft.Windows.Common−Controls"
version="6.0.0.0"
processorArchitecture="X86"
publicKeyToken="6595b64144ccf1df"
language="*"
/>
</dependentAssembly>
</dependency>
</assembly>
The 6.0 version of the common controls DLL includes support for the themes used by Windows XP. If you
don’t include the manifest, then the application will continue using the older version of the common controls
DLL. The interesting part about this solution is that the application will now use the Windows XP themes
when running under Windows XP, but act normally under other versions of Windows. Figure 3.2 shows the
output of the application (on the right) and contrasts it to the normal appearance of the dialog box without
changes (on the left).
Figure 3.2: A simple change makes Windows XP theme support available to your application.
As you can see from the figure, the application on the right now uses the rounded buttons found in Windows
XP applications. You’ll find that all of the other common controls work the same way. In fact, this technique
also works for all other common elements including dialog boxes. The one compromise you’ll need to make
is that Windows XP won’t change the appearance of owner−drawn controls. For example, the icon displayed
in the modified application still reflects its non−Windows XP origin. This is actually a small price to pay for
everything you do get without a single line of additional code. The “Working with Theme Support Example”
section of Chapter 9 shows how to fix this problem.
A C LIB Substitute Functions Example
50
Interpreting Error and Result Values
Sometimes your best efforts can’t keep the user from making a mistake or prevent the system from befouling
perfectly good code. In those situations, you need to trap and report the error so the user has some idea of
what’s going on with the application. That’s why you need to include some type of error reporting in your
application. The actual error reporting process is relatively easy—not as easy as within .NET, but certainly
easier than some developers think. Listing 3.4 shows the code you’ll need to make this example work.
Listing 3.4: Reporting Win32 API Errors Is Relatively Easy Using This Code.
// Declare the LoadLibraryEx() function.
[DllImport("Kernel32.DLL")]
public static extern IntPtr LoadLibraryEx(String lpFileName,
IntPtr hFile,
Int32 dwFlags);
// Tell Windows to load the DLL as a data file.
public const Int32 LOAD_LIBRARY_AS_DATAFILE = 0x00000002;
// Declare the GetLastError() function.
[DllImport("Kernel32.DLL")]
public static extern Int32 GetLastError();
// Declare the FormatMessage() function.
[DllImport("Kernel32.DLL")]
public static extern Int32 FormatMessage(Int32 dwFlags,
IntPtr lpSource,
Int32 dwMessageID,
Int32 dwLanguageID,
out String lpBuffer,
Int32 nSize,
Int32 Arguments);
// Constants used to format the message.
public const Int32 FORMAT_MESSAGE_ALLOCATE_BUFFER = 0x00000100;
public const Int32 FORMAT_MESSAGE_IGNORE_INSERTS = 0x00000200;
public const Int32 FORMAT_MESSAGE_FROM_STRING = 0x00000400;
public const Int32 FORMAT_MESSAGE_FROM_HMODULE = 0x00000800;
public const Int32 FORMAT_MESSAGE_FROM_SYSTEM = 0x00001000;
public const Int32 FORMAT_MESSAGE_ARGUMENT_ARRAY = 0x00002000;
public const Int32 FORMAT_MESSAGE_MAX_WIDTH_MASK = 0x000000FF;
private void btnTest_Click(object sender, System.EventArgs e)
{
IntPtr hLib; // Handle of the library we want to load.
Int32 ErrNum; // Error number.
String ErrStr; // Error message.
// Attempt to load a non−existent library.
hLib = LoadLibraryEx("Nothing.DLL",
IntPtr.Zero,
LOAD_LIBRARY_AS_DATAFILE);
// Determine there is an error.
if (hLib == IntPtr.Zero)
{
Interpreting Error and Result Values
51
// Retrieve the error.
ErrNum = GetLastError();
// Change it into a string.
FormatMessage(FORMAT_MESSAGE_ALLOCATE_BUFFER |
FORMAT_MESSAGE_FROM_SYSTEM |
FORMAT_MESSAGE_IGNORE_INSERTS,
IntPtr.Zero,
ErrNum,
0,
out ErrStr,
0,
0);
// Display the message on screen.
MessageBox.Show("Error Number: " + ErrNum.ToString() +
"\r\n" + ErrStr,
"Library Load Error",
MessageBoxButtons.OK,
MessageBoxIcon.Error);
}
}
I’ve included the LoadLibrary() function in this example because it comes in handy for a number of purposes.
For example, you’ll use the LoadLibrary() function to read icons embedded in existing DLLs such as
Shell32.DLL. However, in this case, we need to create an error condition, so I’ve asked LoadLibrary() to read
a non−existent DLL file. This code will produce a simple error message.
You have to read the Win32 API documentation carefully when checking for error conditions. In this case, a
return value of 0 represents an error. Any other return value is a handle to the library. All that the code needs
to do is verify that hLib contains a 0 in this example. It will, so the code that follows will execute.
Getting an error message is a two−step process. First, you have to retrieve the error number using
GetLastError(). Of course, a number isn’t particularly helpful to the end user, so you need to change the error
number into a string using the FormatMessage() function. The FormatMessage() function is used for a variety
of tasks, so it looks overly complex. However, when you create error message strings, the code shown in
Listing 3.4 is generally all you need to provide. You have to tell FormatMessage() how to format the message
using a number of flags. The arguments have to include the error number, and you need to provide a buffer to
store the error string. Figure 3.3 shows the output from this example.
Figure 3.3: An example of a system error message retrieved using FormatMessage()
Helpful Win32 Programming Tools
Helpful Win32 Programming Tools
52
Visual Studio .NET comes with a variety of tools as part of the package. In many cases, developers will
already know about these tools because they’ll use them to debug and validate existing applications. However,
many of the tools take on special meaning when you develop applications that rely upon the Win32 API.
These tools can help you discover some of the behaviors of the Win32 API and information that might not
appear in the Visual Studio documentation.
We’ll work with several of these tools as the book progresses. However, three tools are exceptionally
important when you begin working with the Win32 API from the managed environment.
Dependency Walker This utility helps you learn about the contents of unmanaged DLLs on your
system—both imports and exports. In addition, it helps you understand the relationship between various
DLLs.
Error Lookup This utility enables you to decipher the error numbers returned by many of the Win32 API
functions. The error numbers usually don’t provide much information, but Error Lookup helps them make
sense.
Spy++ This utility makes it possible to spy on your application—to see what the application is doing while
running. While Spy++ doesn’t provide the detailed information that a debugger would provide, it does help
you see the application from the Windows perspective. This view often helps reduce the complexity of
learning about the Win32 API.
Now that you know a little more about the utilities, let’s look at them in depth. The following sections discuss
each of the three utilities. We’ll pay special attention to how the utilities can make it easier to work with the
Win32 API. Of course, you’ll also learn some general usage tips as the section progresses.
Dependency Walker
The Dependency Walker (also called Depends for the name of the executable file) enables you to view the
dependencies between various DLLs. For example, you might know that User32.DLL contains the
MessageBoxEx() function, but may not realize that User32.DLL also relies on other DLLs to make the
function work. The interdependencies between DLLs are the cause of a number of problems with older,
unmanaged applications, which is why Microsoft is now promoting the .NET Framework. However,
whenever you work with the Win32 API, you also need to know about these dependencies to avoid problems
with your application.
Now that you know how the Dependency Viewer is used normally, it’s helpful to know how you’ll use it for
Win32 API application development. The Dependency Walker also displays a list of inputs and outputs for a
DLL. For example, it shows that the User32.DLL file exports the MessageBoxEx() function. However, the
Dependency Walker shows more—it shows that that there are actually two versions of this function, one for
Unicode character use and a second for plain American National Standards Institute (ANSI) use. When you
work with the C header files, they automatically convert MessageBoxExA() (ANSI) or MessageBoxExW()
(Unicode) to MessageBoxEx() for the desired platform. In some cases, you’ll have to perform this task
manually by specifying an entry point as shown here. (Visual Basic developers will need to perform this task
more often than C# developers.)
[DllImport("user32.dll",
CharSet=CharSet.Auto,
EntryPoint="MessageBoxExA")]
public static extern int MessageBoxEx(
IntPtr hWnd,
[MarshalAs(UnmanagedType.LPTStr)]String Message,
Dependency Walker
53
[MarshalAs(UnmanagedType.LPTStr)]String Header,
UInt32 Type,
UInt16 LanguageID);
Notice that the EntryPoint argument specifies which version of the MessageBoxEx() function to use—the
ANSI version in this case. Note that you can also use a numeric entry point if desired, but the text version is
usually more readable and less susceptible to changes in the DLL’s organization. Unfortunately, Windows
2000 and Windows XP both rely on the Unicode version of the MessageBoxEx() function, so you get some
odd results as shown in Figure 3.4 when using this form of the DllImport attribute.
Figure 3.4: Choosing the wrong entry point for a DLL can have unanticipated results.
Changing the DllImport attribute to [DllImport("user32.dll", CharSet=CharSet.Auto,
EntryPoint="MessageBoxExW")] returns the output to normal. This modification demonstrates that both
Visual Basic and C# will choose an appropriate version of a function if the selection is clear. The only time
you’ll need to specify an EntryPoint value is when the entry point is unclear or if you’re compiling an
application for a platform other than the current platform. For example, you’ll need to use the
MessageBoxExA() entry point when compiling an application for the Windows 9x platform. You’ll also need
to provide a specific entry point if you set the ExactSpelling argument to true (the default is false). Setting
ExactSpelling to true ensures that you access only the function you need for a particular application, rather
than allow .NET to locate something "close" for you.
Tip To obtain help on any of the common Windows API functions listed in the Dependency
Walker, highlight the function in question and press Enter. Dependency Walker will open the
help file currently associated with Visual Studio. Unfortunately, not all of the functions are
documented in the help provided with Visual Studio .NET. To obtain full documentation,
you’ll need a copy of the Platform SDK or MSDN.
Viewing the Dependencies
Dependency Walker (or Depends, as it’s listed on the Microsoft Visual Studio 6.0 Tools menu) helps you
prevent the problem of the missing file. It lists every file that an application, DLL, or other executable file
depends on to execute. You can use the output of this application to create a list of required files for your
application or to discover the inner workings of DLLs. Both of these functions are actually important when
you use the Win32 API in your application, because you now need to consider the problems of providing the
user with the correct version of any DLL that you use.
Loading a file for examination is as easy as using the File Ø Open command to open the executable file that
you want to examine. Figure 3.5 shows an example of the output generated for the User32.DLL file. As you
can see, User32.DLL contains a wealth of functions. Notice that the figure shows the MessageBoxExA()
function highlighted—the Unicode version, MessageBoxExW() function appears directly below this function.
The figure also shows that each function entry includes both a function name and an ordinal number—either
will work as an entry point.
Dependency Walker
54
Note DLLs created with Visual C++ often have what’s termed decoration in the function names. The
decoration makes the function names almost unreadable to the average human. To undecorate the
function names, right−click within the appropriate function−listing pane, and then choose Undecorate
C++ Functions from the context menu.
Figure 3.5: Dependency Walker can help you determine what external files your component needs to operate.
As you can see, this DLL provides you with a lot of information about the dependencies of your file. In the
upper−left corner is a hierarchical view of dependencies, starting with the executable file that you want to
check. The hierarchy shows the files that each preceding file requires to run. So, while the User32.DLL file
itself relies on NTDLL.DLL, KERNEL32.DLL, and GDI32.DLL (along with other files), each of the support
DLLs rely on other DLLs, such as the RPCRT4.DLL used by the ADVAPI32.DLL.
To the right of the hierarchical view are two lists. The upper list tells you the functions the parent executable
imports from the current file. The lower list tells you the functions the highlighted executable exports for other
executables to use. You’ll typically see a blank export list for applications. Most DLLs export functions, but
some don’t import anything. The presentation will vary depending on the type of file you view.
At the bottom, you’ll see an alphabetical list of all of the files along with pertinent information, such as the
executable file’s version number and whether the DLL or other files relies on a debug version of that file. This
list comes in handy when debugging an application. It helps you to check for problems that might occur when
using an older version of the DLL or to detect potential corruption in a support file. You’ll also find it handy
when you want to check that final release build before you release it for public use. Many applications have
tested poorly because they still had “hidden” debug code in them.
Tip It’s interesting to note that Dependency Walker doesn’t include any kind of print functionality.
Fortunately, you can highlight a list of items you want to print, and click Copy (or press Ctrl−C) to copy
them to the clipboard. Use the Paste function in your favorite word processor to create a document you
can print for future reference.
Newer versions of the Dependency Walker (including the version that ships with Visual Studio .NET) have a
final window shown at the bottom of Figure 3.5. This window contains any messages that affect the display of
the opened file. For example, User32.DLL or one of the imported DLLs in the hierarchy relies on a
delay−loaded module (some executable file). The Dependency Walker might not be able to display this
module if the associated executable doesn’t document it properly.
Dependency Walker
55
Special Viewing Considerations for Managed Applications
As far as a managed application is concerned, the world revolves around MSCOREE.DLL—there are no other
DLLs. Even if you import a DLL using the [DllImport] attribute, the application only sees
MSCOREE.DLL—at least at the outset (see the details on using profiling in the "Using Special Dependency
Viewer Features" section). To demonstrate this principle, open the ShowMessage.EXE application from
Chapter 2. Figure 3.6 shows the C# version of this application, but the Visual Basic version behaves in a
similar manner.
Figure 3.6: Managed applications only see the MSCOREE.DLL file and rely on it for everything.
The really odd part of the display is that you won’t see any imported or exported functions for the application.
The managed environment doesn’t expose its requirements for outside sources the same way as the
unmanaged environment does. If you want to see which DLLs a managed application requires to work, you’ll
need to use ILDASM to view the application manifest. Figure 3.7 shows the example from the ShowMessage
application. Notice that the imported function appears as any other function, which means that you might
spend a considerable amount of time looking for imported functions in a complex application.
Figure 3.7: To see the imported functions for a managed application, you must view the application in
ILDASM.
Double−clicking a function is the only way to make sure it’s actually imported from an external DLL. Figure
3.8 shows the code for the MessageBoxEx() function. Notice that this function relies on PInvoke—a sure sign
that the function appears in another DLL. In fact, the code tells you which DLL is used and all of the
implementation details for the function. However, having to dig for this information does make things
inconvenient for the developer.
Dependency Walker
56