.NET Framework Solution In Search of the Lost Win32 API phần 4 pot
Bạn đang xem bản rút gọn của tài liệu. Xem và tải ngay bản đầy đủ của tài liệu tại đây (278.47 KB, 43 trang )
The code for the SetEnvironmentVariable() function is surprisingly simple, which is why it’s a wonder that
Microsoft didn’t add it to the .NET Framework. As you can see, the function requires a key/value pair input.
The first string contains the key, while the second string contains the value. Figure 6.6 shows the output from
this example.
Figure 6.6: Setting environmental strings is easy— just supply a key and a value.
Using Cursors and Fonts
Many people think that they’re stuck with the cursor and font originally presented in the console
window—others simply don’t think too much about the option of changing either item. However, it pays to
know about both cursor and font manipulation for those times when you want to emphasize something on
screen. The GetConsoleCursorInfo() and SetConsoleCursorInfo() functions help you with the console cursor.
The GetConsoleFontSize() function enables you to work with the font. You can specify the index of the
current font or ask for the dimensions of any font supported by the console window. This function can help
you perform tasks like size the console window for a specific font. When you only want to know about the
current font, you can use the GetCurrentConsoleFont() function. You also need to use the
GetCurrentConsoleFont() function to obtain a font index number for the GetConsoleFontSize() function. The
GetCurrentConsoleFont() function can retrieve the current console font or the font for the maximum window
supported by the current window settings and the machine. If you feel that the console needs a bit of color,
you can use the FillConsoleOutputAttribute() or the SetConsoleTextAttribute() functions.
You’ll use the cursor−related functions relatively often because the console offers little in the way of console
control otherwise. The example in Listing 6.1 shows you how to move the cursor around. The example in this
section will show you how to obtain and change the cursor characteristics. Console applications can use these
functions to modify the appearance of the cursor for emphasis, such as when the application goes from insert
to overwrite mode.
Note Unlike a GUI window, you can’t change the size of the font within a console window directly because
the console window has specific limits placed on it. For example, the console window uses a
monospaced font. You can learn more about the criteria for console fonts at
The window size and the number of
rows and columns of text determine the size of the console font. If you want to change the size of the
font, then you need to change one of the associated font factors. For example, retaining the current
number of rows and columns, while increasing the size of the window, will also increase the size of the
font.
Modifying font characteristics also presents an opportunity for emphasizing information. For example, you
can present the text using a different color—red for danger or green for success. If the font is large enough,
you can also add features such as underline (the underline still works with small fonts, but you can’t really see
Using Cursors and Fonts
118
it). Listing 6.7 demonstrates the various font and cursor functions discussed in this section. You can find the
example code in the \Chapter 06\C#\CursorAndFont and \Chapter 06\VB\CursorAndFont folders on the CD.
(The source listing in Listing 6.7 is incomplete—check the source code on the CD for functions and structures
discussed in previous sections of the chapter.)
Listing 6.7: Examples of How to Use the Cursor and Font Functions
// Obtains the current cursor settings.
[DllImport("kernel32.dll", SetLastError=true)]
public static extern bool GetConsoleCursorInfo(
IntPtr hConsoleOutput,
ref CONSOLE_CURSOR_INFO lpConsoleCursorInfo);
// Modifies the cursor settings.
[DllImport("kernel32.dll", SetLastError=true)]
public static extern bool SetConsoleCursorInfo(
IntPtr hConsoleOutput,
ref CONSOLE_CURSOR_INFO lpConsoleCursorInfo);
// The data structure used to get or set the cursor information.
public struct CONSOLE_CURSOR_INFO
{
public UInt32 dwSize; // Percentage of character cell.
public bool bVisible; // Is it visible?
}
// Function for obtaining the current console font. The font
// can represent either the current window size or the maximum
// window size for the machine.
[DllImport("kernel32.dll", SetLastError=true)]
public static extern bool GetCurrentConsoleFont(
IntPtr hConsoleOutput,
bool bMaximumWindow,
ref CONSOLE_FONT_INFO lpConsoleCurrentFont);
// This structure contains the console font information.
public struct CONSOLE_FONT_INFO
{
public UInt32 nFont; // The font number.
public COORD dwFontSize; // The font size.
}
// This function obtains the font size specified by the font
// index (not necessarily the current font).
[DllImport("kernel32.dll", SetLastError=true)]
public static extern COORD GetConsoleFontSize(
IntPtr hConsoleOutput,
UInt32 nFont);
// This function changes the text attributes.
[DllImport("kernel32.dll", SetLastError=true)]
public static extern bool SetConsoleTextAttribute(
IntPtr hConsoleOutput,
CharacterAttributes wAttributes);
// This enumeration lists all of the character attributes. You
// can combine attributes to achieve specific effects.
public enum CharacterAttributes
{
FOREGROUND_BLUE = 0x0001,
Using Cursors and Fonts
119
FOREGROUND_GREEN = 0x0002,
FOREGROUND_RED = 0x0004,
FOREGROUND_INTENSITY = 0x0008,
BACKGROUND_BLUE = 0x0010,
BACKGROUND_GREEN = 0x0020,
BACKGROUND_RED = 0x0040,
BACKGROUND_INTENSITY = 0x0080,
COMMON_LVB_LEADING_BYTE = 0x0100,
COMMON_LVB_TRAILING_BYTE = 0x0200,
COMMON_LVB_GRID_HORIZONTAL = 0x0400,
COMMON_LVB_GRID_LVERTICAL = 0x0800,
COMMON_LVB_GRID_RVERTICAL = 0x1000,
COMMON_LVB_REVERSE_VIDEO = 0x4000,
COMMON_LVB_UNDERSCORE = 0x8000
}
[STAThread]
static void Main(string[] args)
{
IntPtr hOut; // Handle to the output device.
CONSOLE_CURSOR_INFO CCI; // The current cursor information.
CONSOLE_CURSOR_INFO NewCCI; // The new cursor information.
CONSOLE_FONT_INFO CFI; // The console font information.
COORD FontSize; // The size of the requested font.
// Obtain a handle to the console screen.
hOut = GetStdHandle(StdHandleEnum.STD_OUTPUT_HANDLE);
// Get the cursor information.
CCI.bVisible = false;
CCI.dwSize = 0;
GetConsoleCursorInfo(hOut, ref CCI);
// Display the results.
if (CCI.bVisible)
Console.WriteLine("The cursor is displayed at {0}% of the" +
" cell height.", CCI.dwSize);
else
Console.WriteLine("The cursor is invisible.");
// Modify the cursor appearance.
NewCCI.bVisible = true;
NewCCI.dwSize = 100;
if (SetConsoleCursorInfo(hOut, ref NewCCI))
{
Console.WriteLine("\r\nThe new cursor settings are in effect.");
Console.Write("Press any key when ready ");
Console.ReadLine();
// Reset the cursor to its original size.
Console.WriteLine("Returning the cursor to normal.");
SetConsoleCursorInfo(hOut, ref CCI);
}
else
// The call failed, normally due to an out of range value.
Console.WriteLine("The cursor settings couldn’t be changed.");
// Obtain the current font information.
CFI.nFont = 0;
CFI.dwFontSize.X = 0;
CFI.dwFontSize.Y = 0;
Using Cursors and Fonts
120
FontSize.X = 0;
FontSize.Y = 0;
GetCurrentConsoleFont(hOut, false, ref CFI);
FontSize = GetConsoleFontSize(hOut, CFI.nFont);
Console.WriteLine("\r\nThe Current Font Information:");
Console.WriteLine(" Font Number: {0}\r\n FontSize: {1} X {2}",
CFI.nFont,
FontSize.X,
FontSize.Y);
// Display the list of available font sizes.
Console.WriteLine("\r\nThe List of Fonts Includes:");
GetCurrentConsoleFont(hOut, true, ref CFI);
for (UInt32 Counter = 0; Counter <= CFI.nFont; Counter++)
{
FontSize = GetConsoleFontSize(hOut, Counter);
Console.WriteLine(" {0} X {1}", FontSize.X, FontSize.Y);
}
// Display the text using various colors and attributes.
Console.WriteLine("\r\nTesting Character Attributes:");
SetConsoleTextAttribute(hOut, CharacterAttributes.FOREGROUND_BLUE |
CharacterAttributes.FOREGROUND_GREEN |
CharacterAttributes.FOREGROUND_INTENSITY);
Console.WriteLine("This text is in turquoise.");
SetConsoleTextAttribute(hOut, CharacterAttributes.BACKGROUND_BLUE |
CharacterAttributes.BACKGROUND_GREEN |
CharacterAttributes.BACKGROUND_RED);
Console.WriteLine("This text is reverse video.");
SetConsoleTextAttribute(hOut, CharacterAttributes.FOREGROUND_BLUE |
CharacterAttributes.FOREGROUND_GREEN |
CharacterAttributes.FOREGROUND_RED);
// Wait until the user is done viewing the information.
Console.Write("\r\nPress any key when ready ");
Console.Read();
}
As you can see from the source listing, most of the Win32 API functions in this example return a bool value
indicating success. The exception is GetConsoleFontSize(), which returns a COORD value containing the size
of the font. The use of a bool return value makes it easy to perform a quick check of call success.
The code begins by displaying the current cursor information. If the bVisible variable is true, then the cursor is
visible and the code displays the cursor size. Note that dwSize contains the size of the cursor as a percentage
of the character size. The code then uses the SetConsoleCursorInfo() function to change the size of the cursor.
Again, you need to specify the size of the cursor as a percentage of the character size. The example stops at
this point so you can see the new cursor size. When you press Enter, the code returns the cursor to normal.
The font information write−up in the Platform SDK documentation is unclear because it leads you to believe
that the GetCurrentConsoleFont() function returns the font size in the dwFontSize variable of the
CONSOLE_FONT_INFO structure. What you actually receive in the dwFontSize variable is the number of
characters on screen. The default character settings allow for 80 characters across by 25 characters down.
Consequently, you still need to use the GetConsoleFontSize() function to retrieve the actual size of the
characters in pixels.
Using Cursors and Fonts
121
Another problem with the documentation is that it tells you that you can retrieve the font values for the
maximum window size using the GetCurrentConsoleFont(), without defining the term "maximum window
size." As shown by the example, the maximum window size is determined by the current window size as well
as machine limitations. Increase the current window size and the font index returned by this function will
almost certainly increase. In short, the list returned by the code only reflects those fonts available in the
current window, not the fonts available to Windows as a whole. In addition, the returned sizes only apply to
the selected font, which is the raster font set in most cases. Windows also comes with a Lucida font for
console windows, which changes the output from the example quite a bit.
The character attributes work much as you think they might. However, you must provide a complete set of
attributes for every call to SetConsoleTextAttribute(). Any value you don’t supply is automatically reset to
nothing (black when working with colors). Therefore, if you want both foreground and background colors,
you must supply both background and foreground attributes as part of the call. In addition, the attributes that
begin with COMMON_LVB only apply to a double−byte character set (DBCS). If you want to see underlined
text on screen, you need to use a DBCS font. Unfortunately, the standard version of Windows sold in
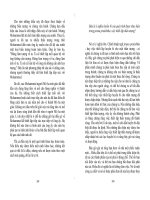
English−speaking countries doesn’t include a DBCS font. Figure 6.7 shows the output from this example.
Figure 6.7: The cursor and font example shows just some of what you can do in a console application.
Determining the Console Window Title
Windows will assign a default title to the console window when you create it—normally the name of the
execution including path information. In some cases, the default title works just fine. However, there are times
when you might want to personalize the window title to reflect the current application. To check the current
title you’ll use the GetConsoleTitle() function—the SetConsoleTitle() function enables you to change the
current title into something more appropriate. Listing 6.8 shows how to use these two functions. You’ll find
the example code in the \Chapter 06\C#\WindowTitle and the \Chapter 06\VB\WindowTitle folders on the
CD.
Listing 6.8: Changing and Restoring the Console Window Title
// This function retrieves the current window title.
[DllImport("kernel32.dll", SetLastError=true)]
public static extern Int32 GetConsoleTitle(StringBuilder lpConsoleTitle,
Int32 nSize);
// This function sets a new window title.
[DllImport("kernel32.dll", SetLastError=true)]
public static extern bool SetConsoleTitle(String lpConsoleTitle);
[STAThread]
static void Main(string[] args)
{
Determining the Console Window Title
122
StringBuilder WindowTitle; // The current window title.
Int32 TitleSize; // The size of the buffer.
// Obtain the current window title.
WindowTitle = new StringBuilder(256);
TitleSize = GetConsoleTitle(WindowTitle, 256);
Console.WriteLine("The Old Window Title Is: \r\n" +
WindowTitle.ToString());
// Create a new console window title.
Console.WriteLine("\r\nSetting a new console window title.");
SetConsoleTitle("A New Window Title");
Console.Write("Press any key to restore the old title ");
Console.ReadLine();
// Restore the old console window title.
SetConsoleTitle(WindowTitle.ToString());
// Wait until the user is done viewing the information.
Console.Write("\r\nPress any key when ready ");
Console.Read();
}
Like other examples of Win32 API functions that modify a string buffer, the GetConsole−Title() function
relies on a StringBuilder variable to hold the returned string value. Of course, you have to allocate the
buffer—something you can do when declaring the variable or as a separate step for clarity. You must also
provide the size of the buffer as part of the call.
The code could have used a StringBuilder variable for the SetConsoleTitle() function as well, but a String
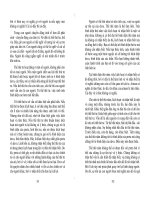
works fine in this case. Changing the title produces the result shown in Figure 6.8. The only inconvenient
aspect of using a string for the SetConsoleTitle() function is that you need to convert the StringBuilder
variable to a string—something that’s easily done.
Figure 6.8: Changing the console window title is easy using the Win32 API functions.
Manipulating the Console Screen Buffer
What precisely is a screen buffer? It’s the area of memory set aside to represent the contents of the screen.
Windows applications don’t write directly to video memory, so they require some area of regular memory in
which to place their data. When Windows updates that actual video memory, it considers the content of the
screen buffer for each application. Consequently, knowing something about the console screen buffer can help
you create a better user environment for your application.
Manipulating the Console Screen Buffer
123
Sometimes you need to move some text around on screen. The easiest way to do this is to use the
ScrollConsoleScreenBuffer() function to move the text. You can move any part of the screen buffer to any
other part of the screen buffer, making this function exceptionally useful when displaying text on screen. Of
course, the movement of text is limited by the clipping rectangle for the window. If part of the text will appear
in an off−screen area as a result of the move, then the function merely clips the text to fit. You need to
validate that any text movement you perform will stay on screen (unless you actually want to clip the text to
fit within certain confines).
An application isn’t limited to one screen buffer, but it must have at least one screen buffer to write any text to
the console. You create a new screen buffer using the CreateConsoleScreenBuffer() function. The interesting
part about creating a new screen buffer is that you can select a level of sharing for the buffer, which means
two processes could potentially work with the same buffer. Use the SetConsoleActiveScreenBuffer() function
to set the screen buffer that Windows uses for display purposes. This function also enables you to draw the
content of the console screen in the background, and then display it in the foreground— creating a type of
animation for the console.
Finally, you can use the SetConsoleScreenBufferSize() function to change the number of rows and columns
displayed by the console. This function is especially handy when the default console window is too small or
large for the task at hand. Listing 6.9 demonstrates some of the functions described in this section. You can
find the source code in the \Chapter 06\C#\ScreenBuffer and \Chapter 06\VB\ScreenBuffer folders on the CD.
(The source listing in Listing 6.9 is incomplete—check the source code on the CD for functions and structures
discussed in previous sections of the chapter.)
Listing 6.9: Methods for Working with the Console Screen Buffer
// This function enables you to move part of the screen buffer
// to another location.
[DllImport("kernel32.dll", SetLastError=true)]
public static extern bool ScrollConsoleScreenBuffer(
IntPtr hConsoleOutput,
ref SMALL_RECT lpScrollRectangle,
ref SMALL_RECT lpClipRectangle,
COORD dwDestinationOrigin,
ref CHAR_INFO lpFill);
// This function enables you to move part of the screen buffer
// to another location.
[DllImport("kernel32.dll", SetLastError=true)]
public static extern bool ScrollConsoleScreenBuffer(
IntPtr hConsoleOutput,
ref SMALL_RECT lpScrollRectangle,
IntPtr NoClipRectangle,
COORD dwDestinationOrigin,
ref CHAR_INFO lpFill);
// This structure defines a rectangular area on the screen
// consisting of an upper left and a lower right corner.
[StructLayout(LayoutKind.Sequential)]
public struct SMALL_RECT
{
public Int16 Left;
public Int16 Top;
public Int16 Right;
public Int16 Bottom;
}
Manipulating the Console Screen Buffer
124
[StructLayout(LayoutKind.Sequential)]
public struct CHAR_INFO
{
public Char Character;
public CharacterAttributes Attributes;
}
[STAThread]
static void Main(string[] args)
{
IntPtr hOut; // Handle to the output device.
SMALL_RECT ScrollRect; // The area to scroll on screen.
COORD Dest; // The scrolled area destination.
CHAR_INFO FillData; // The data to put in the scrolled area.
// Obtain a handle to the console screen.
hOut = GetStdHandle(StdHandleEnum.STD_OUTPUT_HANDLE);
// Display some data on screen.
Console.WriteLine("This is some data to scroll.");
Console.Write("Press any key to scroll ");
Console.ReadLine();
// Initialize the variables.
ScrollRect.Top = 0;
ScrollRect.Left = 0;
ScrollRect.Right = 15;
ScrollRect.Bottom = 5;
Dest.X = 20;
Dest.Y = 10;
FillData.Attributes = CharacterAttributes.FOREGROUND_BLUE |
CharacterAttributes.FOREGROUND_RED |
CharacterAttributes.FOREGROUND_INTENSITY;
FillData.Character = ‘A’;
// Scroll an area of the screen.
if (!ScrollConsoleScreenBuffer(hOut,
ref ScrollRect,
IntPtr.Zero,
Dest,
ref FillData))
Console.WriteLine("Couldn’t scroll the screen buffer.");
// Wait until the user is done viewing the information.
Console.Write("\r\nPress any key when ready ");
Console.Read();
}
This example shows you a couple of new tricks to use when working with Win32 API calls. The first problem
you need to overcome is allowing the clipping rectangle to contain a null value. Unfortunately, neither C# nor
Visual Basic will allow you to assign a null value (Nothing) to a structure, so you need to devise another way
to overcome the problem. There are a number of ways to do this, but the example code shows the most
convenient way. Simply create two declarations of the function. The first contains a place for the clipping
rectangle, while the second doesn’t.
Manipulating the Console Screen Buffer
125
The second problem is one that doesn’t even appear in the code, but could cause a problem if you don’t look
for it in the Platform SDK documentation. The CHAR_INFO structure contains a union as shown in the
following code:
typedef struct_CHAR_INFO {
union {
WCHAR UnicodeChar;
CHAR AsciiChar;
} Char;
WORD Attributes;
} CHAR_INFO, *PCHAR_INFO;
A union is a special class type for C++ that says you must supply one of the data types to fill the structure, but
only one of the data types. The CHAR_INFO structure can accept either an ASCII character or a Unicode
character as its first data member. In this case, we don’t need to worry about the union because the .NET
language takes care of this concern automatically. However, in cases where the language doesn’t resolve the
problem for you, you’ll need to come up with a creative solution. In many cases, the best solution is to create
multiple versions of the data structure—one for each of the types listed in the union.
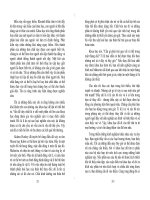
The actual mechanics of the ScrollConsoleScreenBuffer() function are straightforward. The code shows how
to fill out the data structures. The example moves some text that originally appears at the top of the screen to a
location around the middle of the screen as shown in Figure 6.9. The addition of a clipping rectangle makes it
easy to move text within a certain area of the display. Any text that appears outside of the clipping rectangle at
the time of the scroll remains untouched. Any text that would appear outside of the clipping rectangle after the
scroll is clipped.
Figure 6.9: Moving text around on screen is easy when using the ScrollConsoleScreenBuffer() function.
Where Do You Go from Here?
This chapter has shown you some of the things you can do to make your next console application a little easier
to use and more functional. Of course, a console application will never have the same level of user interface
functionality that you’ll find in a GUI application, but the fact remains that most console applications today
are decidedly Spartan. Fortunately, you can still access the Win32 API to fill the holes in coverage left by the
.NET Framework.
One of the things you should do now that you know how to accomplish the tasks presented in this chapter is
look at some of your current applications. Ask yourself whether some of the dialog−based utilities that you
currently provide as part of your application would work better as a console−based application. Remember
that the main reason to use a console−based application is to provide an easy method for administrators to
script the application and to reduce the dependence of the application on the GUI. You’ll also want to spruce
Where Do You Go from Here?
126
up your existing console applications. Make sure the applications provide a reliable and useful appearance.
Even console applications should work well and keep the user’s needs in mind.
It’s important to begin creating toolkits of missing Win32 API functions—essentially DLLs that contain
functions you can call quickly from managed code and know that the function will work immediately without
an understanding of the underlying Win32 API calls. Console applications present a great opportunity for
building such DLLs because the number of functions is limited and working with the console screen is
somewhat easier than working with the GUI. Of course, you’ll want to create toolkits for your GUI
applications too, but now might be a good time to experiment with some of the console functions presented in
this chapter.
Chapter 7 continues the search for ways to plug the holes in the .NET Framework coverage of the Win32 API.
In this next chapter we’ll discuss easy access to hardware—especially lower−level hardware such as the serial
and parallel ports. The chapter concentrates on fairly generic hardware—you won’t find instructions for
creating an interface to specific hardware such as a certain model of camera. It’s also important to note that
this chapter will concentrate on standardized access using existing technology—you won’t learn how to create
a device driver with .NET (something that .NET is ill−equipped to handle in any event).
Where Do You Go from Here?
127
Chapter 7: Accessing the Hardware Directly
Overview
Hardware, the underlying physical element of the computing world, is also the most difficult part of an
application to develop in many cases. It seems as though every piece of hardware has a different interface
from every other piece of hardware. For example, you can find hard drives that use SCSI, IDE, EIDE, USB,
FireWire, and a host of other interfaces—all of which require different programming techniques. In fact,
developing applications that work with all kinds of hardware used to be a major undertaking in the world of
DOS because every vendor had to start from scratch.
Fortunately, you don’t have to worry about touching the hardware directly in Windows—device drivers and
other pieces of software shield the application developer from the strange inner workings of the hardware and
present a reasonably simple interface. However, the .NET developer will find that hardware is the one area
where .NET support is lacking in a big way. Sure, you can access common devices like the hard drive using
objects such as streams, but once you get past the truly common hardware, you’ll find that access becomes
significantly more difficult.
Note Some developers will attempt the impossible with the .NET Framework. While Microsoft might have
some future plans to create a low−level programming environment for the .NET Framework, the basic
goal for the .NET Framework today is application development. In essence, this means you shouldn’t
attempt to write a device driver in .NET; it’s unlikely to work at all. Not only do the files required to run
CLR load well after the device drivers under Windows, but there’s simply no way to create the required
low−level access. The point is that you should use the techniques in this chapter to extend your grasp of
hardware essentials for applications, not attempt to write code that will certainly fail. If you do decide
there’s some low−level code in your future, check out Visual C++, Platform SDK, and the Driver
Development Kit (DDK).
The main purpose of this chapter is to help you overcome some of the major holes in hardware support
currently found in the .NET Framework. We’ll discuss common, but lower−level hardware such as the
parallel and serial ports. You’ll also learn how to access an add−on device—the joystick, in this case, and a
bus, USB for this chapter. These four examples will help you understand the requirements for accessing many
of the pieces of hardware that the .NET Framework doesn’t support. The examples will provide the
information you need to interact with other pieces of hardware on the system. Of course, the one overriding
assumption in this chapter is that you already have a device driver to provide standardized access to the
device; I’m not going into the details of device driver development.
When is Direct Access Required?
It would be easy to say that Microsoft was negligent in leaving out hardware access in the .NET Framework.
However, given the goal of providing basic functionality for business users, Microsoft actually did a great job
with this first version of .NET. The problem is figuring out where .NET falls down on the job so that you can
make a reasonable choice about using the Win32 API to provide the hardware access that your application
needs. Here’s a list of the three questions you should ask yourself.
Can I provide the required access using some other technique? The .NET Framework provides a
lot of hidden functionality that Microsoft markets for one reason, but you can use for another. For
1.
128
example, data streams are an extremely powerful .NET Framework feature and will work fine in
many situations. For example, if you need to send output to the printer, you can use a data stream and
associated printer objects to do it. However, if you need to ascertain that the paper holder is empty,
then a data stream isn’t going to perform the task and you’ll need to rely on direct hardware access in
most cases.
Will a technology such a DirectX solve the problem? DirectX is a powerful technology that
Microsoft supports fully—even more fully than the Win32 API in many cases. You still have to use
the Win32 API to use DirectX (as explained in Part IV of the book), but DirectX provides certain
safeguards and efficiencies you might not find the general Win32 API functions. In addition,
Microsoft may release .NET Framework support for DirectX sooner than it will for older Win32 API
functions. This means that you can develop the application to use DirectX today and will find it easier
to convert to a pure .NET Framework implementation tomorrow. Of course, DirectX is a
multimedia−specific solution—you won’t find it very useful for creating a utility to enumerate the
devices on your USB.
2.
Is there a COM object that can provide the support that I need for my application? Using a
COM object is always easier than trying to create a new library from scratch. Remember that you can
import COM objects into the .NET environment and the Visual Studio IDE will perform all (or at
least most) of the transformation for you. While this approach still means that you’re accessing
unmanaged code, at some point, all of the details of the access are hidden from view. As far as the
application is concerned, the access is transparent. In addition, you’ll save yourself quite a few hours
of work trying to create library routines to perform the direct access. One of the most common
devices that supports COM object is the serial port, but you’ll also find COM libraries suitable for use
with parallel ports, RS−422 port, common scientific equipment, and many types of medical
equipment.
3.
Tip There are a number of places that you should consider looking for ready−made components and hardware
access information. Of course, the best place to look for information on accessing your hardware is the
vendor Web site, but sometimes that’s a lost cause and you need to look elsewhere. There are many good
places to look for components and controls on the Internet. One of the more interesting places is the
HalloGram Publishing site at This
particular page is interesting because they include a lot of control creation tools you might not find
elsewhere. Another interesting place to look is Active−X.COM (ive−x.com/). The only
problem with this site is that you’ll end up getting sidetracked by the sheer volume of controls they have
available. If you don’t find what you want at these two sites, try the 4Developers link page at
http://www.4developers_.com/links/. This site contains a number of links for ActiveX control vendors, as
well as other developer resources. Finally, WinSite has a number of programmer categories on their site at
Many of the components on this site work just fine with .NET
applications. Of course, you’ll need to ensure that any component you download will work with the
hardware you want to use.
Sometimes there’s no way around the direct access question—you must use the Win32 API to accomplish the
task. For example, any application requirement to request status information from the hardware isn’t
supported by the .NET Framework. If you want to know whether the serial port is configured to use 8−bit data
transfers, you’ll need to use a Win32 API function to do it. Likewise, requesting parallel, router, bus, or any
other hardware status information will require a Win32 API (or sometimes a third−party library) call.
Fortunately, this gap in support doesn’t extend to virtual devices, such as the display or desktop, which are
fully accessible using .NET Framework calls.
All esoteric devices will require complete support by the Win32 API or a third−party library. For example, if
you attach a camera to the USB or FireWire port on your computer and want to access it with a custom
application, you’ll need to write code that accesses it using the Win32 API or a third−party library.
Fortunately, you can overcome some of the problems of this approach by placing the routines in a DLL and
Chapter 7: Accessing the Hardware Directly
129
using it as a wrapper. Using this technique means you’ll only have to write a set of generic routines one time
to gain permanent access to the device in question.
Serial Port Access Examples
The serial port represents one of the oldest methods for accessing external peripherals on the PC. It’s
undergone several transformations over the years, but the basic operation of the serial port remains the same.
Even though the serial port is slow relative to faster options present in today’s computers (such as the USB
port), the serial port is still the data transfer method of choice for many peripherals and applications. The only
problem is that the .NET Framework doesn’t provide any direct support for the serial port and there isn’t any
way to determine information such as port status outside of the Win32 API.
Tip It’s possible to use existing COM controls to access the serial port for data transfer.
For example, the Microsoft Communication Control works well for this task.
However, you might run into problems when working with some controls supplied
with Visual Studio 6.0 under .NET. The Microsoft Knowledge Base article at
explains this
problem and how to fix it. If you do decide to use Visual Studio 6.0 controls in your
.NET application, you’ll need to copy the controls from the Visual Studio 6.0 disks
to your hard drive and register them using RegSvr32. These controls are licensed,
so you’ll also need to add the licensing information to the registry. The
README.TXT file located in the \Extras\VB6 Controls folder of Disk 4 of the
Visual Studio .NET Enterprise Edition distribution disks tells how to apply the
required licensing entries. There’s an excellent article on using the Microsoft
Communication Control under .NET (including instructions for creating a null
modem) at />While this technique does work, it doesn’t provide the same level of access as the
Win32 API functions found in this chapter.
The following sections will explore several serial port examples. The main purpose of these examples is to
help you gain full access to the serial port using a combination of the .NET Framework and the Win32 API. I
won’t discuss a full−fledged communication program because that topic is discussed in better detail in other
books. What you’ll walk away with is the tools required to create any type of serial access, not just the access
used of data exchange.
Creating a Serial Stream
For those of us who’ve worked with the Win32 API for a while, the idea of needing to use the Win32 API to
do something as simple as open the serial port might seem a bit strange. In fact, the .NET framework did
provide a means to open the serial port using a FileStream object during the beta. You should be able to use
something as simple as the following code to open the serial port:
FileStream FS = new FileStream("COM1:", FileMode.Open);
Unfortunately, support for this particular call disappeared into the abyss during the beta process, never to
return in the released product. In fact, if you attempt to use this code today, you’ll receive an error message
like the one shown in Figure 7.1. The message is cryptic—what is the CreateFile() function? It doesn’t exist in
the .NET Framework. In fact, this message is Microsoft’s way of telling you that you need to use the Win32
API to perform the desired task—a tacit admission that the .NET Framework is far from complete. This is one
Serial Port Access Examples
130
of many situations when an exception message will tell you which Win32 API function to use. Of course,
most of them have the clarity of the example shown in Figure 7.1 (or worse).
Figure 7.1: Using a FileStream object incorrectly yields error messages.
The fact remains that you need to create a serial stream in order to send or receive data using the serial port.
However, the method for creating this stream is a little more complex than you might have imagined. Listing
7.1 shows the code to send a simple message to the serial port. Of course, this code doesn’t include any status
checking code, which is a requirement when using the serial port to connect with another computer. However,
the listing does show a simple communication with the modem attached to COM3: on the example machine.
You’ll find the source code for this example in the \Chapter 07\C#\Serial1 and \Chapter 07\VB\Serial1 folders
on the CD.
The CreateFile() function has several arguments that could be NULL or set to zero. The example code shows
only one implementation of CreateFile(), but theoretically you’d need three additional overrides for a
complete implementation. A complete set of arguments would include both a template file and a set of
security attributes. You could also create overrides that include just the template file or just the security
attributes. The example doesn’t require any of these overrides and you won’t need them to perform direct
hardware access. Consequently, the example only includes the version of CreateFile() shown in Listing 7.1.
Listing 7.1: Use the Win32 API CreateFile() Function to Open the Serial Port
// Function used to create or open a file or other object including
// ports, consoles, mailslots, pipes, and disk devices. It returns a
// handle you can use to create a file stream. Make sure you always
// use the FileStream object whenever possible because this function
// is more complex.
[DllImport("Kernel32.DLL")]
public static extern IntPtr CreateFile(
String lpFileName,
DesiredAccess dwDesiredAccess,
ShareMode dwShareMode,
IntPtr NoSecurityAttributes,
CreationDisposition dwCreationDisposition,
FlagsAndAttributes dwFlagsAndAttributes,
IntPtr NoTemplateFile);
// This enumeration defines the level of desired access. The
// enumeration contains a special member for querying the
// device without accessing it.
public enum DesiredAccess : uint
{
QueryDeviceOnly = 0,
GENERIC_READ = 0x80000000,
GENERIC_WRITE = 0x40000000,
GENERIC_EXECUTE = 0x20000000,
GENERIC_ALL = 0x10000000,
DELETE = 0x00010000,
READ_CONTROL = 0x00020000,
Serial Port Access Examples
131
WRITE_DAC = 0x00040000,
WRITE_OWNER = 0x00080000,
SYNCHRONIZE = 0x00100000,
STANDARD_RIGHTS_REQUIRED = 0x000F0000,
STANDARD_RIGHTS_READ = READ_CONTROL,
STANDARD_RIGHTS_WRITE = READ_CONTROL,
STANDARD_RIGHTS_EXECUTE = READ_CONTROL,
STANDARD_RIGHTS_ALL = 0x001F0000,
SPECIFIC_RIGHTS_ALL = 0x0000FFFF,
ACCESS_SYSTEM_SECURITY = 0x01000000,
MAXIMUM_ALLOWED = 0x02000000
}
// This enumeration defines the type of sharing to support. It
// includes a special member for no sharing at all.
public enum ShareMode
{
NotShared = 0,
FILE_SHARE_READ = 0x00000001,
FILE_SHARE_WRITE = 0x00000002,
FILE_SHARE_DELETE = 0x00000004
}
// This enumeration defines how the call will treat files or
// other objects that already exist. You must provide one of
// these values as input.
public enum CreationDisposition
{
CREATE_NEW = 1,
CREATE_ALWAYS = 2,
OPEN_EXISTING = 3,
OPEN_ALWAYS = 4,
TRUNCATE_EXISTING = 5
}
// This enumeration defines additional flags and attributes the
// call will use when opening an object. This enumeration contains
// a special value for no flags or attributes.
public enum FlagsAndAttributes : uint
{
None = 0,
FILE_ATTRIBUTE_READONLY = 0x00000001,
FILE_ATTRIBUTE_HIDDEN = 0x00000002,
FILE_ATTRIBUTE_SYSTEM = 0x00000004,
FILE_ATTRIBUTE_ARCHIVE = 0x00000020,
FILE_ATTRIBUTE_NORMAL = 0x00000080,
FILE_ATTRIBUTE_TEMPORARY = 0x00000100,
FILE_ATTRIBUTE_OFFLINE = 0x00001000,
FILE_ATTRIBUTE_NOT_CONTENT_INDEXED = 0x00002000,
FILE_ATTRIBUTE_ENCRYPTED = 0x00004000,
FILE_FLAG_WRITE_THROUGH = 0x80000000,
FILE_FLAG_OVERLAPPED = 0x40000000,
FILE_FLAG_NO_BUFFERING = 0x20000000,
FILE_FLAG_RANDOM_ACCESS = 0x10000000,
FILE_FLAG_SEQUENTIAL_SCAN = 0x08000000,
FILE_FLAG_DELETE_ON_CLOSE = 0x04000000,
FILE_FLAG_BACKUP_SEMANTICS = 0x02000000,
FILE_FLAG_POSIX_SEMANTICS = 0x01000000,
FILE_FLAG_OPEN_REPARSE_POINT = 0x00200000,
FILE_FLAG_OPEN_NO_RECALL = 0x00100000,
SECURITY_ANONYMOUS = 0x00000000,
Serial Port Access Examples
132
SECURITY_IDENTIFICATION = 0x00010000,
SECURITY_IMPERSONATION = 0x00020000,
SECURITY_DELEGATION = 0x00030000,
SECURITY_CONTEXT_TRACKING = 0x00040000,
SECURITY_EFFECTIVE_ONLY = 0x00080000
}
// This constant value helps check for a bad handle.
public const int INVALID_HANDLE_VALUE = −1;
// This function closes most Windows handles, including
// all of the handles returned by the CreateFile() function.
[DllImport("Kernel32.DLL")]
public static extern bool CloseHandle(IntPtr hObject);
// The handle obtained using CreateFile().
IntPtr FileHandle;
// The object used to access the serial port.
FileStream FS;
private void btnTest_Click(object sender, System.EventArgs e)
{
if (btnTest.Text == "Open")
{
// Open the serial port for use.
FileHandle = CreateFile(
cbModemSelect.Text,
DesiredAccess.GENERIC_READ | DesiredAccess.GENERIC_WRITE,
ShareMode.NotShared,
IntPtr.Zero,
CreationDisposition.OPEN_EXISTING,
FlagsAndAttributes.None,
IntPtr.Zero);
// Verify we have a good handle.
if (FileHandle.ToInt32() == INVALID_HANDLE_VALUE)
{
MessageBox.Show("Can’t open the serial port, " +
"make sure it’s installed and not in use.",
"Serial Port Error",
MessageBoxButtons.OK,
MessageBoxIcon.Error);
return;
}
// Open a stream based on the serial port.
FS = new FileStream(FileHandle, FileAccess.ReadWrite);
// Display a success message.
MessageBox.Show("Serial port is open!",
"Serial Port Success",
MessageBoxButtons.OK,
MessageBoxIcon.Information);
// Change the test button caption.
btnTest.Text = "Close";
// Enable the Test Modem button.
btnTestModem.Enabled = true;
}
Serial Port Access Examples
133
else
{
// Close the serial port handle.
if (CloseHandle(FileHandle))
MessageBox.Show("Serial port is closed.",
"Serial Port Success",
MessageBoxButtons.OK,
MessageBoxIcon.Information);
// Change the test button caption.
btnTest.Text = "Open";
// Disable the Test Modem button.
btnTestModem.Enabled = false;
}
}
private void btnTestModem_Click(object sender, System.EventArgs e)
{
byte []Input; // The input byte array.
byte []Output; // The output byte array.
char []Temp; // A temporary character array.
int Counter; // Loop counter.
// Place the input string into the temporary char array.
Temp = txtInput.Text.ToCharArray();
// Size the Input and Output byte arrays.
Input = new byte[txtInput.Text.Length + 2];
Output = new byte[4096];
// Convert the temporary char array to a byte array.
for (Counter = 0; Counter < txtInput.Text.Length; Counter++)
Input[Counter] = Convert.ToByte(Temp[Counter]);
// Add a return to the output.
Input[Counter] = 10;
Input[Counter + 1] = 13;
// Write the data to the file stream.
FS.Write(Input, 0, Input.Length);
// Read the result from the file stream.
FS.Read(Output, 0, Output.Length);
// Convert the byte array to a temporary char array.
Counter = 2;
Temp = new char[4096];
while ((Output[Counter] != 0) && Counter < 4095)
{
Temp[Counter − 2] = Convert.ToChar(Output[Counter]);
Counter++;
}
// Display the result on screen.
txtOutput.Text = new String(Temp);
}
The CreateFile() function is somewhat unforgiving, complicated to use, and prone to providing esoteric
Serial Port Access Examples
134
feedback. The example code reduces the complexity of the CreateFile() function by using as many
enumerations as possible as input. The use of enumerations at least guarantees the input arguments are valid.
However, notice the number of exceptions made for .NET within the enumerations. For example, the
DesiredAccess enumeration contains a special value for querying the device—a value not provided with the
C/C++ headers. If you use enumerations, make sure you also include the special documented values for the
argument.
Some of the enumerations for this example get rather lengthy. Adding to the complexity of using the
CreateFile() function is the fact that not every enumerated value works with every type of object. For
example, you wouldn’t want to use the CreationDisposition.CREATE_NEW value when working with a
device because you can’t create a new device. The CreationDisposition.CREATE_NEW value is normally
used with files. It’s tempting to remove enumerated values that you think you’ll never use, but this could lead
to problems down the road as other developers use your code. The enumerated values you never use might be
the ones the other developer requires for a special purpose.
It’s essential that you rely on a combination of the Platform SDK documentation and the C/C++ header files
when creating your Win32 API calls (as well as some intuition on how the .NET application environment will
react). The C/C++ header files define other FILE_ATTRIBUTE values, in this case, but they’re not safe to
use because they don’t appear within the Platform SDK documentation and there’s no overriding reason to
experiment with them. Even though the C/C++ header contains the following FILE_ATTRIBUTE values, you
won’t find them in the example code.
#define FILE_ATTRIBUTE_DIRECTORY 0x00000010
#define FILE_ATTRIBUTE_DEVICE 0x00000040
#define FILE_ATTRIBUTE_SPARSE_FILE 0x00000200
#define FILE_ATTRIBUTE_REPARSE_POINT 0x00000400
#define FILE_ATTRIBUTE_COMPRESSED 0x00000800
We also have another Visual C++ macro problem in this example. Four of the values are actual macros, not
defines. There are situations when you’ll have to make a choice between precise accuracy and the needs of
your application. Consequently, the four macro values shown in the following code are transformed into
actual values.
#define SECURITY_ANONYMOUS ( SecurityAnonymous << 16 )
#define SECURITY_IDENTIFICATION ( SecurityIdentification << 16 )
#define SECURITY_IMPERSONATION ( SecurityImpersonation << 16 )
#define SECURITY_DELEGATION ( SecurityDelegation << 16 )
This is one case where there’s a minimum potential for problems in converting from a macro value. The other
SECURITY values are included as actual values and the converted forms follow in sequence as you might
expect. However, you need to exercise care in handling macros to ensure you don’t end up with something
that won’t work later—Microsoft has a habit of changing its mind. The btnTest_Click() function is the first
one that the user will access. It either opens or closes the selected serial port based on the current button
caption. Opening a device requires the name of the device and the level of access (read, write, or both).
Generally, you won’t want to share a device with another application, so one of the special enumerations tells
Windows not to allow sharing. Finally, the code must specify CreationDisposition.OPEN_EXISTING
because an application can’t create a new device.
The next step is to check the handle returned by CreateFile(). If the handle is set to
INVALID_HANDLE_VALUE, you can’t use it. You’ll normally receive a bad handle if the serial port
doesn’t exist or another application is using it. Don’t attempt to open a file stream if you receive a bad handle.
Serial Port Access Examples
135
Finally, the code opens the file stream using the handle returned by CreateFile(). Notice that you still have to
specify a FileAccess value. The FileAccess value must match the level of access you requested from
CreateFile() or the application will report strange (and non−reproducible) errors.
Closing the serial port once you’ve finished using it is easy. Simply use the CloseHandle() function. This
Win32 API function works with a number of handle types, including all of the handles that CreateFile() can
return. It’s important to verify that the serial port is actually closed. There are situations when the device
driver is waiting for status or other information and won’t close immediately. If your application shuts down
without closing the port, the user will have to reboot, in most cases, to close it. The example displays a simple
success message, but generally you’ll want to provide some level of error trapping as well in a production
application.
The btnTestModem_Click() method is only active when the serial port is open. The FileStream object only
accepts a byte array as input (or a reasonable facsimile). Unfortunately, the TextBox controls used by the
example only handle strings. They also provide conversions for char arrays, which won’t work with the
FileStream object either. The example shows one of several ways you can convert text to a byte array and
back. The biggest issue, in this case, is to ensure the buffers you use are large enough. Otherwise, the
application might fail due to a buffer overflow. Figure 7.2 shows typical output from this application. You can
use any of the AT commands supported by your modem for testing (although the ATI commands provide
informational output that’s easy to validate).
Figure 7.2: The example _application enables you to check the _status of your modem using AT commands.
Determining the Port Status
The Win32 API provides a wealth of functions that help you determine the current serial port and modem
status. For example, you can use the GetCommConfig() function to determine the modem provider status as
well as obtain device control block (DCB) information about the attached device. Each of the functions uses a
special structure you need to include with the function call. In some cases, you’ll find there are structures
within structures. The COMMCONFIG data structure used with the GetCommConfig() function includes a
DCB structure that’s also used with the GetCommState() function.
This example shows how to obtain the current port status and display the information on screen. You’ll need
this information to determine facts about the serial port in question, such as the availability of a modem (some
Determining the Port Status
136
functions return more information when a modem is attached to the serial port). Listing 7.2 shows the code for
this example. You’ll find the source code for this example in the \Chapter 07\C#\Serial2 and \Chapter
07\VB\Serial2 folders on the CD. Note that this code isn’t complete—I’ve used code from the preceding
example to open and close the port. The complete code appears on the CD.
Listing 7.2: A Common Port Status Function is GetCommState()
// This function returns the current control settings for the
// specified communications device.
[DllImport("Kernel32.DLL")]
public static extern bool GetCommState(IntPtr hFile,
ref DCB dcb);
// This structure contains the control settings.
[StructLayout(LayoutKind.Sequential, Pack=1)]
public struct DCB
{
public Int32 DCBlength;
public Int32 BaudRate;
// This entire section consists of flags. Each flag
// consumes a specific number of bits. The entire
// flag is a UInt32 value.
// public UInt32 fBinary; // 1 bit
// public UInt32 fParity; // 1 bit
// public UInt32 fOutxCtsFlow; // 1 bit
// public UInt32 fOutxDsrFlow; // 1 bit
// public UInt32 fDtrControl; // 2 bits
// public UInt32 fDsrSensitivity; // 1 bit
// public UInt32 fTXContinueOnXoff; // 1 bit
// public UInt32 fOutX; // 1 bit
// public UInt32 fInX; // 1 bit
// public UInt32 fErrorChar; // 1 bit
// public UInt32 fNull; // 1 bit
// public UInt32 fRtsControl; // 2 bits
// public UInt32 fAbortOnError; // 1 bit
// public UInt32 fDummy2; // 17 bits
public UInt32 Flags;
public Int16 wReserved;
public Int16 XonLim;
public Int16 XoffLim;
public Byte ByteSize;
public Byte Parity;
public Byte StopBits;
public Char XonChar;
public Char XoffChar;
public Char ErrorChar;
public Char EofChar;
public Char EvtChar;
public Int16 wReserved1;
}
// This enumeration helps determine the flag
// values returned in the DCB structure.
public enum SeeFlags
{
Binary = 0x0001, // 1 bit
Parity = 0x0002, // 1 bit
OutxCtsFlow = 0x0004, // 1 bit
Determining the Port Status
137
OutxDsrFlow = 0x0008, // 1 bit
DtrControl = 0x0010, // 2 bits
DsrSensitivity = 0x0040, // 1 bit
TXContinueOnXoff = 0x0080, // 1 bit
OutX = 0x0100, // 1 bit
InX = 0x0200, // 1 bit
ErrorChar = 0x0400, // 1 bit
Null = 0x0800, // 1 bit
RtsControl = 0x1000, // 2 bits
AbortOnError = 0x4000, // 1 bit
Dummy2 = 0x8000, // 17 bits
// These special flag values handle the
// two bit flags.
DTR_CONTROL_DISABLE = 0x0000, // 0x00 in C header
DTR_CONTROL_ENABLE = 0x0010, // 0x01 in C header
DTR_CONTROL_HANDSHAKE = 0x0020, // 0x02 in C header
RTS_CONTROL_DISABLE = 0x0000, // 0x00 in C header
RTS_CONTROL_ENABLE = 0x1000, // 0x01 in C header
RTS_CONTROL_HANDSHAKE = 0x2000, // 0x02 in C header
RTS_CONTROL_TOGGLE = 0x3000 // 0x03 in C header
}
// This enumeration determines the parity type.
public enum CommParity
{
NOPARITY = 0,
ODDPARITY = 1,
EVENPARITY = 2,
MARKPARITY = 3,
SPACEPARITY = 4
}
// This enumeration determines the number of stop bits.
public enum CommStopBits
{
ONESTOPBIT = 0,
ONE5STOPBITS = 1,
TWOSTOPBITS = 2
}
private void btnTest_Click(object sender, System.EventArgs e)
{
DCB DevInfo; // The device status information.
StringBuilder SB; // Converted status data.
Int32 SpecChr; // The special character conversion.
// Open the communications port.
if (!CommOpen())
{
MessageBox.Show("Can’t open the serial port, " +
"make sure it’s installed and not in use.",
"Serial Port Error",
MessageBoxButtons.OK,
MessageBoxIcon.Error);
return;
}
// Initialize the DCB.
DevInfo = new DCB();
Determining the Port Status
138
// Get the current control status.
if (!GetCommState(FileHandle, ref DevInfo))
MessageBox.Show("Couldn’t retrieve the device control block.",
"Status Error",
MessageBoxButtons.OK,
MessageBoxIcon.Error);
// Fill the StringBuilder with data.
SB = new StringBuilder();
SB.Append("Baud Rate = " + DevInfo.BaudRate.ToString());
// The single bit flags require special handling.
if ((DevInfo.Flags & (UInt32)SeeFlags.Binary)
== (UInt32)SeeFlags.Binary)
SB.Append("\r\nBinary Transfer Enabled");
if ((DevInfo.Flags & (UInt32)SeeFlags.Parity)
== (UInt32)SeeFlags.Parity)
SB.Append("\r\nParity Checking Enabled");
if ((DevInfo.Flags & (UInt32)SeeFlags.OutxCtsFlow)
== (UInt32)SeeFlags.OutxCtsFlow)
SB.Append("\r\nClear to Send (CTS) Signal is Monitored");
if ((DevInfo.Flags & (UInt32)SeeFlags.OutxDsrFlow)
== (UInt32)SeeFlags.OutxDsrFlow)
SB.Append("\r\nData Set Ready (DSR) Signal is Monitored");
if ((DevInfo.Flags & (UInt32)SeeFlags.DsrSensitivity)
== (UInt32)SeeFlags.DsrSensitivity)
SB.Append("\r\nCommunications Driver DSR Sensitive");
if ((DevInfo.Flags & (UInt32)SeeFlags.TXContinueOnXoff)
== (UInt32)SeeFlags.TXContinueOnXoff)
SB.Append("\r\nData Transfer Continues With Full Input Buffer");
if ((DevInfo.Flags & (UInt32)SeeFlags.OutX)
== (UInt32)SeeFlags.OutX)
SB.Append("\r\nXON/XOFF Enabled During Transmission");
if ((DevInfo.Flags & (UInt32)SeeFlags.InX)
== (UInt32)SeeFlags.InX)
SB.Append("\r\nXON/XOFF Enabled During Reception");
if ((DevInfo.Flags & (UInt32)SeeFlags.ErrorChar)
== (UInt32)SeeFlags.ErrorChar)
SB.Append("\r\nBytes with Errors Replaced with Error Character");
if ((DevInfo.Flags & (UInt32)SeeFlags.Null)
== (UInt32)SeeFlags.Null)
SB.Append("\r\nNULL Bytes Discarded When Received");
if ((DevInfo.Flags & (UInt32)SeeFlags.AbortOnError)
== (UInt32)SeeFlags.AbortOnError)
SB.Append("\r\nRead/Write Operation Aborted After an Error");
// Process the DTR two−bit flag
if ((DevInfo.Flags & (UInt32)SeeFlags.DTR_CONTROL_ENABLE)
== (UInt32)SeeFlags.DTR_CONTROL_ENABLE)
SB.Append("\r\nData Terminal Ready (DTR) Handling Enabled");
else
if ((DevInfo.Flags & (UInt32)SeeFlags.DTR_CONTROL_HANDSHAKE)
== (UInt32)SeeFlags.DTR_CONTROL_HANDSHAKE)
SB.Append("\r\nData Terminal Ready (DTR) Hand Shaking Enabled");
else
SB.Append("\r\nData Terminal Ready (DTR) Handling Disabled");
// Process the RTS two−bit flag.
if ((DevInfo.Flags & (UInt32)SeeFlags.RTS_CONTROL_ENABLE)
== (UInt32)SeeFlags.RTS_CONTROL_ENABLE)
SB.Append("\r\nReady to Send (RTS) Handling Enabled");
Determining the Port Status
139
else
if ((DevInfo.Flags & (UInt32)SeeFlags.RTS_CONTROL_HANDSHAKE)
== (UInt32)SeeFlags.RTS_CONTROL_HANDSHAKE)
SB.Append("\r\nReady to Send (RTS) Hand Shaking Enabled");
else
if ((DevInfo.Flags & (UInt32)SeeFlags.RTS_CONTROL_TOGGLE)
== (UInt32)SeeFlags.RTS_CONTROL_TOGGLE)
SB.Append("\r\nReady to Send (RTS) High When Data Available");
else
SB.Append("\r\nReady to Send (RTS) Handling Disabled");
// Process the remaining data fields.
SB.Append("\r\nXON Character Limit: " +
DevInfo.XonLim.ToString());
SB.Append("\r\nXOFF Character Limit: " +
DevInfo.XoffLim.ToString());
SB.Append("\r\nByte Size: " +
DevInfo.ByteSize.ToString());
// Determine the parity type.
switch (DevInfo.Parity)
{
case (byte)CommParity.EVENPARITY:
SB.Append("\r\nUsing Even Parity");
break;
case (byte)CommParity.MARKPARITY:
SB.Append("\r\nUsing Mark Parity");
break;
case (byte)CommParity.NOPARITY:
SB.Append("\r\nUsing No Parity");
break;
case (byte)CommParity.ODDPARITY:
SB.Append("\r\nUsing Odd Parity");
break;
case (byte)CommParity.SPACEPARITY:
SB.Append("\r\nUsing Space Parity");
break;
default:
SB.Append("\r\nCouldn’t Determine the Parity");
break;
}
// Determine the number of stop bits.
switch (DevInfo.StopBits)
{
case (byte)CommStopBits.ONESTOPBIT:
SB.Append("\r\nUsing 1 Stop Bit");
break;
case (byte)CommStopBits.ONE5STOPBITS:
SB.Append("\r\nUsing 1.5 Stop Bits");
break;
case (byte)CommStopBits.TWOSTOPBITS:
SB.Append("\r\nUsing 2 Stop Bits");
break;
default:
SB.Append("\r\nCouldn’t Determine the Number of Stop Bits");
break;
}
// List the special characters.
SpecChr = Convert.ToInt32(DevInfo.XonChar);
Determining the Port Status
140
SB.Append("\r\nThe XON Character is: " +
SpecChr.ToString());
SpecChr = Convert.ToInt32(DevInfo.XoffChar);
SB.Append("\r\nThe XOFF Character is: " +
SpecChr.ToString());
SpecChr = Convert.ToInt32(DevInfo.ErrorChar);
SB.Append("\r\nThe Error Character is: " +
SpecChr.ToString());
SpecChr = Convert.ToInt32(DevInfo.EofChar);
SB.Append("\r\nThe End of Data Character is: " +
SpecChr.ToString());
SpecChr = Convert.ToInt32(DevInfo.EvtChar);
SB.Append("\r\nThe Event Character is: " +
SpecChr.ToString());
// Display the information on screen.
txtOutput.Text = SB.ToString();
// Close the communications port.
if (!CommClose())
MessageBox.Show("Can’t close the serial port, " +
"make sure it’s not in use.",
"Serial Port Error",
MessageBoxButtons.OK,
MessageBoxIcon.Error);
}
There are some interesting new concepts to learn in this example. For example, the GetCommState() function
declaration is deceptively simple. All you have to supply are two arguments—what could be simpler?
However, the reality is that the complexity of this call is hidden in the DCB structure. Hidden complexity is a
common theme throughout the Win32 API calls. Many of the really interesting functions require construction
of complex data structures that might contain information derived from other calls, which makes the
supposedly simple call quite complicated.
The DCB structure has a feature we haven’t really had to work with in the past—a flag data element. The
commented text shows the various flag values. However, it’s important to note that they appear as DWORD
values in the Platform SDK documentation. Your only clue that these values are all part of a single DWORD
value is the "f" in front of each value. Fortunately, the majority of the flags consume a single bit, which makes
them easier to interpret than multiple−bit flags. All you need to perform is a simple comparison (as we’ll see
later in this example).
Single−bit flags are problematic, but easily handled with special enumerations that you compare to the flag
value individually. The two−bit flag values for RTS and DTR present special problems. If you look in the
C/C++ header files, you’ll notice that these values are defined as shown here.
//
// DTR Control Flow Values.
//
#define DTR_CONTROL_DISABLE 0x00
#define DTR_CONTROL_ENABLE 0x01
#define DTR_CONTROL_HANDSHAKE 0x02
//
// RTS Control Flow Values
//
Determining the Port Status
141
#define RTS_CONTROL_DISABLE 0x00
#define RTS_CONTROL_ENABLE 0x01
#define RTS_CONTROL_HANDSHAKE 0x02
#define RTS_CONTROL_TOGGLE 0x03
The problem with these values is that they assume you have isolated the two−bit values and are looking at
them as individual values. Unfortunately, our flag is a single 32−bit value that contains the values in bit
positions other than the starting bits, so we have to offset the values. That’s where the special two−bit field
values come from in the code. These values represent that DTR and RTS values as they actually appear to C#,
rather than to a Visual C++ application. The SeeFlags enumeration contains the translated values so you can
see how to put them together. Unfortunately, you’ll have to put these flag enumerations together
yourself—the Platform SDK won’t offer any help in this area.
Tip There are times when an enumeration is actually superfluous. For example, the Platform
SDK documentation provides a listing of indexes for the BaudRate field of the DCB
structure. However, the enumerated values are the same as the baud rate. Unless you have
some reason to include the enumeration, using the BaudRate field as returned from the
GetCommConfig() function will work best.
The code begins with a call to CommOpen() and ends with a call to CommClose(). These functions aren’t
special Win32 API calls that I forgot to document—they’re special implementations of the code found in
Listing 7.1. The CommOpen() function opens the serial port selected on the dialog box, while the
CommClose() function closes the serial port. These two functions represent a partial generalization of the
code and you could easily place it within a DLL for use with any application you might create.
In past examples, the code set the individual values of the data structures—a perfectly valid method for
making a Win32 API call. In this example the DevInfo variable is set to a new instance of the DCB structure.
This second method for initializing a structure assumes a default value for each structure member (such as 0
for numeric values). This second method works better in cases where you plan to call a function to obtain
default values because you don’t need to worry about setting each structure member individually.
Tip The code uses a StringBuilder object, SB, to hold the port status information. You’ll find that
this technique uses fewer system resources and gives your application a performance boost.
Many of the DevInfo structure members are easy to display. All you have to do is convert the member to a
string. However, this technique only works for the integer members of the structure, we also have flag, byte,
and char members to consider in this case, so the code uses a variety of techniques for conversion purposes.
As you can see, the single bit flags require a simple comparison. You and the flag bit with the appropriate
SeeFlags enumeration member, and then verify the setting of that bit. A value of 1 indicates a true value in
most cases. The code then adds a new string element to SB that shows the enabled status of the flag.
Checking the status of the two−bit flags requires several comparisons. One of the key techniques is to perform
all of the comparisons that include at least one set bit. This makes the comparison code easier to create. If you
perform all of the comparisons with at least one bit set and none of them match, it’s usually safe to assume
that none of the bits are set and act accordingly.
The DevInfo.Parity and DevInfo.StopBits members are both byte values. As shown in the code, you can use a
simple enumeration combined with a switch structure to determine their value. The only caveat is that you
must translate the enumerated value to a byte value.
Determining the Port Status
142