PHP in Action phần 7 potx
Bạn đang xem bản rút gọn của tài liệu. Xem và tải ngay bản đầy đủ của tài liệu tại đây (680.8 KB, 55 trang )
WHICH TEMPLATE ENGINE?305
the
PHPTAL equivalent would be
<td tal:content="username">Dummy user name</td>
PHPTAL is supremely friendly from a web designer’s point of view. WYSIWYG HTML
editing tools generally ignore unknown attributes, and PHPTAL lets you insert dummy
content that will make the template look like the real web page when viewed in a
WYSI-
WYG
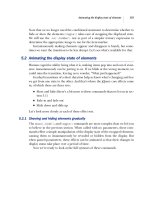
HTML editor—or in a web browser for that matter. Figure 13.4 shows what a
PHPTAL template for the user list looks like when opened as a file in a web browser.
This is possible because of
PHPTAL’s ability to insert example content that disappears
when the real application is run. Let’s look at the
PHPTAL template (see listing 13.5).
<!DOCTYPE html PUBLIC "-//W3C//DTD XHTML 1.0 Transitional//EN"
"
<html xmlns="
c
<head>
<title>
User administration
</title>
</head>
<body>
<div id="content">
<h1>
User administration
</h1>
<table id="AdminList" cellspacing="0">
<tr>
<th>Login name</th>
<th>First Name</th>
<th>Last name</th>
<th>Email address</th>
<th>Role</th>
<th>
</th>
</tr>
<tr tal:repeat="user users">
d
Figure 13.4 PHPTAL template viewed in web browser
Listing 13.5 PHPTAL template for user list
b
306 CHAPTER 13 USING TEMPLATES TO MANAGE WEB PRESENTATION
<td tal:content="user/getUsername">victor</td>
<td tal:content="user/getFirstname">Victor</td>
<td tal:content="user/getLastname">Ploctor</td>
<td tal:content="user/getEmail"></td>
<td tal:content="user/getRole">regular</td>
<td>
<a href="userform.php?id=$user/getID"
f
class="CommandLink">Edit</a>
</td>
</tr>
<tr tal:replace="">
<td>elietta</td>
<td>Elietta</td>
<td>Floon</td>
<td></td>
<td>webmaster</td>
<td>
<a href="userform.php?id=42"
class="CommandLink">Edit</a>
</td>
</tr>
</table>
</div>
</body>
</html>
b The DOCTYPE declaration was generated by HTML Tidy. It expresses the fact that
this is an
XHTML document. PHPTAL will be just as happy if we replace it with a
plain
XML declaration such as <? xml version="1.0">. In fact, PHPTAL seems
to accept the file without the declaration, but it’s better to have a file that can be
checked by an
XML parser.
C The xmlns attribute, generated by Tidy, declares the XHTML namespace to be the
default namespace for this document. That means that all tags and attributes without
an explicit namespace should be interpreted as belonging to the
XHTML namespace.
D The tal:repeat attribute is technically an XML attribute belonging to the TAL
namespace. The namespace is a way of making sure an attribute is distinct from all
other attributes. This makes it possible for us to use another
repeat attribute from
another namespace if we should happen to need it.
What
tal:repeat does in PHPTAL may be obvious: it iterates over the array of
user objects in exactly the same way that
foreach in PHP or Smarty does. The dif-
ference is that because
tal:repeat is an attribute, we don’t need to place a separate
tag for it. Nor do we need an end tag; the
</tr> tag is the end tag for tal:repeat.
E tal:content replaces everything between the tags with the content taken from
our user object. So the user name and other data inside the tags is only dummy or
e
g
WHICH TEMPLATE ENGINE?307
example content that makes the template easier to understand and to view in a
WYSI-
WYG
editor.
No escaping is required, since
PHPTAL does this by default.
F Most of the dynamic content in PHPTAL templates is represented as TAL attributes.
To add content to an attribute, it’s more intuitive to use a different syntax, which is
what you can see here. To insert the user
ID into the href attribute, we represent it
as
$user/getID. Again, the template is as close to the plain HTML representation
as possible.
G Because of the tal:replace attribute, this entire table row is thrown out—
replaced with an empty string—when the template is processed. The first table row in
the template—the one that contains
tal:repeat—generates all the table rows in
the output. The dummy row is only there for the sake of the template: it makes the
template resemble the web page that’s generated when the application is run. We can
add any number of such dummy rows if we want. They will all disappear when the
template is processed.
The difference between
tal:replace and tal:content is the following:
tal:content removes the material between the HTML tags and replaces it with
dynamic content.
tal:replace removes what’s between the tags and the tags
themselves.
When we want to write the
PHP code to process the template, we find that PHP-
TAL
is similar to Smarty and other template engines (see listing 13.6).
<?php
require_once 'HTML/Template/PHPTAL.php';
require_once 'UserFinder.php';
$finder = new UserFinder;
$users = $finder->findAll();
$template = new PHPTAL('userlist.tal');
$template->set("users",$users);
echo $template->execute();
The difference between this and the Smarty example is slight. The methods are
named differently and
PHPTAL has no method for displaying the output directly, so
we just echo the results of template processing.
One of the advantages of
PHPTAL is that the templates are XML and can be pro-
cessed using other
XML-based tools. This is even more applicable to the next item on
our agenda:
XSLT.
Listing 13.6 Processing the PHPTAL template
308 CHAPTER 13 USING TEMPLATES TO MANAGE WEB PRESENTATION
13.3 TRANSFORMATION: XSLT
XSLT stylesheets are another popular way of expressing the HTML tag content of a
web page.
XSLT, the XML stylesheet language, is a way of transforming XML docu-
ments into
HTML documents or into other XML documents. So if we want to use
XSLT as templates in a PHP application, we first generate XML code, transform that
using
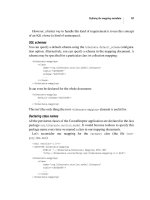
XSLT, and output it to the browser. Figure 13.5 shows how XSLT works when
generating web pages. The stylesheet can be similar to the templates we’ve seen
before, but is officially a recipe for the transformation of the
XML file into HTML.
XSLT is very different from the other template systems. It’s a powerful, non-pro-
cedural programming language. You can do all sorts of advanced things with it. But
it’s not necessarily the answer to all your template prayers. Its main advantage is its sta-
tus as a cross-platform standard. Martin Fowler says:
You can use XSLT to transform XML created from J2EE or .NET, which can
help in putting a common
HTML view on data from different sources.
Another way of putting it would be that a lot of different programming languages and
environments, including
PHP, have tools available for parsing and generating XML.
Therefore,
XML can be used to communicate between these languages and environ-
ments, and
XSLT is a natural tool to use when you already have data in XML format.
Fowler also thinks that
XSLT makes it “easier to keep the transform focused only
on rendering
HTML, thus avoiding having too much logic in the view.” My experience
is exactly the opposite:
XSLT offers such interesting opportunities for implementing
view logic that the temptation may be hard to resist.
Figure 13.5 XSLT works by
transforming an XML data
file using an XSL stylesheet.
TRANSFORMATION: XSLT 309
13.3.1 “XMLizing” a web page
When you want to produce an
XSLT stylesheet from an existing PHP file or from a
sample
HTML file, the first thing to do is to create something that’s valid XML. One
way to do this is the following:
• Replace the
PHP processing instructions (<?php ?>) with something
that an
XML parser will take to be a plain string. For example, you can replace
<? with [ and ?> with ].
•Run
HTML Tidy to generate valid XML (XHTML).
HTML Tidy is a utility program that helps clean up HTML and convert it into
XHTML. It’s available at . There is also a PHP Tidy exten-
sion. But for our current purposes, the command-line utility is fine. A typical way to
run it would be as follows:
tidy -indent -asxml -wrap 150 userlist.xhtml
-indent produces indented output. -asxml specifies that the output should be
XML. -wrap 150 makes Tidy wrap lines at 150 characters rather than the default
68. With very complex web pages, this may be helpful, since they will sometimes be
so deeply indented that there is little room left on the line.
Tidy sometimes only gives warnings. At other times, it reports fatal errors that
require you to change the file manually. For instance, browsers are usually willing to
render a web page even if table markup is incorrectly and inconsistently placed. Tidy
(not to mention
XML parsers) is not so forgiving.
After using Tidy, you can test the result using an
XML parser such as the command
line utility called
xmllint. It’s part of libxml2, the Gnome XML toolkit. The XML
support in PHP 5 is based on libxml2. It’s included in several Linux distributions
and is also available for Windows.
13.3.2 Setting up XSLT
When setting up a
PHP application based on XSLT, we can start by making the trans-
formation work independently of
PHP. To do that, we need
•An
XML test file that is a representative sample of the XML the PHP application
will generate
•The
XSLT stylesheet
•A command-line
XSLT tool
The command-line
XSLT tool for libxml2 is called xsltproc. You can run it as follows:
$ xsltproc userlist.xsl userlist.xml
310 CHAPTER 13 USING TEMPLATES TO MANAGE WEB PRESENTATION
You can generate the XML test file or write it manually. It’s typically a very simple
representation of the data from the database. Listing 13.7 shows how the user list
may be represented.
<?xml version="1.0" ?>
<userlist>
<user>
<username>victor</username>
<firstname>Victor</firstname>
<lastname>Ploctor</lastname>
<email></email>
<role>regular</role>
<id>1</id>
</user>
<! More users on the same format >1
</userlist>
13.3.3 The XSLT stylesheet
If you’re not used to
XSLT, the real challenge is in the XSLT stylesheet itself. The
stylesheet shown in listing 13.8 tries to approximate ordinary
HTML as much as pos-
sible. That means that using
HTML-like constructs is more important than idiomatic
XSLT. The reason for this is the same as with all the other templates: we want a web
designer to find it easy to use.
<xsl:stylesheet version="1.0"
xmlns:xsl="
<xsl:output method="html">
c
<xsl:template match="/">
d
<html xmlns="
e
<head>
<title>
User administration
</title>
</head>
<body>
<div id="content">
<h1>
User administration
</h1>
<table id="AdminList" cellspacing="0">
<tr>
<th>Login name</th>
<th>First Name</th>
<th>Last name</th>
<th>Email address</th>
<th>Role</th>
Listing 13.7 XML file for testing XSLT template processing
Listing 13.8 XSLT stylesheet for the user list
b
TRANSFORMATION: XSLT 311
<th>
</th>
</tr>
<xsl:for-each select="/userlist/user">
f
<tr>
<td><xsl:value-of select="username"/></td>
<td><xsl:value-of select="firstname"/></td>
<td><xsl:value-of select="lastname"/></td>
<td><xsl:value-of select="email"/></td>
<td><xsl:value-of select="role"/></td>
<td>
<a class="CommandLink"
href="{concat('userform.php?id=',id)}">
h
Edit
</a>
</td>
</tr>
</xsl:for-each>
</table>
</div>
</body>
</html>
</xsl:template>
</xsl:stylesheet>
b Yes, you have to insert all this stuff just to get a valid XSL stylesheet. XSL is verbose.
C The output method is html, as we want to generate HTML code.
D xsl:template is where the real XSLT processing starts. The match expression is an
XPath expression capable of matching a node or a set of nodes in the input
XML doc-
ument. The template is processed whenever
XSLT encounters a node that matches. In
this case, the template matches the root node. Since processing starts at the root node,
XSLT will start on this template immediately. And since there are no other templates,
processing this one is all it will do.
E All namespaces have to be declared. This goes for the html namespace as well.
F The xsl:for-each selects all the user elements and tells XSLT to process each one.
From an
XSLT-purist point of view, this is sinful: using xslt:for-each in this
context is not idiomatic in
XSLT. XSLT is a non-procedural programming language,
and
for-each is a procedural mode of expression, foreign to XSLT. The typical way
to do it in
XSLT would be to use a separate template for the repeating section. The rea-
son for using
for-each is not to make it cozy and familiar for PHP programmers.
Instead, the intention is to make a single template that will resemble an
HTML page.
g
312 CHAPTER 13 USING TEMPLATES TO MANAGE WEB PRESENTATION
G xsl:value-of is the XSLT equivalent of echo or print in PHP. Again, the
select expression is an XPath expression. The expression is interpreted relative to
the current node, so while
XSLT is processing one of the user nodes, it outputs the
content of, say, the
username element in that user node.
H The expression that defines the link URL may be an ugly brute, but it’s more HTML-
like than some alternatives. The outer braces mean that what’s inside is an XPath
expression instead of a string. The
concat() function is simple string concatena-
tion. In this case, it concatenates the literal string
userform.php?id= with the
result of the XPath expression
id, which happens to be the user ID.
13.3.4 Running XSLT from PHP
Although the functions needed to run
XSLT from PHP are documented in the PHP
manual, we’ll see them in context using the user list again for a complete example.
First we generate the
XML code and then we transform it (see listing 13.9).
$finder = new UserFinder;
$users = $finder->findAll();
ob_start();
b
?>
<?php echo '<?xml version="1.0" ?>'."\n"; ?>
<userlist>
<?php foreach ($users as $u) : ?>
<user>
<username>
<?php echo htmlentities($u->getUserName()) ?>
</username>
<firstname>
<?php echo htmlentities($u->getFirstName()) ?>
</firstname>
<lastname>
<?php echo htmlentities($u->getLastName()) ?>
</lastname>
<email><?php echo htmlentities($u->getEmail()) ?></email>
<role><?php echo htmlentities($u->getRole()) ?></role>
<id><?php echo htmlentities($u->getID()) ?></id>
</user>
<?php endforeach; ?>
</userlist>
<?php
$xml = ob_get_contents();
ob_end_clean();
print processXslt($xml,'userlist.xsl');
e
function processXslt($xml,$xslfile) {
$dom = new DomDocument;
$dom->loadXML($xml);
Listing 13.9 Generating the user list with XSLT
c
d
f
KEEPING LOGIC OUT OF TEMPLATES 313
$xsldom = new domDocument();
$xsldom->load($xslfile);
$proc = new xsltprocessor;
$proc->importStylesheet($xsldom);
return $proc->transformToXml($dom);
}
b Output buffering is an extremely versatile feature of PHP. Here we’re using it to avoid
having to put quotes around all the
XML code. Instead, we can have an XML section,
similar to the usual
HTML sections. Instead of being output, it’s kept until we ask for it.
C The XML section is basically a simplified version of an HTML section in a PHP file.
All presentation-related elements have been stripped away, and all that’s left is a
data structure.
Again, we are escaping all the data. This is to be processed through
XSLT, and XSLT
will usually ignore HTML tags, so the risk of cross-site scripting attacks is less. It’s more
likely that suspicious content could generate a fatal syntax error, and using
htmlen-
tities()
helps prevent that.
D We get the buffered XML code and turn off output buffering.
E The XSLT processing is packaged into a function that takes XML text and the name of
the stylesheet file as arguments.
F Create a DOM based on the XML document in $xml.
G Create another DOM based on the stylesheet. We read this from a file instead of a
string, since we have the
XML code as a string and the XSLT stylesheet in a file. That’s
natural since the stylesheet is relatively constant, while the
XML code contains data-
base data that may change at any time.
H Instantiate an XSLT processor. Tell the XSLT processor to use the stylesheet repre-
sented by our second
DOM. Then transform the XML using the XSL stylesheet.
We’ve seen how to use template engines based on various principles. Using templates
goes a long way toward achieving separation between
HTML and PHP code. But
there is still the risk that we will start undermining the separation by adding too
much programming logic to the template itself, either by using the template engine’s
built-in programming capabilities (
XSLT has a lot of that), or by sneaking in signifi-
cant amounts of
PHP code (Smarty and PHTAL both have that option). In the next
section, we’ll study some tricks that will help us resist that temptation in particularly
difficult cases.
13.4 KEEPING LOGIC OUT OF TEMPLATES
Most web application pages have a relatively simple structure, such as a form or a sim-
ple list. A loop and perhaps a few simple conditionals will suffice as logic for the
g
h
314 CHAPTER 13 USING TEMPLATES TO MANAGE WEB PRESENTATION
presentation. That’s no big problem in a template, since this minimal logic doesn’t
obscure the
HTML layout of the page much.
But there are a few challenges that are harder to manage without putting more logic
into the templates. Presentation logic is a gray area between domain logic and pure lay-
out and design: logic that only determines how the data is presented on the web page
but is still program logic.
These are the cases in which presentation logic gets more complex. An example that
is often cited is alternating colors for table rows. There is no way (currently) to do this
with
HTML or CSS only. (It should be possible with the nth-child() pseudo-class
in
CSS 3, but browser support for this is practically nonexistent at this writing. It’s also
possible with the JavaScript
DOM.)
Unless the template engine has a special feature that will help us with it, we need
something like an
if test embedded in a loop. That makes the logic in the template
more complex and harder to read and manage.
Template designers can live with looping and simple conditionals. But when you
start to get nested loops and complex conditionals, they find it at best annoying
because it gets in the way of their work. At worst, it’s confusing to designers and opens
the door to the dreaded tangle of
HTML markup and program code.
In this section, we’ll first deal with a general pattern (View Helper) for handling
logic that is part of the Presentation layer but is too complex to fit comfortably in a
template. Then we’ll look at a series of real-life situations that challenge our ability to
keep program logic out of templates and suggest a solution to each of these situations.
13.4.1 View Helper
A common strategy for dealing with this is to put presentation logic in
PHP classes
outside the template (see figure 13.6). We can keep them in separate classes that only
handle the View and do not touch the Domain layer. These classes should not gener-
ate any
HTML code, but they can generate presentation-related information such as
the depth of an item in a hierarchical display or
CSS classes to allow alternating row
colors in a table.
This is often considered a form of the View Helper design pattern. View Helper
is a somewhat vague concept. But in this context, it has a specific responsibility: to
Figure 13.6
Presentation logic can be han-
dled by a specialized view class
KEEPING LOGIC OUT OF TEMPLATES 315
convert or translate the information in domain and data objects into a form that can
be used in a template.
This approach makes it possible to use a very simple template language. In fact, you
could probably make your own with little effort. Simple variable substitution, condi-
tionals, and loops should be sufficient.
13.4.2 Alternating row colors
Alternating colors in the rows of a table is a popular way to make it easier to distinguish
the rows in the browser. You might think this needs to be implemented with program-
ming logic in the template because a designer might need to change it. The colors
might change, or the designer might decide not to have alternating colors after all.
Some template engines have facilities that make this easier. For example, Smarty
has a function called
cycle that lets you alternate automatically between a set of val-
ues. The alternative, which will work with any template engine, is to do the alternation
logic in
PHP before passing the values to the template.
We definitely want to avoid having explicit color names or codes in the
PHP pro-
gram code. We don’t want to have to change a
PHP file for the sake of a styling change.
The way to do it is to generate a table with alternating
CSS classes for the rows. Then
the colors can be defined in
CSS, and the only thing that’s left for PHP is the abstract
alternation logic. The
HTML code would look like this example:
<table>
<tr class="row1"><td>Banana</td></tr>
<tr class="row2"><td>Apple</td></tr>
<tr class="row1"><td>Orange</td></tr>
<tr class="row2"><td>Pineapple</td></tr>
</table>
And the template would have
<tr class="{$fruit.rowcss}"><td>{$fruit.name}</td></tr>
Now all we need is the PHP code to establish the $fruit.rowcss variables.
Assuming that the fruit is in a plain array of associative arrays, we could pre-process it
as follows:
foreach (array_keys($fruits) as $rownumber) {
$fruits[$rownumber]['rowcss'] = 'row'.($rownumber % 2 + 1);
}
The template designer defines the colors for the CSS classes row1 and row2 and is
happy. Making them all the same color can be done by letting the two
CSS classes be
identical. That is duplication, but not of a very harmful kind.
13.4.3 Handling date and time formats
Date and time formats are another challenge when we try to separate the program-
mer’s job from the web designer’s. The choice of format is purely a presentation issue;
316 CHAPTER 13 USING TEMPLATES TO MANAGE WEB PRESENTATION
there is no reason why it should depend on technical considerations. But, as with
alternating colors, it has no native syntax in
HTML and/or CSS. So ideally, we should
provide the web designer with a way to specify the format inside the template. (There
is an exception to this: if we know there is only one date format we ever want to use,
we can just generate it in the
PHP code.)
One way to do this is to use a modifier. Smarty has a built-in variable modifier
called
date_format that allows a designer to specify a date format using strf-
time()
syntax:
{$smarty.now|date_format:"%H:%M:%S"}
But it would be less cryptic and probably more practical if the date format had a
name. A web site will probably be using only a few different date formats that are
used repeatedly on different web pages. So having two or three named date formats
would make them easier to remember and make it possible to change a date format
globally. For example, we might have a standard date and time format, one format for
just the time, and a short format for cramped spaces on the page.
If the template engine has the ability to define custom modifiers, you could use that
to define named date formats. But a solution which is more general—more indepen-
dent of which template engine you’re using—is to give the template a
PHP object which
has a method to generate the appropriate date format. For some reason, objects that rep-
resent date and time have not been common in
PHP, but they’re useful for this kind of
task. Listing 13.10 shows a simplified class resembling the examples in chapter 8.
class DateAndTime {
private $timestamp;
function __construct($timestamp=FALSE) {
$this->timestamp = $timestamp ? $timestamp : time();
b
}
function isoformat() {
return strftime("%Y-%m-%d %H:%M:%S",$this->timestamp);
}
function rfcformat() {
return strftime("%a %e %b %Y %H:%M:%S",$this->timestamp);
}
}
b The DateAndTime object is constructed from a specified timestamp. If no timestamp
is specified, the object represents the current time when it was created.
c The isoformat() and rfcformat() methods return the formatted date and time
as a string.
Listing 13.10 A simplified date and time class
c
KEEPING LOGIC OUT OF TEMPLATES 317
So we could use the object like this:
$now = new DateAndTime;
echo $now->isoformat()."\n";
This is interesting, but the real practical value starts to appear when we use the Date-
AndTime object to replace other ways of representing the date and time.
Listing 13.11 shows a class representing a DiscussionMessage object that contains the
knowledge of when it was created.
class DiscussionMessage {
private $subject;
private $text;
private $created;
function __construct($subject,$text,DateAndTime $created) {
b
$this->subject = $subject;
$this->text = $text;
$this->created = $created;
}
function isotime() { return $this->created->isoformat(); }
function rfctime() { return $this->created->rfcformat(); }
function getSubject() { return $this->subject; }
function getText() { return $this->text; }
function getCreated() { return $this->created; }
}
b To make sure we construct the object correctly, let’s use a type hint to require that the
$created argument is already a DateAndTime object. Using a type hint is particu-
larly appropriate in this case. It’s easy to make a mistake and use an integer time-
stamp, and the mistake won’t become apparent during construction.
C The isotime() and rfctime() methods just call the corresponding methods in
the DateAndTime objects. They are not strictly needed if we have a convenient way
to call a method on the DateAndTime object itself. Since we’re using it in a template,
that depends on the template engine.
The DiscussionMessage class can be used like this in
PHP 5 code:
$message = new DiscussionMessage(
'Re: Templates',
'I love templates, too!',
new DateAndTime
);
echo $message->getCreated()->isoformat()."\n";
Listing 13.11 A DiscussionMessage class that uses the DateAndTime class
c
318 CHAPTER 13 USING TEMPLATES TO MANAGE WEB PRESENTATION
Since a template engine won’t necessarily let us do the equivalent of that last line, it’s
convenient to be able to do this instead:
echo $message->isotime()."\n";
Now, if we happen to have a Smarty object lying around, we can assign the message
object to the Smarty object and display the results using a template:
$smarty->assign('message',$message);
echo $template->fetch($mode.'.tpl');
The template can use the isotime() or rfctime() methods to display the date:
<div id="content">
<h1>
{$message->getSubject()}
</h1>
<p class="ArticleText">
{$message->getText()}
</p>
<p class="ArticleInfo">
{$message->isotime()}
</p>
</div>
So far, we’ve populated the DiscussionMessage object by hard-coding its values. In
practice, of course, we would typically be getting these from a database. We’ll see how
that’s done in part 4 of this book.
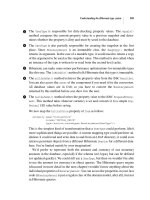
13.4.4 Generating hierarchical displays
Threaded discussion forums—such as the one in figure 13.7—are good examples of
hierarchical data to display on a web page.
An object-oriented tree structure is useful for processing this type of data. But how
can we insert it into a template? The problem is that we don’t know how many levels
of replies we need to handle. So even a very complex (and not very readable) set of
nested loops is inadequate for the task.
Figure 13.7 A threaded discussion view
KEEPING LOGIC OUT OF TEMPLATES 319
Recursion is the normal way to process tree
structures. So one possibility is to give the tem-
plate engine the ability to do recursion. This
will still not be very readable, nor will it be easy
to test. Another way to do it is to simplify the
data structure by first transforming it into a
simple two-dimensional array or an array of
objects. To show the threaded list using
HTML,
we need to insert it into rows and columns any-
way. Figure 13.8 depicts this process. A tree,
identical in structure to the one implied by figure 13.7, is transformed into an array.
By using a separate View-oriented class to do this, we can maintain the separation
between presentation and domain logic while keeping the template from containing
much more than the usual presentation logic. The class in listing 13.12 does the job
of generating this plainer data structure. The most crucial part of the job is done by
the
getList() method, which operates on a discussion node, getting a sequential
list of descendant nodes by recursion.
getList() is what is known as a foreign
method. It does something the node object might have done itself. The reason we don’t
let the node object do it is because we want to keep the presentation logic out of the
discussion node.
Listing 13.12 shows the DiscussionView class. The list it generates is an array of
arrays; so it’s not an object-oriented structure at all, but it’s a structure that’s simple to
use in a template. (You can use a simplified object-oriented structure instead if your
template engine supports this.)
class DiscussionView {
private $discussionID;
function __construct($discussionID) {
b
$this->discussionID = $discussionID;
}
function getDiscussionData() {
$mapper = new DiscussionMapper;
c
$discussion = $mapper->find($this->discussionID);
d
$list = $this->getList($discussion);
e
array_shift($list);
f
return $list;
}
function getList($node,$depth=-1) {
g
++$depth;
h
$array = $this->asArray($node);
i
$array['depth'] = $depth;
j
Figure 13.8 Transforming a
tree structure into an array that
is easier to display
Listing 13.12 The DiscussionView class transforms a hierarchical threaded dis-
cussion into a linear data structure
320 CHAPTER 13 USING TEMPLATES TO MANAGE WEB PRESENTATION
$result[] = $array;
foreach ($node->getChildren() as $child) {
$result = array_merge(
$result,
$this->getList($child,$depth));
}
return $result;
}
function asArray($node) {
return array(
'id' => $node->getID(),
'subject' => $node->getSubject(),
'text' => $node->getText(),
'author' => $node->getAuthor()
);
}
function execute() {
$template = new Template('discussion.html');
$template->set('messages',$this->getDiscussionData());
return $template->execute();
}
}
b The DiscussionView class takes a discussion ID as input and does all the work of get-
ting the data from the database and putting it into a form that is easy to display in a
template. It might be tidier to give it the data instead, so that the View object doesn’t
depend on the database-related code.
C To get the data from the database, we use a Data Mapper called DiscussionMapper.
Although we haven’t introduced Data Mappers yet, to understand this example, you
just need to know that it’s a class that can be used for getting data from the database.
D The mapper’s find() method takes the discussion ID and retrieves the discussion
from the database. The discussion is an object-oriented tree structure composed of
discussion nodes.
E Now we call the method that converts the Composite structure into a simple list in
the form of an array.
F We remove the first element of the list. It’s the root node representing the entire dis-
cussion, and we don’t want that to show up on the web page. We just want the indi-
vidual threads, which are the children of the root node.
G The getList() method returns the contents of the discussion as an array in the
order the posts will be listed on the web page. This is where the recursion happens.
H We have a $depth variable to keep track of the current level in the hierarchy. When
the method is called initially (on the root node),
$depth is set to -1 and then
incremented. So the root node’s depth is 0. Then, when we call the method on the
1)
1!
KEEPING LOGIC OUT OF TEMPLATES 321
children of the root node, we pass
$depth on and it gets incremented to 1. And so it
keeps increasing as we move recursively to deeper levels.
An inelegant but relatively flexible way to use this is to generate separate
CSS classes
for each level (level1, level2, and so on). Assuming a limited number of levels, they can
be separately styled in this manner:
table#AdminList tr.level2 td.threaded { padding-left: 2em; }
table#AdminList tr.level3 td.threaded { padding-left: 4em; }
table#AdminList tr.level4 td.threaded { padding-left: 6em; }
table#AdminList tr.level5 td.threaded { padding-left: 8em; }
I $array is an associative array representing a single node. The asArray() method
converts the node from an object, potentially with children, to a plain associative array.
J $result is the list that will contain this node and all its descendants. We build the
list starting with the current node.
1) Each child generates a list of nodes, and we append the list to the result list.
1! Since a plain array is relatively easy to use with any template engine, generating an
array from an object, as we’re doing here, may be reasonable. However, if we can, it
might be better to use the object directly or via a decorator. An object-oriented data
structure is more flexible and easier to modify.
13.4.5 Preventing updates from the template
If we represent our data as objects, it’s convenient to be able to pass the object to the
template and use methods inside the template to display the data inside it. But what
if this allows a template designer to modify the object and perhaps even store it in the
database? Now we have the same kind of security problem as with template languages
that allow
PHP code, although perhaps to a lesser degree. In principle, a template
should not be allowed to change anything. It should only have access to read-only
data, or to its own copies that are not used anywhere else.
This is a case where the
PHP 5 object model may be a hindrance rather than a help.
In
PHP 4, objects were copied by default, so a template would always get its own copies
of the objects. So even if a template designer were to modify the object, it would not
affect anything outside the processing of the template.
We can solve that problem by explicitly cloning the objects. This can be built into
a template engine by decorating it or extending it with a subclass. (I would normally
prefer a decorator to reduce the dependency on the template engine API, but we’re
using inheritance here to illustrate the possibility.)
class Template extends PHPTAL {
public function set($name,$data) {
if (is_object($data)) $data = clone $data;
parent::set($name,$data);
}
}
322 CHAPTER 13 USING TEMPLATES TO MANAGE WEB PRESENTATION
But there is another, potentially worse problem: The object may have methods that
affect the outside world. In particular, it might have methods to insert, update, or
delete itself in the database. A clone would have the same power to do that as the
original object.
There are several ways we might handle this problem. We might
• Use Data Mappers. Data Mappers are specialized objects that handle database
interaction. So a User object would not be able to insert itself into the database.
Instead, we would have to use a UserMapper. And there would be no way to get
hold of the UserMapper from the template unless it was
PHP-enabled.
• Use a template engine-specific way to restrict access to methods. Smarty allows you
to specify a list of allowed methods in Smarty’s
register_object() method.
• Decorate the object or copy it to a specialized View object containing the same
data but having fewer capabilities.
Security considerations have been mentioned along the way in this chapter, but in the
next section, we’ll summarize and complete them.
13.5 TEMPLATES AND SECURITY
The most important issue is the danger of cross-site scripting (XSS) attacks. (For an
introduction to this and other security-related concepts, see appendix B.) To prevent
this, we need to escape all output. The template engines described in this chapter are
very different in how they escape output. Preferably, we want the template engine to
escape output by default. In other words, output escaping should be the easiest
option for the programmer and/or designer. Template engines support this to differ-
ent degrees and in different ways. In this section, we’ll take a closer look at how it
works in
PHPTAL, Smarty, and XSLT.
13.5.1 PHPTAL
PHPTAL escapes all output variables by default. This is excellent for security. But
using the
structure keyword disables escaping for a variable:
<p tal:content="structure introduction">dummy intro</p>
Obviously, we should be careful when using structure. If the variable contains
data that may come from the user, there is a risk. In addition, you should make sure
output is escaped with the correct character encoding. The encoding should match
the encoding set in the
HTTP header. PHPTAL’s default is UTF-8, which is often a
good choice. However, if you do need to use a different encoding, you can set it with
the constant
PHPTAL_DEFAULT_ENCODING:
define('PHPTAL_DEFAULT_ENCODING', 'ISO-8859-1');
$tpl = new PHPTAL('abc.html');
SUMMARY 323
Although this is probably less relevant, it’s also possible to set the encoding for a sin-
gle template:
$tpl->setEncoding('ISO-8859-2');
13.5.2 Smarty
Smarty has no default output escaping. To escape an output variable properly, you
have to add the escape variable modifier manually:
{$introduction|escape:"htmlall":"UTF-8"}
This clutters the templates, and you're likely to forget to do it. Or rather, you're
likely to use it only when you know the variable is unsafe. But it's more secure to
escape all output.
This can be achieved by using the
$default_modifiers variable:
$template->default_modifiers = array('escape:"htmlall:UTF-8"');
For the exceptional case, when we need to output a variable unescaped, we can use
the nodefaults modifier in the template to get rid of the default modifiers:
{$safe_html|smarty:nodefaults}
Smarty also has a feature to prevent template designers from using PHP code and to
restrict include capabilities. This can be turned on as follows:
$smarty->security = true;
13.5.3 XSLT
In general,
XSLT will not output any tags that are not explicit in the stylesheet. This
means that with most stylesheets, there is no way for tags such as
<script> to be
output as part of the dynamic content.
There is one exception:
xsl:copy-of makes a deep copy of the current node in
the input
XML file, including child nodes.
As mentioned in the comments to listing 13.9, escaping variables from
PHP may
be necessary mainly to avoid
XML syntax errors. The file to be transformed has to be
valid
XML or the XML parser will complain. If it contains arbitrary text, there is a high
risk that the text will contain some characters that will make it invalid.
13.6 SUMMARY
One of the central dogmas of modern web programming is the need to separate
HTML markup from program code. Although many believe this can be done effec-
tively with plain
PHP, others find it more appropriate to use a template engine. All the
template engines meet roughly the same challenges, but they do so in syntactically
different ways. Some, such as Smarty, use a custom syntax exclusively.
XSLT, although
not strictly a template engine, is a specialized programming language that transforms
324 CHAPTER 13 USING TEMPLATES TO MANAGE WEB PRESENTATION
an XML file containing the data to be displayed, adding markup to it. PHPTAL uses
XML attributes to specify dynamic content.
A powerful template engine typically has the ability to execute
PHP code or other
potentially advanced constructs. This makes it all too easy to slip back into an exces-
sively strong mixture of markup and program code. Fortunately, there are additional
techniques for handling the challenges—such as alternating row colors and date and
time formatting—that tend to lead you into that particular swamp.
Templates pose particular challenges to security. To guard against attacks, we need
to make sure we escape all output. This is always possible, though easier with some
template engines than with others.
Web presentation becomes even more demanding when the web page is composed
of many interacting components. In the next chapter, we will look into what is often
called the Composite View pattern. We will see how to gain layout and content flex-
ibility both for the whole web page and its parts and how to integrate existing appli-
cations into a Composite View.
325
CHAPTER 14
Constructing complex
web pages
14.1 Combining templates (Composite View) 325
14.2 Implementing a straightforward composite view 326
14.3 Composite View examples 332
14.4 Summary 337
A complex web page is like a zoo. There may be all sorts of different creatures, all
with different habits and requiring different care, cleaning, and feeding. Some of
them are in cages (typically the stuff that surrounds the main content, such as ban-
ners, ads, menus, and various kinds of sidebars); some of them range freely on the
main expanse of the page.
Keeping all these coordinated is one of the great challenges of web programming.
In addition, different species play together. A menu may need to communicate
with a news list as well as with itself. Making this work properly is actually a challenge
that goes beyond the scope of this chapter, since that challenge involves user interac-
tion. Here, we will focus mostly on the display or View part of the job.
In this chapter, we’ll first introduce and discuss the Composite View pattern. Then
we’ll show how to implement a simple, straightforward composite template using
Smarty or
PHPTAL. Finally, we’ll see how to solve a few more advanced challenges.
14.1 COMBINING TEMPLATES (COMPOSITE VIEW)
Modern web pages are not just complex; they tend to grow increasingly complex. But
we have some tools to help us.
326 CHAPTER 14 CONSTRUCTING COMPLEX WEB PAGES
Assembling a page is not really difficult with PHP include files. You just use one
include file for each part of the page, and one file that includes all of them. Most tem-
plates have include capabilities as well. There is no magic or rocket science involved.
But careful thinking is needed to develop a structured approach that gets you the nec-
essary flexibility and avoids inelegant hacks even when solving problems such as sep-
arate print-friendly views of a page. That’s what we’ll develop in this chapter.
14.1.1 Composite View: one or several design patterns?
The book Core J2EE Patterns (and its companion online pattern catalog) [Alur et al.]
has Composite View listed as a design pattern and demonstrates several different
strategies for implementing it. The Composite View itself is the idea of assembling a
web page from pluggable, reusable components. The solutions to this problem are
presented as different strategies that are actually completely different solutions to the
same problem. This may be confusing if you’re used to design patterns that give a rea-
sonably specific solution to a problem.
That need not trouble us too much, though. The challenge is to achieve the kinds
of flexibility we need for developing complex layouts. In
PHP, this is typically achieved
by using the built-in features of
PHP or template engines.
14.1.2 Composite data and composite templates
The Composite View is one of the harder challenges in web programming. One key
idea that is not widely recognized is this: assembling the template from components
and assembling the data that goes into it (parts of the Model in Model-View-Con-
troller terms) are two separate challenges. You can have a monolithic class that does
the whole job of creating the data for the template even if the template itself is assem-
bled from several pieces. And you can have a complex composite or collection of
PHP
components that assemble and insert the data into a template, even if the template is
a single sheet of
HTML with slots for dynamic information.
The following sections will focus mostly on creating the composite template. We’ll
first see how to do it in a typical, straightforward case.
14.2 IMPLEMENTING A STRAIGHTFORWARD
COMPOSITE VIEW
To design a strategy for assembling web pages, we need to know the requirements.
How much and what flexibility do we need? The solution featured in the J2EE book
[Alur et al.] is based on the idea of pluggable components and pluggable layout, and
uses custom tags to achieve it.
In this section, we’ll first define more specifically what we need to do. Then we’ll
see how it can be implemented with two template engines; first Smarty, then
PHPTAL.
We’ll also look at an additional,
PHPTAL-specific way of doing it.
IMPLEMENTING A STRAIGHTFORWARD COMPOSITE VIEW 327
14.2.1 What we need to achieve
To get an idea of what it takes to implement a Composite View, let’s do a simple exam-
ple in plain
PHP, starting with the simplest-possible implementation. Figure 14.1
shows the kind of layout we want.
We have four different components here: the banner, the menu, the main text, and
the sidebar containing the news list. To implement this in “naive”
PHP, we use plain
include statements:
<html>
<head><! The usual stuff goes here ></head>
<body>
<?php include 'banner.php' ?>
<?php include 'menu.php' ?>
<?php include 'welcome.php' ?>
<?php include 'news.php' ?>
</body>
</html>
So now we’ve assembled the page from a number of components. But they’re not yet
pluggable. We can fix that by replacing one or more of the file names with variables:
<?php include 'banner.php' ?>
<?php include 'menu.php' ?>
<?php include "$content.php" ?>
<?php include "$sidebar.php" ?>
Pretty basic, but we want basic. (As it stands, it's insecure if the variables can contain
data supplied by the user. We are assuming here, and in the following examples, that
they cannot.) We don’t want a sophisticated solution if we can get by with a simpler
one. The point is that this satisfies the first requirement of a Composite View.
The other concern addressed by the Composite View pattern is pluggable layout.
We should be able to replace the overall layout of the page with a different one. Again
staying within plain, blunt
PHP, all we need to do is make a separate file out of the
preceding code and include that from our main script:
Figure 14.1
Composite View-type page
layout with several different
components
328 CHAPTER 14 CONSTRUCTING COMPLEX WEB PAGES
<?php
// Find out which $layout to use
//
include "$layout.php";
Wait a minute, you might say. There’s no layout at all in the layout file! No HTML
tags. Yes—and no. The only layout that’s present is the presence and sequence of the
components. We will assume that the rest is in
CSS. Each of the included files will be
an
HTML <div> element with contents such as this:
<div id="banner">
<img src="hazycrazy2.png" width="519"/>
</div>
Each of these <div>s, and individual elements
within them, can be styled, positioned, even hid-
den, using
CSS. In fact, since CSS can be used
for positioning and hiding, you might even
question whether there is a need for the layout
file at all. With
CSS, you can position <div>s
accurately and (somewhat) freely regardless of
their sequence in the
HTML markup. And you
can hide them using
display:none. But the
hidden elements will still be present in the web page that is downloaded to the
browser. So they will still consume bandwidth, potentially making response times
longer for the user.
Figure 14.2 shows how we’ve named the parts of the page.
14.2.2 Using Smarty
In our Composite View implementation, we want something that satisfies the
requirements and leverages the tools we have available to make the solution as simple,
easy, and maintainable as possible. We can use Smarty to do something similar to
what we did with plain
PHP in the previous section:
<body>
{include file="banner.tpl"}
{include file="menu.tpl"}
{include file="$content"}
{include file="$sidebar"}
</body>
As before, we have the pluggable components sidebar and content, whose names
have to be assigned to the template. The pluggable layout is the main template itself:
$template->assign('content','welcome.tpl');
$template->assign('sidebar','news.tpl');
echo $template->fetch($current.'.tpl');
b
Figure 14.2 Names for the
components of the page from
figure 14.1
IMPLEMENTING A STRAIGHTFORWARD COMPOSITE VIEW 329
b Using $current this way is not as dangerous as using it in a PHP include. Still, if
the variable can be altered by a user, there is a potential for retrieving a file from any-
where in the file system.
There is one more thing we might like to do. We need to handle the title of the
HTML document as well. Frequently, the main content area has a heading, for example:
<div id="content">
<h1>Event calendar</h1>
Typically, the heading should be the same as the document title or at least coordi-
nated with it as figure 14.3 shows.
We could set the title in the
PHP code and output the same variable in two places.
But the title is ideally within the template designer’s jurisdiction. The other simple
alternative would be to use two template files. But there would be a risk that one would
be updated and not the other. Having them both in one file would be better.
What we can do is use Smarty’s
capture feature to define a template section as
a variable that can be used somewhere else. We would define the
title and con-
tent
sections in the same file as follows:
{capture name=title}
<title>Welcome to Hazycrazy.com</title>
{/capture}
{capture name=content}
<div id="content">
<h1>Welcome to Hazycrazy.com</h1>
</div>
{/capture}
Now in our layout template, we can include the file and then use the variables:
{include file="$content"}
<html>
<head>
Figure 14.3 We want the same text for the title and the main heading,
even though they are in separate parts of the page.