Pro Server Controls and AJAX Components phần 2 pptx
Bạn đang xem bản rút gọn của tài liệu. Xem và tải ngay bản đầy đủ của tài liệu tại đây (3.32 MB, 77 trang )
52
CHAPTER 2
■ ENCAPSULATING FUNCTIONALITY IN ASP.NET
Next, add the assembly to a test web application by right-clicking the application, selecting
Add Reference, and browsing to the user control assembly. The next step is to make the server
control available on a web form by registering it:
<%@ Register TagPrefix="apressuc" Namespace="ControlsBook2"
Assembly="App_Web_simpleusercontrol.ascx.5b4d926a.dll" %>
The final step is to add a tag to the .aspx page:
<apressUC:SimpleUserControl ID="SimpleUserControl1" runat="server" />
While it is possible to deploy a user control in a similar manner to a custom server control
as shown in the preceding example, deployment of a user control as an .ascx file is a bit more
straightforward and probably more applicable where user controls are of most interest, which
is for sharing code internal to an organization.
The design-time rendering of user controls and the ability to deploy a user control as an
assembly are welcome ASP.NET improvements; custom server controls provide superior design-
time capabilities, simpler deployment, and finer control over functionality. Naturally, all the
benefits of custom controls do not come for free. Generally, custom controls require a longer
development cycle and a higher skill level from the development staff. The focus of this book is
on custom server control development with the goal of easing the learning curve and developing
some useful server control samples to help you get started.
Building a User Control
So far, we’ve discussed user controls and custom server controls, and their benefits and differ-
ences. User controls and server controls have differing strengths and trade-offs that we highlight in
this section by building two families of controls:
• A static hyperlink menu control
• A dynamically generated HTML table control
The example controls we present may seem simple and somewhat removed from real-world
web projects, but we do this for a reason. We believe that you must start simple and build toward
more complexity to achieve a deep understanding of the process. In upcoming chapters, we
explore controls that leverage the complete functionality available to controls in ASP.NET as
well as provide interesting capabilities.
ASP.NET developers typically look to the user control as the first option for creating controls
due to its ease of construction and simplicity. Building a user control closely mirrors the construc-
tion techniques and technical details of a web form. User controls support drag-and-drop
development with the Visual Studio control toolbox, a fully editable design surface in the IDE,
and a code-behind class file structure to support a separation of UI and logic programming.
User controls are built in two ways:
• From scratch
• By taking out reusable content from an existing web form
The first method is used when enough planning and design work is done ahead of time to
figure out which portions of the UI are going to be reused on the web site. The second technique
Cameron_865-2C02.fm Page 52 Wednesday, February 20, 2008 4:31 PM
Simpo PDF Merge and Split Unregistered Version -
CHAPTER 2 ■ ENCAPSULATING FUNCTIONALITY IN ASP.NET
53
results from refactoring the content of a site after it has been built to make it modular and
easier to maintain.
The MenuUserControl User Control
Our first example takes advantage of the declarative nature of the user control to encapsulate a
simple hyperlink menu as a control that we build from scratch. The control is pure, static HTML
without a single embedded server control. It consists of nothing more than a list of fixed hyper-
links to a variety of web sites.
The simplicity is shown in the tags present in the .ascx file in Listing 2-5. The code-behind
class in Listing 2-6 is left unchanged from the blank template Visual Studio produces when you
add a user control to a web application.
Listing 2-5. The MenuUserControl User Control .ascx File
<%@ Control Language="C#" AutoEventWireup="true"
CodeBehind="MenuUserControl.ascx.cs"
Inherits="ControlsBook2Web.Ch02.MenuUserControl" %>
<div>
<span><a href="">Apress</a></span> | <span>
<a href="">
Microsoft</a></span> | <span><a href="">MSDN</a></span>
| <span><a href="">ASP.NET</a></span>
</div>
Listing 2-6. The MenuUserControl User Control Code-Behind Class File
using System;
namespace ControlsBook2Web.Ch02
{
public partial class MenuUserControl : System.Web.UI.UserControl
{
protected void Page_Load(object sender, EventArgs e)
{
}
}
}
The Control directive at the top of the user control .ascx file shown in Listing 2-5 identifies
it as a user control to the ASP.NET parsing engine. The format is similar to that of the Page
directive in an .aspx page file.
The Control directive helps set up the code-behind system through its CodeFile and Inherits
properties. In ASP.NET 1.1, the attribute name was CodeBehind, but in ASP.NET 2.0 and later,
the attribute is CodeFile. The CodeFile attribute points to the location of the class file, and the
Inherits attribute specifies the class name the .ascx tag page inherits from. The CodeFile attribute
for the @Control (and the @Page) directive in conjunction with the partial class declaration in
Cameron_865-2C02.fm Page 53 Wednesday, February 20, 2008 4:31 PM
Simpo PDF Merge and Split Unregistered Version -
54
CHAPTER 2
■ ENCAPSULATING FUNCTIONALITY IN ASP.NET
the code-behind file is part of the new code-behind model in ASP.NET 2.0 and later. The model
also removes the requirement to have protected declarations of all server controls used on a
web form or user control page in the code behind file, removing what was a fragile relationship
in ASP.NET 1.1 between the .aspx/.ascx page and the code-behind file, as well as generally
making the code-behind files cleaner and shorter.
■Note The partial class model applies only if the CodeFile attribute exists in the @Page or @Control
directive. If the Inherits or src attribute is used without the CodeFile attribute, ASP.NET 2.0 and later
resorts to ASP.NET 1.1 code-behind style and places the class as the sole base class for the .aspx or .ascx
file. If there isn’t a code-behind file, class generation is also similar to ASP.NET 1.1. Features like strongly
typed master page access and previous page access are dependent on the new partial class/code-behind
model in ASP.NET 2.0 and later.
Notice that the inheritance tree in an .ascx file uses the System.Web.UI.UserControl class
instead of the System.Web.UI.Page base class (as in an .aspx file).
Using the MenuUserControl User Control
To actually see the content of the user control, we must host the user control on a web form.
Doing so requires a registration step to give the web form enough information to find the user
control content and bring it into the scope of the page via a tag associated with the user control.
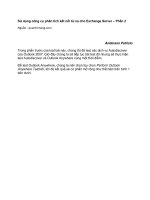
The menu user control demonstration web form accomplishes this task. Figure 2-3 shows the
final output of the web form in the browser.
Figure 2-3. The browser view of the HTML output from the menu user control demonstration
web form
Listing 2-7 shows the source code for the MenuUserControlDemo .aspx file.
Cameron_865-2C02.fm Page 54 Wednesday, February 20, 2008 4:31 PM
Simpo PDF Merge and Split Unregistered Version -
CHAPTER 2 ■ ENCAPSULATING FUNCTIONALITY IN ASP.NET
55
Listing 2-7. The MenuUserControlDemo Web Form .aspx File
<%@ Page Language="C#" MasterPageFile="~/MasterPage/ControlsBook2MasterPage.Master"
AutoEventWireup="true" CodeBehind="MenuUserControlDemo.aspx.cs"
Inherits="ControlsBook2Web.Ch02.MenuUserControlDemo"
Title="Menu User Control Demo" %>
<%@ Register Src="MenuUserControl.ascx" TagName="MenuUserControl"
TagPrefix="apressuc" %>
<asp:Content ID="Content1" ContentPlaceHolderID="ChapterNumAndTitle" runat="server">
<asp:Label ID="ChapterNumberLabel" runat="server"
Width="14px">2</asp:Label> <asp:Label
ID="ChapterTitleLabel" runat="server" Width="360px">
Encapsulating Functionality in ASP.NET</asp:Label>
</asp:Content>
<asp:Content ID="Content2" ContentPlaceHolderID="PrimaryContent" runat="server">
<apressuc:MenuUserControl ID="MenuUserControl1" runat="server" />
</asp:Content>
The Register directive does its part by locating the .ascx file representing the user control
with its src attribute and determining its look on the page with the TagName and TagPrefix
attributes:
<%@ Register Src="MenuUserControl.ascx"
TagName="MenuUserControl" TagPrefix="apressuc" %>
As a common convention in this book, we use apressuc as the tag prefix for our user controls
and apress for custom controls. You are free to choose a prefix to suit your organizational or
company standards. In the example, we use MenuUserControl as the name of the tag and identify
our single instance with the id attribute menu1. The runat="server" attribute is also present to
signify that it is a server control and must be handled appropriately by the ASP.NET parsing system:
<apressuc:MenuUserControl id="menu1" runat="server" />
An interesting thing to note about this example is how the user control displays on the web
form when you view the hosting web form in Design view. It is shown as a gray box that provides
little feedback as to what the final output in the browser will be.
The TableUserControl User Control
Our second user control example raises the degree of difficulty by demonstrating how to use
the dynamic control-building features of ASP.NET inside a user control. Because the UserControl
class itself has an inheritance chain back to the root System.Web.UI.Control class and is a full-
blown control in its own right, we can add controls to its Controls collection at runtime to build
up its content structure. We can also manipulate the child controls on its surface programmatically.
This example has similar functionality to the examples in Chapter 1. Here, the action is
orchestrated according to the properties that the control exposes to the web form at runtime in
its declaration, specifically the X and Y properties. Listing 2-8 shows the source code for the
TableUserControlascx file. Listing 2-9 shows the source code for the TableUserControl code-
behind class file.
Cameron_865-2C02.fm Page 55 Wednesday, February 20, 2008 4:31 PM
Simpo PDF Merge and Split Unregistered Version -
56
CHAPTER 2
■ ENCAPSULATING FUNCTIONALITY IN ASP.NET
Listing 2-8. The TableUserControl User Control .ascx File
<%@ Control Language="C#" AutoEventWireup="true" CodeBehind=
"TableUserControl.ascx.cs"
Inherits="ControlsBook2Web.Ch02.TableUserControl" %>
<h3>
TableUserControl<br />
X:<asp:Label ID="XLabel" runat="server"></asp:Label>
Y:<asp:Label ID="YLabel" runat="server"></asp:Label>
</h3>
<table id="Table1" border="1" runat="server">
</table>
Listing 2-9. The TableUserControl User Control Code-Behind Class File
using System;
using System.Web.UI.HtmlControls;
namespace ControlsBook2Web.Ch02
{
public partial class TableUserControl : System.Web.UI.UserControl
{
protected void Page_Load(object sender, EventArgs e)
{
XLabel.Text = X.ToString();
YLabel.Text = Y.ToString();
BuildTable(X, Y);
}
// properties to access dimensions of HTML table
public int X {get; set;}
public int Y {get; set;}
// HTML table building routine
private void BuildTable(int xDim, int yDim)
{
HtmlTableRow row;
HtmlTableCell cell;
HtmlGenericControl content;
for (int y = 0; y < yDim; y++)
{
// create <TR>
row = new HtmlTableRow();
Cameron_865-2C02.fm Page 56 Wednesday, February 20, 2008 4:31 PM
Simpo PDF Merge and Split Unregistered Version -
CHAPTER 2 ■ ENCAPSULATING FUNCTIONALITY IN ASP.NET
57
for (int x = 0; x < xDim; x++)
{
// create <TD cellspacing=1>
cell = new HtmlTableCell();
cell.Attributes.Add("border", "1");
// create a <SPAN>
content = new HtmlGenericControl("SPAN");
content.InnerHtml = "X:" + x.ToString() +
"Y:" + y.ToString();
cell.Controls.Add(content);
row.Cells.Add(cell);
}
Table1.Rows.Add(row);
}
}
}
}
In this example, the .ascx page is a mix of HTML content and server controls. The two
Label controls come from the System.Web.UI.WebControls namespace. The labels display the X
and Y properties’ configuration of the user control:
X:<asp:label id="XLabel" Runat="server"></asp:label>;
Y:<asp:label id="YLabel" Runat="server"></asp:label>
The HtmlTable control comes from the System.Web.UI.HtmlControls namespace and is
declared as a table with a border size of 1 on the .ascx page.
The table control in the HtmlControl namespace was chosen over the table in the WebControl
namespace, because it does not automatically add styling information to the final output. This
is desirable at this point in the book; we defer the control styling discussion until Chapter 4.
The code-behind class file of the user control is much more interesting in this example,
because it contains the content-building code. The X and Y properties exposed by the user control
map to private variables in a demonstration of data encapsulation. These properties are exposed to
the containing web forms in their .aspx page file via attributes on the user control tag or program-
matically in the code-behind class file via a variable reference to an instance of the user control.
We could have exposed public methods, fields, and events from the user control as well.
The Page_Load() method that is mapped to the web form’s Page.Load event is responsible
for transferring the data from the dimension properties to build the table hierarchy via the
BuildTable() routine. It also configures the display of the Label controls on the user control to
indicate what data was passed in to build the table. We pass on examining the BuildTable()
routine in more detail here, because it is very similar to the HTML table building routine from
Chapter 1.
Using the TableUserControl User Control
Like the menu demonstration, the table user control demonstration web form hosts the user
control in order for us to realize its output. The table user control demonstration web form sets
Cameron_865-2C02.fm Page 57 Wednesday, February 20, 2008 4:31 PM
Simpo PDF Merge and Split Unregistered Version -
58
CHAPTER 2
■ ENCAPSULATING FUNCTIONALITY IN ASP.NET
the X and Y properties of the TableUserControl control in both the .aspx tag page and the code-
behind class file. This demonstrates how you can work with the user control in a declarative
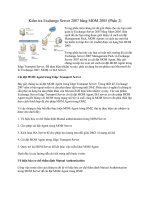
and a programmatic fashion on a web form. Figure 2-4 shows the table user control demon-
stration web form at design time, and Figure 2-5 shows our web form at runtime.
Figure 2-4. The Visual Studio Design view of the table user control demonstration web form
Figure 2-5. The browser view of the HTML output from the table user control demonstration
web form
Cameron_865-2C02.fm Page 58 Wednesday, February 20, 2008 4:31 PM
Simpo PDF Merge and Split Unregistered Version -
CHAPTER 2 ■ ENCAPSULATING FUNCTIONALITY IN ASP.NET
59
Listings 2-10 and 2-11 show TableUserControlDemo’s .aspx page file and its code-behind
class file, respectively.
Listing 2-10. The TableUserControlDemo Web Form .aspx File
<%@ Page Language="C#" MasterPageFile="~/MasterPage/ControlsBook2MasterPage.Master"
AutoEventWireup="true" CodeBehind="TableUserControlDemo.aspx.cs"
Inherits="ControlsBook2Web.Ch02.TableUserControlDemo"
Title="Table User Control Demo" %>
<%@ Register Src="TableUserControl.ascx" TagName="TableUserControl"
TagPrefix="apressuc" %>
<asp:Content ID="Content1" ContentPlaceHolderID="ChapterNumAndTitle" runat="server">
<asp:Label ID="ChapterNumberLabel" runat="server"
Width="14px">2</asp:Label> <asp:Label
ID="ChapterTitleLabel" runat="server" Width="360px">
Encapsulating Functionality in ASP.NET</asp:Label>
</asp:Content>
<asp:Content ID="Content2" ContentPlaceHolderID="PrimaryContent" runat="server">
<h3>
Table User Control</h3>
<p>
<apressuc:TableUserControl ID="TableUserControl1" runat="server" X="1" Y="1" />
</asp:Content>
Listing 2-11. The TableUserControlDemo Code-Behind Class File
using System;
namespace ControlsBook2Web.Ch02
{
public partial class TableUserControlDemo : System.Web.UI.Page
{
protected void Page_Load(object sender, EventArgs e)
{
TableUserControl1.X = 4;
TableUserControl1.Y = 3;
}
}
}
The user control is registered at the top of the .aspx page and declared via an apressuc tag
prefix as before. Although we declare the HTML table structure to be a 1 × 1 grid declaratively
in the .aspx page file, the code-behind class file programmatically changes it to 4 × 3. The
Page_Load() method is executed after the ASP.NET system has set the value of the control
declaratively, so it wins the contest over the value of the X and Y parameters.
Cameron_865-2C02.fm Page 59 Wednesday, February 20, 2008 4:31 PM
Simpo PDF Merge and Split Unregistered Version -
60
CHAPTER 2
■ ENCAPSULATING FUNCTIONALITY IN ASP.NET
Unlike in ASP.NET 1.1, we did not need to declare a member variable with the name and
type of our user control to gain access to the user control in the code-behind class file and
programmatically set the parameters. In ASP.NET 1.1, we would have had to add a protected
member in the code behind page, like in the following code, but this additional typing is no
longer required in the ASP.NET 2.0 and later code-behind model:
protected ControlsBook2Web.Ch02.TableUserControl TableUserControl1;
After this chapter, we do not touch on building user controls, as this book focuses on building
custom server controls. For more information on building ASP.NET user controls, please refer
to the ASP.NET documentation.
Building a Custom Control
We now turn our attention to creating custom server controls. The first decision that we must
make when building a custom server control is what base class to inherit from. In the next
section, we cover the generic base classes that are available to inherit from in addition to some
decision-making guidelines on which base class to use.
Which Base Class?
The discussion of the control hierarchy in Chapter 1covered the various families of controls in
the three main namespaces: System.Web.UI, System.Web.UI.WebControls, and System.Web.UI.
HtmlControls. You have the option to inherit from any of the controls in these namespaces.
For those who prefer to start with a blank slate, which is the approach we take in this
section, three control classes stand out as a potential starting point:
• System.Web.UI.Control is the base class that all controls directly or indirectly inherit
from. It provides the bare minimum features required to call a class a server control.
• System.Web.UI.WebControls.WebControl adds CSS styling management to the rendering
process, which makes it easier to build a styled custom control.
• System.Web.UI.WebControls.WebParts adds web part functionality to ASP.NET 2.0 and
later, whereas with ASP.NET 1.1 web part functionality was only available within the
SharePoint runtime environment. It is still possible to create SharePoint-specific web
parts to take advantage of the features and capabilities available within the SharePoint
runtime environment, but it is no longer a requirement with ASP.NET 2.0 and later.
Still a blank state but a bit more specific are the following potential base classes that became
available in .NET Framework 2.0 and later:
• System.Web.UI.WebControls.CompositeControl can serve as a great starting point when
building composite controls. It also removes the need to create a custom designer
for composite controls to render correctly at design-time as was required in .NET
Framework 1.1.
• System.Web.UI.WebControls.DataBoundControl can serve as a great starting point when
building custom server controls that include data binding, since it takes care of much of
the data binding plumbing code. DataBoundControl also includes a custom designer that
can serve most needs when building a data-bound control.
Cameron_865-2C02.fm Page 60 Wednesday, February 20, 2008 4:31 PM
Simpo PDF Merge and Split Unregistered Version -
CHAPTER 2 ■ ENCAPSULATING FUNCTIONALITY IN ASP.NET
61
• System.Web.UI.WebControls.CompositeDataBoundControl can serve as a great starting
point when building a custom composite server control that includes data binding,
since it also helps to manage the data binding and includes a designer.
Except for the composite control TableCompCustomControl, the examples in this chapter
inherit from System.Web.UI.Control to keep things as simple as possible and provide you with
a foundation in the features of the root control class. In later chapters, we examine the extra
features that make System.Web.UI.WebControls.WebControl the best starting point for most
projects as well as what is available when inheriting from the System.Web.UI.WebControls.WebParts
base class.
Another option for building controls is inheriting from existing controls that are available
in the framework. An example would be to inherit from the TextBox control and add validation
capabilities to ensure that only a phone number is entered into it. You could also take a more
complex control, such as the DataGrid, and customize it to your needs. Though we do provide
a simple example of inheriting from an existing control, this chapter concentrates on building
custom controls from scratch or, more accurately, from the base System.Web.UI.Control class.
Rendered or Composite Control?
The second major decision in building a custom control concerns the construction technique.
The two main options available relate to how a control generates its HTML:
• A server control that renders its own HTML
• A composite control that relies on its children controls to perform the HTML rendering
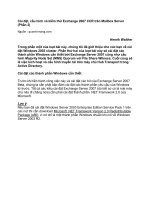
Figure 2-6 shows these two control options.
Figure 2-6. Rendered versus composite custom controls
>qppkj 8ejlqppula9oq^iep:
Naj`ana`?kjpnkh
@]p]Cne` 8p]^ha:***8+p]^ha:
Nks 8pn:***8+pn:
?ahh 8p`:***8+p`:
H]^ah 8ol]j:***8ol]j:
?ahh 8p`:***8+p`:
>qppkj 8ejlqppula9oq^iep:
?kilkoepa?kjpnkh
Cameron_865-2C02.fm Page 61 Wednesday, February 20, 2008 4:31 PM
Simpo PDF Merge and Split Unregistered Version -
62
CHAPTER 2
■ ENCAPSULATING FUNCTIONALITY IN ASP.NET
Rendered controls tend to be simpler in nature and have a close relationship with indi-
vidual HTML tags. Examples of this type of control in the ASP.NET Framework are the TextBox
and Button controls that emit the <input> tag into the HTML stream. Nothing prevents a devel-
oper from putting more complex HTML rendering into these custom controls, but at some
point, maintaining large amounts of rendered HTML can present a code maintenance problem.
Composite controls are able to take on more complex UI rendering tasks, because they
follow good object-oriented principles of abstraction and encapsulation. Instead of trying to
generate all the output through direct HTML emission, they break down the content genera-
tion process into a hierarchy of child controls that are responsible for rendering the portion of
HTML that is their responsibility. A great example of this is the GridView control, which builds
a fairly complex hierarchy of controls to generate its HTML table output. In .NET Framework
2.0 and later, there is a new base class System.Web.UI.CompositeControl that includes a custom
designer to ensure proper rendering at design time. We inherit from CompositeControl when
building the TableCompCustomControl example.
Separating the Web Application and Control Library
The examples demonstrated so far in the book have all been built under the assumption that
they are part of the same ASP.NET web application. Custom ASP.NET server control develop-
ment should deviate from this method and be constructed in a separate library project to
generate an assembly independent of any web application code. The sample source code for
the book follows this advice, as it has a web application project and a control library project
holding the source code for all the custom controls.
The MenuCustomControl Server Control
The MenuCustomControl class is a clone of its user control cousin, rendering a simple HTML hyper-
link menu. Because custom controls do not have the luxury of declaratively specifying the HTML
output using drag and drop with the Visual Studio Toolbox and the Designer surface, we must use
the facilities of the HtmlTextWriter class to generate the HTML output programmatically.
HtmlTextWriter is passed as the only parameter to the all-important Render() method of
the System.Web.UI.Control base class. Render() is overridden by a custom control to inject the
appropriate HTML content into the output stream.
The Render() method in Listing 2-12 calls on the services of a helper method named
RenderMenuItem() that does the work for each item in the menu. Using helper methods is a
good habit, as it keeps the rendering code more manageable.
Listing 2-12. The MenuCustomControl Class File
using System;
using System.Web;
using System.Web.UI;
namespace ControlsBook2Lib.Ch02
{
Cameron_865-2C02.fm Page 62 Wednesday, February 20, 2008 4:31 PM
Simpo PDF Merge and Split Unregistered Version -
CHAPTER 2 ■ ENCAPSULATING FUNCTIONALITY IN ASP.NET
63
[ToolboxData("<{0}:menucustomcontrol runat=server></{0}:menucustomcontrol>")]
public class MenuCustomControl : Control
{
protected override void Render(HtmlTextWriter writer)
{
base.Render(writer);
writer.WriteLine("<div>");
RenderMenuItem(writer, "Apress", "");
writer.Write(" | ");
RenderMenuItem(writer, "Microsoft", "");
writer.Write(" | ");
RenderMenuItem(writer, "MSDN", "");
writer.Write(" | ");
RenderMenuItem(writer, "ASP.NET", "");
writer.WriteLine("</div>");
}
private void RenderMenuItem(HtmlTextWriter writer, string title, string url)
{
writer.Write("<span><a href=\"");
writer.Write(url);
writer.Write("\">");
writer.Write(title);
writer.WriteLine("</a><span>");
}
}
}
HtmlTextWriter in this example is used in its basic mode by sticking to its Write() and
WriteLine() methods. These methods should be familiar to the ASP developer, as they are
analogous to the Response.Write() and Response.WriteLine() methods that take string input
and pass it directly to the output stream.
Using the MenuCustomControl Server Control
Like user controls, custom controls cannot stand alone without the hosting support of a web
form .aspx page. The registration process with custom controls is similar to that of user controls
except for describing the location of the control content. Instead of providing a path to an .ascx
file, we are looking for an assembly and namespace that contains the code of the custom control:
<%@ Register TagPrefix="apress" Namespace="ControlsBookLib.Ch02"
Assembly="ControlsBookLib" %>
You have to remember to make the control assembly, like ControlsBookLib in this example,
available to the web application either through the GAC or the web application’s bin directory.
If things are set up properly, the MenuCustomControl provides an accurate representation in the
Design view of its HTML output, as shown in Figure 2-7.
Cameron_865-2C02.fm Page 63 Wednesday, February 20, 2008 4:31 PM
Simpo PDF Merge and Split Unregistered Version -
64
CHAPTER 2
■ ENCAPSULATING FUNCTIONALITY IN ASP.NET
Figure 2-7. The Visual Studio Design view of the MenuCustomControl on a web form
Figure 2-8 confirms that the HTML output from our MenuCustomControl custom server control
is the same as that of the user control in a browser. Listing 2-13 presents MenuCustomControlDemo’s
.aspx file.
Figure 2-8. Output from the menu custom control demonstration web form
Cameron_865-2C02.fm Page 64 Wednesday, February 20, 2008 4:31 PM
Simpo PDF Merge and Split Unregistered Version -
CHAPTER 2 ■ ENCAPSULATING FUNCTIONALITY IN ASP.NET
65
Listing 2-13. The MenuCustomControlDemo Web Form .aspx File
<%@ Page Language="C#" MasterPageFile="~/MasterPage/ControlsBook2MasterPage.Master"
AutoEventWireup="true" CodeBehind="MenuCustomControlDemo.aspx.cs"
Inherits="ControlsBook2Web.Ch02.MenuCustomControlDemo"
Title="Menu Custom Control Demo" %>
<%@ Register TagPrefix="apress" Namespace="ControlsBook2Lib.Ch02"
Assembly="ControlsBook2Lib" %>
<asp:Content ID="Content1" ContentPlaceHolderID="ChapterNumAndTitle" runat="server">
<asp:Label ID="ChapterNumberLabel" runat="server"
Width="14px">2</asp:Label> <asp:Label
ID="ChapterTitleLabel" runat="server" Width="360px">
Encapsulating Functionality in ASP.NET</asp:Label>
</asp:Content>
<asp:Content ID="Content2" ContentPlaceHolderID="PrimaryContent" runat="server">
<h3>
Menu Custom Control</h3>
<apress:MenuCustomControl ID="menu1" runat="server" />
<br />
<br />
</asp:Content>
The TableCustomControl Server Control via Rendering
We continue our task of duplicating the user control examples via custom controls by imple-
menting the dynamic HTML table. To make things more interesting, we demonstrate some of
the more advanced techniques of the HtmlTextWriter class, and we use control composition to
build the HTML table content. The rendering version is on deck first. Listing 2-14 shows the
TableCustomControl class file.
Listing 2-14. The TableCustomControl Class File
using System;
using System.Web;
using System.Web.UI;
namespace ControlsBook2Lib.Ch02
{
[ToolboxData("<{0}:tablecustomcontrol runat=server></{0}:tablecustomcontrol>")]
public class TableCustomControl : Control
{
// Properties to access dimensions of HTML table
// New property declaration syntax in C# 3.0
public int X { get; set; }
public int Y { get; set; }
Cameron_865-2C02.fm Page 65 Wednesday, February 20, 2008 4:31 PM
Simpo PDF Merge and Split Unregistered Version -
66
CHAPTER 2
■ ENCAPSULATING FUNCTIONALITY IN ASP.NET
protected override void Render(HtmlTextWriter writer)
{
base.Render(writer);
RenderHeader(writer);
RenderTable(writer, X, Y);
}
private void RenderHeader(HtmlTextWriter writer)
{
// write just <H3
writer.WriteBeginTag("h3");
// write >
writer.Write(HtmlTextWriter.TagRightChar);
writer.Write("TableCustomControl");
// write <br/>
writer.WriteFullBeginTag("br");
writer.Write("X:" + X.ToString() + " ");
writer.WriteLine("Y:" + Y.ToString() + " ");
// write </h3>
writer.WriteEndTag("h3");
}
private void RenderTable(HtmlTextWriter writer, int xDim, int yDim)
{
// write <TABLE border="1">
writer.AddAttribute(HtmlTextWriterAttribute.Border, "1");
writer.RenderBeginTag(HtmlTextWriterTag.Table);
for (int y = 0; y < yDim; y++)
{
// write <TR>
writer.RenderBeginTag(HtmlTextWriterTag.Tr);
for (int x = 0; x < xDim; x++)
{
// write <TD cellspacing="1">
writer.AddAttribute(HtmlTextWriterAttribute.Cellspacing, "1");
writer.RenderBeginTag(HtmlTextWriterTag.Td);
// write <SPAN>
writer.RenderBeginTag(HtmlTextWriterTag.Span);
writer.Write("X:" + x.ToString());
writer.Write("Y:" + y.ToString());
// write </SPAN>
writer.RenderEndTag();
Cameron_865-2C02.fm Page 66 Wednesday, February 20, 2008 4:31 PM
Simpo PDF Merge and Split Unregistered Version -
CHAPTER 2 ■ ENCAPSULATING FUNCTIONALITY IN ASP.NET
67
// write </TD>
writer.RenderEndTag();
}
// write </TR>
writer.RenderEndTag();
}
// write </TABLE>
writer.RenderEndTag();
}
}
}
The property declarations for the X and Y dimensions of the HTML table demonstrate the
new C# 3.0 syntax available to declare simple properties in a compact manner. Instead of declaring
a private member variable and essentially empty getter and setter methods, this syntax will
create a private member variable automatically:
public int X { get; set; }
public int Y { get; set; }
More interestingly, the Render() method drives the process of rendering the control output.
Rendering the Table Header
The RenderHeader() method is responsible for displaying information about the X and Y prop-
erties inside of an <h3> section. The code to build the <h3> tag demonstrates the ability to use
the special Write() methods of the HtmlTextWriter class.
WriteBeginTag() writes the starting portion of a tag, including the opening bracket and the
name of the tag, without closing it:
// write just <h3
writer.WriteBeginTag("h3");
At this point, you can manually add HTML attributes, such as borders and styles, using the
Write() method of HtmlTextWriter if necessary. You also have the responsibility of explicitly
closing the tag.
A handy way to write out special characters is to use the helper fields exposed by
HtmlTextWriter to produce the correct strings, which sure beats the escaping that has to occur
inside the C# string for special characters if you do all the work on your own. Table 2-1 shows
the fields that are available.
Table 2-1. String Fields Exposed by HtmlTextWriter
HtmlTextWriter Field String Output
DefaultTabString Single tab character
DoubleQuoteChar ""
EndTagLeftChars </
EqualsChar =
Cameron_865-2C02.fm Page 67 Wednesday, February 20, 2008 4:31 PM
Simpo PDF Merge and Split Unregistered Version -
68
CHAPTER 2
■ ENCAPSULATING FUNCTIONALITY IN ASP.NET
The RenderHeader() code uses TagRightChar to generate the closing bracket for the <h3> tag:
// write >
writer.Write(HtmlTextWriter.TagRightChar);
An easier method to write a fully formed tag is to use the WriteFullBegin() tag method.
This is useful for HTML tags such as <br/> that are commonly used without attributes:
// write <br/>
writer.WriteFullBeginTag("br");
Closing the <h3> tag requires a tag that contains a closing slash before the name (e.g.,
</h3>). WriteEndTag() can be used to generate this content in one atomic action:
// write </h3>
writer.WriteEndTag("h3");
Rendering the Table
Once the control header content is rendered, we move on to building the HTML table in the
RenderTable() method. This portion of the control demonstrates a nifty feature of the
HtmlTextWriter in working with HTML attributes. The AddAttribute() method takes a key/value
string pair for each attribute you wish to render on an HTML tag. You can call this method
multiple times to build up as many attributes to the follow-on tag as necessary. Once you’ve
finished adding attributes, the next step is to use the RenderBeginTag() method. This method is
smart enough to look at the attributes that were added previously and render them into the
final output stream along with the tag name and brackets. The RenderTable() method uses this
functionality to build the <table> tag and add a Border attribute to it:
// write <table border="1">
writer.AddAttribute(HtmlTextWriterAttribute.Border,"1");
writer.RenderBeginTag(HtmlTextWriterTag.Table);
EqualsDoubleQuoteString =""
SelfClosingChars /
SelfClosingTagEnd />
SemicolonChar ;
SingleQuoteChar '
SlashChar /
SpaceChar Space
StyleEqualsChar :
TagLeftChar <
TagRightChar >
Table 2-1. String Fields Exposed by HtmlTextWriter (Continued)
HtmlTextWriter Field String Output
Cameron_865-2C02.fm Page 68 Wednesday, February 20, 2008 4:31 PM
Simpo PDF Merge and Split Unregistered Version -
CHAPTER 2 ■ ENCAPSULATING FUNCTIONALITY IN ASP.NET
69
The HtmlTextWriterTag enumeration is used for the <table> tag and the Border attribute
strings as a simplified means of specifying the correct HTML name. Many of the HtmlTextWriter
methods are overloaded to accept this enumeration and return the appropriate string value.
See the ASP.NET documentation for full details on what names are supported.
If you use the RenderBeginTag() to build your opening tag, you must remember to pair it
with a RenderEndTag() call to generate the closing tag. Fortunately, the HtmlTextWriter class is
smart enough to remember the nesting and the order of the two routines to match them up
and generate the correct closing tags. Closing our table is a direct call to RenderEndTag() with
no parameters:
// write </table>
writer.RenderEndTag();
The rest of the RenderTable() routine uses RenderBeginTag() and RenderEndTag() in a two-
loop scenario to build the <tr> and <td> tags along with their content according to the size
specified in the X and Y dimension fields of the control.
The TableCustomControl Server Control via Control Composition
The second table custom control example accomplishes the same task as the first but does not
bother with getting its hands dirty with HTML rendering. It follows the lead of the table user
control and builds up its control content programmatically by adding child controls such as
the table and its cells.
■Note Because we are building a composite control, we inherit from System.UI.Web.CompositeControl,
which implements the INamingContainer interface, to ensure that unique names are generated for each
server control instance on the same page to prevent name conflicts. We discuss why this is necessary in
Chapter 5. CompositeControl also brings in a custom designer automatically via the base class to ensure
proper design-time rendering.
Listing 2-15 shows TableCompCustomControl’s class file.
Listing 2-15. The TableCompCustomControl Class File
using System;
using System.ComponentModel;
using System.Web.UI;
using System.Web.UI.HtmlControls;
using System.Web.UI.WebControls;
using System.Text;
namespace ControlsBook2Lib.Ch02
{
[ToolboxData("<{0}:tablecompcustomcontrol runat=server></{0}:
tablecompcustomcontrol>")]
Cameron_865-2C02.fm Page 69 Wednesday, February 20, 2008 4:31 PM
Simpo PDF Merge and Split Unregistered Version -
70
CHAPTER 2
■ ENCAPSULATING FUNCTIONALITY IN ASP.NET
public class TableCompCustomControl : CompositeControl
{
private HtmlTable table;
// properties to access dimensions of HTML table
int xDim;
public int X
{
get
{
return xDim;
}
set
{
xDim = value;
}
}
int yDim;
public int Y
{
get
{
return yDim;
}
set
{
yDim = value;
}
}
public override ControlCollection Controls
{
get
{
EnsureChildControls();
return base.Controls;
}
}
protected override void CreateChildControls()
{
Controls.Clear();
BuildHeader();
BuildTable(X, Y);
}
private void BuildHeader()
{
Cameron_865-2C02.fm Page 70 Wednesday, February 20, 2008 4:31 PM
Simpo PDF Merge and Split Unregistered Version -
CHAPTER 2 ■ ENCAPSULATING FUNCTIONALITY IN ASP.NET
71
StringBuilder sb = new StringBuilder();
sb.Append("TableCompCustomControl<br/>");
sb.Append("X:");
sb.Append(X.ToString());
sb.Append(" ");
sb.Append("Y:");
sb.Append(Y.ToString());
sb.Append(" ");
HtmlGenericControl header = new HtmlGenericControl("h3");
header.InnerHtml = sb.ToString();
Controls.Add(header);
}
private void BuildTable(int xDim, int yDim)
{
HtmlTableRow row;
HtmlTableCell cell;
HtmlGenericControl content;
// create <table border=1>
table = new HtmlTable();
table.Border = 1;
for (int y = 0; y < Y; y++)
{
// create <tr>
row = new HtmlTableRow();
for (int x = 0; x < X; x++)
{
// create <td cellspacing=1>
cell = new HtmlTableCell();
cell.Attributes.Add("border", "1");
// create a <span>
content = new HtmlGenericControl("span");
content.InnerHtml = "X:" + x.ToString() +
"Y:" + y.ToString();
cell.Controls.Add(content);
row.Cells.Add(cell);
}
table.Rows.Add(row);
}
Controls.Add(table);
}
}
}
Cameron_865-2C02.fm Page 71 Wednesday, February 20, 2008 4:31 PM
Simpo PDF Merge and Split Unregistered Version -
72
CHAPTER 2
■ ENCAPSULATING FUNCTIONALITY IN ASP.NET
Composite custom controls typically do not override the Render() method. They rely on
the base class implementation of Render() provided by the System.Web.UI.Control class that
locates the Controls collection and calls Render() for each child control. This recursive call, in
turn, causes the child controls to either render or do the same with their children, recursively
walking through the render tree. In the end, we have a nice HTML output.
Although the composite control doesn’t override the Render() method, it needs to override the
CreateChildControls() method that is called by the ASP.NET Framework. This method is called
to give the custom server control the opportunity to create its Controls collection, populating
it with the appropriate child controls for rendering the desired output.
One extra task we need to perform is to override the Controls property exposed by the base
Control class. This ensures that when an outside client attempts to access our composite control,
the child control content will always be created and ready for access.
The EnsureChildControls() method does the work for us. Calling it will call
CreateChildControls() if the child controls have not been initialized. Overriding Controls is
always recommended in composite controls.
It is also recommended to call EnsureChildControls() for properties in a composite control
right at the beginning of the Get and Set methods. This prevents any chance of accessing a
child control before it is created. We deviate from this practice for the TableCompCustomControl
control, because the X and Y properties must be set and available before we can create the control
hierarchy. Otherwise, we wouldn’t know what dimensions to use for the table.
Our implementation of CreateChildControls() calls into routines responsible for adding
the child controls representing the header and the HTML table of the control, which are named
BuildHeader() and BuildTable(), respectively. It is also the linkage point for evaluating the X
and Y dimensions of the table.
BuildHeader() demonstrates the use of an HtmlGenericControl control from the System.
Web.UI.HtmlControls namespace to render the <h3> content. This control was chosen due to its
lack of built-in styling capabilities to keep the example simple. We build up the string content
of the control by using the StringBuilder class. This class is a more efficient way of building up
strings in .NET than concatenating literals as Strings, because StringBuilder uses a buffer.
Variables of type String are immutable, and a concatenation operation actually builds a third
string from the two strings brought together, literal or otherwise. For those who were worried
about the HtmlTextWriter class and its efficiencies, the Render() and Write() methods write to a
buffer, so there aren’t any performance concerns about calling these methods multiple times.
Once we have built up the string content, we next use the InnerHtml property to easily load
the HTML information inside the <h3> control. The final step is to add the HtmlGenericControl
to the Controls collection of our new custom server control.
Building the HTML table in the BuildTable() method follows the well worn process of
programmatically building up the HtmlTable control’s child content. The result is almost an
exact image of the user control version of the table. This is a good indication of the strength of
custom controls when it comes to dynamic generation. The declarative advantages of the user
control are not as powerful when content is built on the fly.
Using the Custom Table Controls
To verify that both custom controls provide identical HTML output, we use a web form that
hosts them side by side in an HTML table. Figure 2-9 shows that they have the same Designer
capability, though TableCompCustomControl requires the additional Designer attribute on its
class to render correctly at design time, as discussed previously. Figure 2-10 shows that the
final output is identical in the browser.
Cameron_865-2C02.fm Page 72 Wednesday, February 20, 2008 4:31 PM
Simpo PDF Merge and Split Unregistered Version -
CHAPTER 2 ■ ENCAPSULATING FUNCTIONALITY IN ASP.NET
73
Figure 2-9. The Visual Studio Design view of custom table controls on a web form
Figure 2-10. Output from the table custom control demonstration web form
Listings 2-16 and 2-17 show TableCustomControlDemo’s .aspx and class files.
Cameron_865-2C02.fm Page 73 Wednesday, February 20, 2008 4:31 PM
Simpo PDF Merge and Split Unregistered Version -
74
CHAPTER 2
■ ENCAPSULATING FUNCTIONALITY IN ASP.NET
Listing 2-16. The TableCustomControlDemo Web Form .aspx File
<%@ Page Language="C#" MasterPageFile="~/MasterPage/ControlsBook2MasterPage.Master"
AutoEventWireup="true" CodeBehind="TableCustomControlDemo.aspx.cs"
Inherits="ControlsBook2Web.Ch02.TableCustomControlDemo"
Title="Table Custom Controls Demo" %>
<%@ Register TagPrefix="apress" Namespace="ControlsBook2Lib.Ch02"
Assembly="ControlsBook2Lib" %>
<asp:Content ID="Content1" ContentPlaceHolderID="ChapterNumAndTitle" runat="server">
<asp:Label ID="ChapterNumberLabel" runat="server"
Width="14px">2</asp:Label> <asp:Label
ID="ChapterTitleLabel" runat="server" Width="360px">
Encapsulating Functionality in ASP.NET</asp:Label>
</asp:Content>
<asp:Content ID="Content2" ContentPlaceHolderID="PrimaryContent" runat="server">
<h3>
Table Custom Controls</h3>
<table>
<tr>
<td style="width: 50%">
<apress:TableCustomControl ID="TableCust1" runat="server" Y="2" X="2">
</apress:TableCustomControl>
</td>
<td>
<apress:TableCompCustomControl ID="TableCompCust1"
runat="server" X="2" Y="2"></apress:TableCompCustomControl>
</td>
</tr>
</table>
</asp:Content>
Listing 2-17. The TableCustomControlDemo Code-Behind Class File
using System;
namespace ControlsBook2Web.Ch02
{
public partial class TableCustomControlDemo : System.Web.UI.Page
{
protected void Page_Load(object sender, EventArgs e)
{
if (!Page.IsPostBack)
{
TableCust1.X = 3;
TableCust1.Y = 3;
TableCompCust1.X = 3;
TableCompCust1.Y = 3;
}
Cameron_865-2C02.fm Page 74 Wednesday, February 20, 2008 4:31 PM
Simpo PDF Merge and Split Unregistered Version -
CHAPTER 2 ■ ENCAPSULATING FUNCTIONALITY IN ASP.NET
75
}
}
}
Inheriting from an Existing Server Control
The previous examples are very simple controls in concept. This was by design; we focused on
the details required to build the simplest of controls in order to give you a taste of the control-
building process. In this section, we demonstrate how, with just a little bit of code, it is possible
to add pleasing functionality through inheritance to one of the existing ASP.NET controls.
In this simple inheritance example, we’ll add a 3-D look to the WebControl TextBox class. To
add this UI behavior, we take advantage of the DHTML features of Internet Explorer when
rendering our new server control. Listing 2-18 contains TextBox3d’s class file.
Listing 2-18. The TextBox3d Class File
using System;
using System.Web.UI;
using System.Web.UI.WebControls;
using System.ComponentModel;
using System.Drawing;
namespace ControlsBook2Lib.Ch02
{
[ToolboxData("<{0}:textbox3d runat=server></{0}:textbox3d>"),
ToolboxBitmap(typeof(ControlsBook2Lib.Ch02.TextBox3d),
"ControlsBook2Lib.Ch03.TextBox3d.bmp")]
public class TextBox3d : TextBox// Inherit from rich control
{
public TextBox3d()
{
Enable3D = true;
}
// Custom property to set 3D appearance
[DescriptionAttribute("Set to true for 3d appearance"), DefaultValue("True")]
public bool Enable3D
{
get
{
object enable3D = ViewState["Enable3D"];
if (enable3D == null)
return false;
else
return (bool)enable3D;
}
set
{
Cameron_865-2C02.fm Page 75 Wednesday, February 20, 2008 4:31 PM
Simpo PDF Merge and Split Unregistered Version -
76
CHAPTER 2
■ ENCAPSULATING FUNCTIONALITY IN ASP.NET
ViewState["Enable3D"] = value;
}
}
protected override void Render(HtmlTextWriter output)
{
// Add DHTML style attribute
if (Enable3D)
output.AddStyleAttribute("FILTER", "progid:DXImageTransform.Microsoft.
dropshadow(OffX=2, OffY=2, Color='gray', Positive='true'");
base.Render(output);
}
}
}
In our inheritance example, we have two main features: a property called Enable3D and an
overridden Render() method. The property is used to determine whether or not to render with
a 3-D look. Providing a Boolean property that allows the developer to revert to the default
behavior of the base class server control is a good design guideline to follow when inheriting
from rich server controls in ASP.NET.
We make this property available so that it is possible to revert to the TextBox base class’s look
and feel without having to swap out the control. The property uses ViewState, which we cover in
Chapter 3, to store the value, with a default value of true set in the control’s constructor.
The only other interesting code in this simple control is the Render() method. Here, we add a
style attribute to the output variable to provide the 3-D look to the base TextBox control. We round
out this method with a call to the base class’s Render() method to finish off all the work.
As in previous examples, we need an .aspx page to host our custom control and show off
our new 3-D look. Figure 2-11 shows the 3-D TextBox at runtime.
Figure 2-11. Output from the TextBox3dDemo web form
Cameron_865-2C02.fm Page 76 Wednesday, February 20, 2008 4:31 PM
Simpo PDF Merge and Split Unregistered Version -