Pro C# 2008 and the .NET 3.5 Platform, Fourth Edition phần 10 ppsx
Bạn đang xem bản rút gọn của tài liệu. Xem và tải ngay bản đầy đủ của tài liệu tại đây (4.84 MB, 140 trang )
To illustrate working with these validation controls, create a new Web Site project named
ValidatorCtrls. To begin, place four (well-named)
TextBox types (with four corresponding and
descriptive
Labels) onto your page. Next, place a RequiredFieldValidator, RangeValidator,
RegularExpressionValidator, and CompareValidator type adjacent to each respective field.
Finally, add a single
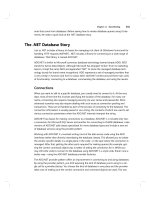
Button and final Label (see Figure 32-18).
Figure 32-18. Various validators
Now that you have a UI, let’s walk through the process of configuring each member.
The RequiredFieldValidator
Configuring the RequiredFieldValidator is straightforward. Simply set the ErrorMessage and
ControlToValidate properties accordingly using the Visual Studio 2008 Properties window. Here
would be the resulting markup to ensure the
txtRequiredField text box is not empty:
<asp:RequiredFieldValidator ID="RequiredFieldValidator1"
runat="server" ControlToValidate="txtRequiredField"
ErrorMessage="Oops! Need to enter data.">
</asp:RequiredFieldValidator>
The RequiredFieldValidator supports an InitialValue property. You can use this property to
ensure that the user enters any value other than the initial value in the related
TextBox. For example,
when the user first posts to a page, you may wish to configure a
TextBox to contain the value “Please
enter your name”. Now, if you did not set the
InitialValue property of the RequiredFieldValidator,
the runtime would assume that the string “Please enter your name” is valid. Thus, to ensure a
required
TextBox is valid only when the user enters anything other than “Please enter your name”,
configure your widgets as follows:
CHAPTER 32 ■ ASP.NET WEB CONTROLS, THEMES, AND MASTER PAGES1232
8849CH32.qxd 10/16/07 12:51 PM Page 1232
www.free-ebooks-download.org
Simpo PDF Merge and Split Unregistered Version -
<asp:RequiredFieldValidator ID="RequiredFieldValidator1"
runat="server" ControlToValidate="txtRequiredField"
ErrorMessage="Oops! Need to enter data."
InitialValue="Please enter your name">
</asp:RequiredFieldValidator>
The RegularExpressionValidator
The RegularExpressionValidator can be used when you wish to apply a pattern against the charac-
ters entered within a given input field. To ensure that a given
TextBox contains a valid US Social
Security number, you could define the widget as follows:
<asp:RegularExpressionValidator ID="RegularExpressionValidator1"
runat="server" ControlToValidate="txtRegExp"
ErrorMessage="Please enter a valid US SSN."
ValidationExpression="\d{3}-\d{2}-\d{4}">
</asp:RegularExpressionValidator>
Notice how the RegularExpressionValidator defines a ValidationExpression property. If you
have never worked with regular expressions before, all you need to be aware of for this example is
that they are used to match a given string pattern. Here, the expression
"\d{3}-\d{2}-\d{4}" is cap-
turing a standard US Social Security number of the form
xxx-xx-xxxx (where x is any digit).
This particular regular expression is fairly self-explanatory; however, assume you wish to test
for a valid Japanese phone number. The correct expression now becomes much more complex:
"(0\d{1,4}-|\(0\d{1,4}\)?)?\d{1,4}-\d{4}". The good news is that when you select the
ValidationExpression property using the Properties window, you can pick from a predefined set
of common regular expressions by clicking the ellipse button.
■Note If you are interested in regular expressions, you will be happy to know that the .NET platform supplies two
namespaces (
System.Text.RegularExpressions and System.Web.RegularExpressions) devoted to the pro-
grammatic manipulation of such patterns.
The RangeValidator
In addition to a MinimumValue and MaximumValue property, RangeValidators have a property named
Type. Because you are interested in testing the user-supplied input against a range of whole num-
bers, you need to specify
Integer (which is not the default!):
<asp:RangeValidator ID="RangeValidator1"
runat="server" ControlToValidate="txtRange"
ErrorMessage="Please enter value between 0 and 100."
MaximumValue="100" MinimumValue="0" Type="Integer">
</asp:RangeValidator>
The RangeValidator can also be used to test whether a given value is between a currency value,
date, floating-point number, or string data (the default setting).
The CompareValidator
Finally, notice that the CompareValidator supports an Operator property:
CHAPTER 32 ■ ASP.NET WEB CONTROLS, THEMES, AND MASTER PAGES 1233
8849CH32.qxd 10/16/07 12:51 PM Page 1233
www.free-ebooks-download.org
Simpo PDF Merge and Split Unregistered Version -
<asp:CompareValidator ID="CompareValidator1" runat="server"
ControlToValidate="txtComparison"
ErrorMessage="Enter a value less than 20." Operator="LessThan"
ValueToCompare="20">
</asp:CompareValidator>
Given that the role of this validator is to compare the value in the text box against another value
using a binary operator, it should be no surprise that the
Operator property may be set to values
such as
LessThan, GreaterThan, Equal, and NotEqual. Also note that the ValueToCompare is used to
establish a value to compare against.
■Note The CompareValidator can also be configured to compare a value within another Web Form control
(rather than a hard-coded value) using the ControlToValidate property.
To finish up the code for this page, handle the Click event for the Button type and inform the
user he or she has succeeded in the validation logic:
public partial class _Default : System.Web.UI.Page
{
protected void Page_Load(object sender, EventArgs e)
{
}
protected void btnPostback_Click(object sender, EventArgs e)
{
lblValidationComplete.Text = "You passed validation!";
}
}
Now, navigate to this page using your browser of choice. At this point, you should not see any
noticeable changes. However, when you attempt to click the Submit button after entering bogus
data, your error message is suddenly visible. Once you enter valid data, the error messages are
removed and postback occurs.
If you look at the HTML rendered by the browser, you see that the validation controls generate
a client-side JavaScript function that makes use of a specific library of JavaScript functions (con-
tained in the
WebUIValidation.js file) that is automatically downloaded to the user’s machine. Once
the validation has occurred, the form data is posted back to the server, where the ASP.NET runtime
will perform the
same validation tests on the web server (just to ensure that no along-the-wire tam-
pering has taken place).
On a related note, if the HTTP request was sent by a browser that does not support client-side
JavaScript, all validation will occur on the server. In this way, you can program against the validation
controls without being concerned with the target browser; the returned HTML page redirects the
error processing back to the web server.
Creating Validation Summaries
The next validation-centric topic we will examine here is the use of the ValidationSummary widget.
Currently, each of your validators displays its error message at the exact place in which it was posi-
tioned at design time. In many cases, this may be exactly what you are looking for. However, on a
complex form with numerous input widgets, you may not want to have random blobs of red text
pop up. Using the
ValidationSummary type, you can instruct all of your validation types to display
their error messages at a specific location on the page.
CHAPTER 32 ■ ASP.NET WEB CONTROLS, THEMES, AND MASTER PAGES1234
8849CH32.qxd 10/16/07 12:51 PM Page 1234
www.free-ebooks-download.org
Simpo PDF Merge and Split Unregistered Version -
The first step is to simply place a ValidationSummary on your *.aspx file. You may optionally set
the
HeaderText property of this type as well as the DisplayMode, which by default will list all error
messages as a bulleted list.
<asp:ValidationSummary id="ValidationSummary1"
runat="server" Width="353px"
HeaderText="Here are the things you must correct.">
</asp:ValidationSummary>
Next, you need to set the Display property to None for each of the individual validators (e.g.,
RequiredFieldValidator, RangeValidator, etc.) on the page. This will ensure that you do not see
duplicate error messages for a given validation failure (one in the summary pane and another at
the validator’s location). Figure 32-19 shows the summary pane in action.
Figure 32-19. Using a validation summary
Last but not least, if you would rather have the error messages displayed using a client-side
MessageBox, set the ShowMessageBox property to true and the ShowSummary property to false.
Defining Validation Groups
It is also possible to define groups for validators to belong to. This can be very helpful when you
have regions of a page that work as a collective whole. For example, you may have one group of
controls in a
Panel object to allow the user to enter his or her mailing address and another Panel
containing UI elements to gather credit card information. Using groups, you can configure each
group of controls to be validated independently.
Insert a new page into your current project named
ValidationGroups.aspx that defines two
Panels. The first Panel object expects a TextBox to contain some form of user input (via a
RequiredFieldValidator), while the second Panel expects a US SSN value (via a
RegularExpressionValidator). Figure 32-20 shows one possible UI.
CHAPTER 32 ■ ASP.NET WEB CONTROLS, THEMES, AND MASTER PAGES 1235
8849CH32.qxd 10/16/07 12:51 PM Page 1235
www.free-ebooks-download.org
Simpo PDF Merge and Split Unregistered Version -
Figure 32-20. These Panel objects will independently configure their input areas.
To ensure that the validators function independently, simply assign each validator and the con-
trol being validated to a uniquely named group using the
ValidationGroup property. Here is some
possible markup (note that the
Click event handlers used here are essentially empty stubs in the
code file, and they are only used to allow postback to occur to the web server):
<form id="form1" runat="server">
<asp:Panel ID="Panel1" runat="server" Height="83px" Width="296px">
<asp:TextBox ID="txtRequiredData" runat="server"
ValidationGroup="FirstGroup">
</asp:TextBox>
<asp:RequiredFieldValidator ID="RequiredFieldValidator1" runat="server"
ErrorMessage="*Required field!" ControlToValidate="txtRequiredData"
ValidationGroup="FirstGroup">
</asp:RequiredFieldValidator>
<asp:Button ID="bntValidateRequired" runat="server"
OnClick="bntValidateRequired_Click"
Text="Validate" ValidationGroup="FirstGroup" />
</asp:Panel>
<asp:Panel ID="Panel2" runat="server" Height="119px" Width="295px">
<asp:TextBox ID="txtSSN" runat="server"
ValidationGroup="SecondGroup">
</asp:TextBox>
<asp:RegularExpressionValidator ID="RegularExpressionValidator1"
runat="server" ControlToValidate="txtSSN"
ErrorMessage="*Need SSN" ValidationExpression="\d{3}-\d{2}-\d{4}"
ValidationGroup="SecondGroup">
</asp:RegularExpressionValidator>
<asp:Button ID="btnValidateSSN" runat="server"
OnClick="btnValidateSSN_Click" Text="Validate"
ValidationGroup="SecondGroup" />
</asp:Panel>
</form>
Now, right-click this page’s designer and select the View In Browser menu option to verify each
panel’s widgets operate in a mutually exclusive manner.
CHAPTER 32 ■ ASP.NET WEB CONTROLS, THEMES, AND MASTER PAGES1236
8849CH32.qxd 10/16/07 12:51 PM Page 1236
www.free-ebooks-download.org
Simpo PDF Merge and Split Unregistered Version -
■Source Code The ValidatorCtrls project is included under the Chapter 32 subdirectory.
Working with Themes
At this point, you have had the chance to work with numerous ASP.NET web controls. As you have
seen, each control exposes a set of properties (many of which are inherited by
System.Web.UI.
WebControls.WebControl
) that allow you to establish a given UI look and feel (background color,
font size, border style, and whatnot). Of course, on a multipaged website, it is quite common for
the site as a whole to define a common look and feel for various types of widgets. For example, all
TextBoxes might be configured to support a given font, all Buttons have a custom image, and all
Calendars have a light blue border.
Obviously it would be very labor intensive (and error prone) to establish the
same property set-
tings for every widget on
every page within your website. Even if you were able to manually update
the properties of each UI widget on each page, imagine how painful it would be when you now need
to change the background color for each
TextBox yet again. Clearly there must be a better way to
apply sitewide UI settings.
One approach that can be taken to simplify applying a common UI look and feel is to define
style sheets. If you have a background in web development, you are aware that style sheets define a
common set of UI-centric settings that are applied on the browser. As you would hope, ASP.NET
web controls can be assigned a given style by assigning the
CssStyle property.
However, ASP.NET ships with an alternative technology to define a common UI termed
themes.
Unlike a style sheet, themes are applied on the web server (rather than the browser) and can be
done so programmatically or declaratively. Given that a theme is applied on the web server, it has
access to all the server-side resources on the website. Furthermore, themes are defined by author-
ing the same markup you would find within any
*.aspx file (as you may agree, the syntax of a style
sheet is a bit on the terse side).
Recall from Chapter 31 that ASP.NET web applications may define any number of “special”
subdirectories, one of which is App_Theme. This single subdirectory may be further partitioned
with additional subdirectories, each of which represents a possible theme on your site. For example,
consider Figure 32-21, which illustrates a single App_Theme folder containing three subdirectories,
each of which has a set of files that make up the theme itself.
Figure 32-21. A single App_Theme folder may define numerous themes.
CHAPTER 32 ■ ASP.NET WEB CONTROLS, THEMES, AND MASTER PAGES 1237
8849CH32.qxd 10/16/07 12:51 PM Page 1237
www.free-ebooks-download.org
Simpo PDF Merge and Split Unregistered Version -
Understanding *.skin Files
The one file that every theme subdirectory is sure to have is a *.skin file. These files define the look
and feel for various web controls. To illustrate, create a new website named FunWithThemes. Next,
insert a new
*.skin file (using the Web Site ➤ Add New Item menu option) named BasicGreen.skin,
as shown in Figure 32-22.
Figure 32-22. Inserting *.skin files
Visual Studio 2008 will prompt you to confirm this file can be added into an App_Theme folder
(which is exactly what we want). If you were now to look in your Solution Explorer, you would
indeed find your App_Theme folder has a subfolder named BasicGreen containing your new
BasicGreen.skin file.
Recall that a
*.skin file is where you are able to define the look and feel for various widgets
using ASP.NET control declaration syntax. Sadly, the IDE does not provide designer support for
*.skin files. One way to reduce the amount of typing time is to insert a temporary *.aspx file into
your program (
temp.aspx, for example) that can be used to build up the UI of the widgets using the
VS 2005 page designer.
The resulting markup can then be copied and pasted into your
*.skin file. When you do so,
however, you
must delete the ID attribute for each web control! This should make sense, given that
we are not trying to define a UI look and feel for a particular
Button (for example) but all Buttons.
This being said, here is the markup for
BasicGreen.skin, which defines a default look and feel
for the
Button, TextBox, and Calendar types:
<asp:Button runat="server" BackColor="#80FF80"/>
<asp:TextBox runat="server" BackColor="#80FF80"/>
<asp:Calendar runat="server" BackColor="#80FF80"/>
Notice that each widget still has the runat="server" attribute (which is mandatory), and none
of the widgets have been assigned an
ID attribute.
CHAPTER 32 ■ ASP.NET WEB CONTROLS, THEMES, AND MASTER PAGES1238
8849CH32.qxd 10/16/07 12:51 PM Page 1238
www.free-ebooks-download.org
Simpo PDF Merge and Split Unregistered Version -
Now, let’s define a second theme named CrazyOrange. Using the Solution Explorer, right-click
your App_Theme folder and add a new theme named CrazyOrange. This will create a new subdirec-
tory under your site’s App_Theme folder. Next, right-click the new CrazyOrange folder within the
Solution Explorer and select Add New Item. From the resulting dialog box, add a new
*.skin file.
Update the
CrazyOrange.skin file to define a unique UI look and feel for the same web controls. For
example:
<asp:Button runat="server" BackColor="#FF8000"/>
<asp:TextBox runat="server" BackColor="#FF8000"/>
<asp:Calendar BackColor="White" BorderColor="Black"
BorderStyle="Solid" CellSpacing="1"
Font-Names="Verdana" Font-Size="9pt" ForeColor="Black" Height="250px"
NextPrevFormat="ShortMonth" Width="330px" runat="server">
<SelectedDayStyle BackColor="#333399" ForeColor="White" />
<OtherMonthDayStyle ForeColor="#999999" />
<TodayDayStyle BackColor="#999999" ForeColor="White" />
<DayStyle BackColor="#CCCCCC" />
<NextPrevStyle Font-Bold="True" Font-Size="8pt" ForeColor="White" />
<DayHeaderStyle Font-Bold="True" Font-Size="8pt"
ForeColor="#333333" Height="8pt" />
<TitleStyle BackColor="#333399" BorderStyle="Solid"
Font-Bold="True" Font-Size="12pt"
ForeColor="White" Height="12pt" />
</asp:Calendar>
At this point, your Solution Explorer should like Figure 32-23.
Figure 32-23. A single website with multiple themes
So now that your site has a few themes defined, the next logical question is how to apply them
to your pages? As you might guess, there are many ways to do so.
■Note To be sure, these example themes are quite bland. Feel free to spruce things up to your liking.
Applying Sitewide Themes
If you wish to make sure that every page in your site adheres to the same theme, the simplest way to
do so is to update your
web.config file. Open your current web.config file and locate the <pages>
element within the scope of your <system.web> root element. If you add a theme attribute to the
CHAPTER 32 ■ ASP.NET WEB CONTROLS, THEMES, AND MASTER PAGES 1239
8849CH32.qxd 10/16/07 12:51 PM Page 1239
www.free-ebooks-download.org
Simpo PDF Merge and Split Unregistered Version -
<pages> element, this will ensure that every page in your website is assigned the selected theme
(which is, of course, the name of one of the subdirectories under App_Theme). Here is the core
update:
<configuration>
<system.web>
<pages theme="BasicGreen">
</pages>
</system.web>
</configuration>
If you were to now place various Buttons, Calendars, and TextBoxes onto your Default.aspx file
and run the application, you would find each widget has the UI of BasicGreen. If you were to update
the theme attribute to CrazyOrange and run the page again, you would find the UI defined by this
theme is used instead.
Applying Themes at the Page Level
It is also possible to assign themes on a page-by-page level. This can be helpful in a variety of cir-
cumstances. For example, perhaps your
web.config file defines a sitewide theme (as described in
the previous section); however, you wish to assign a different theme to a specific page. To do so, you
can simply update the
<%@Page%> directive. If you are using Visual Studio 2008 to do so, you will be
happy to find that IntelliSense will display each defined theme within your App_Theme folder.
<%@ Page Language="C#" AutoEventWireup="true"
CodeFile="Default.aspx.cs" Inherits="_Default" Theme ="CrazyOrange" %>
Because we assigned the CrazyOrange theme to this page, but the Web.config file specified the
BasicGreen theme, all pages
but this page will be rendered using BasicGreen.
The SkinID Property
Sometimes you wish to define a set of possible UI look and feels for a single widget. For example,
assume you want to define two possible UIs for the
Button type within the CrazyOrange theme.
When you wish do so, you may differentiate each look and feel using the
SkinID property:
<asp:Button runat="server" BackColor="#FF8000"/>
<asp:Button runat="server"
SkinID = "BigFontButton"
Font-Size="30pt" BackColor="#FF8000"/>
Now, if you have a page that makes use of the CrazyOrange theme, each Button will by default
be assigned the unnamed
Button skin. If you wish to have various buttons within the *.aspx file
make use of the BigFontButton skin, simply specify the
SkinID property within the markup:
<asp:Button ID="Button2" runat="server"
SkinID="BigFontButton" Text="Button" /><br />
As an example, Figure 32-24 shows a page that is making use of the CrazyOrange theme. The
topmost
Button is assigned the unnamed Button skin, while the Button on the bottom of the page
has been assigned the
SkinID of BigFontButton.
CHAPTER 32 ■ ASP.NET WEB CONTROLS, THEMES, AND MASTER PAGES1240
8849CH32.qxd 10/16/07 12:51 PM Page 1240
www.free-ebooks-download.org
Simpo PDF Merge and Split Unregistered Version -
Figure 32-24. Fun with SkinIDs
Assigning Themes Programmatically
Last but not least, it is possible to assign a theme in code. This can be helpful when you wish to
provide a way for end users to select a theme for their current session. Of course, we have not yet
examined how to build stateful web applications, so the current theme selection will be forgotten
between postbacks. In a production-level site, you may wish to store the user’s current theme selec-
tion within a session variable, or persist the theme selection to a database.
Although we really have not examined the use of session variables at this point in the text, to
illustrate how to assign a theme programmatically, update the UI of your
Default.aspx file with
three new
Button types as shown in Figure 32-25. Once you have done so, handle the Click event
for each
Button type.
Figure 32-25. The updated UI
CHAPTER 32 ■ ASP.NET WEB CONTROLS, THEMES, AND MASTER PAGES 1241
8849CH32.qxd 10/16/07 12:51 PM Page 1241
www.free-ebooks-download.org
Simpo PDF Merge and Split Unregistered Version -
Now be aware that you can only assign a theme programmatically during specific phases of
your page’s life cycle. Typically, this will be done within the
Page_PreInit event. This being said,
update your code file as follows:
partial class _Default : System.Web.UI.Page
{
protected void btnNoTheme_Click(object sender, System.EventArgs e)
{
// Empty strings result in no theme being applied.
Session["UserTheme"] = "";
// Triggers the PreInit event again.
Server.Transfer(Request.FilePath);
}
protected void btnGreenTheme_Click(object sender, System.EventArgs e)
{
Session["UserTheme"] = "BasicGreen";
// Triggers the PreInit event again.
Server.Transfer(Request.FilePath);
}
protected void btnOrangeTheme_Click(object sender, System.EventArgs e)
{
Session["UserTheme"] = "CrazyOrange";
// Triggers the PreInit event again.
Server.Transfer(Request.FilePath);
}
protected void Page_PreInit(object sender, System.EventArgs e)
{
try
{
Theme = Session["UserTheme"].ToString();
}
catch
{
Theme = "";
}
}
}
Notice that we are storing the selected theme within a session variable (see Chapter 33 for
details) named
UserTheme, which is formally assigned within the Page_PreInit() event handler. Also
note that when the user clicks a given
Button, we programmatically force the PreInit event to fire by
calling
Server.Transfer() and requesting the current page once again. If you were to run this page,
you would now find that you can establish your theme via various
Button clicks.
■Source Code The FunWithThemes project is included under the Chapter 32 subdirectory.
CHAPTER 32 ■ ASP.NET WEB CONTROLS, THEMES, AND MASTER PAGES1242
8849CH32.qxd 10/16/07 12:51 PM Page 1242
www.free-ebooks-download.org
Simpo PDF Merge and Split Unregistered Version -
Positioning Controls Using HTML Tables
If you are new to web development, you may have quickly noticed that positioning controls on a
designer surface is far from intuitive. For example, unlike with Windows Forms, you cannot (by
default) drag a UI element from the Toolbox and position it
exactly where you want to (which as you
might agree is quite frustrating).
Earlier versions of ASP.NET provided two modes of positioning (
GridLayout and FlowLayout)
that could be set via the
pageLayout attribute of the DOCUMENT. When set to GridLayout, absolute
positioning was possible using DHTML. This, however, made ASP.NET 1.
x web pages limited to
browsers that supported dynamic HTML.
FlowLayout (the current default mode for ASP.NET) does
not provide for absolute position . . . which can be frustrating to develop with; however, it does
ensure every browser can correctly display the web content.
Strictly speaking, ASP.NET does still allow developers to define controls (manually) using
GridLayout semantics. However, the designers will complain, as the necessary infrastructure is not
considered valid within the XHTML specification. For example, consider the following
*.aspx file,
which makes use of the
style attribute to provide absolute position to a Button type using the style
attribute of the Button type:
<body MS_POSITIONING="GridLayout">
<form id="Form2" method="post" runat="server">
<asp:Button id="Button1" runat="server" Text="Button"
style="Z-INDEX: 101; LEFT: 106px; POSITION: absolute; TOP: 79px">
</asp:Button>
<asp:TextBox id="TextBox1" runat="server">
</asp:TextBox>
</form>
</body>
Rather than making use of non–XHTML-compliant code (and risk the chance of not working
within every browser), many web developers place widgets within HTML tables. The HTML table is
not literally visible in the browser; however, at design time, controls may be placed within the cells
to provide a level of absolute positioning.
Better yet, Visual Studio 2008 allows you to edit and manipulate these cells visually in a manner
similar to an Excel spreadsheet. For example, the Tab key moves you between each cell, and select-
ing multiple cells allows you to merge/resize them via the context menu. Furthermore, each cell can
be customized with various styles via the Properties window. By way of a quick example, consider
the designer snapshot of an HTML table control on an arbitrary
*.aspx file shown in Figure 32-26.
Once you have configured the cells of your table (which typically include other nested tables),
you are then able to arrange the ASP.NET web controls in a manner of your choice. The benefit is
that as the user resizes the web browser, the controls retain their relative positioning.
■Note The remaining examples of this section of the book do not require you to design pages using HTML
tables; however, you should be aware of their usefulness in web development.
CHAPTER 32 ■ ASP.NET WEB CONTROLS, THEMES, AND MASTER PAGES 1243
8849CH32.qxd 10/16/07 12:51 PM Page 1243
www.free-ebooks-download.org
Simpo PDF Merge and Split Unregistered Version -
Figure 32-26. Visual Studio 2008 provides excellent HTML table configuration support.
Summary
This chapter examined how to make use of various ASP.NET web controls. We began by examining
the role of the
Control and WebControl base classes, and you came to learn how to dynamically
interact with a panel’s internal controls collection. Along the way, you were exposed to the new site
navigation model (
*.sitemap files and the SiteMapDataSource component), the new data binding
engine (via the
SqlDataSource component and the new GridView type), and various validation
controls.
The latter half of this chapter examined the role of master pages and themes. Recall that master
pages can be used to define a common frame for a set of pages on your site. Also recall that the
*.master file defines any number of “content placeholders” to which content pages plug in their
custom UI content. Finally, as you were shown, the ASP.NET theme engine allows you to declara-
tively or programmatically apply a common UI look and feel to your widgets on the web server.
CHAPTER 32 ■ ASP.NET WEB CONTROLS, THEMES, AND MASTER PAGES1244
8849CH32.qxd 10/16/07 12:51 PM Page 1244
www.free-ebooks-download.org
Simpo PDF Merge and Split Unregistered Version -
ASP.NET State Management
Techniques
The previous two chapters concentrated on the composition and behavior of ASP.NET pages and
the web controls they contain. This chapter builds on that information by examining the role of the
Global.asax file and the underlying HttpApplication type. As you will see, the functionality of
HttpApplication allows you to intercept numerous events that enable you to treat your web appli-
cations as a cohesive unit, rather than a set of stand-alone
*.aspx files.
In addition to investigating the
HttpApplication type, this chapter also addresses the all-
important topic of state management. Here you will learn the role of view state, session and
application variables (including the application cache), cookie data, and the ASP.NET Profile API.
The Issue of State
At the beginning of the Chapter 31, I pointed out that HTTP on the Web results in a stateless wire
protocol. This very fact makes web development extremely different from the process of building an
executable assembly. For example, when you are building a Windows Forms application, you can
rest assured that any member variables defined in the
Form-derived class will typically exist in mem-
ory until the user explicitly shuts down the executable:
public partial class MainWindow : System.Windows.Forms.Form
{
// State data!
private string userFavoriteCar = "Yugo";
}
In the world of the World Wide Web, however, you are not afforded the same luxurious assump-
tion. To prove the point, create a new ASP.NET website named SimpleStateExample. Within the
code-behind file of your initial
*.aspx file, define a page-level string variable named
userFavoriteCar:
public partial class _Default : System.Web.UI.Page
{
// State data?
private string userFavoriteCar = "Yugo";
protected void Page_Load(object sender, EventArgs e)
{
}
}
1245
CHAPTER 33
8849CH33.qxd 10/17/07 5:52 PM Page 1245
www.free-ebooks-download.org
Simpo PDF Merge and Split Unregistered Version -
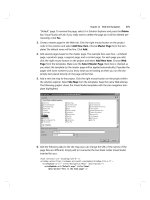
Next, construct the web UI as shown in Figure 33-1.
Figure 33-1. The UI for the simple state page
The server-side Click event handler for the Set button (named btnSetCar) will allow the user to
assign the
string member variable to the value within the TextBox (named txtFavCar):
protected void btnSetCar_Click(object sender, EventArgs e)
{
// Store fave car in member variable.
userFavoriteCar = txtFavCar.Text;
}
while the Click event handler for the Get button (btnGetCar) will display the current value of the
member variable within the page’s
Label widget (lblFavCar):
protected void btnGetCar_Click(object sender, EventArgs e)
{
// Show value of member variable.
lblFavCar.Text = userFavoriteCar;
}
Now, if you were building a Windows Forms application, you would be right to assume that
once the user sets the initial value, it would be remembered throughout the life of the desktop
application. Sadly, when you run this web application, you will find that each time you post back to
the web server (by clicking either button), the value of the
userFavoriteCar string variable is set
back to the initial value of “Yugo”; therefore, the
Label’s text is continuously fixed.
Again, given that HTTP has no clue how to automatically remember data once the HTTP
response has been sent, it stands to reason that the
Page object is destroyed almost instantly. There-
fore, when the client posts back to the
*.aspx file, a new Page object is constructed that will reset
any page-level member variables. This is clearly a major dilemma. Imagine how useless online
shopping would be if every time you posted back to the web server, any and all information you
previously entered (such as the items you wished to purchase) were discarded. When you wish to
remember information regarding the users who are logged on to your site, you need to make use of
various state management techniques.
■Note This issue is in no way limited to ASP.NET. Java servlets, CGI applications, classic ASP, and PHP applica-
tions all must contend with the thorny issue of state management.
CHAPTER 33 ■ ASP.NET STATE MANAGEMENT TECHNIQUES1246
8849CH33.qxd 10/17/07 5:53 PM Page 1246
www.free-ebooks-download.org
Simpo PDF Merge and Split Unregistered Version -
To remember the value of the userFavoriteCar string type between postbacks, you are required
to store the value of this string type within a
session variable. You will examine the exact details of
session state in the pages that follow. For the sake of completion, however, here are the necessary
updates for the current page (note that you are no longer using the private
string member variable,
therefore feel free to comment out or remove the definition altogether):
public partial class _Default : System.Web.UI.Page
{
// State data?
// private string userFavoriteCar = "Yugo";
protected void Page_Load(object sender, EventArgs e)
{
}
protected void btnSetCar_Click(object sender, EventArgs e)
{
// Store value to be remembered in session variable.
Session["UserFavCar"] = txtFavCar.Text;
}
protected void btnGetCar_Click(object sender, EventArgs e)
{
// Get session variable value.
lblFavCar.Text = (string)Session["UserFavCar"];
}
}
If you now run the application, the value of your favorite automobile will be preserved across
postbacks, thanks to the
HttpSessionState object manipulated indirectly by the inherited Session
property.
■Source Code The SimpleStateExample project is included under the Chapter 33 subdirectory.
ASP.NET State Management Techniques
ASP.NET provides several mechanisms that you can use to maintain stateful information in your
web applications. Specifically, you have the following options:
• Make use of ASP.NET view state.
• Make use of ASP.NET control state.
• Define application-level variables.
• Make use of the cache object.
• Define session-level variables.
• Define cookie data.
The one thing these approaches have in common is that they each demand that a given user is
in session and that the web application is loaded into memory. As soon as a user logs off (or times
out) from your site (or your website is shut down), your site is once again stateless. If you wish to
CHAPTER 33 ■ ASP.NET STATE MANAGEMENT TECHNIQUES 1247
8849CH33.qxd 10/17/07 5:53 PM Page 1247
www.free-ebooks-download.org
Simpo PDF Merge and Split Unregistered Version -
persist user data in a permanent manner, ASP.NET provides an out-of-the-box Profile API. We’ll
examine the details of each approach in turn, beginning with the topic of ASP.NET view state.
Understanding the Role of ASP.NET View State
The term view state has been thrown out a few times here and in the previous two chapters without
a formal definition, so let’s demystify this term once and for all. Under classic (COM-based) ASP,
web developers were required to manually repopulate the values of the incoming form widgets dur-
ing the process of constructing the outgoing HTTP response. For example, if the incoming HTTP
request contained five text boxes with specific values, the
*.asp file required script code to extract
the current values (via the
Form or QueryString collections of the Request object) and manually
place them back into the HTTP response stream (needless to say, this was a drag). If the developer
failed to do so, the caller was presented with a set of five empty text boxes!
Under ASP.NET, we are no longer required to manually scrape out and repopulate the values
contained within the HTML widgets because the ASP.NET runtime will automatically embed a hid-
den form field (named
__VIEWSTATE), which will flow between the browser and a specific page. The
data assigned to this field is a Base64-encoded string that contains a set of name/value pairs that
represent the values of each GUI widget on the page at hand.
The
System.Web.UI.Page base class’s Init event handler is the entity in charge of reading the
incoming values found within the
__VIEWSTATE field to populate the appropriate member variables
in the derived class (which is why it is risky at best to access the state of a web widget within the
scope of a page’s
Init event handler).
Also, just before the outgoing response is emitted back to the requesting browser, the
__VIEWSTATE data is used to repopulate the form’s widgets, to ensure that the current values of the
HTML widgets appear as they did prior to the previous postback.
Clearly, the best thing about this aspect of ASP.NET is that it just happens without any work on
your part. Of course, you are always able to interact with, alter, or disable this default functionality if
you so choose. To understand how to do this, let’s see a concrete view state example.
Demonstrating View State
First, create a new ASP.NET web application called ViewStateApp. On your initial *.aspx page, add
a single ASP.NET
ListBox web control (named myListBox) and a single Button type (named
btnPostback). Handle the Click event for the Button to provide a way for the user to post back to
the web server:
public partial class _Default : System.Web.UI.Page
{
protected void Page_Load(object sender, EventArgs e)
{
}
protected void btnPostback_Click(object sender, EventArgs e)
{
// No-op. This is just here to allow a postback.
}
}
Now, using the Visual Studio 2008 Properties window, access the Items property and add four
ListItems to the ListBox using the associated dialog box. The resulting markup looks like this:
<asp:ListBox ID="myListBox" runat="server">
<asp:ListItem>Item One</asp:ListItem>
<asp:ListItem>Item Two</asp:ListItem>
CHAPTER 33 ■ ASP.NET STATE MANAGEMENT TECHNIQUES1248
8849CH33.qxd 10/17/07 5:53 PM Page 1248
www.free-ebooks-download.org
Simpo PDF Merge and Split Unregistered Version -
<asp:ListItem>Item Three</asp:ListItem>
<asp:ListItem>Item Four</asp:ListItem>
</asp:ListBox>
Note that you are hard-coding the items in the ListBox directly within the *.aspx file. As you
already know, all
<asp:> definitions found within an HTML form will automatically render back
their HTML representation before the final HTTP response (provided they have the
runat="server"
attribute).
The
<%@Page%> directive has an optional attribute called EnableViewState that by default is set
to
true. To disable this behavior, simply update the <%@Page%> directive as follows:
<%@ Page Language="C#" AutoEventWireup="true"
CodeFile="Default.aspx.cs" Inherits="_Default"
EnableViewState ="false" %>
So, what exactly does it mean to disable view state? The answer is, it depends. Given the previ-
ous definition of the term, you would think that if you disable view state for an
*.aspx file, the
values within your
ListBox would not be remembered between postbacks to the web server. How-
ever, if you were to run this application as is, you might be surprised to find that the information in
the
ListBox is retained regardless of how many times you post back to the page.
In fact, if you examine the source HTML returned to the browser (by right-clicking the page
within the browser and selecting View Source), you may be further surprised to see that the hidden
__VIEWSTATE field is still present:
<input type="hidden" name="__VIEWSTATE" id="__VIEWSTATE"
value="/wEPDwUKLTM4MTM2MDM4NGRkqGC6gjEV25JnddkJiRmoIc10SIA=" />
The reason the view state string is still visible is the fact that the *.aspx file has explicitly
defined the
ListBox items within the scope of the HTML <form> tags. Thus, the ListBox items will
be autogenerated each time the web server responds to the client.
However, assume that your
ListBox is dynamically populated within the code-behind file
rather than within the HTML
<form> definition. First, remove the <asp:ListItem> declarations from
the current
*.aspx file:
<asp:ListBox ID="myListBox" runat="server">
</asp:ListBox>
Next, fill the list items within the Load event handler within your code-behind file:
protected void Page_Load(object sender, EventArgs e)
{
if (!IsPostBack)
{
// Fill ListBox dynamically!
myListBox.Items.Add("Item One");
myListBox.Items.Add("Item Two");
myListBox.Items.Add("Item Three");
myListBox.Items.Add("Item Four");
}
}
If you post to this updated page, you will find that the first time the browser requests the page,
the values in the
ListBox are present and accounted for. However, on postback, the ListBox is sud-
denly empty. The first rule of ASP.NET view state is that its effect is only realized when you have
widgets whose values are dynamically generated through code. If you hard-code values within the
*.aspx file’s <form> tags, the state of these items is always remembered across postbacks (even when
you set
EnableViewState to false for a given page).
CHAPTER 33 ■ ASP.NET STATE MANAGEMENT TECHNIQUES 1249
8849CH33.qxd 10/17/07 5:53 PM Page 1249
www.free-ebooks-download.org
Simpo PDF Merge and Split Unregistered Version -
Furthermore, view state is most useful when you have a dynamically populated web widget
that always needs to be repopulated for each and every postback (such as an ASP.NET
GridView,
which is always filled using a database hit). If you did not disable view state for pages that contain
such widgets, the entire state of the grid is represented within the hidden
__VIEWSTATE field. Given
that complex pages may contain numerous ASP.NET web controls, you can imagine how large this
string would become. As the payload of the HTTP request/response cycle could become quite
heavy, this may become a problem for the dial-up web surfers of the world. In cases such as these,
you may find faster throughput if you disable view state for the page.
If the idea of disabling view state for the entire
*.aspx file seems a bit too aggressive, do know
that every descendent of the
System.Web.UI.Control base class inherits the EnableViewState prop-
erty, which makes it very simple to disable view state on a control-by-control basis:
<asp:GridView id="myHugeDynamicallyFilledGridOfData" runat="server"
EnableViewState="false">
</asp:GridView>
■Note ASP.NET pages reserve a small part of the __VIEWSTATE string for internal use. Given this, you will find
that the
__VIEWSTATE field will still appear in the client-side source even when the entire page (and all the con-
trols) have disabled view state.
Adding Custom View State Data
In addition to the EnableViewState property, the System.Web.UI.Control base class provides an
inherited property named
ViewState. Under the hood, this property provides access to a System.
Web.UI.StateBag
type, which represents all the data contained within the __VIEWSTATE field. Using
the indexer of the
StateBag type, you can embed custom information within the hidden
__VIEWSTATE form field using a set of name/value pairs. Here’s a simple example:
protected void btnAddToVS_Click(object sender, EventArgs e)
{
ViewState["CustomViewStateItem"] = "Some user data";
lblVSValue.Text = (string)ViewState["CustomViewStateItem"];
}
Because the System.Web.UI.StateBag type has been designed to operate on any type-derived
System.Object, when you wish to access the value of a given key, you should explicitly cast it into
the correct underlying data type (in this case, a
System.String). Be aware, however, that values
placed within the
__VIEWSTATE field cannot literally be any object. Specifically, the only valid types
are
Strings, Integers, Booleans, ArrayLists, Hashtables, or an array of these types.
So, given that
*.aspx pages may insert custom bits of information into the __VIEWSTATE string,
the next logical question is when you would want to do so. Most of the time, custom view state data
is best suited for user-specific preferences. For example, you may establish a point of view state data
that specifies how a user wishes to view the UI of a
GridView (such as a sort order). View state data is
not well suited for full-blown user data, such as items in a shopping cart or cached
DataSets. When
you need to store this sort of complex information, you are required to work with session or appli-
cation data. Before we get to that point, you need to understand the role of the
Global.asax file.
■Source Code The ViewStateApp project is included under the Chapter 33 subdirectory.
CHAPTER 33 ■ ASP.NET STATE MANAGEMENT TECHNIQUES1250
8849CH33.qxd 10/17/07 5:53 PM Page 1250
www.free-ebooks-download.org
Simpo PDF Merge and Split Unregistered Version -
A BRIEF WORD REGARDING CONTROL STATE
Since the release of .NET 2.0, a control’s state data can now be persisted via control state rather than view state.
This technique is most helpful if you have written a custom ASP.NET web control that must remember data between
round-trips. While the
ViewState property can be used for this purpose, if view state is disabled at a page level,
the custom control is effectively broken. For this very reason, web controls now support a
ControlState property.
Control state works identically to view state; however, it will not be disabled if view state is disabled at the
page level. As mentioned, this feature is most useful for those who are developing custom web controls (a topic not
covered in this text). Consult the .NET Framework 3.5 SDK documentation for further details.
The Role of the Global.asax File
At this point, an ASP.NET application may seem to be little more than a set of *.aspx files and their
respective web controls. While you could build a web application by simply linking a set of related
web pages, you will most likely need a way to interact with the web application as a whole. To this
end, your ASP.NET web applications may choose to include an optional
Global.asax file via the Web
Site
➤ Add New Item menu option, as shown in Figure 33-2 (notice you are selecting the Global
Application Class icon).
Figure 33-2. The Global.asax file
Simply put, Global.asax is just about as close to a traditional double-clickable *.exe that we
can get in the world of ASP.NET, meaning this type represents the runtime behavior of the website
itself. Once you insert a
Global.asax file into a web project, you will notice it is little more than a
<script> block containing a set of event handlers:
CHAPTER 33 ■ ASP.NET STATE MANAGEMENT TECHNIQUES 1251
8849CH33.qxd 10/17/07 5:53 PM Page 1251
www.free-ebooks-download.org
Simpo PDF Merge and Split Unregistered Version -
<%@ Application Language="C#" %>
<script runat="server">
void Application_Start(object sender, EventArgs e)
{
// Code that runs on application startup.
}
void Application_End(object sender, EventArgs e)
{
// Code that runs on application shutdown.
}
void Application_Error(object sender, EventArgs e)
{
// Code that runs when an unhandled error occurs.
}
void Session_Start(object sender, EventArgs e)
{
// Code that runs when a new session is started.
}
void Session_End(object sender, EventArgs e)
{
// Code that runs when a session ends.
// Note: The Session_End event is raised only when the sessionstate mode
// is set to InProc in the Web.config file. If session mode is set to
// StateServer or SQLServer, the event is not raised.
}
</script>
Looks can be deceiving, however. At runtime, the code within this <script> block is assembled
into a class type deriving from
System.Web.HttpApplication (if you have a background in ASP.NET
1.x, you may recall that the
Global.asax code-behind file literally did define a class deriving from
HttpApplication).
As mentioned, the members defined inside
Global.asax are in event handlers that allow you to
interact with application-level (and session-level) events. Table 33-1 documents the role of each
member.
Table 33-1. Core Types of the System.Web Namespace
Event Handler Meaning in Life
Application_Start() This event handler is called the very first time the web application is
launched. Thus, this event will fire exactly once over the lifetime of a web
application. This is an ideal place to define application-level data used
throughout your web application.
Application_End() This event handler is called when the application is shutting down. This
will occur when the last user times out or if you manually shut down the
application via IIS.
Session_Start() This event handler is fired when a new user logs on to your application.
Here you may establish any user-specific data points.
CHAPTER 33 ■ ASP.NET STATE MANAGEMENT TECHNIQUES1252
8849CH33.qxd 10/17/07 5:53 PM Page 1252
www.free-ebooks-download.org
Simpo PDF Merge and Split Unregistered Version -
Event Handler Meaning in Life
Session_End() This event handler is fired when a user’s session has terminated (typically
through a predefined timeout).
Application_Error() This is a global error handler that will be called when an unhandled
exception is thrown by the web application.
The Global Last-Chance Exception Event Handler
First, let me point out the role of the Application_Error() event handler. Recall that a specific page
may handle the
Error event to process any unhandled exception that occurred within the scope of
the page itself. In a similar light, the
Application_Error() event handler is the final place to handle
an exception that was not handled by a given page. As with the page-level
Error event, you are able
to access the specific
System.Exception using the inherited Server property:
void Application_Error(object sender, EventArgs e)
{
// Obtain the unhandled error.
Exception ex = Server.GetLastError();
// Process error here
// Clear error when finished.
Server.ClearError();
}
Given that the Application_Error() event handler is the last-chance exception handler for
your web application, it is quite common to implement this method in such a way that the user is
transferred to a predefined error page on the server. Other common duties may include sending an
e-mail to the web administrator or writing to an external error log.
The HttpApplication Base Class
As mentioned, the Global.asax script is dynamically generated into a class deriving from the
System.Web.HttpApplication base class, which supplies some of the same sort of functionality as
the
System.Web.UI.Page type (without a visible user interface). Table 33-2 documents the key mem-
bers of interest.
Table 33-2. Key Members Defined by the System.Web.HttpApplication Type
Property Meaning in Life
Application This property allows you to interact with application-level variables, using the
exposed
HttpApplicationState type.
Request This property allows you to interact with the incoming HTTP request, using the
underlying
HttpRequest object.
Response This property allows you to interact with the incoming HTTP response, using the
underlying
HttpResponse object.
Server This property gets the intrinsic server object for the current request, using the
underlying
HttpServerUtility object.
Session This property allows you to interact with session-level variables, using the
underlying HttpSessionState object.
CHAPTER 33 ■ ASP.NET STATE MANAGEMENT TECHNIQUES 1253
8849CH33.qxd 10/17/07 5:53 PM Page 1253
www.free-ebooks-download.org
Simpo PDF Merge and Split Unregistered Version -
Again, given that the Global.asax file does not explicitly document that HttpApplication is the
underlying base class, it is important to remember that all of the rules of the “is-a” relationship do
indeed apply. For example, if you were to apply the dot operator to the
base keyword within any of
the members within
Global.asax, you would find you have immediate access to all members of the
chain of inheritance, as you see in Figure 33-3.
Figure 33-3. Remember that HttpApplication is the parent of the type lurking within Global.asax.
Understanding the Application/Session Distinction
Under ASP.NET, application state is maintained by an instance of the HttpApplicationState type.
This class enables you to share global information across all users (and all pages) who are logged on
to your ASP.NET application. Not only can application data be shared by all users on your site, but
also if the value of an application-level data point changes, the new value is seen by all users on
their next postback.
On the other hand, session state is used to remember information for a specific user (again,
such as items in a shopping cart). Physically, a user’s session state is represented by the
HttpSessionState class type. When a new user logs on to an ASP.NET web application, the runtime
will automatically assign that user a new session ID, which by default will expire after 20 minutes of
inactivity. Thus, if 20,000 users are logged on to your site, you have 20,000 distinct
HttpSessionState
objects, each of which is automatically assigned a unique session ID. The relationship between a
web application and web sessions is shown in Figure 33-4.
As you may remember based on past experience, under classic ASP, application- and session-
state data is represented using distinct COM objects (e.g.,
Application and Session). Under
ASP.NET,
Page-derived types as well as the HttpApplication type make use of identically named
properties (i.e.,
Application and Session), which expose the underlying HttpApplicationState and
HttpSessionState types.
CHAPTER 33 ■ ASP.NET STATE MANAGEMENT TECHNIQUES1254
8849CH33.qxd 10/17/07 5:53 PM Page 1254
www.free-ebooks-download.org
Simpo PDF Merge and Split Unregistered Version -
Figure 33-4. The application/session state distinction
Maintaining Application-Level State Data
The HttpApplicationState type enables developers to share global information across multiple
sessions in an ASP.NET application. For example, you may wish to maintain an application-wide
connection string that can be used by all pages, a common
DataSet used by multiple pages, or any
other piece of data that needs to be accessed on an application-wide scale. Table 33-3 describes
some core members of this type.
Table 33-3. Members of the HttpApplicationState Type
Members Meaning in Life
Add() This method allows you to add a new name/value pair into
the
HttpApplicationState type. Do note that this method is
typically
not used in favor of the indexer of the
HttpApplicationState class.
AllKeys This property returns an array of System.String types that
represent all the names in the
HttpApplicationState type.
Clear() This method deletes all items in the HttpApplicationState
type. This is functionally equivalent to the RemoveAll()
method.
Count This property gets the number of item objects in the
HttpApplicationState type.
Lock(), Unlock() These two methods are used when you wish to alter a set of
application variables in a thread-safe manner.
RemoveAll(), Remove(), RemoveAt() These methods remove a specific item (by string name)
within the
HttpApplicationState type. RemoveAt() removes
the item via a numerical indexer.
To illustrate working with application state, create a new ASP.NET web application named
AppState and insert a new
Global.asax file. When you create data members that can be shared
among all active sessions, you need to establish a set of name/value pairs. In most cases, the most
CHAPTER 33 ■ ASP.NET STATE MANAGEMENT TECHNIQUES 1255
8849CH33.qxd 10/17/07 5:53 PM Page 1255
www.free-ebooks-download.org
Simpo PDF Merge and Split Unregistered Version -
natural place to do so is within the Application_Start() event handler of the HttpApplication-
derived type, for example:
void Application_Start(Object sender, EventArgs e)
{
// Set up some application variables.
Application["SalesPersonOfTheMonth"] = "Chucky";
Application["CurrentCarOnSale"] = "Colt";
Application["MostPopularColorOnLot"] = "Black";
}
During the lifetime of your web application (which is to say, until the web application is manu-
ally shut down or until the final user times out), any user (on any page) may access these values as
necessary. Assume you have a page that will display the current discount car within a
Label via a
button
Click event handler:
protected void btnShowCarOnSale_Click(object sender, EventArgs arg)
{
lblCurrCarOnSale.Text = string.Format("Sale on {0}'s today!",
(string)Application["CurrentCarOnSale"]);
}
Like the ViewState property, notice how you should cast the value returned from the
HttpApplicationState type into the correct underlying type as the Application property operates
on general
System.Object types.
Now, given that the
HttpApplicationState type can hold any type, it should stand to reason
that you can place custom types (or any .NET object) within your site’s application state. Assume
you would rather maintain the three current application variables within a strongly typed class
named
CarLotInfo:
public class CarLotInfo
{
public CarLotInfo(string s, string c, string m)
{
salesPersonOfTheMonth = s;
currentCarOnSale = c;
mostPopularColorOnLot = m;
}
// Public for easy access, could also make use of automatic
// property syntax.
public string salesPersonOfTheMonth;
public string currentCarOnSale;
public string mostPopularColorOnLot;
}
With this helper class in place, you could modify the Application_Start() event handler as
follows:
void Application_Start(Object sender, EventArgs e)
{
// Place a custom object in the application data sector.
Application["CarSiteInfo"] =
new CarLotInfo("Chucky", "Colt", "Black");
}
and then access the information using the public field data within a server-side Click event handler
for a
Button type named btnShowAppVariables:
CHAPTER 33 ■ ASP.NET STATE MANAGEMENT TECHNIQUES1256
8849CH33.qxd 10/17/07 5:53 PM Page 1256
www.free-ebooks-download.org
Simpo PDF Merge and Split Unregistered Version -