Pro VB 2005 and the .NET 2.0 Platform Second Edition phần 7 potx
Bạn đang xem bản rút gọn của tài liệu. Xem và tải ngay bản đầy đủ của tài liệu tại đây (2.38 MB, 109 trang )
CHAPTER 20 ■ THE .NET REMOTING LAYER606
Implementing CarService.OnStart()
You can likely already assume what sort of logic should happen when your custom service is started
on a given machine. Recall that the role of CarService is to perform the same tasks as your custom
console-based service. Thus, if you wish to register CarService as a WKO-singleton type that is avail-
able via HTTP, you could add the following code to the OnStart() method (of course, you could also
choose to dynamically read the remoting information from a *.config file):
Protected Overrides Sub OnStart(ByVal args() As String)
' Create a new HttpChannel.
Dim c As HttpChannel = New HttpChannel(32469)
ChannelServices.RegisterChannel(c, False)
' Register as single-call WKO.
RemotingConfiguration.RegisterWellKnownServiceType( _
GetType(CarGeneralAsm.CarProvider), _
"CarProvider.soap", _
WellKnownObjectMode.SingleCall)
End Sub
Technically speaking, the CarService does not demand any sort of shutdown logic. Therefore,
for this example, we can leave the OnStop() method implementation empty.
Now that the service is complete, the next task is to install this service on the target machine.
Adding a Service Installer
Before you can install your service on a given machine, you need to add an additional type into your
current CarWinService project. Specifically, any Windows service (written using .NET or the Win32 API)
requires a number of registry entries to be made to allow the OS to interact with the service itself.
Rather than making these entries manually, you can simply add an Installer type to a Windows
service project, which will configure your ServiceBase-derived type correctly when installed on the
target machine.
To add an installer for the CarService, open the design-time service editor (by double-clicking
the CarService.vb file from Solution Explorer), right-click anywhere within the designer, and select
Add Installer (see Figure 20-9).
Figure 20-9. Including an installer for the custom Windows service
5785ch20.qxd 3/31/06 11:14 AM Page 606
CHAPTER 20 ■ THE .NET REMOTING LAYER 607
This selection will add a new component that derives from the System.Configuration.Install.
Installer base class. On your designer will be two components. The ServiceInstaller1 type repre-
sents a specific service installer for a specific service in your project. If you select this icon and view
the Properties window, you will find that the ServiceName property has been set to the CarService
class type.
The second component (ServiceProcessInstaller1) allows you to establish the identity under
which the installed service will execute. By default, the Account property is set to User. Using the
Properties window of Visual Studio 2005, change this value to LocalService (see Figure 20-10).
That’s it! Now compile your project.
Installing the CarWinService
Installing CarService.exe on a given machine (local or remote) requires two steps:
1. Move the compiled service assembly (and any necessary external assemblies; CarGeneralAsm.dll
in this example) to the remote machine.
2. Run the installutil.exe command-line tool, specifying your service as an argument.
Assuming step 1 is complete, open a Visual Studio 2005 command window, navigate to the
location of the CarWinService.exe assembly, and issue the following command (note that this same
tool can be used to uninstall a service as well using the -u options):
installutil carwinservice.exe
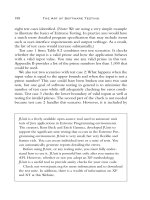
Once this Windows service has been properly installed, you are now able to start and configure
it using the Services applet, which is located under the Administrative Tools folder of your system’s
Control Panel. Once you have located your CarService (see Figure 20-11), click the Start link to load
and run the binary.
Figure 20-10. Establishing the identity of the CarService
5785ch20.qxd 3/31/06 11:14 AM Page 607
CHAPTER 20 ■ THE .NET REMOTING LAYER608
At this point, you can build any number of clients that can communicate with the remote
objects hosted by the Windows service.
■Source Code The CarWinService project is located under the Chapter 20 subdirectory.
Hosting Remote Objects Using IIS
Hosting a remote assembly under IIS is even simpler than building a Windows service, as IIS is pre-
programmed to allow incoming HTTP requests via port 80. Now, given the fact that IIS is a web
server, it should stand to reason that IIS is only able to host remote objects using the HttpChannel
type (unlike a Windows service, which can also leverage the TcpChannel type). Assuming this is not
perceived as a limitation, follow these steps to leverage the remoting support of IIS:
1. On your hard drive, create a new folder to hold your CarGeneralAsm.dll. Within this folder,
create a subdirectory named \Bin. Now, copy the CarGeneralAsm.dll to this subdirectory
(e.g., C:\IISCarService\Bin).
2. Open the Internet Information Services applet on the host machine (located under the
Administrative Tools folder in your system’s Control Panel).
3. Right-click the Default Web Site node and select New ➤ Virtual Directory.
4. Create a virtual directory that maps to the root folder you just created (C:\IISCarService).
The remaining default settings presented by the New Virtual Directory Wizard are fine.
5. Finally, create a new configuration file named web.config to control how this virtual direc-
tory should register the remote type (see the following code). Make sure this file is saved
under the root folder (in this example, C:\IISCarService).
<configuration>
<system.runtime.remoting>
<application>
<service>
<wellknown mode="Singleton"
type="CarGeneralAsm.CarProvider, CarGeneralAsm"
objectUri="carprovider.soap" />
</service>
<channels>
<channel ref="http"/>
</channels>
Figure 20-11. The Windows Services applet
5785ch20.qxd 3/31/06 11:14 AM Page 608
CHAPTER 20 ■ THE .NET REMOTING LAYER 609
</application>
</system.runtime.remoting>
</configuration>
Now that your CarGeneralAsm.dll has been configured to be reachable via HTTP requests under
IIS, you can update your client-side *.config file as follows (using the name of your IIS host, of course):
<configuration>
<system.runtime.remoting>
<application>
<client displayName = "CarClient">
<wellknown
type="CarGeneralAsm.CarProvider, CarGeneralAsm"
url="http://NameTheRemoteIISHost/IISCarHost/carprovider.soap"/>
</client>
<channels>
<channel ref="http"/>
</channels>
</application>
</system.runtime.remoting>
</configuration>
At this point, you are able to build a client application that loads the *.config file to make use
of the remote objects now hosted under IIS.
Asynchronous Remoting
To wrap things up, let’s examine how to invoke members of a remote type asynchronously. In
Chapter 16, you were first introduced to the topic of asynchronous method invocations using dele-
gate types. As you would expect, if a client assembly wishes to call a remote object asynchronously,
the first step is to define a custom delegate to represent the remote method in question. At this
point, the caller can make use of any of the techniques seen in Chapter 16 to invoke and receive the
method return value.
By way of a simple illustration, create a new console application (AsyncWKOCarProviderClient)
and set a reference to the first iteration of the CarGeneralAsm.dll assembly. Now, update the Program
module as follows:
Imports CarGeneralAsm
Imports System.Runtime.Remoting
' The delegate for the GetAllAutos() method.
Public Delegate Function GetAllAutosDelegate() As List(Of JamesBondCar)
Module Program
Sub Main()
Console.WriteLine("Client started! Hit enter to end")
RemotingConfiguration.Configure( _
"AsyncWKOCarProviderClient.exe.config", False)
' Make the car provider.
Dim cp As CarProvider = New CarProvider()
' Make the delegate.
Dim getCarsDel As GetAllAutosDelegate = _
New GetAllAutosDelegate(AddressOf cp.GetAllAutos)
5785ch20.qxd 3/31/06 11:14 AM Page 609
CHAPTER 20 ■ THE .NET REMOTING LAYER610
' Call GetAllAutos() asynchronously.
Dim ar As IAsyncResult = getCarsDel.BeginInvoke(Nothing, Nothing)
' Simulate client-side activity.
While Not ar.IsCompleted
Console.WriteLine("Client working ")
End While
' All done! Get return value from delegate.
Dim allJBCs As List(Of JamesBondCar) = getCarsDel.EndInvoke(ar)
' Use all cars in List.
For Each j As JamesBondCar In allJBCs
UseCar(j)
Next
Console.ReadLine()
End Sub
Public Sub UseCar(ByVal j As JamesBondCar)
Console.WriteLine("Can car fly? {0}", j.canFly)
Console.WriteLine("Can car swim? {0}", j.canSubmerge)
End Sub
End Module
Notice how the client application first declares a delegate that matches the signature of the
GetAllAutos() method of the remote CarProvider type. When the delegate is created, you pass in
the name of the method to call (GetAllAutos), as always. Next, you trigger the BeginInvoke() method,
cache the resulting IAsyncResult interface, and simulate some work on the client side (recall that
the IAsyncResult.IsCompleted property allows you to monitor whether the associated method has
completed processing).
Finally, once the client’s work has completed, you obtain the List(Of T) returned from the
CarProvider.GetAllAutos() method by invoking the EndInvoke() member, and pass each JamesBondCar
into a shared helper function named UseCar(). Again, the beauty of the .NET delegate type is the
fact that the logic used to invoke remote methods asynchronously is identical to the process of local
method invocations.
■Source Code The AsyncWKOCarProviderClient project is located under the Chapter 20 subdirectory.
Summary
In this chapter, you examined how to configure distinct .NET assemblies to share types between
application boundaries. As you have seen, a remote object may be configured as an MBV or MBR
type. This choice ultimately controls how a remote type is realized in the client’s application domain
(a copy or transparent proxy).
If you have configured a type to function as an MBR entity, you are suddenly faced with a number
of related choices (WKO versus CAO, single call versus singleton, and so forth), each of which was
addressed during this chapter. As well, you examined the process of tracking the lifetime of a remote
object via the use of leases and lease sponsorship. Finally, you revisited the role of the .NET delegate
type to understand how to asynchronously invoke a remote method (which, as luck would have it, is
identical to the process of asynchronously invoking a local type).
5785ch20.qxd 3/31/06 11:14 AM Page 610
Building a Better Window with
System.Windows.Forms
If you have read through the previous 20 chapters, you should have a solid handle on the VB 2005
programming language as well as the foundation of the .NET architecture. While you could take
your newfound knowledge and begin building the next generation of console applications (boring!),
you are more likely to be interested in building an attractive graphical user interface (GUI) to allow
users to interact with your system.
This chapter is the first of three aimed at introducing you to the process of building traditional
form-based desktop applications. Here, you’ll learn how to build a highly stylized main window using
the Form and Application classes. This chapter also illustrates how to capture and respond to user
input (i.e., handle mouse and keyboard events) within the context of a GUI desktop environment.
Finally, you will learn to construct menu systems, toolbars, status bars, and multiple document inter-
face (MDI) applications, both by hand and using the designers incorporated into Visual Studio 2005.
Overview of the System.Windows.Forms
Namespace
Like any namespace, System.Windows.Forms is composed of various classes, structures, delegates,
interfaces, and enumerations. Although the difference in appearance between a console UI (CUI)
and graphical UI (GUI) seems at first glance like night and day, in reality the process of building
a Windows Forms application involves nothing more than learning how to manipulate a new set of
types using the VB 2005 syntax you already know. From a high level, the many types within the
System.Windows.Forms namespace can be grouped into the following broad categories:
• Core infrastructure: These are types that represent the core operations of a .NET Forms pro-
gram (Form, Application, etc.) and various types to facilitate interoperability with legacy
ActiveX controls.
• Controls: These are types used to create rich UIs (Button, MenuStrip, ProgressBar,
DataGridView, etc.), all of which derive from the Control base class. Controls are configurable
at design time and are visible (by default) at runtime.
• Components: These are types that do not derive from the Control base class but still provide
visual features to a .NET Forms program (ToolTip, ErrorProvider, etc.). Many components
(such as the Timer) are not visible at runtime, but can be configured visually at design time.
• Common dialog boxes: Windows Forms provides a number of canned dialog boxes for com-
mon operations (OpenFileDialog, PrintDialog, etc.). As you would hope, you can certainly
build your own custom dialog boxes if the standard dialog boxes do not suit your needs.
611
CHAPTER 21
■ ■ ■
5785ch21.qxd 3/31/06 11:20 AM Page 611
CHAPTER 21 ■ BUILDING A BETTER WINDOW WITH SYSTEM.WINDOWS.FORMS612
Given that the total number of types within System.Windows.Forms is well over 100 strong, it
would be redundant (not to mention a terrible waste of paper) to list every member of the Windows
Forms family. To set the stage for the next several chapters, however, Table 21-1 lists some of the core
.NET 2.0 System.Windows.Forms types (consult the .NET Framework 2.0 SDK documentation for full
details).
Table 21-1. Core Types of the System.Windows.Forms Namespace
Classes Meaning in Life
Application This class encapsulates the runtime operation of
a Windows Forms application.
Button, CheckBox, ComboBox, These classes (in addition to many others) correspond to
DateTimePicker, ListBox, various GUI widgets. You’ll examine many of these items in
LinkLabel, MaskedTextBox, detail in Chapter 23.
MonthCalendar, PictureBox,
TreeView
FlowLayoutPanel, .NET 2.0 now supplies various layout managers that
TableLayoutPanel automatically arrange a Form’s controls during resizing.
Form This type represents a main window, dialog box, or MDI
child window of a Windows Forms application.
ColorDialog, OpenFileDialog, These are various standard dialog boxes for common GUI
SaveFileDialog, FontDialog, operations.
PrintPreviewDialog,
FolderBrowserDialog
Menu, MainMenu, MenuItem, These types are used to build topmost and context-
ContextMenu, MenuStrip, sensitive menu systems. These controls (new to .NET 2.0)
ContextMenuStrip allow you to build menus that may contain traditional
drop-down menu items as well as other controls (text
boxes, combo boxes, and so forth).
StatusBar, Splitter, ToolBar, These types are used to adorn a Form with common child
ScrollBar, StatusStrip, ToolStrip controls.
■Note In addition to System.Windows.Forms, the System.Windows.Forms.dll assembly defines additional
GUI-centric namespaces. For the most part, these additional types are used internally by the Forms engine and/or the
designer tools of Visual Studio 2005. Given this fact, we will keep focused on the core
System.Windows.Forms
namespace.
Working with the Windows Forms Types
When you build a Windows Forms application, you may choose to write all the relevant code by
hand (using Notepad or TextPad, perhaps) and feed the resulting *.vb files into the VB 2005 com-
piler using the /target:winexe flag. Taking time to build some Windows Forms applications by hand
not only is a great learning experience, but also helps you understand the code generated by the
various graphics designers found within various .NET IDEs.
To make sure you truly understand the basic process of building a Windows Forms application,
the initial examples in this chapter will avoid the use of graphics designers. Once you feel comfort-
able with the process of building a Windows Forms application “wizard-free,” you will then leverage
the various designer tools provided by Visual Studio 2005.
5785ch21.qxd 3/31/06 11:20 AM Page 612
CHAPTER 21 ■ BUILDING A BETTER WINDOW WITH SYSTEM.WINDOWS.FORMS 613
Building a Main Window by Hand
To begin learning about Windows Forms programming, you’ll build a minimal main window from
scratch. Create a new folder on your hard drive (e.g., C:\MyFirstWindow) and create a new file within
this directory named MainWindow.vb using your text editor of choice.
In the world of Windows Forms, the Form class is used to represent any window in your application.
This includes a topmost main window in a single-document interface (SDI) application, modeless
and modal dialog boxes, and the parent and child windows of a multiple-document interface (MDI)
application. When you are interested in creating and displaying the main window in your program,
you have two mandatory steps:
1. Derive a new class from System.Windows.Forms.Form.
2. Configure your application’s Main() method to invoke Application.Run(), passing an instance
of your Form-derived type as an argument.
Given this, update your MainWindow.vb file with the following class definition (note that because
our Main() subroutine is within a Class type (not a Module), we are required to define Main() using
the Shared keyword):
Imports System.Windows.Forms
Namespace MyWindowsApp
Public Class MainWindow
Inherits Form
' Run this application and identify the main window.
Shared Sub Main()
Application.Run(New MainWindow())
End Sub
End Class
End Namespace
In addition to the always present mscorlib.dll, a Windows Forms application needs to reference
the System.dll and System.Windows.Forms.dll assemblies. As you may recall from Chapter 2, the
default VB 2005 response file (vbc.rsp) instructs vbc.exe to automatically include these assemblies
during the compilation process, so you are good to go. Also recall that the /target:winexe option of
vbc.exe instructs the compiler to generate a Windows executable.
■Note Technically speaking, you can build a Windows application at the command line using the /target:exe
option; however, if you do, you will find that a command window will be looming in the background (and it will stay
there until you shut down the main window). When you specify
/target:winexe, your executable runs as a native
Windows Forms application (without the looming command window).
To compile your VB 2005 code file, open aVisual Studio 2005 command prompt, change to the
directory containing your *.vb file, and issue the following command:
vbc /target:winexe *.vb
Figure 21-1 shows a test run.
5785ch21.qxd 3/31/06 11:20 AM Page 613
CHAPTER 21 ■ BUILDING A BETTER WINDOW WITH SYSTEM.WINDOWS.FORMS614
Figure 21-1. A simple main window à la Windows Forms
Granted, the Form is not altogether that interesting at this point. But simply by deriving from
Form, you have a minimizable, maximizable, resizable, and closable main window (with a default
system-supplied icon to boot!). Unlike other Microsoft GUI frameworks you may have used in the
past (Microsoft Foundation Classes, in particular), there is no need to bolt in hundreds of lines of
coding infrastructure. Unlike a C-based Win32 API Windows application, there is no need to manu-
ally implement WinProc() or WinMain() procedures. Under the .NET platform, those dirty details
have been encapsulated within the Form and Application types.
Honoring the Separation of Concerns
Currently, the MainWindow class defines the Main() method directly within its scope. If you prefer, you
may create a dedicated module (I named mine Program) that is responsible for the task of launching
the main window, leaving the Form-derived class responsible for representing the window itself:
Imports System.Windows.Forms
Namespace MyWindowsApp
Public Class MainWindow
Inherits Form
End Class
Public Module Program
' Run this application and identify the main window.
Sub Main()
Application.Run(New MainWindow())
End Sub
End Module
End Namespace
By doing so, you are abiding by an OO design principle termed the separation of concerns.
Simply put, this rule of OO design states that a class should be in charge of doing the least amount
of work possible. Given that you have refactored the initial class into two unique classes, you have
decoupled the Form from the class that creates it. The end result is a more portable window, as it
can be dropped into any project without carrying the extra baggage of a project-specific Main()
method.
5785ch21.qxd 3/31/06 11:20 AM Page 614
CHAPTER 21 ■ BUILDING A BETTER WINDOW WITH SYSTEM.WINDOWS.FORMS 615
■Source Code The MyFirstWindow project can be found under the Chapter 21 subdirectory.
The Role of the Application Class
The Application class defines numerous shared members that allow you to control various low-
level behaviors of a Windows Forms application. For example, the Application class defines a set of
events that allow you to respond to events such as application shutdown and idle-time processing.
In addition to the Run() method, here are some other methods to be aware of:
• DoEvents(): Provides the ability for an application to process messages currently in the mes-
sage queue during a lengthy operation.
• Exit(): Terminates the Windows application and unloads the hosting AppDomain.
• EnableVisualStyles(): Configures your application to support Windows XP visual styles. Do
note that if you enable XP styles, this method must be called before loading your main win-
dow via Application.Run().
The Application class also defines a number of properties, many of which are read-only in
nature. As you examine Table 21-2, note that most of these properties represent an application-level
trait such as company name, version number, and so forth. In fact, given what you already know about
assembly-level attributes (see Chapter 14), many of these properties should look vaguely familiar.
Table 21-2. Core Properties of the Application Type
Property Meaning in Life
CompanyName Retrieves the value of the assembly-level <AssemblyCompany> attribute
ExecutablePath Gets the path for the executable file
ProductName Retrieves the value of the assembly-level <AssemblyProduct> attribute
ProductVersion Retrieves the value of the assembly-level <AssemblyVersion> attribute
StartupPath Retrieves the path for the executable file that started the application
Finally, the Application class defines various shared events, some of which are as follows:
• ApplicationExit: Occurs when the application is just about to shut down.
• Idle: Occurs when the application’s message loop has finished processing the current batch
of messages and is about to enter an idle state (as there are no messages to process at the
current time).
• ThreadExit: Occurs when a thread in the application is about to terminate. If the exiting thread
is the main thread of the application, ThreadExit is fired before the ApplicationExit event.
Fun with the Application Class
To illustrate some of the functionality of the Application class, let’s enhance your current MainWindow
to perform the following:
• Reflect over select assembly-level attributes.
• Handle the shared ApplicationExit event.
5785ch21.qxd 3/31/06 11:20 AM Page 615
CHAPTER 21 ■ BUILDING A BETTER WINDOW WITH SYSTEM.WINDOWS.FORMS616
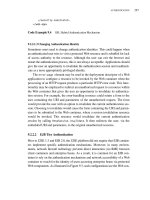
Figure 21-2. Reading attributes via the Application type
The first task is to make use of select properties in the Application class to reflect over some
assembly-level attributes. To begin, add the following attributes to your MainWindow.vb file (note you
are now importing the System.Reflection namespace):
Imports System.Windows.Forms
Imports System.Reflection
' Assembly-level attributes.
<assembly:AssemblyCompany("Intertech Training")>
<assembly:AssemblyProduct("A Better Window")>
<assembly:AssemblyVersion("1.1.0.0")>
Namespace MyWindowsApp
End Namespace
Rather than manually reflecting over the <AssemblyCompany> and <AssemblyProduct> attributes
using the techniques illustrated in Chapter 14, the Application class will do so automatically using
various shared properties. To illustrate, implement the default constructor of MainForm as follows:
Public Class MainWindow
Inherits Form
' Reflect over attributes using Application type.
Public Sub New
MessageBox.Show(Application.ProductName, _
string.Format("This app brought to you by {0}", _
Application.CompanyName))
End Sub
End Class
When you recompile and run this application, you’ll see a message box that displays various
bits of information (see Figure 21-2).
Now, let’s equip this Form to respond to the ApplicationExit event. When you wish to respond
to events from within a Windows Forms application, you will be happy to find that the same event
syntax detailed in Chapter 10 is used to handle GUI-based events. Therefore, if you wish to intercept
the shared ApplicationExit event, simply register an event handler using the AddHandler statement:
Public Class MainWindow
Inherits Form
' Reflect over attributes using Application type.
Public Sub New
' Handle Application.Exit event.
AddHandler Application.ApplicationExit, AddressOf MainWindow_OnExit
End Sub
5785ch21.qxd 3/31/06 11:20 AM Page 616
CHAPTER 21 ■ BUILDING A BETTER WINDOW WITH SYSTEM.WINDOWS.FORMS 617
Public Sub MainWindow_OnExit(ByVal sender As Object, ByVal args As EventArgs)
MessageBox.Show(string.Format("Form version {0} has terminated.", _
Application.ProductVersion))
End Sub
End Class
The System.EventHandler Delegate
Notice that the ApplicationExit event works in conjunction with the System.EventHandler delegate.
This delegate must point to subroutines that conform to the following signature:
Sub MyEventHandler(ByVal sender As Object, ByVal args As EventArgs)
System.EventHandler is the most primitive delegate used to handle events within Windows
Forms, but many variations do exist for other events. As far as EventHandler is concerned, the first
parameter of the assigned method is of type System.Object, which represents the object sending
the event. The second EventArgs parameter contains any relevant information regarding the cur-
rent event.
■Note EventArgs is the base class to numerous derived types that contain information for a family of related
events. For example, mouse events work with the
MouseEventArgs parameter, which contains details such as the
(x, y) position of the cursor. Many keyboard events work with the
KeyEventArgs type, which contains details
regarding the current keypress, and so forth.
In any case, if you now recompile and run the application, you will find your message box
appears upon the termination of the application.
■Source Code The AppClassExample project can be found under the Chapter 21 subdirectory.
The Anatomy of a Form
Now that you understand the role of the Application type, the next task is to examine the functionality
of the Form class itself. Not surprisingly, the Form class inherits a great deal of functionality from its
parent classes. Figure 21-3 shows the inheritance chain (including the set of implemented interfaces)
of a Form-derived type using the Visual Studio 2005 Object Browser.
5785ch21.qxd 3/31/06 11:20 AM Page 617
Figure 21-3. The derivation of the Form type
Although the complete derivation of a Form type involves numerous base classes and interfaces,
do understand that you are not required to learn the role of each and every member from each and
every parent class or implemented interface to be a proficient Windows Forms developer. In fact,
the majority of the members (properties and events in particular) you will use on a daily basis are
easily set using the Visual Studio 2005 IDE Properties window. Before we move on to examine some
specific members inherited from these parent classes, take a look at Table 21-3, which outlines the
basic role of each base class.
Table 21-3. Base Classes in the Form Inheritance Chain
Parent Class Meaning in Life
System.Object Like any class in .NET, a Form “is-a” object.
System.MarshalByRefObject Recall during our examination of .NET remoting (see
Chapter 20) that types deriving from this class are
accessed remotely via a reference (not a copy) of the
remote type.
System.ComponentModel.Component This class provides a default implementation of the
IComponent interface. In the .NET universe,
a component is a type that supports design-time
editing, but is not necessarily visible at runtime.
System.Windows.Forms.Control This class defines common UI members for all
Windows Forms UI controls, including the Form type
itself.
System.Windows.Forms.ScrollableControl This class defines support for auto-scrolling behaviors.
System.Windows.Forms.ContainerControl This class provides focus-management functionality
for controls that can function as a container for
other controls.
System.Windows.Forms.Form This class represents any custom Form, MDI child,
or dialog box.
CHAPTER 21 ■ BUILDING A BETTER WINDOW WITH SYSTEM.WINDOWS.FORMS618
5785ch21.qxd 3/31/06 11:20 AM Page 618
CHAPTER 21 ■ BUILDING A BETTER WINDOW WITH SYSTEM.WINDOWS.FORMS 619
As you might guess, detailing each and every member of each class in the Form’s inheritance
chain would require a large book in itself. However, it is important to understand the behavior sup-
plied by the Control and Form types. I’ll assume that you will spend time examining the full details
behind each class at your leisure using the .NET Framework 2.0 SDK documentation.
The Functionality of the Control Class
The System.Windows.Forms.Control class establishes the common behaviors required by any GUI
type. The core members of Control allow you to configure the size and position of a control, capture
keyboard and mouse input, get or set the focus/visibility of a member, and so forth. Table 21-4
defines some (but not all) properties of interest, grouped by related functionality.
Table 21-4. Core Properties of the Control Type
Properties Meaning in Life
BackColor, ForeColor, These properties define the core UI of the control (colors, font for
BackgroundImage, Font, text, mouse cursor to display when the mouse is over the widget, etc.).
Cursor
Anchor, Dock, AutoSize These properties control how the control should be positioned within
the container.
Top, Left, Bottom, Right, These properties specify the current dimensions of the control.
Bounds, ClientRectangle,
Height, Width
Enabled, Focused, Visible These properties each return a Boolean that specifies the state of the
current control.
ModifierKeys This shared property checks the current state of the modifier keys
(Shift, Ctrl, and Alt) and returns the state in a Keys type.
MouseButtons This shared property checks the current state of the mouse buttons
(left, right, and middle mouse buttons) and returns this state in
a MouseButtons type.
TabIndex, TabStop These properties are used to configure the tab order of the control.
Opacity This property determines the opacity of the control, in fractions (0.0 is
completely transparent; 1.0 is completely opaque).
Text This property indicates the string data associated with this control.
Controls This property allows you to access a strongly typed collection
(ControlsCollection) that contains any child controls within the
current control.
As you would guess, the Control class also defines a number of events that allow you to inter-
cept mouse, keyboard, painting, and drag-and-drop activities (among other things). Table 21-5 lists
some (but not all) events of interest, grouped by related functionality.
Table 21-5. Events of the Control Type
Events Meaning in Life
Click, DoubleClick, MouseEnter, Various events that allow you to interact with the mouse
MouseLeave, MouseDown, MouseUp,
MouseMove, MouseHover, MouseWheel
KeyPress, KeyUp, KeyDown Various events that allow you to interact with the keyboard
DragDrop, DragEnter, Various events used to monitor drag-and-drop activity
DragLeave, DragOver
Paint An event that allows you to interact with GDI+ (see Chapter 22)
5785ch21.qxd 3/31/06 11:20 AM Page 619
Finally, the Control base class also defines a number of methods that allow you to interact with
any Control-derived type. As you examine the methods of the Control type, you will notice that
a good number of them have an On prefix followed by the name of a specific event (OnMouseMove,
OnKeyUp, OnPaint, etc.). Each of these On-prefixed virtual methods is the default event handler for its
respective event. If you override any of these virtual members, you gain the ability to perform any
necessary pre- or postprocessing of the event before (or after) invoking your parent’s default imple-
mentation:
Imports System.Windows.Forms
Public Class MainForm
Protected Overrides Sub OnMouseDown(ByVal e As MouseEventArgs)
' Add code for MouseDown event.
' Call parent implementation when finished.
MyBase.OnMouseDown(e)
End Sub
End Class
While this can be helpful in some circumstances (especially if you are building a custom con-
trol that derives from a standard control), you will often handle events using the VB 2005 Handles
keyword (in fact, this is the default behavior of the Visual Studio 2005 designers). When you do
so, the framework will call your custom event handler once the parent’s implementation has
completed:
Imports System.Windows.Forms
Public Class MainForm
Private Sub MainForm_MouseDown(ByVal sender As Object, _
ByVal e As MouseEventArgs) Handles Me.MouseDown
' Add code for MouseDown event.
End Sub
End Class
Beyond these OnXXX() methods, here are a few other methods provided by the Control class to
be aware of:
• Hide(): Hides the control and sets the Visible property to False
• Show(): Shows the control and sets the Visible property to True
• Invalidate(): Forces the control to redraw itself by sending a Paint event
To be sure, the Control class does define additional properties, methods, and events beyond
the subset you’ve just examined. You should, however, now have a solid understanding regarding
the overall functionality of this base class. Let’s see it in action.
Fun with the Control Class
To illustrate the usefulness of some members from the Control class, let’s build a new Form that is
capable of handling the following events:
• Respond to the MouseMove and MouseDown events.
• Capture and process keyboard input via the KeyUp event.
To begin, create a new class derived from Form. In the default constructor, you’ll make use of
various inherited properties to establish the initial look and feel. Note you’re now importing the
CHAPTER 21 ■ BUILDING A BETTER WINDOW WITH SYSTEM.WINDOWS.FORMS620
5785ch21.qxd 3/31/06 11:20 AM Page 620
CHAPTER 21 ■ BUILDING A BETTER WINDOW WITH SYSTEM.WINDOWS.FORMS 621
System.Drawing namespace to gain access to the Color structure (you’ll examine this namespace in
detail in the next chapter):
Imports System.Windows.Forms
Imports System.Drawing
Namespace MyWindowsApp
Public Class MainWindow
Inherits Form
Public Sub New()
' Use inherited properties to set basic UI.
Text = "My Fantastic Form"
Height = 300
Width = 500
BackColor = Color.LemonChiffon
Cursor = Cursors.Hand
End Sub
End Class
Public Module Program
' Run this application and identify the main window.
Sub Main()
Application.Run(New MainWindow())
End Sub
End Module
End Namespace
Compile your application at this point, just to make sure you have not injected any typing
errors:
vbc /target:winexe *.vb
Responding to the MouseMove Event
Next, you need to handle the MouseMove event. The goal is to display the current (x, y) location within
the Form’s caption area. All mouse-centric events (MouseMove, MouseUp, etc.) work in conjunction
with the MouseEventHandler delegate, which can call any method matching the following signature:
Sub MyMouseHandler(ByVal sender As Object, ByVal e As MouseEventArgs)
The incoming MouseEventArgs structure extends the general EventArgs base class by adding
a number of members particular to the processing of mouse activity (see Table 21-6).
Table 21-6. Properties of the MouseEventArgs Type
Property Meaning in Life
Button Gets which mouse button was pressed, as defined by the MouseButtons enumeration
Clicks Gets the number of times the mouse button was pressed and released
Delta Gets a signed count of the number of detents the mouse wheel has rotated
X Gets the x-coordinate of a mouse click
Y Gets the y-coordinate of a mouse click
5785ch21.qxd 3/31/06 11:20 AM Page 621
Figure 21-4. Monitoring mouse movement
Here, then, is the updated MainForm class that handles the MouseMove event as intended:
Public Class MainWindow
Inherits Form
Public Sub MainForm_MouseMove(ByVal sender As Object, _
ByVal e As MouseEventArgs) Handles Me.MouseMove
Text = string.Format("Current Pos: ({0} , {1})", e.X, e.Y)
End Sub
End Class
If you now run your program and move the mouse over your Form, you will find the current
(x, y) value display on the caption area as shown in Figure 21-4.
CHAPTER 21 ■ BUILDING A BETTER WINDOW WITH SYSTEM.WINDOWS.FORMS622
Determining Which Mouse Button Was Clicked
One thing to be aware of is that the MouseUp (or MouseDown) event is sent whenever any mouse button
is clicked. If you wish to determine exactly which button was clicked (such as left, right, or middle),
you need to examine the Button property of the MouseEventArgs class. The value of the Button prop-
erty is constrained by the related MouseButtons enumeration defined in the System.Windows.Forms
namespace. The following MouseUp event handler displays which mouse button was clicked inside
a message box:
Public Sub MainForm_MouseUp(ByVal sender As Object, _
ByVal e As MouseEventArgs) Handles Me.MouseUp
If e.Button = System.Windows.Forms.MouseButtons.Left Then
MessageBox.Show("Left click!")
End If
If e.Button = System.Windows.Forms.MouseButtons.Right Then
MessageBox.Show("Right click!")
End If
If e.Button = System.Windows.Forms.MouseButtons.Middle Then
MessageBox.Show("Middle click!")
End If
End Sub
5785ch21.qxd 3/31/06 11:20 AM Page 622
CHAPTER 21 ■ BUILDING A BETTER WINDOW WITH SYSTEM.WINDOWS.FORMS 623
Responding to Keyboard Events
Processing keyboard input is almost identical to responding to mouse activity. The KeyUp and KeyDown
events work in conjunction with the KeyEventHandler delegate, which can point to any method taking
an object as the first parameter and KeyEventArgs as the second:
Sub MyKeyboardHandler(ByVal sender As Object, ByVal e As KeyEventArgs)
KeyEventArgs has the members of interest shown in Table 21-7.
Table 21-7. Properties of the KeyEventArgs Type
Property Meaning in Life
Alt Gets a value indicating whether the Alt key was pressed
Control Gets a value indicating whether the Ctrl key was pressed
Handled Gets or sets a value indicating whether the event was fully handled in your handler
KeyCode Gets the keyboard code for a KeyDown or KeyUp event
Modifiers Indicates which modifier keys (Ctrl, Shift, and/or Alt) were pressed
Shift Gets a value indicating whether the Shift key was pressed
Update your MainForm to handle the KeyUp event. Once you do, display the name of the key that
was pressed inside a message box using the KeyCode property.
Public Sub MainForm_KeyUp(ByVal sender As Object, _
ByVal e As KeyEventArgs) Handles Me.KeyUp
MessageBox.Show(e.KeyCode.ToString(), "Key Pressed!")
End Sub
Now compile and run your program. You should be able to determine not only which mouse
button was clicked, but also which keyboard key was pressed.
That wraps up our look at the core functionality of the Control base class. Next up, let’s check
out the role of Form.
■Source Code The ControlBehaviors project is included under the Chapter 21 subdirectory.
The Functionality of the Form Class
The Form class is typically (but not necessarily) the direct base class for your custom Form types. In addi-
tion to the large set of members inherited from the Control, ScrollableControl, and ContainerControl
classes, the Form type adds additional functionality in particular to main windows, MDI child windows,
and dialog boxes. Let’s start with the core properties in Table 21-8.
5785ch21.qxd 3/31/06 11:20 AM Page 623
CHAPTER 21 ■ BUILDING A BETTER WINDOW WITH SYSTEM.WINDOWS.FORMS624
Table 21-8. Properties of the Form Type
Properties Meaning in Life
AcceptButton Gets or sets the button on the Form that is clicked when the user
presses the Enter key.
ActiveMDIChild Used within the context of an MDI application.
IsMDIChildIsMDIContainer
CancelButton Gets or sets the button control that will be clicked when the user
presses the Esc key.
ControlBox Gets or sets a value indicating whether the Form has a control box.
FormBorderStyle Gets or sets the border style of the Form. Used in conjunction with
the FormBorderStyle enumeration.
Menu Gets or sets the menu to dock on the Form.
MaximizeBox Used to determine whether this Form will enable the maximize and
MinimizeBox minimize boxes.
ShowInTaskbar Determines whether this Form will be seen on the Windows taskbar.
StartPosition Gets or sets the starting position of the Form at runtime, as specified
by the FormStartPosition enumeration.
WindowState Configures how the Form is to be displayed on startup. Used in
conjunction with the FormWindowState enumeration.
In addition to the expected On-prefixed default event handlers, the Form type defines several
core methods, as listed in Table 21-9.
Table 21-9. Key Methods of the Form Type
Method Meaning in Life
Activate() Activates a given Form and gives it focus.
Close() Closes a Form.
CenterToScreen() Places the Form in the dead-center of the screen.
LayoutMDI() Arranges each child Form (as specified by the LayoutMDI enumeration)
within the parent Form.
ShowDialog() Displays a Form as a modal dialog box. More on dialog box programming in
Chapter 23.
Finally, the Form class defines a number of events, many of which fire during the Form’s lifetime.
Table 21-10 hits the highlights.
Table 21-10. Select Events of the Form Type
Events Meaning in Life
Activated Occurs whenever the Form is activated, meaning the Form has been given the
current focus on the desktop
Closed, Closing Used to determine when the Form is about to close or has closed
Deactivate Occurs whenever the Form is deactivated, meaning the Form has lost current
focus on the desktop
Load Occurs after the Form has been allocated into memory, but is not yet visible
on the screen
MDIChildActive Sent when a child window is activated
5785ch21.qxd 3/31/06 11:20 AM Page 624
CHAPTER 21 ■ BUILDING A BETTER WINDOW WITH SYSTEM.WINDOWS.FORMS 625
The Life Cycle of a Form Type
If you have programmed user interfaces using GUI toolkits such as Java Swing, Mac OS X Cocoa, or
the raw Win32 API, you are aware that window types have a number of events that fire during their
lifetime. The same holds true for Windows Forms. As you have seen, the life of a Form begins when
the type constructor is called prior to being passed into the Application.Run() method.
Once the object has been allocated on the managed heap, the framework fires the Load event.
Within a Load event handler, you are free to configure the look and feel of the Form, prepare any
contained child controls (such as ListBoxes, TreeViews, and whatnot), or simply allocate resources
used during the Form’s operation (database connections, proxies to remote objects, and whatnot).
Once the Load event has fired, the next event to fire is Activated. This event fires when the
Form receives focus as the active window on the desktop. The logical counterpart to the Activated
event is (of course) Deactivate, which fires when the Form loses focus as the active window. As you
can guess, the Activated and Deactivate events can fire numerous times over the life of a given Form
type as the user navigates between active applications.
When the user has chosen to close the Form in question, two close-centric events fire: Closing and
Closed. The Closing event is fired first and is an ideal place to prompt the end user with the much hated
(but useful) “Are you sure you wish to close this application?” message. This confirmational step is quite
helpful to ensure the user has a chance to save any application-centric data before terminating the
program.
The Closing event works in conjunction with the CancelEventHandler delegate defined in the
System.ComponentModel namespace. If you set the CancelEventArgs.Cancel property to True, you
prevent the Form from being destroyed and instruct it to return to normal operation. If you set
CancelEventArgs.Cancel to False, the Close event fires and the Windows Forms application termi-
nates, which unloads the AppDomain and terminates the process.
To solidify the sequence of events that take place during a Form’s lifetime, assume you have
a new MainWindow.vb file that handles the Load, Activated, Deactivate, Closing, and Close events
(be sure to add a using directive for the System.ComponentModel namespace to obtain the definition
of CancelEventArgs).
In the Load, Closed, Activated, and Deactivate event handlers, you are going to update the
value of a new Form-level System.String member variable (named lifeTimeInfo) with a simple
message that displays the name of the event that has just been intercepted. As well, notice that
within the Closed event handler, you will display the value of this string within a message box:
Public Class MainWindow
Inherits Form
Private lifeTimeInfo As String
' Handle the Load, Activated, Deactivate, and Closed events.
Public Sub MainForm_Load(ByVal sender As Object, _
ByVal e as EventArgs) Handles Me.Load
lifeTimeInfo = lifeTimeInfo & "Load event" & VbLf
End Sub
Public Sub MainForm_Activated(ByVal sender As Object, _
ByVal e as EventArgs) Handles Me.Activated
lifeTimeInfo = lifeTimeInfo & "Activated event" & VbLf
End Sub
Public Sub MainForm_Deactivate(ByVal sender As Object, _
ByVal e as EventArgs) Handles Me.Deactivate
lifeTimeInfo = lifeTimeInfo & "Deactivate event" & VbLf
End Sub
5785ch21.qxd 3/31/06 11:20 AM Page 625
CHAPTER 21 ■ BUILDING A BETTER WINDOW WITH SYSTEM.WINDOWS.FORMS626
Figure 21-5. The life and times of a Form-derived type
Public Sub MainForm_Closed(ByVal sender As Object, _
ByVal e as EventArgs) Handles Me.Closed
lifeTimeInfo = lifeTimeInfo & "Closed event" & VbLf
MessageBox.Show(lifeTimeInfo)
End Sub
End Class
Within the Closing event handler, you will prompt the user to ensure he or she wishes to termi-
nate the application using the incoming CancelEventArgs:
Private Sub MainForm_Closing(ByVal sender As Object, _
ByVal e As CancelEventArgs) Handles Me.Closing
Dim dr As System.Windows.Forms.DialogResult = _
MessageBox.Show("Do you REALLY want to close this app?", _
"Closing event!", MessageBoxButtons.YesNo)
If dr = System.Windows.Forms.DialogResult.No Then
e.Cancel = True
Else
e.Cancel = False
End If
End Sub
Notice that the MessageBox.Show() method returns a DialogResult type, which has been set to
a value representing the button clicked by the end user (Yes or No). Now, compile your code at the
command line:
vbc /target:winexe *.vb
Run your application and shift the Form into and out of focus a few times (to trigger the Activated
and Deactivate events). Once you shut down the Form, you will see a message box that looks some-
thing like Figure 21-5.
Now, most of the really interesting aspects of the Form type have to do with its ability to create
and host menu systems, toolbars, and status bars. While the code to do so is not complex, you will
be happy to know that Visual Studio 2005 defines a number of graphical designers that take care of
most of the mundane code on your behalf. Given this, let’s say goodbye to the command-line compiler
for the time being and turn our attention to the process of building Windows Forms applications
using Visual Studio 2005.
5785ch21.qxd 3/31/06 11:20 AM Page 626
CHAPTER 21 ■ BUILDING A BETTER WINDOW WITH SYSTEM.WINDOWS.FORMS 627
Figure 21-6. The Visual Studio 2005 Windows Application project
■Source Code The FormLifeTime project can be found under the Chapter 21 subdirectory.
Building Windows Applications with
Visual Studio 2005
Visual Studio 2005 has a specific project type dedicated to the creation of Windows Forms applications.
When you select the Windows Application project type, you not only receive an initial Form-derived
type, but you also can make use of the VB 2005–specific startup object. As you may know, VB 2005
allows you to declaratively specify which Form to show upon application startup, thereby removing
the need to manually define a Main() method. However, if you do need to add additional startup logic,
you are able to define a dedicated Main() method that will be called when your program launches.
Better yet, the IDE provides a number of graphical designers that make the process of building
a UI child’s play. Just to learn the lay of the land, create a new Windows Application project work-
space, as shown in Figure 21-6. You are not going to build a working example just yet, so name this
project whatever you desire (for example, MyTesterWindowsApp).
Once the project has loaded, you will no doubt notice the Forms designer, which allows you to
build a UI by dragging controls/components from the Toolbox (see Figure 21-7) and configuring
their properties and events using the Properties window (see Figure 21-8).
5785ch21.qxd 3/31/06 11:20 AM Page 627
CHAPTER 21 ■ BUILDING A BETTER WINDOW WITH SYSTEM.WINDOWS.FORMS628
Figure 21-7. The Visual Studio 2005 Toolbox
Figure 21-8. The Visual Studio 2005 Properties window
5785ch21.qxd 3/31/06 11:20 AM Page 628
CHAPTER 21 ■ BUILDING A BETTER WINDOW WITH SYSTEM.WINDOWS.FORMS 629
Figure 21-9. Adding additional controls to the Toolbox
As you can see, the Toolbox groups UI controls by various categories. While most are self-
explanatory (e.g., Printing contains printing controls, Menus & Toolbars contains recommended
menu/toolbar controls, etc.), a few categories deserve special mention:
• Common Controls: Members in this category are considered the “recommended set” of common
UI controls.
• All Windows Forms: Here you will find the full set of Windows Forms controls, including
various .NET 1.x controls that are considered deprecated.
The second bullet point is worth reiterating. If you have worked with Windows Forms using
.NET 1.x, be aware that many of your old friends (such as the DataGrid control) have been placed
under the All Windows Forms category. Furthermore, many common UI controls you may have
used under .NET 1.x (such as MainMenu, ToolBar, and StatusBar) are not shown in the Toolbox by
default.
Enabling the Deprecated Controls
The first bit of good news is that these (deprecated) UI elements are still completely usable under
.NET 2.0. The second bit of good news is that if you still wish to program with them, you can add
them back to the Toolbox by right-clicking anywhere in the Toolbox and selecting Choose Items.
From the resulting dialog box, check off the items of interest, as shown in Figure 21-9.
■Note At first glance, it might appear that there are redundant listings for a given control (such as the MainMenu).
In reality, each listing is unique, as a control may be versioned (1.0 versus 2.0) and/or may be a member of the
.NET Compact Framework. Be sure to examine the directory path to select the correct item.
5785ch21.qxd 3/31/06 11:20 AM Page 629
CHAPTER 21 ■ BUILDING A BETTER WINDOW WITH SYSTEM.WINDOWS.FORMS630
At this point, I am sure you are wondering why many of these old standbys have been hidden
from view. The reason is that .NET 2.0 provides a set of new menu-, toolbar-, and status bar–centric
controls that are now favored. For example, rather than using the legacy MainMenu control to build
a menu, you can use the MenuStrip control, which provides a number of new bells and whistles in
addition to the functionality found within MainMenu.
■Note In this chapter, I will favor the use of this new recommended set of UI elements. If you wish to work with
the legacy MainMenu, StatusBar, or ToolBar types, consult the .NET Framework 2.0 SDK documentation.
Dissecting a Visual Studio 2005 Windows Forms Project
Each Form in a Visual Studio 2005 Windows Application project is composed of two related VB 2005
files, which can be verified using Solution Explorer (note that I renamed this initial class from
Form1 to MainWindow). Be aware that the *.Designer.vb file is hidden until you click the Show All
Files button on the Solution Explorer, as shown in Figure 21-10.
Right-click the MainForm.vb icon and select View Code. Here you will see a class type that will
contain all of the Form’s event handlers, custom constructors, member overrides, and any additional
member you author yourself. Upon startup, the Form type is quite empty:
Public Class MainForm
End Class
The first point of interest is it does not appear that the MainForm class is extending the neces-
sary Form base class. Rest assured this is the case; however, this detail has been established in the
related *.Designer.vb file. If you open up the *.Designer.vb file, you will find that your MainForm
class is further defined via the Partial keyword examined in Chapter 5. Recall this keyword allows
a single type to be defined across multiple files. Visual Studio 2005 uses this technique to hide the
designer-generated code, allowing you to keep focused on the core logic of your Form-derived type.
Here is the initial definition of this Partial class:
<Global.Microsoft.VisualBasic.CompilerServices.DesignerGenerated()> _
Partial Class MainForm
Inherits System.Windows.Forms.Form
Figure 21-10. Under Visual Studio 2005, each Form is composed of two *.vb files.
5785ch21.qxd 3/31/06 11:20 AM Page 630