Professional ASP.NET 2.0 Security, Membership, and Role Management phần 9 pps
Bạn đang xem bản rút gọn của tài liệu. Xem và tải ngay bản đầy đủ của tài liệu tại đây (1.93 MB, 64 trang )
With this configuration, the provider expects that any usernames passed to its methods will be just the
username portion of the NT4-style
DOMAIN\USERNAME format. For example, the following code retrieves
the user object for
CORSAIR\demouser:
MembershipUser mu = Membership.GetUser(“demouser”);
Notice how the username parameter doesn’t include the domain identifier. This is important because if
you attempt to pass full NT4-style usernames to the provider, the calls will never return anything (that
is, if you pass
DOMAIN\USERNAME the provider is literally looking for a user object whose SAM account
name is
DOMAIN\USERNAME ). Because the provider already knows the domain within which it is operat-
ing, it does not need the domain portion of the username. Remember that the provider is effectively
acting like a database provider— except that the “database” is really an LDAP server. When the
provider looks for objects using a SAM account name, it is performing an LDAP search where the
sAMAccountName attribute on the directory’s user object equals a specific value. As a result, you only
need to supply the username.
If you happen to set up
ActiveDirectoryMembershipProvider, and you are unable to retrieve any
existing users, keep in mind the
attributeMapUsername attribute. It is likely that if the connection
string works and you are getting back nulls from methods like
GetUser that your directory users have
been configured only with SAM account names— and not UPNs. Switching
attributeMapUsername
over to sAMAccountName is probably the most common configuration step that developers need to make
to get the provider working with their directory.
However, if you have been creating user accounts in the directory using the
ActiveDirectoryMembershipProvider with its default setting of UPN-style usernames, you may run
into a different problem. When you create users in the Active Directory Users and Computers MMC, the UI
conveniently auto-selects a domain suffix for your UPN. In fact, the UI remembers previous UPN suffixes
that have been used with the tool, and it displays a drop-down list where you can choose any one of them.
However, if you create users directly with the provider, you may find yourself creating users with just a
username and no suffix (for example, “demouser98” as opposed to “”). This kind
of a UPN will sort of work with Active Directory, but you will find that if you also write code with
System.DirectoryServices there are cases where a UPN without an @ will fail. As a result, you should
always ensure that UPNs have an
@ sign and some kind of domain suffix in them. For Internet-facing sites,
it makes sense to create user accounts with some kind of domain suffix — with the user’s email address
being the most likely candidate.
This raises the question of whether you should eventually switch your user population over to UPNs.
Although as far back as Windows 2000, the guidance was to create users with UPNs, the reality is that
many folks still rely on the older NT4-style usernames, especially if their current domain infrastructure
was the result of an NT4 domain upgrade. I certainly wouldn’t recommend reworking your user popu-
lation to use UPNs just because
ActiveDirectoryMembershipProvider defaults to UPNs. (That’s
why the username mapping is configurable!) However, it does seem to be a recurring theme that UPNs
are architecturally preferable. For e-commerce sites or extranet sites that rely on Active Directory, UPNs
do make more sense because, typically, you don’t want external users to be aware of AD domain names.
Technically, external sites that do this are leaking a little bit of their security architecture to the public by
requiring a domain name. Also UPNs frequently mirror a person’s email address, so they can be a more
natural username for your website users to grasp.
485
ActiveDirectoryMembershipProvider
15_596985 ch12.qxp 12/14/05 7:52 PM Page 485
Container Nesting
You already saw a simple example where nested OUs were used in a connection string. However, con-
tainer nesting raises some interesting issues when working with the provider. If you have different sets
of users in different OUs, and you want some provider operations to span all of these sets of users, how
do you go about configuring the provider? Remember that data modification operations can occur only
in the container specified by the connection string, whereas search-oriented operations are rooted at the
container specified by the connection string.
Using the sample directory structure, so far there are users are laid out as follows:
Cn=Users
demouser
OU=UserPopulation_A
testuserpopA
OU=SomeNestedOU
Testusernestedinpopa
If you use the following connection string:
<add name=”DirectoryConnection” connectionString=”LDAP://corsdc2.corsair.com”/>
then all search operations are rooted at what is called the default naming context for the domain. What
this means is that all containers and OUs are considered children of the default naming context, so this
type of connection string allows searches to be performed across all available containers. Because the
provider performs its search operations using subtree searches, the following code searches across all
containers, as well as down through the container hierarchy to its lowest nested level:
MembershipUserCollection muc = Membership.GetAllUsers();
foreach (MembershipUser mu in muc)
Response.Write(“Username: “ + mu.UserName + “<br />”);
The result from running this code is:
Username:
Username:
Username:
Username:
Username:
Username:
Username:
The bolded identities are the three accounts used earlier in the chapter. The demouser account as well as
all of the other unbolded user accounts are located in the
CN=Users container (some of the accounts
should be a bit familiar from back in Chapters 1 and 2!). The other two
testuser* accounts are from
OU=UserPopulation_A and OU=SomeNestedOU.
486
Chapter 12
15_596985 ch12.qxp 12/14/05 7:52 PM Page 486
Similarly, if you perform get operations such as:
MembershipUser mu = Membership.GetUser(“”);
the code will return a valid user object because even though the user account is nested two OUs deep,
the
Get* methods on the provider start their search at the default naming context (because the connec-
tion string from earlier doesn’t specify a container) and then work their way down. If you explicitly
specify a container hierarchy in your connection string, then get and search methods will be rooted at
the container you specify and then searches will work their way down through any remaining container
hierarchy.
However, if you attempt to create a new user or delete an existing user, then these operations only
occur in the container specified on the connection string. In the case of the sample connection string that
doesn’t explicitly specify a container, this means that user creation and deletion only occur in the
CN=Users container. There are other provider methods that involve modifying information for a user,
including
UpdateUser, ChangePassword, and so on. Although these methods are technically data-modi-
fication operations, all of these methods first bind to a specific user in the directory (a get operation) prior
to making a change. As a result, updates to existing users also have the behavior of being rooted at a spe-
cific point in the directory, and then searching for the user object down through the nested containers.
With this behavior, it is possible to come up with some interesting provider configurations. For example,
if your site supports multiple sets of users, you could allocate each set of users to a different OU. You
could then configure a separate provider instance for each different OU (and hence each provider
instance would have its own unique connection string). These different providers could be used exclu-
sively for create and delete operations. For the rest of your site, you could then configure one more
provider pointed at the default naming context or at a root OU, depending on how you structured your
containers. This last provider would be used for things like calling
ValidateUser or for fetching a
MembershipUser object to display information on a page. In this way, you would get the flexibility to
create and delete users in different OUs, while still having the convenience of searching, retrieving, and
modifying users across the OUs with a single provider.
Securing Containers
So far, the sample code has been running with the credentials of the IIS6 worker process. The reason that
the samples have worked so far is that the NETWORK SERVICE account is implicitly considered part of
the Authenticated Users group. If you look at the default security configuration in the directory, you will
see that this group has rights to list objects in a container as well as having some read permissions on
individual object. The concept of read permissions on objects though differs depending on the object in
question.
In the case of the provider, the object type you care about are user objects. The default permissions that any
authenticated user in a domain has on any other user object in the directory are read general information,
read personal information, read web information, and read public information. General information, per-
sonal information, web information, and public information are just property sets that conveniently group
together dozens of different directory attributes so that permissions can be granted to them without having
to spam dozens or hundreds of ACLs on user objects. These default permissions are why the sample pages
running as NETWORK SERVICE were able to find the user object in the first place and then read the vari-
ous directory attributes in order to construct an instance of
ActiveDirectoryMembershipUser.
487
ActiveDirectoryMembershipProvider
15_596985 ch12.qxp 12/14/05 7:52 PM Page 487
If you attempt to use the sample configuration shown earlier to update an existing user object or create a
new user object, you will get a
System.UnauthorizedAccessException. The exception bubbles up
from the underlying
System.DirectoryServices API and is triggered because, for obvious reasons,
authenticated domain users don’t have the right to arbitrarily make data modifications to other objects
or containers in the directory. This behavior is roughly equivalent to the exceptions you get when you
haven’t granted login rights to SQL Server or execute permissions to the Membership stored procedures
and you attempt to use the
SqlMembershipProvider.
One obvious solution would be to just add rights in the directory granting NETWORK SERVICE the
required rights. However, in general this is not the correct approach. Each machine in a domain has a
corresponding machine account in the directory. Because the account is comparatively well known,
granting broad rights to it is not something you should do. Additionally, if you are running in a web
farm, each individual server has a different machine account in the directory that locally is known as
NETWORK SERVICE. So if you granted broad rights to the machine account, you would have to repeat
this task for each and every server running in your web farm.
A better approach would be to at least assign your application’s worker process a different domain iden-
tity and then grant this domain identity the necessary rights in the directory depending on what your
code needs to do with the provider. With this approach, if you run multiple machines in a web farm,
each web server can be configured with the same domain account for the worker process. For a lot of
application scenarios, this is actually a reasonable approach. However, if you need to host multiple
applications in a single worker process, with each application having a different set of privileges in the
directory, or if you want to configure multiple providers in a single application with each provider hav-
ing a different set of privileges, then you will need to use explicit provider credentials instead.
The
ActiveDirectoryMembershipProvider exposes the connectionUsername and
connectionPassword configuration attributes. With these attributes, you can explicitly set the
domain credentials that the provider will use when connecting to the directory. Even though the default
provider behavior is to revert to either the process credentials, or application impersonation credentials
if application impersonation is being used, when explicit credentials are configured the provider always
uses them in lieu of any other security identity.
The advantage of using explicit credentials in combination with application specific OUs (as opposed to
just using the
Users container) is that you have the ability to specify granular permissions for different sets
of application users. With the provider configuration attributes you then have the flexibility to fine-tune
individual providers to allow only certain operations through specific providers. Let’s see how this works
by creating a new admin account to work with the
UserPopulation_A container: userpopaadmin. You
want this account to have the ability to create and delete user objects, as well as the ability to reset pass-
words and unlock users.
Remember that for a provider instance to be able to create users, it also needs the ability to delete users
(in the event that the multistep user creation process failed) and to set passwords (because part of the
process of creating the user is setting password). Note that the ability to set passwords for new accounts
as well as reset existing passwords is shown as the Reset Password inside of the security dialogs boxes
shown in the MMC.
488
Chapter 12
15_596985 ch12.qxp 12/14/05 7:52 PM Page 488
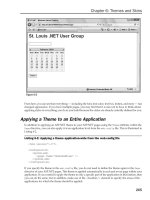
The Active Directory Users and Computers MMC has a wizard that steps you through delegating control
over containers like the OUs used here. You can open up the MMC to display all of the containers that are
currently available in a directory. In the test directory, I am running, right-clicking the
UserPopulate_
A
container and selecting Delegate Control opens the first step of the wizard as shown in Figure 12-1.
In the next wizard step you can select one or more user/group accounts that will all be granted a specific
set of rights over the OU. In Figure 12-2, you can see that I have selected the userpopaadmin account.
Figure 12-1
489
ActiveDirectoryMembershipProvider
15_596985 ch12.qxp 12/14/05 7:52 PM Page 489
Figure 12-2
On the next step of the wizard, you can select multiple rights to grant to the accounts. Because you want
the admin account to have the ability to create/delete users, reset passwords and unlock users, the first
three sets of tasks are selected in the wizard. Figure 12-3 shows these selections.
490
Chapter 12
15_596985 ch12.qxp 12/14/05 7:52 PM Page 490
Figure 12-3
The final step of the wizard (not shown) just asks for confirmation of the selections. When you click the
Finish button on the last wizard step, the security changes take effect. You can see the new set of security
rights if you right-click the
UserPopulation_A OU and then drill into the security settings for user-
popaadmin. Figure 12-4 shows the two sets of rights highlighted in the Advanced Security Settings
dialog box.
491
ActiveDirectoryMembershipProvider
15_596985 ch12.qxp 12/14/05 7:52 PM Page 491
Figure 12-4
Notice that the account now has Full Control on any user objects in the container as well as the Create/
Delete User Objects privilege on the container. The account needs to have two different sets of rights
because the intent is for the userpopaadmin account to have a set of specific user object rights within the
container as well as the ability to add and remove user objects in the container. Notice that the account
doesn’t have Full Control on the container itself. This allows other object types that are managed by other
user accounts to be stored in the container.
If you highlight the Full Control row and click the Edit button, you will see the set of permissions that
userpopaadmin now has on any user object located in the container. Specifically, it has Write All
Properties permission as well as the Reset Password and Change Password permissions. These permis-
sions will allow userpopaadmin the ability to set all of the properties on a newly created user object
(including the password property) as well as the ability to reset the password when the
ResetPassword
method is called on the provider. These permissions also allow the account to be used when calling the
Update method because this method updates a number of different properties on a user object in the
directory.
With the security configuration for the admin user complete, you can make use of it to connect to the
directory with a connection string which points directly at the OU:
492
Chapter 12
15_596985 ch12.qxp 12/14/05 7:52 PM Page 492
<add name=”DirectoryConnection” connectionString=”LDAP://corsdc2.corsair.com/
OU=UserPopulation_A,DC=corsair,DC=com”/>
In this example, you configure two providers: one for admin operations and one for get/search operations:
<membership defaultProvider=”readonlyprovider”>
<providers>
<clear/>
<add name=”adminprovider”
type=”System.Web.Security.ActiveDirectoryMembershipProvider, ”
enableSearchMethods=”true”
connectionUsername=””
connectionPassword=”pass!word1”
connectionStringName=”DirectoryConnection” />
<add name=”readonlyprovider”
type=”System.Web.Security.ActiveDirectoryMembershipProvider, ”
enableSearchMethods=”true”
connectionStringName=”DirectoryConnection” />
</providers>
</membership>
The provider named adminprovider uses the explicit credentials with elevated privileges. The second
provider instance named
readonlyprovider depends on the default rights that the Authenticated
Users group has to read various attributes on a user object. Note that in a production environment you
should use protected configuration (discussed in Chapter 4) so that the explicit credentials are not stored
as cleartext. You can now create users with the admin provider:
MembershipCreateStatus status;
MembershipProvider mp = Membership.Providers[“adminprovider”];
mp.CreateUser(“”, “pass!word1”, “”,
null, null, true,null, out status);
Response.Write(status.ToString());
Read operations use the default provider running as NETWORK SERVICE, and thus the default provider
can only search for users and read attributes on the user object. Note that you can take security lock down a
step further by removing the Authenticated Users ACL from the default ACL defined for the
user class in
the directory’s schema. Doing so gets into the nitty-gritty of managing Active Directory default ACLs,
which is a bit far afield from the topic of how to use
ActiveDirectoryMembershipProvider.
However, if you have changed the default ACL for the user object (you can see the default ACL using the
Active Directory Schema editor, look at the Default Security tab on the Properties dialog box of the
user
class) by removing the Authenticated Users group, you can create a read-only user account using the
same approach just shown for the administrative user. Just create a new read-only user account and
with the Delegation of Control Wizard grant read permissions on all user objects in the container to the
account. Because the wizard will end up granting read permissions on all attributes of user objects, you
can right-click the container and use the Security tab to fine-tune the specific sets of user attributes that
you really want the read-only account to have access to. The default set of permissions granted to the
Authenticated Users account as described earlier is a good starting point.
493
ActiveDirectoryMembershipProvider
15_596985 ch12.qxp 12/14/05 7:52 PM Page 493
Configuring Self-Service Password Reset
Self-service password resets are the one piece of provider functionality that is not “auto-magically” sup-
ported without a moderate amount of intervention on your part. Unlike
SqlMembershipProvider,
where this functionality is just a matter of setting the
enablePasswordReset configuration attribute to
true, ActiveDirectoryMembershipProvider requires schema changes prior to turning on the func-
tionality. Furthermore, after the schema changes are made you need to configure the ACLs appropriately
in the directory so that a provider has rights to read and update these properties.
You could use preexisting directory attributes to store password question-and-answer-related informa-
tion. Although this saves you from having to modify the directory schema, from a long-term perspective
it makes more sense to extend the schema with attributes to support the provider, rather than attempt to
reuse existing directory attributes. This will prevent problems down the road if you overloaded a direc-
tory attribute for use with the provider, but then find out you actually need to “take back” the attribute
for its original purposes.
The attributes that you need to add are those for the following pieces of information:
❑ Password question — A Unicode string attribute to store the user’s password question.
❑ Password answer — A Unicode string attribute to store the user’s password answer.
❑ Failed password answer count — An attribute of type
Integer that is the counter for keeping
track of the number of failed password answer attempts.
❑ Failed password answer time — An attribute of type
Large Integer/Interval that will store
the beginning of the time tracking window for failed password answer attempts.
❑ Failed password answer lockout time — An attribute of type
Large Integer/Interval
that stores the time the account was locked out because of too many failed password answer
attempts.
You can use the Active Directory Schema snap-in to create five new attributes for storing these values.
Before you do so, note that you have to have rights to edit the schema for your domain. This right is nor-
mally reserved for members of the Schema Admins group because of the sensitive nature of schema
edits. Schema edits are a one-way affair; after you add an attribute, you can never actually delete it.
Instead, you can only deactivate attributes. For this reason, enabling self-service password reset for the
provider makes sense only for Internet facing websites that rely on Active Directory. Making irreversible
schema edits to an extranet directory is less of an issue than making schema edits to your core corporate
directories.
Whenever you create a new directory attribute you need to have a name for the attribute as well as an
X.500 OID. If you are an old database developer like me, the need for the OID is sort of weird, but it is
a necessary part of creating any new classes or attributes in Active Directory. If you happen to have the
Windows 2000 Resource Kit lying around it has a handy command-line tool called
oidgen.exe that
will automatically generate a base OID for new attributes. I created five new attributes in my directory
as follows:
494
Chapter 12
15_596985 ch12.qxp 12/14/05 7:52 PM Page 494
Attribute Name (Both LDAP and Common) OID
ampPasswordQuestion 1.2.840.113556.1.4.7000.233.28688.28684.8
.311583.60825.551176.463623.1
ampPasswordAnswer 1.2.840.113556.1.4.7000.233.28688.28684.8
.311583.60825.551176.463623.2
ampFailedPasswordAnswerCount 1.2.840.113556.1.4.7000.233.28688.28684.8
.311583.60825.551176.463623.3
ampFailedPasswordAnswerTime 1.2.840.113556.1.4.7000.233.28688.28684.8
.311583.60825.551176.463623.4
ampFailedPasswordAnswerLockoutTime 1.2.840.113556.1.4.7000.233.28688.28684.8
.311583.60825.551176.463623.5
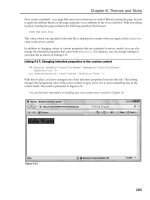
You can see what configuring the new password answer attribute looks like in Figure 12-5:
Figure 12-5
495
ActiveDirectoryMembershipProvider
15_596985 ch12.qxp 12/14/05 7:52 PM Page 495
The configuration for the password question attribute looks exactly the same. Figure 12-6 shows how the
password answer count attribute is configured as an
Integer type.
Figure 12-6
The configuration of the failed password answer time attribute is shown in Figure 12-7.
496
Chapter 12
15_596985 ch12.qxp 12/14/05 7:52 PM Page 496
Figure 12-7
Configuring the failed password answer lockout time works the same way, just with a different attribute
name and OID.
With the attribute configuration completed, you can add these attributes to the
user class in the directory.
You just right-click the
user class in the MMC, select Properties and in the Attributes tab, add the five new
attributes as optional attributes. After you have done this, the Attributes tab will look something like
Figure 12-8.
497
ActiveDirectoryMembershipProvider
15_596985 ch12.qxp 12/14/05 7:52 PM Page 497
Figure 12-8
Now that the user object has been modified to include extra attributes for storing password-reset-related
information, you can configure a provider to make use of the new attributes. Using the administrative
provider shown earlier, you can modify its configuration to allow for question-and-answer-based
password resets.
<add name=”adminprovider”
type=”System.Web.Security.ActiveDirectoryMembershipProvider, ”
enableSearchMethods=”true”
connectionUsername=””
connectionPassword=”pass!word1”
attributeMapPasswordQuestion=”ampPasswordQuestion”
attributeMapPasswordAnswer=”ampPasswordAnswer”
attributeMapFailedPasswordAnswerCount=”ampFailedPasswordAnswerCount”
attributeMapFailedPasswordAnswerTime=”ampFailedPasswordAnswerTime”
attributeMapFailedPasswordAnswerLockoutTime=”ampFailedPasswordAnswerLockoutTime”
enablePasswordReset=”true”
requiresQuestionAndAnswer=”true”
connectionStringName=”DirectoryConnection” />
498
Chapter 12
15_596985 ch12.qxp 12/14/05 7:52 PM Page 498
Because the provider now has to store a password answer, and you don’t want the plaintext password
answer to be easily viewable by arbitrary accounts (such as Authenticated Users), the provider always
encrypts the password answer. Unless you derive from the provider and add in your own custom encryption
routines, this means that the provider encrypts the password answer using the encryption key specified in
machine.config. Just like SqlMembershipProvider though, ActiveDirectoryMembershipProvider
requires you to explicitly set a decryption key. This requirement exists to prevent the problem that would
occur if different machines have completely different auto-generated encryption keys. If this were allowed
the password answer created on one web server would be useless on another server.
The hashing of the password answer is not supported, because there is no mechanism for having Active
Directory hash anything other than a user’s password. Rather than confuse things by adding a
passwordFormat attribute on the provider that would be configurable for password answers and have
no effect on the actual password, the feature team decided to support encryption of password answers
only. In this way, there is no ambiguity around the protections for user passwords (AD hashes them) as
opposed to the protections for password answers (they are always encrypted).
As a result of this requirement, the sample application now explicitly defines a decryption key as follows:
<machineKey
decryptionKey=”A225194E99BCCB0F6B92BC9D82F12C2907BD07CF069BC8B4”
decryption=”AES” />
With the changes to the admin provider and the definition of a fixed decryption key, the sample application
can now create users with question and answers. Because the Login controls work seamlessly with arbi-
trary membership providers, I just dropped a
CreateUserWizard onto a form, configured it to use the
admin provider, and started creating test accounts with questions and answers.
After creating a user with
CreateUserWizard, you can dump the contents of the user object with a
low-level tool like
ldp.exe or the ADSI Edit MMC (you can get these tools if you install the server
support tools included on the Windows Server 2003 CD). Running
ldp.exe and looking at the contents
of the newly created user, you can see the following:
1> cn: ;
1> userPrincipalName: ;
1> distinguishedName: CN=
,OU=UserPopulation_A,DC=corsair,DC=com;
snip
1> mail: ;
1> ampPasswordQuestion: question;
1> ampPasswordAnswer: qrwD6QSuoUdaznjvBAe3JPfQmhaJtQVpFgEFARppG3c=;
As you would expect after all of the configuration work, the password question was successfully stored,
as was the encrypted version of the password answer.
If you keep using the
adminprovider provider, you can create a test page where you attempt to reset
the password using the
PasswordRecovery control. If you intentionally supply the wrong answer a few
times, you will see the tracking information stored in the other attributes of the user object.
1> ampFailedPasswordAnswerCount: 3;
1> ampFailedPasswordAnswerTime: 127692324484470447;
499
ActiveDirectoryMembershipProvider
15_596985 ch12.qxp 12/14/05 7:52 PM Page 499
These attributes are showing that so far three failed password answer attempts have been made. The
weird-looking password answer time is just the integer representation of the UTC date-time that is the
start of the bad password answer tracking window. Because the default number of failed password
answer attempts that can be made is five (the same setting as
SqlMembershipProvider), after the fifth
bad password attempt occurs, the tracking information for the user looks like this:
1> ampPasswordQuestion: question;
1> ampPasswordAnswer: qrwD6QSuoUdaznjvBAe3JPfQmhaJtQVpFgEFARppG3c=;
1> ampFailedPasswordAnswerCount: 5;
1> ampFailedPasswordAnswerTime: 127692325545659847;
1> ampFailedPasswordAnswerLockoutTime: 127692325545659847;
Any attempt at this point to log in with the user’s credentials, change his password or reset his pass-
word, will immediately fail because the provider sees that user is now locked out. As with the failed
password answer time, the lockout time is stored as an integer representing the UTC time when the
lockout occurred. Remember that one difference between this provider and the SQL provider is that if
you wait 30 minutes (the default lockout timeout duration if one is configured for the domain), then the
user account auto-unlocks despite the previous failed password answer attempts.
Of course, if you are impatient, you can use the
Unlock method on the provider to forcibly unlock the user:
MembershipProvider mp = Membership.Providers[“adminprovider”];
mp.UnlockUser(“”);
The result of unlocking the user with the admin provider looks like this:
1> ampPasswordQuestion: question;
1> ampPasswordAnswer: qrwD6QSuoUdaznjvBAe3JPfQmhaJtQVpFgEFARppG3c=;
1> ampFailedPasswordAnswerCount: 0;
1> ampFailedPasswordAnswerTime: 0;
1> ampFailedPasswordAnswerLockoutTime: 0;
After an unlocking operation, the provider resets the count to zero and also stores a zero value in the
two time-tracking fields. At this point, if you choose to reset the password, the new password will be
sent to you. As a side note, if you want to get the
PasswordRecoveryControl to work on a web server
that has the default SMTP service installed, you will need a configuration entry like the following:
<system.net>
<mailSettings>
<smtp deliveryMethod=”PickupDirectoryFromIis”>
<network host=”localhost” port=”25” defaultCredentials=”true”/>
</smtp>
</mailSettings>
</system.net>
Without this entry, the PasswordRecoveryControl will fail when it attempts to email the password. In
the case of my sample application, because I reset the email address of my test user account to match the
domain address of my web server (that is, the
account now has an email
address of
and my local SMTP server is running on a machine
with the DNS address of
demotest.corsair.com), the PasswordRecoveryControl sent the password
reset email to my local drop directory
D:\inetpub\mailroot\drop. The text of the email looks like:
500
Chapter 12
15_596985 ch12.qxp 12/14/05 7:52 PM Page 500
Please return to the site and log in using the following information.
User Name:
Password: l}5x)$}k!KHp]y
This entire process shows the power of the provider model used in conjunction with
ActiveDirectoryMembershipProvider and the various Login controls. Although the initial schema
edits in the directory are a bit of a hassle, after those are completed you can see that with some edits to
web.config to configure the Membership provider and the mail server, the self-service password reset
process is pretty much automated. Attempting to hand-code a similar solution yourself, especially using
Active Directory (or ADAM for that matter) as the backing store, would be substantially more complex
than the process you just walked through.
Note that I intentionally used the admin provider because that provider was running with security
credentials in the directory necessary to allow it to reset the password of any user in the
UserPopulation_A
OU. Clearly, running with the other named provider (readonlyprovider) won’t work for resetting
passwords because the Authenticated Users group doesn’t have the privileges necessary to reset arbi-
trary user passwords.
Within the
ActiveDirectoryMembershipProvider methods like ValidateUser, ChangePassword,
ChangePasswordQuestionAndAnswer and GetUser will be able to read the new password answer
tracking fields to determine whether the user is considered locked out. This holds true for the special
administrative account that created earlier, as well the NETWORK SERVICE account that is being used
by the default provider. This is behavior is OK because you want the failed-password-answer-tracking
information to be readable by these methods.
There is a subtle requirement though for the
ValidateUser and ChangePassword methods. Both of
these methods will reset the password-answer-tracking information if the following conditions are met:
❑ The user supplies the correct password.
❑ The password-answer-tracking information contains nondefault values due to previously
logged bad password answer attempts.
If both of these conditions are met, then the provider will reset the password answer tracking counters
inside of
ValidateUser and ChangePassword. For this reason, if you setup a nonadministrative
account to handle user logins, make sure to grant this account write access to the three bad-password-
answer-tracking attributes.
However, if you feel uncomfortable with running a nonadministrative provider under the default privi-
leges of Authenticated Users, you can lock things further. For example, to prevent a nonadministrative
provider from ever being able to read the encrypted password answer, you can go through the following
steps to lock down access.
1. Create a read-only account that will be used by the nonadministrative provider to access the OU.
2. Configure a nonadministrative provider instance to run with the read-only user account, just as
was done for the administrative provider that we have been using.
3. In the Active Directory Users and Computers MMC, configure the read-only account by denying
specific granular user object property rights.
501
ActiveDirectoryMembershipProvider
15_596985 ch12.qxp 12/14/05 7:52 PM Page 501
Figure 12-9 shows a special read-only user account being configured:
Figure 12-9
Notice how the ability to read and write the encrypted password answer field is being revoked from the
userpopareader account. The password answer field needs to be readable only for accounts that fetch the
answer from the directory for comparison with the answer typed in by a user. For
ActiveDirectory
MembershipProvider
, this only occurs when calling ResetPassword, so only the administrative
account that was configured earlier needs read access on this attribute. Write access to the password
answer attribute is only necessary for methods that the update this information. The only methods on
ActiveDirectoryMembershipProvider where these updates occur are CreateUser (where the ques-
tion and answer are initially created) and
ChangePasswordQuestionAndAnswer (where the question
and answer are updated). For this reason, it makes sense to have a separate provider instance (like the
administrative provider used in the examples in this chapter) configured for creating users, updating
questions and answers and carrying out password resets.
502
Chapter 12
15_596985 ch12.qxp 12/14/05 7:52 PM Page 502
Using ADAM
From the ActiveDirectoryMembershipProvider’s perspective, using ADAM as a backing store is
pretty much the same as using Active Directory as the backing store. ADAM’s schema supports the
user
class, and just as with Active Directory, you can extend the schema in ADAM if you choose to enable
self-service password resets. In terms of directory structure, you can use the same general approaches for
both AD and ADAM: using a single container for storing users, or separate user containers for different
applications. The behavior around user creation/deletion as opposed to other operations works the same
way in ADAM as well — that is, creation and deletion always occur in the container pointed at by the
connection string, whereas searches and operations that bind to a user start at the root of the specified
container and then wend their way down through the container hierarchy looking for a match.
The differences you will encounter when using ADAM as a directory store with the provider are:
❑ You can choose to run ADAM on a machine that is not joined to a domain. This will probably
not be common for folks that run a lot of Windows Server machines, but it would be familiar to
UNIX shops that just need to talk to an LDAP server and don’t need the security mechanisms
supported by an AD domain infrastructure.
❑ ADAM can be installed multiple times on a single machine, with separate ADAM installations
running on different ports. Unlike AD, this means you can install ADAM to listen on something
other than port 389 (if using non-SSL connections) or port 636 (if using SSL connections).
❑ For an ADAM server that is part of a domain, you can connect to the ADAM instance using
either a domain principal or an ADAM principal. An ADAM principal is simply a user account
that only exists inside of the ADAM instance and is unknown in the general AD directory.
❑ You need to manually set up ADAM properly to store the data needed by the provider. With
that said, you can go through the GUI installer for ADAM and have it perform 95% of the setup
work for you. If you don’t get the GUI portion of the install correct though, you have to use the
dsmgmt.exe command-line tool that comes with ADAM to manually create an application par-
tition for use by your application.
❑ Quite honestly, security management of ADAM is either much simpler or much more compli-
cated depending on which approach you take to securing your application data. You can take
the simple approach where you use the application identity of your worker process (or applica-
tion impersonation identity if you choose) and make it an administrator in an ADAM partition.
This gives your web servers easy access to read and write data via
ActiveDirectory
MembershipProvider
. On the other hand, you can follow the lockdown approaches described
in the previous section on Active Directory where you grant specific rights to specific accounts
(for example, admin accounts versus read-only accounts) and then use different provider
instances for different operations. The snag with this approach is that the administrative tool for
modifying ADAM ACLs is quite simply abominable for anyone who isn’t directory savvy (and I
definitely do not fall in the directory guru camp!). You have to use the command-line
dsacls
.exe
tool that comes with ADAM to manually ACL your application containers. This same pro-
cess with Active Directory can be a little intimidating, but the MMC management tools for AD
help you through the process. No such GUI tool support currently exists for ADAM, although
there is supposed to be an updated version of the
ldp.exe tool in Windows Server 2003 R2 that
should have some level of GUI support for editing ACLs in ADAM. With that said, if you feel
comfortable manually ACL’ing containers in ADAM, you can definitely use that approach to
narrow the privileges granted to different accounts.
503
ActiveDirectoryMembershipProvider
15_596985 ch12.qxp 12/14/05 7:52 PM Page 503
❑ Connectivity to the ADAM instance is either in the clear or over an SSL connection. Active
DirectoryMembershipProvider
does not support any type of connection security other than
SSL. Of course, you can always use lower-level security measures such as IPSEC, but that level
of network security functions at a lower level and is transparent to both the provider and the
LDAP networking stack.
Because using ADAM has a bit of a different flavor from using Active Directory, you will see some common
steps described in this section so that you get an idea of how to get an application partition installed
properly. After you see how to get to that point, you will look at connecting to the ADAM store and carrying
out basic provider operations against the directory store.
Installing ADAM with an Application Partition
The first thing you need to accomplish is the installation of an ADAM instance that the provider can connect
to. Unlike Active Directory, where you already have a server running with the default Users container,
with ADAM you are starting from scratch. The first step is to download the ADAM installation package and
then run the installer. The installer walks you through a number of wizard steps for setting up an ADAM
instance. The first important step in the installation process is the naming the ADAM instance. This is impor-
tant when you work with ADAM through a tool like the services control panel, but the service name itself
has no impact when using the provider. Figure 12-10 shows the wizard step where you name the ADAM
instance.
Figure 12-10
One of the next wizard steps lets you choose the port numbers for SSL and non-SSL communications. If
this is the only ADAM instance that will be running on the server, and the server is also not an AD
domain controller (in which case AD already owns ports 389 and 636), you can just leave the default port
selections as is.
Later on in the wizard, there is a step where you create an application partition. This is important
because it determines the first part of the distinguished name that you will use in the connection string.
Because ADAM directories are their own little world, you can use any type of distinguished name that
504
Chapter 12
15_596985 ch12.qxp 12/14/05 7:52 PM Page 504
makes sense. However, if you plan to create organizational units within this application partition, you
are limited to specific types of objects in the distinguished name that you choose— the ADAM FAQ on
the web describes the limitations that apply. In Figure 12-11, you can see that I chose a distinguished
name that ends in an organization because organizations in ADAM can contain OUs.
Figure 12-11
As you progress through the wizard, one of the next steps is choosing an administrative user for the appli-
cation partition. This user account will by default be able to use command-line and GUI tools to configure
ADAM further. In Figure 12-12, I left the wizard with the default of the currently logged on user.
Figure 12-12
505
ActiveDirectoryMembershipProvider
15_596985 ch12.qxp 12/14/05 7:52 PM Page 505
One of the last major steps in the wizard that you definitely want to take advantage of is the option to
import an LDIF file. LDIF files are conceptually the same as running
.sql files against SQL Server to
install schema elements. In Figure 12-13, I selected the
MS-User.ldf file to import because it contains
the definition of the
user class that is required by the provider. If you forget to choose anything in this
step, then you have to import the LDIF file from the command-line using a tool like
ldifde.exe.
Figure 12-13
With these steps completed, you can finish the wizard, and after a bit of a pause you will have an
ADAM directory server running and available for use by the provider. To connect to the ADAM instance
and the application partition that you just created, you can use the adsiedit MMC tool, which is auto-
matically installed with ADAM on your machine. You will need to set up the connection settings by
choosing Connect To from the ADAM ADSI Edit node in the MMC. You can see how to set up the
connection settings in Figure 12-14.
In this case, I have pointed the MMC at my local machine’s ADAM instance listening on port 389. The
connection settings also point at the application partition
O=MyOrganization,DC=corsair,DC=com
that was created with the ADAM install wizard. Because you probably don’t want user objects to be
stored directly at the root of the application partition, you should create a container to store your
application’s user objects. In my case, I created an OU by right-clicking the partition node and
choosing New ➪ Object. In the dialog box that pops up after this selection, I chose an object of type
organizationalUnit and then named it ApplicationUsers. Note that if you don’t see the object type
organizationUnit in the selection list box, it is probably because your application partition used a
container type that cannot be a parent of OU objects.
506
Chapter 12
15_596985 ch12.qxp 12/14/05 7:52 PM Page 506
Figure 12-14
The last step at this point is to configure a domain account with administrative rights in the partition so
that all of the methods on
ActiveDirectoryMembershipProvider will work. Unlike AD where a
familiar security UI is used, in ADAM you have to go through a somewhat awkward configuration
process. Using the adsiedit MMC tool, click the CN=Roles node. This displays all of the ADAM groups
(not Active Directory domain groups) that currently exist in the ADAM application partition. In the
right-hand side of the MMC, right-click the CN=Administrators entry and select Properties. This pulls
up a list of all of the attributes on the Administrators object. You need to scroll through this list and find
the member attribute. Highlight that attribute and click the Edit button. This pulls up the clearly named
Multivalued Distinguished Name with Security Principal Editor dialog box. In this box, there are two
buttons: Add Windows Account and Add ADAM Account.
This dialog box allows you to add either domain principals (such as domain users, as well as well-known
accounts like the NETWORK SERVICE account) or ADAM user principals into the Administrators group.
For now, I just added the web server’s NETWORK SERVICE account to the group. You can see what this
all looks like in Figure 12-15.
507
ActiveDirectoryMembershipProvider
15_596985 ch12.qxp 12/14/05 7:52 PM Page 507
Figure 12-15
If you don’t plan on setting up SSL for your ADAM instance, then you will to add some other account
aside from NETWORK SERVICE to the Administrators group. Remember that you can only connect to
ADAM with the
ActiveDirectoryMembershipProvider in one of two ways: over SSL or in the clear.
The provider is not able to connect to ADAM over non-SSL connections using either the default process
credentials or explicit domain account credentials. Instead, you always need an ADAM user principal
that can be used as the explicit username configured for the provider.
Because the demo code in the next section uses an ADAM instance that is not configured to use SSL, you
need to add some other security principal to the Administrators group. I created another OU in the
application partition called
PartitionUserAccounts, and I added a user to it called Application
UsersAdministrator
. The full distinguished name for this new account is:
CN=ApplicationUsersAdministrator,OU=PartitionUserAccounts,O=MyOrganization,DC=corsa
ir,DC=com
508
Chapter 12
15_596985 ch12.qxp 12/14/05 7:52 PM Page 508
You can add this account to the Administrators group using the same process described earlier, though
you will want to click the Add ADAM Account button for this case. Make sure that you have the distin-
guished name of the administrators account handy because you won’t get any nice GUI for selecting
ADAM principals — instead you have to type in the full distinguished name. Figure 12-16 shows the end
result of adding the ADAM user principal to the Administrators group. Notice the highlighted account
in the security principal dialog box.
Figure 12-16
One thing to warn you about — at this point even though you now have an ADAM user principal it is
very likely that you still can’t use it at this point. Unfortunately, the errors you will get back from the
provider or from other tools like
ldp.exe won’t tell you the problem. There are two more things you
need to do to get the ADAM user principal working:
1. You need to explicitly set a password on it. You might have noticed that when you created the
ADAM user principal, at no point were you prompted for a password.
2. You need to enable the user account. By default newly created ADAM user principals are created
in a disabled state when running on Windows Server 2003 machines that have any type of pass-
word restrictions in effect. As a result, you need to enable the account after you set the password.
509
ActiveDirectoryMembershipProvider
15_596985 ch12.qxp 12/14/05 7:52 PM Page 509