Programming Java 2 Micro Edition on Symbian OS A developer’s guide to MIDP 2.0 phần 5 ppsx
Bạn đang xem bản rút gọn của tài liệu. Xem và tải ngay bản đầy đủ của tài liệu tại đây (446.02 KB, 50 trang )
172 MIDP 2.0 AND THE JTWI
public void itemStateChanged(Item item){
if (item instanceof Gauge){
Gauge volumeIndicator = (Gauge)item;
int level = volumeIndicator.getValue();
audioPlayer.setVolume(level);
}
}
The itemStateChanged() method obtains the value requested by
the user and invokes the setVolume() method to adjust the audio
playback volume via the Player’s VolumeControl.
The showAlert()method (see below) is called by the AudioPlayer
instance in the event of an Exception being thrown at any stage of the
Player lifecycle.
public void showAlert(String title, String message){
Alert alert = new Alert(title, message, null, AlertType.ERROR);
display.setCurrent(alert, initialView);
initialView.removeProgressGauge();
initialView.addCommand(playCommand);
}
After displaying an error Alert, the current Displayable is set to
the InitialView allowing the user to try either the same URL again or
a different URL.
The MIDletController class also provides a couple of callback
methods: updateProgressGauge and removeVolumeControl. The
first updates the InitialView progress gauge as the Player progresses
through its lifecycle. The second removes the interactive volume indicator
Gauge from the PlayerView in the event that the implementation of
Player does not support a VolumeControl.
The full source code and JAR and JAD files for the Audio Player
MIDlet can be downloaded from the Symbian website at
www.symbian.
com/books
.
3.4.1.5 Working with Video
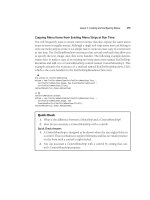
We shall now illustrate how to play a video with code highlights taken
from a simple Video Player MIDlet (see Figure 3.26).
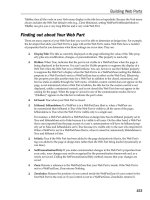
The architecture of the Video Player MIDlet (see Figure 3.27) is very
similar to that of the Audio Player.
The MIDlet contains four classes: MIDletController,
InitialView, VideoPlayer and VideoCanvas. The VideoCan-
vas is used for rendering the video playback as well as providing
controls similar to those found in the PlayerView of the Audio Player
MIDlet. The other classes fulfill very similar roles to their equivalents in
the Audio Player MIDlet.
OPTIONAL J2ME APIS IN THE JTWI 173
Figure 3.26 The Video Player MIDlet running on a Nokia Series 60 phone.
javax.microedition.lcdui.Form
InitialView
MIDletController VideoPlayer javax.microedition.media.control.VideoControl
javax.microedition.lcdui.Canvas
javax.microedition.media.Player
VideoCanvas
Figure 3.27 UML class diagram of the Video Player MIDlet.
The VideoPlayer Class
Let’s first take a look at the key methods of the VideoPlayer class:
import javax.microedition.media.*;
import javax.microedition.media.control.*;
import java.io.*;
// Acquires the video content and renders it
public class VideoPlayer implements Runnable {
private final static String THREE_GPP = "3gp";
private final static String MPEG = "mpg";
174 MIDP 2.0 AND THE JTWI
private final static String MIME_3GPP = "video/3gpp";
private final static String MIME_MPEG = "video/mpeg";
private MIDletController controller;
private VideoCanvas canvas;
private Player player;
private VideoControl videoControl;
private String resource;
private String mimeType = THREE_GPP;
private Thread initializer;
public VideoPlayer(MIDletController controller,
VideoCanvas canvas){ }
public void initializeVideo(String resource){ }
public void run(){ }
public void startPlayer(){ }
public void stopPlayer(){ }
public void closePlayer(){ }
}
The constructor is shown below.
public VideoPlayer(MIDletController controller, VideoCanvas canvas){
this.controller = controller;
this.canvas = canvas;
}
It simply initializes the controller and canvas attributes with refer-
ences to the MIDletController and the VideoCanvas respectively.
One difference between the Video Player and Audio Player MIDlets
is that the Video Player obtains its content from resource files packaged
in the MIDlet suite JAR file, rather than from a remote resource. The
initializeVideo() method takes the name of the video file as
a parameter.
public void initializeVideo(String resource){
this.resource = resource;
String fileExt =
resource.substring(resource.lastIndexOf('.') + 1);
if(fileExt.equals(THREE_GPP)) {
mimeType = MIME_3GPP;
}
else if(fileExt.equals(MPEG)) {
mimeType = MIME_MPEG;
}
initializer = new Thread(this);
initializer.start();
}
OPTIONAL J2ME APIS IN THE JTWI 175
The resource file name is tested to ascertain its format (MPEG for the
Sun’s J2ME Wireless Toolkit 2.0 emulator and 3GPP for real phones) and
the appropriate MIME type set. A new thread is then launched to perform
the essential initialization required to play the video content.
The run() method, mandated by the Runnable interface, contains
the initialization of the Player.
public void run(){
try {
InputStream in = getClass().getResourceAsStream("/"
+ resource);
player = Manager.createPlayer(in, mimeType);
player.addPlayerListener(controller);
player.realize();
player.prefetch();
videoControl =
(VideoControl)player.getControl("VideoControl");
if (videoControl != null) {
videoControl.initDisplayMode(
videoControl.USE_DIRECT_VIDEO, canvas);
int cHeight = canvas.getHeight();
int cWidth = canvas.getWidth();
videoControl.setDisplaySize(cWidth, cHeight);
videoControl.setVisible(true);
startPlayer();
}
else{
controller.showAlert("Error!",
"Unable to get Video Control");
closePlayer();
}
} catch (IOException ioe) {
controller.showAlert("Unable to access resource",
ioe.getMessage());
closePlayer();
} catch (MediaException me) {
controller.showAlert("Unable to create player",
me.getMessage());
closePlayer();
}
}
An InputStream is obtained from the resource file and used to
create the Player instance. A PlayerListener (the controller)is
registered with the Player in order to receive callbacks. The prefetch
and realize() methods are then called on the Player instance.
Once the player is in the PREFETCHED state we are ready to render
the video content. First we must obtain a VideoControl by calling
getControl on the Player, and casting it down appropriately. Note
that the MMAPI specification requires that a player for video media
must support a VideoControl, unlike the case of a player for audio
content, where support for VolumeControl is only a recommended
practice.
176 MIDP 2.0 AND THE JTWI
The initDisplayMode() method is used to initialize the video
mode that determines how the video is displayed. This method takes
an integer mode value as its first argument with one of two predefined
values: USE_GUI_PRIMITIVE or USE_DIRECT_VIDEO. In the case of
MIDP implementations (supporting the LCDUI), USE_GUI_PRIMITIVE
will result in an instance of a javax.microedition.lcdui.Item
being returned:
Item display = control.initDisplayMode(control.USE_GUI_PRIMITIVE, null);
For CDC implementations supporting AWT, USE_GUI_PRIMITIVE
will return an instance of java.awt.Component. For implementations
that support both LCDUI and AWT, the required type must be specified
by a String as the second argument:
Item display = control.initDisplayMode(control.USE_GUI_PRIMITIVE,
"javax.microedition.lcdui.Item");
The USE_DIRECT_VIDEO mode can only be used with implementa-
tions that support the LCDUI (such as Symbian OS) and a second argument
of type javax.microedition.lcdui.Canvas (or a subclass) must
be supplied. This is the approach adopted in the example code above.
Methods of VideoControl can be used to manipulate the size and the
location of the video with respect to the Canvas where it will be dis-
played. Since we are using direct video as the display mode it is necessary
to call setVisible(true) in order for the video to be displayed. (In
the case of USE_GUI_PRIMITIVE the video is shown by default when
the GUI primitive is displayed.) Finally, we start the rendering of the
video with the startPlayer() method. If at any stage an Exception
is thrown the MIDletController.showAlert() method is called
and the resources acquired by the Player are released by calling the
closePlayer() method.
The other methods of the VideoPlayer class are the same as their
namesakes in the AudioPlayer class of the Audio Player MIDlet.
The MIDletController Class
The MIDletController class for the Video Player MIDlet is very
similar to that of the Audio Player. The method signatures of the class are
shown below.
import javax.microedition.midlet.*;
import javax.microedition.lcdui.*;
import javax.microedition.media.*;
// A simple video player MIDlet using JSR 135 - Mobile Media API
public class MIDletController extends MIDlet implements
OPTIONAL J2ME APIS IN THE JTWI 177
CommandListener, PlayerListener {
private Command exitCommand, playCommand, backCommand,
replayCommand;
private Display display;
private InitialView initialView;
private VideoCanvas videoCanvas;
private VideoPlayer videoPlayer;
public MIDletController() { }
public void startApp(){ }
public void pauseApp(){ }
public void destroyApp(boolean unconditional){ }
public void commandAction(Command c, Displayable s){ }
public void playerUpdate(Player p, String event,
Object eventData) { }
public void showAlert(String title, String message){ }
public void releaseResources(){ }
}
The constructor is listed below:
public MIDletController() {
int noOfVideos = Integer.parseInt(getAppProperty(
"number-of-videos"));
String[] videoNames = new String[noOfVideos];
for (int i = 1; i <= noOfVideos; i++){
videoNames[i-1] = getAppProperty("video-" + i);
}
initialView = new InitialView(this, videoNames);
exitCommand = new Command("Exit", Command.EXIT, 2);
playCommand = new Command("Play", Command.SCREEN, 1);
initialView.addCommand(exitCommand);
videoCanvas = new VideoCanvas(this);
backCommand = new Command("Back", Command.BACK, 1);
videoCanvas.addCommand(backCommand);
videoPlayer = new VideoPlayer(this, videoCanvas);
display = Display.getDisplay(this);
}
It first uses the MIDlet getAppProperty() method to retrieve user-
defined attributes from the JAD file, namely the number of video files
packaged in the JAR and their names. The names are then used to
initialize the InitialView. The VideoCanvas and VideoPlayer
instances are then created.
178 MIDP 2.0 AND THE JTWI
All the other methods in MIDletController are essentially the
same as their Audio Player namesakes.
The VideoCanvas Class
We will briefly take a look at the (very simple) VideoCanvas class:
import javax.microedition.lcdui.*;
public class VideoCanvas extends Canvas{
public VideoCanvas(MIDletController controller){
setCommandListener(controller);
}
// Paints background color
public void paint(Graphics g){
g.setColor(128, 128, 128);
g.fillRect(0, 0, getWidth(), getHeight());
}
}
The important point to note is that the paint() method plays no part
in rendering the video. This is performed directly by the VideoControl.
The full source code and JAR and JAD files for the Video Player
MIDlet can be downloaded from the Symbian website at
www.symbian.
com/books
.
3.4.1.6 Capturing Images
Another use of VideoControl is to capture images from a camera. In this
case, rather than specifying a file (and MIME type) as the data source,
we specify capture://video. Other than that, the setting up of the
video player and control proceeds pretty much as in the Video Player
MIDlet above.
The Picture Puzzle MIDlet, included as a case study in Chapter 5,
illustrates image capture. The following code which performs the neces-
sary initialization of a video player and a control is reproduced from the
Capturer class in that example.
// Creates a VideoPlayer and gets an associated VideoControl
public void createPlayer() throws ApplicationException {
try {
player = Manager.createPlayer("capture://video");
player.realize();
// Sets VideoControl to the current display.
videoControl =
(VideoControl)(player.getControl("VideoControl"));
if (videoControl == null) {
discardPlayer();
} else {
OPTIONAL J2ME APIS IN THE JTWI 179
videoControl.initDisplayMode(VideoControl.USE_DIRECT_VIDEO,
canvas);
int cWidth = canvas.getWidth();
int cHeight = canvas.getHeight();
int dWidth = 160;
int dHeight = 120;
videoControl.setDisplaySize(dWidth, dHeight);
videoControl.setDisplayLocation((cWidth - dWidth)/2,
(cHeight - dHeight)/2);
}
By setting the Canvas to be the current one in the Display, we can
use it as a ‘‘viewfinder’’ for the camera. When we are ready to take a
picture, we simply call getSnapshot(null) on the VideoControl,
as shown in the following code from the Picture Puzzle MIDlet:
public byte[] takeSnapshot() throws ApplicationException {
byte[] pngImage = null;
if (videoControl == null) {
throw new ApplicationException("Unable to capture photo:
VideoControl null");
}
try {
pngImage = videoControl.getSnapshot(null);
}catch(MediaException me) {
throw new ApplicationException("Unable to capture photo",
me);
}
return pngImage;
}
It should be noted that, if a security policy is in operation, user
permission may be requested through an intermediate dialog, which may
interfere with the photography!
3.4.1.7 Generating Tones
MMAPI also supports tone generation. Generating a single tone is simply
achieved using the following method of the Manager class:
public static void playTone(int note, int duration, int volume)
throws MediaException
The note is passed as an integer value in the range 0–127. ToneCon-
trol.C4 = 60 represents middle C. Adding or subtracting 1 increases
or lowers the pitch by a semitone. The duration is specified in milliseconds
and the volume is an integer value on the scale 0–100.
To play a sequence of tones it is more appropriate to create a Player
and use it to obtain a ToneControl.
180 MIDP 2.0 AND THE JTWI
byte[] toneSequence = { ToneControl.C4, ToneControl.C4 + 2,
ToneControl.c4 +4, };
try{
Player player = Manager.createPlayer(Manager.TONE_DEVICE_LOCATOR);
player.realize();
ToneControl control = (ToneControl)player.getControl("ToneControl");
control.setSequence(toneSequence);
player.start();
} catch (IOException ioe) {
} catch (MediaException me) { //handle }
A tone sequence is specified as a list of tone–duration pairs and user-
defined sequence blocks, using Augmented Backus–Naur form (ABNF)
syntax (refer to the MMAPI specification for more detail). The list is
packaged as a byte array and passed to the ToneControl using the
setSequence() method. To play the sequence we simply invoke the
start() method of the Player.
A more sophisticated example can be found in the documentation of
ToneControl in the MMAPI specification.
3.4.2 MMAPI on Symbian OS Phones
We next look at the important question of which media capabilities are
supported in practice on the various Symbian OS phones on the market.
It is important to understand that when we talk about MMAPI on Symbian
OS we are not talking about a single version but three, based on two
distinct implementations. These are:
• Symbian MIDP 2.0 Audio subset (on Symbian OS Version 7.0)
• Series 60 Developer Platform 1.0 (on Symbian OS Version 6.1)
• Series 60 Developer Platform 2.0 (on Symbian OS Version 7.0s).
These MMAPI implementations will be discussed in turn.
MMAPI was first implemented on Symbian OS not by Symbian but
by Nokia, for their Series 60 Developer Platform 1.0 (as embodied in
the Series 60 MIDP SDK 1.2.1 for Symbian OS, Nokia edition, based on
Symbian OS Version 6.1). This is available on all phones based on this
platform, with the exception of the Nokia 7650 which was technically
based on a precursor to the Series 60 Developer Platform 1.0, and
provided multimedia capabilities only through custom Nokia APIs.
This implementation was extended by Nokia for the Series 60 Devel-
oper Platform 2.0 and Series 90 Developer Platform 1.0, both based on
Symbian OS Version 7.0s. At the time of writing, the only announced
phones based on these platforms are the Nokia 6600 and the Nokia 7700,
based on Series 60 and Series 90 respectively.
OPTIONAL J2ME APIS IN THE JTWI 181
As the number of phones based on these platforms continues to grow,
the reader is referred to
www.symbian.com/phones
to ascertain the cur-
rent list. Note that Nokia licenses its platforms to other mobile phone
manufacturers, so the list is not restricted to Nokia phones.
At the same time, Symbian has separately implemented the audio
subset (‘‘building block’’) of MMAPI defined by MIDP 2.0, which became
available with the release of Symbian OS Version 7.0s. Consequently, it
is not available as standard on phones based on Symbian OS Version 7.0.
However, the whole of MIDP 2.0 has been ‘‘backported’’ from Symbian
OS Version 7.0s to Symbian OS Version 7.0 as part of the upgrade of the
UIQ platform from UIQ 2.0 to UIQ 2.1. As a result, phones based on UIQ
2.1 (the first of which to be announced are the Sony Ericsson P900/P908
and the BenQ P30) support the audio subset.
Symbian is releasing a fully featured MMAPI implementation in the
forthcoming Symbian OS Version 8.0, which will be available for
all Symbian OS phones (see
www.symbian.com/technology/standard-
java.html
). This will certainly mean a closer match of the MMAPI
capabilities of Symbian OS phones based on different UIs than at
present.
3.4.2.1 Symbian MIDP 2.0 Audio Subset
The audio subset of MIDP 2.0 is described in the MIDP 2.0 specification
document under javax.microedition.media and javax.micro-
edition.media.control. Notably there is no javax.micro-
edition.media.protocol package, since custom DataSources
are not supported. The associated overridden version of Manager.
createPlayer() is not, as a result, supported either. Only two con-
trols are available, VolumeControl and ToneControl, both of which
are fully supported by Symbian OS. There is no support for media
recording or capture.
The following are the audio formats supported:
Format File extension MIME types
AU audio .au audio/basic
Wave audio .wav audio/wav, audio/x-wav
MP3 .mp3 audio/mp3
Tone sequence n/a audio/x-tone-seq
These can all, with the exception of tone sequences, be played via the
various mechanisms described in Section 3.4.1.2. Tone sequences differ
in that there is no file extension associated with them; they can only be
created in a programmatic manner, in the context of a ToneControl.
182 MIDP 2.0 AND THE JTWI
The P900 adds additional support for the following audio types:
Format File extension MIME types
RMF (Beatnik) .rmf audio/rmf
iMelody .imy text/x-imelody, audio/x-imelody
MIDI .mid audio/midi, audio/x-midi
3.4.2.2 Series 60 Developer Platform 1.0
Nokia’s implementation of MMAPI in Series 60 Developer Platform 1.0
supports playing of the following types of media:
Format File extension MIME types
Wave audio .wav audio/x-wav
AMR audio .amr audio/amr
Nokia ring tone .rng audio/x-nokia-rng
Tone sequence n/a audio/x-tone-seq
MIDI .mid audio/midi
Scalable Polyphonic MIDI .mid audio/sp-midi
3GPP video .3gp video/3gpp
NIM video .nim video/vnd.nokia.interleaved-
multimedia
These all support VolumeControl and StopTimeControl (which
allows you to specify in advance a stop time, rather than letting the
media play to its end). In addition, tone sequences necessarily support
ToneControl and videos support VideoControl. No other controls
are supported.
It is worth noting that Nokia’s MIDP implementation supports full-
screen display of a Canvas, through a custom FullCanvas class. It is
possible to play video full-screen using such a class as follows:
FullCanvas canvas
VideoControl videoControl;
Player player;
videoControl = (VideoControl)player.getControl(“VideoControl”);
videoControl.initDisplayMode(VideoControl.USE_DIRECT_VIDEO, canvas);
There are no recording capabilities. Nor is there support for audio
capture. However, still images can be captured from the camera, using
OPTIONAL J2ME APIS IN THE JTWI 183
the protocol described in Section 3.4.1.2. The default encoding for the
captured image on all Nokia phones is PNG. Alternatively you can specify
one of the three supported formats:
• Portable Network Graphics (PNG)
• Bitmap (BMP)
• JPEG (JPG).
You do this by passing one of the strings encoding=png, encoding
=bmp or encoding=jpeg as an argument to the getSnapshot()
method of VideoControl. You can set the width and height in the
same way. The default is 160 × 120 pixels. Be aware that if you change
the aspect ratio in your specification, the image will be stretched rather
than clipped. VideoControl is the only control which can be used in the
context of video capture. Further details about the use of VideoControl
can be found in
Camera MIDlet: A Mobile Media API Example
on Forum
Nokia (
/>).
Other points worth noting about Nokia’s implementation are that:
• ‘‘mixing’’, in the sense of simultaneous playback by multiple players,
is not supported; although the TimeBase concept is supported, it
would not appear to be usable for its intended purpose of playback
synchronization
• RTP streaming is not supported: the protocol itself is unsupported
• HTTP streaming is not supported; media data will be downloaded
completely (during the ‘‘realization’’ phase) before ‘‘prefetching’’ and
playing can begin (see Figure 3.23).
3.4.2.3 Series 60 Developer Platform 2.0
A number of modifications have been made to Nokia’s MMAPI imple-
mentation for the Series 60 Developer Platform 2.0. The comments below
can be expected to apply equally to the Series 90 Developer Platform 1.0
which is closely related.
The main differences are that support has been added for audio
capture and recording, and there are changes to the set of supported
content types. In particular, support for the proprietary Nokia audio and
video file formats has been removed and support has been added for
AU, Raw and AMR wideband audio formats and MP4 and Real Media
video formats.
184 MIDP 2.0 AND THE JTWI
The following is the list of supported content types:
Format File extension MIME types
Wave audio .wav audio/wav, audio/x-wav
AMR audio .amr audio/amr
AMR wideband audio .awb audio/amr-wb
Raw audio .raw audio/basic
AU audio .au audio/au, audio/x-au
Tone sequence n/a audio/x-tone-seq
MIDI .mid audio/midi
Scalable Polyphonic MIDI .mid audio/sp-midi
3GPP video .3gp video/3gpp
MP4 video .mp4 video/mp4
Real Media video .rm application/vnd.rn-realmedia
It might be observed here that a number of the file extensions have
associated with them more than one MIME type. For media downloaded
from a server this is not a problem; the server can specify the MIME type as
part of the transaction. Where media is obtained from an InputStream
rather than a URI (as will typically be the case for local data), a default
MIME type will be assumed. In the case of AU and WAV files, the
defaults are audio/au and audio/x-wav, respectively. With MIDI, the
more powerful audio/sp-midi format will be assumed; if no prioritization
of channels is specified (as will be the case for the generic MIDI format),
but the number of requested channels exceeds the supported number, an
arbitrary selection of channels is played.
Note that, although MP3 playback is supported on a number of Series
60 and Series 90 phones, it is not among the above-listed formats, so
it is not supported through MMAPI. Again, although streaming video is
supported on the Nokia 6600 and Nokia 7700, the restrictions on mixing
and streaming media are the same as in Series 60 Developer Platform 1.0.
The support for controls is exactly the same as in Series 60 Developer
Platform 1.0, with one exception. Because of the introduction of sup-
port for audio capture and recording, RecordControl is available for
audio/wav, audio/au and audio/amr. Usage of RecordControls
is illustrated in the following code sample reproduced from the MMAPI
specification:
try {
// Create a Player that captures live audio.
Player p = Manager.createPlayer("capture://audio");
p.realize();
// Get the RecordControl, set the record stream,
// start the Player and record for 5 seconds.
RecordControl rc = (RecordControl)p.getControl("RecordControl");
OPTIONAL J2ME APIS IN THE JTWI 185
ByteArrayOutputStream output = new ByteArrayOutputStream();
rc.setRecordStream(output);
rc.startRecord();
p.start();
Thread.currentThread().sleep(5000);
rc.commit();
p.close();
} catch (IOException ioe) {
} catch (MediaException me) {
} catch (InterruptedException ie) { }
This will capture five seconds of audio input from the microphone.
Noticeherethatthecommit() method implies a call to stopRecord
before ending the record session. The MIME type of the captured data
can conveniently be ascertained using the getContentType() method
of RecordControl. For the Nokia 6600, the default encoding is PCM.
You can also, if you wish, specify the encoding to use for the record-
ing. You should first ascertain which encodings are supported by the
implementation (see Section 3.4.2.5). Then, if you wanted to ensure the
audio stream was captured in WAV format, for example, you could
specify capture://audio&encoding=wav as the argument to the
createPlayer() method.
Similar code will allow recording from a remote URI providing audio
data of one of the supported MIME types. The URI is passed in as an
argument to the setRecordLocation of RecordControl. The server
which delivers the audio content would specify the MIME type, which
you can ascertain in the manner just discussed. Rather than causing the
thread to sleep for a preset time, however, it would be better to arrange
to commit the recording on receipt of an END_OF_MEDIA event. Clearly
there is no important use case for recording local audio data since, by
definition, a data InputStream would already exist which could be
piped to an OutputStream.
3.4.2.4 Symbian OS Version 8.0
From Symbian OS Version 8.0, Symbian is providing a fully-featured
MMAPI implementation as standard. Although at time of writing no
phones have been announced based on this OS release, it is worth spend-
ing a little time reviewing some of the main features of this forthcoming
implementation, to get a flavor of what is to come.
One of the main features is that the content types supported are
not considered as a closed set but depend on what is implemented
natively in the multimedia framework on the host phone. The capabilities
will inevitably vary from phone to phone, so there is not so much
value in discussing the details of Symbian’s default implementation here.
However, it is likely that playing MP3 files from Java will become possible
for the first time on phones based on Symbian OS Version 8.0.
186 MIDP 2.0 AND THE JTWI
Another significant difference in the new implementation is that many
more controls are supported than hitherto, and in more contexts. In fact,
all 12 of the controls listed in Section 3.4.1.3 have been implemented.
The details of which controls are supported for different players will be
subject to some variation in practice, depending on the phone design.
Perhaps the most important development in this regard is that Record-
Control is supported in the context of both capture://audio and
capture://video, opening up the possibility of recording video clips
from Java for the first time!
Also device://midi is supported, and both tone generation and
midi sound generation have PitchControl and RateControl avail-
able. Thus many more possibilities are presented.
3.4.2.5 Working Out What Is Supported
If you know which of the Symbian OS platforms you are targeting with
a MIDlet, you will be able to craft your code to conform to the cited
capabilities. However, in practice it is more likely that you will want
to write portable code which can run on several or all of the above
platforms, or indeed on non-Symbian OS phones with MMAPI capability.
In this case you will need to be able to work out the supported capabilities
dynamically and make use of what is available, or else fail gracefully (for
example, by removing certain options from menus) if the capability you
want is just not available.
This you can achieve by interrogating the javax.microedition.
media.Manager class about the properties of interest. In particular, if
you want to find out which content types are supported, you can do so
with the following call:
String[] types = Manager.getSupportedContentTypes(null);
This will return an array of the MIME types as strings preceded by
audio/ or video/. In the case of the Nokia 6600, the RealMedia MIME
type is preceded by application/.
Correspondingly, to find out which protocols are supported, you
can call:
String[] types = Manager.getSupportedProtocols(null);
This will return the appropriate selection of http, capture or
device on Symbian OS phones. If you want to know which con-
tent types are available for a particular protocol, simply pass the relevant
string returned by getSupportedProtocols(null) as the argument
to getSupportedContentTypes(), instead of null. Similarly, if you
want to know the protocols available for a particular content type, pass
the content type to getSupportedProtocols().
OPTIONAL J2ME APIS IN THE JTWI 187
In addition, there are a number of system properties which can be
used to work out what multimedia capabilities are supported for a
particular implementation. These are described in full in the overview
of the MMAPI specification. They can be recovered as strings with the
usual System.getProperty() method. The following properties are
of particular use:
• supports.mixing – returns false on all Symbian OS phones
• supports.audio.capture – returns true on Nokia 6600 (Series
60 v2.0) and in the Symbian OS Version 8.0 implementation
• supports.video.capture – returns true on all Symbian OS
phones, indicating that snapshots are possible
• supports.recording – returns true on Nokia 6600 (Series 60
v2.0) and in the Symbian OS Version 8.0 implementation
• audio.encodings – returns a list of encodings depending on the
implementation
• video.encodings – returns non-null values on only the Symbian
OS Version 8.0 implementation, which is the first to support video
recording (the default is encoding=video/msvideo)
• video.snapshot.encodings – returns the default encoding=
png for Series 60 v2.0; returns a list of all supported encodings for
Series 60 v1.2 and Symbian OS Version 8.0 (for which the default is
the first value in the list)
• streamable.contents – returns null on all Symbian OS phones.
3.4.3 MMAPI and the MIDP 2.0 Security Model
For reasons of privacy the following Mobile Media API calls are restricted
under the MIDP 2.0 security model (see
Mobile Media API Specification
1.1 Maintenance Release
at
.)
• RecordControl.setRecordLocation(String locator)
• RecordControl.setRecordStream(OutputStream
stream)
• VideoControl.getSnapshot(String type).
Under the MIDP 2.0 security model, a signed MIDlet suite which contains
MIDlets that make use of these APIs must explicitly request the appro-
priate permission in its MIDlet-Permissions attribute. The required
MIDlet-Permissions attribute entries in the JAD file or manifest are
as follows:
MIDlet-Permissions: javax.microedition.media.control.RecordControl,
188 MIDP 2.0 AND THE JTWI
or:
MIDlet-Permissions:
javax.microedition.media.control.VideoControl.getSnapshot,
These protected APIs are part of the Multimedia Recording function
group as defined by the
Recommended Security Policy for GSM/UMTS
Compliant Devices
addendum to the MIDP 2.0 specification.
It must also be remembered that if a MIDlet in a signed MIDlet
suite makes use of a protected API of the javax.microedition.io
package, for instance to fetch media content over HTTP, then explicit
permission to access that API must be requested in the MIDlet-
Permissions attribute. This is the case even if it is fetched implicitly,
perhaps by calling:
Manager.createPlayer(“www.myserver.com/video.3gp”)
Whether MIDlets in untrusted MIDlet suites can use the protected APIs
of the MMAPI depends on the security policy relating to the untrusted
domain in force on the device. Under the JTWI Release 1
Security Policy
for GSM/UMTS Compliant Devices
, MIDlets in untrusted MIDlet suites
can access the Multimedia Recording function group APIs with explicit
permission from the user. The default user permission setting is oneshot
(‘‘Ask every time’’).
Current devices based on the MIDP 2.0-enabled Series 60 Developer
Platform 2.0, such as the Nokia 6600, support both audio recording and
capturing snapshots. The security policy for the untrusted domain on
this device complies with the JTWI Release 1 requirements. Note that
on the Nokia 6600, the user may change the default user permission
from oneshot to session (‘‘Ask first time’’) in the following manner (see
Figure 3.28):
1. Navigate to the main menu.
2. Select the Application Manager.
3. Highlight the appropriate MIDlet from the list of applications.
4. Select Options > Settings > Multimedia.
5. Select ‘‘Ask first time’’.
Devices based on the MIDP 1.0-enabled Series 60 Developer Platform
1.x, such as the Nokia 3650, only support the capture of snapshots. Obvi-
ously such devices are not subject to the MIDP 2.0 security requirements.
Taking photos using the getSnapshot() method of the VideoCon-
trol does not require explicit user permission on these devices.
OPTIONAL J2ME APIS IN THE JTWI 189
Figure 3.28 Changing the default user permission on the Nokia 6600.
3.4.4 Wireless Messaging API
3.4.4.1 Introduction
The Wireless Messaging API (JSR 120) is an optional API targeted at
devices supporting the Generic Connection Framework defined in the
CLDC. The Wireless Messaging API (WMA) specification defines APIs for
sending and receiving SMS messages and receiving CBS messages. At
the time of writing the current release of the Wireless Messaging API is
version 1.1. This contains minor modifications to the 1.0 specification to
enable the API to be compatible with MIDP 2.0.
The WMA is a compact API containing just two packages:
• javax.microedition.io
• javax.wireless.messaging.
The first package contains the platform network interfaces modified for
use on platforms supporting wireless messaging connection, in particular
an implementation of the Connector class for creating new Mes-
sageConnection objects. The second package defines APIs which
allow applications to send and receive wireless messages. It defines a base
interface Message from which BinaryMessage and TextMessage
both derive. It also defines a MessageConnection interface, which
provides the basic functionality for sending and receiving messages, and
a MessageListener interface for listening to incoming messages.
In this section we shall consider sending and receiving SMS messages.
We shall then go on to show how to use the Push Registry API of MIDP
2.0 to register an incoming SMS connection with a MIDlet.
190 MIDP 2.0 AND THE JTWI
3.4.4.2 Sending Messages
Sending an SMS message using the WMA could not be simpler, as the
code paragraph below shows:
String address = “sms://+447111222333”;
MessageConnection smsconn = null;
try {
smsconn = (MessageConnection)Connector.open(address);
TextMessage txtMessage =
(TextMessage)smsconn.newMessage(MessageConnection.TEXT_MESSAGE);
txtmessage.setPayloadText(“Hello World”);
smsconn.send(txtMessage);
smsconn.close();
} catch (Exception e) {
//handle
}
First we obtain a MessageConnection instance by invoking the
Connector.open() method with an address of the appropriate syntax.
A MessageConnection can operate in client or server mode depending
on the URL syntax of the address passed to the open() method. For a
client mode connection (as used in the code listed above), messages can
only be sent. The URL address syntax for a client mode connection has
the following possible formats:
• sms://+447111222333
• sms://+447111222333:1234
The first format (as in the example above) is used to open a connection
for sending a normal SMS message, which will be received in the
end-user’s inbox. The second format is used to open a connection to
send an SMS message to a particular Java application listening on the
specified port.
The MessageConnector instance is then used to create a Message
instance using the method:
public Message newMessage(String type)
The MessageConnection interface defines two public static
final String variables BINARY_MESSAGE and TEXT_MESSAGE.If
type is equal to BINARY_MESSAGE an instance of BinaryMessage
is returned, whereas if type equals TEXT_MESSAGE an instance of a
TextMessage is returned. Both BinaryMessage and TextMessage
implement the Message interface. In the above code we specify a type
equal to TEXT_MESSAGE and cast the returned instance appropriately.
OPTIONAL J2ME APIS IN THE JTWI 191
Now that we have a TextMessage object we use the following
method to set the message text:
public void setPayloadText(String data)
We are now ready to send the message. This is achieved by invoking
the send method of the MessageConnection class:
public void send(Message msg)
Finally, when we no longer need the connection we should close it
using the close() method inherited from the Connection class.
3.4.4.3 Receiving Messages
Receiving a message is, again, straightforward and is illustrated with the
code paragraph below.
MessageConnection smsconn = null;
Message msg = null;
String receivedMessage = null;
String senderAddress = null;
try {
conn = (MessageConnection) Connector.open(("sms://:1234”);
msg = smsconn.receive();
//get sender's address for replying
senderAddress = msg.getAddress();
if (msg instanceof TextMessage) {
//extract text message
receivedMessage = ((TextMessage)msg).getPayloadText();
//do something with message
}
}catch (IOException ioe) {
ioe.printStackTrace();
}
We open a server mode MessageConnection by passing in a URL
of the following syntax:
sms://:1234
We retrieve the message by invoking the following method on the
MessageConnection instance.
public Message receive()
The address of the message sender can be obtained using the following
method of the Message interface:
public String getAddress()
192 MIDP 2.0 AND THE JTWI
A server mode connection can be used to reply to incoming messages,
by making use of the setAddress() method of the Message interface.
In the case of a text message, we cast the Message object appropriately
and then retrieve its contents with the TextMessage interface, using the
method below.
public String getPayloadText()
If the Message is an instance of BinaryMessage then the corre-
sponding getPayloadData() method returns a byte array.
In practice, of course, we need the receiving application to listen
for incoming messages and then invoke the receive() method upon
receipt. We achieve this by implementing a MessageListener inter-
face for notification of incoming messages. The MessageListener
mandates one method, below, which is called on registered listeners by
the system when an incoming message arrives.
public void notifyIncomingMessage(MessageConnection conn)
The MessageConnection interface supplies the following to register
a listener on MessageConnection:
public void setMessageListener(MessageListener l)
Only one listener can be registered on a given MessageConnec-
tion at a given time. A call to setMessageListener(l) will replace
a previously registered MessageListener with l. To de-register a
MessageListener on a MessageConnection we call setMes-
sageListener(null).
Note that the notifyIncomingMessage() method must return
quickly to avoid blocking the event dispatcher. The method should
not, therefore, handle the incoming message directly but hand off the
processing to a new thread.
3.4.4.4 WMA in MIDP 2.0
The Wireless Messaging API can be implemented on either MIDP 1.0
or MIDP 2.0 platforms. When implemented in conjunction with MIDP
2.0, the Wireless Messaging API can take advantage of the push registry
technology. A MIDlet suite lists the server connections it wishes to register
in its JAD file, or manifest, by specifying the protocol and port for the
connection end point. The entry has the following format:
MIDlet-Push-<n>: <ConnectionURL>, <MIDletClassName>, <AllowedSender>
OPTIONAL J2ME APIS IN THE JTWI 193
In this example, the entry in the JAD file would be as follows:
MIDlet-Push-1: sms://:1234, SMSMIDlet, *
The <AllowedSender> field acts as a filter indicating that the AMS
should only respond to incoming connections from a specific sender. For
the SMS protocol the <AllowedSender> entry is the phone number of
the required sender (note the sender port number is not included in the
filter). Here the wildcard character ‘‘*’’ indicates respond to any sender.
The AMS will respond to an incoming SMS directed to the spec-
ified MessageConnection by launching the corresponding MIDlet
(assuming it is not already running). The MIDlet should then respond
by immediately handling the incoming message in the startApp()
method. As before, the message should be processed in a separate thread
to avoid conflicts between blocking I/O operations and the normal user
interaction events.
3.4.4.5 The SMS ChatMIDlet Sample Code
We shall illustrate the WMA APIs just discussed using a simple SMS
ChatMIDlet. The ChatMIDlet allows a user to send and receive SMS
messages and displays the ongoing conversation in a TextBox. The
ChatMIDlet also makes use of the push registry so that the MIDlet will
be launched in response to an incoming SMS targeted at the application.
Let’s first consider the main controller ChatMIDlet class.
package com.symbian.devnet.chatmidlet;
import javax.microedition.midlet.*;
import javax.microedition.lcdui.*;
import javax.wireless.messaging.*;
import javax.microedition.io.*;
import java.io.*;
public class ChatMIDlet extends MIDlet implements CommandListener,
MessageListener{
private Sender sender;
private Receiver receiver;
private MessageConnection smsconn;
//Widgets for the UI for entering and reading the msgs
private ChatView chatBox;
private MessageView messageView;
private Display display;
private String smsPort;//The port on which we send SMS messages
private final static int SENT = 1;
private final static int RECEIVED = 2;
private final static int ERROR = 3;
public ChatMIDlet() {
display = Display.getDisplay(this);
194 MIDP 2.0 AND THE JTWI
smsPort = getAppProperty("SMS-Port");
receiver = new Receiver(this);
sender = new Sender(smsPort);
chatBox = new ChatView(this);
messageView = new MessageView(this);
}
public void startApp() {
smsconn = receiver.open(smsPort);
if (smsconn != null) {
String[] connections =PushRegistry.listConnections(true);
if (connections.length > 0) {
for(int i = 0; i < connections.length; i++) {
if (connections[i].equals("sms://:" + smsPort)) {
receiver.handleMessage(smsconn);
}
}
}
display.setCurrent(chatBox);
}else {
//handle
}
}
public void notifyIncomingMessage(MessageConnection conn) {
if (conn == smsconn) {
receiver.handleMessage(conn);
}
}
public void pauseApp() {
if (smsconn != null) {
receiver.close(smsconn);
smsconn = null; // make eligible for garbage collection
}
}
public void destroyApp(boolean unconditional) {
if (smsconn != null) {
receiver.close(smsconn);
}
}
public void commandAction(Command command,
Displayable displayable) {
if(command.getLabel().equals("Send")) {
display.setCurrent(messageView);
}
else if(command.getLabel().equals("Exit")) {
if (smsconn != null) {
receiver.close(smsconn);
}
notifyDestroyed();
}
else if(command.getLabel().equals("OK")) {
String message = messageView.getMessage();
String phoneNumber = messageView.getPhoneNumber();
sender.connectAndSend(message, phoneNumber);
chatBox.addMsg(ChatMIDlet.SENT, message);
display.setCurrent(chatBox);
OPTIONAL J2ME APIS IN THE JTWI 195
}
}
public Display getDisplay() {
return display;
}
public void msgTypeError(String error) {
chatBox.addMsg(ChatMIDlet.ERROR,error);
}
public void processMsg(String message, String destinationAddress) {
chatBox.addMsg(ChatMIDlet.RECEIVED,message);
messageView.setPhoneNumber(destinationAddress);
}
}
The ChatMIDlet constructor creates instances of the Sender and
Receiver classes which encapsulate functionality for sending and
receiving SMS messages, and the ChatView and MessageView UI
classes. The startApp() method sets up the Receiver for handling
incoming SMS messages by calling open() on the Receiver instance:
public void startApp() {
smsconn = receiver.open(smsPort);
if (smsconn != null) {
String[] connections = PushRegistry.listConnections(true);
if (connections.length > 0) {
for(int i = 0; i < connections.length; i++) {
if (connections[i].equals("sms://:" + smsPort)) {
receiver.handleMessage(smsconn);
}
}
}
display.setCurrent(chatBox);
}else {
//handle
}
}
As will be shown later, in addition to opening a connection, this
also registers the ChatMIDlet as a MessageListener on the receiver
connection. The startApp() method also checks to see if it was
invoked in response to an incoming message via the push registry and, if
so, immediately handles the message.
Since the ChatMidlet class implements the MessageListener
interface it must implement the notifyIncomingMessage interface:
public void notifyIncomingMessage(MessageConnection conn) {
if (conn == smsconn) {
receiver.handleMessage(conn);
}
}
196 MIDP 2.0 AND THE JTWI
This checks that the incoming connection bearing the SMS message
belongs to this application and if so calls the handleMessage() method
of Receiver to process the message in a separate Thread.
The pauseApp() method, in line with good practice, releases
resources by closing the Receiver.
Now let’s look at the Receiver class:
package com.symbian.devnet.chatmidlet;
import javax.wireless.messaging.*;
import java.io.*;
import javax.microedition.io.*;
// Opens and closes a connection for receiving SMS messages.
public class Receiver implements Runnable {
private ChatMIDlet chat;
private MessageConnection smsconn;
private boolean listening = false;
private int messageWaiting = 0;
public Receiver(ChatMIDlet chat) {
this.chat = chat;
}
public MessageConnection open(String smsPort) {
String smsAddress = "sms://:" + smsPort;
MessageConnection conn = null;
try {
conn = (MessageConnection) Connector.open(smsAddress);
conn.setMessageListener(chat);
receiverThread.start();
listening = true;
}catch (IOException ioe) {
ioe.printStackTrace();
}
return conn;
}
public synchronized void handleMessage(MessageConnection conn) {
messageWaiting++;
smsconn = conn;
notify();
}
public void run() {
while (listening) {
synchronized(this) {
while (listening && messageWaiting == 0 ) {
try {
wait();
} catch (InterruptedException ie) {
// Handle interruption
}
}
if (messageWaiting != 0) {
receiveMessage();
messageWaiting ;
}
}