Linux System Administration phần 4 ppt
Bạn đang xem bản rút gọn của tài liệu. Xem và tải ngay bản đầy đủ của tài liệu tại đây (947.35 KB, 50 trang )
HFS+ The follow−on to HFS borrows many features from Unix−style filesystems, but
it stops short of adding a journal. New Macintoshes invariably ship with their disks
formatted for HFS+, but this filesystem is not used much on removable media. (The
MacOS X installation CD−ROM is an exception; it uses HFS+.) Linux support for
HFS+ is in the alpha stage and is not yet integrated into the kernel. The Linux HFS+
Web page is />FFS MacOS X provides the option to use the Unix Fast Filesystem (FFS), which is
described in the next section. Many MacOS X systems continue to use HFS+,
though.
If you need to exchange removable media between Macintosh and Linux systems, you can do so.
HFS is the best choice for a filesystem; and if you use a floppy disk, it has to be a 1.44MB floppy or
a rare 720KB HFS floppy. Alternatively, you can use FAT, because modern Macintoshes support
FAT. In theory, you can use FFS for exchanges with a Macintosh running MacOS X, but this option
is tedious to implement.
If you run Linux on a Macintosh, you may want to create an HFS partition to be used for data
exchange between Linux and MacOS. Because Linux can't read HFS+ partitions, this
data−exchange partition is a practical necessity when you want to share files across OSs.
Miscellaneous Filesystems
In addition to Microsoft and Apple filesystems, Linux supports a wide variety of other foreign
filesystems. Most are of extremely limited utility and interest. Here are some highlights:
BeFS BeOS uses its own journaling filesystem, known as BeFS. A read−only Linux
driver for this filesystem is available from
The author claims to be working on
read/write support, but it does not yet exist. The driver also does not yet work with
2.4.x kernels, as of mid−2002. Although BeOS is a single−user OS, BeFS supports
file ownership and permissions similar to those used in Linux. In theory, BeFS could
become a contender for a native journaling filesystem, but the others have a
commanding lead in 2002. BeFS also lacks support for file access time−stamps,
which may hinder its abilities as a native Linux filesystem. BeFS's filesystem type
code is befs.
Note The 2.4.x kernels include support for another filesystem, known as
BFS, that is completely unrelated to BeFS. BFS is used for storing
critical system startup files on SCO's UnixWare OS.
FFS/UFS The Fast Filesystem (FFS; aka Unix Filesystem or UFS) was developed
early in the history of Unix. It's still used by many Unix and derivative systems,
including FreeBSD and Solaris. In principle, FFS/UFS could have been adopted as a
native Linux filesystem, but Linux's write support for this filesystem is still considered
dangerous, much as is Linux's support for writing to NTFS. FFS has been around
long enough to spawn several minor variants, but one Linux driver handles them all.
FFS's filesystem type code is ufs.
UDF The Universal Disk Format (UDF) is a filesystem designed for recordable CD,
DVD, and recordable DVD media. Linux includes UDF support in the 2.4.x kernel
series, but the write support is marked "dangerous" and is very limited in terms of
139
supported hardware. This filesystem's type code is udf.
You can browse the Linux kernel configuration menus to learn about other filesystems supported by
Linux. If you're looking for support of a specific filesystem and can't find it in the kernel menu, try a
Web search.
Network Filesystems
Some filesystems are designed for use over a network, as opposed to on a hard disk. You can
mount these filesystems in Linux much as you do disk−based filesystems, and then perform normal
file−access operations on the filesystem. Network filesystems supported by Linux include the
following:
NFS Sun's Network Filesystem (NFS) is the preferred method of file sharing for
networks of Unix or Linux computers. The Linux kernel includes both NFS client
support (so that Linux can mount another system's NFS exports) and core routines to
help a Linux NFS server, which is separate from the kernel. NFS's filesystem type
code is nfs.
Coda This is an advanced network filesystem that supports features omitted from
NFS. These features include better security (including encryption) and improved
caching. The Linux kernel includes Coda client support, and separate packages are
needed to run a Coda server. The main Coda homepage is at
Coda's filesystem type code is coda.
SMB/CIFS The Server Message Block (SMB) protocol, which has been renamed the
Core Internet Filesystem (CIFS), is the usual means of network file sharing among
Microsoft OSs. The Linux kernel includes SMB/CIFS client support, so you can
mount SMB/CIFS shares. You can configure your Linux computer as an SMB/CIFS
server using the Samba package ( The filesystem type code
for SMB/CIFS shares is smbfs.
NCP The NetWare Core Protocol (NCP) is NetWare's file sharing protocol. As with
SMB/CIFS, Linux includes basic NCP client support in the kernel, and you can add
separate server packages to turn Linux into an NCP server. NCP's filesystem type
code is ncpfs.
It's important to recognize that the network filesystem is completely independent of the filesystems
used on both the server and client for disk access. Consider a Linux computer that's running
Samba, sharing files for a Windows system. The server makes files available using the SMB/CIFS
network filesystem. Locally, these files may be stored on any filesystem that Linux supports—ext2fs,
ISO−9660, ReiserFS, FAT, or anything else. These filesystems all look identical to the client, except
where the underlying filesystem has a limitation that obtrudes itself, such as 8.3 filename limits
when Linux uses its msdos driver to access FAT, or the read−only nature of ISO−9660 or BeFS.
Likewise, if Linux uses NFS to mount a remote filesystem, it's unimportant whether the server is
using ext2fs, FFS, HFS+, or anything else. This characteristic means that you can give a computer
access to filesystems it cannot natively understand, as when Linux accesses HFS+ from a
Macintosh running an NFS server, or when Windows XP accesses JFS through a Linux system
using SMB/CIFS.
Chapter 12, "TCP/IP Linux Networking," covers network filesystem configuration in more detail.
140
Filesystem Design
In order to understand what can be done with filesystems, it's helpful to understand some of the
data structures from which they're built. Because ext2fs is the most common Linux filesystem, this
section describes ext2fs and its data structures. Other Linux native filesystems use similar
structures, although some of the details differ. (Ext3fs is identical to ext2fs at this level of analysis.)
Non−Linux filesystems often differ in more details, but many of the basic principles still apply.
The Physical Structure
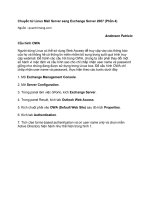
The ext2 filesystem is composed of block groups, which may or may not be sequential on the
physical disk. Figure 6.2 shows the physical structure of an ext2 filesystem.
Figure 6.2: Each block group is largely independent of the others, which can aid recovery in the
event of data corruption.
Each block group contains filesystem control data: a superblock and filesystem descriptors. It also
contains filesystem data: a block bitmap, an inode bitmap, an inode table, and data blocks. Inodes
are explained in the next section. Normally about 5 percent of these blocks are set aside to allow
the superuser room to recover a filesystem that has reached its capacity and become unusable by
ordinary users.
TipExt2fs allows you to choose the logical block size when you create the filesystem, commonly
1024, 2048, or 4096 bytes. Larger block sizes can speed up I/O since fewer disk head seeks
are needed when more data is read during each seek. Large blocks do, however, waste more
disk space since the last block is almost never full. Larger block sizes therefore leave a larger
amount of unused space than do smaller block sizes.
Inodes and Directories
All of the important information about a file, except for its name and location in the directory tree, is
stored in a data structure called an inode. The inode stores:
Locking information•
The access mode•
The file type•
The number of links to the file•
The owner's user and group IDs•
141
The size of the file in bytes•
Access and modification times•
The inode's time of last modification•
The addresses of the file's blocks on disk•
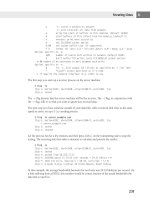
Each file is assigned a unique inode when it is created. The name of the file is stored separately in a
directory−name cache entry. The inode number of each entry in the directory−name cache can be
used to obtain the corresponding inode cache entry, which contains the specific information about
the file represented by that inode. Figure 6.3 illustrates this structure. (The howdy.wav and
sound.wav files are hard links—two directory entries that point to the same inode, and hence the
same file data. Hard links are described further in Chapter 7, "Linux Files and Processes.") In this
way, a command to obtain a directory listing is fast since it doesn't have to concern itself with the
actual data in a file but only that contained in the inode.
Figure 6.3: Directory entries, inodes, and the locations of files on disk need not all come in the same
order.
When a file is opened, it locks its entry into the inode cache to indicate that it is in use. Inactive files
are kept in memory, with an inactive inode that may still contain data pages from its previously
associated file if the inode has not yet been reclaimed by the filesystem. When an inactive inode is
reused, its data pages are flushed to make room for the inode's new data.
Accessing Filesystems
The preceding discussion outlines the major filesystems available for the 2.4.x Linux kernels, and
how they structure data internally. Actually using these filesystems requires practical knowledge of
several Linux commands and configuration files. The most important of these in day−to−day
operations are the commands used to mount and unmount filesystems. Some additional
peculiarities arise when it comes to accessing removable media such as floppy disks, Zip disks, and
CD−ROM discs.
Mounting and Unmounting Filesystems
Linux provides two methods for mounting hard disk filesystems: manual mounting via the mount
command, and automatic mounting at boot time via entries in /etc/fstab. (It's also possible to
auto−mount removable media, as described later in "Using Removable Media.") To stop using a
filesystem, you must unmount it by using the umount command. (Yes, that's spelled correctly;
umount is missing the first n.)
142
Using the mount Command
Linux uses the mount command to make a filesystem available. Here is the basic format of this
command:
mount [−t fstype] [−o options] device dir
The fstype is the filesystem type, such as ext2, vfat, or jfs. You can often omit the −t parameter, and
Linux will correctly detect the filesystem type. The preceding discussion of filesystems for Linux
includes these type codes.
device is the Linux device file associated with the filesystem. For instance, /dev/sdb4 indicates the
fourth partition on the second SCSI disk, and /dev/fd0 indicates the first floppy disk.
dir is the mount point, which should be an empty directory. (You can use a nonempty directory, but
then you lose access to the files stored in that directory for as long as the filesystem is mounted.)
The options are special codes that give Linux instructions on how to treat filesystem features. Some
options apply to most or all filesystems, but others are filesystem−specific. Type man mount for a
discussion of the filesystem options that apply to most of the standard Linux filesystems, and
consult the filesystem's documentation for information on rarer filesystem options. Table 6.1
summarizes the most important filesystem options.
Table 6.1: Important Filesystem Options for the mount Command
Option Supported Filesystems Description
defaults All Uses the default options for this filesystem. It's
used primarily in the /etc/fstab file (described
shortly) to ensure that there's an options column
in the file.
loop All Uses the loopback device for this mount. Allows
you to mount a file as if it were a disk partition. For
instance, entering mount −t vfat −o loop
image.img /mnt/image mounts the file image.img
as if it were a disk.
auto or noauto All Mounts or does not mount the filesystem at boot
time, or when root issues the mount −a command.
Default is auto, but noauto is appropriate for
removable media. Used in /etc/fstab.
user or nouser All Allows or disallows ordinary users to mount the
filesystem. Default is nouser, but user is often
appropriate for removable media. Used in
/etc/fstab. When included in this file, user allows
users to type mount /mountpoint, where
/mountpoint is the assigned mount point, to mount
a disk.
owner All Similar to user, except that the user must own the
device file. Some distributions, such as Red Hat,
assign ownership of some device files (such as
/dev/fd0, for the floppy disk) to the console user,
so this can be a helpful option.
143
remount All Changes one or more mount options without
explicitly unmounting a partition. To use this
option, you issue a mount command on an
already−mounted filesystem, but with remount
along with any options you want to change. This
feature can be used to enable or disable write
access to a partition, for example.
ro All Specifies a read−only mount of the filesystem.
This is the default for filesystems that include no
write access, and for some with particularly
unreliable write support.
rw All read/write filesystems Specifies a read/write mount of the filesystem.
This is the default for most read/write filesystems.
uid=value Most filesystems that don't
support Unix−style
permissions, such as vfat,
hpfs, ntfs, and hfs
Sets the owner of all files. For instance, uid=500
sets the owner to whoever has Linux user ID 500.
(Check Linux user IDs in the /etc/passwd file.)
Option Supported Filesystems Description
gid=value Most filesystems that don't
support Unix−style
permissions, such as vfat,
hpfs, ntfs, and hfs
Works like uid=value, but sets the group of all files
on the filesystem. You can find group IDs in the
/etc/group file.
conv=code Most filesystems used on
Microsoft and Apple OSs:
msdos, umsdos, vfat, hpfs,
ntfs, hfs
If code is b or binary, Linux doesn't modify the
file's contents. If code is t or text, Linux
auto−converts files between Linux−style and
DOS− or Macintosh−style end−of−line characters.
If code is a or auto, Linux applies the conversion
unless the file is a known binary file format. It's
usually best to leave this at its default value of
binary, because file conversions can cause
serious problems for some applications and file
types.
nonumtail vfat Normally, Linux creates short filenames when
using VFAT in the same way as Windows; for
instance, longfilename.txt becomes
LONGFI~1.TXT. Using this parameter blocks the
creation of the numeric tail (~1) whenever
possible, so the file becomes LONGFILE.TXT.
This can improve legibility in DOS, but may cause
problems if you use Linux to back up and restore
a Windows system, because the short filenames
may be changed after a complete restore.
eas=code hpfs If code is no, Linux ignores OS/2's Extended
Attributes (EAs). If code is ro, Linux reads EAs
and tries to extract Linux ownership and
permissions information from them, but doesn't
create new EAs. If code is rw, Linux stores
ownership and permissions information in EAs,
overriding the settings provided by the uid, gid,
and umask options.
144
case=code hpfs, hfs When code is lower, Linux converts filenames to
all lowercase; when code is asis, Linux leaves
filenames as they are. The default for HFS and
HPFS in 2.4.x kernels is asis; for the read−only
HPFS in the 2.2.x kernels, it's lower.
fork=code hfs Sets the HFS driver handling of Macintosh
resource forks. Options are cap, double, and
netatalk. These correspond to the methods used
by the Columbia AppleTalk Package (CAP),
AppleDouble, and Netatalk networking systems
for storing resource forks on Unix systems. If you
use one of these networking packages and want
to export Macintosh filesystems, you should use
the appropriate code.
afpd hfs Use this parameter if you want to export
filesystems using Netatalk. This option makes the
filesystem fully read/write compatible with
Netatalk, but causes problems with some
Linux−native commands.
norock iso9660 Disables Rock Ridge extensions for ISO−9660
CD−ROMs.
nojoliet iso9660 Disables Joliet extensions for ISO−9660
CD−ROMs.
With these mount options at hand, you should be able to mount filesystems with the characteristics
you desire. In most cases, Linux−native filesystems don't require any special filesystem options.
Foreign filesystems, however, often benefit from one or more options. Filesystems that don't support
Linux's permissions, in particular, usually benefit greatly from the uid, gid, and umask options. You
might want to use a command similar to the following to mount a VFAT partition, for instance:
# mount −t vfat −o uid=500,gid=100,umask=002 /dev/hdc8 /dos/drive−e
This command gives ownership to all files on the VFAT partition to whoever has user ID 500
(usually the first user created on a Red Hat system), gives group ownership to group 100, and
removes write access to the world but leaves write access for the owner and group. The result is
that user 500 and anybody in group 100 can both read and write files on the partition, but users who
aren't in group 100 can only read files on the partition.
Creating /etc/fstab Entries
When Linux boots, it needs to know what filesystems to mount and at what locations in its directory
tree in order to produce a usable system. If you've created separate partitions for /usr, /home, and
/var, for instance, Linux must know to mount the appropriate partitions at these points—it will do you
no good to have Linux mount your user files (which should go at /home) at /usr, where program files
normally reside. Linux's solution to this problem is the /etc/fstab file, which contains default mount
assignments.
This file comprises a series of lines, one per filesystem. Lines preceded by a pound sign (#) are
ignored by Linux. Each line is a series of entries separated by whitespace, as illustrated in Listing
6.1.
145
Listing 6.1: A Sample /etc/fstab File
#device mountpoint fs options dump fsck
/dev/hda2 / ext2 defaults 1 1
/dev/hdb7 /home jfs defaults 0 2
/dev/hda3 /dos msdos umask=0 0 0
server:/home /server/home nfs ro 0 0
/dev/cdrom /mnt/cdrom iso9660 noauto,user 0 0
/dev/fd0 /mnt/floppy auto noauto,user 0 0
/dev/hdb8 swap swap defaults 0 0
The /etc/fstab file's columns contain the following information:
device This column lists the device filename associated with the disk or partition.
One of the devices in Listing 6.1, server:/home, is an NFS share. For this device,
server is the name of the server, and /home is the directory it exports.
mountpoint This column indicates the mount point for the filesystem. The first entry
is usually /, the root filesystem. Linux normally reads the /etc/fstab file from the root
filesystem, but once it gets this file, it remounts the root filesystem using the options
specified in this file. A swap partition, which is used as an extension of RAM, uses a
mount point of swap or none.
fs You must specify the filesystem type code for most filesystems. If you use any
nonstandard filesystems, such as jfs for the /home partition in Listing 6.1, you must
ensure that you've compiled your kernel with that support. It's also critically important
that the root partition's filesystem be compiled into the kernel (rather than as a
module), or else Linux won't be able to read its startup files. The /mnt/floppy mount
point in Listing 6.1 specifies a filesystem type code of auto. Linux can auto−detect
many filesystem types, and this configuration is particularly convenient for
removable−media devices such as floppy drives.
Warning Don't confuse the /etc/fstab filesystem type code of auto (which
tells Linux to auto−detect the filesystem type) with the auto mount
option (which tells Linux to mount the filesystem at boot time).
options You can specify options from Table 6.1, as well as any other options you
discover, for any filesystem. The noauto,user combination used for the floppy disk
and CD−ROM drive in Listing 6.1 is particularly useful for removable−media devices,
because it allows ordinary users to mount and unmount these devices. Be sure not to
put spaces between mount options, just commas.
dump This column contains a 1 or 0, indicating that the dump utility should or should
not back up the specified partition when it's run. This utility is filesystem−specific, and
JFS still lacks a dump program, which is why it's set to 0 for the JFS /home partition
in Listing 6.1.
fsck This column indicates the file system check order. When Linux boots, it checks
filesystems with non−0 values in this column for corruption, in the order specified by
this column's value. Normally, the root partition has a value of 1, while other Linux
native filesystems have higher values. XFS and ext3fs partitions should have values
of 0, because these filesystems handle this task automatically whenever they're
mounted. Most non−native filesystems lack fsck utilities, and so should have 0
146
values, as well.
When you install Linux, it creates an initial /etc/fstab file based on the information you gave the
installation programs about your partitions. You can modify this configuration to add partitions not
understood by the installation routines (such as BeFS partitions, if you have BeOS installed); to
fine−tune the configuration (such as adding extra parameters for FAT partitions); and to add
variants, particularly for removable media. It's a good idea to test your mount options by issuing
them directly with the mount command before adding them to /etc/fstab. (Of course, this doesn't
make much sense for some options, such as noauto and user.) Once you've modified /etc/fstab, you
can test its configuration by typing mount −a. This causes Linux to reread /etc/fstab and mount any
filesystems that are not mounted but that are listed without a noauto option in /etc/fstab.
You can also modify /etc/fstab using GUI configuration tools. In Webmin, for example, you can
select the Disk and Network File systems item in the System area, as shown in Figure 6.4. This
configuration page presents a summary of information on the computer's filesystems. By clicking a
mount point (in the Mounted As column), you can adjust the mount options, as shown in Figure 6.5.
You can also mount and unmount a filesystem from this page.
Figure 6.4: GUI system configuration tools let you edit /etc/fstab via a point−and−click interface.
Using the umount Command
When you're done using a filesystem, you can issue the umount command to unmount it. The basic
syntax for this command is as follows:
umount [−a][−f][−t fstype] mountpoint | device
The meanings of the options are as follows:
−a If this option is specified, umount tries to unmount all the partitions specified in
/etc/fstab. This is an option you should not issue in normal operation, although you
might in emergency recovery situations after restoring a system to health.
147
−f When you specify −f, umount forces the unmount operation. This option can be
useful if an ordinary umount command fails, which often occurs when an NFS server
goes down.
−t fstype If you use this parameter, umount unmounts filesystems of the specified
type.
mountpoint This is the mount point on which the device is mounted, such as
/mnt/floppy or /home.
device This is the device on which the filesystem resides, such as /dev/fd0 or
/dev/hdb8.
Normally, you use umount without most options and specify only the mount point or the device, not
both. For instance, you might type umount /mnt/floppy to unmount the floppy disk.
The umount command is most useful when applied to removable−media devices, because these
devices are typically mounted and unmounted on a regular basis while Linux is running. Most
installations leave hard disk partitions permanently mounted, so they need not be explicitly
unmounted. Linux automatically unmounts these partitions when it shuts down, however; and you
may need to temporarily unmount a normally mounted partition when performing certain types of
system maintenance, such as moving the contents of a partition to a new hard disk.
Figure 6.5: Webmin uses mount option descriptions that are more verbose than the actual options in
/etc/fstab.
WarningLinux locks most removable devices, such as CD−ROM and Zip drives, so that you can't
eject the disk while it's mounted. When you unmount the disk, the eject button will work
again. Floppy disk drives on x86 computers, however, cannot be locked. It's therefore
possible to eject a floppy disk while it's still mounted. Because Linux caches writes to its
filesystems, this mistake can cause serious filesystem corruption. Be very careful to
148
unmount a floppy disk before ejecting it.
Using Removable Media
Linux's model of the disk world makes little distinction between hard disks and removable disks. You
use the same mount and umount commands to access both types of devices, and you can create
similar /etc/fstab entries for both types of media. Nonetheless, there are a few caveats and special
features that apply to removable media only.
Accessing Floppy Disks
The most important caveat concerning floppy disks is about accidentally ejecting them, as noted in
the preceding Warning. Beyond this, you can access floppy disks as if they were very small hard
disk partitions. The usual device file for accessing floppies is /dev/fd0. If your system has two floppy
drives, the second is accessible as /dev/fd1. There are also a number of specialized device access
files, such as /dev/fd0H1440, which provide forced access to a disk of a specific capacity, such as
1440KB for /dev/fd0H1440. (In normal operation, you can use /dev/fd0 to access disks of any
capacity.)
If you're presented with an unformatted floppy disk, you must format it. In DOS or Windows, this
procedure is handled with a single command, FORMAT. In Linux, by contrast, you perform two
actions. First, you do a low−level format using the fdformat command, as in fdformat /dev/fd0. (It's
here that the capacity−specific device files can be most useful, because they can force a format at a
specified capacity.) Second, you create a filesystem on the disk, as described in "Creating a
Filesystem" later in this chapter.
Most filesystems that you use on hard disks can be used on floppy disks, with a few exceptions.
Most notably, some journaling filesystems require journal files larger than floppies can hold. You
can use Linux's ext2fs on floppy disks, but ext2fs has enough overhead that it's not the best choice.
The Minix filesystem is popular on floppy disks because it includes support for Linux permissions
and ownership, and it consumes less overhead than ext2fs. FAT filesystems, too, are popular on
floppies, even for transfer between Linux systems. The drawback to FAT is that you lose Linux
ownership and permissions unless you also archive files into a tar or similar carrier file.
Disk Access without a Filesystem
It's possible to access a floppy disk without using a filesystem per se. This is commonly done by
writing a tar file directly to a floppy disk. Suppose you want to transfer a directory, somedir, between
systems. You can do so by issuing the following tar command on the source system:
$ tar −cvf /dev/fd0 somedir
This command copies the contents of somedir to a tar file on the floppy disk. You can reverse the
process on the target system by issuing this command:
$ tar −xvf /dev/fd0
Of course, you can also transfer tar files in a similar way by mounting a disk with a filesystem and
then using an appropriate tar file on the disk (such as /mnt/floppy/somedir.tar) rather than the device
file (/dev/fd0). Why use direct access, then? It's most useful when transferring files between
versions of Unix that don't share an appropriate common filesystem. You can be sure that a tar file
written without a filesystem can be read by any Unix−like OS, because tar is so widely available.
Support for any given filesystem is not so universal, although FAT filesystem support is extremely
149
common on modern Unixes.
One unusual shortcut used for access to floppy disks is the Mtools package. It's a set of programs
that allow access to FAT floppy disks (or, in principle, other removable media formatted with FAT)
without explicitly mounting them. Mtools includes a series of commands named after DOS
disk−access commands. These include mdir (to take a directory listing), mcopy (to copy a file), mdel
(to delete a file), and mformat (to create a FAT filesystem on a floppy). These commands use a
DOS−style drive letter in place of Linux's device identifier. For instance, to copy a file to a floppy,
you would type mcopy filename a:. Mtools can be a very useful method for copying a few files to or
from a FAT floppy, but if you want to give programs direct access to files on a floppy, you must
mount it normally. Mtools comes with most Linux distributions. You can read more about it at
/>A package similar to Mtools, called HFS Utilities ( exists for
accessing Macintosh floppies. These utilities use an h prefix to the DOS−style commands, as in hdir
and hformat. The package also includes a GUI front−end.
Note As noted earlier, standard x86 PC hardware is incapable of reading the low−level data
recording methods used by Apple for its 400KB and 800KB floppy disks. The HFS Utilities
package doesn't provide a magical way around this limitation.
Accessing High−Capacity Removable Disks
High−capacity removable disks such as Iomega Zip disks, Imation LS−120 disks, and Castlewood
Orb drives are becoming increasingly popular as typical file sizes increase. As a general rule, Linux
has no problem with these devices, but there are a few caveats.
The most important of these is to ensure that the device's interface (ATAPI, SCSI, parallel−port,
USB, or something else) is compatible with Linux. For the most part, this isn't a problem. Some of
the rarer parallel−port or USB devices sometimes pose problems, though, particularly with pre−2.4.x
kernels. Check with ux−usb.org/ for details on USB device support.
There are two ways to treat high−capacity removable devices: as big floppy disks or as removable
hard disks. In the first case, you use the main device file to access the drive, as in /dev/hdb for an
EIDE or ATAPI drive that's configured as the slave drive on the primary EIDE chain, or as in
/dev/sda for a SCSI drive that's got the lowest SCSI ID number of all SCSI disks. Treating
removable disks in this way is common for some media, such as magneto−optical drives. It has the
advantage that you don't need to worry about partitioning the disks.
More frequently, removable disks are handled as if they were hard disks. In this arrangement, the
disk is partitioned with fdisk (discussed shortly, in "Disk Partitioning") or a similar disk−partitioning
tool. You then access the partition when creating and mounting filesystems. For instance, you might
access /dev/hdb1 or /dev/sda4. One problem with this approach is that the partition number can
vary from one disk to another. Iomega Zip disks commonly use the fourth partition, but some other
disk types and tools use the first partition. You may therefore need to create multiple /etc/fstab
entries to handle all the possibilities, particularly if you exchange disks with several people.
Note Macintosh Zip disks are partitioned using the Mac's partition table, which is different
from the partition table used on x86 PCs. Linux's HFS driver, however, includes
limited support for the Macintosh partition table, so you can mount Macintosh Zip
150
disks as if they were big floppies (using /dev/hdb, /dev/sda, or similar "numberless"
device files). Alternatively, you can compile Macintosh partition table support into
your Linux kernel and mount the fourth partition on the removable disk.
You can use any filesystem on a large removable disk that you can use on a hard disk. In particular,
ext2fs works well on removable disks. FAT and HFS are also popular choices, particularly when you
want to exchange data with Windows or Macintosh users, respectively. The journal files used by
journaling filesystems may consume a large percentage of a removable disk's capacity. For
instance, ReiserFS creates a journal file that's 32MB in size—roughly a third the capacity of a
100MB Zip disk.
Reading CD−ROM Discs
CD−ROM discs are not terribly unusual in terms of how they're mounted and accessed. There are
two factors to keep in mind:
Read−only access. CD−ROM discs are by nature read−only. The rw option therefore has no
effect, and you cannot write to CD−ROM discs.
•
Filesystem choices. Although Linux can mount a CD−ROM created using just about any
filesystem, ISO−9660 dominates the CD−ROM filesystem landscape. Many discs created for
the Macintosh market, however, use HFS instead of or in addition to ISO−9660. Discs
created with Linux or Unix in mind usually include Rock Ridge extensions, while Joliet is a
common addition to discs created for the Windows market. It's possible to create a
CD−ROM with ISO−9660, Rock Ridge, Joliet, and HFS, pointing to some combination of the
same and different files.
•
Note For purposes of mounting a disc for read access, CD−R and CD−RW discs and
drives are just like CD−ROM discs and drives. To write to one of these discs, you
normally use special software such as the mkisofs and cdrecord combination
(discussed in Chapter 9), or a GUI front−end such as X−CD−Roast. Linux includes
experimental UDF support for more direct read/write access to CD−RW media, but
this support is limited in 2002.
You can use the mount command's −t parameter, along with −o and the norock and nojoliet options,
to specify how Linux will try to mount a CD−ROM. Table 6.2 summarizes the possibilities.
Table 6.2: Mount Options for CD−ROMs
Mount Options Linux's Action
−t hfs Mounts the CD−ROM using HFS, if possible.
−t iso9660 Mounts the CD−ROM using Rock Ridge, if present. If
Rock Ridge is not present but Joliet is, and if the
kernel includes Joliet support, Linux uses Joliet;
otherwise, it uses plain ISO−9660.
−t iso9660 −o norock Mounts the filesystem using Joliet, if the CD−ROM
includes a Joliet filesystem and the kernel includes
Joliet support. Otherwise, plain ISO−9660 is used.
−t iso9660 −o nojoliet Mounts the CD−ROM using Rock Ridge, if present. If
Rock Ridge is not present, plain ISO−9660 is used.
−t iso9660 −o nojoliet,norock Mounts the CD−ROM using plain ISO−9660.
151
Automating Removable−Media Access
Microsoft's OSs treat removable disks differently than does Linux. In a Microsoft OS, each
removable disk has a drive letter, such as A: for the first floppy disk. There's no need to explicitly
mount a removable disk; you can simply specify a file on a removable disk by inserting the drive
letter in front of the file's name, as in A:\SOMEFILE.TXT. This approach is convenient for users but
has the drawback of possibly making it unsafe to cache disk writes, so performance suffers. Some
hardware notifies the OS when the user presses the eject button, allowing the OS to finish any
cached disk accesses before ejecting the disk. When using such a device, cached disk writes are
possible.
This discussion is relevant to Linux because many new Linux users are accustomed to the Windows
method of handling disks. These users expect to be able to read and write files on the disk without
explicitly mounting the disk, much less relying on the superuser to do the job. Linux provides several
workarounds for these users. Specifically:
The user and owner mount options, which are normally used in /etc/fstab, allow users to
mount and unmount removable disks. Although these options don't provide truly automatic
access, they can be adequate for users with some Linux know−how. They're also a critical
first step to some other possibilities.
•
Window managers and file managers can be customized to run specific commands when a
user clicks on an icon or picks an item from a pop−up menu. Such a configuration can allow
users who are uncomfortable with a text−based shell to issue mount and umount
commands. Configuration details vary substantially from one program to another, so consult
the appropriate package documentation for details.
•
The default configurations for the KDE and GNOME desktop environments include
automated access to CD−ROM and floppy disks similar to the access in Windows.
Double−click on the appropriate desktop icon, and the system mounts the disk and opens a
browser window on the disk's contents. You can later select an unmount option from the
appropriate icon's context menu to unmount the disk. These options rely on the presence of
user or owner options in /etc/fstab. Some configurations (including the default GNOME setup
in Red Hat 7.3) mount a removable disk automatically when it's inserted in a drive.
•
An automounter is a tool that monitors access attempts to specified directories and, when
one is detected, mounts a specified device at that location. Once all opened files are closed,
the automounter waits a specified time and then unmounts the device. This configuration
can be convenient for mounting, but may pose problems for certain media types because of
the delays when unmounting. Floppies can be particularly troublesome in this respect
because you won't know when it's safe to eject a floppy, except by issuing a command such
as df to see if the disk is still mounted.
•
Of these options, /etc/fstab configuration has already been described. GUI configurations (including
those for window managers and desktop environments) vary a lot from one package to another, so
you should check your package's documentation for details. The automounter requires the most
elaborate configuration. To use this tool, follow these steps:
Check that your kernel configuration includes both the Kernel Automounter support in the
Filesystems area and NFS Filesystem Support in the Network File Systems area. These
options are included in the standard Red Hat 7.3 kernel. (Kernel compilation is discussed in
Chapter 8.)
1.
If it's not already installed, install the autofs package. The exact filename is
autofs−3.1.7−28.i386.rpm in Red Hat 7.3, but it may be called something else in other
distributions.
2.
152
Edit the automounter's configuration file, /etc/auto.master. It normally contains a single line
that lists the base automount point (/misc by default), the configuration file for that mount
point (/etc/auto.misc by default), and a timeout value (60 by default). Change any of these
parameters as needed. If this line is commented out, uncomment it to activate it.
3.
Edit the /etc/auto.misc configuration file. This file should list specific subdirectories within the
base automount point (/misc), filesystem type codes, and device files for each device you
want auto−mounted. For example:
floppy −fstype=auto :/dev/fd0
maczip −fstype=hfs :/dev/sda
This example sets the automounter to check /misc/floppy for floppy disk accesses using any
filesystem (type auto) and /misc/maczip for HFS filesystems mounted on a SCSI Zip drive
(/dev/sda).
4.
Start the automounter by typing /etc/rc.d/init.d/autofs start. It should start up automatically
when you reboot the computer, as well. (If you're not using Red Hat, you may need to use
another startup script, or start the automounter manually by typing automount /misc file
/etc/auto.misc.
5.
You do not create directories within the /misc directory for each mount point. Instead, the
automounter detects attempts to access nonexistent directories and dynamically creates them when
mounting the device. This fact can make the automounter ineffective if you use a file manager,
since these programs typically only let you access existing directories. The automounter is useful,
however, when you use command−line tools.
Note In addition to autofs, a second automounter implementation, the automounter daemon (amd),
is available for Linux. See "Linux NFS and Automounter Administration," by Erez Zadok, for
the most complete documentation of amd available.
Using Swap Space
One type of disk access is critically important to Linux but has not yet been mentioned in this
chapter: swap space. This is disk space that's set aside as auxiliary to system memory (RAM).
Suppose your computer has 256MB of RAM, but you want to run 380MB worth of programs on the
system. Swap space allows you to accomplish this, by treating disk space as if it were RAM. The
result is that you can run all 380MB worth of programs—albeit more slowly on this 256MB computer
than on a machine that has in excess of 380MB of RAM.
Linux typically assigns one or more disk partitions as swap space. These partitions use the type
code 0x82 (Linux swap), as described in "Disk Partitioning." It's also possible to use an ordinary disk
file as swap space. Normally, Linux sets up a swap partition during system installation, so this
feature is handled automatically. You may want to adjust this default configuration, however.
You can find out how much swap space your system currently has by typing free, which produces
output like the following:
total used free shared buffers cached
Mem: 127752 121416 6336 61108 26748 53316
−/+ buffers/cache: 41352 86400
Swap: 136512 4928 131584
Pay particular attention to the line labeled Swap. Under the Total column is the number of kilobytes
of swap space available to the system. The Used and Free columns list how much of that space is
153
in use and available, respectively. If the Used value begins to approach the Total value, you should
consider adding more swap space.
Tip It's difficult to anticipate how much swap space a system will need, because it depends on how
the computer is to be used. One rule of thumb is to create swap space equal to twice your
system's physical RAM. In fact, if you're using a 2.4.x kernel, you should always exceed this
value, because under rare conditions, the 2.4.x kernel may crash if it has less swap space than
this.
To add more swap space, follow these steps:
Set aside appropriate disk space. You can do this in either of two ways:
Create a new disk partition for the swap space. This approach can be difficult
because it requires that you repartition your hard disk.
♦
Create an empty file of the appropriate size on a Linux−native filesystem. For
example, the command dd if=/dev/zero of=/swap bs=1024 count=n creates an
appropriate file (called /swap) that's n kilobytes in size.
♦
1.
Issue the mkswap command on the new swap space you've created. For a partition, you'll
type something like mkswap /dev/sdc5. For a file, the command will resemble mkswap
/swap. This command prepares the space to store swap information.
2.
Use the swapon command to add the new swap space, as in swapon /dev/sdc5 or swapon
/swap. Enter another free command, and you'll see that the available swap space has
increased by the size of your new swap partition or file.
3.
To make the use of swap space permanent, you should add an /etc/fstab file entry for the swap
space. This entry uses the mount point and the filesystem type code entries of swap, but otherwise
resembles other /etc/fstab entries. For instance, both of the following lines add swap space:
/dev/sdc5 swap swap defaults 0 0
/swap swap swap defaults 0 0
Once you've added these entries, Linux uses the specified swap space after a reboot.
If you want to stop using a specific swap partition or file, you can use the swapoff command, which
works much like the swapon command—for instance, swapoff /dev/sdc5.
Updating and Maintaining Filesystems
Before you can use a filesystem, you must prepare one. If you obtain a new disk, you must break it
into partitions and create filesystems on those partitions. Only then will you be able to mount the
filesystems. These steps are necessary when adding a disk and when replacing one, but the
precise details of these operations differ. There's also the issue of filesystem maintenance. In some
situations—particularly after a system crash or power failure—Linux must check its filesystems for
integrity. You may need to supervise this process, so it's important to understand what goes on
during such a check.
Disk Partitioning
If you've bought a new disk, your first task once you've connected it to your computer is to partition
the disk. This procedure carves the disk into smaller chunks so that you can share the disk across
154
multiple OSs, or subdivide the space used on a single OS to protect files on one partition should
another develop problems. Chapter 2 briefly discusses these issues, and it describes partitioning a
disk during a Red Hat Linux installation session. You can also use assorted partitioning tools after
installation, to change your configuration or to add a new disk.
Tip If you want to change an existing partition configuration, one of
the best tools available is PartitionMagic, from PowerQuest
( This commercial package allows
you to add, delete, move, resize, and copy FAT, HPFS, NTFS,
ext2fs, and Linux swap partitions, without damaging their
contents. The open source GNU Parted
( provides some
of PartitionMagic's functionality. ReiserFS, XFS, ext2fs, and
ext3fs all include their own partition−resizing utilities, but they
aren't as easy to use or as flexible as PartitionMagic.
Planning a Partition Layout
Before you begin working with partitioning software, it's important to design an appropriate partition
layout. Unfortunately, it's hard to give simple and complete rules for doing this, because every
system's needs are different. What's suitable for a high−level news server may be wholly
inappropriate for a desktop workstation. Here are some rules of thumb to keep in mind:
Keep it simple. The simpler the configuration, the better. Complex configurations can be
difficult to maintain. Further, if a system has many partitions, it's more likely that one of them
will run out of room while another has plenty of free space.
•
Keep related data together. Because the time required to access data varies with the
distance from one point to another on a disk, it's best to keep related data in one area. One
consequence of this rule is that in a multi−OS configuration, you should keep the partitions
for each OS contiguous.
•
Put the most−used data in the center. Heavily accessed partitions should go in the middle of
a range of partitions. Swap partitions typically see a lot of use, so they should be positioned
in between nonswap partitions.
•
Split OSs across disks. If you have two or more operating systems, you may be tempted to
put one OS entirely on one disk and another on a second disk. If you split both OSs across
both disks, however, you'll achieve slightly better performance because two sets of disk
heads are working in both OSs.
•
Isolate critical data. Consider putting particularly important or much−used data on partitions
separate from other files. This can reduce the risk of damage to those data should a disk
error in another part of the disk occur. Similarly, if a heavily used partition runs out of disk
space, the problems this causes can be isolated. Putting /home and, on some servers, /var
and /tmp, on their own partitions are typical examples of this rule of thumb.
•
Put the Linux kernel under the disk's 1024−cylinder mark. Old BIOSes and versions of the
Linux Loader (LILO) couldn't boot the Linux kernel if it resided in an area past the 1024th
cylinder. One easy way around this limitation is to create a small (5–20MB) partition under
that point and mount it as /boot. Recent versions of LILO and GRUB don't suffer from this
problem, but if you've got old hardware, you may need to use this workaround.
•
Note The 1024−cylinder mark is the point where the 1024th cylinder of the disk, as
reported by an EIDE drive or SCSI host adapter, lies. On modern hard disks, this
point works out to just under 8GB.
You shouldn't take any of these rules as being absolute. Indeed, they sometimes contradict one
155
another. For instance, the data−isolation rule is at odds with the keep−it−simple rule. In the end,
you'll need to decide which rules best reflect your own personal preferences and needs for the
system, and create a partitioning scheme that reflects these factors. For new Linux administrators,
we typically recommend a root (/) partition, a /home partition, a swap partition, possibly a /boot
partition, and whatever partitions are necessary to support any other OSs that exist on the
computer. Creating more partitions can be difficult because it's hard to judge how large to make
them. Another administrator's experience is of limited use in making that judgment, because the
systems may be used in radically different ways. Once you've gained some experience, or if you
see a compelling reason to do so initially, you may want to separate out partitions for /var, /tmp,
/usr, /usr/local, /opt, and other directories.
Linux Disk−Partitioning Software
Linux's main partitioning tool is called fdisk (for fixed disk). It's named after the DOS FDISK utility
but works quite differently. To use fdisk, type its name followed by the device file you want to
modify, such as /dev/sda or /dev/hdb, thus:
# fdisk /dev/hdb
Warning Every x86 OS has its own disk−partitioning software. Linux's fdisk is unusually flexible,
and so can produce partitions that other OSs don't like. As a general rule of thumb, you
should use each OS's partitioning tools to create its own partitions. Alternatively, you can
use a more OS−neutral tool, such as PartitionMagic, to do the job for all OSs.
On modern disks, you'll likely be told that the number of cylinders exceeds 1024. You can safely
ignore this warning. Once fdisk is running, you see only a prompt that reads Command (m for help):.
You type single−character commands at this prompt in order to accomplish various tasks. You can
type m or ? to see what these commands are. Table 6.3 summarizes the most important ones.
Table 6.3: Important Linux fdisk Commands
fdisk Command Meaning
d Deletes a partition
l Displays a list of known partition type codes
m or ? Displays a summary of commands
n Creates a new partition
p Displays the disk's current partition table
q Quits without saving changes
t Changes a partition's ID type code
v Verifies the partition table; checks that it's internally consistent and returns
basic information
w Saves (writes) changes and exits from the program
It's generally a good idea to start any fdisk session with a p command to display the current
contents of the disk. This allows you to verify that you're modifying the correct disk, and gives you
the partition numbers for partitions you might want to delete. You also need this information in
planning where to put new partitions.
WarningDon't make changes to any partitions that are currently mounted. Doing so can confuse
Linux and possibly cause a system crash. You can unmount a partition and then delete it,
if that's your intention. To change a partition's size, use a dynamic partition resizing tool;
156
or you can back the partition up, resize it, and restore the backup. Some ext2fs partition
resizers require that you separately resize a partition with fdisk and resize the filesystem
with the partition resizer. Follow those tools' instructions, if you use them.
Once you've seen what (if anything) already exists on the disk, you can proceed to delete, add, and
otherwise modify the partition table using fdisk's commands. Consider the following fdisk exchange:
Command (m for help): p
Disk /dev/hdb: 255 heads, 63 sectors, 1216 cylinders
Units = cylinders of 16065 * 512 bytes
Device Boot Start End Blocks Id System
/dev/hdb1 257 1216 7711200 5 Extended
/dev/hdb2 1 192 1542208+ fb Unknown
/dev/hdb3 193 256 514080 17 Hidden HPFS/NTFS
/dev/hdb5 257 516 2088418+ 6 FAT16
/dev/hdb6 517 717 1614501 7 HPFS/NTFS
Command (m for help): n
Command action
l logical (5 or over)
p primary partition (1−4)
l
First cylinder (718−1216, default 718): 718
Last cylinder or +size or +sizeM or +sizeK (718−1216, default 1216): +400M
In this situation, the initial configuration included five partitions, and the n command added a new
one. fdisk gave the option of creating a logical or primary partition. The x86 partitioning scheme
originally provided for only four partitions per disk, which soon became inadequate. The workaround
was to use one of the original four primary partitions as a placeholder for a potentially large number
of logical partitions. The "placeholder" primary partition is then referred to as an extended partition.
In Linux, the primary partitions use numbers from 1 to 4; the logical partitions are numbered 5 and
up. Linux doesn't care whether its partitions are primary or logical, so we recommend using mostly
or exclusively logical partitions for Linux. This reserves primary partitions for OSs that do need
them, such as DOS, Windows, and FreeBSD.
Linux's fdisk lets you specify partition sizes either in terms of an ending cylinder number or in bytes,
kilobytes, or megabytes. The preceding example specified a 400MB partition starting at cylinder
718.
Tip For the final partition on a disk, enter the size by specifying an ending cylinder number that
corresponds to the maximum available. This practice minimizes the amount of unused disk
space.
By default, fdisk creates partitions that use the type code 0x83 (Linux native). Such partitions are
suitable for holding Linux's ext2fs or any of the journaling filesystems available for Linux. If you want
to create a Linux swap partition or a partition to be used in another OS, however, you must change
its type code. You do this with the t command, which prompts you for a hexadecimal code. If you
don't know the code, type L at this point for a list. (You can enter a code that's not on the list if you
like, but fdisk won't be able to identify the associated OS if you do so.) You can use this feature to
convert a partition created with another tool for use by Linux.
Note Linux doesn't actually use the partition type codes except during installation. Instead, Linux
relies on the −t parameter to mount, or on Linux's auto−detection algorithms, to determine the
partition type. Many other OSs, however, rely upon the partition type codes to determine what
157
partitions they use.
When you're done editing the partition table, look it over with the p command; then verify that
everything's okay with the v command. Chances are that v will report your disk has some number of
unallocated sectors. This is normal and reflects sectors lost to the standard PC method of accessing
the disk. You should write down the partition numbers and your intended uses for them, so that you
don't forget these details. Once you're satisfied with your new partitioning scheme, type w to commit
the changes to disk and exit.
Tip Linux's fdisk does not alter any on−disk structures until you enter the w command. If you create
an unusable disk structure and want to start over again from scratch, you can type q to quit
without saving the changes. When you start fdisk again, you'll see the same starting conditions
you saw initially.
Creating a Filesystem
Filesystems aren't completely blank slates. To function, they rely upon the presence of certain key
components, even when they contain no actual files. These initial data structures include pointers to
the root directory and whatever data structures the filesystem uses to allocate space, boot sector
code, and perhaps some files or directories required by the OS or filesystem (such as the
lost+found directory that appears on every ext2 filesystem). The process of writing these core data
structures to disk is sometimes referred to formatting a disk. This term is common in the Microsoft
world, but it's ambiguous, because it can also refer to creating new magnetic marks the disk
mechanism uses to locate individual sectors on the disk. To avoid ambiguity, it's common in the
Linux world to refer to the process of writing sector marks as low−level formatting, and to laying out
initial filesystem data structures as high−level formatting or creating (or making) a filesystem.
For floppy disks, the DOS and Windows FORMAT command performs both low−level and
high−level formats, although it may skip the low−level format if that's already been done. In Linux,
the fdformat program (described earlier in "Accessing Floppy Disks") performs a low−level format on
floppy disks. Under any OS, special utilities are used to perform low−level formats on hard disks
and high−capacity removable disks. These utilities are sometimes integrated into the BIOS,
especially for SCSI disks. It's unlikely that you'll need to perform low−level formats on hard disks.
In Linux, each filesystem has its own utility to create a filesystem. These utilities are usually named
mkfs.fsname, where fsname is a code for the filesystem; for instance, mkfs.ext2 to create an ext2 or
ext3 filesystem. Often these utilities go by other names, too, such as mke2fs. The mkfs utility is a
front−end to all these specific filesystem−creation programs. Here is the syntax for this command:
mkfs [−t fsname] [options] device [size]
The options to this command are as follows:
−t fsname Specify the filesystem type with this option. Then mkfs calls mkfs.fsname.
options You can pass filesystem−specific options to the program that does the
actual filesystem creation. Precisely what options are available varies from one
filesystem to another; check the mkfs.fsname man page for details. Common options
include the following:
−c Checks the device for bad blocks.
158
−l filename Reads a list of known bad blocks from filename.
−v Displays extra information during the filesystem creation process.
device This is the only truly required parameter. Use it to tell the program on what
device to make the filesystem, such as /dev/sdb1 or /dev/fd0.
size You can tell the system to create a filesystem of a particular size, measured in
blocks that are typically 1024 bytes in size. If you omit this parameter, the program
creates a filesystem that fills the partition or device.
Red Hat Linux includes filesystem−creation utilities for ext2fs/ext3fs, ReiserFS, the Minix filesystem,
and FAT (the FAT tool is called mkfs.msdos; but as there are no differences at filesystem creation
time between ordinary FAT and long filename−enabled VFAT, you can use this utility to create
VFAT filesystems). In addition, the Mtools package includes another FAT filesystem creation
program, and the HFS Utils package includes a program to create Macintosh HFS filesystems. The
JFS and XFS projects include their own mkfs.fsname utilities. Aside from FAT, Linux utilities to
create most non−Linux filesystems are rare. As an example of filesystem creation, the following
commands both create a FAT filesystem on a floppy disk:
# mkfs.msdos /dev/fd0
and
# mformat a:
Tip If you want to use ext2fs on floppy disks or other removable media, use the −m 0 parameter to
mkfs.ext2. The −m parameter specifies the percentage of disk space that's reserved for use by
root. This percentage can be safely set to 0 for removable disks, but it's best to leave it at its
default value of 5 for most disk partitions, especially the root (/) partition.
Adding a Disk
As your system grows, it accumulates files. What's more, as time goes on, file sizes increase.
Real−time video files, for instance, can easily consume literally gigabytes of disk space, compared
to the kilobytes that were common for personal productivity applications of just a decade ago. To
cope, you may want to add a new hard disk to an existing computer that's been in service for a
while.
Most x86 computers sold today use EIDE disks. These disks are inexpensive and easy to find, but
they have a disadvantage: A typical computer can support just four EIDE devices. Because
common add−on devices, such as CD−ROM drives, tape backup drives, and high−capacity
removable−media drives, also use the EIDE interface, you may be limited to just one or two EIDE
hard disks. Beyond that, you'll have to either add another EIDE controller or add a SCSI adapter.
SCSI adapters can host either 7 or 15 devices, depending upon the SCSI variant, and SCSI hard
disks often outperform their EIDE cousins. Unfortunately, SCSI disks are generally more expensive
than equivalent EIDE devices. Check your current inventory of disk devices before buying a new
one to determine what type of device to buy.
When it comes to actually adding a disk, the partitioning and filesystem creation procedures outlined
earlier are the critical ones in terms of software configuration. Depending on the disk's intended role,
you may want to transfer some files to the new disk, as well. Overall, the steps involved in adding a
new disk are as follows:
159
Check your hardware and decide on a disk type and model.1.
Add the disk hardware, paying attention to characteristics such as EIDE master/slave status
and SCSI termination and ID.
2.
Partition the disk in a way that's suitable for your system.3.
Create filesystems on the new disk's partitions.4.
Mount the new disk's partitions.5.
If you want to transfer data, you can do so in between steps 4 and 5. The usual procedure is to
select a directory to move to the new disk. For instance, you might move /opt to a new disk. To do
so, follow these steps:
Follow steps 1 through 4 just above.1.
Mount the new partition at a temporary location. This can be an existing mount point, such
as /mnt/floppy; or one you create specifically for this purpose. The remaining steps assume
that you're using /mnt/floppy as a temporary mount point.
2.
Change to the base of the directory you want to move, as in cd /opt.3.
Type the following command to copy all files to the new filesystem:
# tar clpf − . | (cd /mnt/floppy; tar xpvf −)
Note The −l parameter keeps tar from moving into filesystems mounted on the
source directory. If you want to transfer two current filesystems onto one
new one, you'll need to omit this parameter. It's included in step 4
because omitting it can sometimes cause problems. In particular, be
careful not to copy the /proc filesystem, which is a pseudo−filesystem that
contains system information. Copying it is wasteful and potentially
dangerous. Another potential pitfall lies in copying a filesystem on which
the destination filesystem is mounted, which results in an endless loop
unless the −l tar parameter is specified. Both problems are most likely to
occur if you attempt to move the root (/) filesystem.
4.
Check, as best you can, that the new partition contains the files that it should.5.
Remove the files from their original location. For instance, type rm −r /opt/*.
Warning Step 6 is potentially very dangerous. If there's been an error in copying the
files, removing the originals will result in data loss. You might want to skip
this step for a while. If you do, you can mount the new partition over the
contents of the original directory. You'll then access the new partition
rather than the old directory. When you're satisfied that all is well,
temporarily unmount the new partition and come back to perform step 6.
6.
Unmount the new partition from its temporary location.7.
Mount the new partition at the (now empty) directory that held the original files.8.
Edit /etc/fstab to reflect the new filesystem mount point.9.
This procedure allows you to remove much of the load from one disk by spreading it across two.
You may encounter complications, however. Specifically, if you want to move a directory that's
normally in heavy use, such as /usr, you may have problems deleting the directory. In such cases,
you may need to resort to an emergency boot disk to perform steps 6 and 9, skipping the
intervening steps.
Replacing a Disk
Fundamentally, you can treat a disk transplant much as you do a disk addition; it's just that you're
160
moving everything from one disk to another. Here are some special caveats to keep in mind:
If you're replacing a disk because you can't add any more disks to your system, you'll need
to temporarily disconnect a device, such as a Zip or CD−ROM drive, in order to perform the
replacement. Alternatively, you can use a tape backup device as an intermediary storage
device, but this is likely to slow down the process.
Note You can use a network storage device, such as a server system, as an
intermediary storage device. If you do so, it's best to use tar to back up the
files to the network server. Copying the files directly may result in the loss of
important filesystem characteristics.
•
Step 4 of the second procedure in "Adding a Disk" specifies use of the −l parameter to tar.
This parameter keeps the transfer restricted to one filesystem, which helps avoid problems
with /proc or endless loops that result when copying the root filesystem. When moving an
entire installation, it's best to do so one filesystem at a time.
•
When you've finished copying all the files, edit /etc/fstab on the destination system to reflect
the partition assignments as they will exist after you've removed the original disk. For
instance, if the original disk is /dev/sda and the new one is /dev/sdb, removal of /dev/sda
changes all the /dev/sdb partitions to equivalently numbered /dev/sda partitions. The new
disk's /etc/fstab file should include references to itself as /dev/sda.
•
Create a DOS boot floppy and put on it a copy of your Linux kernel and the LOADLIN.EXE
program from the Linux installation CD. You'll use this floppy to boot your copied system for
the first time. If you don't have a copy of DOS handy, FreeDOS ( can
serve this function quite well. Note the device identifier that the root filesystem will have
when the original hard disk is removed.
•
When you've copied everything and removed the old disk, boot with the DOS boot floppy.
Type LOADLIN VMLINUZ root=/device ro, where VMLINUZ is your Linux kernel filename
and /device is the device ID of the root partition. This procedure should boot Linux. If
necessary, you can then edit /etc/lilo.conf and type lilo to install LILO on the new disk, or
edit /etc/grub.conf. Thereafter, the new disk should boot without the aid of a floppy, just as
did the original disk.
•
Warning Don't remove any partitions or overwrite any data on your old hard disk until you're sure
all your important data exist on the new disk. If you miss a partition or make an error in
copying the original disk's data, keeping the original around for a brief period can save
you a lot of aggravation when you discover the problem.
Checking Filesystem Integrity
At every boot, Linux checks that its filesystems were shut down correctly. If they weren't, Linux
initiates a filesystem check, which is performed by a utility called fsck.fsname, where fsname is the
filesystem name. (Like mkfs.fsname, these utilities often go by other names, such as e2fsck for
fsck.ext2. The fsck utility is a front−end that calls the appropriate filesystem−specific utility.) The
filesystem check process is most important for ext2fs, because an unclean shutdown can leave
ext2fs in an inconsistent state, resulting in lost or damaged files; a filesystem check prevents this.
One of the prime advantages of journaling filesystems, as explained earlier, is that they require only
very minimal filesystem checks after a system crash. JFS relies upon an fsck program to perform
this check, but the others can do the checks automatically at boot time. Linux lacks programs for
checking most foreign filesystems; you must normally use programs native to those OSs to perform
such checks. (FAT is an exception to this rule; there is a Linux fsck.msdos program.)
The operations of a filesystem check vary from one filesystem to another. For ext2fs, it involves five
separate passes through the filesystem, the first two of which take 90 percent or more of the
161
program's running time. Each pass detects and corrects a different class of filesystem errors. If all
goes well, this process completes automatically, without the need for human intervention; it just
takes some time—a time that can be measured in tens of minutes or even hours on multigigabyte
partitions.
Unfortunately, the filesystem check process sometimes does require human intervention. When this
happens, you're likely to see a message that the operation failed and that you must run fsck
manually. You must type the root password to gain limited access to the system, whereupon you
should issue the fsck command on the partition that caused the problem, as in fsck /dev/hda9. The
program is likely to ask you bewildering questions concerning whether it should duplicate specific
inodes or store lost files in the lost+found directory. Unless you know a great deal about the design
of the filesystem that's being checked, you should select the default for each of these questions.
When this is over, type shutdown now −r to reboot the computer and hope for the best.
Even when an ext2fs partition has been cleanly unmounted, Linux sometimes issues an fsck on the
filesystem at boot time. This is because ext2fs has a maximum mount count—a maximum number
of times that Linux will mount the partition before it requires a check, in order to ensure that errors
haven't crept onto the system. There's also a maximum time between checks, for similar reasons.
You can determine these values for any given ext2fs partition by using the dumpe2fs program. (This
program produces a lot of output, so you should pipe it through less, as in dumpe2fs /dev/hda9 |
less.) Look for lines labeled Maximum mount count and Check interval. Typical values are 20
mounts and 6 months, respectively.
You can alter these values (and several others) using the tune2fs program. Include the −c
parameter to adjust the maximum mount count, and the −i parameter to adjust the check interval.
For instance, type tune2fs /dev/hda9 −c 5 −i 1m to reduce the limits to 5 mounts or 1 month. (You
can also use d and w for units to the −i parameter, to indicate days and weeks, respectively.)
Naturally, filesystems other than ext2fs use different criteria for determining when to force a
filesystem check. Most include flags that let them spot a filesystem that was not cleanly unmounted,
but any given filesystem may or may not include equivalents to the forced checks by time or number
of mounts included in ext2fs. Equivalents to the dumpe2fs and tune2fs programs may exist for
specific filesystems, but not usually.
In Sum
Linux has unusually strong support for a wide variety of filesystems. In 2002, the transition from
Linux's traditional ext2 filesystem to journaling filesystems is underway, but it's unclear which of the
four journaling contenders will ultimately become the most popular. In terms of foreign filesystem
support, Linux is unsurpassed; it can at least read, and often write, filesystems from all major x86
OSs, and from many non−x86 OSs.
Using filesystems under Linux entails issuing a mount command and accessing files using normal
Linux programs and shell commands. You can add entries to /etc/fstab to have the computer
automatically mount filesystems at boot time, or to allow non−root users to do so.
Filesystem creation and maintenance involves several tools, including the fdisk tool for partition
creation, mkfs and its helper programs for filesystem creation, and fsck and its helper programs for
filesystem integrity checking. Understanding how to use these tools is critically important for
upgrading and maintaining your system.
162
Chapter 7: Linux Files and Processes
Overview
A Linux system is made up of files of various types; essentially, everything on the system is a file.
These files are organized hierarchically into directories, since having all files in one large directory
would be far too chaotic. As development in Linux is often done individually or in small groups, it
became obvious early on that the hierarchy needed some defined structure that all developers could
work within so that pieces developed by one group would fit with those developed by another. The
basic characteristics of the hierarchy were defined first in the File System Standard (FSSTND),
which was the consensus resulting from a lengthy discussion on a specially created Linux mailing
list. The Filesystem Hierarchy Standard (FHS), a subsequent version of the FSSTND, was intended
to standardize file systems between Linux and Unix for compatibility between different software
packages, distributions, and networked systems.
This chapter discusses the history of these two standards and what they brought to Linux. It
explains the file concept, including file types and file naming. It looks at the filesystem hierarchy as it
has evolved, and outlines the intended purpose for each of the top−level directories. The chapter
also discusses the different types of files that together form a Linux filesystem. Finally, you'll learn
about the processes that perform the actual work on a Linux system, how to track them, and how to
administer them. As a system administrator, you must know the filesystem that you are working on
and its restrictions and limitations in order to allocate system space efficiently and avoid pitfalls. Just
as with city ordinances, you can sometimes get by without knowing them intimately, but you might
find that your lack of knowledge gets you into trouble.
The Filesystem Hierarchy Standard
The history of the Filesystem Hierarchy Standard encapsulates the open−source development of
Linux as a whole. Even if you're not a history buff (or an open source "true believer"), understanding
the issues that the developer community set out to solve in defining the standard can help you
better understand the system you're working with today.
Linus Torvalds intended the Linux operating system to compensate for the problems he
encountered when trying to use the Minix operating system to connect him to a computer at Helsinki
University where the computer lab was overcrowded, making it hard for him to complete his class
assignments. In its very early days, Linux was developed in tandem with the Minix operating
system, allowing Linus to share disks between the Minix and Linux sides. At that point, the Linux
filesystem was in fact the Minix filesystem. Soon thereafter, a Virtual Filesystem (VFS) layer was
developed to handle the file−oriented system calls and pass the I/O functions to the physical
filesystem code, allowing Linux to support multiple filesystems. Developed for use as an
instructional tool, the Minix filesystem supported only 14−character filenames and limited its support
to filesystems smaller than 64 megabytes. In April 1992, after the integration of the VFS into the
kernel, a new filesystem, the Extended File System or extfs, was implemented and added to Linux
version 0.96c.
Although extfs was significantly more usable than the Minix filesystem, it still lacked some features
that Linus wanted. Additionally, its practice of tracking free blocks and inodes via a linked list did not
allow for optimum performance, because, as the filesystem was used, the list became unsorted and
the filesystem became fragmented. Released in alpha version in January of 1993, the Second
Extended File System (ext2fs) grew out of the desire to fix the problems of extfs and to ensure a
163