Developing Web Services with Apache Axis 2 phần 3 docx
Bạn đang xem bản rút gọn của tài liệu. Xem và tải ngay bản đầy đủ của tài liệu tại đây (1.43 MB, 22 trang )
Chapter 2 Implementing a web service 45
Then you'll see:
This looks fine. Now, save the file.
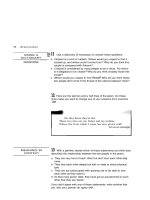
Validating the WSDL file
The next step is to validate the WSDL file to make sure it conforms to the
various web services standards. To do that, right click the SimpleService.wsdl
file in Eclipse and choose "Validate". If there were anything wrong, they would
be reported in the Problems window. For example, here I had introduced an
error into the file:
Click it to see the whole
schema
46 Chapter 2 Implementing a web service
Generating a service stub
Next, in order to implement the web service, you will generate a "service stub"
(see the diagram below). When a request message comes in, the service stub
will convert the <concatRequest> XML element into a ConcatRequest Java
object. Then it will pass it to the concat() method in a service skeleton to be
supplied by you. Your concat() method will create and return a ConcatResponse
Java object. The service stub will convert it into a <concatResponse> XML
element and return it to the client:
Try to include an unknown
part into the SOAP body
Chapter 2 Implementing a web service 47
To implement this idea, in Eclipse choose "File | New | Other" and choose
"Axis2 Code Generator" (see below). The default is to generate Java code from
WSDL. This is what you want:
Click "Next" (see below). Click "Browse" to locate your SimpleService.wsdl file:
Service stub
1: A request comes in
ConcatResponse concat( )
{
}
3: Call concat() and pass that
ConcatRequest object to it
5: Convert the ConcatResponse
Java object into a response
message
<foo:concatRequest>
<s1>abc</s1>
<s2>123</s2>
</foo:concatRequest>
s1: abc
s2: 123
ConcatRequest
2: Convert the request
message into a
ConcatRequest Java
object
Service skeleton
body: abc123
ConcatResponse
4: Create and return a
ConcatResponse
object
<foo:concatResponse>
abc123
</foo:concatResponse>
48 Chapter 2 Implementing a web service
Click "Next" (see below). Set the options as shown below:
Chapter 2 Implementing a web service 49
Note that by default how the namespaces will be mapped to Java packages.
For example, your SimpleService port type in namespace will
be mapped to a SimpleService Java interface in the com.ttdev.ss Java
package:
Of course this is just the default. You can change the Java package names in
/>com.ttdev.ss
Reverse it so that it goes from
broad (com) to narrow (ttdev)
Change slash (/) to dot (.)
Set to "custom" in order to enable the
options below.
Generate server side code (the code
implementing the service)
50 Chapter 2 Implementing a web service
the dialog box above. But for our purpose the default mapping is just fine. So,
click "Next" (see below) and enter the information as shown below:
Click "Finish". Right click your project and choose "Refresh". Then you'll see
some files have been generated:
Store the output into an existing
Eclipse project
Click it to choose your SimpleService
project
Copy the Axis2 jar files into the "lib" folder
in your SimpleService project
Tell it where is your Axis2 installation
Chapter 2 Implementing a web service 51
The Java source files are in errors because they are referring to the Axis2 jar
files but they are not on the build path. So, go to the build path dialog and click
"Add JARs":
Choose all the jar files in the "lib" folder in your project:
Some Java source
files
The Axis2 jar files
A copy of your WSDL has been
put into the "resources" folder
This file describes your
web service to the Axis2
server. It will be further
examined later.
This file will be examined
later
52 Chapter 2 Implementing a web service
Then the errors will disappear.
Implementing the web service
To implement the web service, modify the SimpleServiceSkeleton.java which is
the service skeleton:
Where do the ConcatRequest class and ConcatResponse class come from?
They were generated by the Axis2 Code Generator Wizard:
public class SimpleServiceSkeleton implements SimpleServiceSkeletonInterface {
public com.ttdev.ss.ConcatResponse concat(
com.ttdev.ss.ConcatRequest concatRequest0) {
String result = concatRequest0.getS1()+concatRequest0.getS2();
ConcatResponse response = new ConcatResponse();
response.setConcatResponse(result);
return response;
}
}
<foo:concatRequest>
<s1>abc</s1>
<s2>123</s2>
</foo:concatRequest>
Read the body of
<s1>
This object corresponds to
the request
<foo:concatResponse>
abc123
</foo:concatResponse>
This object corresponds to
the response
Set its body
Chapter 2 Implementing a web service 53
Deploying a web service
To deploy the web service with the Axis2 server, copy the files as shown below:
Now, start the Axis2 server by running c:\axis\bin\axis2server.bat. You should
see that it is picking up your SimpleService:
c:
workspace
SimpleService
com
ttdev
ss
c:
axis
repository
services
SimpleService
META-INF
com
ttdev
ss
Copy the class files
Each folder represents a
web service
bin
services.xml
SimpleService.wsdl
resources
services.xml
SimpleService.wsdl
Copy the
configuration files
54 Chapter 2 Implementing a web service
Go to http://localhost:8080 and you should see your SimpleService listed:
To see its WSDL file, just click the "SimpleService" link:
Chapter 2 Implementing a web service 55
Creating a client using a client stub
To call this web service, you can use the Axis2 Code Generator Wizard to
generate a "client stub". When you call a method on it (see the diagram below),
it will convert your Java data/objects into the right format (XML), create a
request message in the right format (SOAP), send it over the Internet to the
right endpoint using the right transport protocol (HTTP) to invoke that operation,
wait for the response message, convert the XML back into Java data/object and
then return it to you:
Your code
Stub
1: Call concat(new ConcatRequest("a", "b"))
3: Send the SOAP
message to the
endpoint
4: Send a response
message back to
the stub
5: Convert the returned
XML element into a
ConcatResponse Java
object and return it to
your code
Endpoint: http://
Format: SOAP
Protocol: HTTP
<foo:concatRequest>
<s1>a</s1>
<s2>b</s2>
</foo:concatRequest>
2: Create a SOAP message by
converting the ConcatRequest
object into a <concatRequest>
element
Web service
<foo:concatResponse>
ab
</foo:concatResponse>
56 Chapter 2 Implementing a web service
To implement this idea, run the Axis2 Code Generator Wizard as before until
you see the follow screen. Then tell it to generate client side code instead of
server side code:
Then tell it to put the code into your SimpleService project. This time, no need to
copy the Axis2 jar files again:
Click "Finish" and then refresh the project. You'll see a couple of new Java
Chapter 2 Implementing a web service 57
source files:
Among them, SimpleServiceStub.java is the client stub. As you're simulating
someone else calling your web service, they should not be mixed with the code
implementing the web service. Therefore, move them into another package
such as com.ttdev.ss.client.
Next, create a SimpleClient.java file in the com.ttdev.ss.client package:
Run it and it should work:
package com.ttdev.ss.client;
import java.rmi.RemoteException;
import com.ttdev.ss.client.SimpleServiceStub.ConcatRequest;
import com.ttdev.ss.client.SimpleServiceStub.ConcatResponse;
public class SimpleClient {
public static void main(String[] args) throws RemoteException {
SimpleServiceStub service = new SimpleServiceStub();
ConcatRequest request = new ConcatRequest();
request.setS1("abc");
request.setS2("123");
ConcatResponse response = service.concat(request);
System.out.println(response.getConcatResponse());
}
}
LOOK OUT! There is a ConcatRequest class
defined inside the SimpleServiceStub class.
There is another one in the com.ttdev.ss
package for the service implementation. You
must use the former as you're writing a client.
You should have no access to the server side
code.
The same is true for
the ConcatResponse
class
Call the web service and
get the response
58 Chapter 2 Implementing a web service
Undeploying a web service
If you'd like to undeploy a web service, all you need to do is to delete the
SimpleService folder:
This works even when the Axis2 server is running. It will note the removal of the
folder and undeploy the service:
c:
axis
repository
services
SimpleService
META-INF
com
ttdev
ss
Delete this folder
services.xml
SimpleService.wsdl
Chapter 2 Implementing a web service 59
If you put the folder back, it will be deployed again:
This is called "hot deployment".
Summary
Tomcat hosts one or more web applications. The Axis server is installed as one
60 Chapter 2 Implementing a web service
of the web applications. It in turn hosts one or more web services.
Most usually your input message or output message is sent in a SOAP
message. A SOAP message is always an <Envelope> element. It may contain a
<Header> which contains one or more header entries/elements. The
<Envelope> must contain a <Body> which may contain one or more body
entries/elements. For a document style web service, the one and only input
message part is usually the single body entry. For a RPC style web service, the
element named after the operation will usually contain all message parts and is
then included as the single body entry.
To create a web service, you first create a WSDL file describing its interface.
This can be done manually or using a tool like Eclipse. Then use the Axis Code
Generator Wizard on the WSDL file to generate a service stub. Then fill in the
code in the service skeleton. The service stub will convert the XML elements in
a request message into Java data/objects, call your skeleton and convert the
Java objects returned into XML elements and put them into the response
message.
To deploy a web service, copy the class files and the services.xml file to the
Axis2 server according to a specific folder structure. To undeploy a web service,
just delete that folder. The Axis2 server supports hot deployment. It means you
can deploy or undeploy a service while it is running.
The endpoint of the deployed web service is
http://localhost:8080/axis2/services/<name-of-your-service>.
To call a web service, run the Axis Code Generator Wizard on the WSDL file to
generate a client stub. Then, in your code create an instance of the client stub
and call its methods as if it were the web service. The client stub will convert the
Java data/objects into XML elements, create the request message in the right
format, send it to the right endpoint using the right transport protocol and
convert the XML elements in the response message back into Java
data/objects.
61
Chapter 3
Chapter 3 Optimizing the development
environment
62 Chapter 3 Optimizing the development environment
What's in this chapter?
In this chapter you'll learn how to optimize the development environment.
Placing the class files into Axis directly
At the moment, whenever you make changes to say your web service Java
code (SimpleServiceSkeleton.java), you will have to copy the class file into the
Axis server again. This is troublesome. To solve this problem, you can tell
Eclipse to put the class files directly into the Axis repository:
However, there is a problem: Eclipse can only use a folder inside the project as
the output folder. To allow you to work around this restriction, fortunately Eclipse
allows you to link such a folder to an outside folder:
To implement this idea, right click the project and choose "New | Folder". Enter
the information as shown below:
c:
axis
repository
services
SimpleService
META-INF
com
ttdev
ss
services.xml
SimpleService.wsdl
Use it as the output folder
in Eclipse
This way the class files will
be put here
c:
axis
repository
services
SimpleService
Link it to the outside
SimpleProject
out
Chapter 3 Optimizing the development environment 63
To set the output folder, right click the project in Eclipse and choose
"Properties", then choose "Java Build Path" and choose the "Source" tab:
Click "Browse" and choose the "out" folder. Then confirm to delete the existing
"bin" folder as it is no longer used.
Click it in order to see the
options below
64 Chapter 3 Optimizing the development environment
Now the class files are in the right place. The next step is to make the META-
INF folder appear in the service folder. To do that, you need to have such a
folder in the "src" folder:
Therefore, rename your "resources" folder as META-INF and move it into "src".
To verify that this setup is working, modify the code to turn the result string into
upper case:
public class SimpleServiceSkeleton implements SimpleServiceSkeletonInterface {
public com.ttdev.ss.ConcatResponse concat(
com.ttdev.ss.ConcatRequest concatRequest0) {
String result = concatRequest0.getS1()+concatRequest0.getS2();
ConcatResponse response = new ConcatResponse();
response.setConcatResponse(result.toUpperCase());
return response;
}
}
Now start the Axis2 server. Run the client and the output should be in upper
case:
Making changes take effect immediately
Let's restore the code now:
public class SimpleServiceSkeleton implements SimpleServiceSkeletonInterface {
public com.ttdev.ss.ConcatResponse concat(
com.ttdev.ss.ConcatRequest concatRequest0) {
String result = concatRequest0.getS1()+concatRequest0.getS2();
ConcatResponse response = new ConcatResponse();
response.setConcatResponse(result.toUpperCase());
return response;
}
}
Will it take effect while the Axis server is running? No. It will still output ABC123.
This is because by default once the Axis server loads a web service, it will not
monitor changes to its file any more. To change this behavior, modify
c:\axis\conf\axis2.xml:
c:
axis
repository
services
SimpleService
META-INF
services.xml
SimpleService.wsdl
SimpleProject
src
META-INF
services.xml
SimpleService.wsdl
Compile/copy
Chapter 3 Optimizing the development environment 65
You may have noticed that there is also a hot deployment option in addition to
the hot update option. What's the difference? It is explained in the diagram:
You need to restart the Axis server so that this hot update option takes effect.
Then modify the Java code:
public class SimpleServiceSkeleton implements SimpleServiceSkeletonInterface {
public com.ttdev.ss.ConcatResponse concat(
com.ttdev.ss.ConcatRequest concatRequest0) {
String result = concatRequest0.getS1()+concatRequest0.getS2();
ConcatResponse response = new ConcatResponse();
response.setConcatResponse("hello: "+result);
return response;
}
}
Save the code. Then you should see that the Axis server redeploying your
service:
<axisconfig name="AxisJava2.0">
<parameter name="hotdeployment">true</parameter>
<parameter name="hotupdate">false true</parameter>
<parameter name="enableMTOM">false</parameter>
<parameter name="enableSwA">false</parameter>
</axisconfig>
Enable hot update
c:
axis
repository
services
SimpleService
FooService
Axis server
Hot deployment: Monitor changes in this
folder. If there is a new sub-folder,
deploy it as a service.
Hot update: Monitor changes in
each folder. If any file in a
folder is modified, redeploy that
service.
66 Chapter 3 Optimizing the development environment
Run the client and it should work:
Note that the Axis server looks for changes every 10 seconds. So it may take
some time before the web service is redeployed.
Debugging a web service
To debug your web service in Eclipse, you need to set an environment variable
before launching the Axis server (shut it down first if it's running):
This way the Axis server will run the JVM in debug mode so that the JVM will
listen for connections on port 8000. Later you'll tell Eclipse to connect to this
port. Now, set a breakpoint here:
C:\axis\bin>set JAVA_OPTS=-Xdebug -Xrunjdwp:transport=dt_socket,add
ress=8000,server=y,suspend=n
C:\axis\bin>axis2server.bat
Type it all on one
line
Launch it as usual