cisco security professional''''s guide to secure intrusion detection systems phần 3 pot
Bạn đang xem bản rút gọn của tài liệu. Xem và tải ngay bản đầy đủ của tài liệu tại đây (930.87 KB, 68 trang )
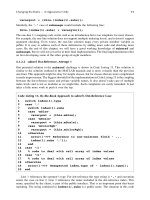
110 Chapter 3 • Initializing Sensor Appliances
active-selection
exit
exit
service webServer
general
ports
exit
exit
6. You are prompted whether to continue with the configuration dialog.
Type yes or press Enter.Any default answers are in the square “[]”
brackets.
7. Type the host name of the sensor.
8. Type the IP address.
9. Type the IP netmask.
10. Type the default gateway.
11. Enter the Telnet server status.The server is disabled by default
12. Enter the Web server port, which is 443 by default.
13. Save the configuration by typing yes or no to reconfigure.
14. Do not reboot at this point.Type no when asked to continue with the
reboot.
15. Enter configuration terminal mode.Type configure terminal.
16. Enter host configuration mode.Type service host.
17. Enter network parameters configuration mode.Type networkParams.
18. To show the current settings, type show settings.The expected output
should be similar to the following:
networkParams
ipAddress: 10.0.0.8
netmask: 255.255.255.0 default: 255.255.255.0
defaultGateway: 10.0.0.10
hostname: sensor1
telnetOption: disabled default: disabled
accessList (min: 0, max: 512, current: 1)
www.syngress.com
267_cssp_IDS_03.qxd 9/25/03 4:42 PM Page 110
Initializing Sensor Appliances • Chapter 3 111
ipAddress: 10.0.0.0
netmask: 255.0.0.0 default: 255.255.255.255
19. Remove the 10. network from having complete access.The command
syntax is as follows:
no accessList ipAddress 10.0.0.0 netmask 255.0.0.0
20. Enter the IP addresses of hosts or networks that will have access to the
sensor. If you can afford to do it, only specify individual host addresses
that will have access. Do not give entire networks access unless abso-
lutely necessary.
The syntax for a single host is as follows:
accessList ipAddress 10.0.0.4
The syntax for an entire network is as follows:
accessList ipAddress 10.0.0.0 netmask 255.255.255.0
Repeat the command as necessary depending on the number hosts
or networks being added.
21. Exit the parameters configuration mode.Type exit.
22. Set the System clock settings.Type timeParams. When done, exit back
to configure terminal mode.
23. Type yes to apply settings.Type no to keep the system from rebooting,
then exit configure terminal mode.Type exit.
24. Set the clock.Type clock set hh:mm month day year.
25. At this point, you need to generate the X.509 by typing tls generate
key. Record the results.You will need to verify the authenticity of the
certificate when you connect via a Web browser.
26. Reboot the sensor.Type reset, then yes.
27. Once you have rebooted, you will need to upgrade to the latest signa-
ture updates and set the interfaces.
www.syngress.com
267_cssp_IDS_03.qxd 9/25/03 4:42 PM Page 111
112 Chapter 3 • Initializing Sensor Appliances
www.syngress.com
Switching Interfaces for Multicast Traffic
Multicast Media Access Control (MAC) traffic is becoming more promi-
nent on enterprise networks. More employees have a need for, or want
to have access to, television feeds, stock tickers, broadcast news, and
radio
. In order to monitor this type of traffic on the 4220-E or 4230-FE
sensors, the sniffing ports need to be changed. Follow these five simple
steps:
1. Log in to the sensor as root.
2. Change directories to the /usr/nr/etc/ directory.
3. Open the packetd.conf file for editing.
4. Change the NameOfPacketDevice token to /dev/iprb0.
5. Save and exit.
6. Type mv /etc/hostname.iprb0 /etc/hostname.spwr0 to
reconfigure the spwr interface for command and control.
7. Swap the network cables between the two interfaces, iprb0
and spwr0.
8. Reboot the sensor for changes to take place.
Configuring & Implementing…
267_cssp_IDS_03.qxd 9/25/03 4:42 PM Page 112
Initializing Sensor Appliances • Chapter 3 113
Summary
Initializing the sensor is essential in getting your IDS infrastructure up and run-
ning. Without the proper settings, the sensor may not communicate with the
management devices or the network in general.There are basically two types of
sensors available:
■
4200 series sensors (4210, 4220, 4230, and 4235)
■
Catalyst 6000 IDS Module
We have only discussed the 4200 series sensors and how to bootstrap them.
The Catalyst 6000 IDS Module will be discussed in a later chapter.The sensor
port or the sniffer port is important to be able to identify for proper configura-
tion.The sniffing port on the 4210, /dev/iprb0, is physically located directly above
the control port.
The 4220 and 4230 sensors have expansion slots. One of the ports is built in (a
control port) and the other is located on the expansion slot.The sniffing port for
Ethernet, /dev/spwr0, is physically located in slot 5. Depending on the type of net-
work, different cards and slots are used. For token ring, use /dev/mtok36, located in
slot 6. An FDDI network utilizes /dev/ptpci, which can be found in slot 4.
sysconfig-sensor is the utility used to initially configure the sensor. Options 1–6
must be done in order to get the sensor up on the network and talking.
The sensors have two accounts associated with them, root and netrangr. Root is
used to bootstrap the sensor and perform OS-level functions on it, while
netrangr (remember, no “e”) is used to administer the sensor.The commands
netrangr can utilize on the sensor include: cidServer, idsstart, idsstop, idsvers, idsconns,
and idsstatus.
The PostOffice protocol utilizes UDP45000 for communications, and can
send the same messages to as many as 255 devices. It can also be configured to
send messages to multihomed devices in the event of a segment failure on your
network.Thus, it will continue to send the same message until an acknowledg-
ment is received from the management device.
A SPAN port, or SPAN VLAN (VSPAN), needs to be configured in order for
the sensor to capture packets.The sensor should be placed on the destination port
in the configuration.The source ports or VLANs are configured to copy packets
to the destination port the sensor resides on.
When reinitializing or recovering, the CD is quickest. Insert it and reboot.
The whole process takes about an hour to get back to the sysconfig-sensor
www.syngress.com
267_cssp_IDS_03.qxd 9/25/03 4:42 PM Page 113
114 Chapter 3 • Initializing Sensor Appliances
screen. Downloading images from Cisco.com is another option, but if you keep
up with the notifications from Cisco, you should probably already have the image
on file and thus can reinstall it. Rolling back to a previous image/version is also
an option, but as I mentioned before, I have never seen this used for any reason
other than just to do it. If you have already upgraded, chances are the manage-
ment software has been upgraded too.You may as well start off with a fresh install
if you have to back up.
Solutions Fast Track
Identifying the Sensor
4210 is a single RU.
4210 ports are on top of each other.The sniffing port, /dev/prb0, is
located on the bottom.The control port prb1 can be found on top.
The 4220 and 4230 have expansion slots.The control port is built in,
while the sniffing ports occupy one of the slots (which slot depends on
the network used).
The Ethernet sniffing port /dev/spwr0 occupies slot 5.
For token ring, use /dev/mtok36. The card occupies slot 6.
An FDDI network utilizes /dev/ptpci, which occupies slot 4.
Initializing the Sensor
You must be root to initialize the sensor.
Execute the command sysconfig-sensor and complete options 1–6 to get
the sensor online.
The host IDs must be unique for each device in the IDS infrastructure.
The organization name and ID should be the same for all devices in a
single infrastructure.
www.syngress.com
267_cssp_IDS_03.qxd 9/25/03 4:42 PM Page 114
Initializing Sensor Appliances • Chapter 3 115
Using the Sensor Command-Line Interface
When troubleshooting the sensor, utilize idsconns to check connectivity
with the management device.
idsstatus will tell you what services are up.
cidServer version will tell you what versions of the daemons are being
used.
idsstart and idsstop do just what they say.
idsvers verifies the version of sensor software.
Don’t forget to be logged in as netrangr to use these commands!
Configuring the SPAN Interface
Configure SPAN ports or VSPAN for either Egress, Ingress, or both.
Egress is the SPAN port (or VSPAN) receiving and copying to the
destination port.
Ingress is the SPAN port (or VSPAN) transmitting and copying to the
destination port.
Both copies transmit and receive traffic to the destination port.
The destination port is where the sensor resides.
Recovering the Sensor’s Password
Don’t even attempt to recover the sensor’s password unless you have a
Solaris for Intel CD-ROM, Solaris Device Configuration Assistant disk
(boot disk).
You need console access to the workstation for password recovery.
The Solaris Device Configuration Assistant boot disk can be
downloaded from Sun, not from Cisco.
You will be editing the shadow file in the OS that contains accounts and
passwords. If you are not familiar or comfortable with the process, find a
Unix person and have them do it for you.
www.syngress.com
267_cssp_IDS_03.qxd 9/25/03 4:42 PM Page 115
116 Chapter 3 • Initializing Sensor Appliances
Reinitializing the Sensor
Use the accompanying Upgrade/Recovery CD to reinitialize the sensor.
If you have the image downloaded from Cisco.com, use that to save a
minute or two.
Once you reinitialize the sensor, everything is overwritten, including
passwords.You are starting from scratch.
Don’t forget to document your settings before going this route.
Upgrading a Sensor from 3.1 to 4.0
To upgrade sensor models IDS-4220-E or IDS-4230-FE, swap the cables
for the sniffing interface as well as for the command and control
interface.
Before you can upgrade a sensor model IDS-4235 or IDS-4250, you
have to upgrade the BIOS in order to install version 4.0.
The default username and password to log in to the CLI for version 4.0
are both cisco.
The command to initially configure the sensor is setup.
www.syngress.com
267_cssp_IDS_03.qxd 9/25/03 4:42 PM Page 116
118 Chapter 3 • Initializing Sensor Appliances
A: iprb0 must be reconfigured from the command and control interface to the
monitoring interface.
Q: What does the command cidServer do and what user must you be in order to
execute it?
A: cidServer can start and stop the Web server for IDM and also show the version.
You must be root to execute the command.
Q: What configuration options require a reboot in sysconfig-sensor?
A: Options 1–5, IP Address, IP Netmask, IP Host Name, Default Route, and
Network Access Control.
Q: If you are upgrading sensor models IDS-4220-E or IDS-4230-FE, what must
you do before you can upgrade to version 4.0?
A: You have to swap the interface cables on the two ports.The PCI card that is
normally used for sniffing on the IDS-4220-E and the IDS-4230-FE does
not support monitoring of dot1q trunk packets or the tracking of alarm 993,
Dropped Packet.The performance of the PCI card is also lower than the inte-
grated NIC. If you do not swap the cables on the IDS-4220-E or IDS-4230-
FE, there is a chance you will not be able to connect to your appliance over
the network.
Q: Before you can upgrade to software version 4.0 on a sensor model IDS-4235
or IDS-4250, what has to be done first?
A: You must upgrade the BIOS before you can install version 4.0.
www.syngress.com
267_cssp_IDS_03.qxd 9/25/03 4:42 PM Page 118
Cisco IDS
Management
Solutions in this Chapter:
■
Managing the IDS Overview
■
Using the Cisco Secure Policy Manager
■
Using the CSID Director for Unix
■
Using the IDS Device Manager
■
Using the Cisco Network Security
Database (NSDB)
Chapter 4
119
Summary
Solutions Fast Track
Frequently Asked Questions
267_cssp_IDS_04.qxd 9/25/03 4:43 PM Page 119
120 Chapter 4 • Cisco IDS Management
Introduction
There is so much more to intrusion detection than just putting a sensor out on a
network and then never addressing it again. Someone has to take the time and
manage the sensors. It would not be very efficient to have to go to each of the
sensors on a network and look at them on an individual basis. What if you saw
something suspicious? Then you would have to go to the others and try and cor-
relate the events.That is not the most efficient way to manage a group of security
sensors. Luckily, we have a central management solution to help us manage our
Cisco IDS sensors.
There are several items that need to be addressed when managing the IDS
sensors on the network:
■
How secure is the network going to be? Are we looking at everything
or looking for specific events driven by our security policy?
■
How many people will have access to the management console and who
can modify the configuration?
■
How much logging is going to take place? Do we log everything or
only the events we care about?
■
How often do we generate reports?
■
Will alarms be sent to e-mail/pagers?
■
Do I shun or carry out TCP resets?
www.syngress.com
Shunning and Resets
Shunning is the process of blocking traffic from a certain host or net-
work. To most, this sounds like a great idea, but if you have a Web pres-
ence for the purpose of e-commerce or marketing, you may be denying
customers or potential ones the ability to do business with your organi-
zation. Shunning should be done with extreme caution, or not at all.
Make sure you get the okay from management and explain the situation
carefully to them before shutting someone out.
Designing & Planning…
Continued
267_cssp_IDS_04.qxd 9/25/03 4:43 PM Page 120
www.syngress.com
This only scratches the surface of planning your management solution.
Depending on your business needs, you may find some solutions suit your busi-
ness better than others. No matter what the solution though, IDS management is
a full-time job with or without the central management solution.The central
management solution just makes it much easier.You will find yourself constantly
tuning signatures to reduce the amount of traffic that is generated. Be warned
that the initial traffic can seem overwhelming, but in the end it’s manageable. In
fact, having any of these management solutions in place makes life easy, letting
you implement one change at one location that affects all the sensors simultane-
ously.
In this chapter, we cover all the IDS management applications in depth. Cisco
has three different methods: Cisco Secure Policy Manager (CSPM), IDS Device
Manager (IDM), and Cisco IDS Director. After covering management solutions,
we take a look at the Cisco Network Security Database (NSDB). Like most
management solutions, initial deployment and configuration is the toughest. So it
is our intent to cover these steps thoroughly.
Managing the IDS Overview
Many organizations often struggle with intrusion detection solutions.The solu-
tions are not always as straightforward as you might think. One of the major
drawbacks of IDS solutions is experience with intrusion analysis and what exactly
is being protected. IDS sensors have to be tuned to the organization and each
organization is different. Different types of traffic and traffic flow can set off
alarms, even though it may be considered normal traffic for a particular organiza-
tion. As always, Cisco has graced us with multiple ways to manage the IDS sen-
sors, CSPM, Unix Director, and IDM.The goal of any of the Cisco IDS
management applications is to provide a method for configuring certain features
of the IDS, configuring logging and to generate reports from the IDS. With the
Cisco IDS Management • Chapter 4 121
The other option is to do TCP resets. The name of "TCP reset" itself
should be a clue to you that this only applies to TCP traffic. When an
attack is detected, the sensors send out TCP reset messages to both the
source and the destination of the attack. In order to properly use TCP
resets in a switched network, a SPAN port must be configured for bidi-
rectional traffic. The SPAN configuration must support bidirectional
traffic and on the SPAN port, MAC learning must be disabled.
267_cssp_IDS_04.qxd 9/25/03 4:43 PM Page 121
122 Chapter 4 • Cisco IDS Management
management application, it is possible to manage more than one IDS sensor
without much difficulty, greatly reducing your workload, and allowing you to do
it all from one centralized location. In the past, IDS sensors did not work very
well unless there was an administrator in front of the IDS sensor scrutinizing
every little record or alarm.The administrator had to be careful to tune signatures
precisely in order to filter out the false positives and false negatives. But Cisco—
and its tools—has taken a lot of the work out of IDS monitoring.
Up to now, one of the most common tools for managing Cisco IDS sensors
has been CSPM. CSPM is a very scalable solution for centralized management of
IDS sensors. CSPM does not only support Cisco IDS sensors but also other com-
ponents within your enterprise, such as IP Security (IPSec), virtual private net-
works (VPNs), PIX firewalls, and IOS firewalls. CSPM allows you, the security
administrator, to implement, enforce, and audit a security policy from a central
location. CSPM provides a friendly graphical user interface (GUI) that gives
administrators the ability to tune signatures for all the sensors in the enterprise or
a single signature on one sensor.The ability to generate reports on demand or
schedule them is also a benefit of having CSPM. If incidents are not being
reported, the sensors may as well not even be on the network.
Another enterprise level management solution for multiple security compo-
nents is the Cisco IDS Director. It runs on a Unix platform in the flavor of HP-
UX or Sun Solaris. Another feature of the Director is the fact that it also has to
run on top of HP OpenView. As you can tell right away, this solution is a very
costly one. But, if you already have OpenView deployed in your enterprise, it
might not be a bad solution to look into. Provided you have a robust enough
system, the Director software can be loaded on an already existing OpenView
platform running other OpenView applications.
Unlike CSPM and the Director, IDM is a web-based management solution
that only allows you to configure and manage your IDS sensors on your net-
work. IDM Web-based management is quickly becoming the management tool
of choice for the Cisco IDS sensor.You can access your sensor right from your
desktop or through a remote connection via a secure session. Both Netscape and
Internet Explorer can be used to access the Web server.The Web server process
runs locally on each IDS sensor.The best thing about IDM is it is FREE! It
comes with 4.x and later IDS sensor software. It also comes with an Event
Viewer to let you peruse alarms without having to parse through the log files,
and allows you the luxury of viewing them from multiple sensors.The drawback
to IDM is that you can only configure one sensor at a time.
www.syngress.com
267_cssp_IDS_04.qxd 9/25/03 4:43 PM Page 122
Cisco IDS Management • Chapter 4 123
There are different approaches with each of these, and thus some tips that will
make your life easier. Currently, the push is towards Web-based management with
the Cisco IDS device manager. Future trends show even more of a push towards
a management solution that ties together almost all functionality from the dif-
ferent tools for Cisco’s entire product line. Expect the functionality of all of these
security management solutions to be integrated into VMS VPN/Security
Management Solution in the near future.
Using the Cisco Secure Policy Manager
Even though there is a huge push for ease of use technology, such as Web-based
interfaces like IDM, CSPM is still the prominent application in the industry for
administrators tasked with managing Cisco IDS sensors.This section will take
you through the installation of CSPM, configuration, and management.
For most administrators, CSPM is what we look for in an administration tool,
a Windows-based product designed specifically to manage security policies not
only for sensors but also for the PIX firewall, IOS routers, and VPN software.The
focus here is strictly on managing the sensors. CSPM allows us to manage mul-
tiple sensors from a single location without having to perform any administration
at the devices themselves.
Installing CSPM
Before installing CSPM, make sure the following software requirements have
been met to save yourself from having to backtrack and install/configure them:
■
Windows NT 4.0
■
Service Pack 6a for NT
■
Internet Explorer 5.5
■
TCP/IP Protocol Stack
■
HTML Help 1.32 Update
■
Microsoft’s XML Parser 3 (MSXML3)
■
NTFS
■
TAPI/MAPI for email
■
DHCP should be disabled
■
NT Startup time set to zero
www.syngress.com
267_cssp_IDS_04.qxd 9/25/03 4:43 PM Page 123
124 Chapter 4 • Cisco IDS Management
NOTE
The autostart utility does a check for NT 4.0, Internet Explorer 5.5, HTML
Help 1.32 Update, and MSXML3 during setup. The installation applica-
tion does not know what any Windows version later than NT 4 is, or any
browser version later than 5.5, so it will not continue. It will run nicely in
a Connectix Virtual PC session, which in turn runs very well on Windows
2000 or XP.
Due to the sensitivity of intrusion detection it is recommended that you
install the CSPM as a stand-alone system.The CSPM system is designed to be in
a location like a Security Operations Center (SOC). It allows all of the security
personnel to look at the same interface and only those personnel with access to
the SOC can access the system.The client/server installation allows administra-
tion to take place from different locations.This is not always a best practice and
auditing, traceability, and nonrepudiation become an issue.
1. Insert the CSPM installation CD.The autostart utility will automatically
initiate the installation.
2. The first thing you will see is a warning to disable any antivirus software
during installation. Next, you will get the notice in Figure 4.1, Cisco
Secure VPN client Not Installed on Host.
3. If you plan on installing the VPN client, do that before you install
CSPM. Otherwise, press Continue.
4. Select Install Product in the Options box as seen in Figure 4.2, and
then click Next.
www.syngress.com
Figure 4.1 Cisco Secure VPN Client Warning Message
267_cssp_IDS_04.qxd 9/25/03 4:43 PM Page 124
Cisco IDS Management • Chapter 4 125
5. At this point, if the applications listed previously have not been installed,
the installation cannot proceed.The Options box will display any
required components that are not present.
6. At the License Agreement panel, accept the terms of the license and
click Next.
7. Specify the location of the CSPM license disk, usually on the accompa-
nying diskette, by entering the directory path.
8. You will also have to enter the password that corresponds with the
license disk.The password is usually on the diskette label. Click Next.
See Figure 4.3
9. If you have downloaded the software, the password will be in the readme
file.
www.syngress.com
Figure 4.2 Cisco Secure Policy Manager Installation
Figure 4.3 CSPM License Disk
267_cssp_IDS_04.qxd 9/25/03 4:43 PM Page 125
126 Chapter 4 • Cisco IDS Management
10. Select the type of system you want to install: Standalone or
Client/Server. CSPM does not support the Distributed CSPM option.
See Figure 4.4.
11. If you are installing a client/server system, select Policy Server.This
needs to be intalled before Policy Administrator in the Feature Set
list.The Policy Administrator Feature Set is for Remote Administration.
The Feature Set drop-down box is disabled for the Standalone option.
12. Specify the installation path in the Installation Folder box and click
Next.
13. You will be prompted to enter the password for the Windows NT user-
name detected during setup. Click Next.
14. Select the IP address configured on the local host for the stand-alone
system and enter the port the Primary Policy Database will communi-
cate on.The default port is 2567. See Figure 4.5.
www.syngress.com
Figure 4.4 Installation Options
Figure 4.5 Settings
267_cssp_IDS_04.qxd 9/25/03 4:43 PM Page 126
128 Chapter 4 • Cisco IDS Management
17. Verify your settings. If a setting is incorrect, you can use the Back button
to back up and make changes. If everything is correct, click Copy Files.
18. Once the installation has completed, click Finish to close the setup
program.
If you are performing a stand-alone system installation, you will only have to
do the installation procedures once. If you are implementing a client/server
CSPM system, you need to repeat the preceding steps to install the Policy
Administrator feature set on all additional hosts that will serve as clients for
remote administration.
Once you have finished the installation, you will need to log in to start con-
figuring.
NOTE
A stand-alone system can be converted to a client/server system without
having to uninstall and reinstall CSPM. The stand-alone system will act as
the Policy Server. Once you have exported the database key from the
stand-alone system, you can install the Policy Administrator feature set
on multiple hosts for remote administration using that database key
during the installation of the Policy Administrator feature set.
Logging In to CSPM
To log in to CSPM, follow these steps:
1. Open the Log on to Cisco Secure Policy Manager dialog box by
maneuvering to the CSPM executable by clicking Start | Programs |
Cisco Systems. Click Cisco Secure Policy Manager.
2. Use the account that was specified during the installation to log in.
Enter the account name and password.
3. In a client/server system configuration when logging in from the Policy
Server, click Local under Policy Database Server. When logging in from
a remote server, click Remote Server, and then enter the IP address or
DNS name in the box. Click Connect. See Figure 4.7.
www.syngress.com
267_cssp_IDS_04.qxd 9/25/03 4:43 PM Page 128
Cisco IDS Management • Chapter 4 129
If you are having trouble logging on to the CSPM, verify that the ORGID
and ORGNAME on the CSPM match what is defined on the sensor.This is
essential to communicate properly.
N
OTE
If the default port number of 2567 is still the communication port, you
do not need to specify a port value.
Configuring CSPM
Now we are going to go through the configuration process for CSPM.The sen-
sors need to be added to the topology in CSPM to start managing them. But
before that happens, networks need to be defined and your CSPM host needs to
be defined also. One thing that needs to be addressed up-front is that the postof-
fice configuration settings that include HOSTID, ORGID, HOSTNAME, and
ORGNAME are correct and communication has been established between the
sensors and management device. If the sensor is on the outside of a firewall, rules
need to be put in place for postoffice communication to occur.
Once you log on to the CSPM, you will be greeted by the Getting Started
pop-up window.The Getting Started window allows you to view different video
tutorials that walk you through different procedures you will encounter while
using CSPM. If you are a first-time user, it would be wise to take a moment and
go through these videos. See Figure 4.8.
www.syngress.com
Figure 4.7 Log on to Cisco Secure Policy Manager
267_cssp_IDS_04.qxd 9/25/03 4:43 PM Page 129
130 Chapter 4 • Cisco IDS Management
NOTE
The newest CSPM (3.1) does not support IDS sensors. For more details,
see www.cisco.com/en/US/products/sw/secursw/ps2133/
prod_software_versions_home.html.
CSPM v2.3.3i is the last version of CSPM that supports Cisco’s IDS.
The first thing you need to do in configuring a topology in CSPM is to
define the network upon which the control interface of the sensor will reside,
and the network where the CSPM host will reside. If you do not have a com-
mand and control network, they may possibly be on the same subnet, hence only
one network will need to be defined in the topology. So follow these steps to
define a network for CSPM.
Adding a Network
Adding a network is the first step in defining a topology in CSPM. Without it,
you will not be able to add any hosts.This is a logical map and does not neces-
sarily need to be totally accurate, but it does need to be done.
1. You will right mouse-click the Internet icon in the topology map and
select New, then Network to create a new network. (Refer to
Figure 4.9.)
www.syngress.com
Figure 4.8 Getting Started
267_cssp_IDS_04.qxd 9/25/03 4:43 PM Page 130
Cisco IDS Management • Chapter 4 131
2. In the Network screen, add the name of the network, the network
address, and the subnet mask that will be used. Notice in Figure 4.10,
the name of the network can be whatever you want it to be. I recom-
mend you name it something that makes sense to your organization (for
instance, out-of-band network, command network, and so on).You have
the option of simply identifying a network here without supplying any
of the addressing by checking the Unnumbered box at the bottom of
the window.
www.syngress.com
Figure 4.9 Adding a Network
Figure 4.10 Network Parameters
267_cssp_IDS_04.qxd 9/25/03 4:43 PM Page 131
132 Chapter 4 • Cisco IDS Management
3. Click the IP Address button or right-click the interface icon, select
New then IP Address, as shown in Figure 4.11 and enter the IP
address that the network will use to access the Internet.This should be
your network’s Default Gateway.Then click OK.
NOTE
Since you already defined these IP addresses on the sensor, they do not
have to be correct on the topology map. This is for your benefit. The net-
work will still be added to the topology map.
This topology map is more or less eye candy for you to know where
your components are located in your IDS infrastructure. Since the IP
addresses have already been defined on the sensors, they do not have to
be correct
You have now defined your network. Now you need to add the CSPM host
onto that network. We show how to add a CSPM host to your newly defined
network in the next section.
Adding a Host
In order to control a sensor with CSPM, you have to configure CSPM to com-
municate with the sensor. Configuration parameters are required to manage the
www.syngress.com
Figure 4.11 Interface IP Address
267_cssp_IDS_04.qxd 9/25/03 4:43 PM Page 132
Cisco IDS Management • Chapter 4 133
sensor.These procedures take you through the specific settings that have to be
configured before the sensors can be managed with CSPM.Think PostOffice
Protocol while setting up communications between CSPM and the sensors.The
postoffice settings will also allow for the distribution of audit event messages.
1. Right-click the network icon you have just defined and select New |
Host.
2. The Cisco Secure Policy Manager dialog box (shown in Figure 4.12)
should appear, stating that a network object has been detected in the
Policy Database.The dialog box will also display the name of the device.
If you do not get a screen similar to this, you are not on the correct
network.
3. Click the Ye s button to install the CSPM host into the topology map.
4. To verify that the information for the CSPM host is correct, use the
General screen, as shown in Figure 4.13.The SMTP Server will usually
be your e-mail server in most cases.This should be defined as an object
in your topology map also. If there is more than one IP address for your
CSPM host, add them here.
www.syngress.com
Figure 4.12 Network Object Detection
267_cssp_IDS_04.qxd 9/25/03 4:43 PM Page 133
134 Chapter 4 • Cisco IDS Management
5. To configure the postoffice settings on the CSPM host, click the Policy
Distribution tab shown in Figure 4.14. Each of the settings in the right
pane have to be filled in correctly for CSPM to distribute policy
changes.The Network Service field should be set to the PostOffice
Protocol.
6. Once you have entered and verified the settings, click OK.The CSPM
host icon will show up in the topology map under the network defined
earlier.
www.syngress.com
Figure 4.13 The Host General Information Tab
Figure 4.14 Host Policy Distribution Tab
267_cssp_IDS_04.qxd 9/25/03 4:43 PM Page 134