Beginning XML with DOM and Ajax From Novice to Professional phần 8 potx
Bạn đang xem bản rút gọn của tài liệu. Xem và tải ngay bản đầy đủ của tài liệu tại đây (770.53 KB, 45 trang )
Table 10-1 shows the possible values for the status property.
Table 10-1. Values for the status Property of the XML Object
Value Meaning
0 No error; the document parsed successfully.
–2 A CDATA section is not terminated properly.
–3 The XML declaration is not terminated properly.
–4 The DOCTYPE declaration is not terminated properly.
–5 A comment is not terminated properly.
–6 An XML element is malformed.
–7 The application is out of memory.
–8 An attribute value is not terminated properly.
–9 A start tag is not matched with an end tag.
–10 An end tag exists without a matching start tag.
Note that where a document contains more than one error, the status property returns
the value for the first error. Even when Flash detects an error, an application may still be able
to traverse all or part of the document tree.
You can see an example that loads the dvd.xml document into the Flash 8 file dvd.fla.
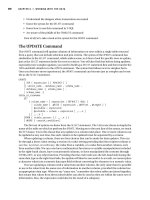
Open dvd.fla in Flash 8, and compile a SWF file by using the Ctrl+Enter shortcut. Figure 10-1
shows an Output window containing the XML content from the external document.
Figure 10-1. Displaying XML content in Flash
The complete ActionScript code contained within this Flash file follows:
var oXML:XML = new XML();
oXML.ignoreWhite = true;
oXML.onLoad = processXML;
oXML.load("dvd.xml");
CHAPTER 10 ■ USING FLASH TO DISPLAY XML296
6765CH10.qxd 5/19/06 11:43 AM Page 296
function processXML(success:Boolean):Void{
if (success){
if (this.status ==0) {
trace (this);
}
}
}
You can display the contents within Flash using the previous line shown in bold.
■Note The trace() action displays content in the Output window within Flash. You won’t see these
messages if you test the compiled Flash movie in a web browser.
If you open the dvd.xml file, you’ll notice that Flash loads the entire contents of the docu-
ment, including the XML declaration. However, Flash removes all white space because of the
true value assigned to the ignoreWhite property.
You should note the following points about loading content into Flash:
• The loading process is asynchronous, so you need to set an event handler to respond to
the loaded document.
• Flash doesn’t maintain a link back to the external XML document, so you need to reload
it if the content changes.
Once you’ve loaded the document, you’ll need to traverse the document tree so you can
display and manipulate the contents.
Understanding the XML Class
The XML class represents the entire XML document and includes methods similar to the fac-
tory methods within the XML DOM. You’ll remember from Chapter 8 that factory methods
create new objects within the document tree. The XML class includes the following methods:
• createElement()
• createTextNode()
• parseXML()
The XML class includes other methods such as addRequestHeader(), getBytesLoaded(),
getBytesTotal(), send(), and sendAndLoad() that I won’t cover here for the sake of brevity.
createElement(name:String)
The createElement()method returns a new XMLNode object with the specified name:
var oElement:XMLNode = oXML.createElement("eName");
CHAPTER 10 ■ USING FLASH TO DISPLAY XML 297
6765CH10.qxd 5/19/06 11:43 AM Page 297
Like the XML DOM methods, using createElement() in ActionScript generates an element
without a position in the document tree. You then need to position it using either the
appendChild() or insertBefore() methods of the XMLNode class.
createTextNode(value:String)
The createTextNode()method returns a text node from the value argument:
var oTextNode:XMLNode = oXML.createTextNode("Some text");
Again, this node has no position in the document tree and will need to be positioned
using appendChild() or insertBefore().
parseXML(value:String)
The parseXML()method parses text within the value parameter and populates an XML object:
var XMLString:String = "<library><dvd id="4"><title>Splash</title></library>";
var oXML:XML = new XML();
oXML.parseXML(XMLString);
The XML class also inherits methods and properties from the XMLNode class.
Understanding the XMLNode Class
The XMLNode class represents elements within the document tree. An XML object is made up of
XMLNode objects. The XMLNode class includes the following members:
• attributes
• parentNode
• childNodes
• firstChild and lastChild
• previousSibling and nextSibling
• nodeType
• nodeName
• nodeValue
• hasChildNodes()
• appendChild()
• cloneNode()
• insertBefore()
• removeNode()
CHAPTER 10 ■ USING FLASH TO DISPLAY XML298
6765CH10.qxd 5/19/06 11:43 AM Page 298
Unlike the XML DOM, ActionScript doesn’t include the replaceChild() method.
Let’s look at each of these methods and properties so you can understand them in more
detail.
attributes
The attributes property returns an object containing all of the attributes of the specified
XMLNode object:
oXMLNode.attributes
You can loop through all attributes within the XMLNode using this code:
for (var theAtt:String in oXMLNode.attributes) {
//process attributes
}
parentNode
The parentNode property returns the XMLNode that is the parent of the current node:
oXMLNode.parentNode
Remember that attributes don’t have a parent node, as they are not the children of their
containing element. If the node doesn’t have a parent, it returns null.
childNodes
The childNodes property returns an array of child XMLNode objects:
oXMLNode.childNodes
You can refer to a specific child node by using its position within the collection:
oXMLNode.childNodes[0]
The previous line refers to the first child node of the oXMLNode element.
You can find out how many child nodes exist within an element by using the length
property:
oXMLNode.childNodes.length
This allows you to loop through the collection:
for (var i:Number=0; i < oXMLNode.childNodes.length; i++) {
//do something
}
As text nodes don’t have child nodes, this property will return undefined.
CHAPTER 10 ■ USING FLASH TO DISPLAY XML 299
6765CH10.qxd 5/19/06 11:43 AM Page 299
firstChild and lastChild
The firstChild and lastChild properties return the first and last XMLNode objects in the
XMLNode’s list of child nodes:
oXMLNode.firstChild
oXMLNode.lastChild
If there are no children, the lastChild property returns null.
Note that text nodes are always the first child of their containing element.
previousSibling and nextSibling
These properties return the previous and next XMLNode objects that share the same parent as
the current XMLNode object:
oXMLNode.previousSibling
oXMLNode.nextSibling
nodeType
Unlike the XML DOM property of the same name, this property returns a value of either 1
(element node) or 3 (text node) for the specified XMLNode:
oXMLNode.nodeType
Flash doesn’t support the other numeric node type indicators from the recommendation.
nodeName
The nodeName property returns the name of the current XMLNode object:
oXMLNode.nodeName
Text nodes don’t have a nodeName property. XMLNodes with a nodeType of 3—i.e., text
nodes—will return null.
nodeValue
The nodeValue property returns the content of the specified text node:
oXMLNode.firstChild.nodeValue
The preceding line finds the text within the oXMLNode element. Note that the text node is
the firstChild of the XMLNode object.
The property returns null for an element node (nodeType = 1).
hasChildNodes()
The hasChildNodes()method returns a Boolean value that indicates whether an XMLNode object
has child elements:
oXMLNode.hasChildNodes()
CHAPTER 10 ■ USING FLASH TO DISPLAY XML300
6765CH10.qxd 5/19/06 11:43 AM Page 300
appendChild(newChild:XMLNode)
The appendChild()method adds a new child after the last child node of the current XMLNode
object. You can use this method to append a node that you’ve just created:
oNewNode = oXML.createElement("dvd");
oXML.childNodes[0].appendChild(oNewNode);
You can also use the method to move an existing node to a new location.
cloneNode(deep:Boolean)
The cloneNode()method clones an existing XMLNode object. It copies all attributes within the
node. Set the deep parameter to true to clone all child nodes recursively:
oXML.oXMLNode.cloneNode(true)
The method returns the cloned node without a parent. You’ll need to use appendChild()
or insertBefore() to locate it within the document tree.
insertBefore(newChild:XMLNode, insertPoint:XMLNode)
This method inserts a new XMLNode object before an existing XMLNode object:
var oOldNode:XMLNode = oXML.firstChild.childNode[1];
var oNewNode:XMLNode = oXML.createElement("dvd");
oXML.insertBefore(oNewNode, oOldNode);
If insertPoint is not a child of the XMLNode object, the insert will fail.
removeNode()
The removeChild()method removes the specified XMLNode. It returns nothing:
var nodeToRemove:XMLNode = oXML.firstChild.childNodes[2];
nodeToRemove.removeNode();
Loading and Displaying XML Content in Flash
In the previous section, I covered the methods and properties that are available to you when
working with XML content in Flash. These will make much more sense if I work through an
example.
The example file dvd2.fla shows how to load the dvd.xml file into Flash and display the
details of a selected DVD in UI components. Figure 10-2 shows this movie with a selected DVD.
CHAPTER 10 ■ USING FLASH TO DISPLAY XML 301
6765CH10.qxd 5/19/06 11:43 AM Page 301
Figure 10-2. Displaying XML content in UI components
I’ll walk through this example so you can see how to traverse the document tree. The
example will also show you how to work with the UI components in Flash.
Open the dvd2.fla file in Flash 8, and you’ll see a number of UI components on the Stage.
If you’re not familiar with Flash, clicking each component displays its name in the Properties
panel at the bottom of the screen. Figure 10-3 shows the Properties panel with the List com-
ponent selected. I can refer to a component using this name.
Figure 10-3. The Properties panel showing a component instance name
You’ll also see two layers in the timeline in the top left-hand corner of the screen. Select
Frame 1 of the actions layer, as shown in Figure 10-4.
Figure 10-4. Selecting Frame 1 of the actions layer
CHAPTER 10 ■ USING FLASH TO DISPLAY XML302
6765CH10.qxd 5/19/06 11:43 AM Page 302
You can press the F9 shortcut key to see the actions added to this frame in the Actions
panel. All of the ActionScript required to run this simple application appears on Frame 1 of
this layer. I’ll work through the code.
The code starts by declaring timeline variables. These are similar to variables with global
scope in a JavaScript code block:
var rootNode:XMLNode;
var selectedDVDNode:XMLNode;
The rootNode variable stores a reference to the document element. In the dvd.xml file,
that’s the <library> element. The selectedDVDNode variable stores a reference to the DVD
chosen by the user.
The next code block loads the XML document and sets the onLoad event handler:
var oXML:XML = new XML();
oXML.ignoreWhite = true;
oXML.onLoad = processXML;
oXML.load("dvd.xml");
When the dvd.xml document loads into Flash, it calls the processXML function. The func-
tion appears at the bottom of the Actions panel:
function processXML(success:Boolean):Void{
if (success){
if (this.status == 0) {
rootNode = this.firstChild;
loadList();
}
}
}
This function starts by testing that the XML document loaded successfully. It then checks
the value of the status property to make sure that there are no errors. The remaining lines
set the value of the rootNode variable to the first child of the loaded XML object, and call the
loadList function:
rootNode = this.firstChild;
loadList();
Setting the rootNode variable is useful because it allows an application to access content
from the XML document, without the XML declaration, from anywhere within the Flash movie.
The loadList() function loads the content into the List component:
function loadList():Void {
dvd_list.removeAll();
var dvdID:Number;
for (var i:Number=0; i < rootNode.childNodes.length; i++) {
dvdID = rootNode.childNodes[i].attributes.id;
dvd_list.addItem(dvdID);
}
}
CHAPTER 10 ■ USING FLASH TO DISPLAY XML 303
6765CH10.qxd 5/19/06 11:43 AM Page 303
The code starts by removing any existing items from the list. Then it declares a variable
that will store the DVD id attribute value. The code loops through the childNodes array using
a for loop. You’ll notice that the construction is the same as within JavaScript:
for (var i:Number=0; i < rootNode.childNodes.length; i++) {
As in the previous chapters, the code uses the length property of the childNodes array to
determine the end point for the loop.
Within the loop, the code determines the id attribute value using this code:
dvdID = rootNode.childNodes[i].attributes.id;
This code finds the relevant childNode array element and finds the id property within the
attributes collection. Finally, the addItem() method adds the id attribute to the dvd_list List
component:
dvd_list.addItem(dvdID);
The other block of code within the Actions panel responds to the user making a selection
from the List component:
var dvdListener:Object = new Object();
dvdListener.change = function(evtObj:Object):Void {
var nodeIndex:Number = evtObj.target.selectedIndex;
selectedDVDNode = rootNode.childNodes[nodeIndex];
title_txt.text = selectedDVDNode.childNodes[0].firstChild.nodeValue;
format_txt.text = selectedDVDNode.childNodes[1].firstChild.nodeValue;
genre_txt.text = selectedDVDNode.childNodes[2].firstChild.nodeValue;
}
dvd_list.addEventListener("change", dvdListener);
The code defines an event listener object called dvdListener and adds it to the dvd_list
component, listening for the change event.
When the object detects the event, it determines which item the user selected and stores
it within the nodeIndex variable:
var nodeIndex:Number = evtObj.target.selectedIndex;
It then uses that value to set an XMLNode object to reference the appropriate element in the
XML object:
selectedDVDNode = rootNode.childNodes[nodeIndex];
Finally, the function sets the text property of each TextInput component to the value
from the appropriate element in the XML object. For example, the title comes from the first
child node (childNodes[0]) of the <dvd> element. You can find the text by using the firstChild
property of this element and determining the nodeValue:
title_txt.text = selectedDVDNode.childNodes[0].firstChild.nodeValue;
Testing the Flash document shows something similar to Figure 10-2. You should be able to
select each DVD from the List component and see the title, format, and genre of each.
CHAPTER 10 ■ USING FLASH TO DISPLAY XML304
6765CH10.qxd 5/19/06 11:43 AM Page 304
■Tip If you’re not familiar with Flash, you can generate a web page that displays the SWF file by choosing
File ➤ Publish. Flash will create the web page in the same folder as the SWF file.
In this example, you saw how to load an XML document into Flash and display it in UI
components. You can also use Flash to update content and send it to a server-side file for
processing.
Updating XML Content in Flash
As you saw earlier in this chapter, Flash can use methods such as createNode(), appendNode(),
insertBefore(), and cloneNode() to manipulate an XML tree. The manipulation takes place
within Flash, but if you need to update an external data source, you’ll have to send the content
to a server-side file for processing.
I’ll work through an example where I take user input and use it to update the dvd.xml
document tree within Flash. You can find this example saved in the file dvd3.fla. Figure 10-5
shows the interface populated with the dvd.xml file.
Figure 10-5. The interface of the dvd3.fla movie
This interface allows you to view the details of a DVD, add a new DVD to the XML tree,
and edit or remove an existing DVD.
If you open Frame 1 of the actions layer with the F9 shortcut key, you’ll see that it’s a little
more complicated than the previous example. To start with, there are now three timeline
variables:
var rootNode:XMLNode;
var selectedDVDNode:XMLNode;
var booNew:Boolean = true;
The added third line creates a Boolean variable that determines whether to add a new
node or to edit an existing node.
CHAPTER 10 ■ USING FLASH TO DISPLAY XML 305
6765CH10.qxd 5/19/06 11:43 AM Page 305
The processXML()function is almost identical to the previous example. When it calls the
loadList() function, it passes null, signifying that a DVD has not yet been selected. The
loadList() function works a little differently from the previous example. This time it displays
a string representation of the complete XMLNode object in the List component. The new and
changed lines appear in bold in the following code block:
function loadList(theNodeIndex:Number):Void {
dvd_list.removeAll();
var dvdNode:XMLNode;
for (var i:Number=0; i < rootNode.childNodes.length; i++) {
dvdNode = rootNode.childNodes[i];
dvd_list.addItem(dvdNode.toString());
}
if (theNodeIndex != null) {
dvd_list.selectedIndex = theNodeIndex;
}
}
The toString() method displays the content of each element within the List component.
The new example includes onRelease handlers for each of the three buttons: Clear,
Update, and Delete. The Clear button clears the selection:
clear_btn.onRelease = function():Void {
dvd_list.selectedIndex = undefined;
selectedDVDNode = null;
booNew = true;
clearTextInputs();
}
The function starts by removing the selection from the dvd_list component:
dvd_list.selectedIndex = undefined;
It then clears the selectedDVDNode variable by setting the value to null. The function sets
the booNew variable to true and then calls the clearTextInputs() function to remove the text
from the interface. The clearTextInputs() function follows:
function clearTextInputs():Void {
title_txt.text = "";
format_txt.text = "";
genre_txt.text = "";
}
Clicking the Update button calls the doUpdate() function. This function either adds a new
record to the XML tree or updates the currently selected element, depending on the value of
the booNew variable.
CHAPTER 10 ■ USING FLASH TO DISPLAY XML306
6765CH10.qxd 5/19/06 11:43 AM Page 306
The doUpdate()function follows:
function doUpdate():Void {
if (booNew) {
if (title_txt.text.length > 0) {
var newDVD:XMLNode = oXML.createElement("DVD");
newDVD.attributes.id = rootNode.childNodes.length + 1;
var newDVDTitle:XMLNode = oXML.createElement("title");
newDVDTitle.appendChild(oXML.createTextNode(title_txt.text));
newDVD.appendChild(newDVDTitle);
if (format_txt.text.length > 0) {
var newDVDFormat:XMLNode = oXML.createElement("format");
newDVDFormat.appendChild(oXML.createTextNode(format_txt.text));
newDVD.appendChild(newDVDFormat);
}
if (genre_txt.text.length > 0) {
var newDVDGenre:XMLNode = oXML.createElement("genre");
newDVDGenre.appendChild(oXML.createTextNode(genre_txt.text));
newDVD.appendChild(newDVDGenre);
}
rootNode.appendChild(newDVD);
loadList(null);
clearTextInputs();
}
}
else {
var selectedNodeIndex:Number = Number(selectedDVDNode.attributes.id)-1;
if (title_txt.text.length > 0) {
selectedDVDNode.childNodes[0].firstChild.nodeValue = title_txt.text;
}
if (format_txt.text.length > 0) {
selectedDVDNode.childNodes[1].firstChild.nodeValue = format_txt.text;
}
if (genre_txt.text.length > 0) {
selectedDVDNode.childNodes[2].firstChild.nodeValue = genre_txt.text;
}
loadList(selectedNodeIndex);
}
}
You can divide the function into two areas—the first section adds a new record, and the
second edits an existing record. If you’re adding a new record (booNew is true), the code tests
whether the record has a title. The function won’t proceed unless a title exists:
if (title_txt.text.length > 0) {
CHAPTER 10 ■ USING FLASH TO DISPLAY XML 307
6765CH10.qxd 5/19/06 11:43 AM Page 307
If a title exists, the code creates a new <DVD> element and adds an id attribute:
var newDVD:XMLNode = oXML.createElement("DVD");
newDVD.attributes.id = rootNode.childNodes.length + 1;
It sets the value of the attribute to one more than the number of <DVD> elements in the
XML tree.
The next code block creates a new <title> element and uses appendChild() to add the
text from the title_txt component:
var newDVDTitle:XMLNode = oXML.createElement("title");
newDVDTitle.appendChild(oXML.createTextNode(title_txt.text));
newDVD.appendChild(newDVDTitle);
The code repeats this process for the <format> and <genre> nodes:
if (format_txt.text.length > 0) {
var newDVDFormat:XMLNode = oXML.createElement("format");
newDVDFormat.appendChild(oXML.createTextNode(format_txt.text));
newDVD.appendChild(newDVDFormat);
}
if (genre_txt.text.length > 0) {
var newDVDGenre:XMLNode = oXML.createElement("genre");
newDVDGenre.appendChild(oXML.createTextNode(genre_txt.text));
newDVD.appendChild(newDVDGenre);
}
Finally, the code appends the <DVD> element to the root node, reloads the List compo-
nent, and clears the values in the text field:
rootNode.appendChild(newDVD);
loadList(null);
clearTextInputs();
Editing an existing node uses a different block of code that’s easier to interpret. First, the
code finds the child node index for the selected node so it can select the node again after the
update:
var selectedNodeIndex:Number = Number(selectedDVDNode.attributes.id)-1;
Then it checks whether appropriate text has been entered into the TextField component
and changes the nodeValue accordingly:
if (title_txt.text.length > 0) {
selectedDVDNode.childNodes[0].firstChild.nodeValue = title_txt.text;
}
if (format_txt.text.length > 0) {
selectedDVDNode.childNodes[1].firstChild.nodeValue = format_txt.text;
}
if (genre_txt.text.length > 0) {
selectedDVDNode.childNodes[2].firstChild.nodeValue = genre_txt.text;
}
CHAPTER 10 ■ USING FLASH TO DISPLAY XML308
6765CH10.qxd 5/19/06 11:43 AM Page 308
Finally, the code calls the loadList() function, passing the index of the selected node:
loadList(selectedNodeIndex);
The remaining button deletes the selected <DVD> element from the List component:
delete_btn.onRelease = function():Void {
selectedDVDNode.removeNode();
clearTextInputs();
loadList(null);
}
It starts by using the removeNode() method to remove the selected <DVD> element from the
XML tree. Then it clears the interface and reloads the list.
As I mentioned earlier, modifying the content within Flash won’t change the external
data. You can only update the external data by sending the content to a server-side document
for processing.
Sending XML Content from Flash
You can use either the send() or sendAndLoad() method to send content from Flash to an
external file for processing. The difference between the two is that the latter method receives
a response from the external file. This makes it a more robust approach.
Because this method allows you to check that the processing has completed successfully,
you can use it to display an appropriate message in the Flash movie. In this section, I’ll look at
the second of these two methods—sendAndLoad().
The sendAndLoad() method requires two XML objects: one to store the content to send to
the server for processing, and one to receive the response after the processing completes. The
first XML object calls the sendAndLoad() method, while the second uses an onLoad handler to
process the server reply.
The sendAndLoad() method uses POST to send its XML content. It takes two parameters:
the path to the processing page and the XML object for the response:
oSendXML.sendAndLoad("processingPage.php", oReceiveXML);
You need to make sure that you set the content type appropriately using the contentType
property:
oSendXML.contentType = "text/xml";
You can use code similar to the following to update external XML content:
var oSendXML:XML = new XML("<DVD>Splash</DVD>");
var oReceiveXML:XML = new XML();
oReceiveXML.onLoad = showResponse;
oSendXML.contentType = "text/xml";
oSendXML.sendAndLoad("http://localhost/apress/updateXML.php", oReceiveXML);
You also need to create the showResponse() function.
CHAPTER 10 ■ USING FLASH TO DISPLAY XML 309
6765CH10.qxd 5/19/06 11:43 AM Page 309
I won’t work through an example because it requires server-side interaction. However,
you should note a couple of points:
• You need to use the full server path to the processing page in the first parameter (e.g.,
http://localhost/apress/updateXML.php).
• You must remember to set the content type appropriately for the processing page using
the contentType property.
In addition to the XML class, Flash Professional provides an alternative way to load and dis-
play XML content using the XMLConnector data component.
Using the XMLConnector Component
If you own Flash Professional and prefer to work visually, you can use the XMLConnector data
component to load XML content from an external source. The advantage is that you can con-
figure the component using the Component Inspector panel. In the previous example, I had to
write for loops to iterate through the XML document tree. Instead, data components support
data binding so that you don’t need to write code.
The XMLConnector component is one of a family of data components that are available
with Flash Professional. The other components allow you to load content from web services or
a database, store external content in a DataSet component, and track changes so that you can
send changed content from Flash. I’ll restrict myself to working with the XMLConnector compo-
nent in this section. Figure 10-6 shows how this component works.
Figure 10-6. Using the XMLConnector
The XMLConnector component loads the XML document. You can bind the results
property from the XMLConnector component directly to UI components. You can also bind
the results to a DataSet or DataHolder component first. In that case, either the DataSet or
DataHolder component is bound to the UI components. You bind to a DataSet if Flash needs
to update an external XML document using an XUpdateResolver component.
You’ll be able to see the process by working through an example. I’ll load the dvd.xml
document into the Flash document dvd4.fla. I’ll then bind the data directly to several UI
components to display the content in Flash. Start by opening the resource file dvd4.fla.
CHAPTER 10 ■ USING FLASH TO DISPLAY XML310
6765CH10.qxd 5/19/06 11:43 AM Page 310
Loading an XML Document
You need to add the XMLConnector component to the Flash document. You can find the data
components in the Components panel. If you can’t see it at the right of the screen, choose
Window
➤ Components.
Drag the XMLConnector to the left of the Stage, as shown in Figure 10-7. Data components
have no visual appearance, so it doesn’t matter where you place them.
Figure 10-7. Dragging the XMLConnector component into the Flash movie
In the Properties panel, give the XMLConnector the name dvd_xc. In the Parameters tab, set
the URL to dvd.xml and the direction to receive, as shown in Figure 10-8.
Figure 10-8. Configuring the component
CHAPTER 10 ■ USING FLASH TO DISPLAY XML 311
6765CH10.qxd 5/19/06 11:43 AM Page 311
The Component Inspector panel allows you to work with the XMLConnector in more detail.
If you can’t see the panel on the right, choose Window
➤ Component Inspector. This panel
contains three tabs: Parameters, Bindings, and Schema. You’ve already configured the parame-
ters for the component. Click the Schema tab.
The Schema tab allows you to build a schema describing the structure of your XML docu-
ment. You can also infer a schema from an external XML document. You can do this for the
params property (data sent out of Flash) or for the results property (data received from exter-
nal sources).
I’ll infer a schema from the dvd.xml file. Select the results property in the Schema tab and
click the Import a schema button, as shown in Figure 10-9.
Figure 10-9. Inferring a schema
Navigate to the dvd.xml document and click Open. The Schema tab populates with a struc-
ture inferred from the document. Figure 10-10 shows the appearance at this point.
Figure 10-10. The inferred schema
■Note Although Flash uses the word schema, this process doesn’t create an XML schema.
CHAPTER 10 ■ USING FLASH TO DISPLAY XML312
6765CH10.qxd 5/19/06 11:43 AM Page 312
You need to trigger the data component before it loads the XML document. You can do
this by adding the following line to Frame 1 of the actions layer:
dvd_xc.trigger();
If you test the Flash movie at this point, nothing will happen because the data has not yet
been bound to the UI components.
Data Binding
You can configure the data bindings for the XMLConnector component within the Bindings tab
of the Component Inspector panel. Select the XMLConnector component on the Stage, and click
the Bindings tab. It will initially appear empty.
You can add a binding by clicking the Add Binding button. It looks like a blue plus sign.
When you click this button, you’ll be prompted for the source of the binding. Because I want
to display details of each DVD in the list, I need to select the DVD : Array option, as shown in
Figure 10-11. When you’ve done this, click OK.
Figure 10-11. Selecting the source for the binding
You then need to select a direction and destination for the binding. The binding will oper-
ate in one way: out from the XMLConnector and in to the List component. Select out for the
direction, and click in the bound to field. This brings up a magnifying glass that you can click to
select the List component. You’ll bind to the dataProvider property of the List component,
as shown in Figure 10-12.
CHAPTER 10 ■ USING FLASH TO DISPLAY XML 313
6765CH10.qxd 5/19/06 11:43 AM Page 313
Figure 10-12. Selecting the destination for the binding
If you use the Ctrl+Enter shortcut to test the movie now, you’ll see the List component
populates with all content from each <DVD> element. You need to format the data to display
only the <title> element.
Click in the formatter field and choose a Rearrange Fields formatter. Click within the
formatter options field and use the magnifying-glass icon to enter the following setting:
label=title
If you test the movie again, you’ll see only the titles in the List component.
You can now bind the selected title so that you can see the details of each DVD within the
TextInput components. You can do this with the selectedIndex property of the List compo-
nent. In other words, show the details of whichever item is selected from the list.
Click the XMLConnector component and add another binding—this time, from the format
item in the schema. You’ll notice that Flash adds a new field, Index for 'DVD', to the Bindings
panel. Set the direction of the binding to out and bind to the TextInput component called
format_txt.
You can display the correct format by changing the Index for 'DVD' field. Click in the
field to bring up the Bound Index dialog box. Uncheck Use constant value and choose the
selectedIndex property of the List component, as shown in Figure 10-13.
If you test the Flash movie now, you’ll be able to populate the format_txt component
by selecting from the list of titles. You’ll need to repeat the process for the genre_txt
component to complete the application. You can find the completed Flash file saved as
dvd4_completed.fla if you run into any difficulties.
It’s worthwhile noting that you can create the XMLConnector component and bindings
using only ActionScript. I’m not going to cover that in this book.
CHAPTER 10 ■ USING FLASH TO DISPLAY XML314
6765CH10.qxd 5/19/06 11:43 AM Page 314
Figure 10-13. Binding the index to the List component
Updating XML Content with Data Components
It’s beyond the scope of this chapter to show you how to send content from Flash using data
components, but you need to know that it’s possible. Sending content from Flash requires
server-side interaction and is quite a complicated process. Figure 10-14 shows the process
for using data components to update external content.
Figure 10-14. Using data components to update XML content
The process starts using an XMLConnector component to load content from an external
source. The component binds the results property to a DataSet component. The DataSet
provides content to UI components in a two-way binding. This means that it remains syn-
chronized as UI components update the XML tree.
When requested, the XMLConnector generates a deltaPacket that contains a list of all
changes to the XML tree. It sends the deltaPacket to an XUpdateResolver component, where
the changes are converted into XUpdate statements. The resolver sends these statements to a
CHAPTER 10 ■ USING FLASH TO DISPLAY XML 315
6765CH10.qxd 5/19/06 11:43 AM Page 315
second XMLConnector, which in turn sends the content externally for server-side processing. As
I mentioned earlier, this is a complicated process, so I won’t go into more detail here.
In this chapter’s examples, I’ve loaded content from an external XML document into
Flash. It’s important to understand the security model for working with external data. This
model applies to any external data accessed by Flash, including XML.
Understanding Flash Security
From Flash Player 6 and above, restrictions apply to the loading of external data, including
XML documents. You can only load content that comes from the same domain as the Flash
movie. In Flash Player 7 and above, you can’t load data from subdomains.
This means that if the SWF file resides at , you can only load
content that is also from . Users with Flash Player 7 and above won’t
be able to load data from subdomains such as or https://
www.apress.com.
The restriction doesn’t apply when you’re working in the Flash Integrated Development
Environment (IDE). However, it comes into effect when the SWF file is located on a web
server. You can get around the restriction by including a cross-domain policy file in the root
of the web server hosting the data. That topic is a little beyond the scope of this book, but
you can find out more in the Flash help files.
Summary
In this chapter, you learned how to use Flash as an alternative mechanism for displaying and
manipulating XML content on the client side. One advantage of using Flash is that you don’t
need to consider cross-browser issues in your application. Flash Lite 2.0 can also display XML
content in devices such as phone handsets, making it easy to deploy your application for a
range of purposes.
You saw two methods of working with XML documents: using the XML and XMLNode classes,
and using the XMLConnector data component. You worked through the properties and methods
available through the XML and XMLNode classes. Many of them were similar to the XML DOM
methods that you worked with in Chapter 8.
You worked through several examples that allowed you to load and manipulate XML con-
tent using a Flash interface. The chapter briefly covered the sendAndLoad() method, which
sends content to a server-side file for external updating.
You used the XMLConnector component to work with an XML document visually. You
were able to load the document and a schema representation by configuring the Component
Inspector panel. You were also able to use data binding to display the content in UI compo-
nents. I worked through an example that used these concepts, and I only needed to write a
single line of ActionScript to include the XML content in a Flash movie. I finished the chapter
by looking at the security restrictions that apply to external data.
This chapter concludes the section on working with XML content on the client. In the
remaining chapters of this book, I’ll look at server-side XML interaction. I’ll introduce the con-
cepts in Chapter 11 and compare the .NET 2.0 and PHP 5 code within an application. You’ll
see two complete server-side case studies: one using .NET 2.0 in Chapter 12, and one using
PHP 5 in Chapter 13.
CHAPTER 10 ■ USING FLASH TO DISPLAY XML316
6765CH10.qxd 5/19/06 11:43 AM Page 316
Introduction to
Server-Side XML
For the remainder of this book, I’ll show you how to work with XML on the server. I’ll focus on
two of the most popular server-side languages—.NET 2.0 and PHP 5.
In this chapter, I’ll present the reasons for using server-side XML, and I’ll work through
some simple server-side code samples. The chapter presents the code samples side-by-side,
so you can see how to access XML documents in each language. In the next two chapters, I’ll
work through two case studies that provide more details about how to use .NET and PHP to
build XML applications. Chapter 12 will focus on a .NET 2.0 application, while Chapter 13 will
provide a PHP case study.
Server-Side vs. Client-Side XML Processing
So far, you’ve learned how to work with XML documents using client-side XML processing.
The client-side examples showed you how to load XML content and display it within the web
browser. You used JavaScript to work with the Document Object Model (DOM), and you trans-
formed XML documents into XHTML using Extensible Stylesheet Language Transformations
(XSLT) stylesheets.
In the examples, you may have noticed that I didn’t update the XML documents—that’s
not possible with client-side XML. You also noticed that when you worked with JavaScript, you
had to consider the target web browsers and write code appropriate to each. You weren’t able
to work with client-side XSLT in Opera.
317
CHAPTER 11
6765CH11.qxd 5/19/06 11:44 AM Page 317
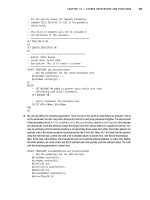
You can overcome some of the limitations of client-side XML by working with XML on the
server. Server-side XML processing provides the following advantages:
• Applications don’t need to be concerned with target web browser versions: Server-side
pages deliver XHTML to the client, so you don’t need to worry about creating code that
works across different browsers. You also don’t need to rewrite applications to cope with
new browsers or browser versions.
• Applying transformations server-side can reduce the amount of content downloaded
from the server: Server-side pages only need to provide XHTML to the browser. In the
case of XSLT transformations, you don’t need to provide both the source XML docu-
ment and XSLT stylesheet.
• Server-side processing allows for increased security of data: Server-side pages can filter
potentially sensitive XML data before providing content to a web page.
The downside of server-side processing is an increase in server load. It’s possible to over-
come this limitation and improve application performance by caching frequently accessed
pages.
This chapter contains sample .NET 2.0 and PHP 5 code. I’ve written the .NET samples in
Visual Basic .NET (VB .NET). If you want to work through the code provided in the chapter,
make sure you have a web server installed that is capable of running the appropriate language.
For the .NET 2.0 samples, you need to install Internet Information Services (IIS) and the
.NET Framework 2.0. You can download the .NET Framework 2.0 from the Microsoft web site;
you can search for it at />the actual URL is too long to print!
If you’re working with PHP 5, you’ll need a web server capable of running PHP, such as
Apache. You can download PHP from You can also run
PHP through IIS, providing you download the relevant installation files from http://
au3.php.net/install.windows.
■Tip As an alternative, you can download XAMPP from />xampp.html
. This download includes PHP, MySQL, and Perl together in a single, preconfigured file.
Simply install the package, and you’ll be ready to start working immediately.
Server-Side Languages
Many different server-side languages are capable of working with XML applications. Common
languages include VB .NET, Visual C# .NET (C#), PHP, ColdFusion, JavaServer Pages (JSP), and
Perl. It can be difficult to choose which language is appropriate for your needs. In this section,
I’ll cover two of the most popular server-side approaches—the .NET Framework and PHP.
CHAPTER 11 ■ INTRODUCTION TO SERVER-SIDE XML318
6765CH11.qxd 5/19/06 11:44 AM Page 318
.NET
The .NET Framework is a set of web development technologies from Microsoft. It is the suc-
cessor to Active Server Pages (ASP) and is part of the .NET platform. It features a common
language runtime (CLR) that all Microsoft applications share. This means that developers can
write .NET web applications in any language supported by the CLR, including C#, VB .NET,
JScript .NET, Perl, and Python. I’ve written the samples in this chapter in VB .NET.
The .NET Framework offers a managed run-time environment. It includes a range of con-
trols and supports data binding. Tools such as Visual Studio allow developers to work visually.
Microsoft released .NET 2.0 in November 2005. It also released Visual Studio 2005 and
SQL Server 2005 at the same time.
Advantages
There are many reasons for working with the .NET Framework, including the following:
• The .NET Framework is free, and you can download it from the Microsoft web site.
• The .NET Framework runs on the Microsoft IIS web server, which is provided with
many recent Windows operating systems.
• .NET is documented extensively on the Microsoft Developer Network (MSDN) at
.
• .NET developers can work in a range of languages.
Drawbacks
Developers working with the .NET Framework need to consider the following:
• .NET requires the Windows operating system and Microsoft IIS web server. It can
run on Linux using Mono ( or DotGNU (http://
www.dotgnu.org/), but this isn’t native.
• .NET 1.0 and 1.1 did not always generate compliant XHTML code. However, .NET 2.0
addresses this problem.
XML Support
The .NET Framework integrates tightly with XML, providing many namespaces, classes, and
controls for working with XML. Namespaces in .NET represent a group of related classes.
They provide a hierarchical system for organizing code and allow developers to interact with
external code libraries. Five namespaces implement the XML core standards. Table 11-1 sum-
marizes these namespaces and their purpose.
CHAPTER 11 ■ INTRODUCTION TO SERVER-SIDE XML 319
6765CH11.qxd 5/19/06 11:44 AM Page 319
Table 11-1. XML Namespaces in .NET
Namespace Purpose
System.Xml Provides the ability to read and write XML content and work with
the DOM. Implements DOM Level 1 Core and DOM Level 2 Core.
System.Xml.Schema Applies XML schema constraints. Implements the XML schema 1
(XML Schema Part 1: Structures) recommendation and supports
XML schema 2 (XML Schema Part 2: Datatypes) for data types.
System.Xml.Serialization Serializes to plain XML and Simple Object Access Protocol (SOAP).
System.Xml.XPath Allows for navigation of XML documents using XPath. Implements
DOM XPath.
System.Xml.Xsl Allows for transformation of XML documents using XSLT
stylesheets.
Other namespaces also work with XML, including System.Web.Services and System.Data.
As you saw in Table 11-1, the .NET Framework supports DOM Level 1 and some of DOM
Level 2. The Framework also includes Microsoft additions to the DOM to make working with
XML documents easier.
Table 11-2 provides information about some of the most useful classes within the
System.Xml namespace. You’ll notice that some of them are named in a similar way to the
DOM interfaces you saw earlier in the book.
Table 11-2. Useful Classes Within the System.Xml Namespace in .NET
Class DOM Interface Equivalent Purpose
XmlAttribute Attribute Represents an attribute.
XmlCDataSection CDATASection Represents a CDATA section.
XmlComment Comment Represents the contents of an XML
comment.
XmlDataDocument Allows structured data to be stored,
retrieved, and manipulated through a
relational DataSet. Appropriate for use
with XML database content.
XmlDocument Document Represents an XML document.
Appropriate for use with a physical
XML document.
XmlDocumentFragment DocumentFragment Represents a lightweight object that is
useful for tree insert operations.
XmlElement Element Represents an element.
XmlEntity Entity Represents an entity declaration.
XmlEntityReference EntityReference Represents an entity reference node.
XmlNamedNodeMap NamedNodeMap Represents a collection of nodes that
you can access by name or index.
XmlNodeList NodeList Represents an ordered collection of
nodes.
XmlNode Node Represents a single node in an XML
document.
CHAPTER 11 ■ INTRODUCTION TO SERVER-SIDE XML320
6765CH11.qxd 5/19/06 11:44 AM Page 320