advanced Flex Application Development Building Rich Media X phần 10 pdf
Bạn đang xem bản rút gọn của tài liệu. Xem và tải ngay bản đầy đủ của tài liệu tại đây (12.48 MB, 54 trang )
8962CH17.qxd
11/7/07
10:55 AM
Page 439
SEARCH ENGINE OPTIMIZATION FOR FLEX
The preceding code is a pure XML representation of the example HTML content. First, I have my XML
declaration specifying my version and encoding choices. Next, I load or attach an XSL style sheet to my
content (more on that in a minute). After the style sheet is the root node, <html>, which is where I
start defining the content. To keep it simple and relative, I’m using the same tags that I would if coding HTML. The <head> tag contains all the data that I want to appear in the <head> of the HTML page:
title plus description and keywords <meta> tags. Following that is a series of <company> tags. Think of
these as the HTML body. This is the data that will be rendered inside the Flex application. Now, back
to the style sheet. Here’s the code for that:
<?xml version="1.0" encoding="ISO-8859-1"?>
<xsl:template match="/">
<html>
<head>
<title>Flex Directory</title>
src=" /><script type="text/javascript">
// function writeView(){
var so = new¯
SWFObject(" ¯
"fxtxsl" , "100%" , "100%" , "9" , "#191919");
so.addParam("scale" , "noscale");
so.addVariable("xmlurl", document.location);
so.useExpressInstall(" />expressinstall.swf");
so.write( 'flexcontent' );
document.getElementById('logger').src= "/log.html"
}
// ]]>
</script>
<style type="text/css">
/* hide from ie on mac \*/
html {
height: 100%;
overflow: hidden;
}
#flexcontent {
height: 100%;
}
/* end hide */
body {
height: 100%;
439
8962CH17.qxd
11/7/07
10:55 AM
Page 440
CHAPTER 17
margin: 0;
padding: 0;
background-color: #191919;
}
</style>
</head>
<body scroll="no" onload="writeView()">
<div id="flexcontent"></div>
<iframe id="logger" style="visibility:hidden"/>
</body>
</html>
</xsl:template>
</xsl:stylesheet>
This style sheet instructs browsers on how to render the XML data model. Notice the JavaScript in this
XSL because that is what takes care of outputting the Flex application, as well as passing in a FlashVar
path to the data model of the application. I activate the writeView() method following the onLoad()
event of the <body> element. Inside that method I use SWFObject to render the application.
SWFObject’s addVariable() method passes in the URL of our data model (XML) to Flex for processing. Using this method, the browser will render the Flex, but search engine spiders don’t even know or
care about it. They get what they want, just the content, which should already be cached.
Summary
In this chapter, I talked about SEO: what it is, its importance to Rich Internet Application developers,
and some of the techniques that Flex developers can use to achieve this often-elusive goal. Armed
with these kinds of tools, there’s no reason why the quantity and quality of the search traffic to your
Flex applications wouldn’t improve.
Now that you’ve got more traffic coming in, you’ll see how you can pimp out your front end with an
ActionScript 3 audio visualizer in the next chapter.
440
8962CH17.qxd
11/7/07
10:55 AM
Page 441
8962CH18.qxd
11/7/07
10:59 AM
Page 442
8962CH18.qxd
11/7/07
10:59 AM
Page 443
Chapter 18
BUILDING AN AUDIO VISUALIZER IN FLEX
By Hasan Otuome
Prior to Flash Player 9, Flash developers had to rely on third-party applications to create equalizer-type displays or audio visualizers. Now, thanks to improvements to the
ActionScript language, you can create these experience enhancers natively. Combine
that with the relative ease of use of the Flex framework, and you can come up with
some pretty amazing visualizations with minimal effort. But before getting into
exactly how to create one, I’ll show you how the landscape has changed from
ActionScript 2 to ActionScript 3.
In addition, this chapter introduces you to the SoundMixer class and the new
ByteArray class, and discusses design planning and implementation.
AS2 vs. AS3
Before ActionScript 3, if you wanted or needed to include an audio visualizer in your
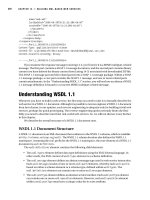
Flash app, you had to use something like FlashAmp Pro, which examined your audio
file and printed an array of amplitude values to a text file that you would then import
into your FLA and use the values to animate your equalizer (EQ) movie clips.
Figure 18-1 shows an example output file.
443
8962CH18.qxd
11/7/07
10:59 AM
Page 444
CHAPTER 18
Figure 18-1. Sample FlashAmp Pro output file
If you wanted a visualizer that actually responded to the audio spectrum of a track, this was the only
way. Although this method works, it is not the most streamlined, as you have to scan and create a peak
file for each MP3, and then do some ActionScript coding to actually read these values on the fly and
animate your clips accordingly. Following is a basic example of the process of creating an audio visualizer in AS2 using Flash 8.
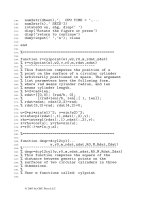
Start off by creating a new Flash document and set the frame rate to 24 frames per second. Next, create a simple EQ band like the one in Figure 18-2.
Figure 18-2. Basic EQ-band graphic
444
8962CH18.qxd
11/7/07
10:59 AM
Page 445
BUILDING AN AUDIO VISUALIZER IN FLEX
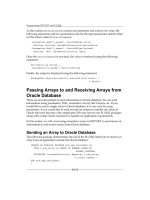
After you’ve created your EQ graphic, convert it to a movie clip and start laying duplicates out on the
stage until you have 16 of them like in Figure 18-3.
Figure 18-3. 16-band EQ
Once you’ve completed the EQ layout, give all instances names like s0, s1, and so on until all clips have
instance names. After the naming phase, you can open your Actions panel by hitting Option+F9 (Mac)
or Alt+F9 (Windows). Here you’ll simply be including a reference to an external ActionScript file that
you’ll create in a minute. So, make sure that Layer 1 is selected, and then insert an include directive
into your Actions panel:
#include flashamp.as
Now, in your favorite text editor, create a new text file and save it as flashamp.as. This is where all the
ActionScript magic will happen. Note that the use of an external ActionScript file is completely
optional. The code you are about to write can just as easily be inserted into your Actions panel inside
of the Flash IDE.
As a matter of habit, I always start off my scripts with a variable declarations section. This serves as my
dictionary that I can quickly reference as the code continually grows. So, the first few lines of our
external script file are dedicated to just that purpose.
var
var
var
var
var
var
var
var
var
var
var
var
var
i:Number;
j:Number;
index:Number;
tl:MovieClip = this;
alb:Number = 7860001;
fps:Number = 24;
numBands:Number = 16;
titles:Array = new Array();
tracks:Array = new Array();
muzak:XML = new XML();
spectrumInt:Number;
spectrumUpdateInt:Number;
spectrumArray:Array = new Array();
445
8962CH18.qxd
11/7/07
10:59 AM
Page 446
CHAPTER 18
Here’s a brief description of what these variables do:
The first two are counter variables to be used later on in some looping construct.
index is a counter variable for stepping through the XML playlist.
tl is a reference to the main timeline.
alb is a placeholder for the currently loaded album’s ID.
fps is the frame rate of the SWF.
numBands is the number of EQ bands you’re dealing with.
titles will hold all the song titles for the playlist.
tracks will hold all the URLs for the playlist.
muzak will be the name for our XML object.
spectrumInt will be used as the interval
spectrumUpdateInt will serve as the ID for.
in
the
setInterval()
function
that
Next, create a new Sound object for the MP3 you’re going to load, and define what you want to happen when the song has loaded.
var snd:Sound = new Sound();
snd.onLoad = function(){
snd.setVolume(50);
snd.start(0, 1);
}
There’s nothing fancy here. You’re loading the song, cutting the volume in half so you don’t blow any
speakers, and starting playback. The next dilemma comes from how you process that spectrum data
that FlashAmp Pro created for you. If you look at Figure 18-1 again, notice the double brackets after
sv=. This means that FlashAmp Pro is outputting those spectrum values as a multidimensional array or
arrays inside of an array. So, each EQ band has an array of values representative of that bandwidth’s
activity at a given point of the song. It’s these values that you’ll use to animate your movie clips, but
first you have to get the values into Flash in a format that Flash can use. Enter the str2array function.
This utility will parse that text file with the spectrum values and return an array formatted for use in
your visualizer.
String.prototype.str2array = function(char){
var spectrumValues:Array = this.split(" ").join("").split(char);
var spectrumIndex:Number = 0;
while(spectrumIndex < spectrumValues.length){
spectrumValues[spectrumIndex] =
spectrumValues[spectrumIndex].split(char.split(",")[0]).join("")
.split(char.split(",")[1]).join("").split(",");
spectrumIndex++;
}
return(spectrumValues);
}
That takes care of one of the hardest parts of the whole process. Now, you need to zero out all the EQ
band clips. This gives your animation that home stereo quality.
446
8962CH18.qxd
11/7/07
10:59 AM
Page 447
BUILDING AN AUDIO VISUALIZER IN FLEX
for(i=0, i < numBands; i++){
setProperty("tl.s"+i, _yscale, 0);
}
Here you use the global function setProperty(target:Object, parameter:Object, expression:Object)
to change the _yscale of all your EQ clips from their defaults to 0. Now they will be hidden until audio
playback begins. Next, you need to put the pieces in place to actually load the spectrum data. For this,
the LoadVars object is perfect. Define a new LoadVars and set up a callback function for the onLoad
event of the LoadVars like the following:
var spectrumLV:LoadVars = new LoadVars();
spectrumLV.onLoad = function(success){
if(success){
sv = this.sv.str2array("],[");
return(sv);
} else {
trace("Error loading/parsing data");
}
}
With your “spectrum reader” set up, you can now focus on loading the XML playlist.
muzak.ignoreWhite = true;
muzak.onLoad = getTrax;
muzak.load("playlist-7860001.xml");
You want to ignore any whitespace in the XML file and execute the getTrax() function once the file
has been loaded. getTrax() is a key function, as it builds the playlist, loads the first track, loads the
spectrum data for that track, and starts the spectrum animation.
function getTrax():Void{
var trax:Array = this.firstChild.childNodes;
for(i=0; i < trax.length; i++){
titles.push(trax[i].attributes.lbl);
tracks.push(trax[i].attributes.src);
}
index=0;
snd.loadSound(tracks[0]);
file = alb+"-"+index+".txt";
spectrumLV.load(file);
setStatus();
}
You see the last line of the getTrax() function makes a call to the setStatus() function. This function will set the initial positions for the EQ clips and set an interval by which to update the EQ display
with new spectrum data.
function setStatus(){
spectrumInt = Math.floor(snd.position/1000*fps);
spectrumUpdateInt = setInterval(updateSV, spectrumInt, snd);
}
447
8962CH18.qxd
11/7/07
10:59 AM
Page 448
CHAPTER 18
So, you use spectrumInt to figure out the frequency or how often you want the animation to be
updated. Next, you tell Flash that you want to call the updateSV() function every spectrumInt and
you’re passing your Sound, snd, as an optional parameter to updateSV(). The updateSV() function will
take care of the actual clip animations by reading the spectrumArray and updating the corresponding
_yscale property of each clip based on the current spectrum value multiplied by the volume to
account for user-initiated volume adjustments.
function updateSV(){
var spectrumPos:Number = Math.floor(snd.position/1000*fps);
vol = snd.getVolume()/100;
for(i=0; i < numBands; i++){
setProperty("tl.s"+i, _yscale, spectrumArray[spectrumPos][i]*vol);
}
}
Now, that wasn’t extremely painful, but it wasn’t exactly painless either. Thanks to the advancements
made to the ActionScript language and the new ActionScript Virtual Machine in Flash Player 9, you
can bypass some of these steps and still produce some really cool user experiences. The first improvement worth exploring is the new SoundMixer class.
Introducing the SoundMixer
The SoundMixer class, found in the flash.media package, contains static properties and methods for
global sound control in a SWF file. The SoundMixer class controls embedded streaming sounds in a
SWF; it does not control dynamically created Sound objects or Sound objects created in ActionScript.
It’s a top-level class inheriting directly from Object, and it has a few properties and methods that
you’ll be tapping into to build your Flex visualizer. The most important method of the SoundMixer
class is computeSpectrum(outputArray:ByteArray, FFTMode:Boolean, stretchFactor:int). What
this method does is it takes a snapshot of the current sound wave and places it into the specified
ByteArray object. This process is very similar to what FlashAmp Pro does when it creates that text file
for you. Here, you’re able to keep it all in-house.
The computed values are formatted as normalized floating-point values that range from –1.0 to 1.0
and are stuffed into the outputArray parameter, a ByteArray object that holds the values associated
with the sound. The size of this ByteArray object is fixed at 512 floating-point values, with the first 256
representing the left channel of audio and the second 256 values representing the right channel.
FFTMode is a Boolean value indicating whether a Fourier transformation is performed on the sound
data first. A Fourier transformation, named after French mathematician and physicist Joseph Fourier,
is a mathematical operation where you break something (technically referred to as the function) down
into a series of related elements (aka the components). A good example is a musical chord (function)
and the individual notes that make up the chord (components).
Setting the FFTMode parameter to true causes the method to return a frequency spectrum instead of
the raw sound wave. In the resulting frequency spectrum, low frequencies are represented on the left,
and high frequencies are on the right. The stretchFactor parameter deals with the resolution of the
sound samples. The default is 0, which equates to data being sampled at 44.1 kHz. A value of 1 cuts
that in half, reducing it to 22.05 kHz and so on.
448
8962CH18.qxd
11/7/07
10:59 AM
Page 449
BUILDING AN AUDIO VISUALIZER IN FLEX
This method is subject to local file security restrictions (aka restrictions on crossdomain loading). If you’re working with sounds loaded from a server in a different
domain than the calling SWF, you might need to utilize a cross-domain policy file.
All of this newly built-in functionality will prove very handy. But before moving any further, you need
to get an understanding of the seemingly mysterious ByteArray.
Understanding the ByteArray
The ByteArray class, found in the flash.utils package, offers methods and properties that optimize
reading, writing, and working with data on a binary level (1s and 0s). To understand how cool this is,
consider how the new ActionScript Virtual Machine in Flash Player 9 deals with things behind the
scenes. The most compact representation of in-memory data is a packed array, or an array of bytes
packed into a specialized format to improve computational performance. That’s why this class is perfect for creating audio visualizers. You can perform a complex computational analysis on an audio file
via SoundMixer.computeSpectrum() and easily gain access to the results through a ByteArray instance
using standard ActionScript array access operators [].
Now, while the ByteArray class has a bevy of properties and methods that enable you to really optimize your data storage, streaming, and performance, you’ll be using just one method for this project,
readFloat(). readFloat() reads an IEEE 754 single-precision floating-point number from the byte
stream and returns that number. Don’t freak out about IEEE 754. It’s just the standard for binary
floating-point arithmetic. It defines the formats for representing floating-point numbers. “Singleprecision” just means the number occupies 32 bits or 4 bytes of data.
So, what this means for your visualizer is that you’ll use computeSpectrum() to take the audio stream
and stuff the analysis of it into a ByteArray instance, and then you’ll use readFloat() to return
numerical data from the stream that will be used to create an accurate animation of the audio spectrum. Armed with knowledge of the tools required, you should now be ready to build it, so let’s get
started.
Design planning
When it comes to architecting your Flex applications, you have a lot of options. You can build them
out using just MXML markup, ActionScript, or various combinations of the two. For this sample project, you’ll need to use a combination. This visualizer will implement the code-behind technique, which
is basically MXML markup powered by an ActionScript class.
To get started, open up your copy of Flex Builder or Eclipse. Next, create a new project either by rightclicking in the Navigator panel and selecting New ® Flex Project or by selecting File ® New ® Flex
Project from the application menu. In the New Flex Project window that pops up, you want to keep the
default selection for how the application will access data since you won’t be using any of the options
in this project. Click Next and name the project visualizer. After you’ve named it, click Finish.
449
8962CH18.qxd
11/7/07
10:59 AM
Page 450
CHAPTER 18
Flex will create a main application file with the same name as your project that’s empty and ready
to be filled. Leave that alone for the time being, as you’re going to create your Equalizer component
and your Visualizer class first. In the Navigator panel, right-click your new project and select
New ® Folder. Name this new folder components, make sure it’s selected, right-click, and choose
New ® MXML Component. Name this new component Equalizer and base it on Canvas. Once the file is
opened, input the following into the file:
<?xml version="1.0" encoding="utf-8"?>
<mx:Canvas xmlns:mx=" /><mx:HBox id="bands"/>
</mx:Canvas>
Save the file and set it to the side for now. In your main file, add a namespace that points to that
components folder you created earlier by inserting this line into the root tag of your main application
file:
xmlns:com="components.*"
This informs the compiler that you plan to have XML tags in your application that start with com and
that these tags are pointed at files located in the components subdirectory. Now that you’ve added
that namespace, you can add an instance of your Equalizer component to the application by inserting
the following line into visualizer.mxml:
<com:Equalizer id="eq" horizontalCenter="0" verticalCenter="0"/>
The most important of the three attributes in this tag is the id since that’s how you’ll be able to talk
to the component from the Visualizer class that you’ll soon create. The other attributes relate to the
layout of the Equalizer component, which in this case is pinned to the center of the browser window.
Your modified main application file should now look like the following:
<?xml version="1.0" encoding="utf-8"?>
layout="absolute">
<com:Equalizer id="eq" horizontalCenter="0" verticalCenter="0"/>
</mx:Application>
Now that you’ve created your EQ component and added it to your application, you’re ready to bring
this project to life by creating your Visualizer class, which will be responsible for loading the MP3
and drawing the visualizations.
450
8962CH18.qxd
11/7/07
10:59 AM
Page 451
BUILDING AN AUDIO VISUALIZER IN FLEX
The visualization
This is where you’ll breathe life into your project by writing a Visualizer class that will serve as the
backbone of your entire application. Your application will literally become an instance of the
Visualizer class thanks to code-behind. So, first thing you want to do is create the location where
the class will reside, aka the package. In the Navigator panel, right-click, choose New ® Folder, and
name the folder com. With the com folder selected, create another new folder and name it almerblank.
Now, with the almerblank folder selected, create another new folder named media. Once you’re
done, you will have created the package where the Visualizer class will live. Now, it is time to create
your class, so, with the media folder selected, select New ® ActionScript Class, name the new class
Visualizer, and ensure that it extends Application.
Flex Builder will then open the new class file complete with some basic stub code. Now would be a
good time to import all the necessary classes that you’ll be making use of in this class. So, make sure
your import section looks as follows:
package com.almerblank.media {
import mx.core.Application;
import flash.media.Sound;
import flash.media.SoundChannel;
import flash.media.SoundMixer;
import flash.utils.ByteArray;
import flash.net.URLRequest;
import flash.events.*;
import flash.filters.*;
import mx.events.*;
import components.Equalizer;
public class Visualizer extends Application {
That takes care of all of your external requirements, so you can now start declaring and defining your
public and private variables. This class will only have one public, or externally accessible, property, and
that’s the file property, which will hold the URL to the MP3. You’ll use a public setter and getter to
retrieve the externally defined value and set the private variable _mp3. So, add the following lines
inside of your class definition:
public class Visualizer extends Application {
[Inspectable]
private var _mp3:String;
public function get file():String {
return _mp3;
}
public function set file(str:String):void {
_mp3 = str;
}
451
8962CH18.qxd
11/7/07
10:59 AM
Page 452
CHAPTER 18
Next, you want to create private variables for your Sound and SoundChannel objects, variables for the
left and right audio peaks, and a public variable for your Equalizer component. For the code-behind
to work, this variable’s name needs to be the same as the ID that you gave your component when you
added it to the main application file. Since it’s named eq, this class variable should be named eq. Your
variable declaration section should now look like the following:
public class Visualizer extends Application {
[Inspectable]
private var _mp3:String;
public function get file():String{
return _mp3;
}
public function set file(str:String):void{
_mp3 = str;
}
private var _sound:Sound;
private var _channel:SoundChannel;
private var _leftStereoBarX:int = 131;
private var _rightStereoBarX:int = 140;
public var eq:Equalizer;
If you’re wondering about the values for _leftStereoBarX and _rightStereoBarX, they’re nothing
special. These values were reached through trial and error. Feel free to play around with them to
achieve your desired effect. With your variables declared, it’s safe to move on to the constructor function. Your constructor should already have a call to its superclass, which in this case is Application.
You now need to do two things; set the background color of the app and add an event listener for the
creationComplete event. Your constructor should look like the following:
public function Visualizer() {
super();
this.setStyle("backgroundGradientColors", [0x0033cc, 0x191970]);
addEventListener(FlexEvent.CREATION_COMPLETE,¯
_creationCompleteHandler);
}
Here you’ve set the background color to a blue gradient and are delaying any further processing until
Flex fires a creationComplete event for the application. This is clearly a matter of preference, as I
don’t like to have a whole lot going on in my constructors. Next thing you need to do is create the
event handler for that Flex event. This handler will create a listener for the ENTER_FRAME event, initialize the Equalizer component, and load and play the chosen MP3 file. Following is the code for that
event handler:
private function _creationCompleteHandler(event:FlexEvent):void {
addEventListener(Event.ENTER_FRAME, _onEnterFrame, false, 0, true);
_initEQ();
452
8962CH18.qxd
11/7/07
10:59 AM
Page 453
BUILDING AN AUDIO VISUALIZER IN FLEX
_sound = new Sound(new URLRequest(_mp3));
_channel = _sound.play();
}
Next, you want to create your initEQ() method, which is responsible for drawing all the background
lines inside of your Equalizer component.
private function _initEQ():void {
var eqX:uint;
var eqY:uint;
//draw background lines for the eq
eq.bands.graphics.lineStyle(.1, 0xcccccc, .1);
for(var i:uint = 2; i < 26; i++) {
eqX = i*5;
for(eqY = 0; eqY < 40; eqY+=2) {
eq.bands.graphics.moveTo(eqX, -eqY);
eq.bands.graphics.lineTo(eqX+4, -eqY);
}
}
//draw the background lines for the left/right peaks
for(eqY = 0; eqY < 60; eqY +=2) {
eq.bands.graphics.moveTo(_leftStereoBarX, - eqY);
eq.bands.graphics.lineTo(_leftStereoBarX+8, - eqY);
}
for(eqY = 0; eqY < 60; eqY +=2) {
eq.bands.graphics.moveTo(_rightStereoBarX, - eqY);
eq.bands.graphics.lineTo(_rightStereoBarX+8, - eqY);
}
}
First, you declare two variables, eqX and eqY, that will be used as x- and y-coordinates when you start
drawing your lines. The third line of code is where you define the characteristics of your drawing pencil. It also demonstrates another difference between AS2 and AS3. In ActionScript 2, you draw directly
on your movie clips; but in ActionScript 3, all methods that you can use to create a vector shape are
part of a new Graphics class, and your display objects, like Sprites and MovieClips, have a graphics
property, which is a Graphics object. So, think of this property as your new sketchpad.
The first for loop is responsible for drawing all the EQ background lines. The inner for loop found
inside this one is used to determine the bars’ height. The += notation just provides the gaps between
the bars. The other two for loops draw the background lines for the left and right peaks, respectively.
With the EQ initialization completed, you can add the event handler for the ENTER_FRAME event, which
will simply call the drawEQ() method every frame.
private function _onEnterFrame(event:Event):void {
_drawEQ();
}
453
8962CH18.qxd
11/7/07
10:59 AM
Page 454
CHAPTER 18
Now, you’re ready for the drawEQ() method, which is where it really gets magical. Here you’ll run
computeSpectrum on the audio every frame and use the readFloat() method to get the numerical
data necessary to animate your graphics.
private function _drawEQ():void {
var singleBand:Number = 0;
//create the byte array
var eqBytes:ByteArray = new ByteArray();
//fill it with data
SoundMixer.computeSpectrum(eqBytes);
//clear the graphics object every trip
eq.bands.graphics.clear();
eq.bands.graphics.beginFill(0xff6600, .1);
//create the left channel visualization
for(var i:uint = 0; i < 256; i++) {
singleBand += eqBytes.readFloat()*2;
if(i%10==0 && i > 0 && i != 10) {
for(var a:uint = 0; a < singleBand; a++){
eq.bands.graphics.beginFill(0xff6600, a/4);
eq.bands.graphics.drawRect(i/2, -(a*2), 4, .2);
}
singleBand = 0;
}
if(i == 10){
singleBand = 0;
}
}
//draw the stereo bars
for(a = 0; a < _channel.leftPeak*20; a++) {
eq.bands.graphics.beginFill(0x66CC00, a/10);
eq.bands.graphics.drawRect(_leftStereoBarX, -(a*2), 8, .5);
}
for(a = 0; a < _channel.rightPeak*20; a++) {
eq.bands.graphics.beginFill(0x66CC00, a/10);
eq.bands.graphics.drawRect(_rightStereoBarX, -(a*2), 8, .5);
}
eq.bands.graphics.endFill();
}
454
8962CH18.qxd
11/7/07
10:59 AM
Page 455
BUILDING AN AUDIO VISUALIZER IN FLEX
In this method, you define two variables, singleBand and eqBytes. singleBand deals with each individual EQ bar, and eqBytes is the ByteArray that is used to store the data retrieved with
computeSpectrum(). The for loops in this method are very similar to the ones from initEQ(). They
are responsible for drawing the EQ bars and peak bars. Instead of drawing lines, here you’re drawing
rectangular fills.
That completes the Visualizer class. All that’s left to do is convert the main application file from an
instance of the Application class to an instance of the Visualizer class. First, add a new namespace
to the main tag that points to the package that Visualizer lives in, and then add a file property and
set its value to the URL where your MP3 is located. Your modified application file should appear as
follows:
<?xml version="1.0" encoding="utf-8"?>
xmlns:com="components.*"
layout="absolute"
file=" /><com:Equalizer id="eq" horizontalCenter="-40" verticalCenter="0"/>
</almerblank:Visualizer>
You can now run the application to see what it looks like by choosing Run ® Run, clicking the Run icon
on the toolbar, or pressing Ctrl+Enter (Windows) or Cmd+Enter (OSX).
Summary
In this chapter, I covered one method of building an audio visualizer in Flex. I shared with you some of
the differences between accomplishing this task in Flex vs. older versions of Flash. I also explored the
two ActionScript classes that allow you to easily create these visualizations without the use of thirdparty tools. You have many more options available to you like creating waveform analyses, and so
forth, and with the power of ActionScript 3 behind you, the sky’s the limit. Now, it’s up to you to take
what you’ve learned, extend it, and create some truly amazing visual effects.
455
8962APX.qxd
11/7/07
11:05 AM
Page 456
8962APX.qxd
11/7/07
11:05 AM
Page 457
Appendix
THE EVOLVING FLEX SCENE
By Hasan Otuome
As if Flex 2 wasn’t groundbreaking enough, Adobe has raised the bar even higher
with the next release of the Flex framework. Chock-full of new development-enhancing
features, Flex 3 promises to change the way we all develop Rich Internet Applications
(RIAs). Some of the improvements that Flex 3 introduces are improved designer and
developer workflow, code enhancements, component and Software Development
Kit (SDK) enhancements, and smaller SWF sizes.
In this chapter, I’ll cover what’s different in Flex 3, the Flash-Flex Integration Kit, and
what open sourcing Flex means.
Designer/Developer workflow
Flex 3 introduces many enhancements that aid in the workflow between developers
and designers as well as improves skinning of all aspects of a Flex app. Some of those
enhancements include the new Skin Importer and CSS outlines.
457
8962APX.qxd
11/7/07
11:05 AM
Page 458
APPENDIX
Skin Importer
With the new Skin Importer, you can select a
folder of bitmaps or a SWF or SWC file and import
them into a Flex project. The Import wizard will
take care of mapping your assets to skin-able elements in the Flex 3 SDK. To import a folder of
bitmaps, follow these steps:
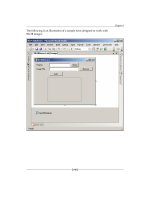
1. Select File ® Import.
2. Select Skin Artwork from the Flex import
category, as shown in Figure A-1, and click
Next.
3. Choose your source and destination folders, as shown in Figure A-2, and click Next.
4. Select the skins to import and set their
style and part names (see Figure A-3).
When you’re done, click Finish.
Figure A-1. Selecting Skin Artwork
Figure A-2. Choosing source and destination folders
458
8962APX.qxd
11/7/07
11:05 AM
Page 459
THE EVOLVING FLEX SCENE
Figure A-3. Selecting the skins to import and setting their style and part names
CSS outlines
I really appreciate the CSS outlines feature, as I personally try to keep all of my styling information in
external CSS files. With this feature, I can traverse my CSS document and find a style definition quickly
and easily just as I have grown accustomed to doing in code view with my MXML and ActionScript
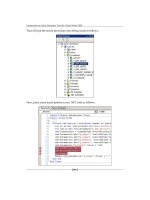
files. From CSS outline view (see Figure A-4), when I select a style property, Flex 3 automatically navigates to that property, as Figures A-5 and A-6 illustrate.
459
8962APX.qxd
11/7/07
11:05 AM
Page 460
APPENDIX
Figure A-4. CSS outline view
Figure A-5. Choosing a style property
460
8962APX.qxd
11/7/07
11:05 AM
Page 461
THE EVOLVING FLEX SCENE
Figure A-6. Flex 3 automatically navigates to the selected style property.
Code enhancements
The following sections discuss new Flex 3 features designed to help make your coding easier.
Refactoring
The new refactoring feature in Flex 3 has to be one of my personal favorites. This feature enables
method, class, and variable renaming at the project level and does so pretty quickly. Case in point: I
was working on a section of the RMX application and started to develop a custom component for one
of the views. After I completed the component, I realized I wanted to change the name of the component, but I didn’t want to go through the chore of opening up all of the various files that made up
the component or used the component—enter refactoring. To refactor my custom component
throughout the project, I chose the class to refactor and then specified a new name, as illustrated in
Figures A-7 and A-8. Figures A-9 and A-10 show the updated MXML and ActionScript after refactoring.
461
8962APX.qxd
11/7/07
11:05 AM
Page 462
APPENDIX
Figure A-7. Choosing the class to refactor
Figure A-8. Choosing the new class name
462
8962APX.qxd
11/7/07
11:05 AM
Page 463
THE EVOLVING FLEX SCENE
Figure A-9. MXML updated after refactoring
Figure A-10. ActionScript updated after refactoring
463