check point ng vpn 1 firewall 1 advanced configuration and troubleshooting phần 9 doc
Bạn đang xem bản rút gọn của tài liệu. Xem và tải ngay bản đầy đủ của tài liệu tại đây (2.85 MB, 64 trang )
Performance Pack • Chapter 13 481
The platform selection guide is, again, edifying as to the expected performance of
different SecurePlatform-based machines.The “basic” SecurePlatform is identified as a
Celeron or Duron processor, 256MB RAM, one 32-bit/33MHz PCI bus with standard
10/100 network interfaces.The throughput of this configuration is given as 200Mbps.
Next up is the “midrange” SecurePlatform, which sports a Pentium or Athlon CPU,
512MB of RAM, two Intel Pro/1000 network interfaces, and 64-bit/66MHz PCI buses.
Throughput is stated as 1Gbps+. Lastly is the “high performance” SecurePlatform, with
dual Xeon or Athlon MP processors, 1GB of RAM, four Intel Pro/1000 network inter-
faces, and four separate PCI-X buses.The stated throughput here is 3Gbps+.
The importance of the I/O bus for raw TCP/UDP throughput cannot be over-
stated, as this example shows: a dual Xeon 1.7 GHz machine, 1GB RAM, two indepen-
dent 64-bit/66MHz PCI buses: 1.7Gbps. A dual Xeon 2.2 GHz machine, 1GB RAM,
four independent PCI-X buses: 3.1Gbps. Comparing the raw CPU speeds, one would
expect a performance increase to about 2Gbps, not 3Gbps. It is the I/O bus that is
slowing the first configuration down.
That said, these throughput figures are large TCP streams without encryption. Read
on for some qualifying statements about performance.
Performance Considerations
Keep in mind that 900Mbps+ (Solaris) or 3Gbps+ (SecurePlatform) is maximum
FireWall-1 throughput using 1500-byte packets.Throughput is lower in a real-world
situation. Look at some numbers:You can expect around 4 percent of your packet
volume, which equals approximately 20 percent of your byte volume, to come from
these 1500-byte packets.About a third of the packets are dataless ACKs (40 bytes), with
maybe another fourth coming from 552-byte packets.The median packet size is about
256 bytes; a good 85 percent of all “streams” are under 1KB in length. Now throw
encryption (VPN-1) into the picture, and your performance drops dramatically from
the quoted 900Mbps+ or 3Gbps+.
We’d love to give you real figures. Unfortunately, we can’t—not for a high-perfor-
mance Sun Solaris platform. We can make some educated guesses, however. We’d
expect a raw FW-1 throughput, with real-world traffic, on the order of 600Mbps to
700Mbps. VPN-1 throughput is hard to estimate. Judging from what other platforms
achieve, 30Mbps to 50Mbps seem reasonable.
For SecurePlatform, Check Point states it offers 710Mbps encrypted throughput
using AES-128 on a high-performance platform. Clearly, then, when encryption comes
into play, the field is leveled between a platform with four PCI-X buses and a platform
with two PCI 64-bit/66MHz buses. Playing our guessing game again, we would expect
between 2.3Gbps and 2.5Gbps throughput with real-world traffic and between
200Mbps and 250Mbps VPN-1 throughput.
www.syngress.com
259_ChkPt_VPN_13.qxd 4/3/03 1:38 PM Page 481
482 Chapter 13 • Performance Pack
We hasten to say that these are guesstimates, based on other platforms for which we
have performance data. Nothing will replace a real RFC2544 performance graph. Insist
on this information when you shop for a FireWall-1/VPN-1 platform.
An area of performance that we have never seen graphed is throughput while using
security servers. Security servers are the most performance-eating application you can
run on your firewall. For this reason, they are not usually deployed on a firewall that has
been specified for maximum throughput. If, however, you do use security servers, and
you are hurting for performance, give Performance Pack serious consideration. It does
accelerate security servers.This will be even truer, we expect, in the upcoming FP4 and
later releases, since Check Point has moved certain security server functions into kernel
streams, and Performance Pack does accelerate kernel streams in FP4.
Installing Performance Pack on Solaris 8
You can install Performance Pack NG FP3 on Solaris 8 with minimal downtime for
your firewall.You do not have to halt the VPN-1/FireWall-1 processes to perform the
installation, although established streams might break when enabling Performance Pack
and will have to be reestablished.This could change with future releases. Be sure to read
the Release Notes to find out whether installation requirements have changed.You
might have to reboot.
There are two methods of installation.You can use the FireWall-1 Comprehensive
Install package, or you can add the Performance Pack package using pkgadd.
Prerequisites
You need root privileges for the installation of Performance Pack. If you are not already
logged in as root, become root by typing su –.
Performance Pack requires the same Solaris patch level as VPN-1/FireWall-1 NG.
As of FP3, all needed patches are included in Sun’s 8_Recommended patch cluster. In
the unlikely case that you have not updated your 8_Recommended patch cluster when
you installed or upgraded to FireWall-1 NG FP3, you should do so now.
If you use the Solaris FireWall-1 wrapper install, you also need about 130MB of
free space on one of your partitions to hold the installation files—around 60MB for the
compressed wrapper file and another 70MB for the uncompressed files and space
during installation. Allow for more space during installation if you install Performance
Pack at the same time you install VPN-1/FireWall-1.
Installation Using the Solaris
Comprehensive Install Package
You can install Performance Pack with the help of the UnixInstallScript that Check
Point provides with its Solaris VPN-1/FireWall-1 Comprehensive Install or wrapper
www.syngress.com
259_ChkPt_VPN_13.qxd 4/3/03 1:38 PM Page 482
Performance Pack • Chapter 13 483
package.The UnixInstallScript contained in that package lets you add Performance Pack
to a system that already has VPN-1/FireWall-1 NG installed.You may also use it to
install Performance Pack at the same time that you install VPN-1/FireWall-1 NG.
Since Check Point recommends using the wrapper install over installing individual
packages, this is the preferred method of installing Performance Pack. If disk space is at
an absolute premium, you might instead want to try the individual package install, cov-
ered in the “Installation as a Separate Package” section. Or invest in a bigger hard drive.
Unpack the solaris_wrapper.tgz file into a directory with sufficient free space.Then
start the install by typing ./UnixInstallScript. Continue through the first few pages
and the License Agreement until you come to the Product Selection Screen, shown in
Figure 13.1.
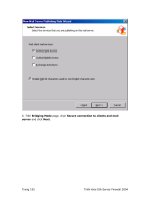
Choose Performance Pack, then Next. Verify that you have correctly chosen
Performance Pack, then choose Next again.The script will now install Performance
Pack and finish with a screen that informs you of what you need to do to activate the
newly installed software.
Let’s activate Performance Pack now. Log out and then back in again as user root.
Next, type cpconfig,You will see an option to enable or disable Check Point
SecureXL.This choice determines the default state of Performance Pack after boot:
acceleration on (enabled) or off (disabled).You can always manually enable or disable
SecureXL through the command line while FireWall-1 is running.
Next, type cpstart.This command starts SecureXL, if you selected it as enabled in
cpconfig, and fetches policy so that acceleration is enabled. In the output of cpstart,you
expect to see a line telling you that the SecureXL device has been enabled:
# cpstart
cpstart: Start product - SVN Foundation
www.syngress.com
Figure 13.1 Product Selection Screen with Performance Pack Selected
259_ChkPt_VPN_13.qxd 4/3/03 1:38 PM Page 483
484 Chapter 13 • Performance Pack
SVN Foundation: cpWatchDog already running
SVN Foundation: cpd already running
SVN Foundation started
cpstart: Start product - FireWall-1
FireWall-1: starting external VPN module OK
FireWall-1: Starting fwd
FireWall-1: Starting fwm (SmartCenter Server)
SecureXL device is enabled
Installing Security Policy Standard on all.all@syngress-fw
Fetching Security Policy from localhost succeeded
FireWall-1 started
If you desire, you can now clean up the installation files by removing the solaris2
directory, the wrappers directory, and the UnixInstallScript and ReadmeUnix.txt files.
Installation as a Separate Package
This method of installation needs considerably less temporary disk space than the
wrapper install. About 10MB of free space will be plenty, plus another 2.5MB on /opt.
To install Performance Pack, first unpack the package’s .TGZ file.The NG FP3
Performance Pack installation package unpacks into a directory called CPppak-53.
The Check Point instructions tell you to use pkgadd –d CPppak-53 to install the
package. If you attempt this, you will get an error message telling you that no package
was found. Instead, while in the parent directory of CPppak-53, type pkgadd –d . and
then choose to install CPppak-53. Answer y to the next two questions. CPppak-53
will install and warn you to reboot. If you are presented with a prompt to install
CPppak-53 once again, break out of it by typing q.
Contrary to what the postinstall script tells you, you do not need to reboot to acti-
vate Performance Pack NG FP3. Follow the same steps as after a wrapper install of
Performance Pack NG FP3. Execute cpconfig and enable SecureXL. Exit the cpconfig
utility and type cpstart to fetch policy and enable acceleration.
If you are installing a later release of Performance Pack NG, read the Release Notes
to see whether installation requirements have changed.
www.syngress.com
259_ChkPt_VPN_13.qxd 4/3/03 1:38 PM Page 484
Performance Pack • Chapter 13 485
Uninstalling Performance Pack
You can uninstall Performance Pack NG FP3 without any downtime to your firewall—
not even a glitch in traffic. Do, however, see the Tools & Traps sidebar for a vital
warning about a possible system crash during uninstall with FP3.
To uninstall, first execute fwaccel off, then remove the package with the command
pkgrm CPppak-53. For future Feature Packs, the name of the package will change
accordingly.The FP4 package will likely be named CPppak-54. When in doubt, use
pkginfo to see the names of all installed packages.
When you uninstall this way, the SecureXL module might remain in memory until
the next reboot, although acceleration is no longer possible. If you desire a clean unin-
stall, you will have to reboot.
Should you be tempted to manually remove the fwaccel binary that the uninstalla-
tion script seemingly left behind, we advise against it. Fwaccel is actually part of the
FireWall-1 package proper, not of Performance Pack.
Installing Performance Pack on SecurePlatform
SecurePlatform installs Performance Pack by default. Unless you expressly deselected
it, SecurePlatform has been installed for you.You may install Performance Pack as an
individual package if you opted out of its installation during initial installation of
SecurePlatform.
www.syngress.com
Crash and Burn
The uninstallation script for Performance Pack NG FP3 does not perform an
fwaccel off command as its first step. As a result, your firewall will crash, and
crash hard, if you attempt to remove the CPppak-53 package without turning
acceleration off first. This is true even if you cpstop the firewall first. It will
crash on the subsequent cpstart if acceleration was not turned off. In our
testing, the server rebooted into single-user mode and needed minor console
intervention (an fsck –y followed by a reboot) to come back up again. Now
imagine that we had done this work remotely, without an out-of-band con-
sole connection.
Always turn acceleration off first before uninstalling. It is likely that
future Feature Packs will sport a more forgiving uninstallation routine. Still,
better to be safe than sorry.
Tools & Traps…
259_ChkPt_VPN_13.qxd 4/3/03 1:38 PM Page 485
486 Chapter 13 • Performance Pack
Prerequisites
You have to be in expert mode to install the Performance Pack package. Expert mode is
what Check Point calls the root shell in SecurePlatform. Because you are going to
install an rpm package, you need a root shell.
Installing the rpm Package
Unpack the contents of the Performance Pack package into a temporary directory.
Execute the command rpm –i CPppak-50-03.i386.rpm to install Performance Pack
NG FP3. After installation, use cpconfig to enable SecureXL if you want acceleration
to be enabled by default; then execute cpstart to start acceleration.
Command-Line Options
for Performance Pack
Because Performance Pack, or more precisely the SecureXL driver, gets “in the way” of
interface-level changes to the host machine, we need a way to stop and start
Performance Pack at will.The ability to stop Performance Pack is also useful in trou-
bleshooting; it enables you to narrow a problem to “no, it is not caused by Performance
Pack” or “yes, it is caused by Performance Pack.” Lastly, you might want to see what
goes on “under the hood” or change some of the settings of Performance Pack.This is
where the command line comes in.
Stopping and Starting SecureXL
You can determine whether acceleration should be on by default with the help of the
cpconfig utility. It offers an option to enable or disable Check Point SecureXL:
■
fwaccel on Turn acceleration on while FireWall-1 is running.
■
fwaccel off Turn acceleration off while FireWall-1 is running.
Checking the Status of SecureXL
You can get the current status of SecureXL by typing fwaccel stat.This command
shows you whether acceleration is enabled and whether Connection Templates are
currently being used:
# fwaccel stat
Status : on
Templates : enabled
Accelerator Features Mask : 0x0006f167
www.syngress.com
259_ChkPt_VPN_13.qxd 4/3/03 1:38 PM Page 486
Performance Pack • Chapter 13 487
To see the number of connections SecureXL currently accelerates, type the com-
mand fwaccel conns –s. You will see two connections per TCP stream there, one for
each direction.To see more detail about the connections, such as source and destination
addresses and ports and the physical interfaces the accelerated traffic passes through, use
fwaccel cons or fwaccel cons –m <max_entries>.The latter form limits the max-
imum number of connections shown to <max_entries>.
You can also filter the connections shown using fwaccel conns –f <flags>.You
can use one or more of these flags:
F/f - forwarded to firewall/cut-through
U/u - unidirectional/bidirectional connections
N/n - entries with/without NAT
A/a - accounted/not accounted
C/c - encrypted/not encrypted
On SecurePlatform only, there are two more ways to gain some status information
about SecureXL.To view the affinity settings of all interfaces—that is, a list of interfaces
and the processors that handle each interface on a multiprocessor system—use sim –l.
To view a list of currently generated Connection Templates, use sim tab templates.
To get a configuration overview or view general statistics, use the command cat
/prot/ppk/conf | ifs | statistics.The Performance Pack configuration is displayed
if you view conf, the interfaces Performance Pack is bound to if you view ifs, and some
general Performance Pack statistics are available through statistics.
Configuring SecureXL
A few aspects of SecureXL’s configuration can be controlled through the command line:
■
fwaccel –l <number> Limit the amount of Connection Templates that
SecureXL can generate.
■
fwaccel –l 0 Reset to defaults.
On SecurePlatform only, you can set the affinity of the network interface
cards.Affinity determines which processors in a multiprocessor system handle that par-
ticular NIC:
■
sim –a Affinity is set automatically, according to the load on each interface.
Retuning of the affinity happens every 60 seconds.This is the default mode.
■
sim –s Affinity is set manually. For each interface, you will be asked to either
enter a space-separated list of processor numbers that will handle this interface
or the keyword all, which will allow all processors to handle that interface.
www.syngress.com
259_ChkPt_VPN_13.qxd 4/3/03 1:38 PM Page 487
488 Chapter 13 • Performance Pack
Troubleshooting Performance Pack
Few areas of Performance Pack will need troubleshooting. Check Point has made
Performance Pack a very simple product. It seamlessly improves the performance of
Firewall-1/VPN-1, with very little configuration necessary.
If you do suspect Performance Pack is causing trouble, turn it off using fwaccel
off, then see whether your issue remains.
That being said, there is one area of Performance Pack that deserves a closer look:
Connection Templates. Connection Templates improve the setup and teardown rate of
connections that differ only by source port. A typical example is a Web server: One
client will initiate many connections to the server in the course of one session.These
connections differ by source port only.
Connection Templates will be generated only for simple TCP or UDP connections.
Connection Templates are subject to a few restrictions:
■
If SYN Defender is enabled, Connection Templates will only be created for
UDP connections.
■
Connection Templates will never be created for:
■
NAT connections
■
VPN connections
■
Complex connections such as H.323, FTP or SQL
■
Connections involving a security server
Connection Templates will be disabled completely if the Rule Base contains a rule
containing one of the following:
■
Service(s) with a source port range
■
A time object
■
Dynamic objects and/or Domain objects
■
Services of type “other” with a match expression
■
Services of type RPC/DCERPC/DCOM
If your Rule Base contains a rule with one or more of the preceding factors, you
will receive console and log messages telling you that Connection Templates have been
disabled and identifying the restricted rules.To enable Connection Templates, you will
have to either rewrite or delete those rules.To merely disable them is not sufficient.
www.syngress.com
259_ChkPt_VPN_13.qxd 4/3/03 1:38 PM Page 488
Performance Pack • Chapter 13 489
Summary
Performance Pack, also called SecureXL, is a software solution to accelerate CPU-
intensive FireWall-1/VPN-1 operations, including but not limited to setup and tear-
down of connections, encryption, authentication, accounting, and NAT. It is supported
on Solaris and SecurePlatform, with support on Nokia IPSO planned in the near
future. Performance Pack is an alternative to performance solutions found on other
FireWall-1/VPN-1 platforms.
Care must be taken when working with the physical interfaces of the host plat-
form; turn acceleration off before enabling, disabling, or changing an interface.
The ideal hardware platform for Performance Pack has multiple high-powered
CPUs, multiple independent very fast I/O buses, and at least 1GB of memory. Lower-
specification hardware will still benefit from Performance Pack but will not reach the
3Gbps+ throughput on high-end hardware that Check Point states.
Real-world throughput will be lower than the numbers quoted by Check Point,
but by no means will they be low. Impressive throughput of well over 2Gbps TCP
throughput and over 600Mbps encrypted VPN can be achieved.
Performance Pack can be installed with the Comprehensive Install package on
Solaris and comes preinstalled by default on SecurePlatform. If so desired, it is possible
to install Performance Pack as a separate package after initial system install.
Performance Pack is very easy to use, but its configuration options are limited.You
can turn acceleration on and off, and you have some tools to optimize performance,
particularly on multiprocessor systems. Session setup and teardown optimization
through Connection Templates might require changes to your Rule Base to work.
Solutions Fast Track
How Performance Pack Works
; Performance Pack accelerates CPU-intensive functions of FireWall-1/VPN-1.
It does so by moving routines into “kernel space,” taking full advantage of the
host OS and CPU it runs on, and using Connection Templates and other low-
level techniques.
; Performance Pack will very likely gain new functionality, such as the ability to
accelerate security server connections, in future Feature Packs.
www.syngress.com
259_ChkPt_VPN_13.qxd 4/3/03 1:38 PM Page 489
490 Chapter 13 • Performance Pack
Installing Performance Pack
; On Solaris, use the Comprehensive Install wrapper and choose Performance
Pack as one of the products to install.
; On SecurePlatform, Performance Pack is installed by default when you install
FireWall-1/VPN-1.
; Be careful when you uninstall Performance Pack on Solaris; turn acceleration
off first.
Command-Line Options for Performance Pack
; Acceleration can be turned on with fwaccel on and off with fwaccel off
; To get the status of Performance Pack, use fwaccel stat
; To see a list of accelerated connections, use fwaccel conns
; On SecurePlatform, the sim command can be used to control the processor
affinity of individual NICs.
Troubleshooting Performance Pack
; Connection Templates will be disabled if the Rule Base contains certain rules.
These rules will have to be deleted, not just disabled, for Connection
Templates to start functioning.
; Disable Performance Pack using fwaccel off if you suspect it of causing
problems.
www.syngress.com
259_ChkPt_VPN_13.qxd 4/3/03 1:38 PM Page 490
Performance Pack • Chapter 13 491
Q: Does Performance Pack on Solaris support VLANs?
A: As of NG FP3, no.
Q: I see deviations from the TCP quotas I have established. Why?
A: Small deviations from the TCP quotas may indeed occur when Performance Pack is
enabled.This is a side effect of the way Performance Pack works.
Q: Accounting information seems to be somewhat lower than actual traffic. Why?
A: If you have a high-availability configuration, some accounting information for
accelerated connections might get lost during HA failover.The accounting infor-
mation reported may thus be somewhat lower than actual traffic. If this is very
noticeable, your HA solution is likely failing over more often than it should—a sit-
uation that you should look into.
Q: How can I downgrade Performance Pack from FP3 to FP2?
A: Uninstall the package, then reinstall once your firewall is on FP2.
Q: Is Performance Pack supported on Solaris 9?
A: Not as of NG FP3. It will install, but upon activating, it will crash your firewall to
the point where you need to remove Performance Pack in single-user mode to
become operational again.
Q: Is Performance Pack the only implementation of SecureXL?
A: No. SecureXL technology is also used to enable more tightly integrated FireWall-1
platforms (platforms without a “general-purpose” host OS and possibly with dedi-
cated coprocessors that SecureXL offloads work to), such as the Nortel Alteon
Switched Firewall or RapidStream VPN/Firewall Appliances.
www.syngress.com
Frequently Asked Questions
The following Frequently Asked Questions, answered by the authors of this book, are
designed to both measure your understanding of the concepts presented in this chapter
and to assist you with real-life implementation of these concepts. To have your questions
about this chapter answered by the author, browse to www.syngress.com/solutions and
click on the “Ask the Author” form.
259_ChkPt_VPN_13.qxd 4/3/03 1:38 PM Page 491
492 Chapter 13 • Performance Pack
Q: The VPN-1 throughput figures given in this chapter seem somewhat arbitrary. How
do I get accurate figures?
A: Ask your vendor. RFC-2544 Performance Figures, also known as the “Bradner
Run,” are an industry standard to measure throughput, although other test methods
also deliver reliable results.These results are arrived at using traffic generator/
analyzer hardware that can be priced in the $150,000 range. Keep in mind that the
median packet size is likely to be around 256 bytes for typical “Internet traffic.”
On a vendor platform that does offer RFC-2544 data but does not implement
Performance Pack, VPN-1 throughput figures tripled on 1450-byte packets, as
compared to throughput on 256-byte packets.The real throughput you get will
depend heavily on your application.
www.syngress.com
259_ChkPt_VPN_13.qxd 4/3/03 1:38 PM Page 492
UserAuthority
Solutions in this chapter:
■
Defining UserAuthority
■
Installing UserAuthority
■
Implementing UserAuthority Chaining
■
Utilizing UserAuthority Logging
■
Understanding Credentials Management
and Domain Equality
■
Deploying UserAuthority
Chapter 14
493
; Summary
; Solutions Fast Track
; Frequently Asked Questions
259_Chkpt_VPN_14.qxd 4/3/03 1:39 PM Page 493
494 Chapter 14 • UserAuthority
Introduction
Single sign-on (SSO), centralized security, LDAP and Active Directory integration…
these are all things that many organizations are trying to achieve. FireWall-1 NG can
now start closing some of those gaps, particularly where Web applications are involved.
UserAuthority can, for example, authenticate external visitors to your Web site against a
centralized Windows Active Directory, without modifying the Web site. Check Point
supplies WebAccess, a plug-in for IIS, that—when combined with the UserAuthority
Server—gives you the capability to have Check Point control the authentication and
traffic flow to your Web server.
UserAuthority can also provide an SSO mechanism for internal users, encompassing
internal Web applications and authenticated Internet access.This chapter discusses the
features of UserAuthority and the methods for deploying it.
Defining UserAuthority
At the heart of UserAuthority is the UserAuthority server.This application performs
two functions:
■
Storage and management of the UA credentials database
■
Provision of a secure interface, allowing remote applications access to the UA
credentials database and context details relevant to a connection or user ID
The user credentials database is called the UA Credentials Manager (UACM). It could
be thought of as holding user “wallets,” each of which stores application authentication
credentials for a particular user. So, for example, user Bob could have different user-
names and passwords for accessing a Web-based e-mail gateway and an intranet server.
This information can be stored in Bob’s “wallet” in the UA credentials database. When
Bob accesses a UA-enabled Web application for the first time, he will be able to store
the credentials he supplies in his wallet. We refer to a user’s credential store as a wallet
because this seems a fitting description, but this is not a term you will find in Check
Point manuals.
The UACM secures this information by providing a lock on each user’s wallet that
can be undone if the user provides valid UA authentication credentials—for example,
by supplying a FireWall-1 username and password. If the FireWall-1 authentication
method is strong, we are providing strong authentication that protects access to creden-
tials, themselves probably based on weaker authentication methods.Taking the example
of our user Bob, he connects to the office from home, authenticating via a secure
method and over an encrypted SecureClient session. Bob has already been authenti-
cated by the corporate firewall, so when Bob attempts to access his BobB mailbox (over
HTTP) or the intranet server, UA can supply Bob’s relevant credentials to these servers.
www.syngress.com
259_Chkpt_VPN_14.qxd 4/3/03 1:39 PM Page 494
www.syngress.com
Bob has authenticated access to the internal servers after authenticating just once, when
he started his SecureClient session.This concept is illustrated in Figure 14.1.
In order to provide this UA functionality, the Web servers involved should run the
UA Web Access Module (WAM).This module is available for Microsoft IIS and—at
time of writing—in beta for Linux Apache.The module integrates with the Web
server’s authentication mechanisms in order to seamlessly authenticate connections to
the server.The UA Web Access software also gives users the ability to manage their UA
wallets—for example, they can view the credentials that are stored; usually a Web server
is configured specifically for users to perform credentials management.The latest incar-
nations of WAM also allow for very granular and powerful access control to Web sites.
Authorization rules can be defined down to just about any property of the HTTP
request—the Web site, path, query, type of HTTP request, or other headers. Permissions
can be based on more than just username: integration with FireWall-1 means that the
context of the connection can be considered, whether it is made over a VPN, the
source IP address, the strength of authentication, and time of day. Other context details
supplied by the UAS can be considered, commonly user group membership. WAM can
also be used to add authentication to a server that itself allows anonymous access.
The example of Bob is based on a UA server installed on the firewall gateway, and
it is authentication against FireWall-1 that gives Bob access to his wallet. A UA server
can also be installed on a Microsoft Windows domain controller (Windows NT or
2000). A domain controller UAS does not provide the functionality of a firewall
UserAuthority • Chapter 14 495
Figure 14.1 Bob and Jane at Work with UserAuthority
Firewall-1
Bob
Internet
E-mail www
PDC
LONDON domain
Jane
Internal
Network
Intranet
DMZ
Data
UAS Credentials
Manager
Bob's "Wallet"
Jane's "Wallet"
259_Chkpt_VPN_14.qxd 4/3/03 1:39 PM Page 495
496 Chapter 14 • UserAuthority
gateway UAS, but it is able to supply authentication details for a given client IP address.
The domain controller UAS can verify the identification of a domain user, thanks to a
lightweight agent, UA SecureAgent, which is automatically installed to users’ PCs when
they log in to a domain.The firewall gateway UAS can then query the domain con-
troller UAS to obtain user details for an internal client—a process known as chaining.
This means that although internal users have not authenticated against the firewall, the
users may access their UACM wallet based on their Windows domain authentication.
Looking at another example from Figure 14.1, a user “Jane” working at her desk
and logged into the corporate domain might need to connect to a restricted area of the
intranet.This special area requires authentication, and Jane has a username hr on that
server. When Jane connects to the server, she is transparently authenticated because her
hr credentials are stored in her UACM wallet.The WAM on the Web server was given
the hr credentials from Jane’s wallet by the firewall gateway UAS because Jane had been
authenticated by the UAS server on the domain controller.
WAM in Detail
Now let’s look in a bit more detail at how WAM works. We know it is a plug-in for
Web servers, and it communicates with a UserAuthority server to allow SSO. It can also
be configured to authenticate access to the Web server at a very granular level. What is
actually happening when a user makes a connection to a Web server?
Consider an incoming Web request for which the native Web server requires
authentication. WAM can intercept the request, then contact the local gateway UA
server and request credentials and any context details that match the incoming connec-
tion.The incoming connection could have passed through the firewall from a
SecureClient user, in which case the UA server will be able to access the wallet of the
SecureClient user and supply the credentials—if any—relating to that Web server. If
there is a UAS on a Windows domain controller and the connection to our WAM-
enabled server is from an internal user, it could be that the gateway UAS will be able to
retrieve the client Windows username via chaining, and then supply that user’s creden-
tials to WAM. If WAM does receive valid credentials from the gateway UAS, it will pass
those to the local Web server and the connection can continue without prompting the
user for authentication.
If WAM does not receive valid credentials from the UAS, it can give the user the
chance to authenticate directly to WAM.The user will be prompted for authentication,
but the credentials supplied by the user are processed by WAM instead of the Web
server’s own authentication handlers (in fact, the Web server itself might not require
authentication for the request involved). WAM will pass the credentials the user sup-
plied to the gateway UAS, which checks them against the FireWall-1 user database and
responds to WAM with the results. WAM will allow access to the Web server only if
www.syngress.com
259_Chkpt_VPN_14.qxd 4/3/03 1:39 PM Page 496
UserAuthority • Chapter 14 497
the UAS confirmed the credentials. We can use this feature to add authentication to an
existing unauthenticated Web server, and the authentication mechanism will be via a
FireWall-1 user database, giving access to the wide range of authentication methods
supported by FireWall-1, including strong authentication servers, certificates ,LDAP, and
Windows Active Directory integration.
Combining multiple UserAuthority servers with WebAccess modules gives the
potential for very powerful configurations. In this chapter we take a look at three simple
configurations that provide the building blocks for more elaborate SSO solutions.
Supported Platforms
Here is a quick rundown of the components and the platforms they can be installed on:
■
UserAuthority Server on FireWall-1 NG FP3 IPSO 3.5/3.51, IPSO 3.6,
Linux, Solaris 2.8, Windows 2000, NT
www.syngress.com
Guide to UserAuthority Acronyms
There are plenty of acronyms to be found when you’re working with
UserAuthority. Here is a quick reference guide:
■
UA UserAuthority
■
UAS UA server
■
UACM UA Credentials Manager
■
WAM UA WebAccess Module
■
UAA UA application—an application that has been UA enabled so
that it can participate in the SSO process; WAM is Check Point’s
own UAA for Web servers
You could also come across some acronyms that have been superseded:
■
UAG UserAuthority Gateway—now known as UAS; still found in
underlying configuration files and commands
■
UAM User to Address Mapping—an early ancestor of UA that inte-
grated with the Meta IP product to provide some SSO capability
Tools & Traps…
259_Chkpt_VPN_14.qxd 4/3/03 1:39 PM Page 497
498 Chapter 14 • UserAuthority
■
UserAuthority Server on domain controller Windows NT4,
Windows 2000
■
WebAccess plug-in module Windows 2000 with IIS v5, Windows NT
with IIS v4, Linux Apache (beta)
■
UserAuthority SecureAgent Windows 98, ME, NT, 2000, and XP
Installing UserAuthority
In this section, we discuss how to install the various parts of UserAuthority, from the
UserAuthority server to the UserAuthority SecureAgent. We also discuss basic configu-
ration that will allow you to test your UserAuthority installation.
Installing the UserAuthority Server
The main component to UserAuthority is the UserAuthority server. Here we cover
how to install the UserAuthority server on a FireWall-1 enforcement module and on a
Windows domain controller.
UserAuthority Server on a
FireWall-1 Enforcement Module
Installation of the UserAuthority server on a FireWall-1 enforcement module can be
performed as part of the standard “CD wrapper” process for installing a normal firewall
enforcement module: When you are presented with the screen that asks you which
Check Point products you want to install, make sure you select UserAuthority
Server, as shown in Figure 14.2.
Figure 14.2 Installing UAS on a Firewall Enforcement Module During CD
Wrapper Install
www.syngress.com
259_Chkpt_VPN_14.qxd 4/3/03 1:39 PM Page 498
UserAuthority • Chapter 14 499
Alternatively, if you have an existing enforcement module that does not have
UserAuthority installed, it is possible to download the individual UserAuthority FP3
package and install that.The installer will probably request a reboot in order to com-
plete installation of the package.
In SmartDashboard, edit the object representing the enforcement module and
enable the UserAuthority Server package, then push a security policy to the enforce-
ment policy in order to check that it still installs correctly.
Once UserAuthority Server has been installed, it can be tested using one of the
simple deployment examples we describe later in the chapter.
UserAuthority Server on a Windows Domain Controller
Installation of a UserAuthority Server on a domain controller can be achieved using the
standard NG FP3 CD wrapper. In this section, we cover the essentials of installing and
configuring UserAuthority Server on a domain controller using the wrapper. Note that
in order to fully test this domain controller installation, we need to install and configure
UAS on a FireWall-1 enforcement module as well.
During the install process, the main area to pay attention to is the Server/Gateway
Components screen, as shown in Figure 14.3. Here you need to make sure you select
UserAuthority.The SVN package will be installed as well because it is required.
You will then see a verification screen popup, as shown in Figure 14.4. Click Next
when you are ready to proceed.
The installation process will proceed to install the SVN software and then the
UAS product.
Following the installation, you will be prompted to perform some initial configura-
tion—licensing and SIC trust.You will see the same screens when you install a WAM
www.syngress.com
Figure 14.3 Installation of Server/Gateway Components
259_Chkpt_VPN_14.qxd 4/3/03 1:39 PM Page 499
500 Chapter 14 • UserAuthority
module; they are described later and illustrated in Figures 14.20–14.22.You do not need
to install a license on the domain controller UAS; the configuration utility will warn
you that you have not added a license, so don’t worry about that. Don’t forget to make
a note of the password you specify when you initialize SIC trust.
Once you have completed the initial configuration, you will be asked if you would
like to reboot your machine, as shown in Figure 14.5.
The installation is now complete.The next section describes how to use
SmartDashboard to configure trust between the management station and the
UserAuthority Server-enabled domain controller.
Setting Up Trust to the UserAuthority Server
To set up trust to UserAuthority server, follow these steps:
1. First you need an object for your domain controller. If you already have a
node object for it, you can right-click on that node in the Object tree, and
www.syngress.com
Figure 14.4 Verification of Components to Install
Figure 14.5 Installation Complete—Reboot?
259_Chkpt_VPN_14.qxd 4/3/03 1:39 PM Page 500
UserAuthority • Chapter 14 501
choose Convert to Check Point Host. Otherwise, go to the Manage
Menu | Network Objects menu in the SmartDashboard GUI. Click New
and select Check Point | Host.You will then see a popup window appear.
Fill in the details of your domain controller (see Figure 14.6). Check the
UserAuthority Server product.
2. Click the Communication button.You will see the window shown in Figure
14.7. Fill in the activation key as supplied during the installation of the UAS
on the domain controller. Confirm the activation key using the same pass-
word. Click the Initialize button. Once the trust has been established, click
Test SIC status to make sure that it says Communicating.
www.syngress.com
Figure 14.6 Defining the Domain Controller UserAuthority Server Object
Figure 14.7 Initiating Trust Between the Management Module and the
Domain Controller
259_Chkpt_VPN_14.qxd 4/3/03 1:39 PM Page 501
502 Chapter 14 • UserAuthority
WARNING
If there is a firewall between the management station and the UserAuthority
server, you will need to set it to allow communications from the management
server to the UserAuthority Server through the firewall enforcement module
policy. If that firewall is managed from your management station, there is an
easy way to ensure that the correct ports are opened: Before clicking your new
UAS object’s Communication button, click OK and then push the policy to the
firewall enforcement module(s). The necessary implied rules will then be in
place so that you can return to your object and successfully initialize the SIC
trust to the UserAuthority server.
Once the trust has been set up, the domain controller UAS is ready to be integrated
with the enforcement module UAS. However, to take advantage of UserAuthority
Server on a domain controller, you need to ensure that the UserAuthority SecureAgent
is installed on the internal desktop PCs.
Installing UserAuthority SecureAgent
This section describes how to install the UserAuthority SecureAgent on a Windows
desktop PC.The UserAuthority SecureAgent is used in conjunction with
UserAuthority Server on a Windows domain controller. SecureAgent will run on
Windows 98, ME, NT 4, 2000, and XP.
Manual Installation on Desktop
This is the simplest way to install SecureAgent—but not by much! If you only have a
handful of desktop Windows machines that require SSO, you can copy the appropriate
files to the users’ desktop machine.
The files will have been installed on the domain controller when you installed the
UserAuthority Server.The files for installing the UserAuthority SecureAgent can be
located in the C:\WINNT\sysvol\sysvol\<domain name>\scripts directory. In our
example, the files were installed to the C:\WINNT\sysvol\sysvol\london.com\
scripts directory, as shown in Figure 14.8.
All you need do here is copy all the files that are shown in Figure 14.8 (apart from
the login.bat file) to the desktop machine, and then run the command InstUatc.exe
/shortcut /icon /debug from the command line.This will install the necessary files
to the C:\Program Files\Check Point\SecureAgent\ directory on the local machine.
Within this directory, you will then see the files uatc.exe, uatc.log, and uatcs_acl.txt (and
maybe a backup of this file).To uninstall, just run the uatcs_uninstall.bat from the files
you copied from the domain controller.
www.syngress.com
259_Chkpt_VPN_14.qxd 4/3/03 1:39 PM Page 502
UserAuthority • Chapter 14 503
NOTE
SecureAgent will not appear in the Add/Remove Programs section of the
Windows Control Panel.
Automatic Installation on Login to the Domain
Automatic installation on domain login is the preferred way of getting the
UserAuthority SecureAgent installed to all of your desktops that log in to your domain.
All you need to do is add the InstUatc.exe /shortcut /icon /debug entry to the
login script for your domain users and it will install to their desktops and run every
time they log in to your domain.You could do this for just one user on the primary
domain controller if you want to test first. In the example in Figure 14.9, we created a
user called Jane on the primary domain controller, and in the Profiles tab of her user
definition, we have the scripts set to login.bat, a batch file we created that runs the
command InstUatc.exe /shortcut /icon /debug.
When Jane next logs in to the London domain, the login script will run and the
UserAuthority SecureAgent will install and start.The system tray of her desktop will
show the icon for the UserAuthority SecureAgent, as shown in Figure 14.10.
In order to configure and test your domain controller UAS and SecureAgent instal-
lation, you need to configure the enforcement module UAS to use them. (Take a look
at the relevant deployment example later in this chapter.)
www.syngress.com
Figure 14.8 Location of the UserAuthority SecureAgent Files on the Primary
Domain Controller
259_Chkpt_VPN_14.qxd 4/3/03 1:39 PM Page 503
504 Chapter 14 • UserAuthority
Installing the UserAuthority WebAccess Plug-In
In this section, we install the WebAccess plug-in module (sometimes referred to as the
WA M ).This component of UserAuthority is installed on the Web server itself. In this
example, it will be installed on Microsoft IIS version 5 on a Windows 2000 SP3 host.
It is recommended, but not essential, to have your firewall management module and
your UserAuthority server already set up and configured at this point.
Prerequisites for the WebAccess Plug-In
Here are the things you need in order to install the UserAuthority WebAccess plug-in:
■
A Windows 2000 or Windows NT server with Microsoft IIS version 4 or 5
■
A single network card (more can be used if required)
■
The NG FP3 SVN package, located on the NG FP3 CD or downloadable
■
WebAccess plug-in, usually a separate package and not included on the NG
FP3 CD (you will have to download it from the Check Point Web site)
Installing the WebAccess Plug-In
Here are the steps you need to take to install the WebAccess plug-in. Before starting,
make sure that the Microsoft IIS service is stopped.
www.syngress.com
Figure 14.9 User Login Script Definition to Auto-Install to the Desktop for User Jane
Figure 14.10 SecureAgent Icon in the System Tray
259_Chkpt_VPN_14.qxd 4/3/03 1:39 PM Page 504
UserAuthority • Chapter 14 505
1. Insert the Check Point NG FP3 CD into the CD drive of your Windows
2000 or NT host that has IIS installed.You could find that the CD auto-runs
the Check Point install wrapper. If it does, cancel this process; it is not possible
to install WebAccess from the CD. However, we do need to install the SVN
package from the CD, and we need to do this manually.
2. Click the Windows Start menu, then select Run. Type in the path where the
SVN package is located on the CD (or the location to which you have down-
loaded it). For a CD, this location should be <Drive letter>:\windows\
CPshared-50\Setup.exe. Click OK to start the installation (see Figure 14.11).
3. You should then see the Check Point Installation wizard for the Check Point
SVN (see Figure 14.12). Click Next to proceed.
4. You will then see the License Agreement screen (see Figure 14.13). Scroll
down to read the license agreement. If you agree with the license terms and
conditions, click Ye s .
5. You will then be prompted to give the location on your hard drive to which
you require the SVN software to install (see Figure 14.14). Select the area and
then click Next.
6. The installation of the SVN software will now proceed (see Figure 14.15).
Wait while it completes.
www.syngress.com
Figure 14.11 Installing the SVN
Figure 14.12 The Check Point SVN Installation Wizard
259_Chkpt_VPN_14.qxd 4/3/03 1:39 PM Page 505