head first iphone development a learners guide to creating objective c applications for the iphone 3 phần 5 docx
Bạn đang xem bản rút gọn của tài liệu. Xem và tải ngay bản đầy đủ của tài liệu tại đây (2.1 MB, 54 trang )
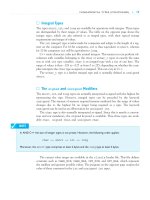
this is a new chapter 185
plists and modal views
5
Refining your app
So you have this almost-working app
That’s the story of every app! You get some functionality working, decide to add something
else, need to do some refactoring, and respond to some feedback from the App Store.
Developing an app isn’t always ever a linear process, but there’s a lot to be learned in that
process.
This soup would be
even better with the perfect
cocktail, maybe a Neon Geek
186 Chapter 5
debugging DrinkMixer
Look, I don’t have time for
posting to Twitter. I need to know
a ton of drink recipes every night.
Is there an app for that?
Sam, bartender
at the HF
Lounge
DrinkMixer
DrinkMixer has two
views: a table view of
the list and a detail view
about each individual
drink.
It all started with Sam
Sam wanted an app to make his bartending work
easier. You got one up and rolling pretty quick,
but hit a snag filling in the details for each drink
because of a plist of dictionaries.
When we last left DrinkMixer, it was
in the middle of being debugged
you are here 4 187
plists and modal views
DrinkMixer started and ran happily until it hit our breakpoint at
line 20. The debugger stopped our application and displayed the
debugging console. By setting a breakpoint in our code, what we
discovered at the end of Chapter 4 is that before your app got
to the commands to import the file, there was no crash; so far so
good.
Let’s walk through loading our plist and make sure that works by
typing next twice. The first “next” looks up the path to the plist,
the second one actually loads the data.
You’ll see buttons
similar to these
in Xcode, too.
Here’s the
Continue button.
Anatomy of
a Crash
This exception tells you that an unknown selector
(message) is being sent to an NSCFDictionary—
specifically, isEqualToString so where is it coming from?
Here’s where it stopped at
the breakpoint. We told the
debugger to let DrinkMixer
execute the next two lines.
It made it past
loading the
plist, so let’s
let it continue
running
Loading the plist worked fine; no problems there. The error must be coming after that.
Let’s have the application continue running and see where it fails. Hit the Continue
button (or type continue in the console) and there’s our exception again. Where is
this actually failing?
188 Chapter 5
CSI iPhone
Use the debugger to investigate the crash
We can reliably get DrinkMixer to crash, and it doesn’t seem to be our
plist loading code. Xcode has suspended our application right before
iPhoneOS shuts it down, so we can use the debugger to see exactly what
it was trying to do before it crashed.
Switch back to the debugger and take a look at the stack in the upper left.
This is the call stack that led to the crash.
Here’s the stack
at the time of
the crash. The
top 5 frames are
framework code,
but frame 6 is
code we wrote
And here’s the line that
caused the problem. See
what’s going on yet?
The buttons along the
top of the debugger
function just like the
buttons in the console.
By default the console prompt
isn’t shown in the debugger; the
debugger is a GUI on top of it.
The red stop sign icon will
terminate your application.
Trying to continue now
will just keep failing -
DrinkMixer has been
stopped by iPhoneOS.
you are here 4 189
plists and modal views
Using what you’ve learned so far, figure out what’s going on!
The exception talked about NSCF Dictionary. What dictionary is it talking about? Where is it coming from?
Who’s sending messages to the dictionary? Why did we get an unrecognized selector?
190 Chapter 5
square peg, round hole
We’re trying to stuff a dictionary into a string
Putting a dictionary into the text field of the label, which wants a string,
isn’t going to work. Our previous array was an array of strings, so
that code worked fine. Now that we have an array of dictionaries, we
need to figure out how to get the drink name value (a string) out of it,
and then assign that to the text label. If you take another look at the
DrinkDirections.plist, you’ll see that we have an array of dictionaries —
one for each drink. Dictionaries store their values using keys; they’re just
a collection of key-value pairs. To get a value out, you simply send the
dictionary the objectForKey:@"key" message.
/
// Configure the cell.
cell.textLabel.text = [self.drinks objectAtIndex:indexPath.row];
return cell;
}
Using what you’ve learned so far, figure out what’s going on!
somelabel.text
≠
Dictionary
name = Cupid’s
Cocktail
ingredients =
Cherry liqueur,
peach
directions =
Shake ingredients
and strain into
The exception talked about NSCF Dictionary. What dictionary is it talking about? Where is it coming from?
Who’s sending messages to the dictionary? Why did we get an unrecognized selector?
The dictionaries are coming from the plist! When we load the plist, we now have an array of
dictionaries instead of an array of strings.
Messages are being sent to the dictionary when we try to set the cell’s label text. It’s actually the
label sending it a message (see the next stack frame, its code in UILabel). It’s sending messages as
though the cell label text was a string. But now we’re assigning a dictionary to the label text!
For each drink, we use the
key
name
for the name of
the drink,
ingredients
for ingredients, and so on.
Instead of assigning the array
value right to the text label,
you’ll need to pull out the name
value from the appropriate
dictionary.
you are here 4 191
plists and modal views
Go ahead and make the changes to your app. After this, it should know
that you’re using an array of dictionaries, not strings—and the detail view
should have a reference to the drink it should display. Finally, the detail
view should populate its fields before it appears on the screen.
Change the way a table cell is configured.
In RootViewController.m, fix the cell’s textLabel.text property to use the
name value from the appropriate dictionary.
1
Add a reference to a drink dictionary in the detail view.
In DrinkDetailViewController.h, add an NSDictionary* field named
drink and the corresponding property declaration.
2
Add drink to the DrinkDetailViewController.m file.
Synthesize and dealloc the new dictionary reference.
3
Don’t forget about the NSDictionary
documentation if you want to know more
about dictionaries.
We’ll update the detail view
controller to use the values in the
new dictionary in a minute
Update your code to handle a
plist of dictionaries
Armed with the knowledge of how the dictionaries are
put together, we can use this information to populate
the detail view, too. If you give the detail view controller
the dictionary of the selected drink, it can populate the
view’s fields before the view is shown to the user.
Datasource
View Controller
View
Detail
Each dictionary has
everything we need for a
drink. We need to get that
dictionary to the datasource
of the detail view.
192 Chapter 5
updating for dictionaries
Go through the code and make sure
that you’ve got everything right
// Configure the cell.
cell.textLabel.text =
[[self.drinks objectAtIndex:indexPath.row]
objectForKey:@”name”];
return cell;
@interface DrinkDetailViewController : UIViewController {
NSDictionary *drink;
IBOutlet UITextField *nameTextField;
IBOutlet UITextView *ingredientsTextView;
IBOutlet UITextView *directionsTextView;
}
@property (nonatomic, retain) NSDictionary *drink;
@property (nonatomic, retain) UITextField *nameTextField;
@implementation DrinkDetailViewController
@synthesize
drink, nameTextField, ingredientsTextView,
directionsTextView;
- (void)dealloc {
[nameTextField release];
[ingredientsTextView release];
[directionsTextView release];
[drink release];
[super dealloc];
}
@end
Add drink to the
synthesize line.
Release our dictionary
reference here.
Declare the NSDictionary* field
and a property with the usual
nonatomic, retain attributes.
Use objectForKey to get the
name from the dictionary.
RootViewController.m
DrinkDetailViewController.m
DrinkDetailViewController.h
you are here 4 193
plists and modal views
Test Drive
Now that we’ve told DrinkMixer to deal with dictionaries, go ahead and build and run the app.
It’s working again! Now that it’s not
crashing, it’s time to fill in the details.
194 Chapter 5
filling in the drink details
The detail view needs data
Now that you’ve figured out how to deal with
dictionaries, it’s time to fill in the drink details.
But getting the details out of the array of
dictionaries to give to the datasource requires
another step.
View Controller
View Controller
Touch here
Detail
Data-
source
Remember this? We talked
about this being the
structure of the app.
How are we going to get the information from
DrinkDirections.plist into the app?
This is the information in
DrinkDirections.plist.
The
datasource
in this case
is the plist.
you are here 4 195
plists and modal views
Organize your dictionary constants to avoid bugs
Since we’re going to need the name, ingredients, and directions keys in
the view controller, we should clean up the code to start using real constants.
Create a new file called DrinkConstants.h (File → New then choose Other
and a blank file). Add constants (#define’s) for name, ingredients, and
directions. Import DrinkConstants.h into DrinkDetailViewController.m
and RootViewController.m. Finally, update the @"name" to the new constant,
NAME_KEY.
1
The view controller needs direct access to the datasource,
and the easiest way to get to that data is going to mean
some quick code refactoring.
Set the detail view controller’s drink property
After you instantiate the detail view controller when a cell is tapped, you need to set
the drink property on the new controller to the selected drink.
2
Add code to the detail view controller to populate the fields
Before the detail view appears, the view controller should use the drink dictionary
to set the contents of the name, ingredients, and directions components.
3
Each dictionary has all the
information we need
Right now we’re just pulling the name of each drink into the app
using the name key. In order to populate the ingredients and
directions, we need to use the other keys. We could just type those
right into our code, but we’re better developers than that, so we’ll
pull them up into constants. The only thing left is getting the proper
dictionary to the detail view controller so it can pull the information
it needs. Go ahead and start setting everything up!
cleaning up with constants
196 Chapter 5
DrinkConstants.h
1
DrinkDetailViewController.m and RootViewController.m both need
Then add the constant to display the name:
#import "DrinkConstants.h".
// Configure the cell.
cell.textLabel.text = [[self.drinks objectAtIndex:indexPath.row]
objectForKey:NAME_KEY];
return cell;
Change this value from
@“name”.
Here’s all the added code to make the detail view work.
We’re changing the dictionary
keys to constants here
RootViewController.m
you are here 4 197
plists and modal views
- (void) viewWillAppear: (BOOL)animated {
[super viewWillAppear:animated];
nameTextField.text = [drink objectForKey:NAME_KEY];
ingredientsTextView.text = [drink
objectForKey:INGREDIENTS_KEY];
directionsTextView.text = [drink objectForKey:DIRECTIONS_
KEY];
}
Set the detail view controller’s drink property
2
Add a method to the detail view controller to populate the fields
3
// Override to support row selection in the table view.
- (void)tableView:(UITableView *)tableView didSelectRowAtIndexPath:(NSInd
exPath *)indexPath {
// Navigation logic may go here for example, create and push
another view controller.
DrinkDetailViewController *drinkDetailViewController =
[[DrinkDetailViewController alloc] initWithNibName:@”DrinkDetailViewContro
ller” bundle:nil];
drinkDetailViewController.drink = [self.drinks
objectAtIndex:indexPath.row];
[self.navigationController pushViewController:drinkDetailViewController
animated:YES];
[drinkDetailViewController release];
}
Add this whole line to grab a
dictionary from the array.
This whole
method is new.
RootViewController.m
DrinkDetailViewController.m
198 Chapter 5
so that’s what’s in a cupid’s cocktail!
Test Drive
Compile and build and run again
Q:
We re-create the detail view every
time someone taps on a drink. Couldn’t I
just reuse that view?
A: For DrinkMixer it really won’t matter
too much; since the view is pretty lightweight,
we won’t suffer too much overhead re-
creating it when a drink is tapped. However,
for best performance you can refactor it to
reuse the same detail view controller and
just change the drink it should be showing
when a row is tapped.
Q:
Why did we have to pull out the
dictionary key names into a separate file?
A: Having magic string values in your
code is generally a bad idea—no matter
what programming language or platform
you’re using. By pulling them up into
constants using #define, they are checked
by the compiler. So a typo like @”nme”
instead of @”name” would end up as a
bug at runtime, while mistyping NME_KEY
instead of NAME_KEY would prevent things
from even compiling.
Q:
I looked at the NSDictionary
documentation and there’s a
valueForKey: and an objectForKey:.
What’s the difference?
A: Great question. valueForKey: is
used for what’s called key value coding,
which is a specific pattern typically used
in Cocoa Binding. The subtle catch is that
NSDictionary usually just turns a call to
valueForKey: into a call to objectForKey, and
it looks like either one will work. However,
valueForKey actually checks the key you
pass it and has different behavior depending
on your key. That’s almost never what you
want (unless you’re doing Cocoa binding
stuff, of course). The correct method to use
is objectForKey:.
you are here 4 199
plists and modal views
Is that app up on the App Store? Then I can
just download it on my phone and start making
even more tips!
Looks like there’s a market there!
A quick submission to Apple and
Sam, ready for your
app to make his (and
your) wallet fatter
200 Chapter 5
a modern-day dear john letter
From: iTunes Store
Subject: DrinkMixer app NOT APPROVED
Your app is NOT APPROVED for distribution on the App
Store. It does not conform to Apple’s Human Interface
Guide in your implementation of the table view. The table
views are not using disclosure indicator elements.
Apps that do not conform to the Human Interface Guide
may not be distributed. After fixing your implementation,
resubmit your app for approval.
We’ll go through the approval
process later.
Later in the book, we’ll take you step by
step through the process of preparing
an app for approval. For now, just worry about how to fix
DrinkMixer!
Time to
investigate
the HIG
Seriously, this can and will happen
if you don’t follow the HIG. It
happened to, um, a friend of the
authors twice.
you are here 4 201
plists and modal views
We have a usability problem
We know that the user needs to touch the name of the drink
to see the details about each individual drink, but how is
the user supposed to know that? The HIG has a number of
recommendations for how to deal with drill-down, hierarchical
data. We’re already on the right track using table views but the
HIG has a number of additional recommendations for helping
the user understand how to navigate the app.
It’s time to dive into the HIG and figure out what went wrong.
When should we be using disclosure indicator elements?
View Controller
Touch here
Here is the root view that
users see, the table view.
When the user
taps, the view
controller
hands off
control to
the detailed
view.
The HIG mentions detailed disclosure buttons and disclosure indicators—which should we use? Why?
Table cells have a number of built-in usability
items that help users understand how to use
your app - even if it’s the first time they’ve
run it.
We’re already using the
navigation controller’s
back button to help the
user know how to get
back to where they came
from
202 Chapter 5
disclose your intentions
When should we be using disclosure indicator elements?
Table Cells Up Close
So, what exactly is the disclosure indicator element, and where does it go?
Let’s look a little deeper in the HIG:
Big Font Info
small detailed text
accessoryType -
common ones are
disclosure indicator,
detailed disclosure
indicator, and
checkmark.
imageView - used
to show images
associated with a cell.
In the HIG, Chapter 8, the “Configuring a Table View” section, you can pretty quickly find out why
you’re in violation over those disclosure indicators:
“The disclosure indicator element is necessary if you’re using
the table to present hierarchical information.”
DrinkMixer uses really basic cells, but you can easily customize your cells for
a different app, besides just adding disclosure indicators. Even though the
table only supports one column, you can make it look like more by adding a
thumbnail, for example. You can also adjust the font sizes to open up some
room for each table cell if you need to.
Most really polished apps use some kind of table cell customizing, so keep that
in mind while you’re looking through the API. For now, we just need to add
the disclosure icon to our cells to indicate there’s more information available if
a user taps on them.
textLabel - the main
text area in a cell.
detailTextLabel - depending on
what cell style you use, it can show
up in different places, fonts, and
colors.
The disclosure indicator denotes that there is an additional level of information available about an item
when you click it (like drink details); it selects that row and shows the additional data. The button can
do something besides select the row - it can kick off an action. That’s more than we’ll need here, so
we’ll just stick with the disclosure indicator.
The HIG mentions detailed disclosure buttons and disclosure indicators—which should we use? Why?
It’s time to dive into the HIG and figure out what went wrong.
you are here 4 203
plists and modal views
Use a disclosure indicator if your cell
leads to more information
TableViewCells have a lot of built-in functionality—we’re just
scratching the surface. Adding a disclosure indicator is simply a
matter of telling the cell what type of accessory icon it should use.
Take a look at the UITableViewCell documentation for some of
the other options.
Here’s the
constant you
need.
//
Configure the cell.
cell.textLabel.text = [[self.drinks objectAtIndex:indexPath.row]
valueForKey:NAME_KEY];
cell.accessoryType = UITableViewCellAccessoryDisclosureIndicator;
return cell;
}
Just set the accessory type to the
Disclosure constant.
There’s just one quick line of
code to set the cell’s accessory
type when we configure the cell:
Test Drive
Go ahead and build and Run make sure it’s working!
RootViewController.m
204 Chapter 5
ready to resubmit to the App Store
Test Drive
One little line of code fixed all of your App Store approval issues.
There are those
disclosure elements—now
the user knows what to
do!
you are here 4 205
plists and modal views
After resubmitting to the App Store,
DrinkMixer is up on iTunes!
This app is great! I’m
going to use it every night.
Sales report - DrinkMixer - Week 1
Overall sales - 400 downloads
Price - $1.99
Overall revenue - $796
Wow, just
for one week!
The reviews are coming in
Remember that Apple
will take a percentage
of this
206 Chapter 5
meanwhile, back in the App Store
Sales were going strong
But then bad reviews started coming in. What’s
going on?
The
reviews
are bad
and sales
are tanking!
They say things like
“DrinkMixer sucks–I
can’t add anything”
Another review:
“I need more
than 40 drinks.”
“My bar has some custom
drinks and I don’t want
to keep a separate sheet
of drinks around.”
“I’m going to switch to iDrink -
it’s more expensive, but it lets
me add new drinks and customize
my list.”
“I don’t like any of
the drinks on the
list.”
you are here 4 207
plists and modal views
Think about how you originally designed DrinkMixer and the
feedback, and figure out what you’ll do next.
What would address the users’ concerns?
1
Given the structure of DrinkMixer, how would you refactor the code to fix the problem?
2
Is there an easy way to fix the code? A hard way?
3
208 Chapter 5
give the people what they want
Think about how you originally designed DrinkMixer and the
feedback, and figure out what you’ll do next.
The easiest way to fix the problem is to update the app so users can add more drinks
to the list.
We could add a new view that lets users enter their drink information. It could look like
the detail view, but allow them to type in the information they want. We’d have to be
able to save that new information and update the table to show the new drink.
There are lots of hard ways and probably a few good “easy” ways. In general, the
easiest way for us to add this functionality is to reuse as much of what we’ve already
done as possible. We can definitely take advantage of our navigation controller, and
let’s see if we can’t do something useful with our DetailDrinkView too
How would you go about implementing a view
where users can add drinks to DrinkMixer?
Think about how you originally designed DrinkMixer and the
feedback, and figure out what you’ll do next.
What would address the users’ concerns?
1
Given the structure of DrinkMixer, how would you refactor the code to fix the problem?
2
Is there an easy way to fix the code? A hard way?
3
you are here 4 209
plists and modal views
App Layout Construction
Which interface is better?
Why? (Be specific.)
Why not the other?
Some kind of button in the
navigation controller to kick
off a new view.
Add a new toolbar with some
buttons below the nav controller.
You’d have
room for an
add button and
others, when you
need them.
Option #1 Option #2
Here is the table view for DrinkMixer with two possible
designs. Based on aesthetics, usability, and standard iPhone
App behavior, which one is better for showing the users
where they should add a drink?