Interpretation of radiography films for NonDestructive Testing (NDT)
Bạn đang xem bản rút gọn của tài liệu. Xem và tải ngay bản đầy đủ của tài liệu tại đây (403.83 KB, 44 trang )
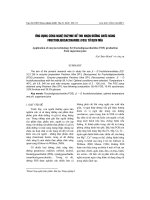
NDT Images
AN OVERVIEW
Your guide to proper
processing and interpretation
of radiography films for
Non-Destructive Testing (NDT)
ndt.carestream.com
INTRODUCTION
FILM HANDLING ARTIFACTS
This guide addresses common artifacts that result
from poor film handling and shows how you can
avoid them.
While many factors can affect image quality,
macroscopic defects known as artifacts are
sometimes produced during film handling
and processing. These artifacts degrade film
images. If images are seriously degraded,
interpretations and analyses derived from those
images will be compromised. Often, those
analyses will be completely unsatisfactory.
The guide is designed to help you identify and
understand a wide variety of casting and welding
defects that appear on images obtained during
Non-Destructive Testing (NDT).
To make sure you achieve the highest quality
images — and operate cost effectively — it is
critical to minimize the number and types of
artifacts that appear on processed films. The
solution is simple. Proper film handling
practices will prevent nearly all artifacts
that compromise NDT films.
Section I of this guide defines the most common
film handling artifacts and describes what causes
them. Detailed troubleshooting procedures are
offered to help you prevent similar artifacts from
forming in the future.
Section II offers general procedures you can
follow to prevent the formation of artifacts.
WELD AND CASTING DEFECTS
It’s critical that your NDT programs produce the
best possible data. This guide will help you identify
the wide variety of artifacts and NDT defects, from
crimps to streaks, from micro-fissures to gas voids.
Section III addresses defects typically found in
images of Castings.
Section IV helps identify defects found in images
of Welds.
1
TABLE OF CONTENTS
TABLE OF CONTENTS
Sections
Sections
Page
Film Handling Artifact
Introduction1
Section I
5
Pressure Marks
Film Handling 7
Crimp Marks
Artifacts
(after exposure)
9
Crimp Marks
(before exposure)
11
Static Marks
13
Poor Definition
15
Spots (fixer)
17
Spots (developer)
19
Hair Lines
21
Screen Marks
23
Paper Marks
25
Black Streaks or Blotches
27
Streaking
29
Pressure Marks
(from automatic processing)
31
Pi Lines
(from automatic processing)
33
Random Black Spots
(from automatic processing)
Section II 34-35 Film handling practices
General Film
in processing
Processing &
environments
Handling 36-37 Darkroom conditions:
Guidelines
practice and
maintenance
38-39 Film processing
2
Section III
Defects in
Castings
Page
41
43
45
47
49
51
53
Section IV 55
Defects in
57
Welds
59
61
63
65
67
69
71
73
75
77
79
81
83
Film Handling Artifact
Shrinkage
Gas Voids
Inclusions
Unfused Chaplet
Hot Tear
Cracks
Core Shift
Cluster Porosity
Excess Penetration
External Undercut
Internal (Root) Undercut
Lack of Penetration
Tungsten Inclusions
Slag Lines
Lack of Fusion
Scattered Porosity
Mismatch
Elongated Slag Inclusions
or “Wagon Tracks”
Weld Spatter
Longitudinal Cracks
Transverse Cracks
Burn Through
3
I
WHAT DO THEY LOOK LIKE?
A pressure mark exhibits a significantly lower
density compared to adjacent areas.
WHAT CAUSES THEM?
A severe localized application of pressure to an area
of the film before exposure.
PRESSURE MARKS
PRESSURE MARKS
WHEN CAN THESE OCCUR?
The major cause of pressure marks is poor film
handling during the preparation of cassettes. Film
may be pinched in the cassette at some point in the
handling process. An object dropped on the cassette
can also cause pressure marks.
HOW DO I TEST FOR PRESSURE MARKS?
Carefully prepare another cassette of film directly
from the same box. Expose and process the film.
If you don’t see defects like you saw the first time,
what you saw the first time is likely a pressure mark.
HOW CAN I PREVENT THEM?
Always handle film with care. Avoid any type of
pressure on the film.
4
5
I
WHAT DO THEY LOOK LIKE?
Crimp marks appear as crescent-shaped defects
that are darker (higher density) than adjacent
film areas.
WHAT CAUSES THEM?
Any sharp bending of the film after exposure and
just before or during processing will crimp the film.
WHEN CAN THESE OCCUR?
This usually happens when film is handled
improperly when cassettes or hangers are
being unloaded.
CRIMP MARKS (AFTER EXPOSURE)
CRIMP MARKS (AFTER EXPOSURE)
HOW DO I TEST FOR POST-EXPOSURE
CRIMP MARKS?
Expose some film and then intentionally crimp or
kink it. Process the film and examine the film with
reflected light. Chances are you’ll see one or more
crescent-shaped defects.
HOW CAN I PREVENT THEM?
Handle the film with care. To carry a single,sheet,
gently bend the film in half and hold it in a “3-point
grip”, that is, grasp it with your thumb and middle
finger and place your index finger in between to
keep the film surfaces separated. It’s easier if you
keep the long dimension parallel to the floor.
6
7
I
WHAT DO THEY LOOK LIKE?
Crimp marks appear as crescent-shaped defects
that are lighter (lower density) than adjacent
film areas.
WHAT CAUSES THEM?
Sharp, abrupt bending of the film before exposure
causes crimp marks of this type.
WHEN CAN THESE OCCUR?
This usually happens when film is handled poorly
when removing a sheet from a box or loading a
cassette prior to exposure.
CRIMP MARKS (BEFORE EXPOSURE)
CRIMP MARKS (BEFORE EXPOSURE)
HOW DO I TEST FOR PRE-EXPOSURE
CRIMP MARKS?
Intentionally crimp or kink some film, expose it,
then process normally. Examine the film and you’ll
probably see lighter crimp marks where you
mishandled the film.
HOW CAN I PREVENT THEM?
Handle the film with care. To carry a single sheet,
gently bend the film in half and hold it in a “3-point
grip”, that is, grasp it with your thumb and middle
finger and place your index finger in between to
keep the film surfaces separated. It’s easier if you
keep the long dimension parallel to the floor.
8
9
I
WHAT DO THEY LOOK LIKE?
Static marks appear as either jagged, branching
dark lines or irregular and intense dark spots. Static
marks are similar to certain casting irregularities.
STATIC MARKS
STATIC MARKS
WHAT CAUSES THEM?
The dissipation of static electricity causes
static marks.
WHEN CAN THESE OCCUR?
Removing film quickly from its box when the
relative humidity is low (a bad hair day) is the
most common cause of static marks.
HOW DO I TEST FOR STATIC MARKS?
Shuffle your feet or rub your hair before handling
film. Sometimes you’ll see or hear the static
discharge. After processing, if you see jagged
lines or dark spots, chances are good you’ve got
static marks.
HOW CAN I PREVENT THEM?
Keep film at a relative humidity that’s greater than
40%. Avoid sliding the films or moving fast when
removing film from its box.
10
11
I
WHAT DOES IT LOOK LIKE?
Poor definition is simply a term to describe images
that are not sharp.
WHAT CAUSES IT?
In most cases, poor definition is caused by a lack of
contact between the screen and the film.
POOR DEFINITION
POOR DEFINITION
WHEN CAN THIS OCCUR?
Any time there’s not enough, or poor, contact
between lead or fluorescent screens and the film
you can get “unsharp” images.
HOW CAN I PREVENT IT?
Simple. Just make sure your screen and film path are
adjusted to correct tolerances and properly aligned.
12
13
I
WHAT DO THEY LOOK LIKE?
Spots from fixer will appear as small spots of a lower
density than the surrounding film area.
WHAT CAUSES THEM?
SPOTS (FIXER)
SPOTS (FIXER)
Before development, a splash of fixer, even in trace
amounts, will cause spots.
WHEN CAN THESE OCCUR?
Any time there’s chemical contamination you
can have a problem. In this case, it’s usually due
to a poor darkroom layout or careless processing
techniques.
HOW CAN I PREVENT THEM?
Don’t splash fixer, of course. And in general, keep
film loading areas completely dry.
14
15
I
WHAT DO THEY LOOK LIKE?
Spots from developer will appear as small spots of
a high density compared to the surrounding area of
the film.
WHAT CAUSES THEM?
A touch or splash of developer prior to developing
the film will cause this type of spot.
SPOTS (DEVELOPER)
SPOTS (DEVELOPER)
WHEN CAN THESE OCCUR?
Poor processing techniques or a bad darkroom
layout can lead to spots.
HOW CAN I PREVENT THEM?
Don’t splash chemicals of any kind. Make sure your
film loading area is totally dry.
16
17
I
WHAT DO THEY LOOK LIKE?
Hair lines look like just what they are — a very
slender white line across a film negative. They can
also be spots created by lint or dust.
HAIR LINES
HAIR LINES
WHAT CAUSES THEM?
In most cases, a hair between the film and the
screen causes a line. Lint or dust will cause irregular
spots or shadow images.
WHEN CAN THESE OCCUR?
Contamination can occur anywhere in the process
of handling films and screens.
HOW DO I CHECK FOR HAIR LINES?
Closely and carefully inspect cassettes and screens.
HOW CAN I PREVENT THEM?
Keep all your work areas clean, and as close to
spotless as possible.
18
19
I
WHAT DO THEY LOOK LIKE?
A screen mark will appear as a dark line on a
negative. Screen marks will also appear as white
spots on a negative.
SCREEN MARKS
SCREEN MARKS
WHAT CAUSES THEM?
A dark line is caused by a deep scratch on the
lead foil screen. Light spots are caused by flakes of
foreign material on the screen.
WHEN CAN THESE OCCUR?
You’ll see screen marks when a screen is scratched
or damaged in some way. They’re also produced
when foreign materials get into your equipment.
HOW DO I CHECK FOR SCREEN MARKS?
Inspect your screens closely. If you see damage of
any kind, they must be replaced. If you’re not sure,
replace the suspect screen with a new one and run
some film tests.
HOW CAN I PREVENT THEM?
You should avoid scratching screens, of course, and
always maintain meticulously clean work areas. In
addition, use leadpack film formats when possible.
20
21
I
WHAT DO THEY LOOK LIKE?
A paper mark will appear as a low density area that
almost completely covers the film.
WHAT CAUSES THEM?
PAPER MARKS
PAPER MARKS
Paper marks appear when the paper gets on the film
and screen and casts a shadow of itself.
WHEN CAN THESE OCCUR?
This happens when the interleaving paper is
not removed.
HOW DO I CHECK FOR PAPER MARKS?
It’s easy. Just run test exposures with and without
the interleaving paper.
HOW CAN I PREVENT THEM?
Make sure you completely remove the interleaving
paper before making an exposure.
22
23
I
WHAT DO THEY LOOK LIKE?
They look just like their name: black streaks or
blotches.
WHAT CAUSES THEM?
Extraneous light creates black streaks or blotches.
WHEN CAN THESE OCCUR?
Most often these defects happen when light leaks
in because a cassette or film holder is damaged
or faulty.
BLACK STREAKS OR BLOTCHES
BLACK STREAKS OR BLOTCHES
HOW DO I TEST FOR STREAKS/BLOTCHES?
Remove a sample piece of film in total darkness,
ensuring there’s no chance it could have been
exposed by light. Process the film and examine it.
HOW CAN I PREVENT THEM?
There are a number of steps you should take. Check
and properly maintain your cassettes. Secure them
with tape or rubber bands as necessary. And finally,
make sure your safelights are really safe.
24
25
I
WHAT DOES IT LOOK LIKE?
Streaking is defined as a line, smear, or band. In this
case it can be black or white
STREAKING
STREAKING
WHAT CAUSES IT?
Streaks are caused by any of several types of chemical contamination. The contamination often occurs
in poor darkroom setups or because of improper
processing technique.
WHEN CAN IT OCCUR?
Streaks of this type happen when chemicals from
prior processing cycles are not completely removed
from hangers.
HOW CAN I PREVENT IT?
Avoid overcrowding hangers. Make sure you rinse
equipment carefully and completely. Also keep film
loading areas dry and free of chemical splashes.
26
27
I
WHAT DO THEY LOOK LIKE?
Pressure marks appear as dark lines or dark spots.
WHAT CAUSES THEM?
A buildup of chemical deposits in automatic
processing or mechanical pressure on the film can
create pressure marks.
WHEN CAN THESE OCCUR?
Poor processor maintenance is the primary cause.
This includes both foreign matter on rollers and
incorrect roller clearances.
HOW CAN I PREVENT THEM?
Thoroughly clean automatic processor rollers on a
regular basis and make sure they are mechanically
maintained and up to spec.
28
PRESSURE MARKS (FROM AUTOMATIC PROCESSING)
PRESSURE MARKS
(FROM AUTOMATIC PROCESSING)
29
I
WHAT DO THEY LOOK LIKE?
A Pi (π) line is a very specific artifact: a dark line at
a distance from the leading edge of the film that’s
exactly equal to the circumference of the roller in
your automatic processor.
WHAT CAUSES THEM?
Pi lines are caused when minute chemical deposits
are transferred from the roller to the film.
WHEN CAN THESE OCCUR?
They are often spaced in a regular sequence,
separated by the circumference of the roller.
HOW DO I TEST FOR PI LINES?
PI LINES (FROM AUTOMATIC PROCESSING)
PI LINES (FROM AUTOMATIC
PROCESSING)
Measure the exact distance between the lines.
If the artifact is repeated again and again at the
same spacing with diminishing density or intensity,
and the distance between the lines is equal to the
circumference of the roller, you have Pi lines.
HOW CAN I PREVENT THEM?
Make sure the rollers in your automatic processors
are carefully and completely cleaned and rinsed on
a regular basis.
30
31
I
WHAT DO THEY LOOK LIKE?
Random black spots look like black comets with
their tails extending in the direction of the film travel.
WHAT CAUSES THEM?
Chemical contamination causes random
black spots.
WHEN CAN THESE OCCUR?
Either the processor or some of its components are
contaminated, or foreign particles have fallen on the
film as it enters the processor.
HOW CAN I PREVENT THEM?
Clean your automatic processor, carefully
paying special attention to the feed trays and
entrance rollers.
32
RANDOM BLACK SPOTS (FROM AUTOMATIC PROCESSING)
RANDOM BLACK SPOTS
(FROM AUTOMATIC PROCESSING)
33
II
FILM HANDLING
Your images must be accurate and offer the highest
quality. They must provide cool, clean image tones,
low noise, high contrast and excellent definition. An
image that’s flawed is useless. A test that has to be
repeated wastes time and resources and costs you
money. Your productivity suffers.
• Handle film only by its edges.
In each category, defects can be drastically reduced
with proper care and consideration. Ensure that you:
• Properly set-up your facility.
• Keep your darkrooms clean.
• Handle and process film using proper methods.
• Keep equipment and work spaces clean.
• Rigorously maintain film processing equipment.
• Be gentle.
• Be careful of metal surfaces.
• Use the fingertips of both hands.
• To carry a single sheet, fold film in half and hold
it in a “3-point grip” between thumb and middle
finger, with index finger in the center to keep film
surfaces separated.
• Give yourself room to spread out.
• Carry film flat in trays or boxes.
• Wear gloves.
• Avoid jewelry that may have sharp edges.
• Clean film as recommended
– Wipe in one direction, not in a circular motion.
– Use Clean Room Wipes, Environmentally Safe
Film Cleaners, TEKNEK Rollers or equivalent
tacky roller cleaners.
To minimize the possibility of creating artifacts,
make sure your darkrooms and film loading rooms
are clean. Maintain film processors regularly, and
always handle films with tender loving care and
common sense.
IN THE PHOTO LAB
Artifacts can be virtually eliminated by following
these guidelines.
• Load cassettes with care.
• Be careful removing raw film from the original
package to avoid scratching and static.
FILM HANDLING PRACTICES IN PROCESSING ENVIRONMENTS
FILM HANDLING PRACTICES IN
PROCESSING ENVIRONMENTS
• Minimize exposure to dirt and dust when handling
and transporting film.
• Carefully package and deliver film to the evaluators
or technicians.
34
35
II
Darkroom practices may be considered under
several categories:
MATERIALS
• Avoid shedding materials such as paper, or
cardboard boxes by using intermediate containers
(such as plastic containers) to transport materials
to the darkroom.
training
• Operators should understand why darkroom
cleanliness is necessary and how they can
contribute to keeping it clean.
• Encourage people to spot problems and provide
solutions to maintain a clean darkroom.
FACILITY
• Inspect all surfaces of the facility and equipment;
tables, chairs, etc.
• Avoid large storage areas near the darkroom by
practicing Just-In-Time delivery.
• Inspect and remove rust, corrosion, and
flaking paint.
EQUIPMENT
• Repaint with epoxy paint where necessary or
use high-gloss paint for easy cleaning.
• Should not generate contaminants (such as rust).
• Use hard surface materials for flooring, never
carpet.
• Should not interfere with filtered air flow and/or
cause turbulence.
• Surfaces should be easy to clean. (i.e., smooth,
glossy, no crevices)
• Perform maintenance outside the dark environment when possible.
• Stainless steel tables and wire coated racks are
good choices for use in darkrooms.
• Use laminate coated ceiling tiles.
• Lighting must meet needs of the process and
product. You should follow the manufacturers’
safelight recommendations.
• Delivery systems and conduits should be made
of non-shedding inert material.
DARKROOM CONDITIONS: PRACTICE AND MAINTENANCE
DARKROOM CONDITIONS:
PRACTICE AND MAINTENANCE
CLEANING
PHYSICAL LAYOUT
• Locate equipment to optimize process flow.
• Steps of the workflow should physically follow
each other and not traverse back and across the
work area.
36
• Schedule cleaning so it does not interfere with
production.
• Cleaning should proceed from highest surface level
to lowest, and from cleanest areas to less clean.
• Cleaning should be followed by a period of time
to allow dust to settle; do this before restarting
production.
37
II
PROCESSOR MAINTENANCE:
Make sure you are processing film at the
recommended development time and temperature.
Carestream recommended times and temperatures
can be found in the Technical Data sheets on our
website for all types of films.
Controlling bioslime growth
Underdeveloping will cause low D-max and affect
image quality. Make sure processor guides and
rollers are properly aligned and crossovers adjusted
correctly. Clean tanks of bioslime and maintain the
processor to avoid:
• Dirty entrance rollers.
• Dirty top rollers.
• Salt crystals on crossover guides.
• Dirty squeegee rollers at entrance to dryer.
• Particulates on dryer rollers.
PREVENTATIVE MAINTENANCE PRACTICE:
Developer and Fixer
Filtration
Use 10 μm filter.
Change weekly.
Water Filtration
25 μm or smaller filter is
best. Change weekly.
Daily Maintenance
Clean all top rollers,
entrance rollers, crossovers, wash to dryer
squeegee rollers.
Weekly Maintenance
Roller Transport Cleanup
Film 4955
38
Remove all racks, developer, fixer, and clean
with high pressure hot
water. Use brushes to
clean. Avoid scratching stainless steel with
SCOTCHBRITE Pads or
equivalent.
• Minimize bioslime, a major cause of pinhole
emulsion pick off.
• Daily addition of 30 mL (1-oz) of household bleach
will help to dissolve gelatin particles, preventing
redeposits and minimizing bioslime growth.
FILM PROCESSING
FILM PROCESSING
• WASHCLEAR, from Rothtech Ecological, has also
proven to be very effective.
• Proxel GLX from Avecia, Inc. is also effective with a
convenient auto-feed dispenser to the processor.
• Drain wash tanks when not in use or when
shutting down your processor.
CLEANING FILM
To clean film, use only isopropyl alcohol (91 percent)
or heptane. Soft, lintless, absorbent cotton pads,
Webril Handi-Pads, or their equivalent should be
used. Never use water because it will soften
the gelatin.
• Apply cleaner to the cleaning wipe.
• Wipe film in a single up-and-down direction, NOT
in a circular motion.
• Fold the cleaning wipe frequently to keep dirt
particles away from the film surface.
• Change wipes often.
Use daily to remove
particles. Especially
important to use immediately after cleaning
racks and after system
cleanings.
39
III
WHAT DOES IT LOOK LIKE?
Shrinkage is indicated when you see several minor
areas of differing density branching away from a
major, abrupt linear defect. Shrinkage looks a lot like
a tree with a thick trunk and several branches.
SHRINKAGE
SHRINKAGE
WHAT CAUSES SHRINKAGE?
When adjacent thick and thin portions of a casting
cool unevenly, and the portions shrink at varying
rates, a discontinuity becomes evident.
40
41
III
WHAT DO THEY LOOK LIKE?
A gas void appears as a smooth dark spot. It can be
round, oval, or elongated. The sizes of these spots
can vary considerably.
GAS VOIDS
GAS VOIDS
WHAT CAUSES GAS VOIDS?
When gas is trapped in a casting, it naturally
produces a void. The gas can erupt spontaneously
from molten metal, and it can develop from water
vapor or green sand in a mold. In addition, during the
pouring of a mold, gas voids can form as a result of
simple turbulence.
42
43
III
WHAT DO THEY LOOK LIKE?
Inclusions usually exhibit lower density than gas
voids. They’re more diffuse than gas voids and
irregular in shape, that is, not oval or spherical.
INCLUSIONS
INCLUSIONS
WHAT CAUSES INCLUSION?
Inclusions develop when low-density foreign matter
and/or sand are entrapped in the molten metal and
don’t dissolve.
44
45
III
WHAT DO THEY LOOK LIKE?
An unfused chaplet is the dark outline of a shape
similar to the shape of the chaplet itself.
WHAT CAUSES AN UNFUSED Chaplet?
Chaplet’s are used to maintain cores in their correct
position during the casting process. When a chaplet
is not fused completely by the molten metal, a
discontinuity is formed.
46
UNFUSED CHAPLET
UNFUSED CHAPLET
47