Android studio overview
Bạn đang xem bản rút gọn của tài liệu. Xem và tải ngay bản đầy đủ của tài liệu tại đây (7.58 MB, 506 trang )
Android Studio Overview
In this document
1. Project and File Structure
2. Android Build System
3. Debug and Performance
4. Installation, Setup, and Update Management
5. Other Highlights
See also
1. IntelliJ FAQ on migrating to IntelliJ IDEA
Android Studio is the official IDE for Android application development, based on IntelliJ
IDEA. On top of the capabilities you expect from IntelliJ, Android Studio offers:
Flexible Gradle-based build system
Build variants and multiple apk file generation
Code templates to help you build common app features
Rich layout editor with support for drag and drop theme editing
Lint tools to catch performance, usability, version compatibility, and other problems
ProGuard and app-signing capabilities
Built-in support for Google Cloud Platform, making it easy to integrate Google Cloud
Messaging and App Engine
And much more
Download Android Studio now.
If you're new to Android Studio or the IntelliJ IDEA interface, this page provides an
introduction to some key Android Studio features.
For specific Android Studio how-to documentation, see the pages in the Workflow section,
such as Managing Projects from Android Studio and Building and Running from Android
Studio.
Project and File Structure
Android Project View
By default, Android Studio displays your profile files in the Android project view. This view
shows a flattened version of your project's structure that provides quick access to the key
source files of Android projects and helps you work with the new Gradle-based build system.
The Android project view:
Groups the build files for all modules at the top level of the project hierarchy.
Shows the most important source directories at the top level of the module hierarchy.
Groups all the manifest files for each module.
Shows resource files from all Gradle source sets.
Groups resource files for different locales, orientations, and screen types in a single
group per resource type.
Figure 1. Show the Android project view.
Figure 2. Project Build Files.
The Android project view shows all the build files at the top level of the project hierarchy
under Gradle Scripts. Each project module appears as a folder at the top level of the project
hierarchy and contains these three elements at the top level:
java/
manifests/
res/
- Source files for the module.
- Manifest files for the module.
- Resource files for the module.
For example, Android project view groups all the instances of the ic_launcher.png resource
for different screen densities under the same element.
Note: The project structure on disk differs from this flattened representation. To switch to
back the segregated project view, select Project from the Project
New Project and Directory Structure
When you use the Project view of a new project in Android Studio, you should notice that the
project structure appears different than you may be used to in Eclipse. Each instance of
Android Studio contains a project with one or more application modules. Each application
module folder contains the complete source sets for that module, including src/main and
src/androidTest directories, resources, build file and the Android manifest. For the most
part, you will need to modify the files under each module's src/main directory for source
code updates, the gradle.build file for build specification and the files under
src/androidTest directory for test case creation.
Figure 3. Android Studio project structure
For more information, see IntelliJ project organization and Managing Projects.
Creating new files
You can quickly add new code and resource files by clicking the appropriate directory in the
Project pane and pressing ALT + INSERT on Windows and Linux or COMMAND + N on Mac.
Based on the type of directory selected, Android Studio offers to create the appropriate file
type.
For example, if you select a layout directory, press ALT + INSERT on Windows, and select
Layout resource file, a dialog opens so you can name the file (you can exclude the .xml
suffix) and choose a root view element. The editor then switches to the layout design editor
so you can begin designing your layout.
Android Build System
Android Build System
The Android build system is the toolkit you use to build, test, run and package your apps.
This build system replaces the Ant system used with Eclipse ADT. It can run as an integrated
tool from the Android Studio menu and independently from the command line. You can use
the features of the build system to:
Customize, configure, and extend the build process.
Create multiple APKs for your app with different features using the same project and
modules.
Reuse code and resources across source sets.
The flexibility of the Android build system enables you to achieve all of this without
modifying your app's core source files. To build an Android Studio project, see Building and
Running from Android Studio. To configure custom build settings in an Android Studio
project, see Configuring Gradle Builds.
Application ID for Package Identification
With the Android build system, the applicationId attribute is used to uniquely identify
application packages for publishing. The application ID is set in the android section of the
build.gradle file.
apply plugin: 'com.android.application'
android {
compileSdkVersion 19
buildToolsVersion "19.1"
defaultConfig {
applicationId "com.example.my.app"
minSdkVersion 15
targetSdkVersion 19
versionCode 1
versionName "1.0"
}
...
Note: The applicationId is specified only in your build.gradle file, and not in the
AndroidManifest.xml file.
When using build variants, the build system enables you to to uniquely identify different
packages for each product flavors and build types. The application ID in the build type is
added as a suffix to those specified for the product flavors.
productFlavors {
pro {
applicationId = "com.example.my.pkg.pro"
}
free {
applicationId = "com.example.my.pkg.free"
}
}
buildTypes {
debug {
applicationIdSuffix ".debug"
}
}
....
The package name must still be specified in the manifest file. It is used in your source code to
refer to your R class and to resolve any relative activity/service registrations.
package="com.example.app">
Note: If you have multiple manifests (for exmample, a product flavor specific manifest
and a build type manifest), the package name is optional in those manifests. If it is
specified in those manifests, the package name must be identical to the package name
specified in the manifest in the src/main/ folder.
For more information about the build files and process, see Build System Overview.
Debug and Performance
Android Virtual Device (AVD) Manager
AVD Manager has updated screens with links to help you select the most popular device
configurations, screen sizes and resolutions for your app previews.
Click the Android Virtual Device Manager
in the toolbar to open it and create new
virtual devices for running your app in the emulator.
The AVD Manager comes with emulators for Nexus 6 and Nexus 9 devices and also
supports creating custom Android device skins based on specific emulator properties
and assigning those skins to hardware profiles. Android Studio installs the Intel® x86
Hardware Accelerated Execution Manager (HAXM) emulator accelerator and creates a
default emulator for quick app prototyping.
For more information, see Managing AVDs.
Memory Monitor
Android Studio provides a memory monitor view so you can more easily monitor your
app's memory usage to find deallocated objects, locate memory leaks and track the
amount of memory the connected device is using. With your app running on a device or
emulator, click the Memory Monitor tab in the lower right corner to launch the memory
monitor.
Figure 4. Memory Monitor
New Lint inspections
Lint has several new checks to ensure:
Cipher.getInstance()
In custom Views, the associated declare-styleable for the custom view uses the
same base name as the class name.
Security check for fragment injection.
Where ever property assignment no longer works as expected.
Gradle plugin version is compatible with the SDK.
Right to left validation
Required API version
many others
is used with safe values
Hovering over a Lint error displays the full issue explanation inline for easy error
resolution. There is also a helpful hyperlink at the end of the error message for
additional error information.
With Android Studio, you can run Lint for a specific build variant, or for all build
variants. You can configure Lint by adding a lintOptions property to the Android
settings in the build.gradle file.
android {
lintOptions {
// set to true to turn off analysis progress reporting by lint
quiet true
// if true, stop the gradle build if errors are found
abortOnError false
// if true, only report errors
ignoreWarnings true
For more information, see Improving Your Code with Lint.
Dynamic layout preview
Android Studio allows you to work with layouts in both a Design View
Figure 5. Hello World App with Design View
and a Text View.
Figure 6. Hello World App with Text View
Easily select and preview layout changes for different device images, display densities,
UI modes, locales, and Android versions (multi-API version rendering).
Figure 7. API Version Rendering
From the Design View, you can drag and drop elements from the Palette to the Preview
or Component Tree. The Text View allows you to directly edit the XML settings, while
previewing the device display.
Log messages
When you build and run your app with Android Studio, you can view adb and device
log messages (logcat) in the DDMS pane by clicking Android at the bottom of the
window.
If you want to debug your app with the Android Debug Monitor, you can launch it by
clicking Monitor
in the toolbar. The Debug Monitor is where you can find the
complete set of DDMS tools for profiling your app, controlling device behaviors, and
more. It also includes the Hierarchy Viewer tools to help optimize your layouts.
Installation, Setup, and Update Management
Android Studio installation and setup wizards
An updated installation and setup wizards walk you through a step-by-step installation and
setup process as the wizard checks for system requirements, such as the Java Development
Kit (JDK) and available RAM, and then prompts for optional installation options, such as the
Intel® HAXM emulator accelerator.
An updated setup wizard walks you through the setup processes as the wizard updates your
system image and emulation requirements, such GPU, and then creates an optimized default
Android Virtual Device (AVD) based on Android 5 (Lollipop) for speedy and reliable
emulation.
Figure 8. Setup Wizard
Expanded template and form factor support
Android Studio supports new templates for Google Services and expands the availabe device
types.
Android Wear and TV support
For easy cross-platform development, the Project Wizard provides new templates for creating
your apps for Android Wear and TV.
Figure 9. New Form Factors
During app creation, the Project Wizard also displays an API Level dialog to help you choose
the best minSdkVersion for your project.
Google App Engine integration (Google Cloud Platform/Messaging)
Quick cloud integration. Using Google App Engine to connect to the Google cloud and create
a cloud end-point is as easy as selecting File > New Module > App Engine Java Servlet
Module and specifying the module, package, and client names.
Figure 10. Setup Wizard
Update channels
Android Studio provides four update channels to keep Android Studio up-to-date based on
your code-level preference:
Canary channel: Canary builds provide bleeding edge releases, updated
about weekly. While these builds do get tested, they are still subject to
bugs, as we want people to see what's new as soon as possible. This is not
recommended for production.
Dev channel: Dev builds are hand-picked older canary builds that
survived the test of time. They are updated roughly bi-weekly or monthly.
Beta channel: Beta builds are used for beta-quality releases before a
production release.
Stable channel: Used for stable, production-ready versions.
By default, Android Studio uses the Stable channel. Use File > Settings > Updates to change
your channel setting.
Other Highlights
Translation Editor
Multi-language support is enhanced with the Translation Editor plugin so you can easily add
locales to the app's translation file. Color codes indicate whether a locale is complete or still
missing string translations. Also, you can use the plugin to export your strings to the Google
Play Developer Console for translation, then download and import your translations back into
your project.
To access the Translation Editor, open a strings.xml file and click the Open Editor link.
Figure 11. Translation Editor
Editor support for the latest Android APIs
Android Studio supports the new Material Design themes, widgets, and graphics, such as
shadow layers and API version rendering (showing the layout across different UI versions).
Also, the new drawable XML tags and attributes, such as <ripple> and <animated-selector>,
are supported.
Easy access to Android code samples on GitHub
Clicking Import Samples from the File menu or Welcome page provides seamless access to
Google code samples on GitHub.
Figure 12. Code Sample Access
Except as noted, this content is licensed under Creative Commons Attribution
2.5. For details and restrictions, see the Content License.
About Android | Legal | Support
Android Studio Tips and Tricks
In this document
1. Productivity Features
2. Working with IntelliJ
3. Key Commands
See also
1. Download Android Studio
2. IntelliJ IDEA Android Tutorials
3. IntelliJ FAQ on migrating to IntelliJ IDEA
If you're unfamiliar with using Android Studio and the IntelliJ IDEA interface, this page
provides some tips to help you get started with some of the most common tasks and
productivity enhancements.
Productivity Features
Android Studio includes a number of features to help you be more productive in your coding.
This section notes a few of the key features to help you work quickly and efficiently.
Smart Rendering
With smart rendering, Android Studio displays links for quick fixes to rendering errors. For
example, if you add a button to the layout without specifying the width and height atttributes,
Android Studio displays the rendering message Automatically add all missing attributs.
Clicking the message adds the missing attributes to the layout.
Bitmap rendering in the debugger
While debugging, you can now right-click on bitmap variables in your app and invoke View
Bitmap. This fetches the associated data from the debugged process and renders the bitmap in
the debugger.
Figure 1. Bitmap Rendering
Output window message filtering
When checking build results, you can filter messages by message type to quickly locate
messages of interest.
Figure 2. Filter Build Messages
Hierarchical parent setting
The activity parent can now be set in the Activity Wizard when creating a new activity.
Setting a hierarchal parent sets the Up button to automatically appear in the app's Action bar
when viewing a child activity, so the Up button no longer needs to be manually specified in
the menu.xml file.
Creating layouts
Android Studio offers an advanced layout editor that allows you to drag-and-drop widgets
into your layout and preview your layout while editing the XML.
While editing in the Text view, you can preview the layout on devices by opening the
Preview pane available on the right side of the window. Within the Preview pane, you can
modify the preview by changing various options at the top of the pane, including the preview
device, layout theme, platform version and more. To preview the layout on multiple devices
simultaneously, select Preview All Screen Sizes from the device drop-down.
Figure 3. Preview All Screens
You can switch to the graphical editor by clicking Design at the bottom of the window. While
editing in the Design view, you can show and hide the widgets available to drag-and-drop by
clicking Palette on the left side of the window. Clicking Designer on the right side of the
window reveals a panel with a layout hierarchy and a list of properties for each view in the
layout.
Working with IntelliJ
This section list just a few of the code editing practices you should consider using when
creating Android Studio apps.
For complete user documentation for the IntelliJ IDEA interface (upon which Android Studio
is based), refer to the IntelliJ IDEA documentation.
External annotations
Specify annotations within the code or from an external annotation file. The Android Studio
IDE keeps track of the restrictions and validates compliance, for example setting the data
type of a string as not null.
Alt + Enter key binding
For quick fixes to coding errors, the IntelliJ powered IDE implements the Alt + Enter key
binding to fix errors (missing imports, variable assignments, missing references, etc) when
possible, and if not, suggest the most probable solution.
Ctrl + D key binding
The Ctrl + D key binding is great for quickly duplicating code lines or fragments. Simply
select the desired line or fragment and enter this key binding.
Navigate menu
In case you're not familiar with an API class, file or symbol, the Navigate menu lets you jump
directly to the class of a method or field name without having to search through individual
classes.
Inspection scopes
Scopes set the color of code segments for easy code identification and location. For example,
you can set a scope to identify all code related to a specific action bar.
External annotations
Specify annotations within the code or from an external annotation file. The Android Studio
IDE keeps track of the restrictions and validates compliance, for example setting the data
type of a string as not null.
Injecting languages
With language injection, the Android Studio IDE allows you to work with islands of different
languages embedded in the source code. This extends the syntax, error highlighting and
coding assistance to the embedded language. This can be especially useful for checking
regular expression values inline, and validating XML and SQL statments.
Code folding
This allows you to selectively hide and display sections of the code for readability. For
example, resource expressions or code for a nested class can be folded or hidden in to one
line to make the outer class structure easier to read. The inner clas can be later expanded for
updates.
Image and color preview
When referencing images and icons in your code, a preview of the image or icon appears (in
actual size at different densities) in the code margin to help you verify the image or icon
reference. Pressing F1 with the preview image or icon selected displays resource asset details,
such as the dp settings.
Quick F1 documentation
You can now inspect theme attributes using View > Quick Documentation (F1), see the
theme inheritance hierarchy, and resolve values for the various attributes.
If you invoke View > Quick Documentation (usually bound to F1) on the theme attribute ?
android:textAppearanceLarge, you will see the theme inheritance hierarchy and resolved
values for the various attributes that are pulled in.
New Allocation Tracker integration in the Android/DDMS window
You can now inspect theme attributes using View > Quick Documentation F1, see the theme
inheritance hierarchy, and resolved values for the various attributes.
Figure 4. Allocation Tracker
Keyboard Commands
The following tables list keyboard shortcuts for common operations.
Note: This section lists Android Studio keyboard shortcuts for the default keymap. To change
the default keymap on Windows and Linux, go to File > Settings > Keymap. To change the
default keymap on Mac OS X, go to Android Studio > Preferences > Keymap.
Note: If you're using Mac OS X, update your keymap to use the Mac OS X 10.5+ version
keymaps under Android Studio > Preferences > Keymap.
Table 1. Programming key commands
Action
Command look-up (autocomplete command name)
Project quick fix
Reformat code
Show docs for selected API
Show parameters for selected method
Generate method
Jump to source
Delete line
Search by symbol name
Android Studio Key Command
CTRL + SHIFT + A
ALT + ENTER
CTRL + ALT + L (Win)
OPTION + CMD + L (Mac)
CTRL + Q (Win)
F1 (Mac)
CTRL + P
ALT + Insert (Win)
CMD + N (Mac)
F4 (Win)
CMD + down-arrow (Mac)
CTRL + Y (Win)
CMD + Backspace (Mac)
CTRL + ALT + SHIFT + N (Win)
OPTION + CMD + O (Mac)
Table 2. Project and editor key commands
Action
Build
Build and run
Toggle project visibility
Navigate open tabs
Android Studio Key Command
CTRL + F9 (Win)
CMD + F9 (Mac)
SHIFT + F10 (Win)
CTRL + R (Mac)
ALT + 1 (Win)
CMD + 1 (Mac)
ALT + left-arrow; ALT + right-arrow (Win)
CTRL + left-arrow; CTRL + right-arrow (Mac)
For a complete keymap reference guide, see the IntelliJ IDEA documentation.
Except as noted, this content is licensed under Creative Commons Attribution 2.5. For details
and restrictions, see the Content License.
About Android | Legal | Support
Developer Workflow
To develop apps for Android, you use a set of tools that are included in Android Studio. In
addition to using the tools from Android Studio, you can also access most of the SDK tools
from the command line. Developing with Android Studio is the preferred method because it
can directly invoke the tools that you need while developing applications.
However, you may choose to develop with another IDE or a simple text editor and invoke the
tools on the command line or with scripts. This is a less streamlined way to develop because
you will sometimes have to call command line tools manually, but you will have access to the
same number of features that you would have in Android Studio.
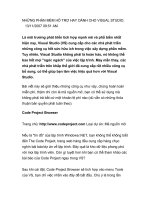
Figure 1. The development process for Android applications.
App Workflow
The basic steps for developing applications (with or without Android Studio) are shown in
figure 1. The development steps encompass four development phases, which include:
Environment Setup
During this phase you install and set up your development environment. You also
create Android Virtual Devices (AVDs) and connect hardware devices on which you
can install your applications.
See Managing Virtual Devices and Using Hardware Devices for more information.
Project Setup and Development
During this phase you set up and develop your Android Studio project and application
modules, which contain all of the source code and resource files for your application.
For more information, see Create an Android project.
Building, Debugging and Testing
During this phase you build your project into a debuggable .apk package(s) that you
can install and run on the emulator or an Android-powered device. Android Studio
uses a build system based on Gradle that provides flexibility, customized build
variants, dependency resolution, and much more. If you're using another IDE, you can
build your project using Gradle and install it on a device using adb. For more
information, see Build and run your application.
Next, with Android Studio you debug your application using the Android Debug
Monitor and device log messages (logact) along with the IntelliJ IDEA intelligent
coding features. You can also use a JDWP-compliant debugger along with the
debugging and logging tools that are provided with the Android SDK. For more
information see Debug your application with the SDK debugging and logging tools.
Last, you test your application using various Android SDK testing tools. For more
information, see Test your application with the Testing and Instrumentation
framework.
Publishing
During this phase you configure and build your application for release and distribute
your application to users. For more information, see Publishing Overview.
Essential command line tools
When developing in IDEs or editors other than Android Studio, be familiar with all of the
tools below, because you will have to run them from the command line or script.
android
Create and update Android projects and create, move, and delete AVDs.
Android Emulator
Run your Android applications on an emulated Android platform.
Android Debug Bridge
Interface with your emulator or connected device (install apps, shell the device, issue
commands, etc.).
In addition to the above tools that are included with the SDK, you need the following open
source and third-party tools:
Gradle
To compile and build your Android project into an installable .apk file(s).
Keytool
To generate a keystore and private key, used to sign your .apk file. Keytool is part of
the JDK.
Jarsigner (or similar signing tool)
To sign your .apk file with a private key generated by Keytool. Jarsigner is part of the
JDK.
If you are using Android Studio, tools such as adb and android are automatically called by
Android Studio so you don't have to manually invoke these tools. You need to be familiar
with adb, however, because certain functions are not accessible from Android Studio, such as
the adb shell commands. You might also need to call Keytool and Jarsigner to sign your
applications, but you can set up Android Studio to do this automatically as well.
For more information on the tools provided with the Android SDK, see the Tools section of
the documentation.
Except as noted, this content is licensed under Creative Commons Attribution 2.5. For details
and restrictions, see the Content License.
About Android | Legal | Support
Managing Virtual Devices
An Android Virtual Device (AVD) is an emulator configuration that lets you model an actual
device by defining hardware and software options to be emulated by the Android Emulator.
The easiest way to create an AVD is to use the graphical AVD Manager, which you launch
from Eclipse by clicking Window > AVD Manager. You can also start the AVD Manager
from the command line by calling the android tool with the avd options, from the
<sdk>/tools/ directory.
You can also create AVDs on the command line by passing the android tool options. For
more information on how to create AVDs in this manner, see Managing Virtual Devices from
the Command Line.
An AVD consists of:
A hardware profile: Defines the hardware features of the virtual device. For example,
you can define whether the device has a camera, whether it uses a physical QWERTY
keyboard or a dialing pad, how much memory it has, and so on.
A mapping to a system image: You can define what version of the Android platform
will run on the virtual device. You can choose a version of the standard Android
platform or the system image packaged with an SDK add-on.
Other options: You can specify the emulator skin you want to use with the AVD,
which lets you control the screen dimensions, appearance, and so on. You can also
specify the emulated SD card to use with the AVD.
A dedicated storage area on your development machine: the device's user data
(installed applications, settings, and so on) and emulated SD card are stored in this
area.
You can create as many AVDs as you need, based on the types of device you want to model.
To thoroughly test your application, you should create an AVD for each general device
configuration (for example, different screen sizes and platform versions) with which your
application is compatible and test your application on each one.
Keep these points in mind when you are selecting a system image target for your AVD:
The API Level of the target is important, because your application will not be able to
run on a system image whose API Level is less than that required by your application,
as specified in the minSdkVersion attribute of the application's manifest file. For
more information about the relationship between system API Level and application
minSdkVersion, see Specifying Minimum System API Version.
You should create at least one AVD that uses a target whose API Level is greater than
that required by your application, because it allows you to test the forward-