Beginner guide to quilting 16 projects to learn to quil
Bạn đang xem bản rút gọn của tài liệu. Xem và tải ngay bản đầy đủ của tài liệu tại đây (31.48 MB, 124 trang )
For Jude and Florence
Beginner’s Guide
to Quilting
16 Projects to Learn to Quilt
Elizabeth Betts
www.stitchcraftcreate.co.uk
Contents
Introduction
Projects
Tools and Equipment
Patchwork Rosette Needle Book
Fabric
Flowered Dolly’s Quilt
Techniques
Tote-ally Fabulous Bag
Simple Seedheads Table Mat
Piecing
Checkerboard Charms Car Quilt
Rotary cutting
Summer Delight Table Runner
Making a quilt sandwich
Spinning Around Cushion
Quilting
Twirling Windmills Quilt
Binding
Scooter Strips Wall Hanging
Here and There Quilt
Box du Jour
Grab and Sew Quilt
Summer Sunburst Cushion
Funky Town Wall Hanging
Spots and Blocks Bookmarks
Blooming Marvellous Bed Quilt
Glossary
Acknowledgments
About the Author
Suppliers
Templates
All full-size templates can be found at:
www.stitchcraftcreate.co.uk/patterns
Introduction
Welcome to my world of patchwork and quilting – your journey starts here!
In my quilt business I meet people every day who fancy making a quilt, but don’t
know where to start. Then there are others who have started making a quilt, then got
stuck and popped in for some advice as a last resort before putting their half-made
quilt in the loft. If you recognize yourself as fitting into one of these categories then
this book is for you. The projects have been designed to be easy and accessible, with
the difficulty increasing gradually as the book goes on. If you work through them all
in order, you will develop a wide range of techniques.
The projects are also suitable for those who want to make a quick quilt, or
experiment with a technique they haven’t tried before, such as using a jelly roll or
machine quilting. The smaller projects can make excellent presents.
Don’t be daunted by the idea of learning a new skill. I have tried to make the tone
of the book friendly rather than authoritative, as if a friend was talking you through
the projects. I believe the process of making is as important as the finished result.
Through trial and error, you will find a way that suits you – if it works for you then it
is fine. Enjoy the process!
Quilts have been made for hundreds of years, so the process of making a quilt
connects you with the past, while making something for the future at the same time.
Investing time in quilting is a relaxing antidote to today’s throwaway culture. I like to
think of each quilt I give away as giving the recepient a hug every time they snuggle
up under it.
My journey in quilt making started with a chance encounter eleven years ago. I
made my first item, a patchwork bag, and something clicked. I found that playing
with pattern and fabric became utterly addictive, which is how I now find myself
here. I hope you get hooked too.
Happy quilting!
Liz
Tools and Equipment
It can be appealing to buy lots of haberdashery when
you start making patchwork. I suggest you begin with
a hand sewing kit, then buy other sewing tools as and
when you need them. A good basic hand sewing kit
should contain needles, thread, scissors, thimble, pins,
tape measure and seam ripper. Keep your sewing kit
in a box. There are some pretty ones available to buy,
although a toolbox from a DIY store does the job just as
well! It is also worth having a notebook and pencil handy
when sewing to jot down notes and ideas as you stitch.
Basic kit
Needles: Use Sharps for hand piecing, and
embroidery or chenille needles for hand quilting with
perle thread. Buy a pack of needles with different sizes
so you can try them to see which one you feel most
comfortable using.
Thread: Make sure you buy a good brand from a
sewing shop as it will be colour-fast and you will be less
likely to have tension issues with your sewing machine.
For piecing cotton fabric it is best to use 50-weight
100 per cent cotton thread. Natural colours, such as
light grey or beige, tend to tone with most fabrics, so
buy them on large reels to save money and trips to the
shop to buy more thread when you run out. For big
stitch hand quilting, I use perle thread in a size 8. For
machine quilting, look for threads specially made for
this purpose as they will be stronger.
Scissors: It is handy to have at least two pairs: a large
pair for cutting fabric, and a small pair for snipping
threads. It is also good to keep a pair of paper scissors
in your sewing box so you aren’t tempted to use your
fabric scissors on template plastic or paper as this will
blunt them.
Thimble: These are available in metal, plastic and
even leather. Try out different styles and sizes to see
what suits you.
Pins: Different types of pins are available, but for
patchwork look for long, fine pins. Flower- or glassheaded pins are handy if you work in a space also used
by children or pets, as you can spot them easily if you
drop them.
Tape measure: A standard tape measure is fine;
however, if you plan to make large quilts, look for an
extra long (120in/300cm) one.
Seam ripper: This is an essential tool for unpicking
seams quickly.
Notebook and pencil: These are handy to keep
nearby when sewing to make notes on, for example,
colour of thread used, size of stitch, or ideas that come
to mind while sewing.
Other quilting tools
Marking tools: These are used to mark sewing or
quilting lines on the fabric. The types most widely used
are:
Chalk based – pencils, tailor’s chalk, propelling pencils.
Pens – water-soluble or vanishing pens.
Adhesive tape – low-tack masking tape, ¼in (0.6cm)
wide.
Pressure based – the Hera marker uses a pressure to
mark quilting lines.
Template plastic: This is a sheet of a strong plastic
that is used to make patchwork or quilting templates.
Quilter’s safety pins: These are normally curved
to make using them easier. They hold the layers of the
quilt together ready for quilting.
Rotary cutter: If you are machine piecing, one
of these is essential. Rotary cutters come in several
sizes, but the 45mm is the one most widely used for
patchwork (see Rotary cutting for more information).
Self-healing mat: An A2 size mat is the most useful,
as it comfortably fits a piece of 44in (110cm) wide
fabric folded in half. I also find an A3 size handy if
sewing at home on a small table (see Rotary cutting for
more information).
Acrylic ruler: Rulers come in many different shapes
and sizes, from small 4in (10.2cm) squares to hexagons
and circles (see Rotary cutting for more information).
Sewing machine: There are some lovely sewing
machines marketed at quilters; however, all you need
to start is a basic sewing machine that sews a straight
stitch. If you are trying patchwork for the first time, it
may be that you can borrow a sewing machine, which
will give you a better idea of what you are looking for
when it comes to buying one. For quilt making using
a sewing machine, it is handy to buy a ¼in (0.6cm)
foot, a darning foot and a walking foot to go with the
standard feet that come with your machine. More
details of these are given in the Machine piecing and
Straight stitch machine quilting sections. You can get
useful advice from specialist sewing machine shops,
which will usually let you try one out. Some features,
such as needle up/down, speed control and the ability
to machine sew a blanket stitch, are handy to have, but
these are not essential.
Fabric
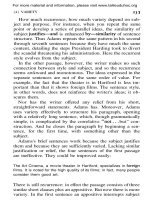
Choosing fabric can be one of the most exciting parts of making a quilt. People sometimes describe the
feeling of going into a quilt shop as being similar to their childhood experience of walking into a sweet
shop – so many lovely things they want to buy! Other people can find it stressful, and get worried about
buying fabric that is wrong or doesn’t go together. Remember, fabric choice is a personal thing, so don’t
get swayed by over-enthusiastic shop assistants or friends. If you like it, then use it.
The essentials
When you are starting out in quilt making, try to use
100 per cent craft-weight cotton. Yes, that vintage silk
quilt you saw at a museum is lovely, but it is easier to
get to grips with the basics using craft-weight cotton
before moving on to more challenging fabric. Likewise,
avoid using polycotton at first; however, with a bit of
perseverance and practice, any fabric can be made into
a quilt. Recycling old clothes and sheets, particularly
when they remind you of a loved one, is great, but try
to match the fabrics so they are of a similar weight.
If you are unsure of what to buy, take your time to
choose. Visit your local quilt shop to touch the fabric.
Try to buy the best quality you can afford. If you are
on a budget, look out for sales or remnant sections.
Another tip to save money is to mix expensive prints
with plain fabrics that tend to be cheaper.
Craft-weight cotton is usually sold from bolts that are
44in (110cm) wide. You can buy any quantity of fabric
from the bolt, from 10in (25cm) upwards. Lots of
quilters like to use a cut of fabric called a ‘fat quarter’.
Fat quarters are sold in both metric and imperial
measurements. Metric fat quarters are made from
0.5m of fabric cut in half across the middle, so they
measure 50cm x 55cm. You can also buy long quarters
that are 25 x 110cm. Imperial fat quarters are slightly
smaller. They are made from ½yd of fabric cut in half
across the middle, so they measure 18in x 22in (45.7cm
x 55.9cm). Some fabrics are available in extra wide
lengths (usually 90in/230cm or 108in/274cm); these
are excellent to use as quilt backings as you don’t then
have to piece fabric together.
Some quilters pre-wash their fabrics before using
them, and others don’t. Fabric from good quality
manufacturers should be colour-fast, but it is worth
giving all fabrics a quick wash and dry before using
them just to make sure.
Colour
Colour is a personal thing. Everyone has colours they
love and hate, but try to keep an open mind. Despite
dressing well and having tasteful homes, it is amazing
the number of quilters who say they can’t ‘do’ colour.
To get inspiration for using colour, look around
you. Magazines, particularly interior and garden
ones, can be good for showing some unusual colour
combinations. Pink and green are a great combination
you often see in nature, and blues and greens can be
seen anywhere there is water.
One way I put colour combinations together is to
choose a fabric I love, one with a strong print and lots
of colours in it, and then match other fabrics from that
starting point. If you are matching fabrics to a project
over time, it can be useful to cut off a small piece and
attach it to a card to keep in your purse. That way you
are not carrying a bundle of fabric everywhere you go
(this is particularly useful when at a quilt show). Other
people find it helpful to cut the part of the selvedge off
where there are the small dots with numbers on them.
These are the colour references for the screen so you
see all the colours used.
If you are buying from a quilt shop, take fabrics to the
window to see them in natural daylight. When buying
fabrics from the internet, take into consideration
that your computer screen may not give you a true
representation of the colour. If you are matching
colours to a specific project, contact the supplier,
as most are happy for you to send them a swatch to
compare, or buy a smaller piece before splashing out
on metres of it.
Bundles and pre-cuts are a useful way to buy fabric
and one where you don’t have to worry about colour.
Bundles are packs of fabric, either fat quarters or half
metres, which go well together. Sometimes they are
all from one designer’s range or the shop can have put
the colour combination together. Pre-cuts are packs
of fabrics that have been cut to a specific size. The
most common one is the Charm Pack, which contains
5in (12.7cm) squares. Also well known are Jelly Rolls,
which are strips measuring 2½in x 44in (6.3cm x
110cm), and Layer Cakes that are 10in (25.4cm)
squares. Buying these packs can speed up the process
of choosing fabric, give you confidence that the fabrics
will co-ordinate, and they can save you money if you
want to work with lots of different colours and prints.
The tone of the fabric can be as important as its colour.
Many quilts look best if you use a combination of
light, medium and dark fabrics. If in doubt as to which
fabric is light and which is dark, try photographing
them together and turning the picture into a black and
white image. Sometimes you can be surprised that the
fabric you thought of as the dark one is actually one of
the lighter ones.
Prints can also help to personalize a quilt if you are
making it for someone else. This can be as obvious as
trains for a child who likes them, or apple fabric for a
couple who got married in New York. Also, consider
the overall feel of a quilt when the prints are put
together. For a quilt with a fifties vintage feel, a variety
of prints can be used, such as florals, spots and stripes,
whereas adding a striking digital print of a computer
would not go with the overall feel.
If you are interested in print, many of the quilt fabric
designers have blogs that explain their inspiration and
work process for their ranges. If you buy some fabric
you like, check whether the designer’s name is on the
selvedge and then do an internet search to see if they
have a website.
The scale of print can be important in patchwork. For
example, a large-scale print may get lost when cut into
smaller pieces, but can look fabulous when used as a
focal point for the quilt, or for a quilt backing where
its full potential can be seen. There is a theory that the
smaller the patchwork the smaller the print should be,
but this does not always apply: remember, rules are
made to be broken!
Pattern
Once you have started buying fabric, you will quickly
discover the type of patterns you prefer. For example, I
love a cheeky novelty print and can never leave a quilt
shop or show without one! Other people love a specific
print, such as leaves. Go with your passion and you
will soon start collecting your very own stash. It is a
good idea to collect a range of stash builders/blenders.
These can be spots, checks or tone-on-tone fabrics, but
they can be invaluable to have on hand to mix in with
more vibrant prints. They are not usually the fabrics
that will attract your eye at first, but they always end up
being used.
Wadding (batting)
Wadding (batting) is the middle layer of a quilt. It
provides warmth and, once quilted, adds texture. It can
be bought off the roll, or pre-packed in different sizes.
If buying the latter, lay it out on a bed for a day before
using it to get rid of any creases.
The majority of waddings (battings) are cream in
colour, but you can get white or black types. If you
are making a project in black fabric, it is essential to
use dark wadding (batting) as cream wadding (batting)
can lighten it; likewise use cream wadding (batting) for
quilts made with paler fabric as dark wadding (batting)
would dull the finished quilt..
Most waddings (battings) shrink when you first wash
them, and the label will tell by what percentage. If you
like the wrinkled vintage look that’s great; however, if
you don’t, it is best to pre-wash your wadding (batting).
The label will also tell you how far apart it needs to be
quilted. It is important not to ignore this information
as the wadding (batting) can start to break up after
repeated washes if you do not put enough quilting
stitches through the quilt. You can now buy wadding
(batting) that can be quilted up to 10in (25.4cm) apart,
so if you are not planning on doing a lot of quilting
look out for this type. The word ‘loft’ refers to how
thick the wadding (batting) is; you can buy very thin
loft wadding (batting) as well as very thick.
You can buy wadding (batting) that contains different
fibre contents. Many shops sell sample packs, which
means you can try different types and see which one
you prefer. Cotton and polyester are the most popular
ones to use. One type that is particularly soft and
lovely to work with is 100 per cent cotton, but it is not
the easiest wadding (batting) to hand quilt, so make
sure you have a sharp needle and thimble to hand.
Polyester is durable and easy to hand quilt, but is quite
stiff and can get very warm. I use it mainly for wall
hangings. Cotton/polyester blends are popular with
those who both machine quilt and hand quilt and like
the durability of polyester with the softness of cotton.
You can also buy wool, silk, soy, bamboo and recycled
wadding (batting).
Techniques
Piecing
In patchwork, piecing is the term used for sewing fabric together. It can be done by hand, or on the
machine. Try piecing using both methods to see what suits you.
When piecing together fabrics that are different colours, use thread in a beige or grey colour as your
eye will not be drawn to it like it would be for a white thread. When I find a neutral colour that works, I
buy large reels as it is economical and convenient. If making a quilt with fabrics in predominantly one
colour, say blue, I would then use a mid-blue colour thread.
For piecing, use100 per cent cotton, 50-weight thread
as it is suitable for both hand and machine piecing, and
easy to find.
Hand piecing
Sewing patchwork by hand is really enjoyable. It is
often portable so you can work for an hour in the
evening in front of the television, then take it into work
and do another 30 minutes on it in your lunch break. It
has a reputation for being slow to do, but hand sewing
while doing another activity means it uses ‘down time’.
It’s faster to piece on the sewing machine, but if you
don’t have a dedicated sewing room where you can
keep your machine set up, it is much more convenient
to have sewing you can pick up and put down.
Keep everything you need in a small box, such as a
pretty vintage tin, then all you have to do is open the
tin and start sewing where you left off. I use Sharps
needles for hand piecing. Buy a pack of needles that
contains different sizes and try different ones to see
which one suits you.
The most important thing about hand piecing is to
make sure that the beginning and end of your seam
are really secure. If you are making something to
be quilted after it is hand pieced, this will add to the
strength of the item.
The two methods of piecing that I use are English
paper piecing and American block patchwork piecing.
English paper piecing
This technique tacks (bastes) fabric to paper shapes,
which are then oversewn. It is good for making
patchwork with different regular shapes, such as
hexagons and diamonds, hence it is also sometimes
known as mosaic patchwork.
1
Make a template out of card or template plastic.
Draw round the template on to paper – scrap paper
is fine – and cut out the shape from the paper.
4
Place two patches on top of each other, right sides
together. To oversew the patches together, thread
a needle and start ¼in (0.6cm) in from the edge of
the piece where you want to start, and take a few tiny
stitches back to the edge, which serves as a backstitch to
secure the thread. Then work your way along the seam
and sew a few reverse stitches at the end of the fabric
to secure. Keep sewing the patches together in this
manner. If you are making a large quilt, work in small
units then join them together later.
4
2
Pin the paper piece to the back of the fabric.
Using scissors, cut around the shape, leaving a
generous ¼in (0.6cm) seam allowance all around.
2
3
Thread a needle and tie a knot in the end. Fold
the seam allowance over the piece of paper and
tack (baste) in place using a large running stitch.
3
5
When you have finished making the patchwork,
take out the tacking (basting) stitches and the
paper backing. Keep the paper backings as they can be
used for another project.
American block
patchwork piecing
In this method you draw a line on the back of the
fabric, which is then used as a guideline to sew along
using a small running stitch.
1
2
To make your template, draw your shape on to card
or template plastic.
Place your fabric on a table, right side down.
Place the template on top and draw around it
using a pencil. The template does not include a seam
allowance, so draw another line ¼in (0.6cm) away
from the first line. You can buy rulers made to this
width for this purpose.
4
Thread a needle with approximately 18in
(45.7cm) of thread (no more than this or it will
tangle up as you sew). Knot the end, then sew a small
running stitch along the line. If you are sewing a long
seam, do a backstitch along it approximately every 5in
(12.7cm) to make the line of stitching stonger. If you
are joining two rows together that already have seams
where pieces of fabric have been sewn together, stitch
along the row then, when you get to a seam, take a
backstitch. Then place the needle through the seam
and, instead of sewing it down, take a backstitch, and
carry on sewing.
4
2
5
When you get to the end, finish with a small
backstitch. Press the seam together as this helps to
make it stronger.
3
Take two pieces, and place them right sides
together. Insert a pin at each end of the row,
making sure it goes through the drawn line on both
pieces of fabric. If it is a long seam, insert as many pins
along the row as needed to ensure the pencil lines on
the top and bottom fabric line up.
3
5
Machine piecing
Speed is the main reason for the popularity of machine
piecing. If you don’t have anywhere to keep a sewing
machine out, it can feel a hassle setting up (as opposed
to hand piecing where you just open a box). On the
plus side, you can whizz though lots of sewing in an
afternoon when using a machine. If you cut fabric
carefully with a rotary cutter, and sew the pieces
together with an accurate seam allowance, you will get
a piece of patchwork that fits together perfectly.
changing the width setting on your sewing machine.
Unless the pattern says, there is no need to do a
reverse stitch at the beginning or end of a seam.
Test again, and then keep doing this until you have
it right. Another idea is to use a strip of low-tack
masking tape on the sewing machine. Write the
correct settings in a notebook so you can get your
machine set up quickly each time you want to sew.
Any sewing machine that can sew a straight stitch can
be used for machine piecing. I set the stitch length to
2.2, and use a 70/12 or 80/12 jeans needle. Change
the needle for each new project.
With machine piecing, the first thing you need to do
is work out where your ¼in (0.6cm) seam allowance
is. If you get this seam allowance accurate, it helps
your sewing match up. Most sewing machines have a
foot you can buy that has a ¼in (0.6cm) guide on it,
so you just need to line the fabric up with the edge of
the foot when sewing.
Chain piecing
Chain piecing is where pieces of fabric are sewn
together, without cutting the threads at the end of
each separate piece of fabric. It is quick, and can
save on thread too.
1
2
Line up two pieces of fabric, right sides together.
Place them under the presser foot, just before the
needle.
2
Alternatively, if you do not have one of these, you
can line up a piece of scrap fabric with the edge
of the foot, sew a short line of stitches, then take
the fabric out and measure the distance between
the edge of the fabric and the sewn line. If it is not
¼in (0.6cm), move the position of your needle by
3
Hold the threads to the back and sew along the
seam, making sure you guide the fabric rather
than pull it through the machine. There is no need
to make a reverse stitch at the beginning or end of
chain piecing.
4
When you get to the end of the fabric, stop sewing
with the needle down. Lift the presser foot and lay
the next piece of fabric to be sewn.
4
[Insert Pic 4 – needle
down, presser foot up]
Tips on pressing
With machine piecing, you can either press the seams
together, or press them open. There are pros and cons
to each method. Pressing seams open can make the
quilt lie flatter, but it can be weaker than when pressing
them together. I have pressed the seams together in the
projects in this book, but use the finish you like best.
Lower the presser foot and carefully start sewing again.
There should be a couple of stitches sewn between the
fabric. When you have finished your sewing, take the
line of fabric from the machine, and cut the thread in
between each piece.
The best way to press is to iron from the front to set
the seam, then turn the fabric over and press the seam
in place. Turn the fabric over and iron the front of the
seam again, making sure the patchwork is nice and flat.
Rotary cutting
The first few projects in this book are sewn by hand, and can be made without a rotary cutter, mat and
ruler. However, if you get hooked on quilting, then a set is an essential piece of kit.
If looked after, they should last a long time. The only extra item you will need to buy is a replacement
blade for your rotary cutter when it starts to blunt.
Rotary cutter: These come in a few sizes, but the
45mm is the one most widely used for patchwork.
There are different types, so see if you can try a few
before deciding on which one to buy.
Self-healing mat: Make sure you store your mat
flat as it can warp. Mats have measurements on them
in inches or centimetres, but I usually only use the
measurements on my acrylic ruler.
Acrylic ruler: I find the most useful ruler to use is a
long, rectangular ruler measuring 24in x 6½in. This is
long enough to cut 44in (110cm) wide fabric folded in
half. I find a 12½in (31.7cm) square and a 6in (15.2cm)
square handy to have too. Rulers are available in both
imperial and metric measurements; however, I would
use them as you would a recipe – don’t mix the two on
the same project.
Cutting strips and
squares
2
Adapt this method to whatever size of square,
rectangle or strip you need to cut. Once you have
got used to using the equipment, you will find it a
quick and accurate way of cutting fabric.
The instructions below are for a single layer of
fabric; you can, however, cut several layers with a
rotary cutter. When cutting layers, keep them lined
up by spinning the board round so it is in the right
position to cut, rather than lifting up the fabric as it
will shift and make your next cut less accurate.
To help cut the fabric on the straight of the grain,
line up the bottom of the ruler with the selvedge for
the first cut. Then trim off the selvedge and put this
to one side, so you don’t accidentally use a piece of
fabric that has the selvedge on it in the quilt. The
selvedge also pulls in the fabric near it, so cutting it
off helps the fabric relax and lay flat.
3
Lay out a strip. Line the edge of the fabric with
the edge of the ruler and cut. The end of the
fabric now has three perfect 90-degree angles. You can
now cut off as many squares as you need, using the
measuring line on the ruler for reference.
3
Before you start, read through the safety tips.
1
Lay the fabric on a cutting mat. Place the ruler at a
right angle on the edge of the fabric and trim off a
small amount of fabric to make a straight edge. This
starts to square up your fabric.
1
2
Turn the fabric round, and line up the 4in
(10.2cm) line on your ruler with the straight edge
of the fabric and cut a strip. Repeat to cut as many
strips as required..
Safety tips
A rotary cutter is a circular blade. You need to take
care with this tool as accidents can occur.
❉❉ Every time you finish cutting, cover the blade
immediately.
❉❉ Cut away from you in one movement.
❉❉ Always use your acrylic ruler; never be tempted to use
a normal one.
❉❉ Be careful to ensure that your fingers are not over the
edge of the ruler when you cut.
❉❉ If you feel the ruler slip when you cut, buy some sticky
pads to apply to the ruler to keep it in place. You can
also stop cutting halfway up a piece of fabric, move
your hands up, then continue cutting.
❉❉ Take care when changing the blade on your cutter. It
will need changing when it stops cutting correctly.
❉❉ Discard old blades carefully.
Making a quilt sandwich
Once you have made your quilt top, the next stage is to make a quilt sandwich, so called as it has three
layers – the backing, wadding (batting) and quilt top. As this is purely functional and not creative, it is my
least favourite part of the quilt-making process, but it is essential to take time over it and get it right so
you end up with a lovely, smooth quilt.
Sometimes it may be necessary to join pieces of fabric together to make a large enough piece of backing
fabric. If you need to join two fabrics together, press the seams open so the fabric lies flat. It does not
have to be the same fabric used – I really like the look of a quilt back which features more than one
fabric. Alternatively, you can buy extra wide, craft-weight fabric.
Assembling the layers
1
Press the backing fabric, then lay it out on a table or
floor, right side down. Smooth it out so it is flat. If I
am working on a quilt larger than 1yd (1m), then it can
be helpful to use low tack masking tape to secure the
backing to a surface, which helps keep it flat while you
work. Make sure it is not pulled too tight.
2
3
4
Lay the wadding (batting) on top. Smooth it so it is
completely flat.
Take the quilt top, press it flat and snip off any
loose threads.
Place the quilt top on the wadding (batting) and
backing, ensuring it is positioned in the middle. I
like to have an extra 4in (10.2cm) of wadding (batting)
and backing on each side of my quilt top. This allows
for any movement while quilting. Smooth again, so all
three layers are flat.
4
5
Use quilter’s safety pins to hold the layers together.
Starting in the centre, pin every 4–6in (10.2–
15.2cm) in rows, to make a grid format. Alternatively,
you can tack (baste) large stitches across the quilt
sandwich in a grid format.
5
Quilting
Quilting is the process that holds the layers together. It is decorative, adding pattern and texture, but
also functional – without quilting, the wadding (batting), which gives the quilt warmth, would ball up
within the quilt after a few washes. Wholecloth quilts are made from a single piece of fabric that is
quilted, which is a great way of using a favourite piece of fabric without piecing it. Give yourself time
to ponder on whether you wish to hand or machine quilt, and what sort of design you wish to use. Look
through books and go to quilt shows for ideas on how others have used quilting to enhance their quilts.
For inspiration, look at the fabrics used in quilts – fabrics with circles may inspire curved quilting, and
geometric shapes might suggest straight line quilting, or you can just quilt an allover pattern.
Whether you hand or machine quilt, always start in the middle and work your way out to the edges.
This helps to smooth the layers as you work.
Marking the
quilting pattern
You can stitch around the pieces of fabric, using your
eye for guidance, but in most instances you will want
to mark your quilting lines on the top. You can either
mark your quilt up before assembling the layers,
which is good as there are no pins to get in the way, or
afterwards, which is handy if using a chalk marker as
it rubs off easily and may otherwise disappear by the
time you start quilting.
There are a wide variety of marking tools available.
My favourites are:
Water-soluble pens: Draw your quilting shapes on
the fabric then, when you have finished, the pen comes
out when it comes into contact with water. Always test
the pen on a piece of scrap fabric before using it on a
quilt, and never iron as it fixes it.
Quilter’s masking tape: This is ¼in (0.6cm) wide
and low tack so it doesn’t leave any residue on the
fabric. You stick it on the quilt top, then stitch alongside
it, being careful not to stitch on top of it. You can
re-use masking tape in various places on the quilt until
it loses its tack.
Chalk liners: These draw a line in chalk which can
be easily removed. The white chalk is ideal for marking
dark fabrics that are too dark to show a water-soluble
marker. Always test on a scrap of fabric before use,
especially if using yellow or blue chalk.
Tie or button quilting
The easiest way to quilt by hand is simply to tie lengths
of perle or embroidery thead at regular intervals
through your quilt. Starting in the middle of the quilt,
with the right side facing, take the needle through to
the back, then up again to the front about ¼in (0.6cm)
away from the first stitch. Take the thread through to
the back, then the front again and tie off in a reef knot.
Trim to leave a tail, which can be as long as you wish.
You can double thread your needle for more definition.
Button quilting works in the same way, with the buttons
being sewn on through the quilt. They can look very
decorative, especially if you choose interesting buttons
that contrast with the fabric.
Hand quilting
Hand quilting is relaxing to do and, once you have got
into a rhythm, surprisingly quick. I like to quilt in front
of the television in the evenings. Big stitch quilting,
also known as utilitarian quilting, is an easy way to
learn the basics of hand quilting. It uses a big needle
and chunky thread to make prominent stitches. I use a
chenille needle, size 22 or 24, although you can also use
embroidery needles; a size 5 is good. When you start,
buy a pack of needles in mixed sizes and try a variety
to see which one you are happy with. It is a must to
wear a thimble, and again try a number of different
types to find one that suits you. FinalIy, I like to use a
frame when hand quilting. Plastic, tubular frames are
good as they pull apart so are easy to store. Don’t pull
the fabric taut in the frame, and if there are any pins
in the place where you want to put the fabric in the
frame, remove them first.
How to big stitch quilt
1
2
Thread your needle with approximately 18in
(45.7cm) of thread. Knot the end.
With the quilt top facing upwards, place the needle
through the top and wadding (batting) 1in (2.5cm)
away from where you want to start quilting. Make
sure the needle only goes through the layers, not to the
back. Pull the thread and then ‘pop’ the knot through
the quilt top and wadding (batting) so it is secure and
hidden inside the quilt. If the end of the thread has left
a tail, trim it.
2
3
Now start making a row of stitches. Don’t worry
too much about what size your stitches are, but
try to make them all the same size. A running stitch will
give you large stitches on top, and smaller stitches on
the back.
3