Học vẽ manga, Mastering Manga
Bạn đang xem bản rút gọn của tài liệu. Xem và tải ngay bản đầy đủ của tài liệu tại đây (19.33 MB, 100 trang )
PART 1
Heads and Faces
The biggest distinction that sets Japanese comics apart from comics
elsewhere is the way the faces are drawn. It’s the natural place for an
aspiring manga artist to start. Who wouldn’t want to learn how to draw those
shiny eyes and wild hairdos?
In this section we will learn the basic structure of manga faces and how to
draw them from a variety of angles. There will be challenges along the way,
but if you keep at it, you’ll be drawing manga faces with the best of them!
Female Front View
There is incredible variety in the way different manga artists draw faces. Any
step-by-step lesson is by necessity teaching you just one approach. If you are
serious about your craft, you will want to learn other ways over time.
I have chosen a style that is somewhat close to real human proportions while
still being recognizable as “manga” in the way it emphasizes the eyes and
de-emphasizes the nose and mouth.
STEP 1 Draw Your Circle
Draw a rough circle neatly divided by a vertical line and a horizontal line. The
vertical line is there to help you place the nose. The horizontal line will help
you find the locations of guidelines for the eyebrows and eyes in the next
step.
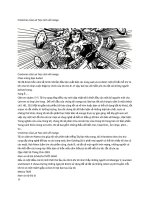
Để có được ba đường
phân cách đều nhau, vẽ
đường giữa đầu tiên, chia
không gian một nửa. Sau
đó vẽ hai dòng khác, chia
không gian thành các
phần
STEP 2 Mark the Feature Lines
Divide the lower half of the circle into four equal sections by adding three
additional horizontal lines. The first of these three lines will help you place
the eyebrows. The other two will help you place the eyes.
STEP 3 Outline the Jaw
Add lines for the jaw. Take care to get the size and shape of this area right.
Focus on the angles of each line and the shape that is created between them
and the circle. The distance between the bottom of the circle and the tip of
the jaw is equal to three of the subsections you created in the previous step.
STEP 4 Place the Features
Add the eyes, eyebrows, nose and mouth. The eyebrows are between the top
two horizontal lines. The eyes rest upon the third line. The nose is at the
point where the vertical line meets the bottom of the circle. The mouth is
slightly closer to the circle than it is to the chin.
STEP 5 Draw the Ears and Eyes
Add the ears and details to the eyes. Note that the two lines above each eye
indicate the fold of the upper eyelid. My style of drawing the ears here is
fairly close to actual human anatomy, but feel free to simplify them if you
prefer. The small circles in each iris will become white highlights, making the
eyes look shiny.
STEP 6 Form the Hair and Neck
Add lines for the hair, the neck and the shoulders. There are hundreds of
ways to draw manga hair. The upper line of the hair is drawn a fair distance
above the circle. This contributes to the youthful look of the character. The
width of the neck is such that it lines up with the irises above.
STEP 7 Fine-tune
Add an indication of shadow beneath the chin, as well as further details to
the hair. Note that the hair lines curve to follow the shape of the head.
STEP 8 Finish It
Carefully ink all the lines you want to keep and erase the rough guidelines
once the ink has dried. The finished drawing can be enhanced with grey
tones or given the full color treatment.
Female Profile View
Drawing a face in profile presents a number of challenges. The lips can be
particularly difficult, and if the lines are off by even just a little, the
expression will look unnatural. Remember that it’s not only a matter of
drawing the lines but replicating the distances between the lines. If you focus
on how far the eyes are from the bridge of the nose and how far the lower lip
is from the chin, you will be rewarded with a balanced and beautiful final
result.
STEP 1 Draw Your Circle
Draw a rough circle neatly divided in half from top to bottom with a single
horizontal line. Take the lower half of the circle and divide it into four
sections, each of them equal in height from top to bottom. These lines will
help you place the eyes and nose later on.
STEP 2 Outline the Nose and Jaw
Begin with a vertical line that is a touch left of center. Go slowly as you
outline the nose and jaw, taking care to reproduce not just the lines, but their
various angles and the shape of blank space that is formed between the lines
and the edge of the circle. The line of the nose touches the circle just above
the third horizontal line. The tip of the nose lies just below the fourth
horizontal line.
STEP 3 Place the Ear, Nose, Chin and Neck
Add lines for the ear, bottom of the nose, chin and neck. The ear touches the
vertical line, the second horizontal line, and the edge of the circle. The
bottom of the nose meets the point of the nose at a 90˚ angle. The chin is
curved. The line of the neck meets the line of the jaw about one-third of the
way along the jawline we drew in the previous step.
STEP 4 Place the Eyes and Lips
The eyebrows are between the top two horizontal lines. The eye rests on the
third horizontal line. Pay attention to the distance between the eyebrow and
the edge of the circle. The lips are a gentle W shape. Note that the lower lip
touches the guideline we drew in step 2, while the upper lip does not.
STEP 5 Add Details
Draw the interior lines of the ear. Use the horizontal lines to help you see
where the lines belong. The fold of the upper eyelid touches the second
horizontal line. The lines of the mouth and lips are a tiny distance from each
other, but that distance is crucial. Pay attention to both the lengths of the
lines and their angles.
STEP 6 Add the Hair
Sketch in a rough hairstyle with a few lines. I’ve chosen to give her a ponytail
but feel free to choose any hairstyle you like.
STEP 7 Fine-tune
Add individual strands of hair, eyelashes and a shadow beneath the chin.
STEP 8 Finish It
Ink the drawing, taking care not to ink any of the early guidelines you needed
only for line placement. Let it dry, then erase the pencil lines. The finished
drawing can be left as is, enhanced with gray tones, or given the full color
treatment.
Male Front View
It’s amazing what a difference a few lines can make.
If you compare the drawing of the female face with that of the male, you will
see that the key differences come down to just two things: the eyelashes and
the bridge of the nose. And yet that’s all it takes. Artists have long
understood the decisive power of a few lines added or subtracted in just the
right places.
STEP 1 Draw Your Circle
Draw a rough circle, neatly divided by a vertical line and a horizontal line.
The vertical line is there to help you place the nose. The horizontal line will
help you find the locations of guidelines for the eyebrows and eyes in the
next step.
STEP 2 Mark the Feature Lines
Divide the lower half of the circle into four equal sections by adding three
additional horizontal lines. The first of these three lines will help you place
the eyebrows. The other two will help you place the eyes.
STEP 3 Outline the Jaw
Add lines for the jaw. Take care to get the size and shape of this area right.
Focus on the angles of each line and the shape that is created between them
and the circle. The distance between the bottom of the circle and the tip of
the jaw is equal to three of the subsections you created in the previous step.
STEP 4 Place the Features
Add the eyes, eyebrows, nose, ears and mouth. The eyebrows are between
the top two horizontal lines.
The eyes rest upon the third line. The nose is at the point where the vertical
line meets the bottom of the circle. The mouth is slightly closer to the circle
than it is to the chin.
STEP 5 Draw the Ears and Eyes
Add the ears and details to the eyes. A simple vertical line defines the bridge
of the nose. The two lines above each eye indicate the fold of the upper
eyelid. My style of drawing the ears here is fairly close to actual human
anatomy, but feel free to simplify them if you prefer. The small circles in each
iris will become white highlights, making the eyes look shiny.
STEP 6 Add the Hair and Neckline
Add lines for the hair, the neck and the shoulders. The upper line of the hair
is drawn a fair distance above the circle. This contributes to the youthful look
of the character. The male character’s neck is wider than that of the female:
These lines point toward the far left and right hand edges of each eye above.
STEP 7 Fine-tune
Add an indication of shadow beneath the chin, shading to the eyes, as well as
further details to the hair. Note that most of the hair lines curve to follow the
shape of the head, while the small strands behind the ears curve away from
the neck.
STEP 8 Finish It
Carefully ink all the lines you want to keep. Let the ink dry, then erase all the
pencil lines. Leave as is, shade, or color.
Male Three-Quarter View
The three-quarter view is arguably the most important one for a manga artist
to learn as it is used most frequently in the storytelling process. Mastering it
requires extra attention since placement of the facial features shifts in subtle
ways to account for the structure of the head as it turns in space.
Manga stories tend to be dominated by characters that appear vaguely
Caucasian. But you may want to present characters of various ethnicities in
your stories, so for this lesson I’ve decided to break away from the “manga
default” in that regard.
STEP 1 Draw Your Circle
Draw a rough circle, neatly divided in half from top to bottom with a single
horizontal line. Then take the lower half of the circle and divide it into four
sections, each of them equal in height from top to bottom. These lines will
help you place the eyes and nose later on.]


