Hatco RHW 1b
Bạn đang xem bản rút gọn của tài liệu. Xem và tải ngay bản đầy đủ của tài liệu tại đây (3.33 MB, 24 trang )
www.hatcocorp.com
Register Online!
(see page 2)
HEATMAX
Heated Wells
电热锅
RHW/RCTHW Series
Installation and Operating Manual
安装及操作手册
P/N 07.04.501.00
POWER
100°C
_
50°C-70°C
TEMP
FULL
POWER
~
70°C-90°C
o
~
~~
FAULT
ON/OFF
ENERGY
SAVE
MODE
Do not operate this equipment unless you have
read and understood the contents of this manual!
Failure to follow the instructions contained in this
manual may result in serious injury or death. This
manual contains important safety information
concerning the maintenance, use, and operation
of this product. If you’re unable to understand the
contents of this manual, please bring it to the
attention of your supervisor. Keep this manual in
a safe location for future reference.
English = p 2
请在认真阅读并理解本手册的内容后再操作本设备!
不按照本手册中的说明操作可能会导致严重的人身伤
亡事故。本手册中包含了有关本产品维护、使用和操
作的重要安全事项。如果您不理解本手册的内容,请
将本手册交给主管人员,以提请其注意。请将本手册
妥善放置,以便参照。
中文 = 第 13 页
© 2011 Hatco Corporation
CONTENTS
English
Operation ...............................................................................9
General ............................................................................9
Maintenance ........................................................................10
General ..........................................................................10
Daily Cleaning ...............................................................10
Options and Accessories...................................................10
Troubleshooting Guide.......................................................11
Hatco Limited Warranty .....................................................12
Service Information ............................................................12
Important Owner Information ..............................................2
Introduction ...........................................................................2
Important Safety Information...............................................3
Model Descriptions...............................................................4
Model Designation................................................................5
Specifications........................................................................5
Plug Configurations .........................................................5
Electrical Rating Chart.....................................................5
Dimensions ......................................................................6
Installation .............................................................................7
General ............................................................................7
Installing a Built-In model ................................................7
IMPORTANT OWNER INFORMATION
Record the model number, serial number, voltage, and
purchase date of the unit in the spaces below (specification
label located on the back of the unit). Please have this
information available when calling Hatco for service assistance.
Business
Hours:
9:00 Am to 6:00 Pm (Beijing Time)
monday through Friday
Telephone: (0512) 6732-5091
model No. ____________________________________
Serial No. ____________________________________
E-mail:
Fax:
(0512) 6732-5092
Additional information can be found by visiting our web sites:
www.hatcocorp.com or www.hatcocorp.cn
Voltage ______________________________________
Date of Purchase ______________________________
Register your unit!
Completing online warranty registration will prevent delay in
obtaining warranty coverage. Access the Hatco website at
www.hatcocorp.com, select the Parts & Service pull-down
menu, and click on “Warranty Registration”.
INTRODUCTION
This manual provides the installation, safety, and operating
instructions for HEATMAX Heated Wells. Hatco recommends all
installation, operating, and safety instructions appearing in this
manual be read prior to installation or operation of the heated
wells.
Hatco HEATMAX Heated Wells are specially-designed to cook
or hold a wide variety of foods including soups, curry, gravies
and a variety of toppings. For RHW units, products for cooking
or holding are placed in a pot which is heated or warmed by a
heating plate. For RCTHW units, products are placed in a
standard size pan which is placed in the heated well. The
heating element temperature is monitored by an electronic
controller for optimum results. Heat is evenly distributed
throughout the unit to hold foods at desired temperatures and
the insulated stainless steel design provides easy maintenance
and durable performance.
Safety information that appears in this manual is identified by
the following signal word panels:
WARNING
WARNING indicates a hazardous situation which, if not
avoided, could result in death or serious injury.
All units are equipped with a control panel featuring three
temperature setpoints from 50°C (122°F) to 100°C (212°F) and
an energy saving low power mode that saves electricity during
off-peak hours.
CAUTION
CAUTION indicates a hazardous situation which, if not
avoided, could result in minor or moderate injury.
Hatco HEATMAX Heated Wells are quality built to meet
the demands of foodservice operations and provide years of
trouble-free performance. The heating elements are
guaranteed against breakage and burnout for 1 year.
NOTICE
NOTICE is used to address practices not related to personal
injury.
HEATMAX Heated Wells are products of extensive research
and field testing. The materials used were selected for
maximum durability, attractive appearance, and optimum
performance. Every unit is inspected and tested thoroughly
prior to shipment.
2
Form No. RHWm_CN-0711
IMPORTANT SAFETy INFORMATION
English
Read the following important safety information before using this equipment to avoid serious injury or death and
to avoid damage to equipment or property.
WARNING
WARNING
ELECTRIC SHOCK HAzARD:
• Plug unit into a properly grounded electrical receptacle
of the correct voltage, size, and plug configuration. If
plug and receptacle do not match, contact a qualified
electrician to determine and install the proper voltage
and size electrical receptacle.
• Turn OFF power switch, unplug power cord, and allow
unit to cool before performing any cleaning,
adjustments, or maintenance.
• DO NOT submerge or saturate with water. Unit is not
waterproof. Do not operate if unit has been submerged
or saturated with water.
• Unit is not weatherproof. Locate unit indoors where
ambient air temperature is a minimum of 21°C (70°F).
Make sure all operators have been instructed on the safe
and proper use of the unit.
This unit is not intended for use by children or persons
with reduced physical, sensory, or mental capabilities.
Ensure proper supervision of children and keep them away
from the unit.
This unit has no “user-serviceable” parts. If service is
required on this unit, contact an Authorized Hatco Service
Agent or contact the Hatco Service Department at
(0512) 6732-5091; fax (0512) 6732-5092.
CAUTION
BURN HAzARD:
• Some exterior surfaces on unit will get hot. Use caution
when touching these areas.
• Do not steam clean or use excessive water on unit.
• This unit is not “jet-proof” construction. Do not use jetclean spray to clean this unit.
• Hot water in unit may cause scalding injury. Allow unit
to cool before draining or cleaning.
• Do not pull unit by power cord.
Locate unit at the proper counter height in an area that is
convenient for use. The location should be level to prevent
the unit or its contents from falling accidentally and strong
enough to support the weight of the unit and contents.
• Discontinue use if power cord is frayed or worn.
• Do not attempt to repair or replace a damaged power
cord. The cord must be replaced by Hatco, an
Authorized Hatco Service Agent, or a person with
similar qualifications.
Do not move or relocate unit when it contains food product.
Turn off unit, remove food product, and allow to cool
completely before moving or cleaning.
• DO NOT use unit to melt or hold ice. Doing so may
cause condensation, creating an electrical hazard and
causing personal injury and/or damage to unit. Damage
caused by condensation is not covered by warranty.
Standard and approved manufacturing oils may smoke up
to 30 minutes during initial startup. This is a temporary
condition. Operate unit without food product until smoke
dissipates.
• Use only Genuine Hatco Replacement Parts when
service is required. Failure to use Genuine Hatco
Replacement Parts will void all warranties and may
subject operators of the equipment to hazardous
electrical voltage, resulting in electrical shock or burn.
Genuine Hatco Replacement Parts are specified to
operate safely in the environments in which they are
used. Some aftermarket or generic replacement parts
do not have the characteristics that will allow them to
operate safely in Hatco equipment.
NOTICE
Remote mounted control panels must have a minimum
152 mm (6″) clearance from unit (not to exceed 1420 mm
[56″]). Mounting control panel closer may cause heat
damage to electrical system in control panel.
Do not locate unit in an area subject to excessive
temperatures or grease from grills, fryers, etc. Excessive
temperatures could cause damage to the unit.
FIRE HAzARD:
• Locate unit a minimum of 25 mm (1″) from combustible
walls and materials. If safe distances are not
maintained, discoloration or combustion could occur.
Unit is designed and recommended for use in or on
metallic countertops. Damage to any countertop material
is not covered under the Hatco warranty. For other
surfaces, verify with manufacturer that material is suitable
for prolonged temperatures up to 100°C (212°F).
• Do not use harsh chemicals such as bleach (or
cleaners containing bleach), oven cleaners, or
flammable cleaning solutions to clean this unit.
Use non-abrasive cleaners and cloths only. Abrasive
cleaners and cloths could scratch finish of unit, marring its
appearance and making it susceptible to soil accumulation.
Do not lay unit on the side with the control panel. Damage
to the unit could occur.
Do not use excessive force when tightening mounting
screws on built-in units. This may damage unit and/or
countertop.
Form No. RHWm_CN-0711
3
MODEL DESCRIPTION
English
All Models
RCTHW-1
All HEATMAX Heated Well units are reliable and versatile. In
addition for use as a Heated Well to keep food hot for serving,
food also can be steamed when used with an optional adapter
kit.
RCTHW-1 is equipped with three heating elements for holding
food hot. It can hold a standard size food pan.
RHW-1
RHW-1 is equipped with a single heating element for holding
food hot or cooking soups or sauces. It is supplied with a
specially-designed, stainless steel 10 liter (11 qt) round pot and
lid.
Figure 4. model RCTHW-1
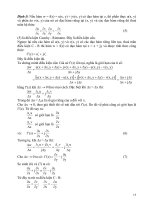
RCTHW-1B
RCTHW-1B is equipped the same as the RCTHW-1 but is a
built-in model equipped with a remote mounted control panel
and a bottom drain.
Figure 1. model RHW-1
RHW-1B
RHW-1B is equipped the same as the RHW-1 but is a built-in
model equipped with a remote mounted control panel.
POWER
100°C
_
50°C-70°C
TEMP
FULL
POWER
~
70°C-90°C
o
~
~~
FAULT
ON/OFF
ENERGY
SAVE
MODE
Figure 2. model RHW-1B
RHW-2
RHW-2 is equipped with double heating element for holding
food hot or cooking soups or sauces. It is supplied with two
specially-designed, stainless steel 10 liter (11 qt) round pots
and lids.
Figure 5. model RCTHW-1B
Figure 3. model RHW-2
4
Form No. RHWm_CN-0711
MODEL DESIGNATION
English
RHW-1-B
R = Round
RCT = Rectangular
Built-In w/Remote Control
1 = Single Unit
2 = Dual Unit
Heated Well
Figure 6. model Designation
SPECIFICATIONS
Plug Configurations
Units are supplied from the factory with an electrical cord and
plug. Plugs are supplied according to the application.
WARNING
CEE 7/7 Schuko
ELECTRIC SHOCK HAzARD: Plug unit into a properly
grounded electrical receptacle of the correct voltage, size,
and plug configuration. If plug and receptacle do not
match, contact a qualified electrician to determine and
install the proper voltage and size electrical receptacle.
BS-1363
China CCC (AS 3112)
NOTE: The specification label is located on the back of the unit.
See label for serial number and verification of unit
electrical information.
Figure 7. Plug Configurations
Electrical Rating Chart
Model
Voltage
Watts
Amps
Plug Configuration
Shipping Weight
RHW-1
230 (CE/CCC)
1250
5.4
BS-1363, CEE 7/7 Schuko, or China CCC
7 kg (15 lbs.)
RHW-1B
230 (CE/CCC)
1250
5.4
BS-1363, CEE 7/7 Schuko, or China CCC
8 kg (18 lbs.)
RHW-2
230 (CE/CCC)
2500
10.9
BS-1363, CEE 7/7 Schuko, or China CCC
12 kg (26 lbs.)
RCTHW-1
230 (CE/CCC)
3000
13
BS-1363, CEE 7/7 Schuko, or China CCC
10 kg (22 lbs.)
RCTHW-1B
230 (CE/CCC)
3000
13
BS-1363, CEE 7/7 Schuko, or China CCC
11 kg (24 lbs.)
NOTE: Shipping weight includes packaging.
Form No. RHWm_CN-0711
5
SPECIFICATIONS
English
Dimensions
Width
(A)
Depth
(B)
Height
(C)
Footprint
Width (D)
Footprint
Depth (E)
RHW-1
359 mm
(14-1/8")
330 mm
(13")
343 mm
(13-1/2")
187 mm
(7-3/8")
232 mm
(9-1/8")
RHW-1B
360 mm
(14-1/8")
330 mm
(13")
330 mm
(13")
N/A
N/A
RHW-2
630 mm
(24-3/4")
330 mm
(13")
343 mm
(13-1/2")
397 mm
(15-5/8")
257 mm
(10-1/8")
RCTHW-1
368 mm
(14-1/2")
611 mm
(24-1/16")
283 mm
(11-3/16")
327 mm
(12-7/8")
507 mm
(20")
RCTHW-1B
368 mm
(14-1/2")
582 mm
(22-15/16")
226 mm
N/A
N/A
(8-15/16")
Model
A
A
A
C
C
C
HEATMAX
_
D
TEMP
~
~
~
FULL
POWER
100°C
POWER
70°C-90°C
ENERGY
SAVE
FAULT
MODE
ON/OFF
o
50°C-70°C
_
50°C-70°C
~
100°C
70°C-90°C
FAULT
TEMP
FULL
POWER
~
~
~
~
HEATED WELL
POWER
ON/OFF
o
ENERGY
SAVE
MODE
D
B
B
B
E
E
RHW-1
RHW-1B
RHW-2
A
A
D
B
B
C
C
E
RCTHW-1
RCTHW-1B
Figure 8. Dimensions
6
Form No. RHWm_CN-0711
INSTALLATION
English
General
Installing a Built-In Model
HEATMAX Heated Well units are shipped from the factory with
most components assembled and ready for use. Care should
be taken when unpacking shipping carton to avoid damage to
unit and the components enclosed.
Use the following procedure(s) to install a built-in model into a
countertop. If the unit is a rectangular built-in model, perform
the “Installing the Drain Assembly” first.
NOTICE
Built-in rectangular models require installation of the drain
assembly and remote mounted control panel.
Unit is designed and recommended for use in or on
metallic countertops. Damage to any countertop material
is not covered under the Hatco warranty. For other
surfaces, verify with manufacturer that material is suitable
for prolonged temperatures up to 100°C (212°F).
WARNING
ELECTRIC SHOCK HAzARD: Unit is not weatherproof.
Locate unit indoors where ambient air temperature is a
minimum of 21°C (70°F).
Installing the Drain Assembly
Before installing a rectangular model into the countertop,
perform the following procedure to install the drain assembly.
FIRE HAzARD: Locate unit a minimum of 25 mm (1″) from
combustible walls and materials. If safe distances are not
maintained, discoloration or combustion could occur.
1. Carefully turn over the unit and lay it on its top side.
2. Remove the bottom panel screws and bottom panel.
CAUTION
3. Connect one end of the drain hose to the drain fitting using
the supplied hose clamp .
Locate unit at the proper counter height in an area that is
convenient for use. The location should be level to prevent
the unit or its contents from falling accidentally and strong
enough to support the weight of the unit and contents.
4. Route the drain hose through the hole in the bottom panel
and reinstall the bottom panel using the original screws.
5. Connect the other end of drain hose to a drain valve using
the supplied hose clamp.
Do not move or relocate unit when it contains food
product. Turn off unit, remove food product, and allow to
cool completely before moving or cleaning.
6. Perform the “Installing the Unit into a Countertop”
procedure in this section. After installing the unit, the drain
valve may connect to external drain pipe, if desired.
NOTICE
Do not lay unit on the side with the control panel. Damage
to the unit could occur.
Drain Valve
Do not locate unit in an area subject to excessive
temperatures or grease from grills, fryers, etc. Excessive
temperatures could cause damage to the unit.
Hose Clamp
Bottom
Panel
1. Remove the unit from the carton.
Drain Hose
2. Remove the information packet.
Bottom
Panel
Screw
3. Remove tape and protective packaging from all surfaces of
the unit and any accessories.
4. If the unit is a countertop model, place the unit in the
desired location.
Hose Clamp
Drain Fitting
• Locate the unit in an area where the ambient air
temperature is constant and a minimum of 21° C
(70° F). Avoid areas that may be subject to active air
movements or currents (i.e., near exhaust fans/hoods
and air conditioning ducts).
• make sure the unit is at the proper counter height in an
area convenient for use.
• make sure the countertop is level and strong enough to
support the weight of the unit and food product.
• make sure all the feet on the bottom of the unit are
positioned securely on the countertop.
5. If the unit is a built-in model, perform the “Installing a BuiltIn model” procedure in this section.
Form No. RHWm_CN-0711
Figure 9. Installing the Drain Assembly
(Built-in rectangular models only)
7
INSTALLATION
English
Installing the Unit
3. Guide the control box and electrical cords through the
countertop cutout and then lower the unit into the cutout.
1. Cut the appropriate opening in the countertop for the unit
being installed (see below).
550 mm
(21-11/16″)
Countertop
Cutout
300 mm
11-7/8″
335 mm
(13-1/4″)
Control Box
Cutout
RHW-1B
RCTHW-1B
Figure 10. Countertop Cutout Dimensions
Figure 12. Installing the Unit
NOTE: The countertop must be level to ensure proper draining
of the rectangular well.
4. Assemble the L-brackets to the
underside of the unit.
NOTICE
5. Tighten the L-bracket screws until
the top flange lies flat on the
countertop.
Remote mounted control panels must have a minimum
152 mm (6″) clearance from unit (not to exceed 1420 mm
[56″]). Mounting control panel closer may cause heat
damage to electrical system in control panel.
NOTICE
Screw
Do not use excessive force when
tightening mounting screws on
built-in units. This may damage unit
and/or countertop.
The remote mounted control box should be installed outside
of heat zone. Locating the control box inside heat zone will
cause the control(s) to overheat, malfunction, and fail.
2. Cut the appropriate opening for the control box in a vertical
surface at least 152 mm (6″) from the unit, but no more
than 1420 mm (56″) (see below).
L Bracket
Installing the Remote Mounted Control Box (RMB)
1. Install the control box in the control box cutout:
a. Remove the four screws that secure the front cover to
the control box. Remove the front cover and pass it
through the cutout to the front of the installation surface.
141 mm
(5-9/16″)
b. Pass one of the mounting flanges on the control box
housing through the cutout. Squeeze the other mounting
flange to fit it through the cutout.
42 mm
(1-11/16″)
c. Align the holes on the Control
mounting flanges with the
Box
screw holes in the installation Housing
surface, and secure the control
box housing to the surface
using four m4 screws (not
supplied).
148 mm
(5-7/8″)
65 mm
(2-9/16″)
Ø 4,5 mm
(3/16″)
Countertop
Top Flange
150 mm
(5-15/16″)
d. Install the front cover on the
control box using the four front
cover screws.
Figure 11. Control Box Cutout Dimensions
NOTE: The electrical cord between the unit and the control box
is 1420 mm (56 inches) in length.
Front
Cover
Mounting
Flange
2. Plug the power cord into a properly grounded electrical
outlet of the correct voltage, size, and plug configuration.
See the SPECIFICATIONS section for details.
8
Form No. RHWm_CN-0711
OPERATION
English
General
4. Press the TEmP button to scroll through and select the
desired temperature setting. The indicator above each
temperature setting will glow when that setting is selected.
There are three temperature settings:
Use the following procedure to operate the HEATMAX Heated
Wells.
• 90–100°C (194–212°F)
WARNING
• 70–90°C (158–194°F)
Read all safety messages in the IMPORTANT SAFETy
INFORMATION section before operating this equipment.
• 50–70°C (122–158°F)
5. Press the mODE button to scroll through and select the
desired heating mode. The indicator above each mode will
glow when that mode is selected. There are two heating
modes:
NOTE: For proper heat transfer, operate the RHW series,
(Round Heated Wells), with the special pan supplied.
This pan has a curved bottom to match the shape of
the heating element.
• FULL POWER mode — Unit operates at 100% power.
1. Plug the unit into a properly grounded electrical outlet of
the correct voltage, size, and plug configuration. See the
SPECIFICATIONS section for details.
• LOW POWER/ENERGy SAVE mode — Unit operates
at 50% power for food warming and to avoid burning.
• The POWER indicator will glow red when the unit has
power.
2. Place a pan/pot filled with food product or water into the
unit.
NOTE: Do not operate the unit without a food pan or with an
empty/dry pan. The unit will overheat and go into
FaulT mode.
POWER
Indicator
3. Press the ON/OFF button to turn on the unit.
• The POWER indicator will glow green when the unit is
on and heating.
FAULT
Indicator
NOTE: The FaulT indicator will illuminate and the unit will
beep when the unit is overheated or if the temperature
sensor short circuits. When this happens, power is cut
off automatically until the temperature returns to normal
range or the temperature sensor functions normally.
ON/OFF
Button
CAUTION
Figure 13. Control Panel
BURN HAzARD: Some exterior surfaces on unit will get
hot. Use caution when touching these areas.
Form No. RHWm_CN-0711
TEMP
Button
9
MODE
Button
MAINTENANCE
English
General
WARNING
HEATMAX Heated Wells are designed for maximum durability
and performance with minimum maintenance.
This unit has no “user-serviceable” parts. If service is
required on this unit, contact an Authorized Hatco Service
Agent or contact the Hatco Service Department at
(0512) 6732-5091; fax (0512) 6732-5092.
WARNING
ELECTRIC SHOCK HAzARD:
• Turn OFF power switch, unplug power cord, and allow
unit to cool before performing any cleaning,
adjustments, or maintenance.
• DO NOT submerge or saturate with water. Unit is not
waterproof. Do not operate if unit has been submerged
or saturated with water.
• Do not steam clean or use excessive water on unit.
Daily Cleaning
To preserve the bright finish of the unit it is recommended that
the exterior surfaces be cleaned daily.
NOTICE
Use non-abrasive cleaners and cloths only. Abrasive
cleaners and cloths could scratch finish of unit, marring its
appearance and making it susceptible to soil accumulation.
• This unit is not “jet-proof” construction. Do not use jetclean spray to clean this unit.
1. Turn off the unit, unplug the power cord, and allow the unit
to cool.
• Use only Genuine Hatco Replacement Parts when
service is required. Failure to use Genuine Hatco
Replacement Parts will void all warranties and may
subject operators of the equipment to hazardous
electrical voltage, resulting in electrical shock or burn.
Genuine Hatco Replacement Parts are specified to
operate safely in the environments in which they are
used. Some aftermarket or generic replacement parts
do not have the characteristics that will allow them to
operate safely in Hatco equipment.
2. Remove food pans and any accessories for proper
cleaning in a dishwasher or wash sink.
3. Drain or remove water from the well.
4. Wipe down all metal surfaces using a soft, damp cloth.
Stubborn stains may be removed with a good non-abrasive
cleaner. Hard to reach areas should be cleaned with a
small brush and mild soap.
5. Wipe dry the entire unit using a dry, non-abrasive cloth.
FIRE HAzARD: Do not use harsh chemicals such as bleach
(or cleaners containing bleach), oven cleaners, or
flammable cleaning solutions to clean this unit.
OPTIONS AND ACCESSORIES
RHW-PAN..................10 liter (11 qt.) round pan — 221 x 203
mm (8-11/16″ dia x 8″H)
RCTHW-Basket ........Noodle Basket
RCTHW-PC ..............Pasta Cooker (not shown)
RHW-LID ..................10 liter (11 qt.) round lid with plastic knob
RHW-SP ....................6-Basket
Round
(not shown)
RHW-SS-Steam ........Stainless Steel
(not shown)
Steam
Steamer
Plate
Basket
RCTHW-SW
RHW-LID
RCTHW-SK
RHW-PAN
Figure 14. RHW Accessories
RCTHW-2/3SP
RCTHW-SW ..............Sauce Warmer Adapter
RCTHW-1/3SP
RCTHW-SK ..............7 Quart Soup Kettle Adapter
RCTHW-2/3SP ..........2-Basket Steam Plate w/ Gastronorm
2/3 pan cutout
RCTHW-1/3SP ..........4-Basket Steam Plate w/ Gastronorm
1/3 pan cutout
RCTHW-SP ..............6-Basket Steam Plate
RCTHW-SP
RCTHW-Basket
Figure 15. RCTHW Accessories
10
Form No. RHWm_CN-0711
TROUBLESHOOTING GUIDE
English
WARNING
WARNING
This unit must be serviced by trained and qualified
personnel only. Service by unqualified personnel may lead
to electric shock or burn.
Symptom
Food well not hot enough.
Food well too hot.
No heat.
Form No. RHWm_CN-0711
ELECTRIC SHOCK HAzARD: Turn OFF power switch,
unplug power cord, and allow unit to cool before
performing any cleaning, adjustments, or maintenance.
Probable Cause
Corrective Action
Temperature setting too low.
Use TEmP button to change to higher
temperature setting.
Wrong pot installed in unit (RHW models).
Use specially-designed round pots for RHW
models from Hatco only. Other pots may not
provide the proper contact between the unit
and the pot.
Heating element not working.
Contact Authorized Service Agent or Hatco for
assistance.
Temperature Control not working properly.
Contact Authorized Service Agent or Hatco for
assistance.
Voltage supplied is incorrect.
Verify correct voltage is supplied to unit. Low
supply voltage will cause improper heating.
Temperature setting too high.
Use TEmP button to change to lower
temperature setting.
Temperature Control not working properly.
Contact Authorized Service Agent or Hatco for
assistance.
Voltage supplied is incorrect.
Verify correct voltage is supplied to unit. High
supply voltage will cause unit to overheat and
my damage the unit.
Unit turned off.
Use ON/OFF button to turn on unit. Follow
procedure in OPERATION section.
Circuit breaker tripped.
Reset circuit breaker. If circuit breaker
continues to trip, contact Authorized Service
Agent or Hatco for assistance.
Temperature Control not working properly.
Contact Authorized Service Agent or Hatco for
assistance.
Heating element not working.
Contact Authorized Service Agent or Hatco for
assistance.
11
INTERNATIONAL LIMITED WARRANTy
English
THE FOREGOING WARRANTIES ARE EXCLUSIVE AND IN
LIEU OF ANy OTHER WARRANTy, EXPRESSED OR
ImPLIED, INCLUDING BUT NOT LImITED TO ANy ImPLIED
WARRANTy OF mERCHANTABILITy OR FITNESS FOR A
PARTICULAR PURPOSE OR PATENT OR OTHER
INTELLECTUAL PROPERTy RIGHT INFRINGEmENT.
Without limiting the generality of the foregoing, SUCH
WARRANTIES DO NOT COVER: Coated incandescent light
bulbs, fluorescent lights, heat lamp bulbs, coated halogen light
bulbs, halogen heat lamp bulbs, xenon light bulbs, LED light
tubes, glass components, and fuses; Product failure in booster
tank, fin tube heat exchanger, or other water heating equipment
caused by liming, sediment buildup, chemical attack, or
freezing; or Product misuse, tampering or misapplication,
improper installation, or application of improper voltage.
1. PRODUCT WARRANTy
Hatco warrants the products that it manufactures (the
“Products”) to be free from defects in materials and
workmanship, under normal use and service, for a period of
one (1) year from the date of purchase when installed and
maintained in accordance with Hatco’s written instructions or
18 months from the date of shipment from Hatco. Buyer must
establish the Product’s purchase date by registering the
Product with Hatco or by other means satisfactory to Hatco in
its sole discretion.
Hatco warrants the following Product components to be free
from defects in materials and workmanship from the date of
purchase (subject to the foregoing conditions) for the period(s)
of time and on the conditions listed below:
a) Two (2) year Parts Warranty:
Conveyor Toaster Elements (metal sheathed)
Drawer Warmer Elements (metal sheathed)
Drawer Warmer Drawer Rollers and Slides
Strip Heater Elements (metal sheathed)
Display Warmer Elements (metal sheathed air heating)
Holding Cabinet Elements (metal sheathed air heating)
Heated Well Elements — HWB Series (metal sheathed)
2. LIMITATION OF REMEDIES AND DAMAGES
Hatco’s liability and Buyer’s exclusive remedy hereunder will be
limited solely to replacement of part or Product using, at Hatco’s
option, new or refurbished parts or Product by Hatco or a Hatcoauthorized service agency with respect to any claim made
within the applicable warranty period referred to above. Hatco
reserves the right to accept or reject any such claim in whole or
in part. In the context of this Limited Warranty, “refurbished”
means a part or Product that has been returned to its original
specifications by Hatco or a Hatco-authorized service agency.
Hatco will not accept the return of any Product without prior
written approval from Hatco, and all such approved returns shall
be made at Buyer’s sole expense. HATCO WILL NOT BE
LIABLE,
UNDER
ANy
CIRCUmSTANCES,
FOR
CONSEQUENTIAL OR INCIDENTAL DAmAGES, INCLUDING
BUT NOT LImITED TO LABOR COSTS OR LOST PROFITS
RESULTING FROm THE USE OF OR INABILITy TO USE THE
PRODUCTS OR FROm THE PRODUCTS BEING
INCORPORATED IN OR BECOmING A COmPONENT OF
ANy OTHER PRODUCT OR GOODS.
b) One (1) year Parts PLUS Four (4) years Parts
Warranty on pro-rated terms that Hatco will explain
at Buyer’s request:
3CS and FR Tanks
c) Ten (10) year Parts Warranty:
Electric Booster Heater Tanks
Gas Booster Heater Tanks
d) Ninety (90) Day Parts Warranty:
Replacement Parts
SERVICE INFORMATION
Non-Warranty Problems
The warranty on Hatco HEATMAX Heated Wells is for one year
from date of purchase or eighteen months from date of shipping
from Hatco, whichever occurs first.
If you experience a non-warranty problem that requires
assistance, please contact the nearest Authorized Hatco
Service Agency.
If you experience a problem with a Heated Well during the
warranty period, please do the following:
To locate the nearest Service Agency:
Contact Local Hatco Dealer
• call Hatco Service at (0512) 6732-5091
When contacting the Hatco dealer for service assistance,
please supply the dealer with the following information to
ensure prompt processing:
• e-mail Hatco at
• model of unit
• Serial number (located on the back of the unit)
• Specific problem with the unit
• Date of purchase
• Name of business
• Shipping address
• Contact name and phone number
The Hatco dealer will do the following:
• Provide replacement part(s) as required
• Submit warranty claim to Hatco for processing
12
Form No. RHWm_CN-0711
目录
中文
操作 ......................................................................................20
总则 ...............................................................................20
维护 ......................................................................................21
总则 ...............................................................................21
日常清理 ........................................................................21
选项和配件 ............................................................................21
故障处理指南 ........................................................................22
全球有限质保 ........................................................................23
服务信息 ...............................................................................23
使用者重要注意事项 .............................................................13
简介 ......................................................................................13
重要安全事项 ........................................................................14
型号说明 ...............................................................................15
型号命名 ...............................................................................16
规格 ......................................................................................16
插头型式 ........................................................................16
电气参数表.....................................................................16
尺寸 ...............................................................................17
安装 ......................................................................................18
总则 ...............................................................................18
安装内置型设备 .............................................................18
使用者重要注意事项
工作时间: 北京时间 上午 9:00 – 下午 6:00
请在下列空白处记下本设备的型号、序列号、电压、和购买日
期(规格标签位于本设备背面)。致电 Hatco 要求服务帮助时
请提供上述信息。
型号 ______________________________________________
序列号 ____________________________________________
电话:
(0512) 6732-5091
E-mail:
传真:
(0512) 6732-5092
查询更多信息请访问我们的网站: www.hatcocorp.com
www.hatcocorp.cn
电压 ______________________________________________
购买日期 __________________________________________
简介
Hatco HEATMAX 电热锅是专为多种食物如汤、咖喱、卤汁以
及各种浇头的烹制和保温而设计的。在 RHW 系列设备中,需烹
制或保温的食物置于罐中,通过一块加热板进行加热或保温。在
RCTHW 系列设备中,食物需放置在标准尺寸的不锈钢隔板
上,然后将其放置在电热锅中。加热元件的温度由一个电子控制
器控制,可以调节到最佳温度。设备整体加热十分均匀,从而可
以将食物保持在所要求的温度水平,而绝热不锈钢设计则易于维
护,且经久耐用。
所有型号的设备均配备控制面板,并具有从 50°C (122°F) 到
100°C (212°F) 的三档温度设置和节能低功率模式,从而可以
在非用电高峰期间节约用电。
Hatco HEATMAX 电热锅质量优异,能够满足餐饮服务业的需
求,并能保证多年正常工作。加热元件有 1 年的防破损和烧损
质保。
HEATMAX 电热锅是经过大量研究和实地测试考验的产品。
所选用的材料经久耐用,外型美观,且性能优异。每件产品
在出厂前都经过严格的检验和测试。
表号:RHWm_CN-0711
本手册中包含了 HEATMAX 电热锅的安装、安全和操作说明。
Hatco 建议您在安装和使用电热锅之前,请仔细阅读本手册中的
所有安装、操作和安全说明。
本手册中的安全信息采用以下标志表示:
“警告”表示有危险情况,如果不加以避免,则可能导致
人身伤亡。
“小心”表示有危险情况,如果不加以避免,则可能导致
轻度或中度人身伤害。
“注意”用于提示不会涉及人身伤害的操作。
13
重要安全事项
中文
使用本设备前,请仔细阅读下列重要安全事项,以免造成严重的人身伤亡及设备或财产的损坏。
触电危险:
• 将设备插头妥善插入有接地的电气插座内,插入前请核对电
压、规格和插头型式是否正确。如果插头和插座不匹配,请
和有正式资格的电工联系,以确定并安装电压和规格正确的
电气插座。
• 对设备进行清洗、调整、或维修前,请切断电源,拔掉电源
线,并让设备冷却。
• 不得将设备浸入水中。本设备不具备防水性能。如果设备被
水浸泡,不得进行操作。
• 本设备不具备耐候性。请将本设备置于室内,室内气温不得
低于 21°C (70°F)。
确保所有操作人员都已了解如何安全和妥善地使用本设备。
儿童或具有身体、感觉或智力残障的人不宜使用本设备。请看
护好儿童,并使其远离本设备。
本设备不含“用户维修”零部件。如需维修,请联系 Hatco 授
权 服 务 机 构 或 Hatco 服 务 部 门 , 电 话 (0512) 6732-5091;
传真 (0512) 6732-5092。
燃烧危险:
• 本设备的某些外表面处温度较高。接触这些部位时请务
必小心。
• 不得用蒸汽或使用过多的水清洁本设备。
• 本设备不具备“防喷淋”结构。
请勿使用喷淋头清洁本设备。
• 设备的热水可能会灼伤人体。在排水或清洁前,请先将设备
冷却。
• 请勿用电源线拖拽本设备。
将本设备置于台面高度适宜、且使用方便的位置。放置位置
应水平,以防止本设备或其部件以外落地,并有足够的强度
支撑本设备及其部件的重量。
• 如果电源线出现磨损,请停止使用。
• 请勿试图维修或更换损坏的电源线。电源线必须由
Hatco、Hatco 授权服务机构或具备类似资格的人
负责更换。
其中放有食物时,请勿挪动或重新摆放。在移动或清洁本设
备前,请先关掉电源,将食物移出,并使之完全冷却。
• 不得使用本设备融化或加热冰,这样会导致结露,从而引起
触电危险,并致使人员伤亡或设备损坏。因结露造成的设备
损坏不属于保修范围。
初次使用时,标准且准许使用的防锈油可能会产生长达 30 分钟
的油烟。这是一种暂时现象。在油烟消散前,请勿放入食物。
• 维修时只能使用正宗的 Hatco 更换零部件。未使用正宗
Hatco 更换零部件会造成质保无效,并可能造成设备操作
人员受到有害电压威胁,并引起触电或着火。正宗 Hatco
更换零部件可以保证使用环境下的安全生产。某些普通零部
件不具备相关特性,从而无法在 Hatco 设备内安全使用。
分离式控制面板应至少距本设备 152 mm(6 吋),最大不超
过 1420 mm(56 吋)。安装距离过近会造成控制面板中的电
气系统受热损坏。
着火危险:
• 本设备距离可燃墙壁或材料应至少有 25 mm(1 吋)。
如果不能保持上述安全距离,则可能引起褪色或燃烧。
请勿将本设备置于烤架、油锅等温度过高或有油烟产生的位
置,温度过高可能会导致本设备受热损坏。
该设备的设计建议用在金属台面上面(里面)。对任何台面材
料造成的损坏不在赫高保修范围之内,请和台面材料供应商确
认该材料能长时间承受高达100°C (212°F)的温度。
• 不得使用反应强烈的化学品如漂白剂(或含漂白剂的清
洁剂)、炉灶清洁剂或易燃的清洁溶液清洁本设备。
只能使用无腐蚀的清洁剂和抹布清洁设备。带腐蚀性的清洁剂
和抹布会划伤设备表面,影响外观,同时容易积污垢。
放置本设备时,不得用控制面板侧承重,否则易造成设备
损坏 。
上紧内置式设备的安装螺钉时,不可用力过度,否则会损坏
设备或台面。
14
表号:RHWm_CN-0711
型号说明
中文
所有型号
RCTHW-1
所有 HEATMAX 电热锅均性能可靠,且功能多样。除了能起到
食物保温作用外,还可以配以选购适配器件来蒸煮食物。
RCTHW-1配置3块加热盘用于保温食物。可配置一个标准1/1份
数盘。
RHW-1
RHW-1 配备了一个加热元件,用于食物保温或煲汤/烹制酱
汁。随机配备一个专门设计的 10 升(11 夸脱)不锈钢汤锅和
锅盖。
图 4:RCTHW-1 型号
RCTHW-1B
图 1:RHW-1 型号
RCTHW-1B的加热盘和份数盘配置与RCTHW-1相同,由于是
嵌入式设计,该型号配置了一个远程控制盒以及底部排水口。
RHW-1B
RHW-1B 的配备器件与 RHW-1 相同,但它是内置式,配有一
个分离式控制面板。
POWER
100°C
_
50°C-70°C
TEMP
FULL
POWER
~
70°C-90°C
o
~
~~
FAULT
ON/OFF
ENERGY
SAVE
MODE
图 2:RHW-1B 型号
RHW-2
RHW-2 配备了两个双加热元件,用于食物保温或煲汤/烹制酱
汁。随机配备两个专门设计的 10 升(11 夸脱)不锈钢汤锅和
锅盖。
图 5:RCTHW-1B 型号
图 3:RHW-2 型号
表号:RHWm_CN-0711
15
型号命名
中文
RHW-1-B
R = ᄳ
RCT = ડᄳ
ˈࠍܕ୰૿፟ಅ֊
1 = ࣫ܠ
2 = ༺࣫
ݢ࣫
图 6:型号命名
规格
插头型式
设备出厂时,随机配备电源线和插头。插头根据实际使用情况
配备。
CEE 7/7 Schuko
BS-1363
触电危险:将设备插头妥善插入有接地的电气插座内,插入前
请核对电压、规格和插头型式是否正确。如果插头和插座不匹
配,请和有正式资格的电工联系,以确定并安装具有正确电压
和规格的电气插座。
China CCC (AS 3112)
注意: 规格标签位于设备背面。请根据标签查看序列号,并核
对设备电气信息。
图 7:插头型式
电气参数表
型号
电压
功率
电流
插头型式
出厂重量
RHW-1
230 (CCC)
1250
5.4
BS-1363,CEE 7/7 Schuko,或 China CCC
7 kg (15 磅)
RHW-1B
230 (CCC)
1250
5.4
BS-1363,CEE 7/7 Schuko,或 China CCC
8 kg (18 磅)
RHW-2
230 (CCC)
2500
10.9
BS-1363,CEE 7/7 Schuko,或 China CCC
12 kg (26 磅)
RCTHW-1
230 (CCC)
3000
13
BS-1363,CEE 7/7 Schuko,或 China CCC
10 kg (22 磅)
RCTHW-1B
230 (CCC)
3000
13
BS-1363,CEE 7/7 Schuko,或 China CCC
11 kg (24 磅)
注意:出厂重量包括包装在内。
16
表号:RHWm_CN-0711
规格
中文
尺寸
宽度
(A)
深度
(B)
高度
(C)
底脚宽度
(D)
底脚深度
(E)
RHW-1
359 mm
(14-1/8 吋)
330 mm
(13 吋)
343 mm
(13-1/2 吋)
187 mm
(7-3/8 吋)
232 mm
(9-1/8 吋)
RHW-1B
360 mm
(14-1/8 吋)
330 mm
(13 吋)
330 mm
(13 吋)
不适用
不适用
RHW-2
630 mm
(24-3/4 吋)
330 mm
(13 吋)
343 mm
(13-1/2 吋)
397 mm
(15-5/8 吋)
257 mm
(10-1/8 吋)
RCTHW-1
368 mm
(14-1/2 吋)
611 mm
(24-1/16 吋)
283 mm
(11-3/16 吋)
327 mm
(12-7/8 吋)
507 mm
(20 吋)
RCTHW-1B
368 mm
(14-1/2 吋)
582 mm
(22-15/16 吋)
226 mm
(8-15/16 吋)
不适用
不适用
型号
A
A
A
C
C
C
HEATMAX
_
D
TEMP
~
~
~
FULL
POWER
70°C-90°C
FAULT
MODE
ON/OFF
o
50°C-70°C
D
B
B
B
E
E
RHW-1
RHW-1B
RHW-2
A
A
D
B
B
C
C
E
RCTHW-1
RCTHW-1B
图 8:尺寸
表号:RHWm_CN-0711
100°C
POWER
ENERGY
SAVE
_
50°C-70°C
~
100°C
70°C-90°C
FAULT
17
TEMP
FULL
POWER
~
~
~
~
HEATED WELL
POWER
ON/OFF
o
ENERGY
SAVE
MODE
安装
中文
总则
安装内置型设备
HEATMAX 电热锅出厂时已配备的大部分部件,以供随时使
用。拆箱时请务必小心,以免损坏设备及随机部件。
请按下列步骤将内置型设备装入工作台面。如果是长方形内置
式设备,请首先“安装排水组件”。
内置式长方形电热锅需要安装排水组件和分离式控制面板。
该设备的设计建议用在金属台面上面(里面)。对任何台面材
料造成的损坏不在赫高保修范围之内,请和台面材料供应商确
认该材料能长时间承受高达100°C (212°F)的温度。
触电危险:本设备不具备耐候性。请将本设备置于室内,室内
气温不得低于 21°C (70°F)。
安装排水组件
着 火 危 险 : 本 设 备 距 离 可 燃 墙 壁 或 材 料 应 至 少 有 25 mm
(1 吋)。如果不能保持上述安全距离,则可能引起褪色或燃烧。
将矩形设备装入台面之前,请先按下列步骤安装排水组件。
1. 将本设备小心翻转,并使其底面朝上。
2. 取下底板螺钉,并卸下底板。
将本设备置于台面高度适宜、且使用方便的位置。放置位置应
水平,以防止本设备或其部件以外落地,并有足够的强度支撑
本设备及其部件的重量。
3. 用随机提供的软管夹将排水软管的一头连接到排水
接头上。
4. 将排水软管穿过底板上的孔,并用螺钉将底板重新
紧固好。
其中放有食物时,请勿挪动或重新摆放。在移动或清洁本设备
前,请先关掉电源,将食物移出,并使之完全冷却。
5. 用随机提供的软管夹将排水软管的另一头与排水阀连接。
6. 按本节“将设备装入台面”中的步骤操作。设备安装好
之后,如有需要,可将排水阀连接到外部排水管。
放置本设备时,不得用控制面板侧承重,否则易造成设备
损坏。
ഠ༽ߞ
请勿将本设备置于烤架、油锅等温度过高或有油烟产生的位
置,温度过高可能会导致本设备受热损坏。
࣏ঢ়
1. 将设备从包装箱中取出。
֊ݒ
ഠ༽࣏
2. 取出资料包。
3. 去掉设备和配件表面的所有胶带和保护包装物。
4. 如果本设备配有台面形,请将本设备置于相应位置。
֊ݒఞݽ
• 本设备的放置区域应温度恒定,且不低于 21°C (70°F)。
请勿将其放在空气流动强烈的地方
(如靠近排风扇/除烟
罩和空调管道)。
࣏ঢ়
ഠ༽ਾဂ
• 务必保证放置位置台面高度适宜,且使用方便。
• 保证台面水平,并有足够强度支撑本设备和食物的
重量。
• 保证本设备的底脚与台面定位配合牢靠。
5. 如果本设备为内置式,请按照本节“安装内置型设备”的
步骤操作。
图 9:安装排水组件
(仅限矩形内置式)
18
表号:RHWm_CN-0711
安装
中文
安装设备
1. 在台面上切开一个大小合适的开口,以便安装设备
(见下图)。
550 mm
(21-11/16 )
ྕಅଁ
300 mm
11-7/8
335 mm
(13-1/4 )
૿፟डଁ
RHW-1B
RCTHW-1B
图 12:安装设备
图 10:台面开口尺寸
4. 将 L 型支架安装在设备下方。
注意:台面必须水平,以保证长方形电热锅排水顺畅。
5. 拧紧 L 型支架的螺钉,使上
边缘平贴在台面上。
分离式控制面板应至少距本设备 152 mm(6 吋),最大不超
过 1420 mm(56 吋)。安装距离过近会造成控制面板中的电
气系统受热损坏。
上紧内置式设备的安装螺钉时,不可
用力过度, 否则会损坏设备或台面。
Screw
ఞݽ
LLBracket
ᄲፀ৩
分离式控制盒应安装在加热区之外。将控制盒安装在加热区内
会引起控制盒过热、出现故障或失灵。
安装分离式控制盒
2. 在垂直面上切割大小适合的开口,用于安装控制盒。
垂直面应至少距本设备 152 mm(6 吋),但不超
过 1420 mm(56 吋)(见下图)。
1.
将控制盒安装在控制盒开口内:
a. 取下 4 枚固定控制盒面盖的螺钉。卸下面盖,并将其穿
过安装面正面的开口。
140 mm
(5-9/16 )
b. 将控制盒底壳上的一个安装凸缘穿过开口。挤压另一个
安装凸缘,使其嵌入开口。
42 mm
(1-11/16 )
c. 将安装凸缘上的孔与安装面上
的螺孔对齐,并用 4 枚 m4 螺
钉(不提供)将控制盒底壳固
定在安装面上。
150 mm
(5-15/16 )
65 mm
(2-9/16 )
ྕಅ
ຢעኒ
૿፟
डݒ૮
d. 用 4 枚面盖螺钉将面盖固定在控
制盒上。
Ø 4,5 mm
(3/16 )
2. 将电源线插头妥善插入有接地的电
气插座内,插入前请核对电压、规
格和插头型式是否正确。详细内容
请参阅“规格”一节。
150 mm
(5-15/16 )
图 11:控制盒开口尺寸
注意:电热锅和控制盒之间的电源线长度为 1420 mm
(56 吋)。
3. 将控制盒及电源线从台面开口处穿过,然后将设备装入
开口处。
表号:RHWm_CN-0711
19
Ꭷငኒ
ಅ
操作
中文
4. 您可以按下 TEmP 键选择所需要的温度设置。当选定温度
设置值后,该温度值上方的指示灯会亮起。您可以设置三
个温度范围:
总则
请按下列步骤操作 HEATMAX 电热锅。
• 90–100°C (194–212°F)
• 70–90°C (158–194°F)
操作本设备前,请仔细阅读“重要安全事项”中的所有安全
说明。
• 50–70°C (122–158°F)
5. 请按下 mODE 键选择所需要的加热模式。当选定加热模
式后,其上方的指示灯会亮起。 您可以设置两种加热模
式:
注意: 为保证热传导顺畅,使用 RHW 系列产品(圆形电热
锅)时,请用随机提供的专用锅加热。此锅底面有一个
与加热元件形状相配的弧度。
• 高功率模式(FULL POWER mode)— 以 100% 的功
率工作。
1. 将电源线插头妥善插入有接地的电气插座内,插入前请核
对电压、规格和插头型式是否正确。详细内容请参阅“规
格”一节。
• 低 功 率 /节 能 模 式 ( LOW POWER/ENERGy SAVE
mode)— 设备以 50% 的功率加热食物,以防烧糊。
• 当本设备接通电源时,电源指示灯(POWER)
为红色。
2. 请将装有食物或水的锅/罐放入本设备。
注意: 如果锅内没有食物或水,请勿使用本设备,否则会引
起本设备过热并进入故障(FaulT)模式。
HEATED WELL
3. 请按下 ON/OFF 按钮开启本设备。
ݢኑፑ݁
• 当本设备通电加热时,电源指示灯(POWER)会变成
绿色。
注意: 当设备过热或温度传感器短路时,故障(FaulT)指示
灯会亮起,且设备会发出鸣叫。发生这种情况时,电源
会自动切断,直至温度恢复到正常范围或温度传感器正
常工作。
ࢽጊፑ݁
POWER
FULL POWER
FAULT
LOW POWER
TEMP
着火危险:本设备的某些外表面处温度较高。接触这些部位时
请务必小心。
ON/OFF
࣋ਉ
TEMP
ၫޡਉ
MODE
MODE
ಠਉ
图 13:控制面板
20
表号:RHWm_CN-0711
维护
中文
总则
日常清洁
HEATMAX 电热锅不但经久耐用,而且维护简便。
为保证本设备外表光洁,建议每天对外表面进行清洁。
触电危险:
• 对设备进行清洗、调整、或维修前,请切断电源,拔掉电源
线,并让设备冷却。
• 不得将设备浸入水中。本设备不具备防水性能。如果设备被
水浸泡,不得进行操作。
• 不得用蒸汽或使用过多的水清洁本设备。
只能使用无腐蚀的清洁剂和抹布清洁设备。带腐蚀性的清洁剂
和抹布会划伤设备表面,影响外观,同时容易积污垢。
1. 请将电源开关置于 OFF 位置,拔下电源线,并使设备
冷却。
2. 将食物盛器和其他附件取下,在洗碗机或水池中妥为
清洗 。
• 本设备不具备“防喷淋”结构。请勿使用喷淋头清洁本
设备。
3. 将电热锅内的水排出。
4. 用较柔软的湿布擦拭所有金属表面。顽渍可用优质非摩
擦性清洁剂去除。较难清洁的位置可用小毛刷和中性肥
皂清洁。
• 维修时只能使用正宗的 Hatco 更换零部件。未使用正宗
Hatco 更换零部件会造成质保无效,并可能造成设备操作人
员受到有害电压威胁,并引起触电或着火。正宗 Hatco 更
换零部件可以保证使用环境下的安全生产。某些普通零部件
不具备相关特性,从而无法在 Hatco 设备内安全使用。
5. 用干燥无腐蚀抹布擦干整台设备。
着火危险:不得使用反应强烈的化学品如漂白剂(或含漂白剂
的清洁剂)、炉灶清洁剂或易燃的清洁溶液清洁本设备。
本设备不含“用户维修”零部件。如需维修,请联系 Hatco 授
权 服 务 机 构 或 Hatco 服 务 部 门 , 电 话 (0512) 6732-5091;
传真 (0512) 6732-5092。
选项和配件
RHW-PAN..................10升(11夸脱)圆锅 — 221 x 203 mm
RHW-LID ..................10 升 (11 夸脱)圆锅盖带塑料把手
RHW-SP ....................6孔蒸板架(未显示)
RCTHW-SK
RCTHW-SW
RHW-LID
RHW-PAN
图 14. RHW配件
RHW-SS-Steam ........不锈钢蒸架(未显示)
RCTHW-2/3SP
RCTHW-SW ..............酱汁/食物保温架
RCTHW-1/3SP
RCTHW-SK ..............保温汤锅架 (可容纳2个7公升汤锅)
RCTHW-2/3SP ..........2孔煮面架带2/3份数盘的开口
RCTHW-1/3SP ..........4孔煮面架带1/3份数盘的开口
RCTHW-SP ..............6孔蒸架
RCTHW-Basket ........煮面斗
RCTHW-SP
RCTHW-PC ..............煮面架(未显示)
RCTHW-Basket
图 15. RCTHW配件
表号:RHWm_CN-0711
21
故障处理指南
中文
本设备只能由受过培训且具备相应资格的人员负责维修。若由
不具备相应资格的人员维修,则可能引起触电或着火。
症状
加热锅温度不够。
电热锅温度过高。
不加热。
触电危险:对设备进行清洗、调整、或维修前,请切断电源,
拔掉电源线,并让设备冷却。
可能原因
纠正措施
温度设定过低。
用 TEmP 键更改至较高的温度设定范围。
使用的食物盛器不正确(RHW 型)。
RHW 型设备只能使用 Hatco 专门设计的圆形
盛器。其他盛器可能达不到本设备与盛器间的
最佳接触。
加热元件不工作。
请联系授权服务机构或 Hatco 请求帮助。
温度控制工作不正常。
请联系授权服务机构或 Hatco 请求帮助。
供电电压不正确。
检查设备的供电电压是否正确。电压低会导致
加热不当。
温度设置范围过高。
用 TEmP 键更改至较低的温度设定范围。
温度控制工作不正常。
请联系授权服务机构或 Hatco 请求帮助。
供电电压不正确。
检查设备的供电电压是否正确。供电电压高会
导致设备过热,并会损坏设备。
设备未通电。
用 ON/OFF 键接通设备电源。请遵照“操作”
一节中的规定步骤。
断路器跳闸。
重置断路器。如果断路器仍然跳开,请联系授
权服务机构或 Hatco 请求帮助。
温度控制工作不正常。
请联系授权服务机构或 Hatco 请求帮助。
加热元件不工作。
请联系授权服务机构或 Hatco 请求帮助。
22
表号:RHWm_CN-0711
全球有限质保
中文
1. 产品质保
HATCO 特此保证,本公司所生产的产品(下称“产品“)不
存在材料和工艺缺陷,在按照HATCO的说明书安装和维护的情
况下,自购买之日起1年内或从HATCO出厂之日起18个月内可
以保证正常工作。买方必须按照能够让HATCO单方面满意的日
期确定购买日期。
上述质保为独家提供,并代替任何明确说明和隐含的质保,包
括但不限于侵犯某个特定用途、专利或其他知识产权的适够性
或适用性的隐含质保。在没有特定说明的情况下,上述质保不
包括:不透明白炽灯、日光灯、装饰性加热灯、不透明卤素灯
、加热玻璃架、玻璃部件和保险丝;由石灰、沉淀物积聚、化
学腐蚀或冷冻所引起的辅助加热箱、鳍片管热交换器或其他水
加热设备的产品故障;或产品不当使用、随意改动或误用、不
当安装或电压不符。
HATCO保证,在下述时间内及条件下,下列产品部件自购买之
日起不存在材料和工艺缺陷(条件如下):
2. 修复和损坏限制
本文所述HATCO责任以及对买方的独家修复义务仅限于在上述
保修期内提出索赔,由HATCO或其授权服务机构负责更换新零
件或产品或对原零件或产品进行维修,具体如何处理由HATCO
决定。HATCO保留接受、部分接受或拒绝此类索赔的权利。在
有限质保规定中,“维修”一词表示将零部件或产品按HATCO
或其授权服务机构的原有规定退回。如事先未得到HATCO的书
面许可,HATCO不接受任何产品的退回,且经过HATCO同意
的产品退回一律由买方承担相关费用。在任何情况下,对于因
故或意外而引起的损失,包括但不限于人工费用或因产品使用
或不能使用、或产品属于或成为其他产品的一部分而造成的利
润损失,HATCO概不负责。
a) 一(1) 年零部件和人工质保外加一(1)年零部件质保:
履带式烤面包机加热器(金属铠装)
保温抽屉加热器(金属铠装)
保温抽屉辊子和滑轨
食品保温器加热器(金属铠装)
陈列式保温器加热器(金属铠装,空气加热)
保温柜加热器(金属铠装,空气加热)
嵌入式保温汤锅加热器— HWB 和 HWBI 系列(金属铠
装)
b) 一(1) 年零部件和人工质保外加四 (4)年零部件质保,费用
分摊由HATCO应用户要求给予解释:
3CS 和FR加热箱
c) 一(1) 年零部件和人工质保外加九(9)年零部件质保:
电辅助加热箱
煤气辅助加热箱
d) 九十(90)天质保:
可替换部件
服务事项
Hatco HEATMAX 电热锅的保修期为自购买之日起1 年或自出厂
日起 15 个月,以先到者为准。
非质保期故障
如果加热锅在保修期内出现问题,您可以:
如果您的设备在非质保期内出现故障需要提供帮助,请联系就
近的HATCO授权服务机构。
联系本地 Hatco 经销商
查找就近的HATCO授权服务机构:
当联系 Hatco 经销商提供服务帮助时,请将以下信息提供给经
销商,以确保得到及时处理:
• 打(0512) 6732-5091电话联系HATCO服务部门。
• 发邮件到联系HATCO服务部门。
• 设备型号
• 序列号(位于设备背面)
• 设备的具体问题
• 购买日期
• 企业名称
• 发运地址
• 联系人姓名和电话号码
Hatco 经销商会为您:
• 提供所需要的更换零部件
• 向 Hatco 提出质保索赔以供处理
表号:RHWm_CN-0711
23
Register your unit online!
See ImPORTANT OWNER INFORmATION
section for details.
HATCO CORPORATION
P.O. Box 340500
Milwaukee, WI 53234-0500 U.S.A.
Telephone (414) 671-6350
International Fax (414) 671-3976
www.hatcocorp.com
2011 年 7 月
HATCO CORPORATION
ASIA HEADQUARTERS
Unit 101, Premier Center, 20 Cheung Shun Street
Cheung Sha Wan, Kowloon, H.K.
Telephone (852) 2991-4121
Fax (852) 2991-4181
24
部件编号:07.04.501.00 表号:RHWm_CN-0711