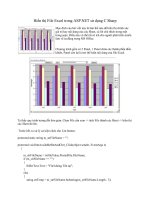
Sử dụng entity framework code first trong ASP NET MVC
Bạn đang xem bản rút gọn của tài liệu. Xem và tải ngay bản đầy đủ của tài liệu tại đây (241.48 KB, 9 trang )
Sử dụng Entity Framework Code First trong ASP.NET MVC
Trong bài viết này chúng ta sẽ cùng nhau tạo một ứng dụng quản lý sách với chức năng CRUD
bằng ASP.NET MVC và áp dụng Entity Framework Code First.
Trước tiên chúng ta cần tạo một project MVC bằng Visual Studio. Ở đây hiện tại mình đang sử
dụng Visual Studio 2013
Để làm việc được với Code First thì trước tiên chúng ta phải tiến hành cài đặt Entity Framework
vào Project bằng cách như sau:
Chọn menu TOOLS -> Nuget Package Manager -> Package Manager Console. Trong màn hình
Package Manager Console chúng ta nhập vào dòng lệnh như sau và nhấn Enter để tiến hành cài đặt:
“Install-Package EntityFramework”
Models:
Trong folder Models chúng ta tạo một class đặt tên là Book chi tiết của class như sau:
1
namespace CodeFirstExample.Models
2
{
3
public class Book
4
{
5
public int Id { get; set; }
6
public string Title { get; set; }
7
public string Author { get; set; }
8
9
}
}
Vẫn ở trong folder Models chúng ta tạo tiếp một class tên là BookContext
1
namespace CodeFirstExample.Models
2
{
3
public class BookContext : DbContext
4
{
5
public BookContext()
6
:base("name=BookContext")
7
{
8
}
9
10
public DbSet<Book> Books { get; set; }
11
12
protected override void OnModelCreating(DbModelBuilder
modelBuilder)
13
{
14
// khai báo Id sẽ là khóa chính
15
modelBuilder.Entity<Book>().HasKey(b => b.Id);
16
17
// khai báo Id sẽ tự động tăng
18
modelBuilder.Entity<Book>().Property(b => b.Id)
19
.HasDatabaseGeneratedOption(DatabaseGeneratedOption.Identity);
20
base.OnModelCreating(modelBuilder);
21
}
22
}
23 }
Để Code First có thể làm việc được với SQL Server thì ở đây ta phải khai báo chuỗi Connection
String như sau ở bên trong file WebConfig.
1
<connectionStrings>
2
3
</connectionStrings>
Controller:
Trong folder Controllers chúng ta tạo class có tên là BooksController bằng cách chuột phải lên
folder Controllers chọn Add -> Controller:
Lúc này visual studio sẽ tự động sinh ra code để giúp bạn dễ dàng thực hiện các thao tác CRUD
(Create – Read – Update – Delete)
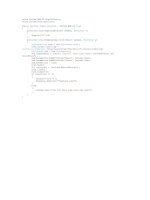
1
namespace CodeFirstExample.Controllers
2
{
3
public class BooksController : Controller
4
{
5
6
private BookContext db = new BookContext();
7
// GET: Books
8
public ActionResult Index()
9
{
10
11
return View(db.Books.ToList());
}
12
13
// GET: Books/Details/5
14
public ActionResult Details(int? id)
15
{
16
if (id == null)
17
{
18
return new
HttpStatusCodeResult(HttpStatusCode.BadRequest);
19
}
20
Book book = db.Books.Find(id);
21
if (book == null)
22
{
23
return HttpNotFound();
24
}
25
return View(book);
26
}
27
28
// GET: Books/Create
29
public ActionResult Create()
30
{
31
32
return View();
}
33
34
// POST: Books/Create
35
// To protect from overposting attacks, please enable the specific
properties you want to bind to, for
36
// more details see />
37
[HttpPost]
38
[ValidateAntiForgeryToken]
39
40
public ActionResult Create([Bind(Include = "Id,Title,Author")]
Book book)
{
41
if (ModelState.IsValid)
42
{
43
db.Books.Add(book);
44
db.SaveChanges();
45
return RedirectToAction("Index");
46
}
47
48
49
return View(book);
}
50
51
// GET: Books/Edit/5
52
public ActionResult Edit(int? id)
53
{
54
if (id == null)
55
{
56
57
return new
HttpStatusCodeResult(HttpStatusCode.BadRequest);
}
58
Book book = db.Books.Find(id);
59
if (book == null)
60
{
61
return HttpNotFound();
62
}
63
return View(book);
64
}
65
66
// POST: Books/Edit/5
67
// To protect from overposting attacks, please enable the specific
properties you want to bind to, for
68
// more details see />
69
[HttpPost]
70
[ValidateAntiForgeryToken]
71
book)
72
public ActionResult Edit([Bind(Include = "Id,Title,Author")] Book
{
73
if (ModelState.IsValid)
74
{
75
db.Entry(book).State = EntityState.Modified;
76
db.SaveChanges();
77
return RedirectToAction("Index");
78
}
79
return View(book);
80
}
81
82
// GET: Books/Delete/5
83
public ActionResult Delete(int? id)
84
{
85
if (id == null)
86
{
87
return new
HttpStatusCodeResult(HttpStatusCode.BadRequest);
88
}
89
Book book = db.Books.Find(id);
90
if (book == null)
91
{
92
return HttpNotFound();
93
}
94
return View(book);
95
}
96
97
// POST: Books/Delete/5
98
[HttpPost, ActionName("Delete")]
99
[ValidateAntiForgeryToken]
100
public ActionResult DeleteConfirmed(int id)
101
{
102
Book book = db.Books.Find(id);
103
db.Books.Remove(book);
104
db.SaveChanges();
105
return RedirectToAction("Index");
106
}
107
108
protected override void Dispose(bool disposing)
109
{
110
if (disposing)
111
{
112
db.Dispose();
113
}
114
base.Dispose(disposing);
115
116
}
}
117 }
Thật tuyệt và bây giờ bạn chỉ việc build lại project rồi nhấn F5 để thưởng thức điều tuyệt vời khi
làm việc với Code First.
Download project tại đây: />