Ebook Practical procedures in aesthetic dentistry: Part 2
Bạn đang xem bản rút gọn của tài liệu. Xem và tải ngay bản đầy đủ của tài liệu tại đây (16.45 MB, 161 trang )
199
Part VII
Indirect Ceramic Veneer Restorations
201
7.1
Planning for Porcelain Laminate Veneers
Christopher C.K. Ho
Principles
Treatment Planning
A comprehensive examination with a complete history and clinical assessment is a
critical step in this treatment modality. The prevention of disease and control should
be considered a first priority, with planning for aesthetic improvement such as veneers
considered after this has been completed.
The treatment planning begins with the following:
●●
●●
●●
Discussion of a patient’s objectives and the ability of the dentist to achieve the desired
outcomes.
Initial examination. A systematic approach documenting clinical findings, including
periodontal conditions, existing restorations, occlusion and so on. A radiographic
examination and study models should complete this initial examination. A photographic series of the patient including extra-oral photos of the full smile and lateral
smiles as well as intra-oral photos should be part of the documentation process.
Informed consent. With the information gathered, discussions should be held to
inform the patient fully about the treatment. This should be done in a simple manner,
detailing the treatment steps and limitations of treatment. Care must be exercised
not to over-promise the final outcomes, and also to determine whether the patient is
expecting unachievable results.
It must be remembered that as health professionals we abide by Primum non nocere, a
Latin phrase that means ‘First, do no harm’. If a patient can be treated with conservative
options, then this must be discussed and recommended to patients as part of the
treatment planning process.
Here are some examples:
●●
Crooked teeth and diastemas may be treated with orthodontic treatment, which
would be advantageous, as there would be no preparation of teeth or long-term
replacement required. Orthodontics may also be a phase of treatment to position the
teeth prior to veneers, allowing for less invasive preparation. The introduction of new
orthodontic techniques like Invisalign™ may help to remove some of the objections to
conventional orthodontics.
Practical Procedures in Aesthetic Dentistry, First Edition. Edited by Subir Banerji, Shamir B. Mehta and
Christopher C.K. Ho. © 2017 John Wiley & Sons, Ltd. Published 2017 by John Wiley & Sons, Ltd.
Companion website: www.wiley.com/go/banerji/aestheticdentistry
202 Practical Procedures in Aesthetic Dentistry
●●
●●
Discoloured teeth might be bleached with vital bleaching or, in the case of a discoloured
non-vital tooth, a non-vital ‘walking’ bleach may be carried out.
Small chips on teeth might be restored with direct resin.
Indications for Porcelain Veneers 1
1) Type I – Teeth resistant to bleaching:
a) Tetracycline discoloration.
b) No response to external or internal bleaching.
2) Type II – Major morphologic modifications:
a) Conoid teeth.
b) Diastema and interdental triangles to be closed.
c) Augmentation of incisal length and prominence.
3) Type III – Extensive restoration:
a) Extensive coronal fracture.
b) Extensive loss of enamel by erosion and wear.
c) Generalised congenital and acquired malformations.
Contraindications for Veneers
●●
●●
●●
●●
●●
●●
Minimal enamel for bonding.
Major changes in tooth colour.
Major changes in tooth positions, such as severe crowding.
Large restorations within tooth, minimal enamel and reduced tooth rigidity.
Bruxism (unprotected) or other parafunctional habits, for instance pen chewing, ice
crushing.
Psychological.
Diagnostic Wax-Up or Mock-Up
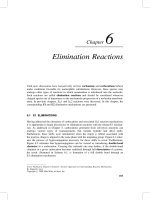
Utilisation of a diagnostic wax-up (Figure 7.1.1) can help plan the desired aesthetic
appearance. This should incorporate the patient’s wants that were expressed in the
initial treatment planning discussions.
The diagnostic wax-up provides visualisation of the desired treatment and a blueprint of the
final restorations. Additionally, a wax-up allows the fabrication of putty keys for provisionalisation and reduction guides for the preparation process. The contours and form of the final
teeth can be transferred from the desired wax-up to the provisionals, allowing the patient to
have a preview of their desired appearance and to re-confirm that they are happy with the
planned changes. It is certainly advantageous for a patient to view the changes prior to constructing the veneers, due to the cost of re-making restorations if patients are not happy.
Material Choices
There are different types of ceramics available to fabricate veneers, but there are two
basic types of materials used: low-fusing feldspathic porcelain and lithium disiliate or
leucite-reinforced ceramics.
Feldspathic Porcelain
This is also referred to as powder liquid or stacked veneers. It is used in the layering
or build-up technique of most modern porcelains. This material contains mainly silica
7.1 Planning for Porcelain Laminate Veneers 203
Figure 7.1.1 Diagnostic wax-up on articulated models
and feldspar. Additional components include pigments and opacifying agents. There
is no outstanding inherent strength (up to 100 MPa flexural strength), but feldspathic
porcelain is twice as strong as human enamel (50 MPa). In the form of a bonded veneer, it
gains much of its strength from the underlying tooth structure, the so-called lamination
effect. One of the advantages of feldspathic porcelain is the ability to build within
each veneer different colours, characteristics and even opacity. Another advantage is
the ability to use a minimal thickness veneer with a depth reduction of 0.3 mm. This
preparation is more conservative, and more likely to remain in enamel, especially if a
reductive approach is required in the preparation.
Lithium Disilicate and Leucite-Reinforced Ceramics
These ceramics were introduced in the 1990s and are made of pre-sintered ingots, which
consist of silicate glasses containing a crystal phase. They can be fabricated using a
pressed approach, where the restoration is created in wax and the lost-wax technique is
used to create the final restoration. The pressing procedure consists of a homogeneous
ceramic ingot being heated and then forced under pressure into a wax-formed void
(investment). The process eliminates porcelain shrinkage, porosity and inconsistencies
that may be present with brush build-up techniques. The alternative technique is the
use of CAD/CAM technology and milling the glass ceramics. Two of the most popular
materials include Empress, leucite containing (Ivoclar Vivadent, Schaan, Liechtenstein),
and e.max, lithium disilicate containing (Ivoclar Vivadent). These materials have several
advantages, including more flexural strength. Due to this higher strength capability, it is
possible even to increase incisal length. It has been reported that up to 4 mm of missing
tooth structure can be restored with leucite-reinforced ceramic. 2 These materials have
good marginal integrity and wear compatibility. They are also available in different
translucencies and opacities, allowing the ceramist better colour masking.
204 Practical Procedures in Aesthetic Dentistry
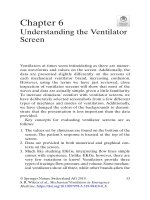
Periodontal Considerations
The patient’s periodontal status must be optimal prior to treatment. This ensures
long-term stability of the periodontal apparatus and minimises any chance of marginal
gingival recession. Periodontal therapy should be completed as well as proper plaque
control methods practised with the patient for long-term maintenance. This also
enables the clinician to work with healthy periodontal tissues and not to have excessive
bleeding due to inflammation while working on the patient. The concept of ‘biologic
width’ should be respected, with preparation margins not invading the minimum space
of 3 mm between the most coronal level of the alveolar bone and the gingival level. The
surgical correction of gingival asymmetries, gingival recession, excessive gingival display
(gummy smile) and altered passive eruption should be completed and time allowed for
the maturation of the tissues prior to veneers being constructed (Figure 7.1.2). This may
range from 3–6 months depending on the case.
Informed Consent
Porcelain veneers are often an aesthetic and elective procedure and as such require a full
discussion on the benefits and risks, with the functional and aesthetic objectives defined
within this process. Alternative means of achieving the patient’s goals must be mentioned
and a discussion held on the procedures involved, including the steps from start to completion. The patient must be educated on the care and maintenance of the veneers, and
mention made of the longevity of the veneers and their eventual replacement.
Figure 7.1.2 Correction of gingival contours with measuring of biologic width and gingivectomy with
diode laser
7.1 Planning for Porcelain Laminate Veneers 205
Figure 7.1.3 Complications with porcelain laminate veneer with fracture
Maintenance and Complications
The survival rate of porcelain veneers has been shown in the literature to be very
high. Friedman, in a review of 3500 veneers over 15 years, found a 7% occurrence of
complications in clinical service, or a success rate of 93% (Figure 7.1.3). Of the 7%
failures, fractures accounted for 67% of total failures, leakage 22% and debonding 11%. 3
Fradeani et al., in a review of 182 veneers, found a probability of veneer survival of
94.4% at 12 years, with a low clinical failure rate (approximately 5.6%). 4
Procedures
●●
●●
●●
●●
Treatment planning – comprehensive history taking with an understanding of the
patient’s needs, and a complete medical and dental history identifying any possible
risk factor(s) that may influence the long-term success of treatment.
Comprehensive examination – hard and soft tissue examination, including occlusal
assessment and periodontal examination. It is important to evaluate the patient’s
dento-labial features and to understand features of smile design, addressing any that
may be improved. It may be that the patient does not understand what makes a smile
beautiful; an example may include gingival asymmetry. In many a case with uneven
gingival contours, carrying out veneers would not give the patient an aesthetic result
without addressing the gingival contours.
Records – photography (see Chapter 2.2) and radiography should be undertaken to
assess the case prior to initiation of treatment. Assessing the teeth to ensure that
there is no pathology or attachment loss with periapical radiographs is an important
step in treatment planning.
Other diagnostic tests – such as transillumination to assess teeth for fractures,
pulpal sensibility testing and so on.
206 Practical Procedures in Aesthetic Dentistry
●●
●●
●●
Study models – these are articulated and assessed for occlusion, as well as planning.
Diagnostic wax-up or mock-up – used to plan the required changes as well as being
transferred onto the patient’s teeth to allow a ‘test run’ or ‘trial smile’, giving them the ability to gauge whether they are happy with the prescribed changes. Often a patient is unsure
of the final aesthetics until given some time to accustom themselves to the changes.
Informed consent – the patient should be given all the available options, the
advantages and disadvantages of each procedure, along with risks, complications and
success rates. It may also be at this stage that it is prudent to address where it may not
be possible to meet the patient’s needs.
Tips
●●
To communicate clearly the correct final orientation of the incisal plane of the planned
veneers, it is important that the ceramist receives a ‘stick bite’ or ‘symmetry bite’ (Figure
7.1.4). This can be as simple as two sticks within the bite registration to register the midline
Figure 7.1.4 Symmetry bite or stick bite – This allows the orientation of the facial vertical plane and
the interpupillary line to be transfered to the dental ceramist, enabling the correct alignment of incisal
edges relative to these planes in the final restorations
7.1 Planning for Porcelain Laminate Veneers 207
●●
●●
and the interpupillary line to the teeth. There are also commercial tools available to carry
out this procedure, including the Kois Dento-Facial Analyser (Panadent, Orpington, UK),
and Symmetry Facial Plane Relator (Clinician’s Choice, New Milford, CT, USA).
It is important to explain to patients that veneers can fracture; they are just like natural
teeth in that they can chip and break. Although veneer failures are rare, they are possible, although it should be explained that the veneers can easily be repaired or replaced.
It is important to explain to patients the aftercare needed with veneers. An instruction
sheet is seen in Table 7.1.1.
Table 7.1.1 Post-operative instructions on the care of veneers
Temporary changes in speech
Your teeth will feel different to your lips and tongue when you first close your mouth. This is
normal and to be expected when changes have been made to the shape and size of the teeth.
Sometimes your speech may change or be affected in the beginning until your tongue adapts to
the changes. Even though the changes are slight (measurable only in millimetres), your mouth is
extremely sensitive and will exaggerate those feelings at first. Usually after a couple of days the
feelings lessen and your mouth will feel normal again.
Daily hygiene
We recommend that you brush with an ultra-soft toothbrush twice a day and floss nightly to extend
the life of your veneer. As with your natural teeth, the veneer may pick up stains from tobacco,
coffee, tea, red wine, colas etc. Having regular dental cleans will usually remove these stains. Do not
use baking soda or any abrasive toothpaste. Avoid routinely rinsing with mouthwashes containing
alcohol. Alcohol softens bonding and weakens the bond of porcelain. Select non-alcoholic
mouthwashes or a solution made of hydrogen peroxide and water.
Diet and habits to avoid
As with natural teeth, avoid chewing excessively hard foods on the veneered teeth, such as:
Hard sweets
Nuts
● Spare ribs
● Hard bread and rolls
● Ice
● Raw carrots.
●
●
This puts stress on the veneer and could result in a fracture or a chip.
Do not bite extremely hard objects with one tooth. Avoid habits such as:
Opening packages with your teeth
Biting thread
● Chewing ice
● Nail biting
● Pipe smoking.
●
●
Playing sports
Extreme force or trauma can break porcelain veneers, just as the same force can break natural teeth.
Use care when playing sports or other potentially traumatic situations. We recommend wearing a
sports mouthguard in these instances.
Continuing care
Visit us for examinations and continuing care at regular six-month examination periods. Often,
problems that are developing with the veneers can be found at an early stage and repaired easily,
while waiting for a longer time may require re-doing the entire restorations. We will arrange your
continuing care appointment with you at the end of your treatment.
208 Practical Procedures in Aesthetic Dentistry
References
1Magne P, Belser U. Bonded porcelain restorations in the anterior dentition: a
biomimetic approach. Berlin: Quintessence; 2003.
2Castelnuovo J, Tjan AH, Phillips K, Nicholls JI, Kois JC. Fracture load and mode of
failure of ceramic veneers with different preparation. J Prosthet Dent. 2000;83:171–80.
3Friedman MJ. A 15-year review of porcelain veneer failure: a clinician’s observations.
Compend Cont Educ Dent. 1998;19;625–32.
4Fradeani M, Redemagni M, Corrado M. Porcelain laminate veneers: 6- to 12-year
clinical evaluation – a retrospective study. Int J Periodontics Restorative Dent.
2005;25(1):9–17.
209
7.2
Tooth Preparation for Porcelain Laminate Veneers
Christopher C.K. Ho
Video: Tooth Preparation for Porcelain Laminate Veneers
Presented by Christopher C.K. Ho
Principles
Relative to crowns, porcelain laminate veneers (PLVs) are a conservative treatment
option to improve anterior aesthetics and have a long history of documented success.
The preparation for PLVs should be based on the final smile design, with the shade and
position of the margin of the restorations being taken into consideration. It is important
that whatever tooth reduction is required, it is based on the definitive wax-up/planned
outcome and not the original tooth. Failure to do this may result in excessive and
unnecessary removal of tooth enamel.
All efforts should be made to contain the preparation within enamel, as this provides
opportunity for a reliable and durable bond between restoration and remaining tooth
tissue. Preparation into dentine should be avoided because of the less reliable bond to
dentine and the difference in elastic modulus and flexibility between dentine and porcelain. This puts the porcelain at risk of fracture when placed under tensile loading. In a
12-year study by Gurel of 583 veneers, 7.2% or 42 veneers failed. 1 Those veneers bonded
to dentin and teeth with preparation margins in dentin were approximately 10 times
more likely to fail than those bonded to enamel.
Meticulous tooth preparation is required with porcelain laminate veneers. The aims
of tooth preparation are to:
●●
●●
●●
●●
●●
Provide sufficient thickness for the porcelain for adequate fracture resistance and not
to over-contour the final restoration.
Provide a definite margin, so that the ceramist has a finishing line, allowing correct
emergence of the veneer from the gingival margin.
Maintain the preparation within enamel wherever possible.
Provide a finished preparation that is smooth and free of any sharp internal line
angles.
Provide definite seating landmarks, allowing proper seating of the veneer.
Practical Procedures in Aesthetic Dentistry, First Edition. Edited by Subir Banerji, Shamir B. Mehta and
Christopher C.K. Ho. © 2017 John Wiley & Sons, Ltd. Published 2017 by John Wiley & Sons, Ltd.
Companion website: www.wiley.com/go/banerji/aestheticdentistry
210 Practical Procedures in Aesthetic Dentistry
Procedures
Labial Preparation
The preparation of the labial contour of anterior teeth needs to be addressed in three
planes: incisal, middle third and cervical (Figure 7.2.1). The labial contour has a convex
surface.
●●
●●
●●
●●
Careful depth reduction of tooth structures is carried out to provide a minimum of
0.3 mm (feldspathic porcelain) or 0.6 mm (Empress, e.max) preparation. The enamel
thickness at the gingival third is 0.3–0.5 mm, up to 0.6–1 mm at the middle third and
1.0–2.1 mm at the incisal third. 2 All efforts should be made to keep preparation within
the enamel for long-term adhesion and also to avoid any unnecessary tooth structure
removal.
Veneers may be used to mask discoloration. A porcelain veneer needs a minimum
thickness of 0.2–0.3 mm for each shade improvement if discoloured, or alternatively
a more opaque porcelain can be chosen.
In short, the thickness of porcelain veneers is determined by the amount of desired
shade change and the final tooth position, which is dictated by functional and aesthetic
parameters.
The use of depth cutters or grooves and dimples has been recommended to control
tooth preparation, as standardised objects allow accurate judgement of depth. Burs
that are specially constructed to provide graded depth cuts are then reduced together
with a chamfer bur (Figures 7.2.2 and 7.2.3). An alternative is to use depth grooves or
dimples. Dimples are depth pits prepared on the surface of the tooth using a 1 mm
diameter round bur sunk to half its diameter to attain 0.5 mm depth. Note that the
orientation of the teeth with regard to the arch form will also influence the depth of
tooth tissue to be removed (see Figure 7.2.4).
Incisal Edge Reduction
There are four different preparation designs possible (Figure 7.2.5), with two (feather
and window preparation) that involve no reduction of the incisal edge or preparation of
the lingual surfaces and other preparations that involve a reduction of the incisal edges.
Figure 7.2.1 Three-plane contour of labial surface of maxillary anterior
tooth Source: Wilson 2015. 3 Reproduced with permission from Elsevier.
7.2 Tooth Preparation for Porcelain Laminate Veneers 211
Figure 7.2.2 Use of depth cutting bur to initiate depth of reduction required
(a)
(b)
(c)
(d)
Figure 7.2.3 (a) Cross-sectional view of depth cuts with depth cutting bur. (b) Cross-sectional view
of depth cuts. (c) Connection of depth cuts with burs; note the convex contour required. (d) Poor
preparation with one plane reduction may encroach into close proximity to the pulp, with irreversible
damage. Source: Wilson 2015.3 Reproduced with permission from Elsevier.
212 Practical Procedures in Aesthetic Dentistry
Figure 7.2.4 Occlusal view of the amount of reduction required to develop the arch form outlined
by the orange line. It is important that you visualise prior to preparation whether the reduction of
tooth structure is actually necessary to attain the final tooth position and contour. Note that one tooth
would not even require preparation, as to attain the desired arch form would be purely additive
●●
●●
●●
Feather preparation. The preparation is taken or feathered to the incisal edge,
without reducing the incisal edge. The disadvantage of this preparation is that the
margins can be subjected to shear forces in protrusion.
Window preparation. This involves preparing the veneer short of the incisal edge,
retaining the enamel over the incisal edge. The disadvantage here is the difficulty of
hiding the margin.
Bevel preparation. A bevel is carried over the incisal edge from buccal to palatal,
with 1–2 mm of incisal reduction. According to Calamia, a tooth preparation that
incorporates incisal overlap is preferable, because the veneer is stronger and provides
a positive seat during cementation. 4 This preparation design has the advantage of
simple tooth preparation, and the aesthetic characteristics are easier to fabricate with
the ceramist, as it is possible to develop incisal translucency. The proper seating of the
veneer is also enabled with the positive seat that is provided. The margin should not
be in a position where it will be subjected to protrusive forces during excursive movements, therefore reducing the stress within the veneer while distributing the occlusal
load over a wider surface area.
(a)
(b)
(c)
(d)
Figure 7.2.5 (a) Feather preparation.
(b) Window preparation. (c) Bevel
preparation. (d) Incisal overlap
preparation
7.2 Tooth Preparation for Porcelain Laminate Veneers 213
●●
Incisal overlap. The incisal edge is reduced with the preparation, then extended onto
the palatal aspect. A positive seat is provided with this preparation, although there is a
need to evaluate carefully the path of insertion to ensure that no undercuts are present.
The ideal choice of incisal preparation has not been determined. An overlap or bevel design
is often used due to the advantages created by a positive seat during cementation. The aesthetic potential with this method allows ceramists to build more characteristics within the
restoration. It is also the design of choice when increasing the length of the tooth.
Proximal Preparation
This preparation can be made proximally by stopping short of breaking the contact, or
by preparing through the contact point.
●●
●●
●●
●●
If contact points are left intact, it is preferable to leave the contact point with the
margin ending approximately 0.25 mm or more labial to the contact region.
The visibility of the tooth:porcelain interproximal interface may be viewed from
different angles and might be hidden by the use of an L-shaped preparation or elbow
preparation to hide the margins interproximally (Figure 7.2.6).
Breaking the contact is often used in changing the shape or position of teeth. With
the additional space interproximally, this allows the ceramist freedom to adjust the
contours and position of the teeth and address any width discrepancies between them.
Preparations may extend futher proximally with the presence of caries and existing
restorations.
Cervical Margin
●●
●●
●●
Recommended chamfer design with a maximum depth of 0.4 mm. This allows the
veneer to reproduce natural tooth contours and not be over-contoured. Additionally,
it allows simple seating of the veneer, and minimises stresses, enhancing the future
fracture resistance of the veneer.
Use of thin, translucent porcelain often allows a ‘contact lens’ effect, where the
margins are blended with no discernible demarcation. This enables margins to be
either equigingival or supragingival.
A supragingival margin has many advantages, with less risk of exposing dentine and
less chance of injury to the soft tissues during preparation. Due to the likelihood of
the margin being in enamel, there is less chance of micro-leakage associated with
enamel bonding.
Figure 7.2.6 L-shaped proximal preparation to hide
proximal margins. Source: Wilson 2015. 3 Reproduced with
permission from Elsevier.
Contact point
214 Practical Procedures in Aesthetic Dentistry
●●
Subgingival margins may be required when there are caries or previous restorations
extending subgingivally. Due to the deeper placement of the margin, often onto dentine,
there is a greater possibility of micro-leakage and staining. It is also more difficult for
the patient to clean and for dentists to finish the restoration after cementation.
Existing Restorations
Bonding veneers onto a composite restoration increases the risk of failure, especially
when the preparation margin is on an existing filling. 5,6 It is preferable to incorporate
the restoration within the veneer so that it is removed completely if possible.
Finishing the Preparation
A thorough final assessment of the preparation should be made, preferably with
magnification. Ensure that there is adequate reduction and internal line angles are
rounded, for example the junction between the lingual, labial and proximal planes of
reduction of the preparation should be rounded with no sharp angles. These areas
may intitiate stress concentration within the ceramic, predisposing it to fracture. The
margins should be defined and smooth, with none located at wear facets or in occlusion.
Tips
●●
Using a silicone index prepared from the diagnostic wax-up may assist in assessing the
amount of reduction. When seen from the occlusal view, this can be cut in horizontal
slices that can be peeled back to assess different vertical positions of the reduced
teeth. Utilisation of a silicone index derived from the wax-up allows visualisation of
the reduction required to achieve the form and contours of the pre-planned shape
and length of the final veneers (Figures 7.2.7 and 7.2.8).
Figure 7.2.7 Silicone index seen from the occlusal view
7.2 Tooth Preparation for Porcelain Laminate Veneers 215
Figure 7.2.8 Silicone index
assessing the vertical reduction.
●●
●●
During the final stages of preparation the use of discs and polishing rubbers can assist
in smoothing the line angles of the teeth.
When an existing restoration is very large, the tooth possesses less structural rigidity,
allowing flexure and possible failure of a veneer. In these cases a decision should be
made to use a full coverage restoration. This also applies to situations where there has
been extensive loss of enamel, with the tooth being less rigid, and furthermore the
lack of enamel means that adhesive bonding is less predictable over the long term.
References
1Gurel G, Sesma N, Calamita MA, Coachman C, Morimoto S. Influence of enamel
preservation on failure rates of porcelain laminate veneers. Int J Periodontics
Restorative Dent. 2013;33(1):31–9.
2Ferrari M, Patroni S, Balleri P. Measurement of enamel thickness in relation to
reduction for etched laminate veneers. Int J Periodont Rest Dent. 1992;23:407–13.
3Wilson N. Essentials of esthetic dentistry: principles and practice of esthetic dentistry.
Amsterdam: Elsevier; 2015.
4Calamia JR. The etched porcelain veneer technique. NY State Dent J. 1988;54:48–50.
5Christensen GJ, Christensen RP. Clinical observations of porcelain veneers. A three
year report. J Esthet Dent. 1991;3:174–9.
6Dunne SM, Millar BJ. A longitudinal study of the clinical performance of porcelain
veneers. Br Dent J. 1993;175:317–21.
216
7.3
Provisionalisation for Porcelain Laminate Veneers
Christopher C.K. Ho
Video: Provisionalisation for Porcelain Laminate Veneers
Presented by Christopher C.K. Ho
Principles
Provisionalisation is an integral stage of treatment procedures, and allows the ability to
communicate with the patient and laboratory about the planned aesthetic changes. Often
patients are planning veneers for an enhanced cosmetic appearance, and as such it is a
subjective process, with many patients not able to determine their desires or visualise the
final result just by discussing the changes verbally. Using provisionals allows an opportunity for a ‘trial smile’ so that patients can preview the final planned result. There are some
clinicians who feel that provisionalisation is not necessary with veneers, due to the minimal tooth reduction required. However, this step is strongly recommended and essential
in the planning process. It is much easier to modify provisional restorations to please a
patient than to send finished veneers back and forth to your dental ceramist or, worse
still, to have to remove permanently cemented veneers due to patient dissatisfaction.
The provisional restorations are duplicated from the diagnostic wax-up incorporating
the proposed changes that the patient, clinician and ceramist have planned. This may
include increases in incisal length, shade changes, form and contour changes.
The main aims in provisionalisation are the following:
●●
●●
●●
Health. Pulpal protection and periodontal health and gingival stability are the focus
here.
Function. The provisional restorations can be used to assess and alert to any functional
and phonetic problems with the proposed changes. The patient can be asked to
perform excursive movements in both laterotrusion and protrusion. Pronouncing
‘V’ and ‘F’ sounds should create a light contact between the central incisor and the
‘wet-dry’ line of the lower lip.
Aesthetics. The provisional restorations can be used to assess the basic shade to be
chosen, incisal edge position, form and shape of teeth, dental midline location, lip
support, parallelism of incisal plane to interpupillary line as well as the curvature of
the lower lip. Evaluation of aesthetics provided by the provisionals at this stage is
crucial in guiding the patient to the amount of display necessary for an aesthetic smile.
Practical Procedures in Aesthetic Dentistry, First Edition. Edited by Subir Banerji, Shamir B. Mehta and
Christopher C.K. Ho. © 2017 John Wiley & Sons, Ltd. Published 2017 by John Wiley & Sons, Ltd.
Companion website: www.wiley.com/go/banerji/aestheticdentistry
7.3 Provisionalisation for Porcelain Laminate Veneers 217
Procedures
There are various techniques for fabricating provisionals.
Freehand Sculpting
Composite resin can be anatomically sculpted from a single veneer to multiple veneers. The
prepared tooth can be spot etched (normally in the mid-labial region), with bonding agent
applied and light cured, prior to building up the composite. This procedure requires more
creative skills to build the correct tooth shape and form, and dentists have complete control
over the build-up rather than relying on the ceramist. Note that prior to cementation of the
veneers, the surface of the tooth that has been spot etched must be carefully smoothed to
remove the resin in order to have a fresh surface to which to bond, and also to ensure that
there is no remnant of composite that would prevent complete seating of a veneer.
Silicone Template
A silicone template developed from the wax-up (Figure 7.3.1) can be used intra-orally.
●●
Shrinkwrap technique. Bisacryl resin composite – temporary materials such as
Luxatemp (DMG America, Englewood, NJ, USA) or Protemp (3M, St Paul, MN,
USA) – can be used and then allowed to set. After this has polymerised the template
is removed, which often leaves the temporary veneers shrinkwrapped onto the prepared teeth due to polymerisation shrinkage. Alternatively, if the temporary veneers
are removed they can be trimmed, polished and then re-cemented to the teeth by rebonding with flowable resin (spot etching). Or the temporary veneers can be cemented
with non-eugenol cement, such as Tempbond Clear (Kerr, Orange, CA, USA), a clear
cement that when cemented temporarily allows a natural translucent appearance in
comparison to opaque temporary cements. If the temporary veneers stay on the teeth
once the silicone template is removed, then any excess flash is removed with carbide
burs or the use of a no. 12 scalpel blade.
Figure 7.3.1 Diagnostic wax-up
218 Practical Procedures in Aesthetic Dentistry
Figure 7.3.2 Spot etch of phosphoric acid applied on mid-labial of tooth. After washing off the etch,
the whole prepared surface has bond applied
●●
Spot etch technique (Figure 7.3.2). The prepared tooth can be spot etched (normally
in the mid-labial region), with bonding agent applied, and light cured. Following that,
bisacryl resin is loaded into the silicone putty and then placed over the prepared teeth
(Figure 7.3.3). As the tooth has been spot etched, the provisional material will adhere
at that region and not be displaced. Any excess flash is then removed with carbide
burs or a no. 12 scalpel blade (Figure 7.3.4).
Figure 7.3.3 Loading of bisacryl resin into silicone template of diagnostic wax-up. Note that the
template has been notched between 11/21 teeth to allow easier insertion intra-orally
7.3 Provisionalisation for Porcelain Laminate Veneers 219
Figure 7.3.4 Provisional material after removal from silicone key. Note that voids and areas of
deficiency can be added with flowable composite resin to repair or modify. Any excess is removed
with a no. 12 scalpel blade or multifluted carbide finishing burs. Ensure adequate contouring of the
interdental spaces to allow sufficient space for access for cleaning
A delayed approach of assessing the provisional restorations is recommended, so that
the patient is not pressured into deciding whether they do or do not like the provisionals
on the day of preparation. The patient is often anaesthetised with associated facial palsy
and cannot adequately assess aesthetics at this time. Furthermore, the patient will often
ask friends and family about the proposed changes and can accustom themselves to
their new look given the extra time. If there are major changes to the lengths of teeth or
occlusion, then time is also required to allow the patient to adapt to the new changes.
If the patient is happy with the provisional restorations, then the ceramist may
construct the final restorations using the original wax-up as a blueprint. If the provisional
restoration requires modifications, the temporaries can be adjusted or composite resin
can be added and an impression of the temporaries can be made. This can then be used
as a template and communication tool to the ceramist about additional changes.
Tips
●●
●●
●●
●●
●●
Any voids or deficient margins present are easily repaired with flowable composite
resin. There is no need to apply adhesive for this purpose.
The use of clear temporary cement (e.g. Tempbond Clear; Tempspan Clear, Pentron,
Orange, CA, USA) is recommended for veneers, as opaque cement will make the veneer
opaque and distinct, not allowing the patient a correct preview of anticipated changes.
There should be minimal to no sensitivity, as there is minimal reduction for veneers,
with many cases being limited to enamel only. Should there be exposed dentine, the
use of bond (non-etched) that has been placed over the prepared tooth normally
blocks out any sensitivity. If there is continuing sensitivity the use of commercial
desensitisers is normally sufficient to block any discomfort.
Ensure that oral hygiene is optimal in the temporary phase so that there is minimal
inflammation and bleeding during the adhesive cementation.
Warn patients of the temporary nature of the veneers and the possibility that they
may dislodge, so that patients are not concerned if this does happen inadvertently.
220
7.4
Appraisal and Cementation of Porcelain Laminate Veneers
Christopher C.K. Ho
Video: Appraisal and Cementation of Porcelain Laminate Veneers
Presented by Christopher C.K. Ho
Principles
Appraisal and Try-In of Veneers
It is important to assess veneers on models to check marginal fit as well as to evaluate
the integrity of the porcelain to ensure that there are no defects or fractures prior to
cemenation. It is vital to have confirmation from the patient that they are happy prior to
proceeding with the cementation procedures.
It is preferable not to use local anaesthetic for the patient to approve the final aesthetics
prior to cementation. However, if local anaesthesia is required, an alternative is to use
the AMSA local anaesthetic block technique, so that the injection achieves pulpal
anaesthesia of the central incisors through the second premolar without collateral
numbness of the face and facial muscles of expression. This is best achieved with the
computer-controlled injection system – the Wand (Milestone Scientific, Livingston, NJ,
USA) – which delivers a virtually painless palatal injection.
Cementation
Correct preparation of the fitting surface of the veneer involves micro-mechanically
roughening the surface by etching with hydrofluoric acid. This removes a layer of glass,
leaving a roughened surface. There is a salt residue on the surface, which should be
removed to enhance the final bond strength. The surface is then silanated and ready for
cementation. Isolate carefully to enhance access and restrict moisture contamination.
The veneers are adhesively bonded with light-cure resin cement, which allows
sufficient working time to seat the veneer and possesses better colour stability. There
are various shades of cement that can be utilised, which have minimal influence on
the final shade due to the low film thickness of the cements once luted. Using opaque
cements may help to block out discoloration as well as increase the value of the final
shade of the veneer. If opaque cement is used it should be applied sparingly, as too much
will make the veneer distinct and not lifelike in appearance.
Practical Procedures in Aesthetic Dentistry, First Edition. Edited by Subir Banerji, Shamir B. Mehta and
Christopher C.K. Ho. © 2017 John Wiley & Sons, Ltd. Published 2017 by John Wiley & Sons, Ltd.
Companion website: www.wiley.com/go/banerji/aestheticdentistry
7.4 Appraisal and Cementation of Porcelain Laminate Veneers 221
Procedures
Appraisal
The provisional veneers can be carefully removed using a spoon excavator to lever
them from the proximal walls. If this is unsuccessful, the provisional material can be
sectioned with a vertical cut and a torquing movement applied with an instrument to
remove separate fragments.
The tooth surface should be cleaned of any residual resin cement or provisional
material, to ensure perfect adaptation of the veneers. If a spot etched temporary veneer
was placed, then the etched area will need be prepared with a fine diamond to allow a
clean surface to which to bond. This will also ensure that there is no resin present that
would interfere with the seating of the veneer.
The tooth is then cleaned with fine pumice slurry or air abraded with 27 micron
aluminium oxide, carefully avoiding the soft tissues to minimise any chance of gingival
bleeding. Small finishing strips can be used interproximally to clean the contact areas.
Each veneer should be assessed to ensure that the marginal fit around the die is
accurate. It is good practice to assess each veneer with transillumination to ensure
there are no fractures within the porcelain. The veneers should then be appraised on
the preparation individually to assess fit. This is best done dry (without water or try-in
gels), as marginal adaptation is then better visualised. Do not apply excessive pressure
while trialling the veneers, as they are brittle prior to bonding.
Incomplete seating is normally due to resin cement that has not been removed,
remaining provisional material or tight contact points. Once each individual veneer has
been assessed, then all the veneers should be assessed in place, evaluating the proximal
contacts. It may be necessary to use the try-in gels at this stage to allow temporary
seating of the veneers.
The veneers should be checked with the patient in relation to colour, form and length,
as well as whether they are pleasing to the patient or may require modification. There are
different water-soluble try-in gels that a clinician can use to alter the colour of the veneer,
from lowering or raising the value to opaquing the restoration to mask discoloration.
At this stage the patient should not be asked to check occlusion, as this may cause
fracture of an unbonded veneer.
Treating the Fitting Surface of the Veneer
Once the final aesthetics of the veneers are approved, the restorations are prepared for
cementation.
The veneers (being silica-based restorations) must be etched with hydrofluoric acid,
which allows a micro-mechanical bond when adhesively bonded. The fitting surface
is etched with 9.5% hydrofluoric acid for 20 seconds with lithium disilicate (e.max) or
60 seconds for other silica-based ceramics. The use of hydrofluoric acid dissolves the
glassy matrix surrounding the crystalline phase within the porcelain, leaving retentive
areas between the acid-resistant crystals.
The treatment of the veneer with hydrofluoric acid etching is often carried out by the
ceramist, and if this is the case it should not be repeated. Instead, the fitting surface can
be treated with >30% phosphoric acid for more than 15 seconds. This helps to remove
the calcium fluoride salt precipitates and to make the surface more active for the silane
primer prior to bonding.
222 Practical Procedures in Aesthetic Dentistry
Although many laboratories etch porcelain for dentists, it is best to treat the veneer
with hydrofluoric acid etching after try-in, as this minimises the contamination of
the etched surface. It has been reported that die stone contamination with the etched
veneers being placed onto the die stone can reduce bond strength, and thus it is preferred
to etch veneers after clinical try-in. 1
The acid should be thoroughly cleansed with air–water spray and the porcelain should
then be placed into a container of distilled water (or 95% alcohol or acetone) and put
into an ultrasonic bath for 4 minutes to remove any residues remaining on the surface. Restorations are removed, dried and silane primer is applied to the fitting surface,
which helps provide a chemical covalent bond to the ceramic. This is allowed to remain
on the veneer for 1 minute and after that the veneer should be gently blown with air to
evaporate any remaining solvent.
Heat treatment of the silane may enhance the effect of silane coupling and this may
be achieved by placing the restoration in a dry furnace at 100 °C for 1 minute, or using
2 minutes of hot air from a hair dryer. 2
Isolation and Haemostasis
The application of rubber dam is recommended to achieve adequate isolation, which
helps to provide a clean, dry environment and minimises contamination from saliva and
blood. It also plays a crucial role in preventing ingestion or aspiration of instruments,
tooth debris, dental materials or other foreign bodies.
As well as the provision of isolation and moisture control, there is the added benefit
of retraction of lips, cheeks and tongue. This allows improved access, visualisation and
protection of soft tissues from rotary instrumentation.
Due to the requirement for adhesive bonding, it is best not to utilise a ferric-containing
haemostatic agent, as this may inhibit polymerisation and cause marginal staining. In
these cases the use of aluminium chloride is recommended.
Cementation
The prepared surfaces are etched with phosphoric acid and adhesive is applied. The use
of different coloured or opaque cements should have been chosen at the try-in phase,
with the ability to modify slightly the final colour or opacity of the veneer.
Bonding Veneers
Light-cure composite resin cement is preferred for cementation of the veneers, as it has
a longer working time than dual-cure or chemically cured composites. This allows sufficient time to remove excess composite prior to curing and thus reduces the finishing
procedures.
The colour stability of light-cure resin cements is much better compared to dual-cure
or chemically cured composites. Dual-cure resin cements contain tertiary amines that
may undergo long-term colour change (‘amine discoloration’) with overall darkening and
thus are normally contraindicated with veneers due to their thin nature and translucency.
For porcelain with a thickness of more than 0.7 mm, light-cure composites do not
reach maximum hardness. It may be necessary to increase the exposure time or utilise
a dual-cure resin cement in these cases. 3
7.4 Appraisal and Cementation of Porcelain Laminate Veneers 223
There are different techniques for bonding the veneers, but they can be basically
categorised into two different techniques: wave or tacking. Both techniques involve first
gently placing the veneer over the tooth, starting from the incisal edge and progressively
placing the veneers towards the apical region, with slight pressure towards the palatal.
It is also important for the resin cement to be squeezed out from all margins, to avoid
voids within the cement margins.
●●
●●
Wave technique. This involves seating the veneer, followed by waving the curing light
over the margins for only a few seconds. It partially polymerises the resin cement into
a gel state that can then be easily removed. Any excess cement around the margins
can be further removed with a brush or a gum stimulator (Figure 7.4.1). This allows a
smooth margin with minimal tendency for the resin to be dragged out of the margin.
Floss should also be used gently to clean out interdental areas. Eventual removal
should always be by pulling the floss towards the palatal to avoid dislodging the
partially set cement (Figure 7.4.2).
Tacking technique. This involves using a tacking tip from the curing light, typically
2–4 mm in diameter, which spot tacks the veneer, stabilising it in the correct position
(Figure 7.4.3). While the veneer is being tacked, the clinician provides a seating pressure that is also directed slightly mesially to ensure complete seating (Figure 7.4.4).
This slight mesial pressure is not intended to change the proximal contact points
inadvertently, which can be an issue when you go on to seat the final veneers and find
that there is no room to seat them due to the contact points being too tight. Once the
veneer is tacked into place, there is a similar clean-up phase with the use of a brush or
a gum stimulator to remove the excess.
Figure 7.4.1 Use of a gum stimulator to remove unset excess resin cement