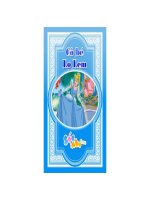
Chart móc cô bé lọ lem Cinderella siêu dễ thương
Bạn đang xem bản rút gọn của tài liệu. Xem và tải ngay bản đầy đủ của tài liệu tại đây (1.38 MB, 12 trang )
* Index *
Content
2
2. Body Pattern
Body Pattern
Chest & Neck Pattern
Body & Chest Assemble
Skirt Pattern
How to Crochet Skirt
Skirt Ornament Pattern
6
3. Arm Pattern
Arm Pattern
Sleeve Pattern
Arm & Sleeve Assemble
8
1 Head Pattern:
Description: Use Yellow yarn and begin with magic ring.
To change yarn color, follow the color code mentioned in
the pattern. Hide the yarn tail left from crocheting after finished inside the head. Crochet a bun and fringe and then
assemble them together.
Head Pattern:
Rnd
9
5. Special Codes
How to crochet “finger”
Cinderella
Page
1. Head Pattern
Head Pattern
Bun Pattern
Fringe Pattern
Head & Bun Assemble
Fringe Assemble
Face-up
Hairband Pattern
4. Assemble
Decoration
*Pattern*
10
1
2
3
4
Code
7 sc into magic ring
(2 sc in next st) *7 Times
(sc, 2 sc in next st) *7 Times
(2 sc, 2 sc in next st) *2 Times, 2 sc, 2 sc in
next st, (2 sc, 2 sc in next st)*2 Times, sc, sc,
2 sc in next st, 2 sc, 2 sc in next st
5 10 sc, 11 sc, 7 sc
6 sc, 2 sc in next st, (3 sc, 2 sc in next st)
*2 Times, (3 sc, 2 sc in next st) *2 Times, 3 sc,
2 sc in next st, 3 sc, 2 sc in next st, 2 sc
7-11 13 sc, 13 sc, 9 sc
12 (3 sc, sc2tog) *2 Times, 3 sc, sc2tog, (3 sc,
sc2tog) *2 Times, sc, 2 sc, sc2tog, 3 sc, sc2tog
13 11 sc, 10 sc, 7 sc
14 (2 sc, sc2tog) *2 Times, 2 sc, sc2tog, (2 sc,
sc2tog) *2 Times, 2 sc, sc2tog, 2 sc, sc2tog
15 (sc, sc2tog) *2 Times, (sc, sc2tog) *5 Times
16 (sc2tog) *7 Times
17 SLST around
***Note:
Black Code = Yellow Yarn
Blue Code = Beige Yarn
Amigurumi Cinderella Pattern | P. 2
sts
7
14
21
28
28
35
35
28
28
21
14
7
Bun Pattern:
Description: Use Yellow yarn to crochet the bun by begin
with 8 chains, do the first code on the 2nd chain from hook.
Continue working along the pattern until finished. Leave
long tail for assembly.
Fringe Pattern:
Description: Use Yellow yarn to crochet the fringe by beginning with 11 chains, crochet the first stitch on the 2nd
chain from hook. (Leave 1 foot long tail before you begin
and leave another 1 foot long tail after finish for assembly)
Fringe pattern diagram
Rnd
Bun pattern diagram
Rnd
1
2
3-5
6
7-9
Code
6 sc, 3 sc in next st, 5 sc, 2 sc in next st
2 sc in next st, 2 sc, 2 sc in next st, 2 sc,
(2 sc in next st) *3 Times, 2 sc, 2 sc in next st,
2 sc, (2 sc in next st) *2 Times
24 sc
3 sc, (sc2tog) *2 Times, 3 sc, 2 sc in next st,
5 sc, (2 sc in next st) *2 Times, 5 sc,
2 sc in next st
Turn, Ch 1, 16 sc
sts
16
24
1
2
3
Code
10 sc
Turn, Ch 1, hdc, dc, 2 hcd in next st, (hdc, 2
hdc in next st) *3 Times, hdc
Turn, Ch 1, (sc2tog, sc) *4 Times, sc2tog
24
26
16
Left to right : finished bun and fringe
(Left to Right) Follow the bun pattern until reaching to the Rnd 9, turn
your work and continue working on Rnd 7 for “17 sc” (you do not
need to complete the whole round). Continue working until finish.
sts
10
14
9
Hair Embroidering:
Description: Embroider yellow yarn around bun and head,
follow photos illustrated on the next column.
Amigurumi Cinderella Pattern | P. 4
Fringe Assemble:
Pin the fringe, let the
base of the fringe adjacent to the base of
the front of the bun.
Sew up the fringe to
the head, leave yarn left
through the neck.
Face-up:
Description: Attach 3 mm. black beads to the face with
black embroidery floss (see photos below)
1 2 3
4 5 6
7 8 9
How to Embroider Hair:
P1 Pin black beads to the eye positions, using
sewing pins. Let each eye attach on 4 sts
away from side face frame and 3 sts away
from the upper face frame
P2 Insert embroidery needle through the neck
and the eye position, put the bead on it
P3 Insert it back near previous position through
the neck
P4 Tie up the floss tails together, hide the left
inside the head
P5 Attach another eye
P6-8 Embroider mouth by pull the needle
through a position 2 sts away from eyes, let
left and right lip 3 sts away from each other
P9 Finish embroidering eyes & mouth
Hairband Pattern:
Crochet hairband, use
blue yarn and begin
with 19 chains, do “18
sc” on the chain, leave
long tail after finish. To
do earing, crochet“5 sc
into magic ring, SLST”
and cut off, leave tail.
Pin hairband on the head between bun and
fringe, use yarn tail left from crocheting the
hairband to attach it to the head. Pull the yarn
through the neck and sew it up securely.Then,
attach earring to the edge of hairband (see
photos).
Chest & Neck Pattern:
2
Description: Use beige yarn, begin with magic ring. Attach
Description: Cinderella’s body is consisted of body pattern chest to the body when you’ve finish Rnd 6 (see photos).
(body and chest) and skirt pattern. You’ll have to finish the
Rnd
Code
sts
body part before working on skirt pattern.
Body Pattern:
Description: Body of Cinderella is
consisted of 2 parts; body and
chest & neck part. Begin working
from the body, use blue yarn and
begin with magic ring. Leave 1 foot
long tail after finish to assemble
with chest & neck part.
Rnd
1
2
3
4
5-15
16
17-18
19
20
21
22-23
24
25
26
27
28
Code
8 sc into magic ring
(2 sc in next st) *8 Times
(sc, 2 sc in next st) *8 Times
24 sc ***work of BLSC
24 sc
(4 sc, sc2tog) *4 Times
20 sc
(8 sc, sc2tog) *2 Times
18 sc
18 sc ***work on BLSC
18 sc
(2 sc, 2 sc in next st) *6 Times
24 sc
(4 sc, sc2tog) *4 Times
20 sc
SLST around
sts
8
16
24
24
24
20
20
18
18
18
18
24
24
20
20
1
2
3
4-5
6
7
8
6 sc
( 2 sc in next st) *6 Times
(sc, 2 sc in next st) *6 Times
18 sc
(sc, sc2tog) *6 Times
(sc2tog) *6 Times
6 sc
6
12
18
18
12
6
6
Body & Chest Assemble:
Amigurumi Cinderella Pattern | P. 6
1 2 3
4 5 6
7 8
How to Assemble Chest Part and Body :
P1
Crochet chest part until reach to Rnd 6
P2
Stuff fiberfill into body, put in chest part, let Rnd 6
emerge from the body. Put the last stitch of body
and neck on the same position
P3-5 Use yarn tail left from crocheting chest to sew up
chest and body together by putting yarn needle up
and down through 2 parts stitch by stitch
P6
Stuff fiberfill into chest
P7-8
Continue working on the chest & neck pattern until
finish, leave 1 foot long tail for head & body assembly
Skirt Pattern:
Description: Use light blue yarn to crochet skirt around the
body, begin from the front loop of body’s Rnd 20. Change
yarn color to white yarn for crocheting ornamental fringe.
Leave 2 feet long tail after finish, hide it along the edge of
the fringe.
Rnd
1
2
Code
sts
18 sc ***work on FLSC of body’s Rnd 20
18
(2 sc, 2 sc in next st) *6 Times
24
***work on BLSC
3
(3 sc, 2 sc in next st) *6 Times
30
4
(4 hdc, 2 hdc in next st) *6 Times
36
5
(5 hdc, 2 hdc in next st) *6 Times
42
6
(6 hdc, 2 hdc in next st) *6 Times
48
7
(7 hdc, 2 hdc in next st) *6 Times
54
8
(9 hdc, 2 hdc in next st) *6 Times
60
9
60 hdc
60
10 (9 hdc, 2 hdc in next st) *6 Times
66
11-12 66 hdc
66
13 (10 hdc, 2 hdc in next st) *6 Times
72
14 (Ch 3, SLST on next 2 st) *36 Times with white
yarn
Note:
“2 hdc in next st” is increasing stitch with “half doulble
crochet” 2 times in the same stitch
How to Crochet Skirt:
1 2 3
4 5 6
7 8 9
9 10 11
12 13
Rnd
1
2
3
4
5
6
7
8
Code
sts
9 sc *** work on FLSC of Skirt’s Rnd 1
9
Turn, Ch 1, (2 sc in next st) *8 Times
16
Turn, Ch 1, 7 sc, sc2tog, 7 sc
15
Turn, Ch 1, sc2tog, 11 sc, sc2tog
13
Turn, Ch 1, sc2tog, 9 sc, sc2tog
11
Turn, Ch 1, sc2tog, 7 sc, sc2tog
9
Turn, Ch 1, sc2tog, 5 sc, sc2tog
7
Turn, Ch 1, SLST to the waist, crochet another
piece, repeat Rnd 1-7
1 2 3
4 5 6
7 8 9
3 Arm Pattern:
Description: Arm is consisted of 2 parts; arm and sleeve.
Use light blue yarn to begin working on the arm with
magic ring, change yarn color before begin Rnd 11.
How to Crochet Skirt Ornament :
P1
Begin crocheting from the center of
the back waist
1
5 sc into magic ring
P2-3 Turn the work, crochet 1 chain before
you begin the next round.
2
(2 sc in next st) *5 Times
P4-5 Continue working on the pattern
3
(3 sc, sc2tog) *2 Times
until you reach to Rnd.7
P6
Do SLST (Slip Stitch) along the edge
4
2 sc, sc2tog, sc, finger*, sc2tog
of the skirt to the base of it (the back
5
4 sc, skip loop on finger, sc
of the waist) Leave long tail to make
6-10 5 sc
a tiny ribbon on the back
P7-8
Make 2 skirt ornaments
11-15 5 sc ***use white yarn
P9
Tie the yarn left from making 2 skirt
ornaments into a ribbon. Cut the left off. Note:
See “How to crochet finger” on Page 10
Rnd
Code
Amigurumi Cinderella Pattern | P. 8
sts
5
10
8
6
5
5
5
Sleeve Pattern:
4 Assemble:
Description: Use light blue yarn to begin with magic ring,
Description: After finish each parts, assemble them toleave 1 foot long tail after finish.
gether by begin with attach arms to body and then attach
Rnd
Code
sts the head to the body. Follow photos illustrated belows.
1
2
3
4-5
6
6 sc into magic ring
(2 sc in next st) *6 Times
(sc, 2 sc in next st) *6 Times
18 sc
(sc2tog) *9 Times
6
12
18
18
9
<<< Finished 2 pieces
of arms and sleeves.
Arm & Sleeve Assemble:
1 2 3
4 5 6
7 8 9
10 11
See description on the next page >>>
Press the sleeve to form the same shape shown in photos, insert the
arm into the hole on it and use yarn left from crocheting sleeve to sew
up them together. Pull the left yarn through the inner side (that will be
attached to the body).
Amigurumi Cinderella Pattern | P. 10


