User Interfaces
Bạn đang xem bản rút gọn của tài liệu. Xem và tải ngay bản đầy đủ của tài liệu tại đây (778.35 KB, 42 trang )
User Interfaces
I
n this chapter, you will look at one of the most common tasks a programmer needs to
perform—the art of putting pixels on the screen. In F# this is all about the libraries and API
that you call, and you have a lot of choices in this area. You can create WinForms, a set of
classes found in
System.Windows.Form.dll. These classes allow you to create desktop applica-
tions based on forms and controls. You can create ASP.NET applications. This library is
contained in
System.Web.dll, which is a simple way to create server-based dynamic HTML
applications. You also have the option to use Windows Presentation Foundation (WPF), which
is a new library distributed with .NET 3.0 that allows you to design interfaces in an XML-based
language called XAML. These three technologies (WinForms, ASP.NET, and WPF) will be the
focus of this chapter. Since whole books have been written on each topic, I won’t be able to
cover them all in detail. Instead, you’ll look at techniques for working with these technologies
in F#.
F# can also use a lot of other graphics libraries—some designed to work with the tech-
nologies already mentioned and others, such as the DirectX or GTK# libraries, designed to
replace them.
Introducing WinForms
WinForms are based on the System.Windows.Forms.Form class. By creating an instance of this
class, you essentially create a new window. You must then create an
event loop, a way of
ensur
ing user interactions with the window are responded to. You do this by calling the
System.Windows.Application.Run method and passing it the form object you have created.
You can control the look of the form by setting its properties and calling its methods. The
following example demonstrates this:
#light
open System.Drawing
open System.Windows.Forms
let form = new Form(BackColor = Color.Purple, Text = "Introducing WinForms")
Application.Run(form)
This example will not work with F# interactive, fsi, because you cannot start an event
loop from within
fsi. So to work with forms in fsi, you simply call the form’s Show method or
set the form’s
Visible property to true. This example shows the second technique:
167
CHAPTER 8
■ ■ ■
7575Ch08.qxp 4/27/07 1:04 PM Page 167
> #light
open System.Drawing
open System.Windows.Forms
let form = new Form(BackColor=Color.Purple,
Text="Introducing WinForms",
Visible=true);;
Either way, you have the advantage that you can dynamically interact with your form
object. For example:
> form.Text <- "Dynamic !!!";;
When working with WinForms, you can take one of two approaches: drawing forms your-
self or using controls to build them. First you’ll look at drawing your own forms, and then
you’ll move on to using controls.
Drawing WinForms
Drawing your own forms means you take responsibility for the pixels that actually appear on
the screen. This low-level approach might appeal to many F# users, because they might find
that many controls that come with the WinForms library are not perfectly suited to displaying
their data structures and the results of functions and algorithms. However, be warned that this
approach can be time-consuming, and your time is usually better spent looking for a graphics
library that abstracts some of the presentation logic.
To draw a WinForm, you attach an event handler to the form’s or the control’s
Paint event.
This means every time Windows requests the form to be drawn, your function will be called.
The event argument that is passed into this function has a property called
Graphics, which
contains an instance of a class also called
Graphics. This class has methods (such as DrawLine)
that allow you to draw pixels on the form. The following example shows a simple form where
you draw a pie on it:
#light
open System.Drawing
open System.Windows.Forms
let brush = new SolidBrush(Color.Red)
let form =
let temp = new Form()
temp.Resize.Add(fun _ -> temp.Invalidate())
temp.Paint.Add
(fun e ->
if temp.Width - 64 > 0 && temp.Height - 96 > 0 then
e.Graphics.FillPie
(brush,
32,
32,
CHAPTER 8
■
USER INTERFACES
168
7575Ch08.qxp 4/27/07 1:04 PM Page 168
temp.Width - 64,
temp.Height - 64,
0,
290))
temp
Application.Run(form)
Figure 8-1 shows the resulting form.
Figure 8-1. A WinForm containing a pie shape
Because this image is linked to the size of the form, you must tell the form to redraw itself
whenever the form is resized. You do this by attaching an event handling function to the
Resize event. In this function, you call the form’s Invalidate method, which tells the form that
it needs to redraw itself.
You’ll now look at a more complete WinForms example. Imagine you want to create a
form to display the
Tree type defined in the next code example and displayed in Figure 8-2.
// The tree type
type 'a Tree =
| Node of 'a Tree * 'a Tree
| Leaf of 'a
// The definition of the tree
let tree =
Node(
Node(
Leaf "one",
Node(Leaf "two", Leaf "three")),
Node(
Node(Leaf "four", Leaf "five"),
Leaf "six"))
CHAPTER 8
■
USER INTERFACES
169
7575Ch08.qxp 4/27/07 1:04 PM Page 169
Figure 8-2. A WinForm showing a tree structure
You can draw this tree with the code in Listing 8-1. I will walk you through how the code
works directly after the listing.
Listing 8-1. Drawing a Tree
#light
open System
open System.Drawing
open System.Windows.Forms
// The tree type
type 'a Tree =
| Node of 'a Tree * 'a Tree
| Leaf of 'a
// The definition of the tee
let tree =
Node(
Node(
Leaf "one",
Node(Leaf "two", Leaf "three")),
Node(
Node(Leaf "four", Leaf "five"),
Leaf "six"))
// A function for finding the maximum depth of a tree
let getDepth t =
let rec getDepthInner t d =
match t with
| Node (l, r) ->
max
(getDepthInner l d + 1.0F)
(getDepthInner r d + 1.0F)
| Leaf x -> d
getDepthInner t 0.0F
CHAPTER 8
■
USER INTERFACES
170
7575Ch08.qxp 4/27/07 1:04 PM Page 170
// Constants required for drawing the form
let brush = new SolidBrush(Color.Black)
let pen = new Pen(Color.Black)
let font = new Font(FontFamily.GenericSerif, 8.0F)
// a useful function for calculating the maximum number
// of nodes at any given depth
let raise2ToPower (x : float32) =
Convert.ToSingle(Math.Pow(2.0, Convert.ToDouble(x)))
let drawTree (g : Graphics) t =
// constants that relate to the size and position
// of the tree
let center = g.ClipBounds.Width / 2.0F
let maxWidth = 32.0F * raise2ToPower (getDepth t)
// function for drawing a leaf node
let drawLeaf (x : float32) (y : float32) v =
let value = any_to_string v
let l = g.MeasureString(value, font)
g.DrawString(value, font, brush, x - (l.Width / 2.0F), y)
// draw a connector between the nodes when necessary
let connectNodes (x : float32) y p =
match p with
| Some(px, py) -> g.DrawLine(pen, px, py, x, y)
| None -> ()
// the main function to walk the tree structure drawing the
// nodes as we go
let rec drawTreeInner t d w p =
let x = center - (maxWidth * w)
let y = d * 32.0F
connectNodes x y p
match t with
| Node (l, r) ->
g.FillPie(brush, x - 3.0F, y - 3.0F, 7.0F, 7.0F, 0.0F, 360.0F)
let d = (d + 1.0F)
drawTreeInner l d (w + (1.0F / d)) (Some(x, y))
drawTreeInner r d (w - (1.0F / d)) (Some(x, y))
| Leaf v -> drawLeaf x y v
drawTreeInner t 0.0F 0.0F None
CHAPTER 8
■
USER INTERFACES
171
7575Ch08.qxp 4/27/07 1:04 PM Page 171
// create the form object
let form =
let temp = new Form(WindowState = FormWindowState.Maximized)
temp.Resize.Add(fun _ -> temp.Invalidate())
temp.Paint.Add
(fun e ->
e.Graphics.Clip <-
new Region(new Rectangle(0, 0, temp.Width, temp.Height))
drawTree e.Graphics tree)
temp
Application.Run(form)
You define a function, drawTree, that has two parameters: the Graphics object and the tree
to be drawn:
let drawTree (g : Graphics) t =
This is a common pattern when drawing WinForms. Creating a function that takes the
Graphics object and a data type to be drawn allows the function to be easily reused by differ-
ent forms and controls.
To implement
drawTree, you first calculate a couple of constants to be used by the function,
center and maxWidth. These are nice—since they can’t be seen by functions outside drawTree yet,
they can be used within all its inner functions without having to be passed around as parameters.
// constants that relate to the size and position
// of the tree
let center = g.ClipBounds.Width / 2.0F
let maxWidth = 32.0F * raise2ToPower (getDepth t)
The rest of the function is implemented by breaking it down into inner functions. You
define
drawLeaf to take care of drawing leaf nodes:
// function for drawing a leaf node
let drawLeaf (x : float32) (y : float32) v =
let value = any_to_string v
let l = g.MeasureString(value, font)
g.DrawString(value, font, brush, x - (l.Width / 2.0F), y)
You use connectNodes to take care of drawing the connections between nodes, where
appr
opriate:
// draw a connector between the nodes when necessary
let connectNodes (x : float32) y p =
match p with
| Some(px, py) -> g.DrawLine(pen, px, py, x, y)
| None -> ()
Finally, you define drawTreeInner as a recursive function that does the real work of walk-
ing the
Tree type and dr
awing it:
CHAPTER 8
■
USER INTERFACES
172
7575Ch08.qxp 4/27/07 1:04 PM Page 172
// the main function to walk the tree structure drawing the
// nodes as we go
let rec drawTreeInner t d w p =
let x = center - (maxWidth * w)
let y = d * 32.0F
connectNodes x y p
match t with
| Node (l, r) ->
g.FillPie(brush, x - 3.0F, y - 3.0F, 7.0F, 7.0F, 0.0F, 360.0F)
let d = (d + 1.0F)
drawTreeInner l d (w + (1.0F / d)) (Some(x, y))
drawTreeInner r d (w - (1.0F / d)) (Some(x, y))
| Leaf v -> drawLeaf x y v
This function uses parameters to store values between recursive calls. Because it is an inner
function, you know that the outside world cannot misuse it by initializing its initial values incor-
rectly; this is because the outside world cannot see it. Hiding parameters to store working values
between recursive function calls is another common pattern in functional programming.
In some ways this tree-drawing function is satisfactory; it gives a nice hierarchical
overview of the tree in a fairly concise 86 lines of F# code. However, there is a limit to how well
this approach scales. As you draw more complicated images, the number of lines of code can
grow rapidly, and working out all the geometry can become time-consuming. To help manage
this complexity, F# can use controls, as discussed in the next section.
■
Caution
Although you can use these techniques to produce animation, such animations will flicker. To
avoid this flicker, you must use a technique called
double buffering, which requires you to understand a lot
about how Windows draws forms. For more information about double buffering, please see
http://
strangelights.com/FSharp/Foundations/default.aspx/FSharpFoundations.DoubleBuffering
.
To make the most of drawing on WinForms, you should get to know the System.Drawing
namespace contained in System.Drawing.dll. You should concentrate on two areas, first
learning how to use the
Graphics object, particularly the overloads of methods prefixed with
either
Draw or Fill.
T
o help y
ou get star
ted, Table 8-1 summaries them.
Table 8-1. Important Methods on the System.Drawing.Graphics Object
Method Name Description
DrawArc Draws a portion of an ellipse.
DrawBezier D
r
aws a Bézier spline, which is a curve represented by two endpoints
and two free-floating points controlling the angle of the curve.
DrawCurve D
r
aws a cur
v
ed line defined b
y an arr
ay of points
.
DrawClosedCurve Draws a closed curved line defined by an array of points.
continued
CHAPTER 8
■
USER INTERFACES
173
7575Ch08.qxp 4/27/07 1:04 PM Page 173
Table 8-1. Continued
Method Name Description
D
rawEllipse
D
raws the outline of an ellipse represented by a rectangle or
rectangular set of points.
DrawPie Draws a portion of the outline of an ellipse, represented by a rectangle
and two radial lines representing the start and finish angles.
DrawLine Draws a single line from two points.
DrawLines Draws a set of lines from an array of points.
DrawPolygon Draws the outline of a polygon, which is a closed set of lines from an
array of points.
DrawRectangle Draws the outline of a rectangle represented by a coordinate and its
width and height.
DrawRectangles Draws the outline of a set of rectangles from an array of rectangles.
FillClosedCurve Draws a solid closed curve defined by an array of points.
FillEllipse Draws a solid ellipse represented by a rectangle or rectangular set of
points.
FillPie Draws a portion of a solid ellipse, represented by a rectangle and two
radial lines representing the start and finish angles.
FillPolygon Draws a solid polygon, which is a closed set of lines from an array of
points.
FillRectangle Draws a solid rectangle represented by a coordinate and its width and
height.
FillRectangles Draws a solid set of rectangles from an array of rectangles
.
DrawIcon Draws an image specified by the System.Drawing.Icon type.
DrawImage Draws an image specified by the System.Drawing.Image type.
DrawImageUnscaled Draws an image specified by the System.Drawing.Image type with no
scaling.
DrawString Draws a string of characters.
MeasureString Gives the dimensions of the string of characters so the programmer can
calculate where it should be placed on the image.
DrawPath Draws an outline represented by the
System.Drawing.Drawing2D.GraphicsPath.
This is a class that allows you
to add geometric constructs such as the curves, rectangle, ellipses, and
polygons described earlier to save you from recalculating them each
time. This is useful if you want to draw something that is complicated
but fairly static.
FillPath Provides the same functionality as DrawPath, except draws an image
that is solid r
ather than an outline
.
The second area is closely related to the System.Drawing.Graphics object; it is the creation
of the
Icon, Image, Pen, and Brush objects that are used b
y its methods. Table 8-2 shows exam-
ples of ho
w to cr
eate these objects via their constr
uctors
.
CHAPTER 8
■
USER INTERFACES
174
7575Ch08.qxp 4/27/07 1:04 PM Page 174
Table 8-2. Important Methods on the System.Drawing.Graphics Object
Snippet Description
Color.FromArgb(33, 44, 55) Creates a color from its red, green, and
blue components
Color.FromKnownColor(KnownColor.Crimson) Creates a color from a member of the
KnownColor enumeration
Color.FromName("HotPink") Creates a color from its name in string
form
new Font(FontFamily.GenericSerif, 8.0f) Creates a new font that is a generic serif
font and 8 points tall
Image.FromFile("myimage.jpg") Creates a new image from a file
Image.FromStream(File.OpenRead
("myimage.gif"))
Creates a new image from a stream
new Icon("myicon.ico") Creates a new icon from a file
new Icon(File.OpenRead("myicon.ico")) Creates a new icon from a stream
new Pen(Color.FromArgb(33, 44, 55)) Creates a pen, used to draw lines, from a
color
new Pen(SystemColors.Control, 2.0f) Creates a pen, used to draw lines, from a
color and with a width of 2 pixels
new SolidBrush(Color.FromName("Black")) Creates a solid brush that can be used to
draw filled shapes
new TexturedBrush(Image.FromFile Creates a new textured brush from an
("myimage.jpg")) image and draws a filled shape with
an image mapped across it
If you prefer to use standard objects, you can use several classes in the System.Drawing
namespace that contain predefined objects. These are Brushes, Pens, SystemBrushes,
SystemColors, SystemFonts, SystemIcons, and SystemPens; the following is a quick example
of using these:
#light
open System.Drawing
let myPen = Pens.Aquamarine
let myFont = SystemFonts.DefaultFont
Working with Controls in WinForms
A control is simply a class that derives from System.Windows.Forms.Control. Any class that
der
ives from this can be displayed in a form by adding it to the
Controls collection on the
form object.
CHAPTER 8
■
USER INTERFACES
175
7575Ch08.qxp 4/27/07 1:04 PM Page 175
You’ll now look at a way to draw the tree using controls. The WinForms library defines a
T
reeView
c
lass, which is specifically for displaying tree-like structures, so you’ll use this control to
display the tree. To use
TreeView, you create an instance of it and configure it by setting its prop-
erties and calling its methods. Most important, you add to its
Nodes collection the nodes you
want to display. Once the control is ready to be displayed, you add it to the form’s
Controls
collection.
The
TreeView class uses TreeNode objects to represent nodes, so you’ll define the function
mapTreeToTreeNode to recursively walk the tree structure and create a TreeNode graph. The pro-
gram in Listing 8-2 produces the tree in Figure 8-3.
Listing 8-2. Drawing a Tree via a TreeView Control
#light
open System.Windows.Forms
// The tree type
type 'a Tree =
| Node of 'a Tree * 'a Tree
| Leaf of 'a
// The definition of the tee
let tree =
Node(
Node(
Leaf "one",
Node(Leaf "two", Leaf "three")),
Node(
Node(Leaf "four", Leaf "five"),
Leaf "six"))
// A function to transform our tree into a tree of controls
let mapTreeToTreeNode t =
let rec mapTreeToTreeNodeInner t (node : TreeNode) =
match t with
| Node (l, r) ->
let newNode = new TreeNode("Node")
node.Nodes.Add(newNode) |> ignore
mapTreeToTreeNodeInner l newNode
mapTreeToTreeNodeInner r newNode
| Leaf x ->
node.Nodes.Add(new TreeNode(any_to_string x)) |> ignore
let root = new TreeNode("Root")
mapTreeToTreeNodeInner t root
root
CHAPTER 8
■
USER INTERFACES
176
7575Ch08.qxp 4/27/07 1:04 PM Page 176
// create the form object
let form =
let temp = new Form()
let treeView = new TreeView(Dock = DockStyle.Fill)
treeView.Nodes.Add(mapTreeToTreeNode tree) |> ignore
treeView.ExpandAll()
temp.Controls.Add(treeView)
temp
Application.Run(form)
Figure 8-3. A TreeView control used to view a tree
This code is about half the length of Listing 8-1, when you drew the tree yourself. It is also
more functional, because it allows you to fold away parts of the tree in which you’re not inter-
ested. This greatly improves the size of tree that can be manageably displayed.
In this example, you use the “dock style” to control how the control looks. You do this by
setting the control’s
Dock property with a member of the DockStyle enumeration. Docking
means that the control will take up as much space as available in the form that contains it on
the left side if you use
DockStyle.Left, on the right side if you use DockStyle.Right, at the top
if you use
DockStyle.Top, on the bottom if you use DockStyle.Bottom, and on the whole form if
you use
DockStyle.Fill. This is great when you have just a few controls, because it creates a
nice dynamic effect because the controls are resized when the user resizes the form; however,
it does not work well with a lot of controls because it is difficult to get lots of controls to fit
together nicely using this technique. For example, if you have two controls that are docked to
the left, it’s confusing which one is supposed to be the leftmost one and how much of the left
side they both take up. A better solution with a lot of controls is to explicitly control their lay-
out using the
Top and Left properties. You can create a dynamic effect by using the Anchor
property to anchor the control to the edge of the containing form. The following example cre-
ates a form with a single textbox on it that will grow and shrink as the user resizes the form:
CHAPTER 8
■
USER INTERFACES
177
7575Ch08.qxp 4/27/07 1:04 PM Page 177
#light
open System
open System.Windows.Forms
let form =
let temp = new Form()
let textBox = new TextBox(Top=8,Left=8, Width=temp.Width – 24.
Anchor = (AnchorStyles.Left |||
AnchorStyles.Right |||
AnchorStyles.Top))
temp.Controls.Add(textBox)
temp
[<STAThread>]
do Application.Run(form)
However, this method of working with controls is not always satisfactory. Here you displayed
only one control. Often you want to display tens, even hundreds, of controls on a form. Writing all
the code to create and configure the controls can quickly become tedious and error-prone. To get
around this, Visual Studio provides some form designers that allow you to graphically create
forms. However, a designer is not currently available for F#, so the next section will discuss work-
ing in F# with forms created with the C# designer.
One of the difficulties facing the WinForms programmer when working with controls is
that there are many controls from which to choose. In this chapter, I have covered just one
control. Unfortunately, in learning what works, there’s no real substitute for experience. The
MSDN library (
) provides an excellent reference, but the volume of
information there can also be a little off-putting for learners, so I have summarized some of
the most useful ones in Table 8-3 to give you a head start.
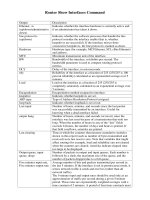
Table 8-3. Common WinForm Controls and Their Usages
Control Description
Label A control for displaying text information to the user; generally most other
controls should be accompanied by a
Label to explain their usage. Placing
an
& in the text of the Text property of the Label will underline the letter
directly after it and allow the keyboard user to hop to the control
associated with the
Label (the control next in the tab order) by pressing
Alt+<letter>; this is good for improving application usability.
TextBox A box for entering text. The default is a single line of text but can be
changed to suppor
t multiline entr
y if y
ou set the
Multiline pr
oper
ty to
true; in this case, also check that the WordWrap and ScrollBar properties
ar
e to your liking. This is also useful for displaying text to the user that you
want them to be able to copy and paste; in this case, set the
ReadOnly
property to true.
MaskedTextBox A textbox similar in a lot of respects to the previous control; it allows you
limit the data a user can enter via setting the
Mask pr
oper
ty
.
Button A button for the user to click; as with the Label contr
ol, placing an
& in the
text of the
Text pr
operty of the
Button contr
ol will allow underline the
letter directly after it and allow the keyboard user to hop to the
Button by
pressing Alt+<letter>. Again, this is great for usability.
CHAPTER 8
■
USER INTERFACES
178
7575Ch08.qxp 4/27/07 1:04 PM Page 178
Control Description
LinkLabel Not really to be used as a label as the name might suggest but as a type of
button that looks like an HTML link. This is great for users who are used to
a web environment or to indicate that clicking the button leads to opening
a web page.
CheckBox A box for the users to check if you have a set of options that are not
mutually exclusive.
RadioButton Similar to a CheckBox but for options that are mutually exclusive. Several of
these placed in the same container are automatically mutually exclusive.
The container is usually a
Form.
DateTimePicker A control to allow the user to pick a date via a drop-down calendar.
MonthCalander A control to allow a user to pick a date from a calendar that is permanently
on display.
ComboBox A control to allow a user to make a selection from a drop-down list; this is
great for showing a dynamic set of data via data binding. For more details
on this, see Chapter 9.
ListBox Similar to a ComboBox but the list of items is display
ed within the for
m rather
than as a drop-down list. Favor this one if your form has lots of free space.
DataGridView A control to provide an excellent way to display information from a database
table, though this can be used to display any kind of tabular data. This
should always be used in preference to the older
DataGrid. I’ll discuss this
further in Chapter 9.
TreeView Another control great for showing dynamic data, but this time it is most
useful for data in a tree-like form.
ProgressBar Giving your users feedback about any long-running activity is vital for a
usable application, and this control provides a good way to do this.
RichTextBox A contr
ol for providing a way to display and edit rich text documents,
which is useful if your users want a little more formatting than offered by
the standard textbox.
WebBrowser A control for displaying HTML documents; this is useful since a lot of
information is available in HTML format.
Panel A control for breaking your for
m into different sections; this is highly
effectiv
e when used with
HScrollBar and VScrollBar.
HScrollBar A horizontal scroll bar, used to fit more information on a Form or Panel.
VScrollBar A vertical scroll bar, used to fit more information on a Form or Panel.
TabControl A for
m that uses a ser
ies of tabs to display user controls.
Using the Visual Studio Form Designer’s Forms
in F#
F# does not
y
et have a form designer of its own; however, thanks to the great interoperability
of .NET, it is easy to use forms created with the designer in F#. You have two approaches. You
can create an F# library and call functions from this library in your Windows form, or you can
create a libr
ary of forms and use them from your F# application. You’ll look first at creating an
CHAPTER 8
■
USER INTERFACES
179
7575Ch08.qxp 4/27/07 1:04 PM Page 179
F# library, and then you will look at creating a forms library. Then I’ll compare the two tech-
n
iques. Both examples will be based on the same Fibonacci calculator shown in Figure 8-4.
■
Caution
This book is about F#, and for the majority of the material, knowledge of no other programming
language is necessary. However, for this topic, it will be necessary to understand a little of another .NET pro-
gramming language, in this case C#. Specifically, you’ll see two short listings in C# in this section. You can
easily replace the C# code with Visual Basic .NET code if you feel more comfortable with that language.
Figure 8-4. A Fibonacci calculator form created with the Visual Studio designer
The main consideration in creating an F# library to be used from a form is making it easy
to use from the form. In this case, you’ll create a function to calculate the Fibonacci number,
so this will take an integer and return an integer. This makes things simple since a form has no
problem using the .NET integer type. You want the library to be reasonably efficient, so create
a lazy list of Fibonacci numbers and define a function that can
get the nth number:
#light
module Strangelights.Fibonacci
let fibs =
(1,1) |> Seq.unfold
(fun (n0, n1) ->
Some(n0, (n1, n0 + n1)))
let getFib n =
Seq.nth n fibs
U
sing this function fr
om a form is pretty straightforward; you just need to reference your
F#
.dll from the Visual Studio form project. You can use the module Strangelights.Fibonacci
by opening the Strangelights namespace and treating Fibonacci as if it were a class in C#.
The following example sho
ws how to call the function in C# and place the result in a control.
Note that because this form was created with Visual Studio 2005, the control definitions are in
a separate source file.
using System;
using System.Windows.Forms;
using Strangelights;
CHAPTER 8
■
USER INTERFACES
180
7575Ch08.qxp 4/27/07 1:04 PM Page 180
namespace CSApp
{
public partial class FibForm : Form
{
public FibForm()
{
InitializeComponent();
}
private void calculate_Click(object sender, EventArgs e)
{
int n = Convert.ToInt32(input.Text);
n = Fibonacci.get(n);
result.Text = n.ToString();
}
}
}
If you want to be able to use the form created in C# from F#, you need to expose certain
controls as properties. Not all controls need to be exposed—just the ones that you want to
interact with from F#. The following example shows how to do this in C#; again, any designer-
generated code is hidden in a separate file:
using System;
using System.Windows.Forms;
namespace Strangelights.Forms
{
public partial class FibForm : Form
{
public FibForm()
{
InitializeComponent();
}
public Button Calculate
{
get { return calculate; }
}
public Label Result
{
get { return result; }
}
CHAPTER 8
■
USER INTERFACES
181
7575Ch08.qxp 4/27/07 1:04 PM Page 181
public TextBox Input
{
get { return input; }
}
}
}
It is then very straightforward to reference the C# .dll from F# and create an instance of
the form and use it. The following example demonstrates the code you use to do this:
#light
open System.Windows.Forms
open Strangelights.Forms
let fibs =
(1,1) |> Seq.unfold
(fun (n0, n1) ->
Some(n0, (n1, n0 + n1)))
let getFib n =
Seq.nth n fibs
let form =
let temp = new FibForm()
temp.Calculate.Click.Add
(fun _ ->
let n = int_of_string temp.Input.Text
let n = getFib n
temp.Result.Text <- string_of_int n)
temp
Application.Run(form)
As you have seen, you can use both techniques to produce similar results, so which is best
to use when? The problem with a C# form calling F# is that you will inevitably end up writing
quite a bit of C# to glue everything together. It can also be difficult to use some F# types, such
as union types, fr
om C#. C
onsider
ing these two facts, I generally create a C# forms library and
use this from F#. I discuss the problem of making F# libraries ready for use with other .NET
languages in Chapter 13.
Working with WinForms Events and the IEvent
Module
The IEvent module, first discussed in Chapter 7, can be useful when working with events in
WinForms. When working with events in a WinForm, there is often not an event that exactly fits
what you want. For example, the
MouseButton event is raised when either the left or right mouse
button is clicked, but you might want to respond only to the click of the left mouse button. In
CHAPTER 8
■
USER INTERFACES
182
7575Ch08.qxp 4/27/07 1:04 PM Page 182