Windows 7 Resource Kit- P33
Bạn đang xem bản rút gọn của tài liệu. Xem và tải ngay bản đầy đủ của tài liệu tại đây (1.21 MB, 50 trang )
Tools for Troubleshooting CHAPTER 31
1553
9 266 ff00::/8 On-link
8 276 ff00::/8 On-link
11 286 ff00::/8 On-link
===========================================================================
Persistent Routes:
None
Fully interpreting the routing configuration requires a detailed understanding of IP
networking; however, you can quickly identify default routes for traffic being sent to your
default gateway by locating the Active Route with a Network Destination and Network Mask
of 0.0.0.0 for IPv4 routes and an Active Route with the prefix ::/0 for IPv6 routes. Other Active
Routes with a Gateway assigned cause traffic for the specific Network Destination and Network
Mask to be sent through that gateway, with a preference for the route with the lowest metric.
MoRe inFo
For additional information on IPv6 networking, read Chapter 28, “Deploying
IPv6.”
If you must manually update the IPv4 routing table (you should typically make changes to
the network infrastructure that assigned the routes to the client), you can use the route add,
route change, and route delete commands. For more information, type route –? at a command
prompt.
To update the IPv6 routing table, you must use the netsh interface ipv6 add|set|delete route
commands.
Task Manager
Task Manager (Taskmgr.exe) is a GUI tool that you can use to view or end a process or an
unresponsive application. You can also use Task Manager to gather other information, such
as CPU statistics. To start Task Manager, click Start, type Taskmgr, and then press Enter.
Alternatively, you can right-click the taskbar and then click Task Manager.
The Windows Task Manager window contains six tabs: Applications, Processes, Services,
Performance, Networking, and Users.
n
The Applications and Processes tabs provide a list of applications or processes that are
currently active on your system. These lists are valuable because active tasks do not
always display a user interface, which can make it difficult to detect activity. Task Man-
ager displays active processes and lets you end most items by clicking End Process. You
cannot end some processes immediately; you might need to use the Services snap-in
or Taskkill to end them. You can also customize Task Manager to increase or decrease
the level of detail shown on the Processes tab.
n
The Services tab displays running services and their PID. If you determine that a specific
PID is using network resources and you find the PID on this tab, you know that a service
Please purchase PDF Split-Merge on www.verypdf.com to remove this watermark.
CHAPTER 31 Troubleshooting Network Issues
1554
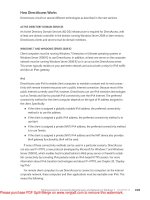
is causing the network utilization. To stop a service, right-click it and then click Stop
Service, as shown in Figure 31-4.
FIGURE 31-4
Use the Services tab to identify services by PID and stop them.
n
The Performance tab graphically displays process and memory utilization. Viewing this
tab quickly reveals the total utilization of all programs and services on the computer.
The Performance tab also shows key performance counters including the number of
processes, the number of threads, and the total physical memory installed in the system.
n
The Networking tab shows the utilization of all network interfaces.
n
With the Users tab, you can disconnect and log off active users.
To view detailed information about processes, follow these steps:
1.
Start Task Manager and then click the Processes tab.
2.
Optionally, click Show Processes From All Users.
3.
On the View menu, click Select Columns.
4.
Select or clear the columns that you want to add to, or remove from, the Processes tab.
5.
Click OK to return to Task Manager.
To identify the cause of high processor utilization, follow these steps:
1.
Start Task Manager and then click the Performance tab.
2.
Click the View menu and then select Show Kernel Times (if it is not already selected).
3.
Examine the CPU Usage History graph. If the graph shows values close to 100 percent,
one process or multiple processes are consuming the bulk of the computer’s process-
Please purchase PDF Split-Merge on www.verypdf.com to remove this watermark.
Tools for Troubleshooting CHAPTER 31
1555
ing capability. The red line shows the percentage of the processor consumed by the
kernel, which includes drivers. If the bulk of the processing time is consumed by the
kernel, verify that you are using signed drivers and have the latest version of all drivers
installed. If the kernel is not responsible for the majority of the processor usage, con-
tinue following these steps to identify the process.
4.
Click the Processes tab.
5.
Click the CPU column heading twice to sort the processes by processor utilization with
the highest utilization at the top of the list.
The process or processes consuming the processor will show high CPU utilization values.
When the processor is not being used heavily, the System Idle Process shows high CPU
utilization.
To find the PID of an application, follow these steps:
1.
Start Task Manager and verify that the Process ID (PID) column is displayed on the
Processes tab. If it is not displayed, open the View menu, click Select Columns, and
then select PID. Click OK.
2.
Click the Applications tab.
3.
Right-click the application and then click Go To Process.
Task Manager will display the Processes tab. The process associated with the application
will be highlighted. The PID is shown in the PID column.
To stop a process, follow these steps:
1.
Start Task Manager and then click the Processes tab.
2.
Right-click the process you want to stop and then click End Process.
Task Manager will attempt to end the process. If Task Manager fails, use Taskkill.
To identify the network utilization, start Task Manager and then click the Networking tab.
Task Manager shows the utilization of each network adapter. The percentage of utilization
is measured in relation to the reported Link Speed of the adapter. In most cases, network
adapters are not capable of 100 percent utilization; peak utilization is approximately 60 per-
cent to 70 percent.
MoRe inFo
For additional information on using Task Manager, refer to Chapter 21.
TCPView
TCPView, shown in Figure 31-5, monitors both incoming and outgoing connections, as well
as listening applications, in real time. You can use TCPView to identify exactly which servers a
client connects to, including the port numbers, or identify the clients connecting to a server.
Please purchase PDF Split-Merge on www.verypdf.com to remove this watermark.
CHAPTER 31 Troubleshooting Network Issues
1556
FIGURE 31-5
TCPView allows you to monitor network connections in real time.
To download TCPView, visit
You do not need to install TCPView; simply copy the executable file to a folder that allows
applications to be run (such as C:\Program Files\) and then double-click Tcpview.exe. TCPView
also includes Tcpvcon.exe, a command-line tool that provides similar functionality.
Telnet Client
Although it is not primarily a troubleshooting tool, Telnet Client is extremely useful for
determining whether TCP-based network services are reachable from a client. Most
commonly used network services are TCP based, including Web services, mail services, and
file transfer services. Telnet Client is not useful for troubleshooting UDP-based network
services such as DNS and many streaming media communications.
Telnet Client is not installed by default in Windows 7. To install it, run the following
command from a command prompt with administrative privileges.
start /w pkgmgr /iu:"TelnetClient"
Alternatively, you can install it by following these steps:
1.
Click Start and then click Control Panel.
2.
Click Programs.
3.
Click Turn Windows Features On Or Off.
4.
In the Windows Features dialog box, select the Telnet Client check box. Click OK.
Please purchase PDF Split-Merge on www.verypdf.com to remove this watermark.
Tools for Troubleshooting CHAPTER 31
1557
Telnet Client is useful only for determining whether a service is reachable, and it will not
provide information that you can use for troubleshooting name resolution, network perfor-
mance, or network connectivity problems. Use Telnet Client only after you have used Ping to
eliminate the possibility of name resolution problems. For more information about Ping, see
the section titled “Ping” earlier in this chapter.
Testing Service Connectivity
After you have identified the port number for the service, you can use Telnet Client to test
connectivity to that service. To test connectivity to a service, open a command prompt and
run the following command.
telnet destination portnumber
For example, to test HTTP connectivity to www.microsoft.com, type the following command
at the command line.
telnet www.microsoft.com 80
The destination might be a host name, computer name, or IP address. The response you
receive will indicate whether a connection was established. If you receive the message “Could
not open connection to the host,” the host did not respond to the request for a connection
on the port number you specified, and the service you are testing is unreachable.
If you receive any other response, including all text disappearing from the command
window, the connection was successfully established. This eliminates the possibility that the
problem you are troubleshooting is caused by a connectivity issue between the client and the
server. Depending on the service you are testing, Telnet Client can be automatically discon-
nected, or the session might remain open. Either circumstance indicates a successful connec-
tion. If the Telnet Client session remains open, you should disconnect Telnet Client to close
the connection.
To disconnect Telnet Client, follow these steps:
1.
Press Ctrl+].
2.
When the Microsoft Telnet> prompt appears, type quit.
Test TCP
With Test TCP, you can both initiate TCP connections and listen for TCP connections. You can
also use the Test TCP tool for UDP traffic. With Test TCP, you can configure a computer to
listen on a specific TCP or UDP port without having to install the application or service on the
computer. This allows you to test network connectivity for specific traffic before the services
are in place.
Test TCP (Ttcp.exe) is a tool that you can use to listen for and send TCP segment data or
UDP messages between two nodes. Ttcp.exe is provided with Windows Server 2003 in the
Valueadd\Msft\Net\Tools folder of the Windows Server 2003 or Windows XP Service Pack 2
(SP2) product CD-ROM.
Please purchase PDF Split-Merge on www.verypdf.com to remove this watermark.
CHAPTER 31 Troubleshooting Network Issues
1558
Test TCP differs from Port Query in the following ways:
n
With Test TCP, you can configure a computer to listen on a specific TCP or UDP port
without having to install the application or service on the computer. This allows you
to test network connectivity for specific traffic before the services are in place. For
example, you could use Test TCP to test for domain replication traffic to a computer
before you make the computer a domain controller.
n
Test TCP also supports IPv6 traffic.
When you are using a TCP port, the following code shows the basic syntax for Ttcp.exe on
the listening node (the receiver):
ttcp -r –pPort
When using a UDP port, use the following syntax.
ttcp -r –pPort -u
After starting Test TCP in receive mode, the tool will wait indefinitely for a transmission
before returning you to the command prompt. The first time you use Test TCP to listen from
a computer running Windows 7, you might be prompted to create a Windows Firewall
exception. You must create the exception for Test TCP to work. If you choose to unblock the
application, Windows Firewall will allow all traffic for that computer on the specified port in
the future. Therefore, you will not need to create a new exception for that network type,
even if you listen on a different port. In Windows Firewall, the exception is named Protocol
Independent Perf Test Command.
When you are using a TCP port, the following code shows the basic syntax for Ttcp.exe on
the sending node (the transmitter):
ttcp -t -pPort hostname
When using a UDP port, use the following syntax.
ttcp -t –pPort -u hostname
If the two computers are able to communicate, the transmitting computer will display
output such as the following.
ttcp-t: Win7 -> 192.168.1.132
ttcp-t: local 192.168.1.196 -> remote 192.168.1.132
ttcp-t: buflen=8192, nbuf=2048, align=16384/+0, port=81 tcp -> Win7
ttcp-t: done sending, nbuf = -1
ttcp-t: 16777216 bytes in 1423 real milliseconds = 11513 KB/sec
ttcp-t: 2048 I/O calls, msec/call = 0, calls/sec = 1439, bytes/call = 8192
Meanwhile, the receiving computer will display output similar to the following.
Please purchase PDF Split-Merge on www.verypdf.com to remove this watermark.
Tools for Troubleshooting CHAPTER 31
1559
ttcp-r: local 192.168.1.132 <- remote 192.168.1.196
ttcp-r: buflen=8192, nbuf=2048, align=16384/+0, port=81 tcp
ttcp-r: 16777216 bytes in 1416 real milliseconds = 11570 KB/sec
ttcp-r: 3492 I/O calls, msec/call = 0, calls/sec = 2466, bytes/call = 4804
You can use Test TCP to connect to any computer listening for incoming TCP connections,
even if that computer is not running Test TCP. However, to accurately test UDP connectivity,
Test TCP must be running on both the receiver and transmitter. For example, to attempt a
connection to www.microsoft.com on TCP port 80, you would run the following command.
ttcp -t -p80 www.microsoft.com
ttcp-t: local 192.168.1.196 -> remote 10.46.20.60
ttcp-t: buflen=8192, nbuf=2048, align=16384/+0, port=80 tcp -> www.microsoft.com
send(to) failed: 10053
ttcp-t: done sending, nbuf = 2037
ttcp-t: 81920 bytes in 16488 real milliseconds = 4 KB/sec
ttcp-t: 11 I/O calls, msec/call = 1498, calls/sec = 0, bytes/call = 7447
In this example, the TCP connection was successful, even though the output includes the
line “send(to) failed.” If the connection was unsuccessful, the output would have included the
phrase “connection refused.” Alternatively, some servers will simply not respond to invalid
communications, which will cause the Test TCP transmitter to pause indefinitely while it awaits
a response from the server. To cancel Test TCP, press Ctrl+C.
Each instance of Test TCP can listen on or send to only a single port. However, you can run
it in multiple command prompts to listen or send on multiple ports. For additional command-
line options, type Ttcp at the command prompt.
Windows Network Diagnostics
Troubleshooting network problems is complicated, especially for users. Many users discover
network problems when they attempt to visit a Web page with Internet Explorer. If the Web
page is not available, Internet Explorer returns the message “Internet Explorer cannot display
the webpage.” The problem could be any one of the following, however:
n
The user mistyped the address of the Web page.
n
The Web server is not available.
n
The user’s Internet connection is not available.
n
The user’s LAN is not available.
n
The user’s network adapter is misconfigured.
n
The user’s network adapter has failed.
Please purchase PDF Split-Merge on www.verypdf.com to remove this watermark.
CHAPTER 31 Troubleshooting Network Issues
1560
The cause of the problem is important for the user to understand. For example, if the Web
server is not available, the user does not need to take any action—the user should simply wait
for the Web server to become available. If the Internet connection has failed, the user might
need to call her Internet service provider (ISP) to troubleshoot the problem. If the user’s
network adapter has failed, she should attempt to reset it and contact her computer manu-
facturer’s technical support for additional assistance.
Windows Network Diagnostics and the underlying Windows Troubleshooting Platform
assist users in diagnosing and, when possible, resolving network connectivity issues. When
Windows 7 detects network problems, it will prompt the user to diagnose them. For example,
Internet Explorer displays a link to start Windows Network Diagnostics if a Web server is
unavailable, and the Network And Sharing Center will display a diagnostic link if a network is
unavailable.
Applications might prompt users to open Windows Network Diagnostics in response to
connectivity problems. To start Windows Network Diagnostics manually, open Network And
Sharing Center, click Troubleshoot Problems, and follow the prompts that appear. Unlike
many of the tools described in this chapter, Windows Network Diagnostics is designed to be
useful without a deep understanding of network technologies. For more information about
Windows Network Diagnostics, see Chapter 25.
The Process of Troubleshooting Network Problems
To most users, the term connectivity problems describes a wide range of problems, including
a failed network connection, an application that cannot connect because of firewall filtering,
and serious performance problems. Therefore, the first step in troubleshooting connectivity
problems is to identify the scope of the connectivity problem.
To identify the source of a connectivity problem, follow these steps and answer the ques-
tions until you are directed to a different section:
1.
Open the Network And Sharing Center by clicking the network icon in the system
tray and then clicking Open Network And Sharing Center. At the bottom of the page,
click Troubleshoot Problems and follow the prompts that appear. If Windows Network
Diagnostics does not identify or resolve the problem, please choose to send the infor-
mation to Microsoft to help improve Windows Network Diagnostics. Then, continue
following these steps.
2.
Are you attempting to connect to a wireless network, but your connection attempt is
rejected? If so, see the section titled “How to Troubleshoot Wireless Networks” later in
this chapter.
3.
Are you attempting to connect to a remote network using a VPN connection, but your
connection attempt is rejected? If so, see Chapter 27, “Connecting Remote Users and
Networks.”
Please purchase PDF Split-Merge on www.verypdf.com to remove this watermark.
The Process of Troubleshooting Network Problems CHAPTER 31
1561
4.
Can you occasionally access the network resource, but it is unreliable or slow? If so,
see the section titled “How to Troubleshoot Performance Problems and Intermittent
Connectivity Issues” later in this chapter.
5.
Can you access other network resources using different applications, such as e-mail or
different Web sites? If not, you have a network connectivity problem or a name resolu-
tion problem. If you can contact servers using the IP address instead of the host name,
see the section titled “How to Troubleshoot Name Resolution Problems” later in this
chapter. If servers are not accessible when you specify an IP address or if you do not
know an IP address, see the next section, “How to Troubleshoot Network Connectivity
Problems.”
6.
Are you trying to join a domain or log on to your computer using a domain account
but are receiving an error message that the domain controller is unavailable? If so, see
the section titled “How to Troubleshoot Joining or Logging on to a Domain” later in
this chapter.
7.
Open a command prompt and run the command Nslookup servername. If Nslookup
does not display an answer similar to the following, you have a name resolution prob-
lem. See the section titled “How to Troubleshoot Name Resolution Problems” later in
this chapter for information on solving these problems.
C:\>nslookup contoso.com
Non-authoritative answer:
Name: contoso.com
Addresses: 10.46.232.182, 10.46.130.117
8.
Are you trying to connect to a shared folder? If so, see the section titled “How to
Troubleshoot File and Printer Sharing” later in this chapter.
9.
If other network applications work and name resolution succeeds, you might have a
firewall problem. See the section titled “How to Troubleshoot Application Connectivity
Problems” later in this chapter.
How to Troubleshoot Network Connectivity Problems
If you have a network connectivity problem, you will be unable to reach any network
resource that can normally be accessed using the failed network. For example, if your Internet
connection has failed, you will be unable to access Internet resources, but you might still be
able to access resources on your LAN. If your LAN fails, however, nothing will be accessible.
Most network connectivity problems result from one of the following issues:
n
Failed network adapter
n
Failed network hardware
n
Failed network connection
n
Faulty network cables
Please purchase PDF Split-Merge on www.verypdf.com to remove this watermark.
CHAPTER 31 Troubleshooting Network Issues
1562
n
Misconfigured network hardware
n
Misconfigured network adapter
note
Often, people jump to the conclusion that the network has failed when only a
single network resource has failed. For example, a failed DNS server will stop your
computer from resolving host names, which would prevent the computer from finding
resources on the network by name. Similarly, if the only network resource a user accesses
is her e-mail server and that server has failed, the failure might appear to that user to be a
total loss of connectivity. To avoid spending time troubleshooting the wrong problem, the
processes in this chapter always start by isolating the cause of the problem.
After you isolate the failed feature, you can work to resolve that specific problem or you
can escalate the problem to the correct support team. For example, if you determine that
the network adapter has failed, you will need to contact the hardware manufacturer for a
replacement part. If you determine that the Internet connection has failed, you will need to
contact your ISP. To isolate the cause of a network connectivity problem, follow these steps:
1.
Open the Network And Sharing Center by clicking the network icon in the system tray
and then clicking Open Network And Sharing Center. At the bottom of the page, click
Troubleshoot Problems and follow the prompts that appear. If Windows Network
Diagnostics does not identify or resolve the problem, continue following these steps.
2.
Open a command prompt on the computer experiencing the problems. Run the
command ipconfig /all. Examine the output as follows:
n
If no network adapters are listed, the computer either lacks a network adapter or
(more likely) it does not have a valid driver installed. Refer to Chapter 30, “Trouble-
shooting Hardware, Driver, and Disk Issues,” for more information.
n
If all network adapters show a Media State of Media Disconnected, the computer
is not physically connected to a network. If you are using a wireless network, see
the section titled “How to Troubleshoot Wireless Networks” later in this chapter. If
you are using a wired network, disconnect and reconnect both ends of the network
cable. If the problem continues, replace the network cable. Attempt to connect a
different computer to the same network cable; if the new computer can connect
successfully, the original computer has a failed network adapter. If neither com-
puter can connect successfully, the problem is with the network wiring, the network
switch, or the network hub. Replace the network hardware as necessary.
n
If the network adapter has an IPv4 address in the range of 169.254.0.1 through
169.254.255.254, the computer has an APIPA address. This indicates that the
computer is configured to use a DHCP server, but no DHCP server is available. With
administrative credentials, run the following commands at a command prompt.
ipconfig /release
ipconfig /renew
ipconfig /all
Please purchase PDF Split-Merge on www.verypdf.com to remove this watermark.
The Process of Troubleshooting Network Problems CHAPTER 31
1563
If the network adapter still has an APIPA address, the DHCP server is offline. Bring a
DHCP server online and restart the computer. If the network does not use a DHCP
server, configure a static or alternate IPv4 address provided by your network admin-
istration team or your ISP. For information about configuring static IP addresses, see
Chapter 25. For more information about IPConfig, read the section titled “IPConfig”
earlier in this chapter.
n
If all network adapters show DHCP Enabled: No in the display of the ipconfig /all
command, the network adapter might be misconfigured. If DHCP is disabled, the
computer has a static IPv4 address, which is an unusual configuration for client
computers. Update the network adapter IPv4 configuration to Obtain An IP Address
Automatically and Obtain DNS Server Address Automatically, as shown in Figure
31-6. Then configure the Alternate Configuration tab of the IP Properties dialog box
with your current, static IP configuration. For information about configuring IP
addresses, see Chapter 25.
FIGURE 31-6
Enable DCHP for most client computers.
For most networks, set client configuration to Obtain An IP Address Automatically.
3.
Having arrived at this step, you know that your computer has a valid, DHCP-assigned
IPv4 address and can communicate on the LAN. Therefore, any connectivity problems
are caused by failed or misconfigured network hardware. Although you cannot solve
the problem from a client running Windows, you can still diagnose the problem. View
the output from the ipconfig command and identify the IPv4 address of your default
gateway. Verify that the IPv4 address of the default gateway is on the same subnet
as the network adapter’s IP address. If they are not on the same subnet, the default
Please purchase PDF Split-Merge on www.verypdf.com to remove this watermark.
CHAPTER 31 Troubleshooting Network Issues
1564
gateway address is incorrect—the default gateway must be on the same subnet as the
client computer’s IPv4 address.
note
To determine whether an IPv4 address is on the same subnet as your computer’s
IPv4 address, first look at your subnet mask. If your subnet mask is 255.255.255.0, com-
pare the first three sets of numbers (called octets) in the IPv4 addresses (for example,
192.168.1 or 10.25.2). If they match exactly, the two IPv4 addresses are on the same
subnet. If your subnet mask is 255.255.0.0, compare the first two octets. If your subnet
mask is 255.0.0.0, compare only the first octet (the first grouping of numbers before the
period in the IP address). If any of the numbers in the subnet mask are between 0 and
255, you will need to use binary math and the AND operation to determine whether
they are on the same subnet.
4.
Attempt to ping the default gateway using the following command.
ping default_gateway_ip_address
For example, given the following IPConfig output:
Ethernet adapter Local Area Connection:
Connection-specific DNS Suffix . : hsd1.nh.contoso.com.
Link-local IPv6 Address . . . . . : fe80::1ccc:d0f4:3959:7d74%10
IPv4 Address. . . . . . . . . . . : 192.168.1.132
Subnet Mask . . . . . . . . . . . : 255.255.255.0
Default Gateway . . . . . . . . . : 192.168.1.1
you would run the following command.
ping 192.168.1.1
If the Ping results show “Request timed out,” your computer has the incorrect IP
address configured for your default gateway, your default gateway is offline, or your
default gateway is blocking ICMP requests. If the Ping results show “Reply from …,”
your default gateway is correctly configured, and the problem is occurring elsewhere
on the network.
note
Ping is not a reliable tool for determining whether computers or network
equipment are available on the network. Today, to reduce security risks, many adminis-
trators configure devices not to respond to Ping requests. However, Ping is still the most
reliable tool for testing routers, and most administrators configure routers to respond
to Ping requests from the local network. It’s a good idea to ping your network equip-
ment when everything is working properly just to determine whether it responds under
normal conditions.
Please purchase PDF Split-Merge on www.verypdf.com to remove this watermark.
The Process of Troubleshooting Network Problems CHAPTER 31
1565
5.
Use the Tracert command to test whether you can communicate with devices outside
your LAN. You can reference any server on a remote network; however, this example
uses the host www.microsoft.com.
C:\>tracert www.microsoft.com
Tracing route to www.microsoft.com [10.46.19.30]
over a maximum of 30 hops:
0 win7.hsd1.nh.contoso.com. [192.168.1.132]
1 192.168.1.1
2 c-3-0-ubr01.winchendon.ma.boston.contoso.com [10.165.8.1]
3 ge-3-37-ur01.winchendon.ma.boston.contoso.com [10.87.148.129]
4 ge-1-1-ur01.gardner.ma.boston.contoso.com [10.87.144.225]
5 10g-9-1-ur01.sterling.ma.boston.contoso.com [10.87.144.217]
The 0 line is your client computer. The 1 line is the default gateway. Lines 2 and above
are routers outside your local area network.
n
If you see the message “Unable to resolve target system name,” your DNS server
is unreachable because the DNS server is offline, your client computer is miscon-
figured, or the network has failed. If your DNS server is on your LAN (as displayed
by the ipconfig /all command) and you can still ping your router, the DNS server
has failed or is misconfigured; see the section titled “How to Troubleshoot Name
Resolution Problems” later in this chapter for more information on these issues. If
your DNS server is on a different network, the problem could be either a network
infrastructure problem or a name resolution problem. Repeat this step, but use Ping
to contact your DNS server IP address (as displayed by the ipconfig /all command).
Then, follow the steps outlined in the section titled “How to Troubleshoot Name
Resolution Problems” later in this chapter to further isolate the issue.
n
If nothing responds after line 1, your default gateway cannot communicate with
external networks. Try restarting the default gateway. If the default gateway is con-
nected directly to the Internet, the Internet connection or the device that connects
you to the Internet (such as a cable or DSL modem) might have failed. Contact your
ISP for additional troubleshooting.
n
If the same gateway appears multiple times in the Tracert route, the network is ex-
periencing a routing loop. Routing loops can cause performance problems or cause
communications to fail entirely. Networks typically fix routing loops automatically;
however, you should contact your network support team to make sure they are
aware of the problem. The following Tracert output demonstrates a routing loop,
because nodes 5, 6, and 7 repeat.
Please purchase PDF Split-Merge on www.verypdf.com to remove this watermark.
CHAPTER 31 Troubleshooting Network Issues
1566
C:\>tracert www.contoso.com
Tracing route to www.contoso.com [10.73.186.238]
over a maximum of 30 hops:
0 d820.hsd1.nh.contoso.com. [192.168.1.196]
1 192.168.1.1
2 c-3-0-ubr01.winchendon.ma.boston.contoso.com [10.165.8.1]
3 ge-3-37-ur01.winchendon.ma.boston.contoso.com [10.87.148.129]
4 ge-1-1-ur01.gardner.ma.boston.contoso.com [10.87.144.225]
5 10g-9-1-ur01.sterling.ma.boston.contoso.com [10.87.144.217]
6 te-9-2-ur01.marlboro.ma.boston.contoso.com [10.87.144.77]
7 10g-8-1-ur01.natick.ma.boston.contoso.com [10.87.144.197]
8 10g-9-1-ur01.sterling.ma.boston.contoso.com [10.87.144.217]
9 te-9-2-ur01.marlboro.ma.boston.contoso.com [10.87.144.77]
10 10g-8-1-ur01.natick.ma.boston.contoso.com [10.87.144.197]
11 10g-9-1-ur01.sterling.ma.boston.contoso.com [10.87.144.217]
12 te-9-2-ur01.marlboro.ma.boston.contoso.com [10.87.144.77]
13 10g-8-1-ur01.natick.ma.boston.contoso.com [10.87.144.197]
n
If any routers on line 2 or above respond (it doesn’t matter if the final host responds),
the client computer and the default gateway are configured correctly. The problem
exists with the network infrastructure, or your Internet connection may have failed.
Follow the troubleshooting steps described in the next section, “How to Trouble-
shoot Application Connectivity Problems,” or contact network support to trouble-
shoot the problem.
To double-check your results, repeat these steps from another client computer on the
same network. If the second client computer exhibits the same symptoms, you can be con-
fident that part of the network infrastructure has failed. If the second client can successfully
communicate on the network, compare the IPConfig /all output from the two computers. If
the Default Gateway or DNS Server addresses differ, try configuring the problematic com-
puter with the other computer’s settings. If this does not resolve the problem, the problem
is unique to the problematic computer and may indicate a hardware or driver problem (see
Chapter 30).
How to Troubleshoot Application Connectivity Problems
Sometimes, you might be able to access the network with some applications but not others.
For example, you might be able to download your e-mail but not access Web servers. Or, you
might be able to view pages on a remote Web server but not connect to the computer with
Remote Desktop.
Several issues might cause these symptoms (in rough order of likelihood):
n
The remote service is not running. For example, Remote Desktop might not be enabled
on the remote computer.
Please purchase PDF Split-Merge on www.verypdf.com to remove this watermark.
The Process of Troubleshooting Network Problems CHAPTER 31
1567
n
The remote server has a firewall configured that is blocking that application’s commu-
nications from your client computer.
n
A firewall between the client and server computer is blocking that application’s com-
munications.
n
Windows Firewall on the local computer might be configured to block the application’s
traffic.
n
The remote service has been configured to use a non-default port number. For
example, Web servers typically use TCP port 80, but some administrators might
configure TCP port 81 or a different port.
To troubleshoot an application connectivity problem, follow these steps:
1.
Before you begin troubleshooting application connectivity, first verify that you do not
have a name resolution problem. To do this, open a command prompt and run the
command Nslookup servername. If Nslookup does not display an answer similar to
the following example, you have a name resolution problem. See the section titled
“How to Troubleshoot Name Resolution Problems” later in this chapter.
C:\>nslookup contoso.com
Non-authoritative answer:
Name: contoso.com
Addresses: 10.46.232.182, 10.46.130.117
2.
Identify the port number used by the application. Table 31-2 lists port numbers for
common applications. If you are not sure which port numbers your application uses,
consult the application’s manual or contact the technical support team. Alternatively,
you can use a protocol analyzer, such as Network Monitor, to examine network traffic
to determine the port numbers used.
TABLE 31-2
Default Port Assignments for Common Services and Tasks
SERVICE NAME OR TASK UDP TCP
Web servers, HTTP, and Internet Information Services (IIS) 80
HTTP- Secure Sockets Layer (SSL) 443
DNS client-to-server lookup (varies) 53 53
DHCP client 67
File and printer sharing 137 139, 445
FTP-control 21
FTP-data 20
Internet Relay Chat (IRC) 6667
Please purchase PDF Split-Merge on www.verypdf.com to remove this watermark.
CHAPTER 31 Troubleshooting Network Issues
1568
SERVICE NAME OR TASK UDP TCP
Microsoft Office Outlook (see POP3, IMAP, and SMTP
for ports)
Internet Mail Access Protocol (IMAP) 143
IMAP (SSL) 993
LDAP 389
LDAP (SSL) 636
Message Transfer Agent (MTA) – X.400 over TCP/IP 102
POP3 110
POP3 (SSL) 995
RPC endpoint mapper 135
SMTP 25
Network News Transfer Protocol (NNTP) 119
NNTP (SSL) 563
POP3 110
POP3 (SSL) 995
SNMP 161
SNMP Trap 162
SQL Server 1433
Telnet 23
Terminal Server and Remote Desktop 3389
Point-to-Point Tunneling Protocol (PPTP)
(See Chapter 27 for more information.)
1723
Joining an AD DS domain
(See the section titled “How to Troubleshoot Joining or
Logging on to a Domain” later in this chapter for more
information.)
After identifying the port number, the first step in troubleshooting the application con-
nectivity problem is to determine whether communications are successful using that port.
If it is a TCP port, you can use PortQry, Test TCP, or Telnet. Of those three tools, Telnet is the
least flexible, but it is the only tool included with Windows (but note that it is not installed by
default). For more information about Telnet, including how to install it, see the section titled
“Telnet Client” earlier in this chapter.
Please purchase PDF Split-Merge on www.verypdf.com to remove this watermark.
The Process of Troubleshooting Network Problems CHAPTER 31
1569
To test a TCP port with Telnet, run the following command.
Telnet hostname_or_address TCP_port
For example, to determine whether you can connect to the Web server at www.microsoft.
com (which uses port 80), you would run the following command.
Telnet www.microsoft.com 80
If the command prompt clears or if you receive text from the remote service, you have
successfully established a connection. Close the command prompt to cancel Telnet. This
indicates that you can connect to the server; therefore, the server application is listening for
incoming connections and no firewall is blocking your traffic. Instead of troubleshooting the
problem as a connectivity issue, you should consider application-level issues, including:
n
Authentication issues View the server’s Security Event Log or the application’s log to
determine whether it is rejecting your client connections because of invalid credentials.
n
Failed service Restart the server. Test whether other client computers can connect to
the server.
n
Invalid client software Verify that the client software running on your computer is
the correct version and is configured properly.
If Telnet displays “Could not open connection to the host,” this indicates an application
connectivity issue, such as a misconfigured firewall. Follow these steps to continue trouble-
shooting the problem:
1.
If possible, verify that the server is online. If the server is online, attempt to connect
to a different service running on the same server. For example, if you are attempting
to connect to a Web server and you know that the server has file sharing enabled,
attempt to connect to a shared folder. If you can connect to a different service, the
problem is almost certainly a firewall configuration problem on the server.
2.
Attempt to connect from different client computers on the same and different subnets.
If you can connect from a client computer on the same subnet, you might have an
application configuration problem on the client computer. If you can connect from a
client computer on a different subnet but not from the same subnet, a firewall on the
network or on the server might be filtering traffic from your client network.
3.
If possible, connect a client computer to the same subnet as the server. If you can con-
nect from the same subnet but not from different subnets, a router-based firewall is
blocking traffic. If you cannot connect from the same subnet, the server has a firewall
that is blocking traffic. Alternatively, the server application might not be running or
might be configured to use a different port.
4.
Log on to the server and use Telnet to attempt to connect to the server application
port. If you can connect to the server from the server but not from other computers,
the server definitely has firewall software configured. Add an exception for the ap-
plication to the firewall software. If you cannot connect to the server application from
the server, the application is not listening for connections or is configured to listen
Please purchase PDF Split-Merge on www.verypdf.com to remove this watermark.
CHAPTER 31 Troubleshooting Network Issues
1570
for incoming connections on a different port. Refer to the application documentation
for information on how to start and configure the application. If the server is running
Windows, you can use Netstat to identify on which ports the server is listening for
incoming connections. For more information, read the section titled “Netstat” earlier in
this chapter.
Sometimes, specific applications might require additional troubleshooting steps:
n
For more information about troubleshooting printing, see Chapter 18, “Managing
Printing.”
n
For more information about troubleshooting Web and e-mail access, see Chapter 20,
“Managing Windows Internet Explorer.”
How to Troubleshoot Name Resolution Problems
Computers use numeric IP addresses (such as 192.168.10.233 or 2001:db8::1) to identify
each other on networks. However, IP addresses are difficult for people to remember, so we
use more friendly host names (such as www.contoso.com). Name resolution is the process
of converting a host name to an IP address, and DNS is by far the most common name
resolution technique.
Many apparent connectivity problems are actually name resolution problems. If any of the
following problems occur, the client will be unable to contact a server using its host name:
n
DNS servers have failed.
n
The network connecting the client to the DNS server has failed.
n
A host name is missing from the DNS database.
n
A host name is associated with an incorrect IP address. Often, this happens because a
host has recently changed IP addresses and the DNS database has not been updated.
n
The client does not have DNS servers configured or is configured with the incorrect
DNS server IP addresses.
To diagnose a name resolution problem, follow these steps:
1.
Open the Network And Sharing Center by clicking Start, clicking Network, and then
clicking Network And Sharing Center. If a red X is displayed over a network link, click
the link to start Windows Network Diagnostics and follow the prompts that appear.
Windows Network Diagnostics can solve many common configuration problems. If
Windows Network Diagnostics does not identify or resolve the problem, continue
following these steps.
2.
Verify that you can connect to other computers using IP addresses. If you cannot
connect to servers by using their IP address, the source of your problem is network
connectivity rather than name resolution. See the section titled “How to Troubleshoot
Network Connectivity Problems” earlier in this chapter. If you can connect to servers
by using their IP address but not by using their host names, continue following these
steps.
Please purchase PDF Split-Merge on www.verypdf.com to remove this watermark.
The Process of Troubleshooting Network Problems CHAPTER 31
1571
note
When your network is working properly, look up the IP addresses of several
different computers, including computers on your subnet, other subnets on your
intranet, and computers on the Internet. Test the IP addresses to verify that they
respond to Ping requests. Keep this list available so that you can use the IP addresses
to test for network connectivity without relying on name resolution.
3.
Open a command prompt and use Nslookup to look up the host name you are
attempting to contact, as the following example shows.
Nslookup www.microsoft.com
Examine the output.
n
If Nslookup displays addresses or aliases for the host name, name resolution was
successful. Most likely, the server you are trying to reach is offline, you have a con-
nectivity problem preventing you from reaching the server, the application you are
using is misconfigured, or the DNS server database is incorrect. See the sections
titled “How to Troubleshoot Network Connectivity Problems” and “How to Trouble-
shoot Application Connectivity Problems” earlier in this chapter. If you believe the
DNS server database is incorrect, contact your DNS server administrator.
n
If Nslookup displays only “DNS request timed out,” the DNS server is not respond-
ing. First, repeat the test several times to determine whether it is an intermittent
problem. Then, use the ipconfig command to verify that the client computer has
the correct DNS servers configured. If necessary, update the client computer’s DNS
server configuration. If the DNS server’s IP addresses are correct, the DNS servers or
the network to which they are connected are offline. Contact the server or network
administrator for additional assistance.
n
If Nslookup displays the message “Default servers are not available,” the computer
does not have a DNS server configured. Update the client network configuration
with DNS server IP addresses or configure the computer to acquire an address
automatically.
4.
If you can connect to the server from a different client computer, run ipconfig /all from
a command prompt to determine which DNS servers the client computer is configured
to use. If the IP addresses are different, consider changing the problematic client com-
puter to use those IP addresses.
How to Verify Connectivity to a DNS Server
Although DNS traffic can use either TCP port 53 or UDP port 53, UDP is almost always used
because it is more efficient for short communications. Because Telnet always uses TCP, it is not
useful for testing UDP DNS connectivity. Instead, you can install and use the PortQry tool, as
described earlier in this chapter.
Please purchase PDF Split-Merge on www.verypdf.com to remove this watermark.
CHAPTER 31 Troubleshooting Network Issues
1572
To test for connectivity to DNS traffic, install PortQry, and then run the following command.
portqry -n DNS_server_name_or_IP_address -p UDP -e 53
If PortQry can connect to the specified DNS server, it will respond with “LISTENING.” If
PortQry cannot connect, it will respond with “LISTENING OR FILTERED.” After displaying
“LISTENING OR FILTERED,” PortQry will attempt to issue a DNS request to the remote
computer and then will display whether the server responded to the request.
If you prefer graphical tools, you can use the PortQueryUI tool to query for UDP port 53,
as shown in Figure 31-7.
FIGURE 31-7
PortqryUI provides a GUI that you can use to test DNS connectivity.
How to Use the Hosts File
You can use the Hosts file as another name resolution method. You might do this if you know
that your DNS server is unavailable or the database is out of date, you need to access a server,
and you know the server’s IP address. It’s also useful when you’ve recently installed a new
server and you want to contact it using a host name before the DNS database is updated.
Please purchase PDF Split-Merge on www.verypdf.com to remove this watermark.