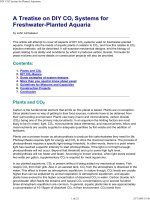
DIY CO2 System for Planted Aquarium
Bạn đang xem bản rút gọn của tài liệu. Xem và tải ngay bản đầy đủ của tài liệu tại đây (1.04 MB, 25 trang )
DIY CO2 System for Planted Aquarium
1 de 25 25/7/2005 15:44
A Treatise on DIY CO
2
Systems for
Freshwater-Planted Aquaria
by John LeVasseur
This article will attempt to cover all aspects of DIY CO
2
systems used on freshwater-planted
aquaria. Insights into
the needs of aquatic plants in relation to CO
2
, and how this relates to CO
2
injection methods, will be described.
It will examine mechanical designs,
and the biology of
yeast relating to its ability and
conditions by which it produces
carbon dioxide. Formulas for
yeast mixtures and some
details on construction projects will also be
provided.
Contents:
Plants and CO
2
1.
DIY CO
2
Basics2.
Some examples
of system designs3.
More than you need
to know about yeast4.
Guidelines
for Mixtures and Capacities5.
Construction
Projects6.
Conclusion
7.
Plants and CO
2
Carbon is
the fundamental element that
all life on this planet
is based. Plants are no
exception.
Since plants have
no way of getting to
their food sources, nutrients have to be
obtained from
their surrounding environment. Plants use
many macro and micronutrients, carbon dioxide
(CO
2
) being one of the primary macronutrients.
In an aquarium
the limiting factors are most
likely
to be (in order): light, CO
2
, micronutrients
(trace elements), and macronutrients. Micro
and
macronutrients are usually supplied in
adequate quantities by fish waste
and the addition of
fertilizers.
Plants
use a process known as photosynthesis
to produce the carbohydrates they need for life.
Photosynthesis requires light for energy and CO
2
to drive the chemical reactions.
The process of
photosynthesis requires a
specific light energy threshold. In other
words, there is a point where
light has reached a
specific intensity to start photosynthesis.
If the light is not bright
enough,
photosynthesis will not occur.
Beyond that threshold and up
to some high light level,
photosynthesis will run faster and faster. According to
known practice, when
light levels exceed
two
watts per gallon, supplementary CO
2
is required for most
aquariums.
In
our planted aquariums, CO
2
is present without it being added my mechanical
means. Fish
respire CO
2
from their gills. Also in an aerated tank, CO
2
from the atmosphere is
dissolved in the
water.
This effect is known as atmospheric equilibrium. In nature though, CO
2
levels are usually
higher
than can be explained by animal respiration or
atmospheric equilibrium, and
aquatic
plants have evolved to this
higher concentration of dissolved CO
2
in water. Carbon dioxide rich
groundwater often feeds
the streams and natural CO
2
concentrations up to several hundred
times atmospheric equilibrium are common.
In general, aquatic plants like to see approximately
a concentration of 10-15ppm of dissolved CO
2
in their environment. CO
2
levels from
DIY CO2 System for Planted Aquarium
2 de 25 25/7/2005 15:44
atmospheric equilibrium are generally around 2-3ppm. (ppm stands for
part per million). As you
can see, CO
2
injection is essential
for vigorous plant growth,
and even more so with higher light
levels.
As
far a fish are concerned,
high concentrations, CO
2
can block the respiration of CO
2
from the
fish gills and cause oxygen starvation.
Since the gills depend on a CO
2
concentration differential
between the levels
in the blood and the water to transfer gases, high levels
in the water will
reduce the amount of CO
2
that can be transferred. Although different
references have wildly
varying values
for toxic levels, a concentration of below 30ppm
is definitely safe.
It is a
common misconception that
water can hold
only so much dissolved gas and adding CO
2
will displace oxygen. This is not true.
As a matter of fact, if enough CO
2
and light is present to
enable
vigorous photosynthesis, oxygen levels
can reach 120% of saturation. Even
at night,
when the plants stop using CO
2
and start using oxygen, the oxygen levels will
stay about the
same as a typical non-planted
aquarium. So reports of people having fish at the surface gasping
for air is not necessarily a result of high CO
2
levels, but instead a lack
of oxygen in the water is
probably the
culprit.
The
relationship between light and CO
2
levels is
important. The diagram at the
right explains it
conceptually. At low light and low CO
2
there is not much
energy to play around with for
up or
down-regulation
of the pools of Chlorophyll
or enzymes contained
in the plant. If we
then add a
little more CO
2
to the system the plant
can afford to invest
less energy and resources in CO
2
uptake and that
leaves more energy for
optimizing the light utilization -
Chlorophyll can
be
produced without fatal
consequences for
the energy. Hence, although
we have not raised the
light,
the plant can
now utilize the
available light more
efficiently. Exactly the same explanation
can be
used to explain
why increased
light can stimulate
growth even at very low CO
2
concentrations. With more
light
available, less investment in the
light
utilization system
is
necessary
and the free energy
can be invested
into a more
efficient CO
2
uptake system
so
that the CO
2
, which is present
in
the water, can be
more efficiently
extracted.
Providing macro
and
micronutrients
to plants is easily
done with
commercially available
fertilizers.
It is often a
more
difficult and
expensive task to
provide adequate light over
the
plant aquarium.
Both numerous
fluorescent light and
halide lamps will
produce sufficient light if
supplied with effective reflectors,
but in deep aquaria (more than 20 inches) is
very difficult
to offer
enough light
to small light
demanding
foreground plants.
Based on known experiments, I suggest commencing CO
2
addition before any other action is taken!
I believe that even at very modest light intensities you
will experience a
conspicuous change in plant performance in your aquarium.
The exact amount
CO
2
may always be discussed but concentrations
from 10-15ppm will only improve plant growth.
You will probably
see that plants, which were barely able to
survive before now thrive in the
presence of CO
2
. These conclusions were derived
from work conducted by Ole
Pedersen, Claus
Christensen, and Troels Andersen.
DIY CO2 System for Planted Aquarium
3 de 25 25/7/2005 15:44
Basics of DIY CO
2
Systems
Injection of CO
2
into a planted aquarium can be accomplished in several ways. There are
commercial
products available like the tablets
available form Bioplast
and other manufacturers
that use tablets
that fizz like Alka-Seltzer,
and metabolite products like Seachem
Excel. While
these provide carbon sources
for plants, they do not provide
a continuous injection of CO
2
into
the aquarium. Another
method is a pressurized CO
2
system. This is
comprised of a tank of
compressed CO
2
gas, a regulator, and needle valve. While this
is probably the best method
available,
it can be cost prohibitive. A nice compromise
is the DIY
system.
The first step is creating a CO
2
generator, a renewable source of carbon dioxide.
There many
ways to generate carbon dioxide gas,
but the simplest and safest method is
a yeast generator.
Yeast consumes sugar and one
of the byproducts of this is CO
2
. How yeast does this
depends
upon the environment
the yeast and sugar is placed in.
The most common method is to place
yeast
and sugar in a solution with
water. This process
is known as fermentation.
Next, you have to be able to collect the CO
2
and deliver it to the water in the tank. The
yeast/sugar solution
is placed in an airtight container, which
has a fitting that allows a tube
to be
connected. This tube is then
run to meet the water in some way.
At this point
some efficient manner is needed to inject and dissolve the CO
2
gas into the water.
This can be done by directly bubbling the CO
2
gas into the water, passive contact, diffusion, or
forced reaction. These methods will be
discussed in more detail later.
These are the
essential elements of a DIY CO
2
system: A CO
2
generator, tubing, and a water
injection system.
Some examples of system designs
While one
can design a system that is very complex, this might
defeat the cost effectiveness
that warrants a DIY approach. Most of
the designs offered here are done so as examples,
and
are designed with cost savings in mind, while at the same time offering
a high degree of good
engineering practice and efficient
performance. Since yeast generators supply
a limited and
varied quantity of CO
2
gas, it is imperative that the designs used are efficient in their
ability to
deliver and dissolve whatever CO
2
is available over
time.
Basic schematic representation of a well-designed DIY CO
2
system is shown below.
DIY CO2 System for Planted Aquarium
4 de 25 25/7/2005 15:44
Yeast Generator
Probably the
cheapest and still the best vessel you can use for
a yeast generator is the two-liter
soda bottle. If you can
find one of those four-liter versions, that is
even better. There are several
factors that make the soda bottle a good
choice. First off, it is designed to hold a
solution of water
with dissolved CO
2
under pressure. This
is important. The pressure that builds up in
a yeast
generator can be substantial. I would venture to say it is not
lethal, but it certainly can make quite
a mess
if it fails and sprays sugar water and yeast all over your
house.
The cap
and how to attach the tubing is another issue that has
created much discussion.
Most of
these caps from soda bottles
are made from polyethylene. Polyethylene does
not readily bond
with most glue. So gluing the tubing in place
is not desirable. Leaks will occur, especially at
the
bond joint. Furthermore, since we're dealing with gasses, the seal
must be airtight. The best all
around
solution is some mechanical means to attach tubing. Some type of
bulkhead fitting is
needed.
Gas Delivery (tubing)
Getting
the gas to the tank water is the next consideration.
Tubing should be selected based upon
several factors. One is
pressure retention, or the ability of tubing to retain
its shape under
pressure. As tubing is put under pressure, it
should not expand in relation to its diameter.
Also the
tubing will need to be inert; meaning not break down
over time due to chemical reaction with the
CO
2
gas internally or the air or water externally.
This pretty much eliminates standard airline
tubing
used for fish tank aeration. Another consideration is
flexibility.
A good
candidate for this application is silicon tubing.
It does not react with CO
2
as quickly, has
good pressure
retention characteristics and is very
flexible. There is also special tubing designed
specifically for carrying CO
2
gas, and I would encourage spending the few extra dollars
needed to
use this. But silicon tubing will
last for several years, and is in keeping with the cost savings
approach DIY
implies.
It
is also important that water is
not allowed to run back down the
line by suction or siphoning.
This problem is
easily remedied with the use of a check valve. Many check valves are available
commercially.
Several factors should be considered when selecting one.
I would avoid choosing
one made from metals.
The caustic nature of CO
2
gas, the high water vapor content of the gas
(which usually contain carbonic acid), will cause a metal check valve to fail.
Therefore it is
important
to choose a plastic valve
or one designed specifically for CO
2
applications. In addition,
for the same reasons,
I recommend avoiding the use
of any metal components in the entire
DIY CO2 System for Planted Aquarium
5 de 25 25/7/2005 15:44
system. In pressurized tank systems, there
is generally no liquids, or solids for that
matter, to foul
or corrode
metal components. So the use of metal
components is common in these
systems. The
same should not be
assumed on a yeast based DIY
system.
Getting the gas dissolved in the water
This
is a topic that has received much attention on
message boards, mailing list servers, and
newsgroups over the years. And I
think rightfully so! Many methods
have been described on what
the best way to dissolve the CO
2
gas into the tank water.
This is the critical point in determining
the effectiveness of a
DIY system and the reason why many feel that
their experience with DIY
systems was a bad one. Since the amount of CO
2
available in a yeast system is limited
by
biological production, it is important to get most,
if not all, the CO
2
produced dissolved into the
water. Skimp here, and you have wasted your
time, not to mention CO
2
gas.
The
simplest, and least effective, method is to
run the tube into the tank and simply let
the gas
bubble into the
tank, or through an air stone.
I do not recommend this method at all.
Since most of
the CO
2
gas simply rises to the surface and
is lost.
Next,
many have suggested placing this tube at the
inlet of a canister filter and allowing the
impeller to munch
up the gas. While it is effective in dissolving
the gas, I do not like this method
either, for two
reasons. First, the CO
2
bubbles can produce cavitations of
the impellor, which
could
cause it to vibrate, making noise and
possibly damage the mechanism.
Second, some of
the components
in the impellor use rubber fittings,
which could be broken down over time by
the
high concentrations of CO
2
gas and carbonic acids present.
A
better but slower method is the use of what is
called a CO
2
bell. Simply put, this is a
hemispherical shaped
vessel of some kind, inverted
and the CO
2
is allowed to fill up inside. The contact
area of the gas
is increased and passive
diffusion
of the gas is increased.
The drawback of this is if
the surface area is not
high enough, so that
diffusion rate exceeds
gas production, the bell will
fill with gas and
any additional bubbles will run out
the side and travel
up to the surface and be lost.
While this is a draw back, many aqaurists
have
have had reasonable sucess using this
method of
gas diffusion. These are
also very simple to
construct. Many have been constructed
from
cutting off the tops of one-liter
soda bottles, petri
dishes,
cups, or any hemisphercal shaped object.
I
would recommend using a
material or object that is
transparent, to allow
for easy viewing.
Another
method is a diffuser. Two versions of diffusers exist.
One is device that increases the
time the bubble is
in contact with the water. Usually by
presenting the bubble
with a long spiral course
it has to travel. In the image to the right is
one
example of this type of spiral
diffusion method, the Econo Aqualine
500
available from AquaBotanic, and
others. The manufacturer claims,
"The
special construction allows a very high CO
2
diffusion rate and automatically
removes
any false gasses. The reactor is
sufficient for an aquarium up to
125
Gallons". This unit is mounted
on the inside of the aquarium.
DIY CO2 System for Planted Aquarium
6 de 25 25/7/2005 15:44
Another diffuser type
is a glass diffuser. This is a device
that increases the
surface area of the CO
2
gas by reducing the
size of the bubbles substantially. This
is a proven method and can be very
effective in allowing all of your CO
2
gas to be
dissolved. In the image to the
left is version of this type of
diffuser made
by Aqua Design Amano Nature Aquarium
Goods, the company
led by the
legendary aquatic artist Takashi Amano.
The gas is fed into the tube
at
the rear, brought down to the bottom
and forced against the
glass diffusser
plate (the black line running
in the middle). This plate has thousands of pores
which the gas passes through, and once it has done this,
the bubbles released
through the top
of the unit are extremely tiny.
This all glass unit is probably the
very best
of its kind, and also very expensive since it is
handmade in Japan.
Other manufacturers
make similar products. The only
drawback of this method
is that
the plate, usually made of sintered glass,
can clog and may need regular
maintenance. Other than that singular drawback,
this is a proven method of
diffusion. The drawbacks of both
versions is that their mechanical
sophistication
do not allow themselves to
be easily homemade, and commercially
produced
products would have
to be purchased. There are many
commercially available choices, in
a wide
range of prices, so finding
one that works in
your budget would not be to
difficult, if you decided
on going this route.
The best method,
in my opinion, is the use of a forced reactor. A forced
reactor is one that can
bring a large
quantity of water to the gas.
The previous
methods are passive in this respect.
In other words if
circulation of the surrounding
water is poor, then the
diffusion may slow
down due to super-staturation of the
water immediatly
around the diffuser. By forcing mass
quantities of water to
meet the gas, via a pump, and
mixing it
thouroughy the gas is forced into
the water
more quickly, and then circulated.
In general a forced
reactor is
comprised simply of a water pump and a
reaction chamber. Within the reaction
chamber there is
some course
media to help churn up the gas and water,
and
increase contact time, as well as preventing bubbles
of gas
from escaping. This simplicity of design
also
lends itself very well to
the DIY concept. The image
to
the right shows one example of a
DIY Forced Reactor. It
is simply comprised of a powerhead
with prefilter, and
gravel cleaning tube,
a course filter pad, and an
airstone.
The cost to build this, if you
where to buy all
the parts,
is inder $35US. More details on
this reactor,
and other construction
projects, will be given at the end
of this article.
Additional Concepts and Designs
Since
we are dealing with solids, liquids
and gasses under pressure, it may
also be a good idea
to incorporate
some features into a DIY system
that improves both the reliability and
saftey.
Emergency pressure release valves
and anti-clogging devices can be designed,
built and utilized
in that
end. The construction
section of this article details
some additional concepts and designs
in these
areas.
DIY CO2 System for Planted Aquarium
7 de 25 25/7/2005 15:44
More than you need to know about yeast.
Yeastie the Beastie!
Yeast is the primary ingredient in our DIY CO
2
generators. Common baker
yeasts are adequate
for the needs of CO
2
generators. But of course, I have
to delve into the esoteric side
of things.
Yeast is a living
organism and optimal living conditions
give it the best opportunity to do what we
need
it to do, I had to touch upon this
in this text. Also knowing there are as many strains of yeast
as there are
different algae, I have to touch on that also.
It is also good to understand the
biological processes
involved here, and I will discuss
this firstly.
Theodor Schwann
(1810-1882) named the yeast cells "Zuckerpilz"
("sugar fungus"), which later
became Saccharomyces,
the genus that most yeast belongs to. Yeasts, that belong to
the
kingdom Fungi, are classified as belonging to
either of two major types: budding
yeasts, named
so because of the
buds formed at the cell divisions,
and fission yeasts that are rod-shaped and
grow
by elongation at their ends. Most yeast used is of the budding type.
Although easily grown in
culture media,
each S. cerevisiae cell (the most common species for our
purposes here) has a
limited number of
buddings of around 20. However, in a given culture only
about half of the cells
will have given rise
to new cells, and only rarely
does a cell give rise to as much as 20
new cells.
Poisoning, mutations and
heat are other factors that affect
the viability of yeasts.
Towards the end
of fermentation many
yeasts aggregate into clumps,
a phenomenon known as flocculation. The
process of
flocculation is not completely understood,
but it is believed to be mediated by bivalent
ions such magnesium, calcium or manganese
ions.
Yeasts
are probably the most researched organisms
in microbiology. Entire scientific
communities
and disciplines have evolved
surrounding this simple, single-cell fungi.
If you want to
blow your mind out one day, check out this link below.
It is a list of researchers, their associated
laboratories, and their research papers on
the singular species Saccharomyces cerevisiae. This
yeast has the distinction
of not only being the one we
generally use for our CO
2
generators,
but
also being the first organism
to have its entire genome (DNA)
completely mapped in 1996.
Yeast Labs and Research
This
is only for the brave of heart! Good luck! A more
pragmatic description of the biology
of yeast
is given below.
BIOLOGY
YEAST:
A living organism formed of only
one cell. Each cell, which is a living being,
of a spherical
or ovoid form,
is nothing but a tiny and
simplified fungus the size of which
does not exceed 6 to 8
thousandth of
millimeter.
Yeast,
like any living organism, lives thanks to
the presence of oxygen (aerobiosis); but
it also has
the remarkable
ability of being adaptable to an environment
deprived of air (anaerobiosis).
To cope
with its expenditure of energy, it can use different carbon
substrates, mainly sugars:
Glucose is the
best favored food of Saccharomyces cerevisiae;
Saccharose is
immediately transformed into glucose and fructose by an enzyme which
yeast has released;
Maltose is the
main endogenous substrate of French bread fermentation;
it gets into the
yeast cell thanks to a specific
permease to be split afterwards into
two molecules of glucose
DIY CO2 System for Planted Aquarium
8 de 25 25/7/2005 15:44
by maltase.
Many other
sugars are also utilized.
An
interesting scientific work by Vern J. Elliot
shows the utilization of sugars by yeast,
and yields
some insight into
this question. If you look at the chart
below you will see growth rates
of yeast
over time when fed by different
sugars.
Just
to understand the chart, the reference of
the test is as follows, (for you technically
oriented
folks out there)
"... Plates (growth samples) were
incubated at 28ºC and growth was determined
at
time zero and at approximately 24-h
intervals by measuring absorbance at 630 nm
with a
microplate reader (Model ELx800UV,
Bio-Tek Instruments,
Winooski, VT)...".
While
this experiment tested some 250 different strains
of yeast, and the chart above shows the
strain labeled "isolate 59",
a brief examination of the published paper shows that
nearly all the
strains showed similar
results in terms of sucrose providing
the highest growth rates. It
can be
reasoned that the yeast
strains we use in our CO
2
systems would have similar results.
So
what does this mean. Essentially,
using less yeast and more cane
sugar (sucrose), and
allowing the yeast to grow and multiply
will assure a longer lasting CO
2
mixture.
Conversly, CO
2
quantity measured over time is another issue
more related to use of specific mutant
strains of
yeast than type of sugar.
Longevity of the yeast culture, due
to toxic death, is also not related to
type of sugar, but to alcohol levels.
Acids play a much lesser role in this respect
than popular
belief, by the way.
(More on this later). So, use
of sucrose seems to be a better
choice, other
factors not withstanding, than other
sugars.
The
conditions of oxygenation of the environment generate two types of
metabolism:
In
AEROBIOSIS
When
yeast is in presence of air, it produces,
from sugar and oxygen, carbon dioxide, water
and a great amount of energy.
It is the metabolic process
of respiration. In these conditions
the oxidation of glucose is
complete:
Glucose + Oxygen —> Carbon dioxide + Water + Energy
All
the biochemical energy potentially contained
in glucose is freed. Thanks to this
energy,
yeast ensures its life.
But it can also use it to
synthesize organically, that is
to say start its
DIY CO2 System for Planted Aquarium
9 de 25 25/7/2005 15:44
growth and
multiply. It will
then have to find other nutritive
elements in its environment,
mainly nitrogen.
In ANAEROBIOSIS
When
there is no oxygen available, yeast can
nevertheless use sugars to produce
the
energy it needs to be maintained in life.
Pasteur defined this metabolic process
as being the
fermentation process.
Sugars are transformed
into carbon dioxide and alcohol.
The glucose
oxidation is incomplete:
Glucose —> Carbon dioxide + Alcohol + Energy
The
alcohol, which has been formed,
still contains a great amount of energy.
This
constitutes only a part of the biochemical
energy potentially present in glucose
that was
freed (about
20 times less than for respiration).
It ensures a minimum level but does
not
enable yeast to multiply
rapidly.
ANAEROBIOSIS
is the process we use in our CO
2
generators, although
AEROBIOSIS would be
preferred.
Aerobiosis is preferred because it produces
less alcohol, which is toxic to yeast at
elevated relative level. But aerobiosis
is also impractical for reasons you will see
later.
"God
is Good" is the name which yeast was given
in the early days of fermentation.
This is prior
to the time when
Louis Pasteur, in the mid 1800's,
discovered that, in fact there was actually
a
single cell microscopic
organism responsible for the conversion
of fermentable barley malt sugars
into
alcohol, carbon dioxide, and flavor
compounds.
As
described by Gay-Lussac at the
beginning of the nineteenth century, the
chemical reaction of
fermentation is as
follows;
C
6
H
12
O
6
+ Saccharomyces
cerevisiae = 2C
2
H
5
OH + 2CO
2
(Sugar plus
yeast yields alcohol and carbon dioxide)
The
tail end of the formula is the thing we're looking for
… CO
2
!!!
Beverages
including wine, fermented milk products,
and mead from honey are some examples of
what developed from
spontaneous fermentation, which
is now understood and managed in
a
scientific manner. Many of these
organisms were discovered more by
chance, than by design.
Other types
of yeast and bacteria are
also utilized in various
styles of beer and brewing beer like
beverages.
The
following is a description of
the many strains of yeast that
are available for CO
2
generation.
Some are commonly available
and inexpensive; some are harder to
get and more expensive. The
advantages and disadvantages of each type are
explained.
Bakers Yeast
Bakers
yeast (or Dutch Process yeast) is widely available at
nearly every supermarket. It is
dried
active yeast. I like
the term "mummy yeast" because it does seem to
"rise" from the dead.
Ouch!
Bad pun, I know! Most of us
know bakers yeast, popularized by companies
like Fleishmann's.
They manufacture little packets
or you can buy 4oz. jars. It comes
in several variations. Regular
bakers
yeast in 7-gram packets is by far
the most common. Lately a new
form known as "Bread
Machine" yeast
has appeared. This yeast is more
tolerant of higher temperatures found when
using these new automated bread machine
thingies. Both work well
in our application. The bread
DIY CO2 System for Planted Aquarium
10 de 25 25/7/2005 15:44
machine yeasts
are available in 4 oz jars, which are more economical.
Here are some detailed
specifics on these types of
yeast:
The
following information is typical for each type of bakers yeast,
but may vary somewhat
according to product
and company:
Compressed Yeast (also called cake, wet, and fresh yeast)
Fleischmann's
compressed yeast is available in supermarkets in 0.6 oz cakes,
and Red
Star compressed yeast is available in some
supermarkets in 2 oz. cakes. It is found
in the
dairy or deli case. Compressed yeast
is available to commercial
bakers from a variety of
companies in 1
and 2 pound packets. Compressed yeast has approximately
30% solids and
70% moisture content.
It is highly perishable and must be
stored at a uniformly low
temperature (about 40º F)
to prevent excessive loss of activity or gassing.
Compressed
yeast generally has a shelf life
of approximately two weeks from its make
or packaging date
when kept at 73.3º F.
(23ºC)
At
32º-42º F. (0º - 5.5º C) compressed
yeast loses approximately 10% of
its gassing power
over a 4-week period.
At 45º F (7.2º C) yeast will
lose 3-4% of its activity per week. At 95º F
(35º C), one
half of the gassing power is lost in 3-4 days.
Once yeast starts to deteriorate or
lose
its fermentative activity, it does so quickly,
losing almost all of its activity (autolysis)
by
the third week. It has,
however, been shown that compressed yeast
can be successfully
stored for
two months at 30º F. (-1º C). When this
is done, good CO
2
production can be
made from
yeast stored for two, but not three,
months.
To use compressed yeast,
soften it in tepid water.
Active Dry Yeast
Fleischmann,
Red Star, and SAF active dry yeast are
available in supermarkets in ¼ oz (7
g)
packets and/or 4 oz (113.4 g) jars. Active
dry yeast is available to commercial bakers
from a variety of companies in 1
and 2 pound, and 500 g packets. It
also is available in
these sizes to
consumers at warehouse or club stores,
and via mail order. Active dry
yeast
has approximately 92.0% solids
and 8.0% moisture content.
It is advisable to store active
dry yeast
in a cool, dry place that does not
exceed 80ºF.
The
shelf life of "active dry yeast" stored
at room temperature is approximately 2
years from
its make date. Once opened,
active dry yeast is best stored in
an airtight container in the
back
of the refrigerator, where
it will retain its activity for approximately 4 months.
To
rehydrate active dry yeast, blend one-part yeast
with four parts lukewarm water, wait 10
minutes, and stir. Depending upon
the particular product and company,
lukewarm water
ranges from 90º-115º F. Temperatures
lower than 90º F and higher than
115º F should be
strictly avoided.
Instant Active Dry Yeast
Fleischmann,
Red Star, and SAF instant active dry
yeast is available in supermarkets
in ¼
oz (7 g) packets and/or 4 oz (113.4 g) jars.
The Fleischmann product is marketed
as
RapidRise, the Red Star product is marketed
as QUICK.RISE, and the SAF product is
marketed as Gourmet Perfect Rise. Fleischmann
also markets an instant active dry yeast
named Bread Machine Yeast. Instant active
dry yeast is available to commercial bakers in 1
and 2 pound, and 500 g packets. It also is available
in these sizes to consumers at
warehouse
or club stores, and via mail order.
Instant active dry yeast
has 96.0% solids and
4.0% moisture content.
It is advisable to store instant
active dry yeast in a cool,
dry place