Secure PHP Development : Building 50 Practical Applications
Bạn đang xem bản rút gọn của tài liệu. Xem và tải ngay bản đầy đủ của tài liệu tại đây (12.4 MB, 916 trang )
<span class='text_page_counter'>(1)</span><div class='page_container' data-page=1>
T
IMELY.
P
RACTICAL.
R
ELIABLE.
Mohammed J. Kabir
<b>Secure PHP</b>
<b>Development</b>
Wiley Technology Publishing
<b>Timely. Practical. Reliable.</b>
Your in-depth guide to designing and developing secure PHP applications
<b>You’ll learn how to:</b>
• Implement the featured
applica-tions in business environments
such as intranets, Internet Web
sites, and system administrations
• Develop e-mail and intranet
solutions using PHP
• Determine the importance of
cer-tain coding practices, coding styles,
and coding security requirements
• Follow the entire process of each
PHP application life cycle from
requirements, design, and
develop-ment to maintenance and tuning.
• Use PHP in groupware, document
management, issue tracking, bug
tracking, and business applications
• Mature as a PHP developer by
using software practices as part
of your design, development, and
software life cycle decisions
• Improve the performance of PHP
applications
<b>It’s a hacker’s dream come true:</b>
<b>over one million Web sites are now</b>
<b>vulnerable to attack through recently</b>
<b>discovered flaws in the PHP scripting</b>
<b>language. So how do you protect your</b>
<b>site? In this book, bestselling author</b>
<b>Mohammed Kabir provides all the</b>
<b>tools you’ll need to close this security</b>
<b>gap. He presents a collection of 50</b>
<b>secure PHP applications that you can</b>
<b>put to use immediately to solve a</b>
<b>variety of practical problems. And he</b>
<b>includes expert tips and techniques</b>
<b>that show you how to write your own</b>
<b>secure and efficient applications for</b>
<b>your organization.</b>
Visit our Web site at www.wiley.com/compbooks/
<b>Secur</b>
<b>e P</b>
<b>H</b>
<b>P Dev</b>
<b>elopment</b>
Kabir
ISBN: 0-7645-4966-9
<b>INCLUDES</b>
<b>CD-ROM</b>
<b>MOHAMMED J. KABIR</b>is the
founder and CEO of Evoknow,
Inc., a company specializing in
customer relationship
manage-ment software developmanage-ment. His
previous books include <i>Red Hat</i>®
<i>Security and Optimization, Red</i>
<i>Hat</i>®<i><sub>Linux</sub></i>®<i><sub>7 Server, Red Hat</sub></i>®
<i>Linux</i>®<i><sub>Administrator’s</sub></i>
<i>Handbook, Red Hat</i>®<i><sub>Linux</sub></i>®
<i>Survival Guide,</i>and <i>Apache 2</i>
<i>Server Bible</i>(all from Wiley).
,!7IA7G4-fejggd!:P;P;k;k;k
*85555-BBDACc
Building
50 Practical
Applications
<b>The companion CD-ROM contains:</b>
• 50 ready-to-use PHP applications
• Searchable e-version of the book
• The latest versions of PHP,
</div>
<span class='text_page_counter'>(2)</span><div class='page_container' data-page=2></div>
<span class='text_page_counter'>(3)</span><div class='page_container' data-page=3></div>
<span class='text_page_counter'>(4)</span><div class='page_container' data-page=4></div>
<span class='text_page_counter'>(5)</span><div class='page_container' data-page=5>
<b>Secure PHP</b>
<b>Development:</b>
<b>Building 50</b>
<b>Practical</b>
<b>Applications</b>
</div>
<span class='text_page_counter'>(6)</span><div class='page_container' data-page=6>
<b>Secure PHP Development: Building 50 Practical Applications</b>
Published by
<b>Wiley Publishing, Inc.</b>
10475 Crosspoint Boulevard
Indianapolis, IN 46256
www.wiley.com
Copyright © 2003 by Wiley Publishing, Inc., Indianapolis, Indiana
Published by Wiley Publishing, Inc., Indianapolis, Indiana
Published simultaneously in Canada
ISBN: 0-7645-4966-9
Manufactured in the United States of America
10 9 8 7 6 5 4 3 2 1
1B/SU/QU/QT/IN
No part of this publication may be reproduced, stored in a retrieval system or transmitted in any form or by
any means, electronic, mechanical, photocopying, recording, scanning or otherwise, except as permitted
under Sections 107 or 108 of the 1976 United States Copyright Act, without either the prior written
permission of the Publisher, or authorization through payment of the appropriate per-copy fee to the
Copyright Clearance Center, 222 Rosewood Drive, Danvers, MA 01923, (978) 750-8400, fax (978) 646-8700.
Requests to the Publisher for permission should be addressed to the Legal Department, Wiley Publishing, Inc.,
10475 Crosspoint Blvd., Indianapolis, IN 46256, (317) 572-3447, fax (317) 572-4447, E-Mail:
is a trademark of Wiley Publishing, Inc.
<b>LIMIT OF LIABILITY/DISCLAIMER OF WARRANTY: WHILE THE PUBLISHER AND AUTHOR HAVE USED</b>
<b>THEIR BEST EFFORTS IN PREPARING THIS BOOK, THEY MAKE NO REPRESENTATIONS OR</b>
<b>WARRANTIES WITH RESPECT TO THE ACCURACY OR COMPLETENESS OF THE CONTENTS OF THIS</b>
<b>BOOK AND SPECIFICALLY DISCLAIM ANY IMPLIED WARRANTIES OF MERCHANTABILITY OR</b>
<b>FITNESS FOR A PARTICULAR PURPOSE. NO WARRANTY MAY BE CREATED OR EXTENDED BY SALES</b>
<b>REPRESENTATIVES OR WRITTEN SALES MATERIALS. THE ADVICE AND STRATEGIES CONTAINED</b>
<b>HEREIN MAY NOT BE SUITABLE FOR YOUR SITUATION. YOU SHOULD CONSULT WITH A</b>
<b>PROFESSIONAL WHERE APPROPRIATE. NEITHER THE PUBLISHER NOR AUTHOR SHALL BE LIABLE</b>
<b>FOR ANY LOSS OF PROFIT OR ANY OTHER COMMERCIAL DAMAGES, INCLUDING BUT NOT LIMITED</b>
<b>TO SPECIAL, INCIDENTAL, CONSEQUENTIAL, OR OTHER DAMAGES.</b>
For general information on our other products and services or to obtain technical support, please contact our
Customer Care Department within the U.S. at (800) 762-2974, outside the U.S. at (317) 572-3993 or fax (317)
572-4002.
Wiley also publishes its books in a variety of electronic formats. Some content that appears in print may not
be available in electronic books.
<b>Library of Congress Cataloging-in-Publication Data</b>
Library of Congress Control Number: 2003101844
</div>
<span class='text_page_counter'>(7)</span><div class='page_container' data-page=7>
<b>Credits</b>
<b>SENIOR ACQUISITIONS EDITOR</b>
Sharon Cox
<b>ACQUISITIONS EDITOR</b>
Debra Williams Cauley
<b>PROJECT EDITOR</b>
Sharon Nash
<b>DEVELOPMENT EDITORS</b>
Rosemarie Graham
Maryann Steinhart
<b>TECHNICAL EDITORS</b>
Richard Lynch
Bill Patterson
<b>COPY EDITORS</b>
Elizabeth Kuball
Luann Rouff
<b>EDITORIAL MANAGER</b>
Mary Beth Wakefield
<b>VICE PRESIDENT & EXECUTIVE GROUP</b>
<b>PUBLISHER</b>
Richard Swadley
<b>VICE PRESIDENT AND EXECUTIVE</b>
<b>PUBLISHER</b>
Bob Ipsen
<b>VICE PRESIDENT AND PUBLISHER</b>
Joseph B. Wikert
<b>EXECUTIVE EDITORIAL DIRECTOR</b>
Mary Bednarek
<b>PROJECT COORDINATOR</b>
Dale White
<b>GRAPHICS AND PRODUCTION</b>
<b>SPECIALISTS</b>
Beth Brooks
Kristin McMullan
Heather Pope
<b>QUALITY CONTROL TECHNICIANS</b>
Tyler Connoley
David Faust
Andy Hollandbeck
</div>
<span class='text_page_counter'>(8)</span><div class='page_container' data-page=8>
<b>About the Author</b>
<b>Mohammed J. Kabir </b>
is CEO and founder of EVOKNOW, Inc. His company
(
www.evoknow.com) develops software using LAMP (Linux, Apache, MySQL, and
PHP), Java, and C++. It specializes in custom software development and offers
security consulting services to many companies around the globe.
When he is not busy managing software projects or writing books, Kabir enjoys
riding mountain bikes and watching sci-fi movies. Kabir studied computer
engi-neering at California State University, Sacramento, and is also the author of
<i>Apache</i>
<i>Server 2 Bible</i>
,
<i>Apache Server Administrator’s Handbook</i>
, and
<i>Red Hat Server 8</i>
. You
can contact Kabir via e-mail at
or visit the book’s Web site at
</div>
<span class='text_page_counter'>(9)</span><div class='page_container' data-page=9>
<b>Preface</b>
Welcome to
<b>Secure PHP Development: Building 50 Practical Applications</b>
. PHP
has come a long way since its first incarnation as a Perl script. Now PHP is a
pow-erful Web scripting language with object-oriented programming support. Slowly
but steadily it has entered the non-Web scripting arena often reserved for Perl and
other shell scripting languages. Arguably, PHP is one of the most popular Web
plat-forms. In this book you will learn about how to secure PHP applications, how to
develop and use an application framework to develop many useful applications for
both Internet and intranet Web sites.
<b>Is This Book for You?</b>
This is not a PHP language book for use as reference. There are many good PHP
language books out there. This book is designed for intermediate- to
advanced-level PHP developers who can review the fifty PHP applications developed for this
book and deploy them as is or customize them as needed. However, it is entirely
possible for someone with very little PHP background to deploy the applications
developed for this book. Therefore, even if you are not currently a PHP developer,
you can make use of all the applications with very little configuration changes.
If you are looking for example applications that have defined features and
implementation requirements, and you want to learn how applications are
devel-oped by professional developers, this book a great starting point. Here you will find
numerous examples of applications that have been designed from the ground up
using a central application framework, which was designed from scratch for this
book.
The book shows developers how PHP applications can be developed by keeping
security considerations in focus and by taking advantage of an object-oriented
approach to PHP programming whenever possible to develop highly maintainable,
extensible applications for Web and intranet use.
<b>How This Book Is Organized</b>
The book is organized into seven parts.
<b>Part I: Designing PHP Applications</b>
Part I is all about designing practical PHP applications while understanding and
avoiding security risks. In this part, you learn about practical design and
imple-mentation considerations, best practices, and security risks and the techniques you
</div>
<span class='text_page_counter'>(10)</span><div class='page_container' data-page=10>
<b>Part II: Developing Intranet Solutions</b>
Part II introduces you to the central application framework upon which almost all
the Web and intranet applications designed and developed for this book are based.
The central application framework is written as a set of object-oriented PHP classes.
Using this framework of classes, you are shown how to develop a set of intranet
applications to provide central authentication, user management, simple document
publishing, contact management, shared calendar, and online help for your intranet
users. Because all of the applications in this part of the book are based on the core
classes discussed in the beginning of the book, you will see how that architecture
works very well for developing most common applications used in modern
intranets.
<b>Part III: Developing E-mail Solutions</b>
Part III deals with e-mail applications. These chapters describe a suite of e-mail
applications such as Tell-a-Friend applications, e-mail-based survey applications,
and a MySQL database-driven e-mail campaign system that sends, tracks, and
reports e-mail campaigns.
<b>Part IV: Using PHP for Sysadmin Tasks</b>
Part IV focuses on demonstrating how PHP can become a command-line scripting
platform for managing many system administration tasks. In these chapters, you
learn to work with many command-line scripts that are designed for small, specific
tasks and can be run automatically via Cron or other scheduling facilities.
Applications developed in this part include the Apache virtual host configuration
generator, the BIND zone generator, a multi-user e-mail reminder tool, a POP3
spam filtering tool, a hard disk partition monitoring tool, a system load monitoring
tool, and more.
<b>Part V: Internet Applications</b>
In Part V, you learn how to develop a generic Web form management application
suite and a voting (poll) application for your Web site. Because Web form
manage-ment is the most common task PHP performs, you will learn a general-purpose
design that shows you how PHP can be used to centralize data collection from Web
visitors, a critical purpose of most Web sites.
</div>
<span class='text_page_counter'>(11)</span><div class='page_container' data-page=11>
<b>Part VII: Appendixes</b>
The four appendixes in Part VII present a detailed description of the contents and
structure of the CD-ROM, and help on PHP, SQL and Linux. The CD-ROM contains
full source code used in the entire book.
The SQL appendix introduces you to various commands that enable you to
cre-ate and manage MySQL databases, tables, and so on, from the command line and
via a great tool called phpMyAdmin.
Linux is one of the most popular PHP platforms. In the Linux appendix, you
learn how you can install PHP and related tools on a Linux platform.
<b>Tell Us What You Think</b>
I am always very interested in learning what my readers are thinking about and
how this book could be made more useful. If you are interested in contacting me
directly, please send e-mail to
. I will do my best to respond
promptly. The most updated versions of all the PHP applications discussed in this
book can be found at
/></div>
<span class='text_page_counter'>(12)</span><div class='page_container' data-page=12></div>
<span class='text_page_counter'>(13)</span><div class='page_container' data-page=13>
<b>Acknowledgments</b>
I’d like to thank Debra Williams Cauley, Sharon Cox, Sharon Nash, Rosemarie
Graham, Maryann Steinhart, Elizabeth Kuball, Luann Rouff, Richard Lynch, and
Bill Patterson for working with me on this book.
I would also like to thank Asif, Tamim, Ruman, and the members of the
EVO-KNOW family, who worked with me to get all the development work done for this
book. Thanks, guys!
Finally, I would also like to thank the Wiley team that made this book a reality.
They are the people who turned a few files into a beautiful and polished book.
</div>
<span class='text_page_counter'>(14)</span><div class='page_container' data-page=14>
<b>Contents at a Glance</b>
<b>Preface . . . vii</b>
<b>Acknowledgments . . . xi</b>
<b>Part </b>
<b>I</b>
<b>Designing PHP Applications </b>
<b>Chapter 1 </b>
<b>Features of Practical PHP Applications . . . 3</b>
<b>Chapter 2 </b>
<b>Understanding and Avoiding Security Risks . . . 25</b>
<b>Chapter 3 </b>
<b>PHP Best Practices . . . 41</b>
<b>Part II</b>
<b>Developing Intranet Solutions </b>
<b>Chapter 4 </b>
<b>Architecture of an Intranet Application . . . 65</b>
<b>Chapter 5 </b>
<b>Central Authentication System . . . 121</b>
<b>Chapter 6 </b>
<b>Central User Management System . . . 157</b>
<b>Chapter 7 </b>
<b>Intranet System . . . 203</b>
<b>Chapter 8 </b>
<b>Intranet Simple Document Publisher . . . 247</b>
<b>Chapter 9 </b>
<b>Intranet Contact Manager . . . 293</b>
<b>Chapter 10 </b>
<b>Intranet Calendar Manager . . . 335</b>
<b>Chapter 11 </b>
<b>Internet Resource Manager . . . 359</b>
<b>Chapter 12 </b>
<b>Online Help System . . . 403</b>
<b>Part III</b>
<b>Developing E-mail Solutions </b>
<b>Chapter 13 </b>
<b>Tell-a-Friend System . . . 431</b>
<b>Chapter 14 </b>
<b>E-mail Survey System . . . 473</b>
<b>Chapter 15 </b>
<b>E-campaign System . . . 507</b>
<b>Part IV</b>
<b>Using PHP for Sysadmin Tasks </b>
<b>Chapter 16 </b>
<b>Command-Line PHP Utilities . . . 559</b>
<b>Chapter 17 </b>
<b>Apache Virtual Host Maker . . . 607</b>
<b>Chapter 18 </b>
<b>BIND Domain Manager . . . 641</b>
<b>Part V Internet </b>
<b>Applications </b>
<b>Chapter 19 </b>
<b>Web Forms Manager . . . 661</b>
</div>
<span class='text_page_counter'>(15)</span><div class='page_container' data-page=15>
<b>Part VI </b>
<b>Tuning and Securing PHP Applications </b>
<b>Chapter 21 </b>
<b>Speeding Up PHP Applications . . . 713</b>
<b>Chapter 22 </b>
<b>Securing PHP Applications . . . 737</b>
<b>Part VII Appendixes </b>
<b>Appendix A </b>
<b>What’s on the CD-ROM . . . 753</b>
<b>Appendix B </b>
<b>PHP Primer . . . 757</b>
<b>Appendix C </b>
<b>MySQL Primer . . . 763</b>
<b>Appendix D </b>
<b>Linux Primer . . . 781</b>
<b>Index . . . 833</b>
</div>
<span class='text_page_counter'>(16)</span><div class='page_container' data-page=16></div>
<span class='text_page_counter'>(17)</span><div class='page_container' data-page=17>
<b>Contents</b>
<b>Preface</b>
. . . vii<b>Acknowledgments</b>
. . . xi<b>Part I</b>
<b>Designing PHP Applications </b>
<b>Chapter 1 </b>
<b>Features of Practical PHP Applications </b>
. . . 3Features of a Practical PHP Application . . . 3
Employing the Features in Applications . . . 5
Creating object-oriented design . . . 5
Using external HTML templates . . . 5
Using external configuration files . . . 11
Using customizable messages . . . 14
Using relational database . . . 21
Using portable directory structure . . . 22
Using access control . . . 24
Summary . . . 24
<b>Chapter 2 </b>
<b>Understanding and Avoiding Security Risks </b>
. . . 25Identifying the Sources of Risk . . . 25
Minimizing User-Input Risks . . . 26
Running external programs with user input . . . 26
Getting user input in a safe way . . . 30
Using validation code . . . 35
Not Revealing Sensitive Information . . . 38
Summary . . . 40
<b>Chapter 3 </b>
<b>PHP Best Practices </b>
. . . 41Best Practices for Naming Variables and Functions . . . 41
Best Practices for Function/Method . . . 43
Returning arrays with care . . . 43
Simplifying the function or method argument list order issue . . . 45
Best Practices for Database . . . 47
Writing good SELECTstatements . . . 47
Dealing with missing data . . . 48
Handling SQL action statements . . . 49
Best Practices for User Interface . . . 54
Avoiding HTML in application code . . . 54
Generating HTML combo lists in application code . . . 55
Reducing template code . . . 58
Best Practices for Documentation . . . 59
</div>
<span class='text_page_counter'>(18)</span><div class='page_container' data-page=18>
Best Practices for Web Security . . . 60
Keep authentication information away from prying eyes . . . 60
See your errors before someone else does . . . 61
Restrict access to sensitive applications . . . 61
Best Practices for Source Configuration Management . . . 61
Summary . . . 62
<b>Part II Developing </b>
<b>Intranet </b>
<b>Solutions </b>
<b>Chapter 4 </b>
<b>Architecture of an Intranet Application </b>
. . . 65Understanding Intranet Requirements . . . 65
Building an Intranet Application Framework . . . 67
Using an HTML template-based presentation layer . . . 68
Using PHP Application Framework components . . . 68
Business logic . . . 69
Relational database . . . 69
Creating a Database Abstraction Class . . . 71
Creating an Error Handler Class . . . 81
Creating a Built-In Debugger Class . . . 85
Creating an Abstract Application Class . . . 91
Creating a Sample Application . . . 113
Summary . . . 119
<b>Chapter 5 </b>
<b>Central Authentication System </b>
. . . 121How the System Works . . . 121
Creating an Authentication Class . . . 124
Creating the Central Login Application . . . 127
Creating the Central Logout Application . . . 138
Creating the Central Authentication Database . . . 146
Testing Central Login and Logout . . . 148
Making Persistent Logins in Web Server Farms . . . 149
Summary . . . 155
<b>Chapter 6 </b>
<b>Central User Management System </b>
. . . 157Identifying the Functionality Requirements . . . 157
Creating a User Class . . . 158
User Interface Templates . . . 168
Creating a User Administration Application . . . 168
Configuring user administration applications . . . 181
Configuring user administration application messages . . . 186
Configuring user administration application error messages . . . 186
Testing the user management application . . . 187
Creating a User Password Application . . . 190
Creating a Forgotten-Password Recovery Application . . . . 194
Designing the forgotten-password recovery application . . . 195
Implementing the forgotten-password recovery application . . . 197
Testing the forgotten-password recovery application . . . 201
</div>
<span class='text_page_counter'>(19)</span><div class='page_container' data-page=19>
<b>Chapter 7 </b>
<b>Intranet System </b>
. . . 203Identifying Functionality Requirements . . . 203
Designing the Database . . . 204
Designing and Implementing the Intranet Classes . . . 207
Messageclass . . . 207
ActivityAnalyzerclass . . . 213
Creating theIntranetUserclass . . . 217
Setting Up Application Configuration Files . . . 219
Setting Up the Application Templates . . . 222
Intranet Home Application . . . 223
MOTD manager application . . . 225
Access reporter application . . . 230
Admin access reporter application . . . 233
Daily logbook manager application . . . 236
User tip application . . . 237
User preference application . . . 237
Installing Intranet Applications from the CD-ROM . . . 238
Testing the Intranet Home Application . . . 240
Changing user preferences . . . 242
Checking user access logs . . . 242
Writing a message to other users . . . 244
Summary . . . 245
<b>Chapter 8 </b>
<b>Intranet Simple Document Publisher </b>
. . . 247Identifying the Functionality Requirements . . . 247
The Prerequisites . . . 248
Designing the Database . . . 248
The Intranet Document Application Classes . . . 250
The Category class . . . 251
The Doc class . . . 255
The Response class . . . 258
Setting Up Application Configuration Files . . . 261
The main configuration file . . . 261
The messages file . . . 266
The errors file . . . 267
Setting Up the Application Templates . . . 267
The Document Publisher Application . . . 268
The document index display application . . . 278
The document details application . . . 280
The document response application . . . 281
The document view list application . . . 282
Installing Intranet Document Application . . . 283
Testing Intranet Document Application . . . 285
Creating a new category . . . 286
Adding a new document . . . 288
Summary . . . 292
</div>
<span class='text_page_counter'>(20)</span><div class='page_container' data-page=20>
<b>Chapter 9 </b>
<b>Intranet Contact Manager </b>
. . . 293Functionality Requirements . . . 293
Understanding Prerequisites . . . 294
The Database . . . 294
The Intranet Contact Manager Application Classes . . . 297
The Categoryclass . . . 298
The Contactclass . . . 302
The Application Configuration Files . . . 308
The main configuration file . . . 308
The messages file . . . 312
The errors file . . . 312
The Application Templates . . . 312
The Contact Category Manager Application . . . 313
The Contact Manager Application . . . 317
Installing Intranet Contract Manager . . . 323
Testing Contract Manager . . . 325
Adding categories . . . 326
Adding a contact . . . 328
Searching for a contact . . . 329
Sending e-mail to a contact . . . 330
Searching for contacts in a subcategory . . . 330
Summary . . . 333
<b>Chapter 10 </b>
<b>Intranet Calendar Manager </b>
. . . 335Identifying Functionality Requirements . . . 335
Understanding Prerequisites . . . 336
Designing the Database . . . 336
The Intranet Calendar Application Event Class . . . 337
The Application Configuration Files . . . 343
The main configuration file . . . 344
The messages file . . . 347
The errors file . . . 347
The Application Templates . . . 348
The Calendar Manager Application . . . 348
The Calendar Event Manager Application . . . 350
Installing the Event Calendar on Your Intranet . . . 353
Testing the Event Calendar . . . 354
Adding a new event . . . 355
Modifying an existing event . . . 356
Viewing an event reminder . . . 356
Summary . . . 358
<b>Chapter 11 </b>
<b>Internet Resource Manager </b>
. . . 359Functionality Requirements . . . 359
Understanding the Prerequisites . . . 360
Designing the Database . . . 360
CATEGORY table . . . 360
</div>
<span class='text_page_counter'>(21)</span><div class='page_container' data-page=21>
RESOURCE_KEYWORD table . . . 361
RESOURCE_VISITOR table . . . 361
Designing and Implementing the Internet Resource
Manager Application Classes . . . 362
Designing and implementing the IrmCategory class . . . 362
Designing and implementing the IrmResource class . . . 364
Designing and implementing the Message class . . . 368
Creating Application Configuration Files . . . 369
Creating the main configuration file . . . 369
Creating a messages file . . . 373
Creating an errors file . . . 373
Creating Application Templates . . . 373
Creating a Category Manager Application . . . 374
run() . . . 375
addDriver() . . . 375
modifyDriver() . . . 375
addCategory() . . . 375
modifyCategory() . . . 376
deleteCategory() . . . 376
displayModifyCategoryMenu() . . . 377
displayAddCategoryMenu() . . . 377
populateCategory() . . . 378
populateSubCategory() . . . 378
showMenu() . . . 378
showWithTheme() . . . 379
authorize() . . . 379
Creating a Resource Manager Application . . . 379
run() . . . 380
addDriver() . . . 380
modifyDriver() . . . 380
populateCategory() . . . 380
populateSubCategory() . . . 381
showAddMenu() . . . 381
addResource() . . . 382
showModifyMenu() . . . 382
modifyResource() . . . 383
delete() . . . 383
displayDescription() . . . 384
selectResource() . . . 384
displayWithTheme() . . . 384
authorize() . . . 385
Creating a Resource Tracking Application . . . 385
run() . . . 385
keepTrack() . . . 385
authorize() . . . 386
</div>
<span class='text_page_counter'>(22)</span><div class='page_container' data-page=22>
Creating a Search Manager Application . . . 386
run() . . . 386
populateCategory() . . . 386
populateSubCategory() . . . 387
populateResource() . . . 387
showMenu() . . . 387
displaySearchResult() . . . 388
sortAndDisplay() . . . 389
displaySearResultNextandPrevious() . . . 389
showTopRankingResource() . . . 390
showMostVisitedResource() . . . 390
showWithTheme() . . . 390
authorize() . . . 391
sortByResourceTitle() . . . 391
sortByResourceAddedBy() . . . 391
sortByResourceRating() . . . 391
sortByResourceVisitor() . . . 391
Installing an IRM on Your Intranet . . . 391
Testing IRM . . . 393
Security Concerns . . . 401
Summary . . . 401
<b>Chapter 12 </b>
<b>Online Help System </b>
. . . 403Functionality Requirements . . . 403
Understanding the Prerequisites . . . 404
Designing and Implementing the Help
Application Classes . . . 404
Designing and implementing the Help class . . . 404
Creating Application Configuration Files . . . 415
Creating a main configuration file . . . 415
Creating a messages file . . . 417
Creating an error message file . . . 417
Creating Application Templates . . . 417
Creating the Help Indexing Application . . . 418
run() . . . 419
makeIndex() . . . 419
getMapHash() . . . 420
authorize() . . . 420
Creating the Help Application . . . 420
run() . . . 420
authorize() . . . 421
getCommand() . . . 421
getAppInfo() . . . 421
showHelp() . . . 421
displayOutput() . . . 422
</div>
<span class='text_page_counter'>(23)</span><div class='page_container' data-page=23>
Testing the Help System . . . 424
Security Considerations . . . 427
Restricting access to makeindex.php script . . . 428
Summary . . . 428
<b>Part III </b>
<b>Developing E-mail Solutions</b>
<b>Chapter 13 </b>
<b>Tell-a-Friend System </b>
. . . 431Functionality Requirements . . . 431
Understanding Prerequisites . . . 433
Designing the Database . . . 433
TAF_FORM Table . . . 433
TAF_FRM_BANNED_IP Table . . . 434
TAF_FRM_OWNER_IP Table . . . 434
TAF_MESSAGE Table . . . 434
TAF_MSG_OWNER_IP Table . . . 434
TAF_SUBMISSION Table . . . 434
TAF_SUBSCRIPTION Table . . . 434
Designing and Implementing the Tell-a-Friend
Application Classes . . . 435
Designing and implementing the Form class . . . 436
Designing and implementing the Message class . . . 442
Designing and implementing the AccessControl class . . . 444
Creating Application Configuration Files . . . 446
Creating the main configuration file . . . 446
Creating a Messages file . . . 449
Creating an Errors file . . . 449
Creating Application Templates . . . 450
Creating the Tell-a-Friend Main Menu
Manager Application . . . 451
run() . . . 451
displayTAFMenu() . . . 451
Creating a Tell-a-Friend Form Manager Application . . . 452
run() . . . 452
authorize() . . . 452
addModifyDriver() . . . 452
displayAddModifyMenu() . . . 453
addModifyForm() . . . 453
deleteForm() . . . 454
Creating a Tell-a-Friend Message Manager Application . . . 454
run() . . . 454
authorize() . . . 455
addModifyDriver() . . . 455
displayAddModifyMenu() . . . 455
addModifyMessage() . . . 456
deleteMessage() . . . 456
</div>
<span class='text_page_counter'>(24)</span><div class='page_container' data-page=24>
Creating a Tell-a-Friend Form Processor Application . . . . 457
run() . . . 457
processRequest() . . . 457
Creating a Tell-a-Friend Subscriber Application . . . 458
run() . . . 458
authorize() . . . 458
processRequest() . . . 459
Creating a Tell-a-Friend Reporter Application . . . 459
run() . . . 460
generateFormCreatorReport() . . . 460
generateOriginReport() . . . 460
Installing a Tell-a-Friend System . . . 461
Testing the Tell-a-Friend System . . . 462
Creating Msg for Friend (Introduction Msg) . . . 464
Security Considerations . . . 471
Summary . . . 471
<b>Chapter 14 </b>
<b>E-mail Survey System </b>
. . . 473Functionality Requirements . . . 474
Architecture of the Survey System . . . 475
Designing the Database . . . 477
Designing and Implementing the Survey Classes . . . 479
Designing and implementing the Survey Class . . . 479
Designing and implementing the SurveyList Class . . . 480
Designing and implementing the SurveyForm Class . . . 482
Designing and implementing the SurveyResponse Class . . . 483
Designing and implementing the SurveyReport Class . . . 484
Designing and Implementing the Survey Applications . . . 484
Developing Survey Manager . . . 485
Developing Survey List Manager . . . 486
Developing Survey Form Manager . . . 488
Developing Survey Execution Manager . . . 489
Developing Survey Response Manager . . . 491
Developing Survey Report Manager . . . 492
Setting Up the Central Survey Configuration File . . . 493
Setting Up the Interface Template Files . . . 497
Setting Up the Central Survey Messages File . . . 498
Setting Up the Central Survey Errors File . . . 498
</div>
<span class='text_page_counter'>(25)</span><div class='page_container' data-page=25>
Understanding Customer Database Requirements . . . 515
Designing E-campaign Classes . . . 516
Creating a List class . . . 516
Creating a URL class . . . 518
Creating a Message class . . . 519
Creating a Campaign class . . . 521
Creating a URL Tracking class . . . 521
Creating an Unsubscription Tracking class . . . 522
Creating a Report class . . . 522
Creating Common Configuration and Resource Files . . . 523
Creating an e-campaign configuration file . . . 523
Creating an e-campaign messages file . . . 526
Creating an e-campaign errors file . . . 526
Creating Interface Template Files . . . 526
Creating an E-campaign User Interface Application . . . 528
run() . . . 528
displayMenu() . . . 528
authorize() . . . 528
Creating a List Manager Application . . . 528
run() . . . 528
addDriver() . . . 529
modifyDriver() . . . 530
authorize() . . . 530
displayAddListMenu() . . . 530
displayModListMenu() . . . 530
modifyList() . . . 530
modifyDatabaseFieldMap() . . . 531
delList() . . . 531
takeMap() . . . 531
addList() . . . 531
addDatabaseFieldMap() . . . 532
Creating a URL Manager Application . . . 532
run() . . . 532
addURLDriver() . . . 532
authorize() . . . 532
modifyURLDriver() . . . 533
delURL() . . . 534
displayAddURLMenu() . . . 534
addURL() . . . 534
displayModifyURLMenu() . . . 534
modifyURL() . . . 534
Creating a Message Manager Application . . . 535
run() . . . 536
addDriver() . . . 536
modifyDriver() . . . 536
</div>
<span class='text_page_counter'>(26)</span><div class='page_container' data-page=26>
authorize() . . . 537
displayAddMessageMenu() . . . 537
displayModMessageMenu() . . . 537
updateMessage() . . . 537
deleteMessage() . . . 537
addMessage() . . . 538
getMsgPreviewInput() . . . 538
doPreview() . . . 538
showMsgPreview() . . . 538
appendHashes() . . . 538
Creating a Campaign Manager Application . . . 538
run() . . . 539
createCampaign() . . . 539
delCampaign() . . . 540
modifyCampaign() . . . 540
authorize() . . . 540
displayCampaignMenu() . . . 540
addCampaign() . . . 540
updateCampaign() . . . 541
Creating a Campaign Execution Application . . . 541
run() . . . 541
executeCampaign() . . . 542
authorize() . . . 543
Creating a URL Tracking and Redirection Application . . . . 544
run() . . . 544
computeCheckSum() . . . 545
keepTrackAndRedirect() . . . 545
redirectTest() . . . 545
Creating an Unsubscription Tracking Application . . . 545
run() . . . 545
computeCheckSum() . . . 546
askForConfirmation() . . . 547
unsubUser() . . . 547
Creating a Campaign Reporting Application . . . 547
run() . . . 548
showEcampaignReport() . . . 548
authorize() . . . 548
toggleDescField() . . . 549
Testing the E-Campaign System . . . 549
Creating a list . . . 549
Creating a target URL . . . 550
Creating a message . . . 552
</div>
<span class='text_page_counter'>(27)</span><div class='page_container' data-page=27>
Executing a campaign . . . 554
Viewing a campaign report . . . 554
Security Considerations . . . 555
Summary . . . 555
<b>Part IV</b>
<b>Using PHP for Sysadmin Tasks </b>
<b>Chapter 16 </b>
<b>Command-Line PHP Utilities </b>
. . . 559Working with the Command-Line Interpreter . . . 560
Reading standard input . . . 562
Getting into arguments . . . 563
Building a Simple Reminder Tool . . . 569
Features of the reminder tool . . . 570
Implementing the reminder tool . . . 570
Installing the reminder tool as a cron job . . . 582
Building a Geo Location Finder Tool for IP . . . 583
Building a Hard Disk Usage Monitoring Utility . . . 587
Installing the hdmonitor tool as a cron job . . . 594
Building a CPU Load Monitoring Utility . . . 595
Installing the loadmonitor tool as a cron job . . . 605
Summary . . . 606
<b>Chapter 17 </b>
<b>Apache Virtual Host Maker </b>
. . . 607Understanding an Apache Virtual Host . . . 607
Defining Configuration Tasks . . . 609
Creating a Configuration Script . . . 611
Developing makesite . . . 612
Creating the makesite.conf file . . . 612
Creating the virtual host configuration . . . 615
Creating the contents configuration file . . . 617
Creating the e-mail template . . . 618
Creating the makesite script . . . 619
Installing makesite on Your System . . . 636
Testing makesite . . . 638
Summary . . . 640
<b>Chapter 18 </b>
<b>BIND Domain Manager </b>
. . . 641Features of makezone . . . 641
Creating the Configuration File . . . 642
Understanding makezone . . . 647
The makezone Functions . . . 653
Installing makezone . . . 655
Testing makezone . . . 656
Summary . . . 658
</div>
<span class='text_page_counter'>(28)</span><div class='page_container' data-page=28>
<b>Part V Internet </b>
<b>Applications</b>
<b>Chapter 19 </b>
<b>Web Forms Manager </b>
. . . 661Functionality Requirements . . . 661
Understanding Prerequisites . . . 662
Designing the Database . . . 662
WEBFORMS_DL_TBL table . . . 663
X_TBL table (a sample form table) . . . 663
Designing and Implementing the Web Forms Manager
Application Classes . . . 664
Designing and implementing the ACL class . . . 665
Designing and implementing the DataCleanup class . . . 666
Designing and implementing the DataValidator class . . . 667
Designing and implementing the FormSubmission class . . . 669
Designing and implementing the FormData class . . . 672
Creating the Application Configuration Files . . . 674
Creating the main configuration file . . . 674
Creating a sample form configuration file . . . 677
Creating the errors file . . . 678
Creating Application Templates . . . 679
Creating the Web Forms Submission
Manager Application . . . 679
run() . . . 680
showPage() . . . 680
authorize() . . . 681
Creating the Web Forms Reporter Application . . . 681
run() . . . 681
showReport() . . . 681
Creating the CSV Data Exporter Application . . . 682
run() . . . 682
processRequest() . . . 683
Installing the Web Forms Manager . . . 683
Testing the Web Forms Manager . . . 685
Security Considerations . . . 693
Summary . . . 695
<b>Chapter 20 </b>
<b>Web Site Tools </b>
. . . 697Functionality Requirements . . . 697
Understanding Prerequisites . . . 698
Designing the Database . . . 698
VOTES Table . . . 698
Designing and Implementing the Voting Tool
Application Class . . . 699
</div>
<span class='text_page_counter'>(29)</span><div class='page_container' data-page=29>
Creating the Application Configuration Files . . . 701
Creating the main configuration file . . . 701
Creating an errors file . . . 703
Creating the Application Templates . . . 703
Creating the Vote Application . . . 703
run() . . . 704
setPollID() . . . 704
getPollID() . . . 704
addVote() . . . 704
displayVoteResult() . . . 704
Installing the Voting Tool . . . 705
Testing the Voting Tool . . . 706
Summary . . . 710
<b>Part VI</b>
<b>Tuning and Securing PHP Applications</b>
<b>Chapter 21 </b>
<b>Speeding Up PHP Applications . . . 713</b>
Benchmarking Your PHP Application . . . 714
Benchmarking your code . . . 714
Avoiding bad loops . . . 718
Stress-testing your PHP applications using ApacheBench . . . . 722
Buffering Your PHP Application Output . . . 723
Compressing Your PHP Application Output . . . 725
Caching Your PHP Applications . . . 727
Caching PHP contents using the jpcache cache . . . 727
Caching PHP contents using the PEAR cache . . . 729
Using PHP opcode caching techniques . . . 734
Summary . . . 736
<b>Chapter 22 </b>
<b>Securing PHP Applications </b>
. . . 737Controlling Access to Your PHP Applications . . . 737
Restricting access to your PHP application-related files . . . 738
Using Web server–based authentication . . . 739
Using the MD5 message digest for login . . . 740
Using Web server–based authorization . . . 743
Restricting write access to directories . . . 744
Securely Uploading Files . . . 744
Using Safe Database Access . . . 747
Recommended php.ini Settings for a
Production Environment . . . 748
Limiting File System Access for PHP Scripts . . . 748
Running PHP Applications in Safe Mode . . . 749
Summary . . . 750
</div>
<span class='text_page_counter'>(30)</span><div class='page_container' data-page=30>
<b>Part VII</b>
<b>Appendixes</b>
<b>Appendix A </b>
<b>What’s on the CD-ROM </b>
. . . 753<b>Appendix B </b>
<b>PHP Primer </b>
. . . 757<b>Appendix C </b>
<b>MySQL Primer </b>
. . . 763<b>Appendix D </b>
<b>Linux Primer </b>
. . . 781<b>Index</b>
. . . 833<b>Wiley Publishing, Inc. End-User </b>
</div>
<span class='text_page_counter'>(31)</span><div class='page_container' data-page=31>
<b>Designing PHP Applications</b>
<b>CHAPTER 1</b>
Features of Practical PHP Applications
<b>CHAPTER 2</b>
Understanding and Avoiding Security Risks
<b>CHAPTER 3</b>
</div>
<span class='text_page_counter'>(32)</span><div class='page_container' data-page=32></div>
<span class='text_page_counter'>(33)</span><div class='page_container' data-page=33>
<b>Chapter 1</b>
<b>Features of Practical PHP</b>
<b>Applications</b>
<b>IN THIS CHAPTER</b>
◆
Exploring the features of a practical PHP application
◆
Putting the features to work in applications
<b>PHP </b>
<b>BEGAN AS A PERSONAL</b>home page scripting tool. Today PHP is widely used in
both personal and corporate worlds as an efficient Web application platform. In
most cases, PHP is introduced in a corporation because of its speed, absence of
license fees, and fast development cycle.
The last reason (fast development cycle) is often misleading. There is no question
that PHP development is often faster than other Web-development platforms like
Java. However, the reasons for PHP development’s faster cycle are often questioned
by serious non-PHP developers. They claim that PHP development lacks design and
often serves as a glue logic scripting platform — thrown together in a hurry.
Frankly, I’ve seen many such scripts on many commercial engagements. In this
book, I introduce you to a PHP application design that is both well planned and
practical, therefore, highly maintainable.
<b>Features of a Practical PHP</b>
<b>Application</b>
When developing a practical PHP application you should strongly consider the
fol-lowing features:
◆
<b>An object-oriented code base:</b>
Granted, most freely available PHP
appli-cations are not object oriented, but hopefully they will change soon. The
benefits of object-oriented design outweigh the drawbacks. The primary
benefits are a reusable, maintainable code base. You’ll find that there are
similar objects in every application you develop, and reusing previously
developed, tested, and deployed code gives you faster development time
as you develop more and more applications.
</div>
<span class='text_page_counter'>(34)</span><div class='page_container' data-page=34>
I developed all the applications in this book using a single object
frame-work (discussed in Chapter 4). Being able to develop more than 50
appli-cations using the same framework means that I can easily fix any bugs,
because the framework object code base is shared among almost all the
applications.
◆
<b>External HTML interfaces using templates:</b>
Having user interface
ele-ments within an application makes it difficult to adapt to the changing
Web landscape. Just as end users like to change their sites’ look and feel,
they also like to make sure the application-generated screens match their
sites’ overall design. Using external HTML templates to generate
applica-tion screens ensures that an end user can easily change the look and feel
of the application as frequently as he or she wants.
◆
<b>External configuration:</b>
When designing a practical application, the
developer must ensure that end-user configuration is not within the code.
Keeping it in an external-configuration-only file makes it very easy for
end users to customize the application for their sites. The external
config-uration file should have site configconfig-uration data such as database access
information (host name, username, password, port, etc.), path information,
template names, etc.
◆
<b>Customizable messages:</b>
The messages and error messages shown by the
application should be customizable, because a PHP application could find
its way into many different locales. A basic internationalization scheme
would be to keep all the status and error messages in external files so that
they can be customized per the local language.
◆
<b>Relational data storage:</b>
Storing data on flat files or comma-separated
value (CSV) files is old and a lot less manageable than storing data in a
fast relational database such as MySQL. If the Web application collects
lots of data points from the Web visitors or customers, using a relational
database for storing data is best. Using a database can often increase your
data security, because proper database configuration and access control
make it difficult for unauthorized users to access the stored data.
◆
<b>Built-in access control:</b>
If a Web application has sensitive operations that
are to be performed by only a select group of people and not the entire
world of Web visitors, then there has to be a way for the application to
control access to ensure security.
</div>
<span class='text_page_counter'>(35)</span><div class='page_container' data-page=35>
<b>Employing the Features in</b>
<b>Applications</b>
Now let’s look at how you can implement those features in PHP applications.
<b>Creating object-oriented design</b>
The very first step in designing a practical application is to understand the problem
you want the application to solve and break down that problem into an
object-oriented design.
For example, say you’re to develop a Web-based library check-in/checkout
sys-tem. In this situation, you have to identify the objects in your problem space. We all
know that a library system allows its members to check in and check out books. So
the objects that are immediately visible are members (that is, users) and books.
Books are organized in categories, which have certain attributes such as name,
description, content-maturity ratings (adults, children), and so on. A closer look
reveals that a category can be thought of as an object as well. By observing the
actual tasks that your application is to perform, you can identify objects in the
sys-tem. A good object-oriented design requires a great deal of thinking ahead of
cod-ing, which is always the preferred way of developing software.
After you have base object architecture of your system, you can determine
whether any of your previous work has objects that are needed in your new
appli-cation. Perhaps you have an object defined in a class file that can be extended to
create a new object in the new problem space. By reusing the existing proven code
base, you can reduce your application’s defects probability number significantly.
<b>Using external HTML templates</b>
Next, you need to consider how user interfaces will be presented and how can you
allow for maximum customization that can be done without changing your core
code. This is typically done by introducing external HTML templates for interface.
For example, instead of using HTML code within your application, you can use
HTML templates.
HTML templates are used for all application interfaces in this book so that the
applications are easy to update in terms of look and feel. To understand the power
of external HTML user-interface templates, carefully examine the code in Listing
1-1 and Listing 1-2.
<b>Listing 1-1: A PHP Script with Embedded User Interface</b>
<?php
// Turn on all error reporting
error_reporting(E_ALL);
<i>Continued</i>
</div>
<span class='text_page_counter'>(36)</span><div class='page_container' data-page=36>
<b>Listing 1-1</b><i>(Continued)</i>
// Get name from GET or POST request
$name = (! empty($_REQUEST[‘name’])) ? $_REQUEST[‘name’] : null;
// Print output
print <<<HTML
<html>
<head><title>Bad Script</title></head>
<body>
<table border=0 cellpadding=3 cellspacing=0>
<tr>
<td> Your name is </td>
<td> $name </td>
</tr>
</table>
</body>
</html>
HTML;
?>
Listing 1-1 shows a simple PHP script that has HTML interface embedded deep
into the code. This is a very unmaintainable code for an end user who isn’t
PHP-savvy. If the end user wants to change the page this script displays, he or she has to
modify the script itself, which has a higher chance of breaking the application. Now
look at Listing 1-2.
<b>Listing 1-2: A PHP Script with External User Interface</b>
<?php
// Enable all error reporting
error_reporting(E_ALL);
// Set PHPLIB path
$PHPLIB_DIR = $_SERVER[‘DOCUMENT_ROOT’] . ‘/phplib’;
// Add PHPLIB path to PHP’s include path
ini_set( ‘include_path’, ‘:’ . $PHPLIB_DIR . ‘:’
. ini_get(‘include_path’));
// Include the PHPLIB template class
</div>
<span class='text_page_counter'>(37)</span><div class='page_container' data-page=37>
// Setup this application’s template
// directory path
$TEMPLATE_DIR = $_SERVER[‘DOCUMENT_ROOT’] .
‘/ch1/templates’;
// Setup the output template filename
$OUT_TEMPLATE = ‘listing2out.html’;
// Get name from GET or POST request
$name = (! empty($_REQUEST[‘name’])) ? $_REQUEST[‘name’] : null;
// Create a new template object
$t = new Template($TEMPLATE_DIR);
// Set the template file for this object to
// application’s template
$t->set_file(“page”, $OUT_TEMPLATE);
// Setup the template block
$t->set_block(“page”, “mainBlock” , “main”);
// Set the template variable = value
$t->set_var(“NAME”, $name);
// Parse the template block with all
// predefined key=values
$t->parse(“main”, “mainBlock”, false);
// Parse the entire template and print the output
$t->pparse(“OUT”, “page”);
?>
This application looks much more complex than the one shown in Listing 1-1,
right? At first glance, it may look that way, but it’s really a much better version of
the script. Let’s review it line by line:
$PHPLIB_DIR = $_SERVER[‘DOCUMENT_ROOT’] . ‘/phplib’;
The first line of the script sets a variable called
$PHPLIB_DIRto a path where
PHPLIB library files are stored. The path is set to PHPLIB (phplib) subdirectory
doc-ument root (hereafter
%DocumentRoot%). This means if your Web document root is
set to
/usr/local/apache/htdocs, the script assumes your PHPLIB directory is
</div>
<span class='text_page_counter'>(38)</span><div class='page_container' data-page=38>
/usr/local/apache/htdocs/phplib
. Of course, if that is not the case, you can
change it as needed. For example:
$PHPLIB_DIR = ‘/www/phplib’;
Here the PHPLIB path is set to
/www/phplib, which may or may not be within
your document root. As long as you point the variable to the fully qualified path, it
works. However, the preferred path is the
%DocumentRoot%/somepath, as shown in
the script.
The next bit of code is as follows:
ini_set( ‘include_path’, ‘:’ . $PHPLIB_DIR . ‘:’
. ini_get(‘include_path’));
It adds the
$PHPLIB_DIRpath to PHP’s
include_pathsetting, which enables
PHP to find files in PHPLIB. Notice that we have set the
$PHPLIB_DIRpath in front of
the existing
include_pathvalue, which is given by the
ini_get(‘include_path’)function call. This means that if there are two files with the same name in
$PHPLIB_DIR
and the original
include_path, the
$PHPLIB_DIRone will be found
first.
Next, the code sets the
$TMEPLATE_DIRvariable to the template path of the
script:
$TEMPLATE_DIR = $_SERVER[‘DOCUMENT_ROOT’] .
‘/ch1/templates’;
The path is set to
%DocumentRoot%/ch1/templates. You can change it to
what-ever the exact path is. Again, the ideal path setting should include
$_SERVER[‘DOCUMENT_ROOT’]
so that the script is portable. If an exact path is hard coded,
such as the following, then the end user is more likely to have to reconfigure the
path because the
%DocumentRoot%may vary from site to site:
$TEMPLATE_DIR = ‘/usr/local/apache/htdocs/ch1/templates’;
The next line in Listing 1-2 sets the output template file name to
$OUT_TEMPLATE
:
$OUT_TEMPLATE = ‘listing2out.html’;
This file must reside in the
$TEMPLATE_DIRdirectory.
The code then sets
$namevariable to the
‘name’value found from an HTTP
GETor
POSTrequest:
</div>
<span class='text_page_counter'>(39)</span><div class='page_container' data-page=39>
The script creates a template object called
$tusing the following line:
$t = new Template($TEMPLATE_DIR);
The Template class is defined in the
template.incfile, which comes from the
PHPLIB library.
The
$ttemplate object will be used in the rest of the script to load the HTML
template called
$OUT_TEMPLATEfrom
$TEMPLATE_DIR, parse it, and display the
resulting contents. The HTML template file
listing2out.htmlis shown in Listing
1-3.
Notice that in creating the object, the
$TEMPLATE_DIRvariable is passed as a
parameter to the Template constructor. This sets the
$tobject’s directory to
$TEMPLATE_DIR
, which is where we are keeping our
listing2out.htmlHTML
template.
The following line is used to set the
$tobject to the
$OUT_TEMPLATEfile. This
makes the
$tobject read the file and internally reference the file as
“page”.
$t->set_file(“page”, $OUT_TEMPLATE);
The following line defines a template block called
“mainBlock”as
“main”from
the
“page”template:
$t->set_block(“page”, “mainBlock” , “main”);
A block is a section of template contents that is defined using a pair of HTML
com-ments, like the following:
<!-- BEGIN <i>block_name</i> -->
HTML CONTENTS GOES HERE
<!-- END <i>block_name</i> -->
A block is like a marker that allows the template object to know how to
manip-ulate a section of an HTML template. For example, Listing 1-3 shows that we have
defined a block called
mainBlockthat covers the entire HTML template.
<b>Listing 1-3: The HTML Template (listing2out.html)for Listing 1-2 Script</b>
<!-- BEGIN mainBlock -->
<html>
<head><title>Bad Script</title></head>
<body>
<table border=1>
<i>Continued</i>
</div>
<span class='text_page_counter'>(40)</span><div class='page_container' data-page=40>
<b>Listing 1-3</b><i>(Continued)</i>
<tr>
<td> Your name is </td>
<td> {NAME} </td>
</tr>
</table>
</body>
</html>
<!-- END mainBlock -->
You can define many blocks; blocks can be nested as well. For example:
<!-- BEGIN <i>block_name1</i> -->
HTML CONTENTS GOES HERE
<!-- BEGIN <i>block_name2</i> -->
HTML CONTENTS GOES HERE
<!-- END <i>block_name2</i> -->
<!-- END <i>block_name1</i> -->
block_name1
is the block that has
block_name2as a nested block. When
defin-ing nested blocks, you have to use
set_block()method carefully. For example:
$t->set_block(“page”, “mainBlock” , “main”);
$t->set_block(“main”, “rowBlock” , “rows”);
The
mainBlockis a block in
“page”and
rowBlockis a block within
“main”block. So the HTML template will look like this:
<!-- BEGIN mainBlock-->
HTML CONTENTS GOES HERE
<!-- BEGIN rowBlock -->
</div>
<span class='text_page_counter'>(41)</span><div class='page_container' data-page=41>
You cannot define the embedded block first.
The next line in Listing 1-2 sets a template variable
NAMEto the value of
$namevariable:
$t->set_var(“NAME”, $name);
In Listing 1-3, you will see a line such as the following:
<td> {NAME} </td>
Here the template variable is
{NAME}. When setting the value for this template
variable using the
set_var()method, you didn’t have to use the curly braces, as it
is automatically assumed.
Now that the script has set the value for the only template variable in the
tem-plate, you can parse the block as done in the next line:
$t->parse(“main”, “mainBlock”, false);
This line calls the
parse()method of the
$ttemplate object to parse the
mainBlock
, which is internally named as “main.” The third parameter is set to
false
, because we don’t intend to loop through this block. Because nested blocks
are often used in loops, you’d have to set the third parameter to true to ensure that
the block is parsed properly from iteration to iteration.
Finally, the only remaining thing to do is print and parse the entire page:
$t->pparse(“OUT”, “page”);
This prints the output page.
What all this additional code bought us is an implementation that uses an
exter-nal HTML template, which the end user can modify without knowing anything
about the PHP code. This is a great achievement, because most of the time the end
user is interested in updating the interface look and feel as his or her site goes
through transitions over time.
<b>Using external configuration files</b>
An external configuration file separates code from information that is end-user
configurable.
By separating end-user editable information to a separate configuration file we
reduce the risk of unintentional modification of core application code. Experienced
commercial developers will tell you that this separation is a key timesaver when
customers make support calls about PHP applications. As a developer, you can
instruct the end user to only modify the configuration file and never to change
anything in the core application files. This means any problem created at the
end-user site is confined to the configuration file and can be identified easily by the
developer.
</div>
<span class='text_page_counter'>(42)</span><div class='page_container' data-page=42>
In Listing 1-2, we had the following lines:
$PHPLIB_DIR = $_SERVER[‘DOCUMENT_ROOT’] . ‘/phplib’;
ini_set( ‘include_path’, ‘:’ . $PHPLIB_DIR . ‘:’
. ini_get(‘include_path’));
include(‘template.inc’);
include(‘template.inc’);
$TEMPLATE_DIR = $_SERVER[‘DOCUMENT_ROOT’] .
‘/ch1/templates’;
$OUT_TEMPLATE = ‘listing2out.html’;
These lines are configuration data for the script. Ideally, these lines should be
stored in an external configuration file. For example, Listing 1-4 shows a modified
version of Listing 1-2.
<b>Listing 1-4: Modified Version of Listing 1-2</b>
<?php
require_once(‘app_name.conf’);
// Enable all reporting
error_reporting(E_ALL);
// Get name from GET or POST request
$name = (! empty($_REQUEST[‘name’])) ? $_REQUEST[‘name’] : null;
// Create a new template object
$t = new Template($TEMPLATE_DIR);
// Set the template file for this object to
// application’s template
$t->set_file(“page”, $OUT_TEMPLATE);
// Setup the template block
$t->set_block(“page”, “mainBlock” , “main”);
// Set the template variable = value
</div>
<span class='text_page_counter'>(43)</span><div class='page_container' data-page=43>
// Parse the template block with all
// predefined key=values
$t->parse(“main”, “mainBlock”, false);
// Parse the entire template and print the output
$t->pparse(“OUT”, “page”);
?>
Notice that all the configuration lines from the Listing 1-2 script have been
removed with the following line:
require_once(‘app_name.conf’);
The
require_once()function loads the configuration file. The configuration
lines now can be stored in the
app_name.conffile, as shown in Listing 1-5.
<b>Listing 1-5: Configuration File for Listing 1-4 Script</b>
<?php
// Set PHPLIB path
$PHPLIB_DIR = $_SERVER[‘DOCUMENT_ROOT’] . ‘/phplib’;
// Add PHPLIB path to PHP’s include path
ini_set( ‘include_path’, ‘:’ . $PHPLIB_DIR . ‘:’
. ini_get(‘include_path’));
// Include the PHPLIB template class
include(‘template.inc’);
// Setup this application’s template
// directory path
$TEMPLATE_DIR = $_SERVER[‘DOCUMENT_ROOT’] .
‘/ch1/templates’;
// Setup the output template filename
$OUT_TEMPLATE = ‘listing2out.html’;
?>
Another great advantage of a configuration file is that it allows you to define
global constants as follows:
define(YOUR_CONSTANT, value);
</div>
<span class='text_page_counter'>(44)</span><div class='page_container' data-page=44>
For example, to define a constant called VERSION with value 1.0.0 you can add
the following line in your configuration file:
define(VERSION, ‘1.0.0’);
Because constants are not to be modified by design, centralizing then in a
con-figuration file makes a whole lot of sense.
<b>Using customizable messages</b>
To understand the importance of customizable messages that are generated by an
application, let’s look at a simple calculator script.
Listing 1-6 shows the script, called
calc.php. The configuration file used by
calc.php
is
calc.conf, which is similar to Listing 1-5 and not shown here. This
script expects the user to enter two numbers (
num1,
num2) and an operator (+ for
addition, – for subtraction, * for multiplication, or / for division). If it doesn’t get
one or more of these required inputs, it prints error messages which are stored in an
$errors
variable.
<b>Listing 1-6: calc.php</b>
<?php
// Enable all error reporting
error_reporting(E_ALL);
require_once(‘calc.conf’);
// Get inputs from GET or POST request
$num1 = (! empty($_REQUEST[‘num1’])) ? $_REQUEST[‘num1’] : null;
$num2 = (! empty($_REQUEST[‘num2’])) ? $_REQUEST[‘num2’] : null;
$operator = (! empty($_REQUEST[‘operator’])) ?
$_REQUEST[‘operator’] : null;
// Set errors to null
$errors = null;
// If number 1 is not given, error occurred
if ($num1 == null)
{
</div>
<span class='text_page_counter'>(45)</span><div class='page_container' data-page=45>
// If number 2 is not given, error occurred
if ($num2 == null) {
$errors .= “<li>You did not enter number 2.”;
}
// If operator is not given, error occurred
if (empty($operator)) {
$errors .= “<li>You did not enter the operator.”;
}
// Set result to null
$result = null;
// If operation is + do addition: num1 + num2
if (!strcmp($operator, ‘+’))
{
$result = $num1 + $num2;
// If operation is - do subtraction: num1 - num2
} else if(! strcmp($operator, ‘-’)) {
$result = $num1 - $num2;
// If operation is * do multiplication: num1 * num2
} else if(! strcmp($operator, ‘*’)) {
$result = $num1 * $num2;
// If operation is / do division: num1 / num2
} else if(! strcmp($operator, ‘/’)) {
// If second number is 0, show divide
// by zero exception
if (! $num2) {
$errors .= “Divide by zero is not allowed.”;
} else {
$result = sprintf(“%.2f”, $num1 / $num2);
}
}
// Create a new template object
$t = new Template($TEMPLATE_DIR);
// Set the template file for this
// object to application’s template
$t->set_file(“page”, $OUT_TEMPLATE);
<i>Continued</i>
</div>
<span class='text_page_counter'>(46)</span><div class='page_container' data-page=46>
<b>Listing 1-6 (Continued)</b>
// Setup the template block
$t->set_block(“page”, “mainBlock” , “main”);
// Set the template variable = value
$t->set_var(“ERRORS”, $errors);
$t->set_var(“NUM1”, $num1);
$t->set_var(“NUM2”, $num2);
$t->set_var(“OPERATOR”, $operator);
$t->set_var(“RESULT”, $result);
// Parse the template block with all
// predefined key=values
$t->parse(“main”, “mainBlock”, false);
// Parse the entire template and
// print the output
$t->pparse(“OUT”, “page”);
?>
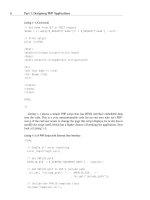
The script can be called using a URL such as the following:
http://yourserver/ch1/calc.php?num1=123&operator=%2B&num2=0
The calc.php script produces an output screen, as shown in Figure 1-1, using the
calc.html
template stored in
ch1/templates.
<b>Figure 1-1: Output of the </b>calc.php<b>script.</b>
</div>
<span class='text_page_counter'>(47)</span><div class='page_container' data-page=47>
<b>Figure 1-2: Output of the calc.phpscript (calling without an operator).</b>
Similarly, if the operator is division (/) and the second number is 0, then the
divide by zero error message is shown, as in Figure 1-3.
<b>Figure 1-3: Output of calc.phpscript (divide by zero error message).</b>
So this script is able to catch input errors and even a run-time error caused by
bad user input (divide by zero). But, sadly, this script is violating a design principle
of a practical PHP application. Notice the following lines in the script:
$errors .= “<li>You did not enter number 1.”;
// lines skipped
$errors .= “<li>You did not enter number 2.”;
// lines skipped
$errors .= “<li>You did not enter the operator.”;
// lines skipped
$errors .= “Divide by zero is not allowed.”;
</div>
<span class='text_page_counter'>(48)</span><div class='page_container' data-page=48>
These error messages are in English and have HTML tags in them. This means if
the end user wasn’t fond of the way the messages were shown, he or she would
have to change them in the code and potentially risk modification of the code that
may result in bugs. Also, what if the end user spoke, say, Spanish, instead of
English? This also means that the end user would have to change the code. A
bet-ter solution is shown in Listing 1-7 and Listing 1-8.
<b>Listing 1-7: calc2.php</b>
<?php
// Enable all error reporting
error_reporting(E_ALL);
require_once(‘calc2.conf’);
require_once(‘calc2.errors’);
// Get inputs from GET or POST request
$num1 = (! empty($_REQUEST[‘num1’])) ? $_REQUEST[‘num1’] : null;
$num2 = (! empty($_REQUEST[‘num2’])) ? $_REQUEST[‘num2’] : null;
$operator = (! empty($_REQUEST[‘operator’])) ?
$_REQUEST[‘operator’] : null;
// Set errors to null
$errors = null;
// If number 1 is not given, error occurred
if ($num1 == null)
{
$errors .= $ERRORS[LANGUAGE][‘NUM1_MISSING’];
}
// If number 2 is not given, error occured
if ($num2 == null) {
$errors .= $ERRORS[LANGUAGE][‘NUM2_MISSING’];
}
// If operator is not given, error occured
if (empty($operator)) {
$errors .= $ERRORS[LANGUAGE][‘OPERATOR_MISSING’];
}
</div>
<span class='text_page_counter'>(49)</span><div class='page_container' data-page=49>
// If operation is + do addition: num1 + num2
if (!strcmp($operator, ‘+’))
{
$result = $num1 + $num2;
// If operation is - do subtraction: num1 - num2
} else if(! strcmp($operator, ‘-’)) {
$result = $num1 - $num2;
// If operation is * do multiplication: num1 * num2
} else if(! strcmp($operator, ‘*’)) {
$result = $num1 * $num2;
// If operation is / do division: num1 / num2
} else if(! strcmp($operator, ‘/’)) {
// If second number is 0, show divide by zero exception
if (! $num2) {
$errors .= $ERRORS[LANGUAGE][‘DIVIDE_BY_ZERO’];
} else {
$result = sprintf(“%.2f”, $num1 / $num2);
}
}
// Create a new template object
$t = new Template($TEMPLATE_DIR);
// Set the template file for this object to application’s template
$t->set_file(“page”, $OUT_TEMPLATE);
// Setup the template block
$t->set_block(“page”, “mainBlock” , “main”);
// Set the template variable = value
$t->set_var(“ERRORS”, $errors);
$t->set_var(“NUM1”, $num1);
$t->set_var(“NUM2”, $num2);
$t->set_var(“OPERATOR”, $operator);
$t->set_var(“RESULT”, $result);
// Parse the template block with all predefined key=values
$t->parse(“main”, “mainBlock”, false);
// Parse the entire template and print the output
$t->pparse(“OUT”, “page”);
?>
</div>
<span class='text_page_counter'>(50)</span><div class='page_container' data-page=50>
The difference between
calc.phpand
calc2.phpis that
calc2.phpdoesn’t
have any error messages hard-coded in the script. The
calc.phperror messages
have been replaced with the following:
$errors .= $ERRORS[LANGUAGE][NUM1_MISSING];
$errors .= $ERRORS[LANGUAGE][NUM2_MISSING];
$errors .= $ERRORS[LANGUAGE][OPERATOR_MISSING];
$errors .= $ERRORS[LANGUAGE][DIVIDE_BY_ZERO];
The
calc2.phpscript loads error messages from the
calc2.errorsfile using the
following line:
require_once(‘calc2.errors’);
The
calc.errorsfile is shown in Listing 1-8.
<b>Listing 1-8: calc2.errors</b>
<?php
// US English
$ERRORS[‘US’][‘NUM1_MISSING’] = “<li>You did not enter number 1.”;
$ERRORS[‘US’][‘NUM2_MISSING’] = “<li>You did not enter number 2.”;
$ERRORS[‘US’][‘OPERATOR_MISSING’] = “<li>You did not enter the operator.”;
$ERRORS[‘US’][‘DIVIDE_BY_ZERO’] = “Divide by zero is not allowed.”;
// Spanish (translated using Google
// Uncomment the following lines to get Spanish error messages
// Also, set LANGUAGE in calc2.conf to ES
// $ERRORS[‘ES’][‘NUM1_MISSING’] = “<li>Usted no incorporo el numero 1”;
// $ERRORS[‘ES’][‘NUM2_MISSING’] = “<li>Usted no incorporo el numero 2.”;
// $ERRORS[‘ES’][‘OPERATOR_MISSING’] = “<li>Usted no inscribio a operador..”;
// $ERRORS[‘ES’][‘DIVIDE_BY_ZERO’] = “Dividase por cero no se permite.”;
?>
The
calc2.errorsfile loads a multidimensional associative array called
$ERRORS
. The first dimension is the language and the second dimension is error
code. For example:
$ERRORS[‘US’][‘NUM1_MISSING’] = “<li>You did not enter number 1.”;
‘US’
is shorthand code for the U.S. English language. The
NUM1_MISSINGis a
code that has the
“<li>You did not enter number 1.”error message associated
with it. When the
calc2.phpscript executes a line such as the following:
</div>
<span class='text_page_counter'>(51)</span><div class='page_container' data-page=51>
The
$errorsstring is set to the value of given code (
NUM1_MISSING) for the
cho-sen language (set using
LANGUAGEin the
calc2.confconfiguration file).
Since we have defined
LANGUAGEconstant as follows in
calc2.conf:
define(LANGUAGE, ‘US’);
The U.S. language versions of error messages are selected. However, if you
wanted to choose the Spanish language (
ES) version of error messages, all you have
to do is set
LANGUAGEto
ESin
calc2.confand uncomment the ES version of error
codes in
calc2.errorsfile. To save memory you can comment out the U.S. version
of the error code or remove them if wanted.
In most applications in this book we define $DEFAULT_LANGUAGEas the
language configuration for applications.
So you see how a simple configuration change can switch the language of a
script from English to Spanish. You can access a large number of major languages
using this method.
We translated the U.S. English to Spanish using Google’s language
transla-tion service and therefore the accuracy of the translatransla-tion is not verified.
In larger application, you will not only have error messages but also messages
that are shown in dialog windows or status screens. In such case you can use the
exact same type of configuration files to load messages. In most of the applications
throughout the books we use app_name
.messagesfor dialog/status messages and
<i>app_name</i>.errors
for error messages.
<b>Using relational database</b>
If you need to store data, strongly consider using a relational database. My
experi-ence shows that, in the beginning of most projects, developers decide whether to
use a database based on available data, complexity of managing data, and expected
growth rate of data. Initially, all of these seem trivial in many projects and,
there-fore, a flat file or comma-separated values (CSV) files–based data store is elected
for quick and dirty jobs.
If you have access to a fast database such as MySQL, strongly consider storing
your application data in the database. The benefits of a database like MySQL are
almost unparalleled when compared with other data-storage solutions.
</div>
<span class='text_page_counter'>(52)</span><div class='page_container' data-page=52>
<b>Using portable directory structure</b>
When designing the directory structure of your application, consider a portable
one. A portable directory structure is one that is easy to deploy and avoids
hard-coded fully qualified paths whenever possible. Almost all the applications in this
book use the following portable directory structure:
%DocumentRoot%
|
+---app_name
|
+--apps
|
+---class
|
+---templates
For example, the calendar application in Chapter 10 uses the following:
%DocumentRoot%
|
+---framework
|
+---pear
|
+---phplib
|
+---calendar
|
+--apps
|
+---class
|
+---templates
This directory structure can be created using the following PHP code
// If you have installed PEAR packages in a different
// directory than %DocumentRoot%/pear change the setting below.
$PEAR_DIR = $_SERVER[‘DOCUMENT_ROOT’] . ‘/pear’ ;
// If you have installed PHPLIB in a different
</div>
<span class='text_page_counter'>(53)</span><div class='page_container' data-page=53>
// If you have installed framewirk directory in a different
// directory than %DocumentRoot%/framework, change the setting below.
$APP_FRAMEWORK_DIR = $_SERVER[‘DOCUMENT_ROOT’] . ‘/framework’;
//If you have installed this application in a different
// directory than %DocumentRoot%, chance the settings below.
$ROOT_PATH = $_SERVER[‘DOCUMENT_ROOT’];
$REL_ROOT_PATH = ‘/calendar’;
$REL_APP_PATH = $REL_ROOT_PATH . ‘/apps’;
$TEMPLATE_DIR = $ROOT_PATH . $REL_APP_PATH . ‘/templates’;
$CLASS_DIR = $ROOT_PATH . $REL_APP_PATH . ‘/class’;
$REL_TEMPLATE_DIR = $REL_APP_PATH . ‘/templates/’;
The key point is that you should avoid hard-coding a fully qualified path in the
application so that deployment of your application is as hassle-free as it can be. For
example, say you have developed the application on your Web server with the
fol-lowing directory structure:
/usr/local/apache/htdocs
|
+---<i>your_app</i>
|
+---templates
If
/usr/local/apache/htdocsis your Web server’s document root
(
%DocumentRoot%), make sure that you haven’t hard-coded it in the configuration.
If you use
$TEMPLATE_DIRto point to your template directory in
your_app.conf,
you should use the following:
$ROOT_PATH = $_SERVER[‘DOCUMENT_ROOT’];
$REL_ROOT_PATH = ‘/<i>your_app</i>;
$TEMPLATE_DIR = $ROOT_PATH . ‘/templates’;
Instead of:
$TEMPLATE_DIR =
‘/usr/local/apache/htdocs/<i>your_app</i>/templates’;
The benefit of the non-hard-coded version is that if you created a tar ball or a
zip file of your entire application and gave it to another user whose Web document
root is set to something else, she doesn’t have to change your application
configu-ration for fixing paths as long as she installs the application in the
%DocumentRoot%/<i>your_appsee</i>
directory.
</div>
<span class='text_page_counter'>(54)</span><div class='page_container' data-page=54>
<b>Using access control</b>
If your PHP application is deployed on a site where unauthorized use is possible,
you have to implement access control. Access control can be established using two
methods:
◆
Authentication, such as restriction using username/password. You can
learn more about this in detail in Chapter 5.
◆
Authorization, such as IP/network address allow/deny control. You can
learn more about this in detail in Chapter 22.
You can deploy one or both of these techniques in developing a comprehensive
access control for sensitive applications.
<b>Summary</b>
</div>
<span class='text_page_counter'>(55)</span><div class='page_container' data-page=55>
<b>Chapter 2</b>
<b>Understanding and</b>
<b>Avoiding Security Risks</b>
<b>IN THIS CHAPTER</b>
◆
Identifying sources of risks
◆
Minimizing user-input risks
◆
Running external programs safely
◆
Acquiring user input in a safe manner
◆
Protecting sensitive information
<b>B</b>
<b>EFORE YOU CAN DESIGN</b>secure PHP applications, you have to understand the
secu-rity risks involved and know how to deal with them. In this chapter, we will discuss
the most common risks involved with Web-based PHP applications.
<b>Identifying the Sources of Risk</b>
The sources of most security problems are user input, unprotected security
infor-mation, and unauthorized access to applications.
Among these risk factors, user input stands out the most, and it is also the most
exploited to make unauthorized, unintended use of applications. A poorly written
PHP application that handles user input as safe data provides ample opportunity for
security breaches quite easily.
Sensitive data is often made available unintentionally by programs to people
who should not have any access to the information. Such exposure can result in
disaster if the information falls in the hands of a malicious hacker.
Unauthorized access is difficult to deal with if users can’t be authenticated using
user names and passwords and/or hostname/IP address based access control cannot
be established. User authentication and access control are covered in detail in
Chapter 5 and Chapter 22 so we will not discuss them here.
In the following sections, we discuss these risks and potential solutions in detail.
</div>
<span class='text_page_counter'>(56)</span><div class='page_container' data-page=56>
<b>Minimizing User-Input Risks</b>
As previously mentioned, user input poses the most likely security risk to your Web
applications. Let’s look at a few scenarios for how seemingly harmless and simple
programs can be made to do malicious tasks.
<b>Running external programs with user input</b>
Listing 2-1 shows a simple PHP script called
bad_whois.php(
bad_has been added
so that you think twice before actually putting this script in any real Web site).
<b>Listing 2-1: </b>bad_whois.php
<?php
// Set error reporting to all
error_reporting(E_ALL);
// Get domain name
$domain = (! empty($_REQUEST[‘domain’])) ?
$_REQUEST[‘domain’] : null;
// The WHOIS binary path
$WHOIS = ‘/usr/bin/whois’;
// Execute WHOIS request
exec(“$WHOIS $domain”, $output, $errors);
// Initialize output buffer
$buffer = null;
while (list(,$line)=each($output))
{
$buffer .= $line . ‘<br>’;
}
</div>
<span class='text_page_counter'>(57)</span><div class='page_container' data-page=57>
if (! empty($errors))
{
echo “Error: $errors when trying to run $WHOIS<br>”;
}
?>
This simple script displays the whois database information for a given domain. It
can be run like this:
http://server/bad_whois.php?domain=evoknow.com
The output is shown in Figure 2-1.
<b>Figure 2-1: Harmless output of </b>bad_whois.php<b>script.</b>
Now what’s wrong with this output? Nothing at all.
domain=evoknow.comis
used as an argument to execute the
/usr/bin/whoisprogram. The result of the
script is the way it was intended by the programmer: It displays the whois database
query for the given domain.
But look what happens when the user runs this same script as follows:
http://server/bad_whois.php?domain=evoknow.com;cat%20/etc/passwd
</div>
<span class='text_page_counter'>(58)</span><div class='page_container' data-page=58>
The output is shown in Figure 2-2.
<b>Figure 2-2: Dangerous output of </b>bad_whois.php<b>script.</b>
The user has supplied
domain=evoknow.com;cat%20/etc/passswd, which is
run by the script as
$runext = exec(“/usr/bin/whois evoknow.com;cat /etc/passwd”, $output);
The user has not only supplied a domain name for the whois program but also
inserted a second command using the semicolon separator. The second command is
cat /etc/passwd
, which displays the
/etc/passwdfile. This is where this simple
script becomes a tool for the malicious hackers to exploit system information or
even do much more harmful activities such as running the
rm -rfcommand to
delete files and directories.
Now, what went wrong with the simple script? The script programmer trusted
user input and will end up paying a big price for such a misplaced trust. You should
never trust user input when you have no idea who the next user is. Listing 2-2
shows an improved version of
bad_whois.phpscript called
better_whois.php.
<b>Listing 2-2: </b>better_whois.php
<?php
// Set error reporting to all
error_reporting(E_ALL);
</div>
<span class='text_page_counter'>(59)</span><div class='page_container' data-page=59>
$secureDomain = (! empty($_REQUEST[‘domain’])) ?
escapeshellcmd($_REQUEST[‘domain’]) : null;
// The WHOIS binary path
$WHOIS = ‘/usr/bin/whois’;
echo “Running whois for $secureDomain <br>”;
// Execute WHOIS request
exec(“$WHOIS $secureDomain”, $output, $errors);
// Initialize output buffer
$buffer = null;
while (list(,$line)=each($output))
{
if (! preg_match(“/Whois Server Version/i”, $line))
{
$buffer .= $line . ‘<br>’;
}
}
echo $buffer;
if (! empty($errors))
{
echo “Error: $errors when trying to run $WHOIS<br>”;
}
?>
If this script is run as
http://server/bette_whois.php?domain=evoknow.com;cat%20/etc/passwd
it will not run the
cat /etc/passwdcommand, because the escaping of shell
characters using the
escapeshellcmd()function makes the given domain name
evoknow.com\;cat /etc/passwd
. Because this escaped version of the (illegal)
domain name does not exist, the script doesn’t show any results, which is much
better than showing the contents of
/etc/passwd.
So why didn’t we call this script
great_whois.php? Because it still has a
user-input-related problem, which is discussed in the next section.
</div>
<span class='text_page_counter'>(60)</span><div class='page_container' data-page=60>
<b>Getting user input in a safe way</b>
In the preceding example, we had user input returned to us via the HTTP
GETmethod as part of the URL, as in the following example:
http://server/bette_whois.php?domain=evoknow.com
When
better_whois.phpis called, it automatically gets a variable called
$domain
created by PHP itself. The value of the
$domainvariable is set to
evo-know.com
.
This automatic creation of input variables is not safe. For an example, take a
look at Listing 2-3.
<b>Listing 2-3: </b>bad_autovars.php
<?php
error_reporting(E_ALL);
// This bad example will only work
// if you have register_globals = Off
// in your php.ini.
// This example is for educational
// purpose only. It will not work in
// sites with register_globals = On
global $couponCode;
if (is_coupon($couponCode))
{
$is_customer = isCustomer();
}
if ($is_customer)
{
echo “You are a lucky customer.<br>”;
echo “You won big today!<br>”;
} else {
echo “Sorry you did not win!<br>”;
}
</div>
<span class='text_page_counter'>(61)</span><div class='page_container' data-page=61>
// some code to verify coupon code
echo “Check if user given coupon is valid or not.<br>”;
return ($code % 1000 == 0) ? TRUE : FALSE;
}
function isCustomer()
{
// a function to determine if current user
// user is a customer or not.
// not implemented.
echo “Check if user is a customer or not.<br>”;
return FALSE;
}
?>
When this script is run as
http://server/bad_autovars.php?couponCode=2000
it checks to see if the coupon code is valid. The
is_coupon()function takes the
user given coupon code and checks if the given code is completely divisible by
1000 or not. Code that are divisible by 1000 are considered valid and the function
returns TRUE else it returns FALSE. If the coupon code is valid, it checks whether
the current user is a customer. If the current user is a customer, it shows a message
indicating that the customer is a winner. If the current user is not a customer, it
shows the following:
Check if user given coupon is valid or not.
Check if user is a customer or not.
Sorry you did not win!
Because we didn’t implement the
isCustomer()function, we return
FALSEat all
times, so there’s no way we should ever show a message stating that the current
user is a winner. But alas! Look at the following request:
http://server/bad_autovars.php?couponCode=1001&is_customer=1
Even with an invalid coupon, the user is able to see the following message:
Check if user given coupon is valid or not.
You are a lucky customer.
You won big today!
</div>
<span class='text_page_counter'>(62)</span><div class='page_container' data-page=62>
Do you know why the user is able to see the preceding message? Because this
user has supplied
is_customer=1, which became an automatic variable and forced
the winner message to appear. This type of trick can be done only with strong
knowledge of the application being used. For example, if this was a free script
widely used by many sites, a malicious hacker could force it to get what he wants.
This example demonstrates that automatic variables can be tricked into doing
things that are not intended by the programmers, so we need to have a better way
of getting user data. Thankfully, PHP 4.2 or above by default do not create
auto-matic variables. Creating autoauto-matic variables is turned off in the
php.iniconfigu-ration file using the following configuconfigu-ration parameter:
register_globals = Off
When register_globals is off by default, PHP does not create automatic variables.
So how can you get data from the user? Very easily using
$_GET,
$_POST,
$_REQUEST
,
$_SERVER,
$_SESSION,
$_ENV, and
$_COOKIE. Table 2-1 shows which of
these variables correspond to what input of a request.
<b>T</b>
<b>ABLE</b><b>2-1 PHP GLOBAL-REQUEST-RELATED AUTOMATIC VARIABLES</b>
<b>Variable</b>
<b>Description</b>
$_GET Used for storing data passed via HTTP GETmethod. For example,
http://server/any.php?a=1&b=2will result in
$_GET[‘a’] = 1;
$_GET[‘b’] = 2;
$_POST Used for storing data passed via HTTP POSTmethod. For
example:
<form action=”any.php” method=”POST”>
<input type=text name=”email”>
<input type=hidden name=”step” value=”2”>
</form>
When this form is submitted, the any.php will have
$_POST[‘email’] = user_supplied_email
$_POST[‘step’] = 2
$_REQUEST Works for both GETand POST. This variable is the best choice
because it will work with your application whether data is
submitted via the GETmethod or the POSTmethod.
$_SESSION Stores session data.
</div>
<span class='text_page_counter'>(63)</span><div class='page_container' data-page=63>
<b>Variable</b>
<b>Description</b>
$_ENV Stores environment information.
$_FILES Stores uploaded file information.
$GLOBALS All global variables that are stored in this associative array.
Now let’s implement
bad_autovars.phpwithout the automatic field variables as
shown in Listing 2-4.
<b>Listing 2-4: </b>autovars_free.php
<?php
// Enable all error reporting
error_reporting(E_ALL);
// Initialize
$is_customer = FALSE;
// Get coupon code
$couponCode = (! empty($_REQUEST[‘couponCode’])) ?
$_REQUEST[‘couponCode’] : null;
if (is_coupon($couponCode))
{
$is_customer = isCustomer();
}
if ($is_customer)
{
echo “You are a lucky customer\n”;
echo “You win big today!\n”;
} else {
echo “Sorry you do not win!\n”;
}
function is_coupon($code = null)
{
// some code to verify coupon code
echo “Check if user given coupon is valid or not <br>”;
return ($code % 1000 == 0) ? TRUE : FALSE;
<i>Continued</i>
</div>
<span class='text_page_counter'>(64)</span><div class='page_container' data-page=64>
<b>Listing 2-4</b><i>(Continued)</i>
}
function isCustomer()
{
// a function to determine if current user
// user is a customer or not.
// not implemented.
echo “Check if user is customer <br>”;
return FALSE;
}
?>
<?php
// Enable all error reporting
error_reporting(E_ALL);
// Initialize
$is_customer = FALSE;
// Get coupon code
$couponCode = (! empty($_REQUEST[‘couponCode’])) ?
$_REQUEST[‘couponCode’] : null;
if (is_coupon($couponCode))
{
$is_customer = isCustomer();
}
if ($is_customer)
{
echo “You are a lucky customer\n”;
echo “You win big today!\n”;
} else {
echo “Sorry you do not win!\n”;
}
function is_coupon($code = null)
{
// some code to verify coupon code
echo “Check if user given coupon is valid or not <br>”;
return ($code % 1000 == 0) ? TRUE : FALSE;
}
function isCustomer()
{
</div>
<span class='text_page_counter'>(65)</span><div class='page_container' data-page=65>
// not implemented.
echo “Check if user is customer <br>”;
return FALSE;
}
?>
Here
$is_customeris first initialized to
FALSE, which makes it impossible for the
user to set it using the
GETor
POSTmethod. Next, improvement is made by using
the
$_REQUEST[‘couponCode’]to get the coupon data. With this version, the user
can’t force
$is_customerto any value and, therefore, the code works as intended.
<b>Using validation code</b>
In addition to getting user data from
$_REQUEST, you also need to validate user
input, because it may contain unwanted patterns that cause security problems.
Sometimes programmers confuse validation with cleanup. Earlier, in Listing 2-2
(
better_whois.php), we used
escapeshellcmd()to escape any user-provided
shell characters. This would qualify as a cleanup or quarantine operation. A
valida-tion operavalida-tion checks the validity of the data and, if it’s invalid, the script rejects it
instead of fixing it.
For example, say you have a PHP script that expects a data field called num1.
You can do a test like the following:
if (!is_numeric($_REQUEST[‘num1’]))
{
// User supplied num1 not a number!
}
There are many built-in functions, such as
is_numeric(),
is_int(),
is_float()
,
is_array(), and so forth, that you can use to perform validation.
However, often you want to validate a number or string from a different
prospec-tive. For example, e-mail addresses are strings, but not all strings are e-mail
addresses. To validate e-mail addresses, you need a validation function for e-mail
address. Similarly, ZIP codes are special type of numbers with
nnnnnor
nnnnn-nnnn
formats. For validating ZIP codes, you would need to create custom validation
functions. Your validation functions should return
TRUEfor valid data and
FALSEfor invalid data. The following is a simple structure of a validation function:
function isValidFIELDNAME($fieldValue = null)
}
// Perform validation code here
// You must return TRUE here if valid.
// Default is false
return FALSE;
}
</div>
<span class='text_page_counter'>(66)</span><div class='page_container' data-page=66>
Validation can be done not only on data types but also on other aspects of the
user input. However, the type validation is more of a security concern than the
actual meaning of the value in your application context. For example, say the user
fills out a form field called “age” with a value of 3000. Because we have yet to find
a person anywhere (on Earth or anywhere else) who lived 3,000 years, the age value
is invalid. However, it isn’t an invalid data type. In this case, you may want to
com-bine all your validity checking in a single
isValidAge()function.
One of the best ways to validate data is to use regular expressions. Following are
some of the regular expression functions PHP provides:
◆ <b>preg_match()</b>
<b>.</b>
This function takes a regular expression and searches for
it in the given string. If a match is found, it returns
TRUE;otherwise, it
returns
FALSE. The matched data can also be returned in an array. It stops
searching after finding the first match. For example, say you want to find
out if a user data field called
$userDatacontains anything other than
digits. You can test it with
preg_match(“/[^0-9]/”, $userData). Here,
the regular expression
/[^0-9]/tells
preg_matchto find anything but
the digits.
◆ <b>preg_match_all()</b>
<b>.</b>
This function is just like
preg_match(), except it
continues searching for all regular expression patterns in the string. For
example:
preg_match(“/[^0-9]/”, $userData, $matches). Here the
regular expression
/[^0-9]/tells
preg_match_allto find anything but
the digits and store them in $matches.
◆ <b>preg_quote()</b>
<b>.</b>
You can use this function to escape a regular expression
that contains regular expression characters. For example, say you want to
find out if a string called
$userDatacontains a pattern such as
“[a-z]”.
If you call the
preg_match()function as
preg_match(“/[a-z]/”,$userData)
, it will return wrong results because
“[a-z]”happens to be a
valid regular expression itself. Instead, you can use
preg_quote()to
escape
“[a-z]”and then use it in the
preg_match()call. For example,
preg_match(‘/’ . preg_quote(“[a-z]”) . ‘/’ , $userData)
will
work.
There are other functions such as
preg_grep(),
preg_replace(), and so forth,
that are also useful. For example, you can access information on these functions
via
and
/>preg_replace. Instead of writing validation routines for common data types, you
can find free validation classes on the Web. One such class is called
Validator,
which can be found at
www.thewebmasters.net/php/Validator.phtml.
</div>
<span class='text_page_counter'>(67)</span><div class='page_container' data-page=67>
<b>Listing 2-5: </b>myform.php
<?php
error_reporting(E_ALL);
define(‘DEBUG’, FALSE);
include(“class.Validator.php3”);
// Create a Validator object
$check = new Validator ();
// Get User data
$email = (! empty($_REQUEST[‘email’])) ? $_REQUEST[‘email’] : null;
$state = (! empty($_REQUEST[‘state’])) ? $_REQUEST[‘state’] : null;
$phone = (! empty($_REQUEST[‘phone’])) ? $_REQUEST[‘phone’] : null;
$zip = (! empty($_REQUEST[‘zip’])) ? $_REQUEST[‘zip’] : null;
$url = (! empty($_REQUEST[‘url’])) ? $_REQUEST[‘url’] : null;
DEBUG and print “Debug Code here \n”;
// Call validation methods
if (!$check->is_email($email)) { echo “Invalid email format<br>\n”;}
if (!$check->is_state($state)) { echo “Invalid state code<br>\n”; }
if (!$check->is_phone($phone)) { echo “Invalid phone format<br>\n”;}
if (!$check->is_zip($zip)) { echo “Invalid zip code<br>\n”; }
if (!$check->is_url($url)) { echo “Invalid URL format<br>\n”; }
// If form data has errors show error and exit
if ($check->ERROR)
{
echo “$check->ERROR<br>\n”;
exit;
}
// Process form now
echo “Form processing not shown here.<br>”;
?>
The class
Validator.php3is included in the script. The
$checkvariable is a
Validator
object, which is used to validate user-supplied data. If there is any error
in any of the validation checks — that is, if any of the validation methods return
false — the script displays an error message. If no error is found, the script continues
to process the form, which is not shown in this sample code. To learn more about
the validation methods that are available in this class, review the documentation
supplied with the class.
</div>
<span class='text_page_counter'>(68)</span><div class='page_container' data-page=68>
<b>Not Revealing Sensitive Information</b>
Another major source of security holes in applications is unnecessary disclosure of
information. For example, say you have a script called
mysite.phpas follows:
<?php
phpinfo();
?>
This script shows all the PHP information about the current site, which is often very
useful in finding various settings. However, if it is made available to the public, you
give malicious hackers a great deal of information that they would love to explore
and potentially exploit.
Such a harmless script can be a security hole. It reveals too much information
about a site. For security purposes, it is extremely important that you don’t reveal
your system-related information about your site to anyone. We recommend that you use
phpinfo()
in only development systems which should not be allowed to be accessed by
everyone on the Web. For example, you can use
$_SERVER[‘REMOTE_ADDR’]value to
restrict who has access to a sensitive script. Here is an example code segment:
<?php
// Enable all error reporting
error_reporting(E_ALL);
// Create a list of valid IP addresses that can access
// this script
$validIPList = array(‘192.168.1.1’, ‘192.168.1.2’);
// If current remote IP address is not in our valid list of IP
// addresses, do not allow access
if (! in_array($_SERVER[‘REMOTE_ADDR’], $validIPList))
{
echo “You do not access to this script.”;
exit;
}
// OK, we have a valid IP address requesting this script
// so show page
</div>
<span class='text_page_counter'>(69)</span><div class='page_container' data-page=69>
Here the script exists whenever a request to this script comes from a remote IP
address that is not in the valid IP list ($validIPList).
Let’s take a look at some other ways in which you can safely conceal
informa-tion about your applicainforma-tion:
◆
<b>Remove or disable any debugging information from your application.</b>
Debugging information can provide clues about your application design
(and possibly its weaknesses) to others who may take the opportunity to
exploit them. If you add debugging code, use a global flag to enable and
disable debugging. For example:
<?php
define(‘DEBUG’, FALSE);
DEBUG and print “Debug message goes here.\n”;
?>
Here
DEBUGconstant is set to
FALSEand, therefore, the
printstatement is
not going to print anything. Setting
DEBUGto
TRUEenables debug
mes-sages. If all your debug code is enabled or disabled in this manner, you
can easily control
DEBUGmessages before you put the script in the
pro-duction environment.
◆
<b>Don’t reveal sensitive paths or other information during Web-form</b>
<b>processing.</b>
A common misunderstanding that hidden fields are secret,
often causes security-novice developers to reveal sensitive path or other
information during Web-form processing. For example:
<input type=hidden name=”save_path”
value=”/www/secret/upload”>
This line in a HTML form is not hidden from anyone who has a decent
Web browser with the View Source feature. So do not ever rely on hidden
field for security. Use hidden fields only for storing information that are
not secret.
◆
<b>Never store sensitive information on the client side.</b>
If you must store
sensitive data, consider using a database or at least a file-based session,
which will store data on the server side. If you must store data on the
client side for some special reason, consider encrypting the data (not just
encoding it). See Chapter 22 for details on data encryption.
</div>
<span class='text_page_counter'>(70)</span><div class='page_container' data-page=70>
<b>Summary</b>
In this chapter, you learned about the common security risks for PHP applications
and how to deal with them. Most of the security risks are related to user input and
how you handle them in your scripts. Expecting all users will behave politely and
will not try to break your code is not at all realistic. Let’s face it, there are a lot of
people (of all ages) with too much free time and Internet bandwidth these days,
which means there is a lot out there with intents to hack, deface Web sites just for
the sake of it. So do not trust user input to be just what you need to run your
appli-cation. You need to deal with unexpected input as well.
</div>
<span class='text_page_counter'>(71)</span><div class='page_container' data-page=71>
<b>Chapter 3</b>
<b>PHP Best Practices</b>
<b>IN THIS CHAPTER</b>
◆
Best practices for naming variables and functions or methods
◆
Best practices for functions or methods
◆
Best practices for database
◆
Best practices for user interface
◆
Best practices for documentation
◆
Best practices for configuration management
<b>T</b>
<b>HE APPLICATION CODE PRESENTED</b>in this book uses a set of programming practices
that qualify as best practices for any PHP application development. This chapter
discusses these practices. Familiarizing yourself with them will ease the learning
curve for the applications discussed in the rest of the book.
<b>Best Practices for Naming Variables</b>
<b>and Functions</b>
Top software engineers know that good variable, function (or method), and class
names are necessary for the maintainability of the code. A good name is one that
conveys meaning related to the named function, object, class, variable, etc.
Application code becomes very difficult to understand if the developers don’t use
good, meaningful names. Take a look at the following code sample:
<?php
error_reporting(E_ALL);
$name = (! empty($_REQUEST[‘field1’])) ? $_REQUEST[‘field1’] : “Friend”;
outputDisplayMsg(“Hello $name”);
exit;
</div>
<span class='text_page_counter'>(72)</span><div class='page_container' data-page=72>
function outputDisplayMsg($outTextMsgData = null)
{
echo $outTextMsgData;
}
?>
Now look at the same code segment with meaningful names for variables and
functions:
<?php
error_reporting(E_ALL);
$name = (! empty($_REQUEST[‘field1’])) ? $_REQUEST[‘field1’] : “Friend”;
showMessage(“Hello $name”);
exit;
function showMessage($outTextMessageData = null)
{
echo $outTextMessageData;
}
?>
The second version is clearly easier to understand because showMessage is a
bet-ter name for the outputDisplayMsg function.
Now let’s look at how you can use easy-to-understand names for variables,
functions (or methods), and classes.
When creating a new variable or function name (or method), ask yourself the
following questions:
◆
What is the purpose of this variable? In other words, what does this
vari-able hold?
◆
Can you use a descriptive name that represents the data the variable
holds?
</div>
<span class='text_page_counter'>(73)</span><div class='page_container' data-page=73>
After you determine a name, follow these rules:
◆
<b>Use title casing for each word in multiword names.</b>
However, the very
first word should be lowercase. For example,
$msgBodyis a better name
then
$msgbody,
$messageBODY, or
$message_body. Single word names
should be kept in lowercase. For example, $path and $data are single
word variables.
◆
<b>Use all capital letters to name variables that are “constant like” — in</b>
<b>other words, variables that do not change within the application.</b>
For
example, if you read a variable from a configuration file, the name of the
variable can be in all uppercase. To separate uppercase words, use
under-score character (for example, use
$TEMPLATE_DIRinstead of
$TEMPLATE-DIR
). However, when creating constants it is best to use
define()function. For example,
define(PI, 3.14)is preferred over
$PI = 3.14.
The defined constant PI cannot be changed once defined whereas $PI can
be changed.
◆
<b>Use verbs such as get, set, add, delete, modify, update, and so forth in</b>
<b>naming your function or method.</b>
For example,
getSomething(),
setSomething()
, and
modifySomething()are better function names
than
accessSomething(),
storeSomething(), and
editSomething(),
respectively.
<b>Best Practices for Function/Method</b>
In this section I discuss a set of practices that will improve your function or method
code.
<b>Returning arrays with care</b>
When your function (or method) returns an array, you need to ensure that the
return value is a defined array because the code from which the function is called
is expecting an array. For example, review the following bad code segment.
// BAD
function getData()
{
$stmt = “SELECT ID, myField1, myField2 from myTable”;
$result = $this->dbi->query($stmt);
</div>
<span class='text_page_counter'>(74)</span><div class='page_container' data-page=74>
if ($result != NULL)
{
while($row = $result->fetchRow())
{
$retArray[$row->ID] = $row;
}
}
return $retArray;
}
In this example, the function called
getData()returns an array called
$retArray
when the SQL statement executed returns one or more rows. The
func-tion works fine if the SQL
selectstatement always returns at least one row.
However, it returns nothing when the SQL statement returns no rows. In such a
case, the following code segment, which calls the function, produces a PHP
warn-ing message:
error_reporting(E_ALL);
$rowObjectArray = $this->getData();
while(list($id, $rowObject) = each($rowObjectArray))
{
// do something here
}
$rowObjectArray
causes
each()to generate a warning when the
myFunction()
method fails to return a real array. Here’s a better version of the
getData()
method:
// GOOD
function getData()
{
$retArray = array();
$stmt = “SELECT ID, myField1, myField2 from myTable”;
$result = $this->dbi->query($stmt);
</div>
<span class='text_page_counter'>(75)</span><div class='page_container' data-page=75>
{
while($row = $result->fetchRow())
{
$retArray[$row->ID] = $row;
}
}
return $retArray;
}
The second version of
getData()function initializes
$retArrayas an array,
which ensures that functions such as
each()do not complain about it.
You can avert PHP warning messages by initializing arrays using array().
<b>Simplifying the function or method </b>
<b>argument list order issue</b>
When a function or method has many arguments, as shown in the following code,
bugs are more likely to appear because of data mismatches in function calls.
// Not So Good
function myFunction($name = null,
$email = null,
$age = null,
$addr1 = null,
$addr2 = null,
$city = null,
$state = null,
$zip = null
)
{
echo “Name = $name\n”;
echo “Email = $email\n”;
echo “Age = $age\n”;
echo “Address 1 = $addr1\n”;
</div>
<span class='text_page_counter'>(76)</span><div class='page_container' data-page=76>
echo “Address 2 = $addr2\n”;
echo “City = $city\n”;
echo “State = $state\n”;
echo “ZIP = $zip\n”;
}
// First call
myFunction($name,
$email,
$age,
$addr1,
$addr2,
$city,
$state,
$zipcode
);
// Second call
myFunction($name,
$email,
$age,
$addr2,
$addr1,
$city,
$state,
$zipcode
);
In this example, the function
myFunction()expects a list of arguments. The code
segment also shows two calls to this function. Notice that the second call has
$addr1
and
$addr2misplaced. This type of argument misplacement is very
com-mon and is the cause of many bugs that take a great deal of time to fix.
When you have a function that requires a large number of parameters to be
passed, use an associative array, as shown in the following code segment:
$params = array(
</div>
<span class='text_page_counter'>(77)</span><div class='page_container' data-page=77>
myFunction($params);
function myFunction($params = null)
{
echo “Name = $params[‘NAME’]\n”;
echo “Email = $params[‘EMAIL’]\n”;
echo “Age = $params[‘AGE’]\n”;
echo “Address 1 = $params[‘ADDR1’]\n”;
echo “Address 2 = $params[‘ADDR2’]\n”;
echo “City = $params[‘CITY’]\n”;
echo “State = $params[‘STATE’]\n”;
echo “ZIP = $params[‘ZIP’]\n”;
}
$params
is an associative array, which is set up using
key=valuepairs. The
function is called with only one argument. The order of the
key=valuedoes not
mat-ter as long as the right key is used with the right value. This position-independent
way of passing values to the function is much less likely to cause parameter bugs in
your code.
<b>Best Practices for Database</b>
Most applications require database connectivity and, therefore, you need to know
about some best practices that will help you make your code more efficient and
bug-free. Here, I discuss the techniques that relate to relational database access. I
assume that you’re using the DBI class (
class.DBI.php), which is part of our
appli-cation framework discussed in Chapter 4. The DBI class is really a database
abstrac-tion layer that allows applicaabstrac-tions to access a set of database methods used to
perform operations such as connect, query, etc. Since this class hides the database
behind the scene, it provides a very easy way to change database backends from
MySQL to Postgres or vise versa when needed. By changing the DBI class code to
connect to a new database, an application can be easily ported from one database
to another.
<b>Writing good </b>
SELECT
<b>statements</b>
SELECT
is the most commonly used SQL statement that applications use to get data
from databases. Unfortunately, a large number of
SELECTstatements that you will
find in many applications use it in a way that can cause serious problems. For
example, look at the following code segment:
// Bad SELECT statement
$statement = “SELECT * FROM myTable”;
</div>
<span class='text_page_counter'>(78)</span><div class='page_container' data-page=78>
$result = $dbi->query($statement);
$result->fetchRow();
This
SELECTstatement gets all the columns (field values) from the named table
(
myTable). If the table is changed to have new fields, the
SELECTstatement will also
get values for the new fields. This is a side effect that can be good or bad.
It is a good side effect only if your code is smart enough to handle the new data.
Most codes are not written to do so. The bad effect could be that your code can
become slower due to additional memory requirements to hold the new data, which
is never used. For example, say that
myTablehas two fields,
IDand
NAME. The
example code segment works just fine until the DBA adds a new field called
COMMENTS
(large text field) in the table to allow another application to work with
comments. Our example code is adversely affected by this database change because
it now wastes memory loading
COMMENTSwhen there’s no use for this data in our
application. Using named fields in the
SELECTstatement is the solution.
// Good SELECT statement
$statement = “SELECT ID, NAME FROM myTable”;
$result = $dbi->query($statement);
$result->fetchRow();
<b>Dealing with missing data</b>
When accessing data via
SELECTstatements, be prepared to handle situations
resulting from no data or missing data. For example:
// Bad
// no data or missing data
$statement = “SELECT myField1 FROM myTable”;
$result = $dbi->query($statement);
$result->fetchRow();
If
myTabledoesn’t have any data when this code executes, the
fetchRow()method
causes PHP to throw an exception. This can be easily avoided by ensuring that the
$result
object is not null before calling the
fetchRow()method of the
$resultobject, as the following code shows:
// Good
$statement = “SELECT myField1 FROM myTable”;
$result = $dbi->query($statement);
if ($result != null)
{
</div>
<span class='text_page_counter'>(79)</span><div class='page_container' data-page=79>
<b>Handling SQL action statements</b>
There are several best practices that make using SQL action statements such as
INSERT, UPDATE, and DELETE most effective. Here I will explain those practices.
<b>Quoting and protecting against slashes</b>
Quote database fields that are
charor
varchartypes, and escape for slashes.
Quoting character or varchar fields is important because these data types can have
keywords or punctuation marks that can be interpreted as part of an SQL statement
and thus producing wrong results. Escaping slashes in these data types is also very
important since data stored in these data types can be easily misinterpreted by the
SQL engine. Often I see code segments that are as shown here:
$params[‘FNAME’] = ‘Jennifer’;
$params[‘LNAME’] = ‘Gunchy’;
$params[‘SCHOOL’] = ‘CSUS, Sacramento’;
$params[‘YEAR’] = 4;
$this->myFunction($params);
// BAD
function myFunction($params = null)
{
$values = “‘“ . $params[‘FNAME’] . “‘,”;
$values .= “‘“ . $params[‘LNAME’] . “‘,”;
$values .= “‘“ . $params[‘SCHOOL’] . “‘,”;
$values .= $params[‘YEAR’];
$stmt = “INSERT INTO myTable VALUES($values)”;
$result = $this->dbi->query($stmt);
return ($result == DB_OK) ? TRUE : FALSE;
}
In this example, the
myFunction()method is called with
$paramsargument. Some
of the data fields stored in the
$paramsvariable are
charor
varcharfields and,
therefore, hard-coded quotations are used as they are stored in
$values. This type
of hard-coded quotation can easily break if the data value include the quotation
character. Here’s a better approach:
</div>
<span class='text_page_counter'>(80)</span><div class='page_container' data-page=80>
// GOOD
function myFunction($params = null)
{
$fields = array(‘FNAME’ => ‘text’,
‘LNAME’ => ‘text’,
‘SCHOOL’ => ‘text’,
‘YEAR’ => ‘number’
);
$fieldList = implode(‘,’, array_keys($fields));
while(list($fieldName, $fieldType) = each($fields))
{
if (strcmp($fieldType, ‘text’))
{
$valueList[] =
$this->dbi->quote(addslashes($params[$fieldName]));
} else {
$valueList[] = $params[$fieldName];
}
}
$values = implode(‘,’, $valueList);
$stmt = “INSERT INTO myTable ($fieldList) VALUES($values)”;
$result = $this->dbi->query($stmt);
return ($result == DB_OK) ? TRUE : FALSE;
}
In this example, an associative array called
$fieldsis used to store field and
field type information. A comma-separated value list called
$fieldListis created
using the keys from the
$fieldsarray.
A
whileloop is used to loop through each of the fields in the
$fieldsarray and
fields of type
‘text’are quoted using the
quote()method in our DBI class. Before
quoting the field value the
char/
varcharvalue is escaped for slashes using the
addslashes()
function.
The quoted, slash-escaped
char/
varcharvalues are stored in
$valueListarray.
Similarly, non-quoted numeric values are stored in
$valueList.
</div>
<span class='text_page_counter'>(81)</span><div class='page_container' data-page=81>
<b>Returning error condition</b>
When using SQL action statements, you cannot assume that your query is always
successful. For example:
// BAD
$statement = “UPDATE myTable SET myField1 = 100 WHERE ID = 1”;
$result = $dbi->query($statement);
Here the
$resultobject needs to be checked to see if the SQL action operation
was successful. The following code takes care of that:
// GOOD
$statement = “UPDATE myTable SET myField1 = 100 WHERE ID = 1”;
$result = $dbi->query($statement);
return ($result == DB_OK) ? TRUE : FALSE;
This segment returns
TRUEif
$result is set to
DB_OK; otherwise, it returns
FALSE. The
DB_OKconstant is set in the DB.php package used by class.DBI.php
dis-cussed in Chapter 4. For our discussion, what is important is that you should test
the result of a query to see if database operation was successful or not.
<b>Naming fields in INSERT</b>
<b>statements</b>
When inserting data in tables, many developers do not use field names in the
INSERT
statement, as the following code shows:
$params[1] = 30;
$params[2] = 500000;
myFunction($params);
// BAD
function myInsertFunction($params = null)
{
$stmt = “INSERT INTO myTable VALUES($params[1], $params[2])”;
$result = $this->dbi->query($stmt);
return ($result == DB_OK) ? TRUE : FALSE;
}
</div>
<span class='text_page_counter'>(82)</span><div class='page_container' data-page=82>
In this example, the
INSERTstatement is dependent on the ordering of the
para-meters and fields in the database. If the database administrator adds a new field
before any of the existing fields, the
INSERTstatement might fail. To remove such
a chance, use the following
INSERTstatement:
// GOOD
function myInsertFunction($params = null)
{
$stmt = “INSERT INTO myTable (AGE, INCOME) VALUES(“
“$params[1], $params[2])”;
$result = $this->dbi->query($stmt);
return ($result == DB_OK) ? TRUE : FALSE;
}
Now the
INSERTstatement uses field list (
AGE,
INCOME) to identify which fields
are being inserted in a row.
<b>Efficient update statement</b>
When updating data using the
UPDATEstatement, you need to create a list of
key=value
pairs to set database fields to respective values. Here’s an example of
how not to do this:
// BAD
function myUpdateFunction($params = null)
{
$values = “FNAME = ‘“ . $params[‘FNAME’] . “‘,” .
“LNAME = ‘“ . $params[‘LNAME’] . “‘,” .
“SCHOOL = ‘“ . $params[‘SCHOOL’] . “‘,” .
“YEAR = “ . $params[‘YEAR’];
$stmt = “UPDATE myTable SET $values WHERE ID = $params[‘ID’]”;
$result = $this->dbi->query($stmt);
</div>
<span class='text_page_counter'>(83)</span><div class='page_container' data-page=83>
This example is “bad” because the code is not clean or easy to manage if the
data-base field list grows or reduces. Here is the better version of the code:
// GOOD:
function myUpdateFunction($params = null)
{
$fields = array(‘FNAME’ => ‘text’,
‘LNAME’ => ‘text’,
‘SCHOOL’ => ‘text’,
‘YEAR’ => ‘number’
);
while(list($k, $v) = each($fields))
{
if (!strcmp($v, ‘text’))
{
$params[$k] = $this->dbi->quote(addslashes($params[$k]));
}
$valueList[] = $k . ‘=’ . $params[$k];
}
$values = implode(‘,’, $valueList);
$stmt = “UPDATE myTable SET $values WHERE ID = $params[‘ID’]”;
$result = $this->dbi->query($stmt);
return ($result == DB_OK) ? TRUE : FALSE;
}
In this example, the field list is stored in
$fieldsas a
field_name=field_typepair. The string data is first slash-escaped and quoted and all data are stored in
$valueList
as
field_name=field_valuepairs. A comma-separated list called
$values
is created from the
$valueList. The
UPDATEstatement then becomes quite
simple and is very readable and easy to maintain. If a new field is added to the
database, you simply update the
$fieldsarray; similarly, if a field is removed,
removing it from the
$fieldsarray takes care of it all.
</div>
<span class='text_page_counter'>(84)</span><div class='page_container' data-page=84>
<b>Best Practices for User Interface</b>
A user interface (UI) is a big part of the applications that we’re going to design and
develop throughout this book. Here are some very good practices that you should
consider when developing code that has UI.
<b>Avoiding HTML in application code</b>
Don’t use HTML tags in PHP code. HTML tags make the code very unmanageable.
For example:
echo “<html>”;
echo “<head><title>My Document</title></head>”;
echo “<body bgcolor=’#ffffff’>”;
echo “<h1>Hello $user</h1>”;
echo “</body>”;
echo “</html>”;
If the above code is in a PHP script, the HTML can only be changed
by modifying the PHP code itself. This means the person changing the
code needs to know PHP, which means someone with good HTML skill but
no PHP skill cannot change the interface, which is very common. This
is why it is not manageable.
When generating HTML interface for Web application, you should use HTML
tem-plate object. For example, below I show you how to use the PHPLIB Temtem-plate class
(found in template.inc) to create HTML template objects to display HTML page
where page is external to the code.
$TEMPLATE_DIR = ‘/some/path’;
$MY_TEMPLATE = ‘screen.ihtml’;
$template = new Template($TEMPLATE_DIR);
$template->set_file(‘fh’, $MY_TEMPLATE);
$template->set_block (‘fh’, ‘mainBlock’, ‘main’);
$template->set_var(‘USERNAME’, $user);
$template->parse(‘main’,’mainBlock’, false);
$template->pparse(‘output’, ‘fh’);
This example code does the following:
◆
Assigns a variable called
$TEMPLATE_DIRto /some/path and
$MY_TEMPLATE
variable to screen.ihtml.
</div>
<span class='text_page_counter'>(85)</span><div class='page_container' data-page=85>
◆
Uses the
set_block()method to assign the variable name
‘main’to a
block called
mainBlock, which is identified in the template using
<!--BEGIN mainBlock -->
and
<!-- END mainBlock -->tags.
◆
Uses the
set_var()method to replace a template tag called
{USERNAME}with data from
$uservariable.
◆
Uses the
parse()method to parse
mainBlockwithin the template.
◆
Parses the template to insert the contents of the already parsed
mainBlockin the output, and uses the
pparse()method to print all the contents of
the template.
<b>Listing 3-1: </b>screen.ihtml
<html>
<head><title>My Document</title></head>
<!-- BEGIN mainBlock -->
<body bgcolor=”#ffffff”>
<h1>Hello {USERNAME} </h1>
</body>
<!-- END mainBlock -->
</html>
<b>Generating HTML combo lists in application code</b>
When using HTML interface, especially Web forms to collect input data from users,
it is often necessary to display drop-down combo list (select) boxes. Ideally, the
PHP code responsible for generating the combo boxes should be free from HTML
tags so that total interface control remains within the HTML template. Here is a
code segment that creates a combo list using PHP but includes HTML tags:
//BAD:
$TEMPLATE_DIR = ‘/some/path’;
$MY_TEMPLATE = ‘bad_screen.ihtml’;
$cmdArray = array(
‘1’ => ‘Add’,
‘2’ => ‘Modify’,
‘3’ => ‘Delete’
);
</div>
<span class='text_page_counter'>(86)</span><div class='page_container' data-page=86>
while(list($cmdID, $cmdName) = each($cmdArray))
{
$cmdOptions .= “<option value=$cmdID>$cmdName</option>”;
}
$template = new Template($TEMPLATE_DIR);
$template->set_file(‘fh’, $MY_TEMPLATE);
$template->set_block (‘fh’, ‘mainBlock’, ‘main’);
$template->set_var(‘USERNAME’, $user);
$template->set_var(‘CMD_OPTIONS’, $cmdOptions);
$template->parse(‘main’,’mainBlock’, FALSE);
$template->pparse(‘output’, ‘fh’);
This example uses
bad_screen.ihtml, shown in Listing 3-2, as the HTML interface
file. A
whileloop is used to create
$cmdOptions. Notice that some HTML tags are
embedded in the following line:
$cmdOptions .= “<option value=$cmdID>$cmdName</option>”;
This violates the principle of keeping all HTML out of the code. There are situations in
which it isn’t possible to keep the HTML out, but in creating combo boxes you can.
<b>Listing 3-2: </b>bad_screen.ihtml
<html>
<head><title>My Document</title></head>
<!-- BEGIN mainBlock -->
<body bgcolor=”#ffffff”>
<h1>Hello {USERNAME} </h1>
<form>
<select name=”cmd”>
{CMD_OPTIONS}
</select>
<input type=submit>
</form>
</body>
<!-- END mainBlock -->
</html>
</div>
<span class='text_page_counter'>(87)</span><div class='page_container' data-page=87>
<b>Listing 3-3: </b>good_screen.ihtml
<html>
<head><title>My Document</title></head>
<!-- BEGIN mainBlock -->
<body bgcolor=”#ffffff”>
<h1>Hello {USERNAME} </h1>
<form>
<select name=”cmd”>
<!-- BEGIN optionBlock -->
<option value=”{CMD_ID}”>{CMD_NAME}</option>
<!-- BEGIN optionBlock -->
</select>
<input type=submit>
</form>
</body>
<!-- END mainBlock -->
</html>
To generate the combo box without having any HTML code inside the PHP
application, we modify the last code segment as follows:
$TEMPLATE_DIR = ‘/some/path’;
$MY_TEMPLATE = ‘bad_screen.ihtml’;
$cmdArray = array(
‘1’ => ‘Add’,
‘2’ => ‘Modify’,
‘3’ => ‘Delete’
);
$template = new Template($TEMPLATE_DIR);
$template->set_file(‘fh’, $MY_TEMPLATE);
$template->set_block (‘fh’, ‘mainBlock’, ‘main’);
$template->set_block (‘mainBlock’, ‘optionBlock’, ‘options’);
while(list($cmdID, $cmdName) = each($cmdArray))
{
$template->set_var(‘CMD_ID’, $cmdID);
$template->set_var(‘CMD_NAME’, $cmdName);
$template->parse(‘options’,’optionBlock’, TRUE);
}
</div>
<span class='text_page_counter'>(88)</span><div class='page_container' data-page=88>
$template->set_var(‘USERNAME’, $user);
$template->parse(‘main’,’mainBlock’, FALSE);
$template->pparse(‘output’, ‘fh’);
The embedded block
optionBlockis populated using the
whileloop, which
replaced the
CMD_ID, and
CMD_NAMEinside the loop. The
parse()method that is
called to parse the
optionBlockhas the append flag set to
TRUE. In other words,
when the block is parsed, the output of the last parsed block is appended to the
cur-rent one to make the list of options.
Finally, the
mainBlockis parsed as usual and the combo box is generated
com-pletely from the interface template, without needing HTML tags in the PHP code.
<b>Reducing template code</b>
When using the
Templateobject to display a user interface, you may think that
many calls to the
set_var()method are needed to replace template tags. For
example:
// OK - could be better
$TEMPLATE_DIR = ‘/some/path’;
$MY_TEMPLATE = ‘screen.ihtml’;
$template = new Template($TEMPLATE_DIR);
$template->set_file(‘fh’, $MY_TEMPLATE);
$template->set_block (‘fh’, ‘mainBlock’, ‘main’);
$template->set_var(‘FIRST’, $first);
$template->set_var(‘LAST’, $last);
$template->set_var(‘EMAIL’, $email);
$template->set_var(‘AGE’, $age);
$template->set_var(‘GENDER’, $gender);
$template->parse(‘main’,’mainBlock’, false);
$template->pparse(‘output’, ‘fh’);
If you are assigning a lot of template variables to values like in the previous code
segment, you can reduce the number of
set_var()calls by combining all of the
calls into a single call. This will speed up the application since a single call is faster
than many calls to a method. An improved version of this script is shown below.
// BETTER
</div>
<span class='text_page_counter'>(89)</span><div class='page_container' data-page=89>
$template = new Template($TEMPLATE_DIR);
$template->set_file(‘fh’, $MY_TEMPLATE);
$template->set_block (‘fh’, ‘mainBlock’, ‘main’);
$template->set_var( array(
‘FIRST’ => $first,
‘LAST’ => $last,
‘EMAIL’ => $email,
‘AGE’ => $age,
‘GENDER’ => $gender
)
);
$template->parse(‘main’,’mainBlock’, false);
$template->pparse(‘output’, ‘fh’);
In this example, a single instance of
set_var()method is used to pass an unnamed
associative array with template tags as keys and appropriate data as values.
<b>Best Practices for Documentation</b>
When you decide to develop software, you should create design and
implementa-tion documentaimplementa-tions. Design documentaimplementa-tions include block diagrams that describe
the system, flow charts that describe a specific process, class diagrams that show
the class hierarchy, and so on.
Implementation documentation also has flow charts to describe specific
imple-mentation processes. Most importantly, though, you use inline code comments to
describe what your code does.
You can use single-line or multiple comments such as:
<?php
// This is a single-line comment
$myName = ‘Joe Gunchy’;
/*
This is a multi-line comment that can span
over multiple lines.
*/
$mySchool = ‘CSUS’;
?>
</div>
<span class='text_page_counter'>(90)</span><div class='page_container' data-page=90>
All the code for this book is commented, although the inline code
com-ments have been stripped out of the code listings printed in the book to
reduce the number of lines and because the book covers each method in
detail. However, you can get the commented version of the code on
the accompanying CD-ROM and/or on the Web site for the book at
www.evoknow.com/phpbook.php.
<b>Best Practices for Web Security</b>
In this section I will discuss a set of best practices that if practiced will result in
bet-ter security for your Web applications.
<b>Keep authentication information </b>
<b>away from prying eyes</b>
Many Web applications use authentication information to allow restricted access to
the application using username/password or IP addresses. Similarly, all
applica-tions using databases use database access information (host name,
username/pass-word, port, etc.) that should never be revealed to any Web visitors. You should keep
these authentication data away from prying eyes by using one of these methods:
◆
Store authentication data way from the Web document tree. Make your
applications read authentication related files from outside the Web
docu-ment tree so that these files are not browseable via Web. This will require
that your Web server has read access to these files. No other user (other
than the root) should have access to these files.
◆
If you cannot store authentication files outside your Web document tree
for some reason, you need to make sure the authentication files are not
browseable via the Web. This can be done by using file extensions and
restricting these extensions from being served by the Web server.
</div>
<span class='text_page_counter'>(91)</span><div class='page_container' data-page=91>
<b>See your errors before someone else does</b>
Often malicious hackers use debugging or error information to take advantage of a
broken application. This is why it is critical that you perform extensive tests on
your Web applications before you deploy it on production servers.
The best way to test and find problems is to have all levels of error reporting
enabled using the
error_reporting(E_ALL)function. This function should be
used as the very first line in your application code. For example:
<?php
// Enable all error reporting
error_reporting(E_ALL)
// Your code goes below.
?>
During development you should set error_reporting() to E_ALL, which enables
all types of errors to be reported. There are many error reporting levels. You can
find all about these error reporting levels in
/>ref.errorfunc.php#errorfunc.constantsOnce you have thoroughly tested your application, you can reduce the error
reporting level or even disable it. However, if you do the latter, make sure you
enable error logging using the
error_log()function. You can learn about this
function at />
<b>Restrict access to sensitive applications</b>
When you have an application that should be used by only a restricted set of users,
you need to control access to the application from either PHP code or using Web
server access control mechanism. This is covered in great detail in Chapter 22.
<b>Best Practices for Source</b>
<b>Configuration Management</b>
When developing any software, use a version-control system to manage changes.
We used Concurrent Version System (CVS) when developing applications discussed
in this book. CVS allows you to create versions of your software by creating a
source repository from which you check out and check in code changes. CVS
main-tains all version information automatically so that you can retrieve an older
</div>
<span class='text_page_counter'>(92)</span><div class='page_container' data-page=92>
version with a single command. It is also the de-facto version control mechanism
for many large-scale Open Source software.
You can learn more about CVS at
www.gnu.org/software/cvsor at
.
<b>Summary</b>
</div>
<span class='text_page_counter'>(93)</span><div class='page_container' data-page=93>
<b>Developing Intranet Solutions</b>
<b>CHAPTER 4</b>
Architecture of an Intranet Application
<b>CHAPTER 5</b>
Central Authentication System
<b>CHAPTER 6</b>
Central User Management System
<b>CHAPTER 7</b>
Intranet System
<b>CHAPTER 8</b>
Intranet Simple Document Publisher
<b>CHAPTER 9</b>
Intranet Contact Manager
<b>CHAPTER 10</b>
Intranet Calendar Manager
<b>CHAPTER 11</b>
Internet Resource Manager
<b>CHAPTER 12</b>
</div>
<span class='text_page_counter'>(94)</span><div class='page_container' data-page=94></div>
<span class='text_page_counter'>(95)</span><div class='page_container' data-page=95>
<b>Chapter 4</b>
<b>Architecture of an Intranet</b>
<b>Application</b>
<b>INTRANET APPLICATIONS ARE PRIMARILY</b>
focused on automating an organization’s
daily business processes. A modern company has many intranet applications that
are available to its employees to help them be more productive and efficient. For
example, a group calendar system or task-tracking system can save a great deal of
time and resources for most companies with more than five employees. This
chap-ter focuses on the underlying architecture of intranet applications and discusses an
open-source framework that enables you to develop intranet PHP applications in a
rapid manner.
<b>Understanding Intranet</b>
<b>Requirements</b>
To develop intranet applications, you need to understand how a typical intranet is
deployed. A company with two employees can have an intranet, but the average
intranet application is deployed in an organization with tens to hundreds of users.
Figure 4-1 shows how an intranet “connects” employees in multiple departments of
a company that uses an intranet application server to manage its daily internal
business functions.
A company generally uses its intranet server to automate interdepartment
com-munication activities such as a shared calendar, shared contact database, document
management, project/task tracking, and so forth.
Before you develop the framework that will enable you to create intranet
appli-cations in PHP, you need to understand the intranet user requirements. Figure 4-2
shows how a single department within an organization appears from an
intranet-requirements point of view.
Users in organizations work in teams. A team usually has a team leader and a
project assignment. The projects are managed by the department head. This type of
hierarchical user base is very common in modern organizations.
</div>
<span class='text_page_counter'>(96)</span><div class='page_container' data-page=96>
<b>Figure 4-1: A typical intranet-enabled company.</b>
<b>Figure 4-2: User requirements for a typical intranet-enabled company.</b>
Each intranet application you develop must be able to authenticate and
autho-rize different types of users. For example, an employee vacation management
application has to incorporate the hierarchical chain of command that enables
employee vacation requests to be reviewed and approved first by team leaders and
then by the department head. So far, our intranet application framework has the
following requirements:
◆
<b>Central authentication:</b>
Users need to be authenticated to access intranet
applications. There are likely to be many intranet applications within an
organization and therefore user authentication should be done such that
a user logs in only once to access any application. A session should be
<b>Any Department</b>
<b>Department Head</b>
<b>Team</b>
Employee
<b>Project 1</b>
Team Leader
<b>Team</b>
Employee
<b>Project (n)</b>
Team Leader
<b>Marketing</b>
PC
PC PC
<b>Engineering</b>
PC PC
PC
PC PC
<b>Sales</b> <b>MIS</b>
PC PC
PC
PC PC
Intranet
Server
Firewall
Database
Server
<b>Administration</b>
PC PC
PC
</div>
<span class='text_page_counter'>(97)</span><div class='page_container' data-page=97>
created that allows all applications to identify an authenticated user.
When a user attempts to access an intranet application without logging in
first, the application should automatically redirect the user to the login
application. When the user is successfully authenticated via the login
application, she should be automatically forwarded back to the
applica-tion she had been attempting to access. The login process should be
seam-less. Similarly, a central, seamless logout facility should be provided to
allow the users to log out from the intranet.
◆
<b>Application-specific authorization:</b>
Different types of users exist in an
intranet and, therefore, intranet applications must discriminate when
authorizing users. Employee access to an intranet application will vary.
Because each application will have different requirements for authorizing
the user, the task of authorization should be left to the application itself.
◆
<b>A shared database: </b>
Most intranet activity involves collaboration or group
efforts. For example, users working in a team within a project might need
to report the status of the project tasks individually, but the team leader or
department head needs to access the information from the entire team to
make technical or business decisions. A shared database is therefore the
solution to store data.
Based on these requirements, let’s go ahead and build an intranet application
framework.
<b>Building an Intranet Application</b>
<b>Framework</b>
An intranet consists of many applications. It is a good idea to create an application
framework that provides a set of commonly needed objects and services to
imple-ment applications. Typical intranet applications have user authentication
require-ments, database access requirerequire-ments, user interfaces requirerequire-ments, and business
logic requirements. Each application’s business logic, which is the work done by the
application, is unique and must be implemented in the application code itself.
However, each application can benefit from using a standard application
frame-work consisting of objects that standardize authentication, database access, user
interface, etc. The framework I will build here will do just that.
Figure 4-3 shows the high-level design diagram for an intranet application that
will use our application framework.
Now let’s discuss the components of this architecture.
</div>
<span class='text_page_counter'>(98)</span><div class='page_container' data-page=98>
<b>Figure 4-3: High-level architecture diagram of an intranet application </b>
<b>using our framework.</b>
<b>Using an HTML template-based presentation layer</b>
All input and output to and from the application is handled via a template-driven
HTML presentation layer. When the application needs input from the user, it
pre-sents an HTML page generated from an appropriate HTML template. Similarly,
when the application needs to display output, it generates an HTML page by
replac-ing special application-specific tags within the template. This ensures that cosmetic
changes to the input or output interfaces can be done without requiring help from
the application developer. For example, an application that uses the template-based
presentation layer can have its interface modified by an HTML writer or graphics
artist.
<b>Using PHP Application Framework components</b>
The components in the PHP Application Framework (PHPAF) layer implement the
base application by providing the following services:
◆
<b>Database abstraction support:</b>
See the “Relational database” section later
in this chapter for details.
◆
<b>Centralized authentication support:</b>
All applications defer the login and
logout to the central authentication facility, as discussed earlier in this
chapter.
Relational
Database
Business Logic
Your PHP
Application
PHP Application
Framework
Components
HTML Template-based
Presentation Layer
</div>
<span class='text_page_counter'>(99)</span><div class='page_container' data-page=99>
◆
<b>Override authorization support:</b>
Each application using the intranet
application defines its own authorization method.
◆
<b>Debugging support:</b>
An application needs to be debugged many times
during the development process. Because debugging is a core part of the
development process, the framework includes a built-in debugger. The
current implementation is very simple yet useful.
◆
<b>Internationalized error and status message handling support:</b>
Each
application using the framework must use a central error message
and status message repository. Both error and status messages can be
internationalized.
<b>Business logic</b>
Each application has its own business-logic requirements. The business-logic
objects will be given database connectivity from the application framework. This
ensures that database abstraction is maintained.
<b>Relational database</b>
The relational database access is abstracted from the application using an
abstrac-tion layer, which is part of the applicaabstrac-tion framework. This ensures that applicaabstrac-tion
database requirements can change without drastically affecting the application. For
example, an application can be developed with this framework such that it works
with the widely used, high-performance MySQL database and then deployed in an
environment where the database is Oracle. Of course, the developers have to be
careful not to use any vendor-specific features.
Figure 4-4 shows a block diagram of an application that uses the previously
mentioned application framework.
<b>Figure 4-4: A block diagram of an application using the PHP Application Framework.</b>
Application Specific
Error and Status
Messages
(Supports
Internationalization)
Database
Independent
Abstraction
Authentication
(Valid User Credentials)
Authorization
(Application Specific Authorization Requirements)
Application Run()
(Application Specific Driver Code)
Business Logic Objects
(Application Specific Code)
</div>
<span class='text_page_counter'>(100)</span><div class='page_container' data-page=100>
The application checks for valid user credentials in the authentication phase,
which is already supplied by the framework’s login application for valid users.
The authorization step involves application-specific privilege management. Not
all valid (authenticated) users are likely to have the same privilege based on the
type of application. For example, an Employee Information System (EIS)
applica-tion in an engineering firm can assign different privileges to executive
manage-ment, department heads, team leaders, and engineers. This is why the authorization
code is specific to the instance of the application and should be written by the
application developer and should not be provided by the framework.
When an application has gone through the authentication and authorization
phases, it will run the application. This code will involve invoking application
spe-cific business objects and database interaction.
The application will have database access via the database-independent
abstrac-tion and also will produce status messages and errors using the facilities provided
by the framework.
Figure 4-5 shows a real-world application framework that we will create in this
chapter.
<b>Figure 4-5: A real-world PHP Application Framework.</b>
The core of this framework is the
class.PHPApplication.php. This class provides
an abstract PHP application that you can extend to incorporate facilities provided by
the error handler (
class.ErrorHandler.php), the debugger (
class.Debugger.php),
and the database abstraction (
class.DBI.php).
DB.php (from PEAR)
class.PHPApplication.php
class.Debugger.php
class.ErrorHandler.php
class.DBI.php
</div>
<span class='text_page_counter'>(101)</span><div class='page_container' data-page=101>
This framework is provided with the CD-ROM. You don’t need to create it
from scratch. Also note that the database abstraction uses DB.phpfrom the
PEAR.
Now let’s create the classes needed to implement this application framework.
<b>Creating a Database </b>
<b>Abstraction Class</b>
Accessing a database using its own API is common in the PHP world. For example,
most PHP developers use PHP with MySQL and, therefore, they write code that is
specific to the MySQL API found in PHP.
There is nothing wrong with this approach if you know that your PHP
applica-tions will be used only for the MySQL database server. However, if there is a chance
that your applications will be used with other databases such as Oracle, Postgres,
and so forth, you need to avoid MySQL-specific API. A developer who has
abstracted the database API in a level above the vendor-specific API can enjoy the
speed of porting the application to different relational databases. Here, we will
cre-ate a class called class.DBI.php that will implement a database abstraction layer for
our application framework. Listing 4-1 shows
class.DBI.php, which implements
the database abstraction using PEAR DB.
See details on
PEAR DB, a unified API for accessing SQL-databases.
<b>Listing 4-1: class.DBI.php</b>
<?php
/*
Database abstraction class
Purpose: this class provides database abstraction using the PEAR
DB package.
<i>Continued</i>
</div>
<span class='text_page_counter'>(102)</span><div class='page_container' data-page=102>
<b>Listing 4-1</b><i>(Continued)</i>
*/
define(‘DBI_LOADED’, TRUE);
class DBI {
var $VERSION = “1.0.0”;
function DBI($DB_URL)
{
$this->db_url = $DB_URL;
$this->connect();
if ($this->connected == TRUE)
{
// set default mode for all resultset
$this->dbh->setFetchMode(DB_FETCHMODE_OBJECT);
}
}
function connect()
{
// connect to the database
$status = $this->dbh = DB::connect($this->db_url);
if (DB::isError($status))
{
$this->connected = FALSE;
$this->error = $status->getMessage();
} else {
$this->connected = TRUE;
}
return $this->connected;
}
</div>
<span class='text_page_counter'>(103)</span><div class='page_container' data-page=103>
{
return $this->connected;
}
function disconnect()
{
if (isset($this->dbh)) {
$this->dbh->disconnect();
return 1;
} else {
return 0;
}
}
function query($statement)
{
$result = $this->dbh->query($statement);
if (DB::isError($result))
{
$this->setError($result->getMessage());
return null;
} else {
return $result;
}
}
function setError($msg = null)
{
global $TABLE_DOES_NOT_EXIST, $TABLE_UNKNOWN_ERROR;
$this->error = $msg;
if (strpos($msg, ‘no such table’))
{
$this->error_type = $TABLE_DOES_NOT_EXIST;
} else {
<i>Continued</i>
</div>
<span class='text_page_counter'>(104)</span><div class='page_container' data-page=104>
<b>Listing 4-1</b><i>(Continued)</i>
$this->error_type = $TABLE_UNKNOWN_ERROR;
}
}
function isError()
{
return (!empty($this->error)) ? 1 : 0;
}
function isErrorType($type = null)
{
return ($this->error_type == $type) ? 1 : 0;
}
function getError()
{
return $this->error;
}
function quote($str)
{
return “‘“ . $str . “‘“;
}
function apiVersion()
{
return $VERSION;
}
}
?>
Here are the functions the DBI class implements:
◆ <b>DBI()</b>
<b>:</b>
This is the constructor method, which creates the instances of the
DBI object. For example, here is a script called test_dbi.php that creates a
DBI object.
<?php
// Turn on all error reporting
error_reporting(E_ALL);
</div>
<span class='text_page_counter'>(105)</span><div class='page_container' data-page=105>
// setting below.
$PEAR_DIR = $_SERVER[‘DOCUMENT_ROOT’] . ‘/pear’ ;
// If you have installed PHPLIB in a different
// directory than %DocumentRoot%/phplib, change
// the setting below.
$PHPLIB_DIR = $_SERVER[‘DOCUMENT_ROOT’] . ‘/phplib’;
// If you have installed framework directory in
// a different directory than
// %DocumentRoot%/framework, change the setting below.
$APP_FRAMEWORK_DIR=$_SERVER[‘DOCUMENT_ROOT’] . ‘/framework’;
// Create a path consisting of the PEAR,
// PHPLIB and our application framework
// path ($APP_FRAMEWORK_DIR)
$PATH = $PEAR_DIR . ‘:’ .
$PHPLIB_DIR . ‘:’ .
$APP_FRAMEWORK_DIR;
// Insert the path in the PHP include_path so that PHP
// looks for our PEAR, PHPLIB and application framework
// classes in these directories
ini_set( ‘include_path’, ‘:’ .
$PATH . ‘:’ .
ini_get(‘include_path’));
// Now load the DB.php class from PEAR
require_once ‘DB.php’;
// Now load our DBI class from application framework
// directory
require_once(‘class.DBI.php’);
// Set the database URL to point to a MySQL
// database. In this example, the database is
// pointing to a MySQL database called auth on
// the localhost server, which requires username
// (root) and password (foobar) to login
$DB_URL = ‘mysql://root:foobar@localhost/auth’;
// Create a DBI object using our DBI class
// Use the database URL to initialize the object
// and make connection to the database
$dbi = new DBI($DB_URL);
</div>
<span class='text_page_counter'>(106)</span><div class='page_container' data-page=106>
// Dump the contents of the DBI object to
// see what it contains.
echo “<pre>”;
print_r($dbi);
echo “</pre>”;
?>
Here,
$dbiis an instance of the DBI object created from
class.DBI.php.
The constructor method has to be passed a database URL which has the
following syntax:
database_type://username:password↓tabase_host/database_name
The
$DB_URLvariable was set to create a database URL that pointed to a
MySQL database (
mysql) named
mydbon host called
localhostThe
data-base can be accessed using the
rootuser account and
foobarpassword.
The
DBI()method sets the DB URL passed to itself as
db_urlmember
variable and calls the
connect()method to connect to the given
data-base. The constructor sets the fetch mode to
DB_FETCHMODE_OBJECT,
which allows us to fetch database rows as objects.
◆ <b>connect()</b>
<b>:</b>
By default, the
DBI()constructor method calls the
connect()function directly to establish the connection, so you don’t need to.
con-nect()
connects to the database specified in
db_urlmember variable of
the object. It sets a member variable
dbhto the database handle object
created by the
DB::connect()method, which is found in the PEAR DB
package.
connectalso sets a member variable called
connectedto
Boolean
TRUEor
FALSEand returns that value.
◆ <b>disconnect()</b>
<b>:</b>
The
disconnect()function disconnects the DBI object
from the database.
The terminate() function in PHPApplication class (class.
PHPApplication.php) calls the disconnect()function if the
applica-tion is connected to a database. See terminate() function in
PHPApplicationclass for details.
</div>
<span class='text_page_counter'>(107)</span><div class='page_container' data-page=107>
If the query is successful, it returns the result object. The result object can
be used to fetch rows. For example, the test_query.php script tries to fetch
data from a table called PROD_TBL using a database URL such as
mysql://root:foobar@localhost/products
.
<?php
// Turn on all error reporting
error_reporting(E_ALL);
// If you have installed PEAR packages in a different
// directory than %DocumentRoot%/pear change the
// setting below.
$PEAR_DIR = $_SERVER[‘DOCUMENT_ROOT’] . ‘/pear’ ;
// If you have installed PHPLIB in a different
// directory than %DocumentRoot%/phplib, change
// the setting below.
$PHPLIB_DIR = $_SERVER[‘DOCUMENT_ROOT’] . ‘/phplib’;
// If you have installed framework directory in
// a different directory than
// %DocumentRoot%/framework, change the setting below.
$APP_FRAMEWORK_DIR=$_SERVER[‘DOCUMENT_ROOT’] . ‘/framework’;
// Create a path consisting of the PEAR,
// PHPLIB and our application framework
// path ($APP_FRAMEWORK_DIR)
$PATH = $PEAR_DIR . ‘:’ .
$PHPLIB_DIR . ‘:’ .
$APP_FRAMEWORK_DIR;
// Insert the path in the PHP include_path so that PHP
// looks for our PEAR, PHPLIB and application framework
// classes in these directories
ini_set( ‘include_path’, ‘:’ .
$PATH . ‘:’ .
ini_get(‘include_path’));
// Now load the DB.php class from PEAR
require_once ‘DB.php’;
// Now load our DBI class from application framework
require_once(‘class.DBI.php’);
</div>
<span class='text_page_counter'>(108)</span><div class='page_container' data-page=108>
// Setup the database URL
$DB_URL = ‘mysql://root:foobar@localhost/products’;
// Create a DBI object that connects to the
// database URL
$dbi = new DBI($DB_URL);
if (! $dbi->isConnected())
{
echo “Connection failed for $DB_URL<br>”;
exit;
}
// Create a SQL statement to fetch data
$statement = ‘SELECT ID, NAME FROM PROD_TBL’;
// Execute the statement using DBI query method
$result = $dbi->query($statement);
// If the result of query is NULL then show
// database error message
if ($result == NULL)
{
echo “Database error:” . $dbi->getError() . “\n”;
// Else check if there are no data available or not
} else if (! $result->numRows()){
echo “No rows found.”;
// Now data is available so fetch and print data
} else {
echo “<pre>ID\tNAME<br>”;
while ($row = $result->fetchRow())
{
echo $row->ID, “\t”, $row->NAME, “<br>”;
}
echo “</pre>”;
}
</div>
<span class='text_page_counter'>(109)</span><div class='page_container' data-page=109>
The SQL statement
SELECT ID, NAME FROM PROD_TBLis stored in
$statement
variable and passed to the
DBI::query()method. The result
is tested first for null. If the result is null, the database error is printed
using the
DBI::getError()method.
If there are no database errors, the next check is made to see if there are
any rows using the
numRow()method from the
$resultobject. If there
are no rows, an appropriate message is printed.
If there are data in the returned
$resultobject, the result is printed in a
loop using the
fetchRow()method.
The row data is fetched in
$rowobject. The
$row-><i>DATA_FIELD</i>method is
used to get the data for each field. For example, to retrieve the
NAMEfield
data, the
$row->NAMEvalue is accessed.
◆ <b>quote()</b>
<b>:</b>
This is a utility function that puts a pair of single quotes around
a string to protect the string from being passed without quotation. Here’s
an example in which the
$namefield is single-quoted using
$this->dbi->quote($name)
call:
<?php
// Turn on all error reporting
error_reporting(E_ALL);
// If you have installed PEAR packages in a different
// directory than %DocumentRoot%/pear change the
// setting below.
$PEAR_DIR = $_SERVER[‘DOCUMENT_ROOT’] . ‘/pear’ ;
// If you have installed PHPLIB in a different
// directory than %DocumentRoot%/phplib, change
// the setting below.
$PHPLIB_DIR = $_SERVER[‘DOCUMENT_ROOT’] . ‘/phplib’;
// If you have installed framework directory in
// a different directory than
// %DocumentRoot%/framework, change the setting below.
$APP_FRAMEWORK_DIR=$_SERVER[‘DOCUMENT_ROOT’] . ‘/framework’;
// Create a path consisting of the PEAR,
// PHPLIB and our application framework
// path ($APP_FRAMEWORK_DIR)
$PATH = $PEAR_DIR . ‘:’ .
$PHPLIB_DIR . ‘:’ .
$APP_FRAMEWORK_DIR;
</div>
<span class='text_page_counter'>(110)</span><div class='page_container' data-page=110>
// Insert the path in the PHP include_path so that PHP
// looks for our PEAR, PHPLIB and application framework
// classes in these directories
ini_set( ‘include_path’, ‘:’ .
$PATH . ‘:’ .
ini_get(‘include_path’));
// Now load the DB.php class from PEAR
require_once ‘DB.php’;
// Now load our DBI class from application framework
require_once(‘class.DBI.php’);
// Setup the database URL
$DB_URL = ‘mysql://root:foobar@localhost/foobar’;
// Create a DBI object that connects to the
// database URL
$dbi = new DBI($DB_URL);
if (! $dbi->isConnected())
{
echo “Connection failed for $DB_URL<br>”;
exit;
}
$id = 100;
$name = “Joe Gunchy”;
$name = $dbi->quote($name);
$statement = “INSERT INTO PROD_TBL (ID,NAME) “ .
“VALUES($id, $name)”;
$result = $dbi->query($statement);
if ($result == NULL)
{
echo “Database error:” . $dbi->getError() . “<BR>\n”;
} else {
echo “Added $name in database.<BR>\n”;
}
</div>
<span class='text_page_counter'>(111)</span><div class='page_container' data-page=111>
◆ <b>apiVersion()</b>
<b>:</b>
This is a utility method that returns the version number of
the DBI object. The DBI abstraction class enables you to connect to any
database and perform any SQL query, such as
SELECT,
INSERT,
UPDATE,
DELETE
, and so forth. Because it hides the database vendor-specific details
from your application, porting to other databases become a much easier
task.
Now let’s look at how we can develop an error handler class.
<b>Creating an Error Handler Class</b>
Every application needs to display error messages. In the old days, error messages
were usually hard-coded in the executable programs and were very difficult to
understand, let alone modify!
Now, in the days of Web interface, we should not resort to the old way of
show-ing hard-coded error messagshow-ing because the application can be used in so many
parts of the world. Error messages written in English are just not friendly enough
for the world in this Internet age. So applications that have internationalizable
error message support will have broader reach.
Listing 4-2 shows an error message handler, which loads and displays error
mes-sages in the application’s default language. Because an application’s default
lan-guage can be changed in the configuration file, it becomes very easy to display
error messages in different languages.
<b>Listing 4-2: class.ErrorHandler.php</b>
<?php
/*
* CVS ID: $Id$
*/
/*
* Centalizes all error messages.
* Supports internationalization of error messages.
*
* @author EVOKNOW, Inc. <>
* @access public
*/
define(‘ERROR_HANDLER_LOADED’, TRUE);
class ErrorHandler
{
function ErrorHandler($params = null)
{
global $DEFAULT_LANGUAGE;
$this->language = $DEFAULT_LANGUAGE;
<i>Continued</i>
</div>
<span class='text_page_counter'>(112)</span><div class='page_container' data-page=112>
<b>Listing 4-2</b><i>(Continued)</i>
$this->caller_class = (!empty($params[‘caller’])) ? $params[‘caller’] :
null;
$this->error_message = array();
//error_reporting(E_ERROR | E_WARNING | E_NOTICE);
$this->load_error_code();
}
function alert($code = null, $flag = null)
{
$msg = $this->get_error_message($code);
if (!strlen($msg))
{
$msg = $code;
}
if ($flag == null)
{
echo “<script>alert(‘$msg’);history.go(-1);</script>”;
} else if (!strcmp($flag,’close’)){
echo “<script>alert(‘$msg’);window.close();</script>”;
} else {
echo “<script>alert(‘$msg’);</script>”;
}
}
function get_error_message($code = null)
{
if (isset($code))
{
if (is_array($code))
{
$out = array();
foreach ($code as $entry)
{
array_push($out, $this->error_message[$entry]);
}
return $out;
} else {
return (! empty(>error_message[$code])) ?
$this->error_message[$code] : null;
}
} else {
return (! empty(>error_message[‘MISSING’])) ?
$this->error_message[‘MISSING’] : null;
</div>
<span class='text_page_counter'>(113)</span><div class='page_container' data-page=113>
}
function load_error_code()
{
global $ERRORS;
if (empty($ERRORS[$this->language]))
{
return FALSE;
}
while (list($key, $value) = each ($ERRORS[$this->language])) {
$this->error_message[$key] = $value;
}
return TRUE;
}
}
?>
The class.ErrorHandler.php class assumes that the application has all its error
messages defined in an application-specific configuration file and all error
mes-sages are stored in a multidimensional array called
$ERRORS. For example:
<?php
// US English
$ERRORS[‘US’][‘SAMPLE_ERR_CODE’] = “This is an error message.”;
// Spanish
$ERRORS[‘ES’][‘SAMPLE_ERR_CODE’] = “Esto es un mensaje de error.”;
//German
$ERRORS[‘DE’][‘SAMPLE_ERR_CODE’] = “Dieses ist eine Fehlermeldung.”;
?>
If this code is stored in
<i>appname</i>.errorsfile and loaded by an application using
require_once(‘<i>appname</i>.errors’)
, then the
ErrorHandlerclass can print the
SAMPLE_ERR_CODE
error message in any of the three languages, depending on the
default language settings.
You can translate your error messages in multiple languages using
Language Translation Tools provided by Google at http://translate.
google.com/translate_t. Be aware that not all automatic translations
are perfect.
</div>
<span class='text_page_counter'>(114)</span><div class='page_container' data-page=114>
You can set an application’s default language using the
$DEFAULT_LANGUAGEvariable in a configuration file for your application. For example,
<?php
// appname.conf
// Default language for
$DEFAULT_LANGUAGE = ‘US’;
?>
If this configuration is loaded by an application using the
ErrorHandlerclass, all
error messages will be displayed in U.S. English.
ErrorHandler()
is the constructor function for the
class.ErrorHandler.php.
This function sets the default language of the error handler to what is set in the
application configuration as global
$DEFAULT_LANGUAGE variable.
This method can be passed an associative array as a parameter. If the parameter
array has a
<i>key</i>=<i>value</i>pair called
caller=<i>class_name</i>, then it sets the member
variable called
caller_class to the
<i>value</i><i>.</i>
The constructor also initializes a member array called
error_messageand loads
the error code for the default language by calling the
load_error_code()method.
The error handler class
ErrorHandleris automatically invoked by the
PHPApplication class
so you don’t need to create an error handler manually in
your application code.
Now let’s look at the other functions available in
ErrorHandlerclass.
◆ <b>alert()</b>
<b>:</b>
This function displays an internationalized error message using
a simple JavaScript pop-up alert dialog box. It is called with the error
code. The
get_error_message()method is used to retrieve the
appropri-ate error message in default application language from the application’s
error configuration file.
◆ <b>get_error_message()</b>
<b>:</b>
This function retrieves the error messages for
given error code. If an array of error codes is supplied as parameter, the
function returns an array of error messages. If no error code is supplied,
the function returns a default error message using the
MISSINGerror code.
◆ <b>load_error_code()</b>
<b>:</b>
This function loads the application’s error code in
from the global
$ERRORSarray to its own member array variable
</div>
<span class='text_page_counter'>(115)</span><div class='page_container' data-page=115>
<b>Creating a Built-In Debugger Class</b>
When developing applications, each developer uses at least some form of
debug-ging. Although PHP-supported Integrated Development Environments (IDEs) are
becoming available, they’re still not the primary development tools for most PHP
developers, who are still using
echo,
print, and
printffunctions to display
debugging information during development.
The debugging class called
class.Debugger.phpis a bit more advanced than
the standard
echo,
print, and
printfmessages.
It provides a set of facilities that include
◆
Color-coding debug messages
◆
Automatically printing debug line numbers
◆
Optionally buffering debug messages
◆
Prefixing debug messages with a given tag to make it easy to identify
messages in a large application
Listing 4-3 shows the debugger class that is part of our application framework.
It can be used to perform basis application debugging.
<b>Listing 4-3: class.Debugger.php</b>
<?php
/*
* CVS ID: $Id$
*/
define(‘DEBUGGER_LOADED’, TRUE);
class Debugger {
var $myTextColor = ‘red’;
function Debugger($params = null)
{
// Debugger constructor method
$this->color = $params[‘color’];
$this->prefix = $params[‘prefix’];
$this->line = 0;
$this->buffer_str = null;
$this->buffer = $params[‘buffer’];
$this->banner_printed = FALSE;
<i>Continued</i>
</div>
<span class='text_page_counter'>(116)</span><div class='page_container' data-page=116>
<b>Listing 4-3</b><i>(Continued)</i>
}
function print_banner()
{
if ($this->banner_printed == TRUE)
{
return 0;
}
$out = “<br><br><font color=’$this->myTextColor’>” .
“<strong>Debugger started for $this->prefix</strong>” .
“</font><br><hr>”;
if ($this->buffer == TRUE ){
$this->buffer_str .= $out;
} else {
echo $out;
$this->banner_printed = TRUE;
}
return 1;
}
function write($msg)
{
$out = sprintf(“<font color=’%s’>%03d </font>” .
“<font color=%s>%s</font><br>\n”,
$this->myTextColor,
$this->line++,
$this->color,
$msg);
if ($this->buffer == TRUE)
{
$this->buffer_str .= $out;
} else {
echo $out;
}
</div>
<span class='text_page_counter'>(117)</span><div class='page_container' data-page=117>
function debug_array($hash = null)
{
while(list($k, $v) = each($hash))
{
$this->write(“$k = $v”);
}
}
function set_buffer()
{
$this->buffer = TRUE;
}
function reset_buffer()
{
$this->buffer = FALSE;
$this->buffer_str = null;
}
function flush_buffer()
{
$this->buffer = FALSE;
$this->print_banner();
echo $this->buffer_str;
}
}
?>
The debugger class has the following methods:
◆ <b>Debugger()</b>
<b>:</b>
This is the constructor function for the debugger class
(
class.Debugger.php). This function initializes the color, prefix, line, and
buffer_str, banner_printed
member variables. The color is used to
display the debug information in a given color. The prefix variable is used
to prefix each debug message displayed, which allows for easier
identifi-cation of messages.
The line variable is initialized to zero, which is automatically incremented
to help locate debug information quickly. The
buffer_strvariable is used
to store buffered debug information. The
banner_printedvariable, which
</div>
<span class='text_page_counter'>(118)</span><div class='page_container' data-page=118>
controls the banner printing, is set to
FALSE. The debugger can be invoked
in an application called test_debugger1.php as follows:
<?php
// Turn on all error reporting
error_reporting(E_ALL);
// If you have installed framewirk directory in
// a different directory than
// %DocumentRoot%/framework, change the setting below.
$APP_FRAMEWORK_DIR=$_SERVER[‘DOCUMENT_ROOT’] . ‘/framework’;
// Insert the path in the PHP include_path so that PHP
// looks for our PEAR, PHPLIB and application framework
// classes in these directories
ini_set( ‘include_path’, ‘:’ .
$APP_FRAMEWORK_DIR . ‘:’ .
ini_get(‘include_path’));
// Now load our Debugger class from application framework
require_once(‘class.Debugger.php’);
$myDebugger = new Debugger(array(
‘color’ => ‘red’,
‘prefix’ => ‘MAIN’,
‘buffer’ => FALSE)
);
// Define an array of fruits
$fruits = array(‘apple’, ‘orange’, ‘banana’);
// Show the array contents
$myDebugger->debug_array($fruits);
?>
In this example, a new
Debuggerobject called
$myDebuggeris created,
which will print debug messages in red color and use
‘MAIN’as the prefix
for each message. The buffering of debug messages is disabled as well.
◆ <b>print_banner()</b>
<b>:</b>
This function prints a banner message as follows:
Debugger started for <i>PREFIX</i>
</div>
<span class='text_page_counter'>(119)</span><div class='page_container' data-page=119>
◆ <b>write()</b>
<b>:</b>
This function displays a debug message using the chosen color
and automatically prints the debug message line number. If debug
buffer-ing is on, then the message is written to the buffer (
buffer_str).
◆ <b>debug_array()</b>
<b>:</b>
This function allows you to debug an associative array. It
prints the contents of the associative array parameter using the
write()method.
◆ <b>set_buffer()</b>
<b>:</b>
This function sets the buffering of debug messages.
◆ <b>reset_buffer()</b>
<b>:</b>
This function resets the buffering of debug messages.
◆ <b>flush_buffer()</b>
<b>:</b>
This function prints the buffer content along with the
debug banner.
Now let’s look at how an application called test_debugger2.php can use this
debugging facility:
<?php
// Turn on all error reporting
error_reporting(E_ALL);
// If you have installed framewirk directory in
// a different directory than
// %DocumentRoot%/framework, change the setting below.
$APP_FRAMEWORK_DIR=$_SERVER[‘DOCUMENT_ROOT’] . ‘/framework’;
// Insert the path in the PHP include_path so that PHP
// looks for our PEAR, PHPLIB and application framework
// classes in these directories
ini_set( ‘include_path’, ‘:’ .
$APP_FRAMEWORK_DIR . ‘:’ .
ini_get(‘include_path’));
// Now load our Debugger class from application framework
require_once(‘class.Debugger.php’);
// Create a variable
$name = ‘M. J. Kabir’;
$myDebugger = new Debugger(array(
‘color’ => ‘blue’,
‘prefix’ => ‘MAIN’,
‘buffer’ => 0)
);
</div>
<span class='text_page_counter'>(120)</span><div class='page_container' data-page=120>
// Write the variable out using debugger write() method
$myDebugger->write(“Name = $name”);
?>
This will print a message such as the following:
<font color=’red’>000 </font>
<font color=blue>Name = M. J. Kabir</font><br>
Buffering debug messages enables you to print all debug messages together,
which is often very beneficial in identifying a flow sequence. For example, here an
application called test_debugger3.php buffers debugging information and prints
the information when the buffer is flushed using
flush_buffer()method found in
the Debugger class.
<?php
// Turn on all error reporting
error_reporting(E_ALL);
// If you have installed framewirk directory in
// a different directory than
// %DocumentRoot%/framework, change the setting below.
$APP_FRAMEWORK_DIR=$_SERVER[‘DOCUMENT_ROOT’] . ‘/framework’;
// Insert the path in the PHP include_path so that PHP
// looks for our PEAR, PHPLIB and application framework
// classes in these directories
ini_set( ‘include_path’, ‘:’ .
$APP_FRAMEWORK_DIR . ‘:’ .
ini_get(‘include_path’));
// Now load our Debugger class from application framework
require_once(‘class.Debugger.php’);
// Create a variable
$name = ‘M. J. Kabir’;
$email = ‘’;
$myDebugger = new Debugger(array(
‘color’ => ‘blue’,
‘prefix’ => ‘MAIN’,
‘buffer’ => TRUE)
);
$myDebugger->write(“Name = $name”);
$myDebugger->write(“Email = $email”);
echo “This will print before debug messages.\n\n”;
$myDebugger->flush_buffer();
</div>
<span class='text_page_counter'>(121)</span><div class='page_container' data-page=121>
In this example, the first two debug messages (
“Name = $name”and
“Email =$email”
) will be printed after the
“This will print before debug messages.\n\n”
message.
In the next section, we look at how we can incorporate all of these classes to
cre-ate an abstract PHP application class.
<b>Creating an Abstract </b>
<b>Application Class</b>
The code in Listing 4-4 uses
class.DBI.php,
class.ErrorHandler.php, and
class.Debugger.php
to create an abstract PHP application class.
<b>Listing 4-4: class.PHPApplication.php</b>
<?php
/*
*
* PHPApplication class
*
* @author <>
* @access public
*
* Version 1.0.1
*/
if (defined(“DEBUGGER_LOADED”) && ! empty($DEBUGGER_CLASS))
{
include_once $DEBUGGER_CLASS;
}
//require_once ‘lib.session_handler.php’;
class PHPApplication {
function PHPApplication($param = null)
{
global $ON, $OFF, $TEMPLATE_DIR;
<i>Continued</i>
</div>
<span class='text_page_counter'>(122)</span><div class='page_container' data-page=122>
<b>Listing 4-4</b><i>(Continued)</i>
global $MESSAGES, $DEFAULT_LANGUAGE,
$REL_APP_PATH,
$REL_TEMPLATE_DIR;
// initialize application
$this->app_name = $this->setDefault($param[‘app_name’], null);
$this->app_version = $this->setDefault($param[‘app_version’],
null);
$this->app_type = $this->setDefault($param[‘app_type’], null);
$this->app_db_url = $this->setDefault($param[‘app_db_url’],
null);
$this->debug_mode= $this->setDefault($param[‘app_debugger’], null);
$this->auto_connect = $this->setDefault($param[‘app_auto_connect’],
TRUE);
$this->auto_chk_session =
$this->setDefault($param[‘app_auto_chk_session’], TRUE);
$this->auto_authorize =
$this->setDefault($param[‘app_auto_authorize’], TRUE);
>session_ok =
$this->setDefault($param[‘app_auto_authorize’], FALSE);
$this->error = array();
$this->authorized= FALSE;
$this->language = $DEFAULT_LANGUAGE;
$this->base_url = sprintf(“%s%s”, $this->get_server(),
$REL_TEMPLATE_DIR);
$this->app_path = $REL_APP_PATH;
$this->template_dir = $TEMPLATE_DIR;
$this->messages = $MESSAGES;
// If debuggger is ON then create a debugger object
if (defined(“DEBUGGER_LOADED”) && $this->debug_mode == $ON)
{
if (empty($param[‘debug_color’]))
{
$param[‘debug_color’] = ‘red’;
}
$this->debugger = new Debugger(array(‘color’ =>
$param[‘debug_color’],
‘prefix’ => $this->app_name,
‘buffer’ => $OFF));
</div>
<span class='text_page_counter'>(123)</span><div class='page_container' data-page=123>
// load error handler
$this->has_error = null;
$this->set_error_handler();
// start session
if (strstr($this->get_type(), ‘WEB’))
{
session_start();
$this->user_id = (! empty($_SESSION[“SESSION_USER_ID”])) ?
$_SESSION[“SESSION_USER_ID”] : null;
$this->user_name = (! empty($_SESSION[“SESSION_USERNAME”])) ?
$_SESSION[“SESSION_USERNAME”]: null;;
$this->user_email = (! empty($_SESSION[“SESSION_USERNAME”])) ?
$_SESSION[“SESSION_USERNAME”]: null;;
$this->set_url();
if ($this->auto_chk_session) $this->check_session();
if (! empty(>app_db_url) && >auto_connect && !
$this->connect())
{
$this->alert(‘APP_FAILED’);
}
if ($this->auto_authorize && ! $this->authorize())
{
$this->alert(‘UNAUTHORIZED_ACCESS’);
}
}
}
function getEMAIL()
{
return $this->user_email;
}
<i>Continued</i>
</div>
<span class='text_page_counter'>(124)</span><div class='page_container' data-page=124>
<b>Listing 4-4</b><i>(Continued)</i>
function getNAME()
{
list($name, $host) = explode(‘’, $this->getEMAIL());
return ucwords($name);
}
function check_session()
{
if ($this->session_ok == TRUE)
{
return TRUE;
}
if (!empty($this->user_name))
{
$this->session_ok = TRUE;
} else {
$this->session_ok = FALSE;
$this->reauthenticate();
}
return $this->session_ok;
}
function reauthenticate()
{
global $AUTHENTICATION_URL;
header(“Location: $AUTHENTICATION_URL?url=$this->self_url”);
}
function getBaseURL()
{
</div>
<span class='text_page_counter'>(125)</span><div class='page_container' data-page=125>
function get_server()
{
$this->set_url();
return $this->server;
}
function getAppPath()
{
return $this->app_path;
}
function getFQAP()
{
// get fully qualified application path
return sprintf(“%s%s”,$this->server, $this->app_path);
}
function getFQAN($thisApp = null)
{
return sprintf(“%s/%s”, $this->getFQAP(), $thisApp);
}
function getTemplateDir()
{
return $this->template_dir;
}
function set_url()
{
$row_protocol = $this->getEnvironment(‘SERVER_PROTOCOL’);
$port = $this->getEnvironment(‘SERVER_PORT’);
if ($port == 80)
{
$port = null;
} else {
$port = ‘:’ . $port;
}
$protocol = strtolower(substr($row_protocol,0,
strpos($row_protocol,’/’)));
<i>Continued</i>
</div>
<span class='text_page_counter'>(126)</span><div class='page_container' data-page=126>
<b>Listing 4-4</b><i>(Continued)</i>
$this->server = sprintf(“%s://%s%s”,
$protocol,
$this->getEnvironment(‘HTTP_HOST’),
$port);
$this->self_url = sprintf(“%s://%s%s%s”, $protocol,
$this->getEnvironment(‘HTTP_HOST’),
$port,
$this->getEnvironment(‘REQUEST_URI’));
}
function getServer()
{
return $this->server;
}
function terminate()
{
if (isset($this->dbi))
{
if ($this->dbi->connected) {
$this->dbi->disconnect();
}
}
//Asif Changed
session_destroy();
exit;
}
function authorize($username = null)
{
// override this method
return FALSE;
}
function set_error_handler()
{
// create error handler
</div>
<span class='text_page_counter'>(127)</span><div class='page_container' data-page=127>
array (‘name’ => $this->app_name));
}
function getErrorMessage($code)
{
return $this->errHandler->error_message[$code];
}
function show_popup($code)
{
return $this->errHandler->alert($code, 0);
}
function getMessage($code = null, $hash = null)
{
$msg = $this->messages[$this->language][$code];
if (! empty($hash))
{
foreach ($hash as $key => $value)
{
$key = ‘/{‘ . $key . ‘}/’;
$msg = preg_replace($key, $value, $msg);
}
}
return $msg;
}
function alert($code = null, $flag = null)
{
return (defined(“ERROR_HANDLER_LOADED”)) ?
$this->errHandler->alert($code, $flag) : false;
}
function buffer_debugging()
{
global $ON;
if (defined(“DEBUGGER_LOADED”) && $this->debug_mode == $ON)
{
$this->debugger->set_buffer();
}
}
<i>Continued</i>
</div>
<span class='text_page_counter'>(128)</span><div class='page_container' data-page=128>
<b>Listing 4-4</b><i>(Continued)</i>
function dump_debuginfo()
{
global $ON;
if (defined(“DEBUGGER_LOADED”) && $this->debug_mode == $ON)
{
$this->debugger->flush_buffer();
}
}
function debug($msg)
{
global $ON;
if ($this->debug_mode == $ON) {
$this->debugger->write($msg);
}
}
function run()
{
// run the application
$this->writeln(“You need to override this method.”);
}
function connect($db_url = null)
{
if (empty($db_url))
{
$db_url = $this->app_db_url;
}
if (defined(‘DBI_LOADED’) && ! empty($this->app_db_url))
{
$this->dbi = new DBI($db_url);
return $this->dbi->connected;
}
return FALSE;
}
function disconnect()
{
</div>
<span class='text_page_counter'>(129)</span><div class='page_container' data-page=129>
return $this->dbi->connected;
}
function get_error_message($code = null)
{
return $this->errHandler->get_error_message($code);
}
function show_debugger_banner()
{
global $ON;
if ($this->debug_mode == $ON)
{
$this->debugger->print_banner();
}
}
function get_version()
{
// return version
return $this->app_version;
}
function get_name()
{
// return name
return $this->app_name;
}
function get_type()
{
// return type
return $this->app_type;
}
function set_error($err = null)
{
// set error condition
if (isset($err))
{
array_push($this->error, $err);
$this->has_error = TRUE;
<i>Continued</i>
</div>
<span class='text_page_counter'>(130)</span><div class='page_container' data-page=130>
<b>Listing 4-4</b><i>(Continued)</i>
return 1;
} else {
return 0;
}
}
function has_error()
{
return $this->has_error;
}
function reset_error()
{
$this->has_error = FALSE;
}
function get_error()
{
// return error condition
return array_pop($this->error);
}
function get_error_array()
{
return $this->error;
}
function dump_array($a)
{
if (strstr($this->get_type(), ‘WEB’))
{
echo ‘<pre>’;
print_r($a);
echo ‘</pre>’;
} else {
print_r($a);
}
}
function dump()
{
</div>
<span class='text_page_counter'>(131)</span><div class='page_container' data-page=131>
{
echo ‘<pre>’;
print_r($this);
echo ‘</pre>’;
} else {
print_r($this);
}
}
function checkRequiredFields($fieldType = null, $fieldData = null,
$errorCode = null)
{
$err = array();
while(list($field, $func) = each ($fieldType))
{
$ok = $this->$func($fieldData[$field]);
if (! $ok )
{
$this->alert($errorCode{$field});
}
}
return $err;
}
function number($num = null)
{
if (is_array($num))
{
foreach ($num as $i)
{
if (! is_numeric($i))
{
return 0;
}
}
return 1;
<i>Continued</i>
</div>
<span class='text_page_counter'>(132)</span><div class='page_container' data-page=132>
<b>Listing 4-4</b><i>(Continued)</i>
} else if (is_numeric($num))
{
return 1;
} else {
return 0;
}
}
function name($name = null)
{
if (!strlen($name) || is_numeric($name))
{
return 0;
} else {
return 1;
}
}
function email($email = null)
{
if (strlen($email) < 5 || ! strpos($email,’’))
{
return 0;
} else {
return 1;
}
}
function currency($amount = null)
{
return 1;
}
function month($mm = null)
{
if ($mm >=1 && $mm <=12)
{
return 1;
} else {
return 0;
}
</div>
<span class='text_page_counter'>(133)</span><div class='page_container' data-page=133>
// ASIF what is thie method doing in this class???
function comboOption($optVal = null)
{
if ($optVal != 0)
{
return 1;
}else {
return 0;
}
}
function day($day = null)
{
if ($day >=1 && $day <=31)
{
return 1;
} else {
return 0;
}
}
function year($year = null)
{
return ($this->number($year));
}
function one_zero_flag($flag = null)
{
if ($flag == 1 || $flag == 0)
{
return 1;
} else {
return 1;
}
}
function plain_text($text = null)
{
return 1;
}
<i>Continued</i>
</div>
<span class='text_page_counter'>(134)</span><div class='page_container' data-page=134>
<b>Listing 4-4</b><i>(Continued)</i>
function debug_array($hash = null)
{
$this->debugger->debug_array($hash);
}
function writeln($msg)
{
// print
global $WWW_NEWLINE;
global $NEWLINE;
echo $msg ,(strstr($this->app_type, ‘WEB’)) ? $WWW_NEWLINE : $NEWLINE;
}
function show_status($msg = null,$returnURL = null)
{
global $STATUS_TEMPLATE;
$template = new Template($this->template_dir);
$template->set_file(‘fh’, $STATUS_TEMPLATE);
$template->set_block(‘fh’, ‘mainBlock’, ‘mblock’);
$template->set_var(‘STATUS_MESSAGE’, $msg);
if (!preg_match(‘/^http:/’, $returnURL) && (!preg_match(‘/^\//’,
$returnURL)))
{
$appPath = sprintf(“%s/%s”, $this->app_path, $returnURL);
} else {
$appPath = $returnURL;
}
$template->set_var(‘RETURN_URL’, $appPath);
$template->set_var(‘BASE_URL’, $this->base_url);
$template->parse(‘mblock’, ‘mainBlock’);
$template->pparse(‘output’, ‘fh’);
}
function set_escapedVar($hash)
{
</div>
<span class='text_page_counter'>(135)</span><div class='page_container' data-page=135>
$this->escapedVarHash{$key} = preg_replace(“/\s/”,”+”,$value);
}
}
function get_escapedVar($key)
{
return $this->escapedVarHash{$key};
}
function setUID($uid = null)
{
$this->user_id = $uid;
}
function getUID()
{
return $this->user_id;
}
//To Kabir: I added this -- Asif
function getUserName()
{
return $this->user_name;
}
function emptyError($field, $errCode)
{
if (empty($field))
{
$this->alert($errCode);
}
}
function getRequestField($field, $default = null)
{
return (! empty($_REQUEST[$field] )) ? $_REQUEST[$field] : $default;
}
function getSessionField($field, $default = null)
{
return (! empty($_SESSION[$field] )) ? $_SESSION[$field] : $default;
}
<i>Continued</i>
</div>
<span class='text_page_counter'>(136)</span><div class='page_container' data-page=136>
<b>Listing 4-4</b><i>(Continued)</i>
function setDefault($value, $default)
{
return (isset($value)) ? $value : $default;
}
function fileextension($filename)
{
return substr(basename($filename), strrpos(basename($filename), “.”) +
1);
}
function outputTemplate(&$t)
{
$t->parse(‘main’, ‘mainBlock’, false);
return $t->parse(‘output’, ‘fh’);
}
function showScreen($templateFile = null, $func = null, $app_name)
{
$menuTemplate = new Template($this->getTemplateDir());
$this->doCommonTemplateWork($menuTemplate, $templateFile, $app_name);
if ($func != null)
{
$status = $this->$func($menuTemplate);
}
if ($status)
{
return $this->outputTemplate($menuTemplate);
} else {
return null;
}
}
</div>
<span class='text_page_counter'>(137)</span><div class='page_container' data-page=137>
$t->set_file(‘fh’, $templateFile);
$t->set_block(‘fh’,’mainBlock’, ‘main’);
$t->set_var(array(
‘APP_PATH’ => $this->getAppPath(),
‘APP_NAME’ => $app_name,
‘BASE_URL’ => $this->getBaseURL()
)
);
}
function getEnvironment($key)
{
return $_SERVER[$key];
}
function showPage($contents = null)
{
global $THEME_TEMPLATE;
global $THEME_TEMPLATE_DIR, $REL_TEMPLATE_DIR;
global $REL_TEMPLATE_DIR;
global $PHOTO_DIR, $DEFAULT_PHOTO, $REL_PHOTO_DIR;
$themeObj = new Theme($this->dbi, null,’home’);
$this->themeObj = $themeObj;
$this->theme = $themeObj->getUserTheme($this->getUID());
$themeTemplate = new Template($THEME_TEMPLATE_DIR);
$themeTemplate->set_file(‘fh’, $THEME_TEMPLATE[$this->theme]);
$themeTemplate->set_block(‘fh’, ‘mmainBlock’, ‘mmblock’);
$themeTemplate->set_block(‘mmainBlock’, ‘contentBlock’, ‘cnblock’);
$themeTemplate->set_block(‘mmainBlock’, ‘printBlock’, ‘prnblock’);
$themeTemplate->set_var(‘printBlock’, ‘ ’);
$themeTemplate->parse(‘prnblock’, ‘printBlock’,false);
$themeTemplate->set_block(‘mmainBlock’, ‘pageBlock’, ‘pblock’);
$themeTemplate->set_var(‘pblock’, null);
$photoFile = sprintf(“%s/photo%003d.jpg”,$PHOTO_DIR, $this->getUID());
$defaultPhoto = sprintf(“%s/%s”,$REL_PHOTO_DIR,$DEFAULT_PHOTO);
$userPhoto = sprintf(“%s/photo%003d.jpg”,$REL_PHOTO_DIR,$this->getUID());
$photo = file_exists($photoFile) ? $userPhoto : $defaultPhoto;
<i>Continued</i>
</div>
<span class='text_page_counter'>(138)</span><div class='page_container' data-page=138>
<b>Listing 4-4</b><i>(Continued)</i>
$themeTemplate->set_var(‘PHOTO’, $photo);
$themeTemplate->set_var(‘TEMPLATE_DIR’, $REL_TEMPLATE_DIR);
$themeDir = $THEME_TEMPLATE_DIR . ‘/’ .
dirname($THEME_TEMPLATE[$this->theme]);
$leftNavigation = $this->themeObj->getLeftNavigation($themeDir);
$themeTemplate->set_var(‘LEFT_NAVIGATION’, $leftNavigation);
$themeTemplate->set_var(‘SERVER_NAME’, $this->get_server());
$themeTemplate->set_var(‘BASE_HREF’, $REL_TEMPLATE_DIR);
$themeTemplate->set_var(‘CONTENT_BLOCK’, $contents);
$themeTemplate->parse(‘cnblock’, ‘contentBlock’);
$themeTemplate->parse(‘mmblock’, ‘mmainBlock’);
$themeTemplate->pparse(‘output’, ‘fh’);
}
}
?>
The methods in the class.PHPApplication.php class, which implements the base
application in our framework, are discussed in detail in Table 4-1.
<b>T</b>
<b>ABLE</b><b>4-1 METHODS IN CLASS.PHPAPPLICATION.PHP</b>
<b>Function</b>
<b>Description</b>
PHPApplication() The constructor function for PHPApplication
(class.PHPApplication.php) class. Sets app_name,
app_version, app_type, debug_mode, error,
authorized, and has_errormember variables.
If debug_modeis set to $ON(1), a debugger object
called debuggeris created. It also creates an error
handler from ErrorHandlerclass.
The constructor starts the session using
session_start(), and also sets self_urlby calling
set_url().
</div>
<span class='text_page_counter'>(139)</span><div class='page_container' data-page=139>
<b>Function</b>
<b>Description</b>
reauthenticate() Redirects the application user to the authentication
application pointed by the global
$AUTHENTICATION_URLvariable.
set_url() Creates a URL that points to the application itself.
terminate() Terminates the application. If the application is connected
to a database, the database connection is first closed and
then the application session is destroyed.
authorize() A blank authorized function method that should be
overridden by the application. The abstract application
object cannot authorize access to the application itself.
set_error_handler() Creates an error handler object and stores the object in
errHandlermember variable.
alert() Calls the alertfunction method from the
ErrorHandlerclass.
get_error_message() Gets the error message from the ErrorHandlerclass.
show_debugger_banner() Displays the debug banner if debugging is enabled. (The
banner display is done by the debugger class.)
buffer_debugging() Sets the debug message buffering in the built-in
Debuggerobject if the debugging is turned on.
dump_debuginfo() Flushes the debug buffer if debugging was turned on.
debug() Provides a wrapper for the write()method in the
built-in debugger.
run() Should be overridden by the instance of the
PHPApplicationto run it.
connect() Creates a DBIobject and connects the application to the
desired relational database.
disconnect() Disconnects the application from the database.
get_error_message() Returns the error message for a given error code (calls the
get_error_messageof the ErrorHandler).
show_debugger_banner() Prints the debugger banner if debugging is turned on.
buffer_debugging() Enables you to buffer debugging so that it can be printed
later.
<i>Continued</i>
</div>
<span class='text_page_counter'>(140)</span><div class='page_container' data-page=140>
<b>T</b>
<b>ABLE</b><b>4-1 METHODS IN CLASS.PHPAPPLICATION.PHP </b>
<i>(Continued)</i>
<b>Function</b>
<b>Description</b>
dump_debuginfo() Dumps all debug information if it was buffered in the
built-in debugger object.
debug() Writes the debug message using the debugger object’s
write()function method.
run() A dummy function method that must be overridden by
each application to run the application. An application
usually has its business logic driver in this method.
connect() Creates a DBIobject and connects the application to a
given database. The database URL is passed as a
parameter, and the DBIobject is stored as a member
variable called dbiin the PHPApplicationclass.
disconnect() Disconnects the database connection for the application
by calling the DBI disconnect()method.
get_version() Returns the version of the application. The version is
supplied as a parameter during PHPApplicationobject
creation.
get_name() Returns the name of the application (supplied as a
parameter during PHPApplicationobject creation).
get_type() Returns the type of the application (supplied as a
parameter during PHPApplicationobject creation).
set_error() Sets error code for the application and also sets the
has_errorflag to TRUE. (When used to set error code,
the error codes are stored in an array called error.)
When application needs to generate an error message,
you use this function method to set the error code first,
and then call get_error_message().
has_error() Returns TRUEif the application has error(s); otherwise it
returns FALSE.
reset_error() Resets has_errorflag to FALSE.
get_error() Returns an error code from the errorarray.
</div>
<span class='text_page_counter'>(141)</span><div class='page_container' data-page=141>
<b>Function</b>
<b>Description</b>
dump() Prints the entire application object without the methods.
This is a very powerful debugging feature.
checkRequiredFields() Performs minimal required field type validation.
number() Returns 1if the parameter is a number or a number
array; otherwise, it returns 0.
name() Returns 1if the parameter is not empty and not a
number; otherwise, it returns 0.
email() Returns 1if the parameter is an e-mail address;
otherwise, it returns 0.
currency() Returns 1if the parameter is a currency number;
otherwise, it returns 0.
month() Returns 1if the parameter is a number between 1 and
12; otherwise, it returns 0.
day() Returns 1if the parameter is a number between 1 and
31; otherwise, it returns 0.
year() Returns 1if the parameter is a number; otherwise, it
returns 0.
one_zero_flag() Returns 1if the parameter is either 1 or 0; otherwise, it
returns 0.
plain_text() Returns 1if the parameter is plain text; otherwise, it
returns 0.
debug_array() Enables you to print out key=valuefrom an associative array.
writeln() Prints a message with either ‘<BR>’or ‘\n’at the end,
depending on application type. For example, when the
application type is set to WEB, it uses ‘<BR>’to end the
message, and when the application type is set to
anything else, it uses the new line character instead.
show_status() Displays a status message screen using an HTML
template. It requires global variables called
$TEMPLATE_DIRand $STATUS_TEMPLATEto be set to
template directory and HTML status template file name.
It is called with two parameters: $msgand $returnURL.
The $msgvariable is used to display the actual message
and the $returnURLis used to create a link back to the
application that displays the status screen.
</div>
<span class='text_page_counter'>(142)</span><div class='page_container' data-page=142>
The
checkRequiredFields()takes three associative arrays as parameters: field
type array, field data array, and corresponding error code array. For example:
$fieldType = array(‘mm’ => ‘month’,
‘dd’ => ‘day’,
‘yy’=> ‘year’
);
reset($fieldType);
$errCode = array();
while (list($k, $v) = each($fieldType))
{
$fields{$k} = (! empty($_REQUEST[$k])) ? $_REQUEST[$k] : null;
$errCode{$k} = ‘MISSING_’ . strtoupper($k) ;
}
// Check required fields
$err = $this->checkRequiredFields($fieldType, $fields, $errCode);
$this->dump_array($err);
In this code segment, the
$fieldTypeis an associative array with three
ele-ments:
mm,
dd, and
yy. This array defines which field is what type of data and then
an
$errCodearray is created in the loop to set each field-specific error code. For
example, for the
$_REQUEST[‘mm’]field, the error code is
MISSING_START_MM.
Next the
checkRequiredFields()method is called to check each field for type and
minimal range validation. The range validation is limited to type. For example,
$_REQUEST[‘mm’]
field is set to type month so the value of this variable must not
be out of the 1 to 12 range. Similarly, the
$_REQUEST[‘dd’]variable is set to type
day and, therefore, the valid range of values for this variable is between 1 and 31.
</div>
<span class='text_page_counter'>(143)</span><div class='page_container' data-page=143>
<b>Creating a Sample Application</b>
Before you can create an application that uses the framework discussed in this
chapter, you need to install the framework on your Web server running PHP. From
the CDROM, copy the framework.tar.gz file which is stored in author’s folder under
CH4 directory. Extract the source code into %DocumentRoot% directory which will
create framework directory. Make sure your Web server has read and execution
per-mission for files in this directory.
Listing 4-5 shows a sample application called
sample.phpthat uses the
frame-work we just developed.
<b>Listing 4-5: sample.php</b>
<?php
// Turn on all error reporting
error_reporting(E_ALL);
require_once ‘sample.conf’;
require_once ‘sample.errors’;
require_once ‘sample.messages’;
$thisApp = new sampleApp(
array(
‘app_name’=> ‘Sample Application’,
‘app_version’ => ‘1.0.0’,
‘app_type’ => ‘WEB’,
‘app_db_url’ =>
$GLOBALS[‘SAMPLE_DB_URL’],
‘app_auto_authorize’ => FALSE,
‘app_auto_chk_session’ => FALSE,
‘app_auto_connect’ => FALSE,
‘app_type’ => ‘WEB’,
‘app_debugger’ => $ON
)
);
$thisApp->buffer_debugging();
$thisApp->debug(“This is $thisApp->app_name application”);
$thisApp->run();
$thisApp->dump_debuginfo();
?>
</div>
<span class='text_page_counter'>(144)</span><div class='page_container' data-page=144>
First, this application loads the
sample.conffile shown in Listing 4-6.
<b>Listing 4-6: sample.conf</b>
<?php
// Turn on all error reporting
error_reporting(E_ALL);
// If you have installed PEAR packages in a different
// directory than %DocumentRoot%/pear change the
// setting below.
$PEAR_DIR = $_SERVER[‘DOCUMENT_ROOT’] . ‘/pear’ ;
// If you have installed PHPLIB in a different
// directory than %DocumentRoot%/phplib, change
// the setting below.
$PHPLIB_DIR = $_SERVER[‘DOCUMENT_ROOT’] . ‘/phplib’;
// If you have installed framewirk directory in
// a different directory than
// %DocumentRoot%/framework, change the setting below.
$APP_FRAMEWORK_DIR=$_SERVER[‘DOCUMENT_ROOT’] . ‘/framework’;
// Relative URL to login script
$AUTHENTICATION_URL=’/login/login.php’;
//Default language
$DEFAULT_LANGUAGE = ‘US’;
// Create a path consisting of the PEAR,
// PHPLIB and our application framework
// path ($APP_FRAMEWORK_DIR)
$PATH = $PEAR_DIR . ‘:’ .
$PHPLIB_DIR . ‘:’ .
$APP_FRAMEWORK_DIR;
// Insert the path in the PHP include_path so that PHP
// looks for our PEAR, PHPLIB and application framework
// classes in these directories
ini_set( ‘include_path’, ‘:’ .
$PATH . ‘:’ .
</div>
<span class='text_page_counter'>(145)</span><div class='page_container' data-page=145>
// Now load the DB.php class from PEAR
require_once ‘DB.php’;
// Now load our DBI class from application framework
require_once $APP_FRAMEWORK_DIR . ‘/’ . ‘constants.php’;
require_once $APP_FRAMEWORK_DIR . ‘/’ . $DEBUGGER_CLASS;
require_once $APP_FRAMEWORK_DIR . ‘/’ . $APPLICATION_CLASS;
require_once $APP_FRAMEWORK_DIR . ‘/’ . $ERROR_HANDLER_CLASS;
require_once $APP_FRAMEWORK_DIR . ‘/’ . $AUTHENTICATION_CLASS;
require_once $APP_FRAMEWORK_DIR . ‘/’ . $DBI_CLASS;
require_once $APP_FRAMEWORK_DIR . ‘/’ . $USER_CLASS;
require_once $TEMPLATE_CLASS;
// Load the Sample Application class
require_once ‘class.sampleApp.php’;
// Setup the database URL
$SAMPLE_DB_URL = ‘mysql://root:foobar@localhost/testdb’;
?>
This configuration file sets the path for the framework classes using
$APP_FRAMEWORK_DIR
. It sets the application name using
$APPLICATION_NAME, the
default language using
$DEFAULT_LANGUAGE, the application’s database URL using
$SAMPLE_DB_URL
, the application’s authenticator URL using
$AUTHENTICATION_URL.
The configuration file also sets the include path for PHP to include application
framework path, PHPLIB, and PEAR path needed to load various classes. The
classes needed to run the application are loaded using :
require_once()function.
The sample application shown in Listing 4-5 then loads the
sample.errorscon-figuration shown in Listing 4-7.
<b>Listing 4-7: sample.errors</b>
<?php
// Errors for Sample appliction
$ERRORS[‘US’][‘UNAUTHORIZED_ACCESS’] = “Unauthorized access.”;
$ERRORS[‘US’][‘MISSING’] = “Missing or invalid.”;
?>
</div>
<span class='text_page_counter'>(146)</span><div class='page_container' data-page=146>
This configuration file creates a multidimensional array called
$ERRORSand sets
two error codes to appropriate error messages in U.S. English. If the sample
appli-cation is to be used in a different language region, say in Spain, then this file can
be modified to create the ES (shorthand for Spanish) language-specific errors by
replacing US as ES and also translating the actual error messages.
When internationalizing the error messages, the error code such as
UNAUTHORIZED_ACCESSshould not be translated because that code name
is the key to locate the “Unauthorized access” error message. Only the error
message should be translated, and the appropriate language identifier
needs to be set.
The sample application then loads the
sample.messagesfile, which is shown in
Listing 4-8.
<b>Listing 4-8: sample.messages</b>
<?php
$MESSAGES[‘US’][‘APP_FAILED’] = “Application Failed.”;
$MESSAGES[‘US’][‘DEFAULT_MSG’] = “Hello World”;
?>
Like the error message files, this file loads a multidimensional array called
$MESSAGES
with language support for each message.
The sample.conf file also loads the
constants.phpfile, which defines a set of
constants needed by the framework classes. The same sample configuration file also
loads the framework classes along with a class called
class.sampleApp.php,
which is shown in Listing 4-9.
This class extends the
PHPApplicationclass and overrides the
run()and
authorize()
function. It implements another function called
doSomething(),
which is specific to itself. We will discuss the details of this class in the next
sec-tion. Now let’s look at the rest of the
sample.php code.
Once the
class.sampleApp.phpclass is loaded, the session is automatically
started by the
sampleAppobject, which extends the
PHPApplicationobject.
</div>
<span class='text_page_counter'>(147)</span><div class='page_container' data-page=147>
After the
$thisAppobject has been created, the sample application enables
debug message buffering by calling the
buffer_debugging()method in class.
PHPApplication.php class.
It then calls the
run()function, which has been overridden in
class.sampleApp.php
. This is the main function that runs the application.
After the application has run, more debugging information is buffered and the
debug information is dumped:
$thisApp->buffer_debugging();
$thisApp->run();
$thisApp->debug(“Version : “ . $thisApp->get_version());
$thisApp->dump_debuginfo();
Figure 4-6 shows what is displayed when the
sample.phpapplication is run
after a user has already logged in.
<b>Figure 4-6: Output of the sample application with debugging turned on.</b>
You have to have the application framework created in this chapter installed
on your system and at least one user created to run this application.To learn
about how to create a user, see Chapter 5.
</div>
<span class='text_page_counter'>(148)</span><div class='page_container' data-page=148>
Figure 4-7 shows the application with the debug flag turned off.
<b>Figure 4-7: Output of the sample application with debugging turned off.</b>
Listing 4-9 shows the
class.sampleApp.php, which extends the
PHPApplicationclass from our framework.
<b>Listing 4-9: class.sampleApp.php</b>
<?php
class sampleApp extends PHPApplication {
function run()
{
// At this point user is authorized
// Start business logic driver
$this->debug(“Real application code starts here.”);
$this->debug(“Call application specific function here.”);
$this->doSomething();
}
function authorize($email = null)
{
return TRUE;
}
function doSomething()
{
</div>
<span class='text_page_counter'>(149)</span><div class='page_container' data-page=149>
$this->debug(“Started doSomething()”);
echo $MESSAGES[$DEFAULT_LANGUAGE][‘DEFAULT_MSG’];
$this->debug(“Finished doSomething()”);
}
} // Class
?>
This sampleApp class has only three functions:
run(),
authorize(), and
doSomething()
. The
run()function overrides the abstract
run()method provided in
class.PHPApplication.php and it is automatically called when the application is run.
Therefore, sampleApp run() method is needed to application logic in
sample.php.
In the example, the authorization check always returns
TRUE, because this isn’t a
real-world application and the
run()function calls the
doSomething()function,
which simply prints a set of debug messages along with a status message. Notice
that although the application status message
$MESSAGES[$DEFAULT_LANGUAGE][‘DEFAULT_MSG’]
is internationalized, the debug messages are in English.
As you can see the application framework makes writing new applications quite
easy; development time is greatly reduced, because you can build onto the
frame-work instead of starting from scratch every time.
<b>Summary</b>
In this chapter I have shown you how to develop a complete application framework
consisting of a few object-oriented classes. These classes provide a set of facilities
for writing applications that use a standard approach to writing PHP applications
for both intranet and the Web.
The application framework developed in this chapter allows you to develop a
new application by simply extending the primary class, PHPApplication class, of
the framework. Immediately your application inherits all the benefits of the new
framework, which includes a database abstraction, an error handler, and a
debug-ging facility.
This application framework is used throughout the rest of the book for
develop-ing most of the applications discussed in this book. The latest version of this
frame-work is always available from
/></div>
<span class='text_page_counter'>(150)</span><div class='page_container' data-page=150></div>
<span class='text_page_counter'>(151)</span><div class='page_container' data-page=151>
<b>Chapter 5</b>
<b>Central Authentication</b>
<b>System</b>
<b>IN THIS CHAPTER</b>
◆
How central authentication works
◆
How to create central login application
◆
How to create central logout application
◆
How to create central authentication database
◆
How to test central login and logout
◆
How to make persistent logins in Web server farms
<b>A </b>
<b>CENTRAL AUTHENTICATION SYSTEM</b>consists of two applications: login and logout.
The login application allows users to login and the logout application is used to
ter-minate the login session. This chapter shows you how to build and implement such
a system.
<b>How the System Works</b>
First, let’s take a look at how such a system will work with any of your PHP
Application Framework–based applications. Figure 5-1 shows a partial flow
dia-gram for a PHP application that requires authentication and authorization.
When such an application starts up, it checks to see if the user is already
authen-ticated. This is done by checking for the existence of a user session. If such a user
session is found, the user is authenticated and the application then performs the
authorization check itself. If the user is not authenticated already, she is
automati-cally redirected to the authentication system. Similarly, in the authorization phase,
if the user is found to be incapable of running the application due to lack of
privi-lege, she is redirected to the authentication system.
In our PHP Application Framework (PHPAF) model, the authentication
applica-tion is called
login.php. Figure 5-2 shows how this application works.
</div>
<span class='text_page_counter'>(152)</span><div class='page_container' data-page=152>
<b>Figure 5-1: How an application works with the authentication system.</b>
<b>Figure 5-2: How the login application works.</b>
Start
Is valid
user?
Get User
Credentials
Create User Session
Data
Too many
Attempts?
Count
Attempts
login.php
Yes Yes
No
Warn user
about abuse
Redirect the user to
the originating
application
No
Start
Any PHP Application
Yes Yes
No
No
Is user
authenticated?
Is user authorized
to access this
application?
Do application
specific tasks
</div>
<span class='text_page_counter'>(153)</span><div class='page_container' data-page=153>
The login application gets the user credentials (username and password) from the
GUI and checks the validity of the credentials with a user table in the
authentica-tion database. If the user has supplied valid credentials, a user session is created
and the user is directed to the application that made the login request.
A user is given a set number of chances to log in, and if she doesn’t succeed in
providing valid credentials, the login application automatically directs the user to
an HTML page which should warn the user about abuse.
Like the login application, the central logout application can be linked from any
application interface to allow a user to immediately log out. The logout application
works as shown in Figure 5-3.
<b>Figure 5-3: How the logout application works.</b>
The logout application checks if the user is really logged in. If she is logged in, the
user session is removed, and if she isn’t, a “Not Logged In” message is displayed.
The class level architecture of the central authentication system is shown in
Figure 5-4.
Here you can see that the login.php application uses a class called class.
Authentication.php and a framework class called class.PHPApplication.php to
implement its services. The latter class provides database access to the login
appli-cation via another framework class called class.DBI.php. Both of these framework
classes have been developed in Chapter 4. The session management aspect of login
and logout is provided by PHP’s built-in session functionality.
Similarly, the logout application uses the class.PHPApplication to implement its
logout service.
Start
Is user
logged in?
No
Yes
Terminate session
Show "not
logged in"
logout.php
</div>
<span class='text_page_counter'>(154)</span><div class='page_container' data-page=154>
In the rest of the chapter we will create necessary classes and develop the
login/logout applications to implement the above-mentioned central
authentica-tion system.
<b>Figure 5-4: Class Level Architecture of the central authentication system.</b>
<b>Creating an Authentication Class</b>
Listing 5-1 shows the authentication class called
class.Authentication.php,
which will implement the central authentication system.
<b>Listing 5-1: class.Authentication.php</b>
<?php
/*
*
* Application class
*
* @author EVOKNOW, Inc. <>
* @access public
* CVS ID: $Id$
*/
include_once $DEBUGGER_CLASS;
class Authentication {
function Authentication($email = null, $password = null, $db_url = null)
{
class.Authentication.php class.PHPApplication.php
class.DBI.php
Central User
Database
Session
Files
Session
Database
Session API
login.php
Redirected authentication request
from applications using the PHP
Application Framework
logout.php
Authenticated requests redirected
to the originating applications
</div>
<span class='text_page_counter'>(155)</span><div class='page_container' data-page=155>
global $AUTH_DB_TBL;
$this->status = FALSE;
$this->email = $email;
$this->password = $password;
$this->auth_tbl = $AUTH_DB_TBL;
$this->db_url = ($db_url == null) ? null : $db_url;
if ($db_url == null)
{
global $AUTH_DB_TYPE, $AUTH_DB_NAME;
global $AUTH_DB_USERNAME, $AUTH_DB_PASSWD;
global $AUTH_DB_HOST;
$this->db_url = sprintf(“%s://%s:%s@%s/%s”,$AUTH_DB_TYPE,
$AUTH_DB_USERNAME,
$AUTH_DB_PASSWD,
$AUTH_DB_HOST,
$AUTH_DB_NAME);
}
$this->status = FALSE;
}
function authenticate()
{
$dbi = new DBI($this->db_url);
$query = “SELECT USER_ID, PASSWORD from “ . $this->auth_tbl;
$query .= “ WHERE EMAIL = ‘“ . $this->email . “‘ AND ACTIVE = ‘1’”;
$result = $dbi->query($query);
if ($result != null)
{
$row = $result->fetchRow();
$salt = substr($row->PASSWORD,0,2);
if (crypt($this->password, $salt) == $row->PASSWORD)
{
<i>Continued</i>
</div>
<span class='text_page_counter'>(156)</span><div class='page_container' data-page=156>
<b>Listing 5-1</b><i>(Continued)</i>
$this->status = TRUE;
$this->user_id = $row->USER_ID;
} else {
$this->status = FALSE;
}
}
$dbi->disconnect();
return $this->status;
}
function getUID()
{
return $this->user_id;
}
}
?>
The following are the functions in this class:
◆ <b>Authentication()</b>
<b>:</b>
This is the constructor method, which sets the default
values of the authentication object. First it sets the status variable to
FALSE
to signify that authentication is not successful yet. The e-mail
vari-able is set to the e-mail address supplied as part of the parameter. (The
authentication system uses e-mail address as the username and, therefore,
it is a required item in the user-supplied credential.) The password
para-meter is stored in the password variable.
The function also sets the
auth_tbland
db_urlvariables to
authentica-tion table name and the fully qualified database name of the central
authentication database.
</div>
<span class='text_page_counter'>(157)</span><div class='page_container' data-page=157>
Now using this class (
class.Authentication.php) and our existing application
framework, let’s create central login and logout applications.
<b>Creating the Central Login</b>
<b>Application</b>
The purpose of the login application is to present a username and password entry
interface using an HTML template, and then to authenticate the user.
If the user is successfully authenticated by the
class.Authentication.phpobject, the login application creates the session data necessary to let other
applica-tions know that the user is already authenticated and has valid credentials.
If the user doesn’t supply valid credentials, the login application should allow the
user to try a few times (say three times) and, if she fails after retrying for a
config-urable number of times, then she is taken to an HTML page showing a warning about
potential abuse of the system. This is to stop non-users from abusing the system.
Valid users who have forgotten their passwords can run another login
helper application to send new passwords via e-mail.This helper application
is discussed in Chapter 6.
Listing 5-2 shows the login application
login.php, which implements these
features.
<b>Listing 5-2: login.php</b>
<?php
require_once “login.conf”;
require_once “login.errors”;
/*
Session variables must be defined before session_start()
method is called
*/
$count = 0;
class loginApp extends PHPApplication {
<i>Continued</i>
</div>
<span class='text_page_counter'>(158)</span><div class='page_container' data-page=158>
<b>Listing 5-2</b><i>(Continued)</i>
function run()
{
global $MIN_USERNAME_SIZE, $MIN_PASSWORD_SIZE, $MAX_ATTEMPTS;
global $WARNING_URL, $APP_MENU;
$email = $this->getRequestField(‘email’);
$password = $this->getRequestField(‘password’) ;
$url = $this->getRequestField(‘url’);
$emailLen = strlen($email);
$passwdLen = strlen($password);
>debug(“Login attempts : “ .
$this->getSessionField(‘SESSION_ATTEMPTS’));
if ($this->is_authenticated())
{
// return to caller HTTP_REFERRER
$this->debug(“User already authenticated.”);
$this->debug(“Redirecting to $url.”);
$url = (isset($url)) ? $url : $this->getServer();
header(“Location: $url”);
} else if (strlen($email) < $MIN_USERNAME_SIZE ||
strlen($password) < $MIN_PASSWORD_SIZE) {
// display the login interface
$this->debug(“Invalid Email or password.”);
$this->display_login();
$_SESSION[“SESSION_ATTEMPTS”] =
$this->getSessionField(“SESSION_ATTEMPTS”) + 1;
} else {
// Prepare the email with domain name
if (!strpos($email, ‘’))
{
$hostname = explode(‘.’, $_SERVER[‘SERVER_NAME’]);
if (sizeof($hostname) > 1)
{
$email .= ‘’ . $hostname[1] . ‘.’ . $hostname[2];
}
</div>
<span class='text_page_counter'>(159)</span><div class='page_container' data-page=159>
// authenticate user
$this->debug(“Authenticate user: $email with password $password”);
if ($this->authenticate($email, $password))
{
$this->debug(“User is successfully authenticated.”);
$_SESSION[“SESSION_USERNAME”] = $email;
$_SESSION[“SESSION_PASSWORD”] = $password;
$_SESSION[“SESSION_USER_ID”] = $this->getUID();
if (empty($url))
{
$url = $APP_MENU;
}
// Log user activity
$thisUser = new User($this->dbi, $this->getUID());
$thisUser->logActivity(LOGIN);
$this->debug(“Location $url”);
header(“Location: $url”);
$this->debug(“Redirect user to caller application at url =
$url.”);
} else {
$this->debug(“User failed authentication.”);
$this->display_login();
$_SESSION[“SESSION_ATTEMPTS”] =
$this->getSessionField(“SESSION_ATTEMPTS”) + 1;
}
}
}
function warn()
{
global $WARNING_URL;
$this->debug(“Came to warn the user $WARNING_URL”);
header(“Location: $WARNING_URL”);
}
function display_login()
{
<i>Continued</i>
</div>
<span class='text_page_counter'>(160)</span><div class='page_container' data-page=160>
<b>Listing 5-2</b><i>(Continued)</i>
global $TEMPLATE_DIR;
global $LOGIN_TEMPLATE;
global $MAX_ATTEMPTS;
global $REL_TEMPLATE_DIR;
global $email, $url;
global $PHP_SELF,
$FORGOTTEN_PASSWORD_APP;
$url = $this->getRequestField(‘url’);
if ($this->getSessionField(“SESSION_ATTEMPTS”) > $MAX_ATTEMPTS)
{
$this->warn();
}
$this->debug(“Display login dialog box”);
$template = new Template($TEMPLATE_DIR);
$template->set_file(‘fh’, $LOGIN_TEMPLATE);
$template->set_block(‘fh’, “mainBlock”);
$template->set_var(‘SELF_PATH’, $PHP_SELF);
$template->set_var(‘ATTEMPT’,
$this->getSessionField(“SESSION_ATTEMPTS”));
$template->set_var(‘TODAY’, date(“M-d-Y h:i:s a”));
$template->set_var(‘TODAY_TS’, time());
$template->set_var(‘USERNAME’, $email);
$template->set_var(‘REDIRECT_URL’, $url);
$template->set_var(‘FORGOTTEN_PASSWORD_APP’, $FORGOTTEN_PASSWORD_APP);
$template->parse(“fh”, “mainBlock”);
$template->set_var(‘BASE_URL’, sprintf(“%s”,$this->base_url));
$template->pparse(“output”, “fh”);
return 1;
}
function is_authenticated()
{
return (!empty($_SESSION[“SESSION_USERNAME”])) ? TRUE : FALSE;
}
function authenticate($user = null, $passwd = null)
{
</div>
<span class='text_page_counter'>(161)</span><div class='page_container' data-page=161>
if ($authObj->authenticate())
{
$uid = $authObj->getUID();
$this->debug(“Setting user id to $uid”);
$this->setUID($uid);
return TRUE;
}
return FALSE;
}
}
global $AUTH_DB_URL;
$thisApp = new loginApp(
array(
‘app_name’ => $APPLICATION_NAME,
‘app_version’ => ‘1.0.0’,
‘app_type’ => ‘WEB’,
‘app_db_url’ => $AUTH_DB_URL,
‘app_auto_authorize’ => FALSE,
‘app_auto_chk_session’ => FALSE,
‘app_auto_connect’ => TRUE,
‘app_type’ => ‘WEB’,
‘app_debugger’ => $OFF
)
);
$thisApp->buffer_debugging();
$thisApp->debug(“This is $thisApp->app_name application”);
$thisApp->run();
$thisApp->dump_debuginfo();
?>
Figure 5-5 shows the flow diagram of
login.php. When the login application is
run, it goes through the following steps:
<b>1.</b>
It determines if the user is already authenticated. It calls the
is_authen-ticated()
method to determine if the user has a session already. If the
user has a session, the
is_authenticated()method returns
TRUEor else
FALSE
.
<b>2.</b>
If the user is authenticated already, the user is redirected to the
applica-tion that called the login applicaapplica-tion.
</div>
<span class='text_page_counter'>(162)</span><div class='page_container' data-page=162>
<b>3.</b>
If the user is not already authenticated, the
login.phpapplication
deter-mines whether the user supplied a username (e-mail address) and whether
the password passes the minimum-size test. If either the username (e-mail
address) or password does not pass the test, the login attempt is counted
and the login menu or the warning page is displayed according to the
allowed number of login attempts per
login.conffile.
<b>Figure 5-5: A flow diagram of the login.phpapplication.</b>
<b>Start</b>
<b>Stop</b>
No
No
No
Yes
Yes
Yes Is user already
authenticated?
User supplied
valid size email and
password?
Authentication
Successful?
Authenticate user using given
username and password
Create session and redirect user
to the caller application
Redirect user to the
referring URL
</div>
<span class='text_page_counter'>(163)</span><div class='page_container' data-page=163>
<b>4.</b>
If the user credentials (username and password) passes the minimum-size
test, the actual authentication is done using the user record stored in the
authentication database via the
authenticate()method found in the
class.Authentication.php
object.
<b>5.</b>
If the
authenticate()method returns
TRUE, the user is valid and a
ses-sion variable called
SESSION_USERNAMEis registered with the supplied
username (e-mail address).
<b>6.</b>
If the
authenticate()method returns
FALSE, the user login attempt is
counted and the login menu or the warning page is displayed according to
the allowed number of login attempts per
login.conffile.
Now that you know how
login.phpworks, let’s take a look at what
configura-tion it gets from
login.confas shown in Listing 5-3.
<b>Listing 5-3: login.conf</b>
<?php
// login.conf
// Turn on all error reporting
error_reporting(E_ALL);
// If you have installed framework directory in
// a different directory than
// %DocumentRoot%/framework, change the setting below.
$APP_FRAMEWORK_DIR=$_SERVER[‘DOCUMENT_ROOT’] . ‘/framework’;
$PEAR =$_SERVER[‘DOCUMENT_ROOT’] . ‘/pear’;
$PHPLIB =$_SERVER[‘DOCUMENT_ROOT’] . ‘/phplib’;
// Insert the path in the PHP include_path so that PHP
// looks for PEAR, PHPLIB and our application framework
// classes in these directories
ini_set( ‘include_path’, ‘:’ .
$PEAR . ‘:’ .
$PHPLIB . ‘:’ .
$APP_FRAMEWORK_DIR . ‘:’ .
ini_get(‘include_path’));
$PHP_SELF = $_SERVER[“PHP_SELF”];
$LOGIN_TEMPLATE = ‘login.html’;
$APPLICATION_NAME = ‘LOGIN’;
$DEFAULT_LANGUAGE = ‘US’;
<i>Continued</i>
</div>
<span class='text_page_counter'>(164)</span><div class='page_container' data-page=164>
<b>Listing 5-3</b><i>(Continued)</i>
$AUTH_DB_URL = ‘mysql://root:foobar@localhost/auth’;
$ACTIVITY_LOG_TBL = ‘ACTIVITY’;
$AUTH_DB_TBL = ‘users’;
$MIN_USERNAME_SIZE= 5;
$MIN_PASSWORD_SIZE= 8;
$MAX_ATTEMPTS = 5;
$FORGOTTEN_PASSWORD_APP = ‘/user_mngr/apps/user_mngr_forgotten_pwd.php’;
$APP_MENU = ‘/’;
$TEMPLATE_DIR = $_SERVER[‘DOCUMENT_ROOT’] . ‘/login/templates’;
$REL_TEMPLATE_DIR = ‘/login/templates/’;
$WARNING_URL = $TEMPLATE_DIR . ‘/warning.html’;
require_once “login.errors”;
require_once “login.messages”;
require_once ‘DB.php’;
require_once $APP_FRAMEWORK_DIR . ‘/’ . ‘constants.php’;
require_once $APP_FRAMEWORK_DIR . ‘/’ . $DEBUGGER_CLASS;
require_once $APP_FRAMEWORK_DIR . ‘/’ . $APPLICATION_CLASS;
require_once $APP_FRAMEWORK_DIR . ‘/’ . $ERROR_HANDLER_CLASS;
require_once $APP_FRAMEWORK_DIR . ‘/’ . $AUTHENTICATION_CLASS;
require_once $APP_FRAMEWORK_DIR . ‘/’ . $DBI_CLASS;
require_once $APP_FRAMEWORK_DIR . ‘/’ . $USER_CLASS;
require_once $TEMPLATE_CLASS;
?>
The configuration details are explained in Table 5-1.
<b>T</b>
<b>ABLE</b><b>5-1</b>
LOGIN.CONF<b>EXPLANATIONS</b>
<b>Variable</b>
<b>Description</b>
$APP_FRAMEWORK_DIR Sets the framework directory to
%DocumentRoot%framework.
$TEMPLATE_DIR Sets /evoknow/intranet/php/login/templates
</div>
<span class='text_page_counter'>(165)</span><div class='page_container' data-page=165>
<b>Variable</b>
<b>Description</b>
$LOGIN_TEMPLATE Sets the name of the login menu file to login.ihtml.
This file has to be stored in /evoknow/intranet/php/
login/templates/login.ihtml.
$APPLICATION_NAME Sets the name of the application to LOGIN.
$DEFAULT_LANGUAGE Sets the default language of the application to US.
$AUTH_DB_TYPE Sets the database type to mysql.
$AUTH_DB_HOST Sets the database server location to localhost.
$AUTH_DB_NAME Sets the authentication database name to auth, which
must have the table specified by $AUTH_DB_TBLfields.
$AUTH_DB_TBL Sets the name of the user information table to users.
$AUTH_DB_USERNAME Sets the username required to access the database. Since
sensitive database information is stored in login.conf file
make sure either store it outside the Web document tree
or use Apache configuration that disallows Web visitors
from retrieving .conf files. See Chapter 22 for details.
$AUTH_DB_PASSWD Sets the password required to access the database. Since
sensitive database information is stored in login.conf file
make sure either store it outside the Web document tree
or use Apache configuration that disallows Web visitors
from retrieving .conf files. See Chapter 22 for details.
$MIN_USERNAME_SIZE Sets the minimum username size to 5. Usernames smaller
than five characters can be guessed too easily and
therefore at least five character name is preferred.
$MIN_PASSWORD_SIZE
$MAX_ATTEMPTS Sets the maximum number of tries to 3.
$WARNING_URL Sets the warning page URL to
/php/login/templates/warning.html.
$DEFAULT_DOMAIN Sets the default name to evoknow.com.
$APP_MENU Sets the name of the application menu to
/php/menu.php. If the login application was directly
called, the successfully authenticated user is redirected to
this menu.
</div>
<span class='text_page_counter'>(166)</span><div class='page_container' data-page=166>
All the error messages that the
login.phpapplication generates are taken from
the
login.errorsfile shown in Listing 5-4.
<b>Listing 5-4: login.errors</b>
<?php
// Errors for Login application
$ERRORS[‘US’][‘MISSING_CODE’] = “No error message found”;
$ERRORS[‘US’][‘INVALID_DATA’] = “Invalid data.”;
?>
The
login.phpapplication displays the login menu using the
login.ihtmlfile,
which is shown in Listing 5-5. The
$LOGIN_TEMPLATEis set to point to
login.ihtml
in the
login.conffile.
<b>Listing 5-5: login.ihtml</b>
<html>
<head><title>Login</title></head>
<body>
<!-- BEGIN mainBlock -->
<center>
<form action=”{SELF_PATH}” method=”POST”>
<table border=0 cellpadding=3 cellspacing=0 width=30%>
<tr>
<td bgcolor=”#cccccc” colspan=2>Login</td>
</tr>
<tr>
<td>Email</td>
<td><input type=text
name=”email”
value=”{USERNAME}”
size=30
maxsize=50>
</td>
</tr>
<tr>
<td>Password</td>
<td><input type=password name=”password” size=30 maxsize=50></td>
</tr>
<tr>
</div>
<span class='text_page_counter'>(167)</span><div class='page_container' data-page=167>
<input type=submit value=”Login”>
<input type=reset value=”Reset”>
</td>
</tr>
</table>
<input type=hidden name=”url”
value=”{REDIRECT_URL}”>
</form>
<font size=2>Login attempt {ATTEMPT}.</font>
</center>
<!-- END mainBlock -->
</body>
</html>
The
login.ihtmltemplate has a set of template tag variables that are replaced
by the
login.phpapplication. These template tag variables are explained in Table
5-2.
<b>T</b>
<b>ABLE</b><b>5-2 TEMPLATE TAG VARIABLES IN LOGIN TEMPLATE</b>
<b>Template Tag</b>
<b>Explanation</b>
{SELF_PATH} Set as a form action. The login application replaces this with the
relative path to the login application itself. This allows the login
menu form to be submitted to the login application itself.
{USERNAME} Replaced with the username previously entered when the user
failed to successfully authenticate the first time. This saves the
user from having to type the username again and again when
she doesn’t remember the password correctly. This is a
user-friendly feature.
{REDIRECT_URL} Set to the URL of the application that redirected the user to the
login application.
{ATTEMPT} Displays the number of login attempts the user has made.
When the login attempts exceed the number of attempts set in the
$MAX_ATTEMPTS
variable in the
login.conffile, the user is redirected to the
$WARNING_URL
page, which is shown in Listing 5-6.
</div>
<span class='text_page_counter'>(168)</span><div class='page_container' data-page=168>
<b>Listing 5-6: warning.html</b>
<html>
<head>
<title>Invalid Login Attempts</title>
</head>
<body>
<h1>Excessive Invalid Login Attempts</h1>
<hr>
You have attempted to login too many times.
</body>
</html>
The warning page can be any page. For example, you can set
$WARNING_URLto your privacy or network usage policy page to alert the
user of your policies on resource usage.
<b>Creating the Central Logout</b>
<b>Application</b>
The central logout application terminates the user session. A flowchart of such an
application is shown in Figure 5-6.
<b>Figure 5-6: A flowchart for the logout application.</b>
<b>Start</b>
<b>Stop</b>
Yes
No <sub>Is user already</sub>
authenticated?
Logout the user by terminating the
session and redirect the user to the
home URL.
Show alert message
</div>
<span class='text_page_counter'>(169)</span><div class='page_container' data-page=169>
The logout application checks to see whether the user is logged in. If the user is
not logged in, she is warned of her status. If the user is logged in, her session is
ter-minated and the user is redirected to a home URL. Listing 5-7 implements this
flow-chart in
logout.php.
<b>Listing 5-7: logout.php</b>
<?php
require_once “login.conf”;
require_once “login.errors”;
/*
Session variables must be defined before session_start()
method is called
*/
$count = 0;
class loginApp extends PHPApplication {
function run()
{
global $MIN_USERNAME_SIZE, $MIN_PASSWORD_SIZE, $MAX_ATTEMPTS;
global $WARNING_URL, $APP_MENU;
$email = $this->getRequestField(‘email’);
$password = $this->getRequestField(‘password’) ;
$url = $this->getRequestField(‘url’);
$emailLen = strlen($email);
$passwdLen = strlen($password);
$this->debug(“Login attempts : “ .
$this->getSessionField(‘SESSION_ATTEMPTS’));
if ($this->is_authenticated())
{
// return to caller HTTP_REFERRER
$this->debug(“User already authenticated.”);
$this->debug(“Redirecting to $url.”);
$url = (isset($url)) ? $url : $this->getServer();
header(“Location: $url”);
<i>Continued</i>
</div>
<span class='text_page_counter'>(170)</span><div class='page_container' data-page=170>
<b>Listing 5-7</b><i>(Continued)</i>
} else if (strlen($email) < $MIN_USERNAME_SIZE ||
strlen($password) < $MIN_PASSWORD_SIZE) {
// display the login interface
$this->debug(“Invalid Email or password.”);
$this->display_login();
$_SESSION[“SESSION_ATTEMPTS”] =
$this->getSessionField(“SESSION_ATTEMPTS”) + 1;
} else {
// Prepare the email with domain name
if (!strpos($email, ‘’))
{
$hostname = explode(‘.’, $_SERVER[‘SERVER_NAME’]);
if (sizeof($hostname) > 1)
{
$email .= ‘’ . $hostname[1] . ‘.’ . $hostname[2];
}
}
// authenticate user
$this->debug(“Authenticate user: $email with password $password”);
if ($this->authenticate($email, $password))
{
$this->debug(“User is successfully authenticated.”);
$_SESSION[“SESSION_USERNAME”] = $email;
$_SESSION[“SESSION_PASSWORD”] = $password;
$_SESSION[“SESSION_USER_ID”] = $this->getUID();
if (empty($url))
{
$url = $APP_MENU;
}
// Log user activity
$thisUser = new User($this->dbi, $this->getUID());
$thisUser->logActivity(LOGIN);
</div>
<span class='text_page_counter'>(171)</span><div class='page_container' data-page=171>
$this->debug(“Redirect user to caller application at url =
$url.”);
} else {
$this->debug(“User failed authentication.”);
$this->display_login();
$_SESSION[“SESSION_ATTEMPTS”] =
$this->getSessionField(“SESSION_ATTEMPTS”) + 1;
}
}
}
function warn()
{
global $WARNING_URL;
$this->debug(“Came to warn the user $WARNING_URL”);
header(“Location: $WARNING_URL”);
}
function display_login()
{
global $TEMPLATE_DIR;
global $LOGIN_TEMPLATE;
global $MAX_ATTEMPTS;
global $REL_TEMPLATE_DIR;
global $email, $url;
global $PHP_SELF,
$FORGOTTEN_PASSWORD_APP;
$url = $this->getRequestField(‘url’);
if ($this->getSessionField(“SESSION_ATTEMPTS”) > $MAX_ATTEMPTS)
{
$this->warn();
}
$this->debug(“Display login dialog box”);
$template = new Template($TEMPLATE_DIR);
$template->set_file(‘fh’, $LOGIN_TEMPLATE);
$template->set_block(‘fh’, “mainBlock”);
$template->set_var(‘SELF_PATH’, $PHP_SELF);
$template->set_var(‘ATTEMPT’,
$this->getSessionField(“SESSION_ATTEMPTS”));
<i>Continued</i>
</div>
<span class='text_page_counter'>(172)</span><div class='page_container' data-page=172>
<b>Listing 5-7</b><i>(Continued)</i>
$template->set_var(‘TODAY’, date(“M-d-Y h:i:s a”));
$template->set_var(‘TODAY_TS’, time());
$template->set_var(‘USERNAME’, $email);
$template->set_var(‘REDIRECT_URL’, $url);
$template->set_var(‘FORGOTTEN_PASSWORD_APP’, $FORGOTTEN_PASSWORD_APP);
$template->parse(“fh”, “mainBlock”);
$template->set_var(‘BASE_URL’, sprintf(“%s”,$this->base_url));
$template->pparse(“output”, “fh”);
return 1;
}
function is_authenticated()
{
return (!empty($_SESSION[“SESSION_USERNAME”])) ? TRUE : FALSE;
}
function authenticate($user = null, $passwd = null)
{
$authObj = new Authentication($user, $passwd, $this->app_db_url);
if ($authObj->authenticate())
{
$uid = $authObj->getUID();
$this->debug(“Setting user id to $uid”);
$this->setUID($uid);
return TRUE;
}
return FALSE;
}
}
global $AUTH_DB_URL;
$thisApp = new loginApp(
array(
‘app_name’ => $APPLICATION_NAME,
‘app_version’ => ‘1.0.0’,
</div>
<span class='text_page_counter'>(173)</span><div class='page_container' data-page=173>
‘app_auto_connect’ => TRUE,
‘app_type’ => ‘WEB’,
‘app_debugger’ => $OFF
)
);
$thisApp->buffer_debugging();
$thisApp->debug(“This is $thisApp->app_name application”);
$thisApp->run();
$thisApp->dump_debuginfo();
?>
The
logout.phpapplication calls the
is_authenticated()method of the
class.PHPApplication.php
object and, if the user is authenticated, it calls its own
logout method. This method calls the
session_unset()and
session_destroy()methods, which are part of PHP’s built-in session management API. The
ses-sion_unset()
method simply makes the session variables as if they were never set
before. The effect of
session_unset()in our login scenario is that session
vari-ables such as
SESSION_USERNAMEand
SESSION_ATTEMPTSare unset. Similarly, the
session_destroy()
method removes the entire session (file or database record)
from the session storage. The full effect is that the user loses her session and will
need a new login session to work with applications that require the central login
facility.
The
logout.phpapplication uses the
logout.conffile shown in Listing 5-8.
This configuration file is very similar to the
login.confand requires no further
explanation except that the
$HOME_URLis a new entry. This variable sets the URL,
which is used to redirect the logged out user to a central page. Typically this URL
would be set to the home page of the intranet or Internet site.
<b>Listing 5-8: logout.conf</b>
<?php
// login.conf
//extract($_GET);
//extract($_POST);
// Turn on all error reporting
error_reporting(E_ALL);
// If you have installed framewirk directory in
// a different directory than
// %DocumentRoot%/framework, change the setting below.
<i>Continued</i>
</div>
<span class='text_page_counter'>(174)</span><div class='page_container' data-page=174>
<b>Listing 5-8</b><i>(Continued)</i>
$APP_FRAMEWORK_DIR=$_SERVER[‘DOCUMENT_ROOT’] . ‘/framework’;
$PEAR =$_SERVER[‘DOCUMENT_ROOT’] . ‘/pear’;
$PHPLIB =$_SERVER[‘DOCUMENT_ROOT’] . ‘/phplib’;
// Insert the path in the PHP include_path so that PHP
// looks for PEAR, PHPLIB and our application framework
// classes in these directories
ini_set( ‘include_path’, ‘:’ .
$PEAR . ‘:’ .
$PHPLIB . ‘:’ .
$APP_FRAMEWORK_DIR . ‘:’ .
ini_get(‘include_path’));
$PHP_SELF = $_SERVER[“PHP_SELF”];
$LOGIN_TEMPLATE = ‘login.html’;
$APPLICATION_NAME = ‘LOGIN’;
$DEFAULT_LANGUAGE = ‘US’;
$AUTH_DB_URL = ‘mysql://root:foobar@localhost/auth’;
$ACTIVITY_LOG_TBL = ‘ACTIVITY’;
$AUTH_DB_TBL = ‘users’;
$MIN_USERNAME_SIZE= 3;
$MIN_PASSWORD_SIZE= 3;
$MAX_ATTEMPTS = 250;
$FORGOTTEN_PASSWORD_APP =
‘/user_mngr/apps/user_mngr_forgotten_pwd.php’;
$APP_MENU = ‘/’;
$TEMPLATE_DIR = $_SERVER[‘DOCUMENT_ROOT’] .
‘/login/templates’;
$REL_TEMPLATE_DIR = ‘/login/templates/’;
$WARNING_URL = $TEMPLATE_DIR . ‘/warning.html’;
require_once “login.errors”;
require_once “login.messages”;
require_once ‘DB.php’;
</div>
<span class='text_page_counter'>(175)</span><div class='page_container' data-page=175>
require_once $APP_FRAMEWORK_DIR . ‘/’ . $DEBUGGER_CLASS;
require_once $APP_FRAMEWORK_DIR . ‘/’ . $APPLICATION_CLASS;
require_once $APP_FRAMEWORK_DIR . ‘/’ . $ERROR_HANDLER_CLASS;
require_once $APP_FRAMEWORK_DIR . ‘/’ . $AUTHENTICATION_CLASS;
require_once $APP_FRAMEWORK_DIR . ‘/’ . $DBI_CLASS;
require_once $APP_FRAMEWORK_DIR . ‘/’ . $USER_CLASS;
require_once $TEMPLATE_CLASS;
?>
The logout application also has a
logout.errorsfile, shown in Listing 5-9, and
logout.messages
file, shown in Listing 5-10.
<b>Listing 5-9: logout.errors</b>
<?php
// Errors for Logout application
$ERRORS[‘US’][‘MISSING_CODE’] = “No error message found”;
$ERRORS[‘US’][‘INVALID_DATA’] = “Invalid data.”;
?>
The logout messages are displayed using the
alert()method found in the
class.PHPApplication.php
object.
<b>Listing 5-10: logout.messages</b>
<?php
// Messages for logout applications
$MESSAGES[‘US’][‘LOGOUT_SUCCESSFUL’] = “You are logged out.”;
$MESSAGES[‘US’][‘LOGOUT_FAILURE’] = “You are not logged in.”;
$MESSAGES[‘US’][‘LOGOUT_NOT_LOGGED_IN’] = “You are not logged in.”;
?>
Now let’s test our central login and logout applications.
</div>
<span class='text_page_counter'>(176)</span><div class='page_container' data-page=176>
<b>Creating the Central Authentication</b>
<b>Database</b>
Before you can use the login and logout applications, you need to create the central
authentication database and then add a user to it. The central authentication
data-base information is stored in both
login.confand
logout.conffiles using the
following configuration variables:
$AUTH_DB_TYPE = ‘mysql’;
$AUTH_DB_HOST = ‘localhost’;
$AUTH_DB_NAME = ‘auth’;
$AUTH_DB_TBL = ‘users’;
$AUTH_DB_USERNAME = ‘root’;
$AUTH_DB_PASSWD = ‘foobar’;
In our example, the database type is
mysqland the database host name is
local-host
, which means we’re implementing the database on the same server as a MySQL
database. If you want to use a different database host or a different database server such
as Postgres or Oracle, you have to change these variables. For our example, I assume
that you’re using the given sample values for
$AUTH_DB_TYPE,
$AUTH_DB_HOST,
$AUTH_DB_NAME
, and
$AUTH_DB_TBL. However, I strongly suggest that you use different
$AUTH_DB_USERNAME
and
$AUTH_DB_PASSWDvalues for your database.
Make sure that the user you specify in $AUTH_DB_USERNAMEhas the
privi-lege to access (select,insert,update, and delete) $AUTH_DB_NAME
on $AUTH_DB_HOST. You should test the user’s ability to access this
data-base using your standard datadata-base-access tools. For example, if you’re using
MySQL, you can run the command-line MySQL client as mysql -u root
-p -D authto access the authentication database.
Assuming that you’re using the given settings, you can create a MySQL database
called
authusing the
mysqladmin create authcommand. You’ll require
appro-priate permission to run
mysqladminor equivalent commands to create the
authdatabase. Please consult your MySQL documentation for details.
Now to create the
$AUTH_DB_TBL(users) table you can run the
users.sqlscript
using
mysql -u <i>AUTH_DB_USERNAME</i> -p -D <i>AUTH_DB_NAME </i>< auth.sqlcom-mand. The
auth.ddlscript is shown in Listing 5-11.
<b>Listing 5-11: auth.sql</b>
# phpMyAdmin MySQL-Dump
# version 2.2.5
</div>
<span class='text_page_counter'>(177)</span><div class='page_container' data-page=177>
# (download page)
#
# Host: localhost
# Generation Time: May 14, 2002 at 01:55 PM
# Server version: 3.23.35
# PHP Version: 4.1.0
# Database : `auth`
#
---#
# Table structure for table `users`
#
CREATE TABLE users (
UID int(11) NOT NULL auto_increment,
EMAIL varchar(32) NOT NULL default ‘’,
PASSWORD varchar(128) NOT NULL default ‘’,
ACTIVE tinyint(4) NOT NULL default ‘0’,
TYPE tinyint(4) NOT NULL default ‘0’,
PRIMARY KEY (UID),
UNIQUE KEY EMAIL (EMAIL)
) TYPE=MyISAM COMMENT=’User Authentication Table’;
The table created using this script is described in Table 5-3.
<b>T</b>
<b>ABLE</b><b>5-3 THE USER TABLE FIELDS</b>
<b>Field</b>
<b>Details</b>
UID This is the user ID field. This is automatically generated.
EMAIL This is the username field. We use e-mail as the username in the
login because e-mail is easy to remember and always unique for
each person in an organization.
PASSWORD This is the encrypted password.
ACTIVE This is the active (1 or 0) field. If the value is 1, then the user is
active and can log in. Otherwise, she cannot log in.
TYPE The type of user is specified using this field. The type can be a
number. Currently, we assume that the number 9 is the
highest-ranking user, such as the administrator.
After this table is created, you can add a user, as explained in the following
sec-tion, to test your login/logout applications.
</div>
<span class='text_page_counter'>(178)</span><div class='page_container' data-page=178>
<b>Testing Central Login and Logout</b>
To test the authentication system, you need to create users in the database. (User
management applications are discussed Chapter 6.)
To create a user using the MySQL command-line tool you can run commands
such as the following:
mysql -u root -p -D auth;
Enter password: *****
mysql> insert into users (EMAIL, PASSWORD, ACTIVE, TYPE)
values(‘’, ENCRYPT(‘mysecret’), 1, 9);
Here the first line tells mysql to connect you to the auth database using
user-name root and a password which you have to enter when asked. Of course if you
are not using root account for this database, you should replace the username as
appropriate.
Next at the mysql prompt, you can enter an INSERT statement as shown. Here
the insert statement creates a user account called with
pass-word mysecret. You should change both the username and passpass-word to what you
desire. The ACTIVE field is set to 1 to turn on the user and TYPE field is set to 9 to
make this user an administrator. To create a regular user the TYPE field has to be set
to 1.
The insert statement inserts a user named “” with a
pass-word called “mysecret” and sets the user’s status to active. The user type is set to
9,
which is the highest-ranking user type. If you want to create new users using this
script, then you have to change the username and password and run the script to
produce the insert statement.
After the user is added in the database you can run the login application from a
Web browser. For example, Figure 5-7 shows the login application being called
using the
/></div>
<span class='text_page_counter'>(179)</span><div class='page_container' data-page=179>
Enter the newly created username and password and log in. If you cannot login,
check to see if the user exists in the authentication database. Also, if the user is not
active, the user cannot log in. You can check whether the active flag is working by
toggling it using
updatestatements such as follows from your MySQL database
command line. The following code shows a MySQL command-line session, which
sets the active flag to 0 (
ACTIVE = 0) and again activates the admin user (
ACTIVE= 1
).
$ mysql -u AUTH_DB_USERNAME -p -D AUTH_DB_NAME
mysql> update users set ACTIVE = 0 where USERNAME =
‘’;
mysql> exit;
$ mysql -u <i>AUTH_DB_USERNAME</i> -p -D <i>AUTH_DB_NAME</i>
mysql> update users set ACTIVE = 1 where USERNAME =
‘’;
mysql> exit;
You can test the logout application by simply calling it directly using the
appro-priate URL. For example,
/>will log out a user session.
<b>Making Persistent Logins in </b>
<b>Web Server Farms</b>
Organizations with Web server farms will have to use site-wide persistent logins to
ensure that users are not required to log in from one system to another. Figure 5-8
shows a typical Web server farm.
<b>Figure 5-8: A typical Web server farm balances an organization’s server workload.</b>
Web
Server 1
Web
Server 2
Load Balancer
Web
Server 3
Web
Server <i>n</i>
</div>
<span class='text_page_counter'>(180)</span><div class='page_container' data-page=180>
Web server farms are often used to increase scalability and redundancy for the
application services the organization provides. Such a farm usually implements all
the applications in each server node so that any one of the servers can go down or
become busy at any time but the user is directed to a server that is able to service
the application request.
In such an environment, the session data cannot be stored in local files in each
server node. Figure 5-9 shows what happens when file-based user sessions are used
in a Web server farm.
<b>Figure 5-9: Why file-based sessions are not persistent in Web server farms.</b>
When a user logs into a system using a file-based session, the file is stored in a
single server and, in the next request, the user might be sent to a different server
due to load or server failure. In such a case the next system will not have access to
the session and will simply redirect the user to the login application to create a new
login session. This can annoy and inconvenience the user, so a central
database-based session solution is needed, which is shown in Figure 5-10.
To implement this solution, we need to define seven session management
func-tions that PHP will use to implement sessions.
The functions are
session_open(),
sess_close(),
sess_read(),
sess_write(),
sess_destroy()
,
sess_gc(), and
session_set_save_handler(). The
sess_open()function is called to start the session, the
sess_close()function called when
ses-sion is closed, the
sess_read()function is called to read the session information,
the
sess_destroy()function is called when session is to be destroyed, the
sess_gc()
function is called when garbage collection needs to be done, and finally
session_set_save_hander()
is used to tell PHP the names of the other six session
functions.
Web
Server 1
Web
Server 2
Load Balancer
Any Request for Application X
User request for
application X
Web
Server 3
Web
Server <i>n</i>
1st Request 2nd Request nth Request
Session
File
Session
File
</div>
<span class='text_page_counter'>(181)</span><div class='page_container' data-page=181>
<b>Figure 5-10: How database-based sessions persist in Web server farms.</b>
Listing 5-12 shows libsession_handler.php which implements all these functions.
<b>Listing 5-12: lib.session_handler.php</b>
<?php
error_reporting(E_ALL);
require_once(‘constants.php’);
require_once(‘class.DBI.php’);
require_once ‘DB.php’;
$DB_URL = “mysql://root:foobar@localhost:/sessions”;
$dbi = new DBI($DB_URL);
<i>Continued</i>
Web
Server 1
Web
Server 2
Load Balancer
Request for application X
Session Database Server
Old Session File New Session File
User request for
application X
Web
Server 3
Web
Server <i>n</i>
Request 2 for application X
User request for
application X
</div>
<span class='text_page_counter'>(182)</span><div class='page_container' data-page=182>
<b>Listing 5-12</b><i>(Continued)</i>
$SESS_LIFE = get_cfg_var(“session.gc_maxlifetime”);
function sess_open($save_path, $session_name) {
return true;
}
function sess_close() {
return true;
}
function sess_read($key) {
global $dbi, $DEBUG, $SESS_LIFE;
$statement = “SELECT value FROM sessions WHERE “ .
“sesskey = ‘$key’ AND expiry > “ . time();
$result = $dbi->query($statement);
$row = $result->fetchRow();
if ($row) {
return $row->value;
}
return false;
}
function sess_write($key, $val) {
global $dbi, $SESS_LIFE;
$expiry = time() + $SESS_LIFE;
$value = addslashes($val);
$statement = “INSERT INTO sessions “.
“VALUES (‘$key’, $expiry, ‘$value’)”;
$result = $dbi->query($statement);
if (! $result) {
$statement = “UPDATE sessions SET “ .
“ expiry = $expiry, value = ‘$value’ “ .
“ WHERE sesskey = ‘$key’ AND expiry > “ .
time();
</div>
<span class='text_page_counter'>(183)</span><div class='page_container' data-page=183>
return $result;
}
function sess_destroy($key) {
global $dbi;
$statement = “DELETE FROM sessions WHERE sesskey = ‘$key’”;
$result = $dbi->query($statement);
return $result;
}
function sess_gc($maxlifetime) {
global $dbi;
$statement = “DELETE FROM sessions WHERE expiry < “ . time();
$qid = $dbi->query($statement);
return 1;
}
session_set_save_handler(
“sess_open”,
“sess_close”,
“sess_read”,
“sess_write”,
“sess_destroy”,
“sess_gc”);
?>
Here the
sess_open(),
sess_close(),
sess_read(),
sess_destory(), and
sess_gc()
methods use a DBI object from our
class.DBI.phpclass to implement
database-based session management. To implement this database-based session
management in our framework, we need to do the following:
<b>1.</b>
Place the
lib.session_handler.phpin the framework directory. For
example, if you’re keeping the
class.PHPApplication.phpin the
/usr/php/framewor
k directory, then you should put the
lib.session_handler.ph
p in the same directory.
<b>2.</b>
Create a database called sessions using
mysqladmincommand such as
mysqladmin -u root -p create sessions
. You will need to know the
username (here root) and password that is allowed to create databases.
Next create a table called
sessionsusing the
sessions.ddlscript with
the
mysql -u root -p -D sessions < sessions.sqlcommand. Here’s
the
sessions.sql:
</div>
<span class='text_page_counter'>(184)</span><div class='page_container' data-page=184>
CREATE TABLE sessions (
sesskey varchar(32) NOT NULL default ‘’,
expiry int(11) NOT NULL default ‘0’,
value text NOT NULL,
PRIMARY KEY (sesskey)
) TYPE=MyISAM;
<b>3.</b>
Modify the following line in
lib.session_handler.phpto reflect your
user name, password, and database host name:
$DB_URL = “mysql://root:foobar@localhost:/sessions”;
Here user name is
root, password is
foobar, and database host is
local-host
. You should change them if they’re different for your system.
<b>4.</b>
Add the following line at the beginning of the
class.PHPApplication.php
file.
require_once ‘lib.session_handler.php’;
After you’ve completed these steps, you can run your login application and see
that sessions are being created in the sessions table in the sessions database. To
view sessions in your sessions database, run
mysql -u root -p -Dsessions. When
you’re logged into the sessions database, you can view sessions using queries such
as the following:
mysql> select * from sessions;
+---+---+---+
| sesskey | expiry | value |
+---+---+---+
| 3b6c2ce7ba37aa61a161faafbf8c24c7 | 1021365812 | SESSION_ATTEMPTS|i:3; |
+---+---+---+
1 row in set (0.00 sec)
After a successful login:
mysql> select * from sessions;
+---+---+---+
| sesskey | expiry | value
|
+---+---+---+
| 3b6c2ce7ba37aa61a161faafbf8c24c7 | 1021365820 |
SESSION_ATTEMPTS|i:3;SESSION_USERNAME|s:15:””; |
</div>
<span class='text_page_counter'>(185)</span><div class='page_container' data-page=185>
1 row in set (0.00 sec)
After logging out:
mysql> select * from sessions;
Empty set (0.00 sec)
You can see that the session is started after login.php and the session is removed
once the user runs logout.php.
<b>Summary</b>
In this chapter you learned about a central authentication system which involves a
login and logout application and a central authentication database. All PHP
appli-cations in your intranet or Web can use this central authentication facility. When
an application is called directly by entering the URL in the Web browser, it can
check for the existence of a session for the user and if an existing session is found,
she is allowed access or else she is redirected to the login form. The logout
applica-tion can be linked from any PHP applicaapplica-tion to allow the user log out at any time.
Once logged out the session is removed. Having a central authentication system
such as this helps you reduce the amount of code and maintenance you need to do
for creating a seamless authentication process throughout your entire Web or
intranet environment.
</div>
<span class='text_page_counter'>(186)</span><div class='page_container' data-page=186></div>
<span class='text_page_counter'>(187)</span><div class='page_container' data-page=187>
<b>Chapter 6</b>
<b>Central User Management</b>
<b>System</b>
<b>IN THIS CHAPTER</b>
◆
Designing a user management system for the central authentication system
◆
Implementing a user management system
◆
Managing administrator and regular users
◆
Creating a user-password application
◆
Creating a forgotten-password recovery application
<b>A </b>
<b>CENTRAL USER MANAGEMENT</b>system is a set of applications that enables you to
manage users for your PHP applications in a central manner. Using the applications
developed in this chapter you will be able to manage user accounts that are stored
in the central authentication database created in the previous chapter.
<b>Identifying the Functionality</b>
<b>Requirements</b>
First, let’s define the functionality requirements for the user management system.
The user manager must provide the following functionality:
◆
<b>Central user database:</b>
The user manager must use a central user
data-base. This is a requirement because of our central authentication
architec-ture. If the user database is not central, we can’t centrally authenticate the
users.
◆
<b>Root user support: </b>
A user should be identified as the root user, which
cannot be deleted or deactivated by anyone including the root user itself.
◆
<b>Administrative user support: </b>
The root user should be able to create other
administrative users.
◆
<b>Standard user support: </b>
A root or administrative user can create, modify,
</div>
<span class='text_page_counter'>(188)</span><div class='page_container' data-page=188>
◆
<b>User password support: </b>
A standard user can change her password at any
time after logging in.
◆
<b>Password recovery support: </b>
If a user forgets her password, she can
recover it.
To implement these features we need a User object that can permit all of these
operations on a user account.
<b>Creating a User Class</b>
The very first class that we need to build here is the User class, which will provide
methods to add, modify, delete user accounts and also return various other
infor-mation about an user.
User()
is the constructor method for the User class. It sets the variables shown
in Table 6-1.
<b>T</b>
<b>ABLE</b><b>6-1 MEMBER VARIABLES SET IN </b>
User()<b>METHOD</b>
<b>Member Variable</b>
<b>Value</b>
user_tbl Set to $USER_TBL, which is a global variable set in the
user_mngr.conffile to point to the user table in the
central authentication database.
dbi Set to the DBI object passed as a parameter to the
constructor.
minimum_username_size Set to the user_mngr.confconfiguration file variable,
$MIN_USERNAME_SIZE, which sets the minimum size of
the username allowed.
min_pasword_size Set to the user_mngr.confconfiguration file variable,
MIN_PASSWORD_SIZE, which sets the minimum size of
the password allowed.
USER_ID Set to null or the user ID passed as parameter (if any).
user_tbl_fields Set to an associative array, which creates a key value pair
for each of the fields and field types (text or number) for
the user table.
</div>
<span class='text_page_counter'>(189)</span><div class='page_container' data-page=189>
method is stored as
is_user, which can be
TRUEor
FALSEdepending on whether
user information was retrieved from the database.
A User class needs the following methods to implement all the operations
needed for user management:
<b>Methods</b>
<b>Description</b>
isUser() Returns TRUEif the current user_idnumber is really
a user ID. If no user ID was supplied to the constructor
method or the supplied-user ID does not point to a
real user, this method returns FALSE.
getUserID() Returns the current user ID.
setUserID() Sets the current user ID if it is supplied or else it
returns the current user ID set by the constructor
method.
getUserIDByName() Returns the user ID by given user name. When a valid
username is given as the parameter, the method
queries the user table to retrieve the appropriate
user ID.
getUserTypeList() Returns an associative array called $USER_TYPE,
which is loaded from the user_mngr.conffile. The
array defines the types of users allowed in the central
user management system, and appears as follows:
$USER_TYPE = array(‘1’ =>
‘Administrator’,
‘2’ => ‘Standard
User’);
getUID() Returns the user ID (USER_ID) for the current User
object.
getEMAIL() Returns the e-mail address (EMAIL) for the current
User object.
getPASSWORD() Returns the password (PASSWORD) for the current
User object.
getACTIVE() Returns the active flag status of a User object.
getTYPE() Returns the user type of the User object.
getUserFieldList() Returns the array of user table fields.
<i>Continued</i>
</div>
<span class='text_page_counter'>(190)</span><div class='page_container' data-page=190>
<b>Methods</b>
<b>Description</b>
getUserInfo() Returns user fields for a given or current user ID.
getUserList() Returns a list of users in the current user table. The
associative array returned contains each user’s ID
(USER_ID) as the key and username (EMAIL) as the
value.
makeUpdateKeyValuePairs() This is a utility method that returns a comma
separated list of key =>value pairs, which can be used
to update a user record.
updateUser() Updates an user data. User data is passed to this
method as an associative array called $data. This
array is passed to the
makeUpdateKeyValuePairs()method which
returns a comma separated list of key=>valuepairs
used in SQL update statement inside the updateUser()
method.
This method returns TRUEif the update is successful
and returns FALSEotherwise.
addUser() Adds a new user in the user table in the central
authentication database. New user record is passed to
the method using the $datavariable.
The method first escapes and quotes the textual data
and makes a list of key=>value pairs to be used in the
insert statement.
This method returns TRUEif the update is successful
and returns FALSEotherwise.
deleteUser() Returns the chosen (or current) user from the
database.
getReturnValue() Returns TRUEif the result parameter ($r) is set to
DB_OKor else it returns FALSE. This method is used
to see if a database query was successful or not.
</div>
<span class='text_page_counter'>(191)</span><div class='page_container' data-page=191>
<b>Listing 6-1: </b>class.User.php
<?php
class User
{
function User($dbi = null, $uid = null)
{
global $AUTH_DB_TBL,
$MIN_USERNAME_SIZE,
$MIN_PASSWORD_SIZE,
$ACTIVITY_LOG_TBL;
$this->user_tbl = $AUTH_DB_TBL;
$this->user_activity_log = $ACTIVITY_LOG_TBL;
$this->dbi = $dbi;
//print_r($this->dbi);
$this->minmum_username_size = $MIN_USERNAME_SIZE;
$this->minmum_pasword_size = $MIN_PASSWORD_SIZE;
$this->USER_ID = $uid;
//$this->debugger = $debugger;
$this->user_tbl_fields = array(‘EMAIL’ => ‘text’,
‘PASSWORD’ => ‘text’,
‘TYPE’ => ‘number’,
‘ACTIVE’ => ‘number’
);
if (isset($this->USER_ID))
{
$this->is_user = $this->getUserInfo();
} else {
$this->is_user = FALSE;
}
}
<i>Continued</i>
</div>
<span class='text_page_counter'>(192)</span><div class='page_container' data-page=192>
<b>Listing 6-1</b><i>(Continued)</i>
function isUser()
{
return $this->is_user;
}
function getUserID()
{
return $this->USER_ID;
}
function setUserID($uid = null)
{
if (! empty($uid))
{
$this->USER_ID = $uid;
}
return $this->USER_ID;
}
function getUserIDByName($name = null)
{
if (! $name ) return null;
$stmt = “SELECT USER_ID FROM $this->user_tbl WHERE EMAIL = ‘$name’”;
$result = $this->dbi->query($stmt);
if ($result != null)
{
$row = $result->fetchRow();
return $row->USER_ID;
}
return null;
}
function getUserTypeList()
{
global $USER_TYPE;
</div>
<span class='text_page_counter'>(193)</span><div class='page_container' data-page=193>
}
function getUID()
{
return (isset($this->USER_ID)) ? $this->USER_ID : NULL;
}
function getEMAIL()
{
return (isset($this->EMAIL)) ? $this->EMAIL : NULL;
}
function getPASSWORD()
{
return (isset($this->PASSWORD)) ? $this->PASSWORD : NULL;
}
function getACTIVE()
{
return (isset($this->ACTIVE)) ? $this->ACTIVE : NULL;
}
function getTYPE()
{
return (isset($this->TYPE)) ? $this->TYPE : NULL;
}
function getUserFieldList()
{
return array(‘USER_ID’, ‘EMAIL’, ‘PASSWORD’, ‘ACTIVE’, ‘TYPE’);
}
function getUserInfo($uid = null)
{
$fields = $this->getUserFieldList();
$fieldStr = implode(‘,’, $fields);
$this->setUserID($uid);
$stmt = “SELECT $fieldStr FROM $this->user_tbl “ .
“WHERE USER_ID = $this->USER_ID”;
//echo “$stmt <P>”;
<i>Continued</i>
</div>
<span class='text_page_counter'>(194)</span><div class='page_container' data-page=194>
<b>Listing 6-1</b><i>(Continued)</i>
$result = $this->dbi->query($stmt);
if ($result->numRows() > 0)
{
$row = $result->fetchRow();
foreach($fields as $f)
{
$this->$f = $row->$f;
}
return TRUE;
}
return FALSE;
}
function getUserIDbyEmail($email = null) // needed for EIS
{
$stmt = “SELECT USER_ID FROM $this->user_tbl “ .
“WHERE EMAIL = ‘$email’”;
$result = $this->dbi->query($stmt);
if($result->numRows() > 0)
{
$row = $result->fetchRow();
return $row->USER_ID;
} else {
return 0;
}
}
</div>
<span class='text_page_counter'>(195)</span><div class='page_container' data-page=195>
$stmt = “SELECT USER_ID, EMAIL FROM $this->user_tbl”;
$result = $this->dbi->query($stmt);
$retArray = array();
if ($result != null)
{
while($row = $result->fetchRow())
{
$retArray[$row->USER_ID] = $row->EMAIL;
}
}
return $retArray;
}
function makeUpdateKeyValuePairs($fields = null, $data = null)
{
$setValues = array();
while(list($k, $v) = each($fields))
{
if (isset($data[$k]))
{
//echo “DATA $k = $data[$k] <br>”;
if (! strcmp($v, ‘text’))
{
$v = $this->dbi->quote(addslashes($data[$k]));
$setValues[] = “$k = $v”;
} else {
$setValues[] = “$k = $data[$k]”;
}
}
}
<i>Continued</i>
</div>
<span class='text_page_counter'>(196)</span><div class='page_container' data-page=196>
<b>Listing 6-1</b><i>(Continued)</i>
return implode(‘, ‘, $setValues);
}
function updateUser($data = null)
{
$this->setUserID();
$fieldList = $this->user_tbl_fields;
$keyVal = $this->makeUpdateKeyValuePairs($this->user_tbl_fields,
$data);
$stmt = “UPDATE >user_tbl SET $keyVal WHERE USER_ID =
$this->USER_ID”;
$result = $this->dbi->query($stmt);
return $this->getReturnValue($result);
}
function addUser($data = null)
{
$fieldList = $this->user_tbl_fields;
$valueList = array();
while(list($k, $v) = each($fieldList))
{
if (!strcmp($v, ‘text’))
{
$valueList[] = $this->dbi->quote(addslashes($data[$k]));
} else {
$valueList[] = $data[$k];
}
}
$fields = implode(‘,’, array_keys($fieldList));
$values = implode(‘,’, $valueList);
$stmt = “INSERT INTO $this->user_tbl ($fields) VALUES($values)”;
//echo $stmt;
</div>
<span class='text_page_counter'>(197)</span><div class='page_container' data-page=197>
return $this->getReturnValue($result);
}
function deleteUser($uid = null)
{
$this->setUserID($uid);
$stmt = “DELETE from $this->user_tbl “ .
“WHERE USER_ID = $this->USER_ID”;
$result = $this->dbi->query($stmt);
return $this->getReturnValue($result);
}
function getReturnValue($r = null)
{
return ($r == DB_OK) ? TRUE : FALSE;
}
function logActivity($action = null)
{
$now = time();
$stmt = “INSERT INTO $this->user_activity_log SET “ .
“USER_ID = $this->USER_ID, “.
“ACTION_TYPE = $action, “ .
“ACTION_TS = $now”;
// echo “$stmt <P>”;
$result = $this->dbi->query($stmt);
return $this->getReturnValue($result);
}
}
?>
</div>
<span class='text_page_counter'>(198)</span><div class='page_container' data-page=198>
<b>User Interface Templates</b>
Throughout the user management system, many user interface templates are
needed to allow users and administrators to interact with the system. These
tem-plates are simple HTML forms with embedded tags, which are dynamically replaced
to create the desired look and feel of the applications. These templates are supplied
with the CD-ROM and are very simple in nature. These templates are:
◆
usermngr_menu.html - this template displays the user manager menu
◆
usermngr_user_form.html - this template is the user add/modify form
◆
usermngr_status.html - this template shows status of add/modify/delete etc.
◆
usermngr_pwd_change.html - this template is used for password changes
◆
usermngr_pwd_reset.html - this template is used to reset passwords
◆
usermngr_forgotten_pwd.html - this template is used as forgotten
pass-word request form.
◆
usermngr_forgotten_pwd_email.html - this template is used in e-mailing
password reset request for those who have forgotten passwords
<b>Creating a User Administration</b>
<b>Application</b>
The primary application in the central user management system is the user
admin-istration application. It enables the user administrator to do the following tasks:
◆
Add new user accounts
◆
Modify user accounts
◆
Toggle user account active flags
◆
Change user passwords
◆
Upgrade or downgrade users
◆
Delete user accounts
user_mngr.php
is a user manager application that implements these features.
Let’s look at some of its main methods:
◆ <b>run()</b>
<b>:</b>
This method is used to run the application. It acts as a driver and
performs the following tasks:
</div>
<span class='text_page_counter'>(199)</span><div class='page_container' data-page=199>
■
If the application is called with
$cmdset to
add,
run()calls
addDriver()
to handle user add operation.
If the application is called with
$cmdset to
modify,
run()calls
modifyDriver()
to handle user modification operation.
If the application is called with
$cmdset to
delete,
run()calls
deleteUser()
to handle user delete operation.
If the
$cmdvariable is not set,
run()calls
showScreen()to show the
user management menu.
◆ <b>addUser()</b>
<b>:</b>
This method adds a user as follows:
<b>1.</b>
It calls
checkInput()to check user input supplied in add user
inter-face.
<b>2.</b>
It adds the default domain to the user’s e-mail address if the username
entered by the user does not include a domain name. For example, if
the user enters
carolas the username,
addUser()sets the username to
assuming
$DEFAULT_DOMAINis set to
evoknow.com
.
<b>3.</b>
It generates a two-character random string to be used as a salt for the
crypt()
function used to encrypt the user-supplied password.
<b>4.</b>
It lowercases the username and creates a User object. An associative
array is defined to hold the user-supplied data in a
key=valuemanner.
The keys are database field names for respective user data.
<b>5.</b>
It uses the User object,
$userObj, to call
addUser(), which in turn
adds the user in the database.
<b>6.</b>
It displays a success or failure status message accordingly.
◆ <b>modifyUser()</b>
<b>:</b>
This method modifies a user account as follows:
<b>1.</b>
It uses
checkInput()to check user-supplied input.
<b>2.</b>
If the user is trying to modify the root user account (identified by the
$ROOT_USER
variable loaded from the
user_mngr.conffile), then the
user is not allowed to deactivate the root user. Also, the root user
account cannot be lowered to a standard account. This check is also
performed and an appropriate alert message is displayed when such
attempts are made by the administrator user.
<b>3.</b>
It enters the user-supplied user type (
TYPE), active flag (
ACTIVE), and
user ID (
USER_ID) into an associative array called
$hash.
<b>4.</b>
If the user-supplied password does not match the dummy password
(identified by the
$DUMMY_PASSWDvariable loaded from the
user_mngr.conf
file),
modifyUser()encrypts the password using a
random two-character-based salt string.
</div>
<span class='text_page_counter'>(200)</span><div class='page_container' data-page=200>
<b>5.</b>
It uses
$userObj to call
getUserInfo()to load current user data into
the object.
<b>6.</b>
It stores modified username (
EMAIL) in the
$hashvariable.
<b>7.</b>
It uses the
$uesrObj object’s
updateUser()method to update the user
in the database.
<b>8.</b>
It displays a success or failure status message as appropriate.
◆
<b>deleteUser():</b>
This method, used to delete the chosen user, works as follows:
<b>1.</b>
It displays an error message if the user ID is not supplied from the user
interface.
<b>2.</b>
It creates a User object,
$userObj, and uses
getUserInfo()to load the
current user data.
<b>3.</b>
It compares the chosen user’s username (
EMAIL) with the
$ROOT_USERspecified user’s name to avoid deleting the root user account.
<b>4.</b>
It uses
$userObj’s
deleteUser()to perform the actual delete
opera-tion, removing the user from the database.
<b>5.</b>
It displays a success or failure status message accordingly.
The following are the other functions/methods used in the user manager
application:
<b>Function</b>
<b>Description</b>
modifyDriver() This is the modify driver. It uses the form variable $stepto control
how the modify operation is implemented. When $stepis not set,
showScreen()is used to display the modify user interface. The
user modify interface sets $stepto 2, which is used to call
modifyUser(). modifyUser()uses the User object’s
updateUser()method to modify the user account.
addDriver() This is the add driver. It uses the form variable $stepto control
how an add operation is implemented. When $stepis not set,
showScreen()is used to display the add user interface. The user
add interface sets $stepto 2, which is used to call
modifyUser(). modifyUser()uses the User object’s
addUser()method to add the user account.
</div>
<!--links-->