Tài liệu Configuring Telnet on Windows 2000 pdf
Bạn đang xem bản rút gọn của tài liệu. Xem và tải ngay bản đầy đủ của tài liệu tại đây (313.75 KB, 8 trang )
1 - 1 IT Essentials II v2.0 - Lab 8.5.3 Copyright 2002, Cisco Systems, Inc.
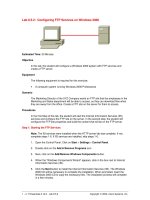
Lab 8.5.3: Configuring Telnet on Windows 2000
IP
IP
Linux Server
Workstation (or
another server)
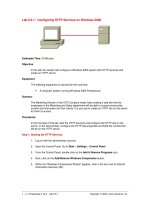
Estimated Time: 40 Minutes
Objective
In this lab, the student will learn how to configure Telnet services on Windows 2000.
Equipment
The following equipment is required for this exercise:
• A system running Windows 2000 Professional
• Network connection from the workstation to hub or switch
• PC with a Telnet client program connected to the same hub or switch
Scenario
The ABC Company has just installed a server running Windows 2000. The company has
asked that Telnet services be configured so that the workstation can be remotely
administered using Telnet.
Procedures
Before beginning this lab, make sure that both the Windows 2000 workstation and the
other PC are ready for log in. Power these hosts on, if necessary.
This activity requires that the PC be connected to at least one other host on the same IP
network. Verify that the Ethernet connections are in place. If using a hub or switch, check
the LED lights to verify a connection.
Finally, ask the instructor or a lab technician for the appropriate IP address information
2 - 2 IT Essentials II v2.0 - Lab 8.5.3 Copyright 2002, Cisco Systems, Inc.
for both hosts. Record that information in the tables provided:
Connected Host IP Address Configuration
IP address:
Subnet mask:
Default gateway:
Local Host IP Address Configuration
IP address:
Subnet mask:
Default gateway:
Record the IP address of the server and workstation in the boxes provided in the network
diagram.
Step 1: Log in to Windows 2000
Once the Windows server boots, the “Welcome to Windows” dialog box appears. Log in
as the administrator.
Step 2: Setting the IP address
Configure the Windows 2000 workstation IP address, subnet mask, and default gateway
to match the information entered in the table. If this information has already been
configured in a previous lab, get the other workstation’s information. Configure the
workstation IP stack accordingly. Use ping to verify that the server can communicate.
Step 3: Open Administrative Tools
On the workstation, start the Computer Management console. Go to Start > Programs >
Administrative Tools.
Step 4: Services and Applications
Once the Computer Management window displays on screen, click the plus (+) symbol to
the left of “Services and Applications” and select Services from the expanded tree.
3 - 3 IT Essentials II v2.0 - Lab 8.5.3 Copyright 2002, Cisco Systems, Inc.
The Services section contains controls for starting and stopping the various services that
are run in Windows 2000.
Step 5: Configuring the Telnet Service
In order to allow Telnet clients to connect to the workstation, the Telnet service must be
started. Scroll the right-hand pane until the “Telnet” service is visible.
Notice that the “Status” column is blank for the Telnet service indicating that the service is
not currently running. To start the Telnet service, right-click on the service and select
Start from the menu.
4 - 4 IT Essentials II v2.0 - Lab 8.5.3 Copyright 2002, Cisco Systems, Inc.
A Status indicator displays as Windows attempts to start the service. Check the Status
column and verify that the service has started.
Step 6: Locating the Telnet Service
The Telnet service for Windows 2000 defaults to using NT LAN Manager NTLM
authentication, which is not supported on all systems. In order to make sure that the
Telnet service will work with any Telnet client, the service needs to be configured to
accept clear text usernames and passwords, if NTLM authentication fails. To do this, start
Telnet Server Administration, which is located in the Administrative tools menu next to
Computer Management.
5 - 5 IT Essentials II v2.0 - Lab 8.5.3 Copyright 2002, Cisco Systems, Inc.
Step 7: Telnet Administration
The Telnet Server Administration program is a menu driven program, to allow plain text
as well as NTLM. Press 3 to enter the “Display / Change the registry settings” section of
the program. At the next menu, choose 7 for NTLM. The default value for NTLM is 2,
which does not allow clear text authentication in any circumstances. Changing the NTLM
value to 1 will allow clear text authentication if NTLM fails. The following dialog with the
menu will change NTLM to 1:
Current value of NTLM = 2
Do you want to change this value? [Y/n] y
NTLM [current value = 2; acceptable values 0, 1 or 2]: 1
Are you sure you want to set NTLM to: 1? [Y/n] y
Activate the changes that were just made by Stopping and Restarting the Telnet service.
Note: Although it is convenient to allow clear text authentication so that clients can have
unrestricted access to the Telnet service (provided a valid user name and password are
present during the Telnet login), it is not recommended that clear text authentication be
enabled on a production server.
Step 8: Starting the Telnet Session
To restart the Telnet service, enter a 0 to return to the main menu, and press the
corresponding number 5 to stop the service. Verify that the Telnet service has stopped by
going to Computer Management. Once the service has been stopped, it can be started
again by choosing the correct number 4 from the menu. The following text will appear on
the screen when the service is started:
Starting Microsoft Telnet Service...
Microsoft Telnet Service started successfully