Tài liệu PHP Objects, Patterns and Practice- P8 pptx
Bạn đang xem bản rút gọn của tài liệu. Xem và tải ngay bản đầy đủ của tài liệu tại đây (1.27 MB, 50 trang )
CHAPTER 15 ■ AN INTRODUCTION TO PEAR AND PYRUS
329
relevant channels have been discovered before running channel-discover with the -o (optional
dependencies) flag set.
Using a PEAR Package
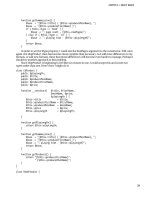
Once you have installed a PEAR package, you should be able to use it in your projects immediately. Your
PEAR directory should already be in your include path—there should be no problem including the
package once it has been installed. Let’s install PEAR_Config and any dependencies it might have:
$ pear install -a Config
downloading Config-1.10.11.tgz ...
Starting to download Config-1.10.11.tgz (27,718 bytes)
.........done: 27,718 bytes
downloading XML_Parser-1.2.8.tgz ...
Starting to download XML_Parser-1.2.8.tgz (13,476 bytes)
...done: 13,476 bytes
install ok: channel://pear.php.net/Config-1.10.11
install ok: channel://pear.php.net/XML_Parser-1.2.8
Here’s how you would include the package:
require_once("Config.php");
class MyConfig {
private $rootObj;
function __construct( $filename=null, $type='xml' ) {
$this->type=$type;
$conf = new Config();
if ( ! is_null( $filename ) ) {
$this->rootObj = $conf->parseConfig($filename, $type);
} else {
$this->rootObj = new Config_Container( 'section', 'config' );
$conf->setroot($this->rootObj);
}
}
function set( $secname, $key, $val ) {
$section=$this->getOrCreate( $this->rootObj, $secname );
$directive=$this->getOrCreate( $section, $key, $val );
$directive->setContent( $val );
}
private function getOrCreate( Config_Container $cont, $name, $value=null ) {
$itemtype=is_null( $value )?'section':'directive';
if ( $child = $cont->searchPath( array($name) ) ) {
return $child;
}
return $cont->createItem( $itemtype, $name, null );
}
function __toString() {
return $this->rootObj->toString( $this->type );
Please purchase PDF Split-Merge on www.verypdf.com to remove this watermark.
CHAPTER 15 ■ AN INTRODUCTION TO PEAR AND PYRUS
330
}
}
We begin by including Config.php. Most PEAR packages work in this way, providing a single top-
level point of access. All further require statements are then made by the package itself.
The rest of the example simply works with the classes provided by the Config package: Config and
Config_Container. The Config package lets you access and create configuration files in a variety of
formats. This simple MyConfig class uses Config to work with configuration data. Here’s a quick usage
example:
$myconf = new MyConfig();
$myconf->set("directories", "prefs", "/tmp/myapp/prefs" );
$myconf->set("directories", "scratch", "/tmp/" );
$myconf->set("general", "version", "1.0" );
echo $myconf;
By default, this generates output in XML format:
<config>
<directories>
<prefs>/tmp/myapp/prefs</prefs>
<scratch>/tmp/</scratch>
</directories>
<general>
<version>1.0</version>
</general>
</config>
As is often the case with sample code, this class is incomplete—it still requires additional error checking
as well as methods for writing the configuration data to file. Still, it is pretty useful already, thanks to the power
of the PEAR package. By passing different type strings to Config, we could have rendered the previous output
in various configuration formats (like the INI format that the PHP application itself uses, for example).Of
course, the details of the Config package are beyond the scope of this chapter. The good news is that for
official PEAR packages, you will find API instructions on the web site at In all cases, you
should expect to be able to add the functionality of a PEAR package to your script with minimal effort. The
package should provide you with a clear, well-documented API.
■
Note The bad news about PEAR packages is that the struggle to support older versions of PHP is extremely
hard to square with the demands of later versions. Like many PEAR packages, Config now relies on deprecated
language features, which cannot be easily discarded for the sake of backward compatibility. In order to turn off
warnings about this, you can set an error_reporting directive like this:
error_reporting = E_ALL & ~E_DEPRECATED
in your php.ini file.
Please purchase PDF Split-Merge on www.verypdf.com to remove this watermark.
CHAPTER 15 ■ AN INTRODUCTION TO PEAR AND PYRUS
331
Handling PEAR Errors
Many, if not most, official PEAR packages use the standard PEAR error class PEAR_Error. This is often
returned in place of the expected value if something goes wrong in an operation. This behavior should
be documented, and you can test return values using the static PEAR::isError() method.
$this->rootObj = @$conf->parseConfig($filename, $type);
if ( PEAR::isError( $this->rootObj ) ) {
print "message: ". $this->rootObj->getMessage() ."\n";
print "code: ". $this->rootObj->getCode() ."\n\n";
print "Backtrace:\n";
foreach ( $this->rootObj->getBacktrace() as $caller ) {
print $caller['class'].$caller['type'];
print $caller['function']."() ";
print "line ".$caller['line']."\n";
}
die;
}
Here, I test the return value from Config::parseConfig().
PEAR::isError( $this->rootObj )
is the functional equivalent of
$this->rootObj instanceof PEAR_Error
So within my conditional block, I know that $this->rootObj is a PEAR_Error rather than a
Config_Container object.
Once I am sure I have a PEAR_Error object, I can interrogate it for more information about the error.
In my example, I have three of the most useful methods: getMessage() returns a message that describes
the error; getCode() returns an integer corresponding to the error type (this is an arbitrary number that
the package author will have declared as a constant and, we hope, documented); and finally,
getBacktrace() returns an array of the methods and classes that lead to the error. This enables us to
work our way back through our script’s operation and locate the root cause of the error. As you can see,
getBacktrace() is itself an array, which describes each method or function that led to the error. The
elements are described in Table 15–1.
Table 15–1.
Fields Provided by PEAR_Error::getBacktrace()
Field Description
file
Full path to PHP file
args
The arguments passed to the method or function
class
The name of the class (if in class context)
function
The name of the function or method
type
If in class context, the nature of the method call (:: or ->)
line
The line number
Please purchase PDF Split-Merge on www.verypdf.com to remove this watermark.
CHAPTER 15 ■ AN INTRODUCTION TO PEAR AND PYRUS
332
The way that PEAR_Error pollutes a method’s return value was an unfortunate necessity before the
advent of PHP 5. With PHP 4 at or near the end of its life, it’s no surprise that PEAR_Error has been
deprecated.
Although many packages continue to use PEAR_Error and will probably do so for some time, more
are beginning to use PEAR_Exception. If you were to use the XML_Feed_Parser package, for example you
would be catching exceptions rather than testing return types:
$source="notthere";
try {
$myfeed = new XML_Feed_Parser( $source );
} catch ( XML_Feed_Parser_Exception $e ) {
print "message: ". $e->getMessage() ."\n";
print "code: ". $e->getCode() ."\n";
print "error class: ". $e->getErrorClass() ."\n";
print "error method: ".$e->getErrorMethod() ."\n";
print "trace: ". $e->getTraceAsString()."\n";
print "error data: ";
print_r( $e->getErrorData() );
}
Typically. a PEAR package will extend PEAR_Exception, partly so that it can add any functionality it
needs, but mainly so that you can use your catch clause to distinguish between Exception types.
PEAR_Exception, of course, itself extends Exception, so you get the standard methods I covered in
Chapter 4. You also benefit from some additions. getErrorClass() and getErrorMethod(), for example,
tell you the class and method from which the error originated. getErrorData() may include additional
error information in an associative array, although this is left for extending classes to implement. Before
being thrown to you, a PEAR_Exception object can be initialized with another Exception or with an array
of Exception objects. In this way, PEAR packages can wrap Exception objects. You can get at wrapped
exceptions by calling PEAR::getCause(). This will either return a wrapped Exception object, an array if
there is more than one, or null if none are found.
PEAR_Exception also uses the Observer pattern, allowing you to register callback functions or
methods that will be called whenever an exception is thrown. First, let’s create some error conditions:
class MyPearException extends PEAR_Exception {
}
class MyFeedThing {
function acquire( $source ) {
try {
$myfeed = @new XML_Feed_Parser( $source );
return $myfeed;
} catch ( XML_Feed_Parser_Exception $e ) {
throw new MyPearException( "feed acquisition failed", $e );
}
}
}
I extend PEAR_Exception and create a simple class that wraps XML_Feed_Parser. If the
XML_Feed_Parser constructor throws an exception, I catch it and pass it to the constructor of
MyPearException, which I then rethrow. This trick allows me to raise my own error while bundling the
root cause.
Here is a client class and a couple of lines of code to invoke it:
Please purchase PDF Split-Merge on www.verypdf.com to remove this watermark.
CHAPTER 15 ■ AN INTRODUCTION TO PEAR AND PYRUS
333
class MyFeedClient {
function __construct() {
PEAR_Exception::addObserver( array( $this, "notifyError") );
}
function process() {
try {
$feedt = new MyFeedThing();
$parser = $feedt->acquire('wrong.xml');
} catch ( Exception $e ) {
print "an error occurred. See log for details\n";
}
}
function notifyError( PEAR_Exception $e ) {
print get_class( $e ).":";
print $e->getMessage()."\n";
$cause = $e->getCause();
if ( is_object( $cause ) ) {
print "[cause] ".get_class( $cause ).":";
print $cause->getMessage()."\n";
} else if ( is_array( $cause ) ) {
foreach( $cause as $sub_e ) {
print "[cause] ".get_class( $sub_e ).":";
print $sub_e->getMessage()."\n";
}
}
print "----------------------\n";
}
}
$client = new MyFeedClient();
$client->process();
All the usual caveats about sample code apply here, of course—especially since this particular
example is designed to fail. First of all, notice the constructor. PEAR_Exception::addObserver() is a static
method that accepts a callback, either a function name or an array containing an object reference and a
method name. The method or function will be invoked every time a PEAR_Exception is thrown. This trick
allows us to design MyFeedClient so that it logs all exceptions.
The process() method passes a nonexistent file to MyFeedThing::acquire(), which passes it on to
the XML_Feed_Parser constructor, thereby guaranteeing an error. We catch the inevitable exception and
print a simple message. notifyError() is the callback method I referenced in the MyFeedClient
constructor. Notice that it expects a PEAR_Exception object. In this case, I simply query the object and
print out error information, although in a real-world situation, I would probably send this data to a log.
Notice the call to PEAR_Exception::getCause(). Because this could return an array or a single Exception
object, I handle both cases. If I run this toy code, this is what I get:
Please purchase PDF Split-Merge on www.verypdf.com to remove this watermark.
CHAPTER 15 ■ AN INTRODUCTION TO PEAR AND PYRUS
334
XML_Feed_Parser_Exception:Invalid input: this is not valid XML
----------------------
MyPearException:feed acquisition failed
[cause] XML_Feed_Parser_Exception:Invalid input: this is not valid XML
----------------------
an error occurred. See log for details
Our logger method is invoked for both the exceptions thrown by this sample (the first by
XML_Feed_Parser, the second by MyFeedThing). The XML_Feed_Parser_Exception object makes a second
appearance in the log output because we added it to the MyPearException object as a cause.
Creating Your Own PEAR Package
Packages from the PEAR repository are well documented and designed to be easy to use. How easy are
they to create, though, and how do you go about creating your own? In this section, we will look at the
anatomy of a PEAR package.
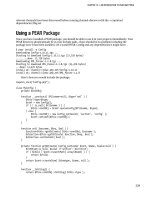
package.xml
The package.xml file is the heart of any PEAR package. It provides information about a package,
determines where and how its participants should be installed, and defines its dependencies. Whether it
operates on a URL, the local file system, or a tarred and gzipped archive, the PEAR installer needs the
package.xml file to acquire its instructions.
No matter how well designed and structured your package is, if you omit the build file, the install
will fail. Here’s what happens if you attempt to install an archive that does not contain package.xml:
$ pear install baddialekt.tgz
could not extract the package.xml file from "baddialekt.tgz"
Cannot initialize 'baddialekt.tgz', invalid or missing package file
Package "baddialekt.tgz" is not valid
install failed
The PEAR installer first unpacks our archive to the temporary directory and then looks for
package.xml. Here, it falls at the first hurdle. So if package.xml is so important, what does it consist of?
Package Elements
The package file must begin with an XML declaration. All elements are then enclosed by the root package
element:
<?xml version="1.0" encoding="UTF-8"?>
<package packagerversion="1.4.11" version="2.0"
xmlns="
xmlns:tasks="
xmlns:xsi="
xsi:schemaLocation="
Please purchase PDF Split-Merge on www.verypdf.com to remove this watermark.
CHAPTER 15 ■ AN INTRODUCTION TO PEAR AND PYRUS
335
<!-- additional elements here -->
</package>
This example would fail with an error. The PEAR installer requires a number of elements to work
with. To start with, we must provide overview information:
<name>Dialekt</name>
<channel>pear.example.com</channel>
<summary>A package for translating text and web pages into silly tones
of voice</summary>
<description>Be the envy of your friends with this hilarious dialect
translator. Easy to extend and altogether delightful.
</description>
<!-- additional elements here -->
These new elements should be pretty self-explanatory. The name element defines the handle by
which the user will refer to the package. The summary element contains a one-line overview of the
package, and description provides a little more detail. All these elements are compulsory with the
exception of channel. If you are not intending to add your package to a channel you can use the uri
element instead of channel, and in the same part of the file.. This should contain a URI that points to
your package file:
<uri>
The file name should not include an extension, even though the package file itself will likely end
with a .tgz extension.
Next, you should provide information about the team behind your package. You should include at
least one lead element:
<lead>
<name>Matt Zandstra</name>
<user>mattz</user>
<email></email>
<active>yes</active>
</lead>
After this, you can define other projects participants in a similar way. Instead of lead, though, you
can use developer, contributor, or helper elements. These are designations recognized by the PEAR
community, but they should adequately cover most non-PEAR projects too. The user element refers to
the contributor’s user name with PEAR. Most teams use similar handles to allow users to log in to
Subversion, a development server, or both.
Before you get to the files in your project, there are a few more details you must provide:
<date>2010-02-13</date>
<time>18:01:44</time>
<version>
<release>1.2.1</release>
<api>1.2.1</api>
</version>
<stability>
<release>beta</release>
<api>beta</api>
</stability>
<license uri=" License</license>
Please purchase PDF Split-Merge on www.verypdf.com to remove this watermark.
CHAPTER 15 ■ AN INTRODUCTION TO PEAR AND PYRUS
336
<notes>initial work
</notes>
Although this is mostly self-explanatory, it’s worth pointing out a couple of features. Of the elements
inside version, release is the one that really counts as far as your package is concerned. The release
element is used by PEAR in dependency calculations. If another system claims to require Dialekt 1.0.0,
and the installing user only has version 0.2.1 on her system, PEAR will halt its installation or attempt to
fetch a later version, depending on the mode in which it was run. The api element, on the other hand, is
there so that you can keep track of changes in your code’s interface which may affect compatibility.
The stability element is similarly split between release and api. The value can be one of snapshot,
devel, alpha, beta, or stable; you should choose the one that best describes your project.
If you are releasing your package according to specific license terms (such as GNU’s GPL license, for
example) you should add this information to the license element.
Unlike summary and description, the notes element will accept line breaks in the contents you add.
The contents Element
Now, we’re finally ready to talk about the files and directories in the package. The contents element
defines the files that will be included in the package archive (sometimes called a tarball, because it’s
archived with the tar and Gzip tools). You can describe the structure of your archive by combining dir
and file elements.
Here’s a simplified example:
<contents>
<dir name="/">
<dir name="data">
<file name="alig.txt" role="data" />
<file name="dalek.txt" role="data" />
</dir> <!-- /data -->
<dir name="Dialekt">
<file name="AliG.php" role="php" />
<file name="Dalek.php" role="php" />
</dir>
</contents>
Every file in a PEAR package has a role. Every role is associated with a default (configurable)
location. Table 15–2 describes the common roles.
Table 15–2.
Some Common PEAR File Roles
Role Description PEAR Config Name Example Location
php
PHP file
php_dir /usr/local/lib/php
test
Unit test file
test_dir /usr/local/lib/php/test/<package>
script
Command line script
bin_dir /usr/local/bin
data
Resource file
data_dir /usr/local/lib/php/data/<package>
doc
Documentation file
doc_dir /usr/local/lib/php/doc/<package>
Please purchase PDF Split-Merge on www.verypdf.com to remove this watermark.
CHAPTER 15 ■ AN INTRODUCTION TO PEAR AND PYRUS
337
When installation takes place, files of role doc, data, and test are not dropped directly into their
respective directories. Instead, a subdirectory named after the package is created in the test_dir and
data_dir directories, and files are installed into this.
In a PEAR project, everything must have a role, and every role has its place. If you do not have the
correct privileges to work with the default role locations, you can set your own locations using the pear
command line tool:
$ pear config-set php_dir ~/php/lib/
$ pear config-set data_dir ~/php/lib/data/
$ pear config-set bin_dir ~/php/bin/
$ pear config-set doc_dir ~/php/lib/doc/
$ pear config-set test_dir ~/php/lib/test/
■
Note Pyrus uses
set
rather than
config-set
for the same purpose.
Now, PEAR will use your directories rather than those described in Table 15–2. Remember that if
you do this, you should add the lib directory to your include path: either in the php.ini file, an
.htaccess file, or using the ini_set() function in your scripts. You should also ensure that the bin
directory is in your shell’s path so that command line commands can be found.
My example revolves around a fictitious package called Dialekt. Here is the package’s directory and
file structure:
./package.xml
./data
./data/dalek.txt
./data/alig.txt
./script
./script/dialekt.sh
./script/dialekt.bat
./cli-dialekt.php
./Dialekt.php
./Dialekt
./Dialekt/AliG.php
./Dialekt/Dalek.php
As you can see, I have mirrored some of the standard PEAR roles in my data structure. So I include
data and script directories. The top-level directory contains two PHP files. These should be installed in
the PEAR directory (/usr/local/php/lib by default). Dialekt.php is designed to be the first port of call for
client code. The user should be able to include Dialekt with
require_once("Dialekt.php");
Additional PHP files (Dalek.php and AliG.php) are stored in a Dialekt directory that will be added to
the PEAR directory (these are responsible for the detailed process of translating web pages and text files
into oh-so-funny versions of themselves). Dialekt.php will include these on behalf of client code. So that
the installed Dialekt package will be callable from the command line, we have included a shell script that
will be moved to PEAR’s script directory. Dialekt uses configuration information stored in text files.
These will be installed in PEAR’s data directory.
Here's the full contents tag:
Please purchase PDF Split-Merge on www.verypdf.com to remove this watermark.
CHAPTER 15 ■ AN INTRODUCTION TO PEAR AND PYRUS
338
<contents>
<dir name="/">
<dir name="data">
<file name="alig.txt" role="data" />
<file name="dalek.txt" role="data" />
</dir> <!-- /data -->
<dir name="Dialekt">
<file name="AliG.php" role="php" />
<file name="Dalek.php" role="php" />
</dir> <!-- /Dialekt -->
<dir name="script">
<file name="dialekt.bat" role="script">
<tasks:replace from="@php_dir@" to="php_dir" type="pear-config" />
<tasks:replace from="@bin_dir@" to="bin_dir" type="pear-config" />
<tasks:replace from="@php_bin@" to="php_bin" type="pear-config" />
</file>
<file name="dialekt.sh" role="script">
<tasks:replace from="@php_dir@" to="php_dir" type="pear-config" />
<tasks:replace from="@bin_dir@" to="bin_dir" type="pear-config" />
<tasks:replace from="@php_bin@" to="php_bin" type="pear-config" />
</file>
</dir> <!-- /script -->
<file name="cli-dialekt.php" role="php" />
<file name="Dialekt.php" role="php">
<tasks:replace from="@bin_dir@" to="bin_dir" type="pear-config" />
</file>
</dir> <!-- / -->
</contents>
I have included a new element in this fragment. The tasks:replace element causes the PEAR
installer to search the file for the trigger string given in the from attribute, replacing it with the pear-
config setting in the to attribute. So the Dialekt.php file, for example, might start out looking like this:
<?php
/*
* Use this from PHP scripts, for a CLI implementation use
* @bin_dir@/dialekt
*/
class Dialekt {
const DIALEKT_ALIG=1;
const DIALEKT_DALEK=2;
//...
}
After installation, the same class comment should look something like this:
/*
* Use this from PHP scripts, for a CLI implementation use
* /home/mattz/php/bin/dialekt
*/
Please purchase PDF Split-Merge on www.verypdf.com to remove this watermark.
CHAPTER 15 ■ AN INTRODUCTION TO PEAR AND PYRUS
339
Dependencies
Although packages are generally stand-alone entities, they often make use of one another. Any use of
another package introduces a dependency. If the used package is not present on the user’s system, then
the package that uses it will not run as expected.
The dependencies tag is a required element, and within it, you must specify at least the PHP, and
PEAR installer versions.
<dependencies>
<required>
<php>
<min>5.3.0</min>
</php>
<pearinstaller>
<min>1.4.1</min>
</pearinstaller>
<!-- other dependencies here if required -->
</required>
</dependencies>
Both php and pearinstall can contain min, max, and exclude elements. exlude defines a version
which will be treated as incompatible with the package, and you can include as many of these as you
need. The pearinstaller element can also contain a recommended element, in which you can set a
preferred installer for the package.
If these or other dependencies within the required element are not satisfied, PEAR will refuse to
install the package by default. A package can depend on another package, a PHP extension (such as zlib
or GD) or a particular version of PHP. Here, I insist that Dialekt has access to the Fandango package at
version 10.5.0 or greater (note, that I add this within the required element):
<package>
<name>Fandango</name>
<channel>pear.example.com</channel>
<min>10.5.0</min>
</package>
Notice the channel element; this specifies where pear should search for the package should it be
invoked with the -a flag (which tells it to acquire all dependencies). You must specify either a channel or
a uri element. The uri element should point to a package file:
<package>
<name>Fandango</name>
<uri>
</package>
The package element accepts the same dependency specifiers as pearinstaller, with the addition of
conflicts in which you can define a version with which this package will not work.
In addition to package you could also specify extension, os, or arch. Table 15–3 summarizes these
dependency elements.
Please purchase PDF Split-Merge on www.verypdf.com to remove this watermark.
CHAPTER 15 ■ AN INTRODUCTION TO PEAR AND PYRUS
340
Table 15–3.
package.xml Dependency Types
Element Description
php
The PHP application
package
A PEAR package
extension
A PHP extension (a capability compiled into PHP such as zlib or GD)
arch
Operating system and processor architecture
os
An operating system
Up until now I have specified mandatory dependencies. In fact, after requires, you can specify an
optional element. This accepts the same dependency elements. When PEAR encounters an unfilled
optional dependency, it will raise a warning but will continue to install nonetheless. You should add
depencies to the optional element where your package can limp along adequately without the preferred
package or extension.
If the user runs the pear install command with the -o flag
pear install -o package.xml
then PEAR will attempt to download and install all unmet required dependencies (remember, though
that passing -o to pyrus means that it will install optional requrements). Running the command with the
-a flag also automates the download of dependencies but will take in optional as well as required
packages.
Tweaking Installation with phprelease
Although you define the files in a package archive with the contents element, you can use phprelease to
fine tune the files that are actually installed onto the users system. Here are the two phprelease elements
in our package:
<phprelease>
<installconditions>
<os>
<name>unix</name>
</os>
</installconditions>
<filelist>
<install as="dialekt" name="script/dialekt.sh" />
<install as="dalek" name="data/dalek.txt" />
<install as="alig" name="data/alig.txt" />
<ignore name="script/dialekt.bat" />
</filelist>
</phprelease>
<phprelease>
<installconditions>
<os>
<name>windows</name>
</os>
Please purchase PDF Split-Merge on www.verypdf.com to remove this watermark.
CHAPTER 15 ■ AN INTRODUCTION TO PEAR AND PYRUS
341
</installconditions>
<filelist>
<install as="dialekt" name="script/dialekt.bat" />
<install as="dalek" name="data/dalek.txt" />
<install as="alig" name="data/alig.txt" />
<ignore name="script/dialekt.sh" />
</filelist>
</phprelease>
The installconditions element can be used to determine the phprelease element that is executed.
It accepts the specifier elements os, extension, arch, and php. These elements work in the same way as
their dependency namesakes. As well as providing phprelease elements qualified by installconditions,
you can provide a default version to be executed if none of the others are matched.
Let’s focus on the unix phprelease. The install element specifies that the file dialekt.sh should be
renamed dialekt on installation.
I specify that my data files should be installed without the .txt suffix. I do not need to specify the
dialekt subdirectory—this is automatically included for files with a data role. Note that the install
element’s as element also strips out the leading directory data that we specified in the contents element
for these files. This means that they are installed as <data_dir>/dialekt/dalek and
<data_dir>/dialekt/alig.
Note also that in Unix mode I don’t want to install the dialekt.bat script file. The ignore element
takes care of that. All being well our package is ready to install locally.
Preparing a Package for Shipment
Now that I have created my package and created a package.xml file,, it is time to generate an archived
and compressed product.
There is a single PEAR command to achieve this. We ensure we are in the root directory of our
project and run this subcommand:
$ pear package package.xml
Analyzing Dialekt/AliG.php
Analyzing Dialekt/Dalek.php
Analyzing cli-dialekt.php
Analyzing Dialekt.php
Package Dialekt-1.2.1.tgz done
This will generate a tarred and gzipped archive (including all referenced files as well as the
package.xml file itself) suitable for distribution. You can make this available for straight download. If you
have dependencies between packages, you can reference URIs in your package elements and use the uri
element in place of channel. If you are offering many interdependent packages to your users, though,
perhaps you should consider taking things to the next level.
Setting Up Your Own Channel
Why set up your own channel? Aside from the sheer coolness of such a thing, the main benefits lie in
PEAR’s automatic dependency management and the consequent ease of installation and upgrade for
your users. It’s easy enough for a user to install a single package using a full path to a tarball URL. If you
have designed a library system in tiers working from low-level utility packages to high-level applications,
things become more complicated. It can be a real pain for users to manage multiple interdependent
packages on their systems, especially as they evolve.
Please purchase PDF Split-Merge on www.verypdf.com to remove this watermark.
CHAPTER 15 ■ AN INTRODUCTION TO PEAR AND PYRUS
342
For this section, I will focus on the Pyrus mechanism for creating and hosting channels. There are
two reasons for this. First, Pyrus is the future. It is likely what we’ll all be using in the coming years. It’s
written from the ground up, without the need for backward compatibility, which makes for cruft-free
code and clean architecture. Second, the required packages are officially supported on the Pyrus site at
. Although a perfectly good PEAR-oriented solution for channel management has
been available since 2006, it has somehow never made it from an external site
() onto the PEAR website. Whatever the reasons for this, it does not inspire
confidence that the software will continue to be supported.
Still, with Pyrus so new, you may encounter some glitches along the way. Where I have to work
around rough edges, I’ll be sure to document it here.
If you're still using PEAR to build packages, don’t worry. There’s no reason why you can’t use Pyrus
channel management to serve PEAR packages. In order to create and host your own channel you will
ideally have
• Root access to your web host computer
• Administrative access to a web server (probably Apache) and the ability to support
a subdomain (pear.yourserver.com, for example)
If you do not have this kind of control over your server, don’t worry, you can host your channel with
a third-party provider such as Google Code (). However you decide to host it,
first of all you will need to define your channel and add some packages to it.
Defining a Channel with PEAR2_SimpleChannelServer
PEAR2_SimpleChannelServer is actually something of a misnomer. It is a tool for defining and channel
and organizing your package files ready for serving, rather than a server or server component.
At the time of this writing, the Pyrus website claims that you should use Pyrus itself to install
PEAR2_SimpleChannelServer. In fact, this currently causes an error. However, you can get the package
in a phar file at
■
Note You’ll likely find that PEAR2_SimpleChannelServer installation will be improved. Check in at
/> to monitor progress.
Once you have phar file you can place it somewhere central, and rename it for convenience (I chose
/usr/share/pearscs.phar). Then you can run it to set up your basic channel environment.
php /usr/share/pearscs.phar create pear.appulsus.com "Appulsus PHP repository" appulsus
Created pear.appulsus.com
| ./channel.xml
| ./rest/
| ./get/
The create subcommand requires a channel name, which is usually a host and subdomain (I’ll
return to that), a summary, and, optionally, an alias. If you omit the alias, the system will suggest one
taken from the name argument. As you can see I chose 'appulsus'. It then creates a file named
Please purchase PDF Split-Merge on www.verypdf.com to remove this watermark.
CHAPTER 15 ■ AN INTRODUCTION TO PEAR AND PYRUS
343
channel.xml, which defines your channel. It also creates empty get/ and rest/ directories. I want these
to be Web-accessible later, so I ran the command in a Web directory.
Now that I’ve created a channel, I can add some categories.
php /usr/share/pearscs.phar add-category productivity "things to help you work"
php /usr/share/pearscs.phar add-category fun "the fun never stops"
The add-category subcommand takes two arguments: the name of the category, and a description.
It simply amends the channel.xml file.
Before I can add a package to the system, I must ensure that my new channel can be recognized or
PEAR, or Pyrus will complain when the package is built. In order to do this I need another Pyrus package:
PEAR2_SimpleChannelFrontend
Managing a PEAR Channel with PEAR2_SimpleChannelFrontend
Once again, the Pyrus site is not currently consistent about the best way to work with this package. The
suggested installation method:
php pyrus.phar install PEAR2_SimpleChannelFrontend
results in an error at the time of this writing. By the time you read this, you may get more useful
instructions on the package page at For now though,
you can get a phar file from You
can also check for more recent versions of the archive.
Now that I have the PEAR2_SimpleChannelFrontend phar file, I need to make it available via the
Web. I can do this by renaming the file to index.php and placing it in the Web-accessible directory that
houses channel.xml. This location should match up with the domain and subdomain that define the
channel. So, earlier I chose the name pear.appulsus.com for my channel. I should configure Apache 2 so
that pear.appulsus.com resolves to the directory in which I've placed index.php. Here’s an extract from
my httpd.conf file (that is the Apache Web server’s configuration file):
<VirtualHost *:80>
ServerAdmin
DocumentRoot /var/www/pear
ServerName pear.appulsus.com
ErrorLog logs/pear.appulsus.com-error_log
TransferLog logs/pear.appulsus.com-access_log
</VirtualHost>
This simply ensures that a request to is routed to the DocumentRoot
directory (/var/www/pear) in which I placed the newly renamed index.php. The
SimpleChannelFrontend packages also requires that some mod_rewrite directives are applied to the
channel directory:
<Directory "/var/www/pear">
<IfModule mod_rewrite.c>
RewriteEngine On
RewriteBase /
RewriteCond %{REQUEST_FILENAME} !-f
RewriteCond %{REQUEST_FILENAME} !-d
RewriteRule . index.php [L]
</IfModule>
</Directory>
Please purchase PDF Split-Merge on www.verypdf.com to remove this watermark.
CHAPTER 15 ■ AN INTRODUCTION TO PEAR AND PYRUS
344
There’s enough in place now to for me to run a browser test. Figure 15.1 shows the default page that
PEAR2_SimpleChannelFrontend-0.1.0.phar generates.
Figure 15–1.
The Channel Frontend Default Page
This means I already have my own channel. I can confirm this on a remote command line.
pear channel-discover pear.appulsus.com
Adding Channel "pear.appulsus.com" succeeded
Discovery of channel "pear.appulsus.com" succeeded
Notice I'm using PEAR on the client side. I‘m hoping to demonstrate that these Pyrus tools can
provide service to a user running with a traditional PEAR setup. So far so good!
Managing a Package
Now that pear.appulsus.com can be recognized as a channel, I can alter the package.xml for Dialekt so
that it belongs there:
<name>Dialekt</name>
<channel>pear.appulsus.com</channel>
<summary>A package for translating text and web pages into silly tones of voice</summary>
Please purchase PDF Split-Merge on www.verypdf.com to remove this watermark.
CHAPTER 15 ■ AN INTRODUCTION TO PEAR AND PYRUS
345
and regenerate the PEAR package
Analyzing Dialekt/AliG.php
Analyzing Dialekt/Dalek.php
Analyzing cli-dialekt.php
Analyzing Dialekt.php
Package Dialekt-1.2.1.tgz done
As before, I have a Dialekt-1.2.1.tgz package. This time, though, it's ready for the pear.appulsus.com
channel. Now I can move or upload the package to my channel directory. Then, before I run the
command to make the release, I must first check a setting in the php.ini file. If you don’t know where
that is, by the way, you can run
php --ini
from the command-line and PHP will tell you. Once I’ve looked up its location I can open up php.ini
and
look for a line like this:
phar.readonly = Off
If the line is not there, or if it differs, I must add or alter it. Without this setting, my release will likely
fail. Now, at last I’m ready to make my release. I change to my channel directory and run.
php /usr/share/pearscs.phar release Dialekt-1.2.1.tgz mattz
Release successfully saved
Once again, I called the pearscs.phar file. Remember, that’s the PEAR_SimpleChannelServer
package. It requires a path to the package file, and a maintainer name. And that’s it. I now have a
channel, containing a package. I can also associate it with a category:
php /usr/share/pearscs.phar categorize Dialekt fun
Added Dialekt to fun
Figure 15.2 shows how I can confirm my new package from the browser.
Of course, the proof of the pudding is in the installing. So, from a remote system I can try just that:
pear install appulsus/Dialekt
downloading Dialekt-1.2.1.tgz ...
Starting to download Dialekt-1.2.1.tgz (1,913 bytes)
....done: 1,913 bytes
install ok: channel://pear.appulsus.com/Dialekt-1.2.1
All that’s left to do now is publicize the channel!
Please purchase PDF Split-Merge on www.verypdf.com to remove this watermark.
CHAPTER 15 ■ AN INTRODUCTION TO PEAR AND PYRUS
346
Figure 15–2.
A Channel Package Page
Summary
PEAR is extensive almost by definition, and I have only had space to provide an introduction here.
Nevertheless, you should leave this chapter with a sense of how easy it is to leverage PEAR packages to
add power to your projects. Through the package.xml file, the PEAR installer (and Pyrus, its future
replacement), you can also make your code accessible to other users. By setting up a channel, you can
automate dependency downloads for your users and allow third-party packages to use yours without the
need for bundling or complicated dependency management.
PEAR is best suited for relatively self-enclosed packages with well-defined functionality. For larger
applications, other build solutions come into their own. We will be looking at Phing, a powerful tool for
building applications, later in the book.
Please purchase PDF Split-Merge on www.verypdf.com to remove this watermark.
C H A P T E R 16
■ ■ ■
347
Generating Documentation with
phpDocumentor
Remember that tricky bit of code? The one in which you treated that method argument as a string,
unless it was an integer? Or was it a Boolean? Would you recognize it if you saw it? Maybe you tidied it up
already? Coding is a messy and complex business, and it’s hard to keep track of the way your systems
work and what needs doing. The problem becomes worse when you add more programmers to the
project. Whether you need to signpost potential danger areas or fantastic features, documentation can
help you. For a large codebase, documentation or its absence can make or break a project.
This chapter will cover
• The phpDocumentor application: Installing phpDocumentor and running it from
the command line
• Documentation syntax: The DocBlock comment and documentation tags
• Documenting your code: Using DocBlock comments to provide information about
classes, properties, and methods
• Creating links in documentation: Linking to web sites and to other documentation
elements
Why Document?
Programmers love and loathe documentation in equal measure. When you are under pressure from
deadlines, with managers or customers peering over your shoulders, documentation is often the first
thing to be jettisoned. The overwhelming drive is to get results. Write elegant code, certainly (though
that can be another sacrifice), but with a codebase undergoing rapid evolution, documentation can feel
like a real waste of time. After all, you’ll probably have to change your classes several times in as many
days. Of course, everyone agrees that it’s desirable to have good documentation. It’s just that no one
wants to undermine productivity in order to make it happen.
Imagine a very large project. The codebase is enormous, consisting of very clever code written by
very clever people. The team members have been working on this single project (or set of related
subprojects) for over five years. They know each other well, and they understand the code absolutely.
Documentation is sparse, of course. Everyone has a map of the project in their heads, and a set of
unofficial coding conventions that provide clues as to what is going on in any particular area. Then the
team is extended. The two new coders are given a good basic introduction to the complex architecture
and thrown in. This is the point at which the true cost of undocumented code begins to tell. What would
Please purchase PDF Split-Merge on www.verypdf.com to remove this watermark.
CHAPTER 16 ■ GENERATING DOCUMENTATION WITH PHPDOCUMENTOR
348
otherwise have been a few weeks of acclimatization soon becomes months. Confronted with an
undocumented class, the new programmers are forced to trace the arguments to every method, track
down every referenced global, check all the methods in the inheritance hierarchy. And with each trail
followed, the process begins again. If, like me, you have been one of those new team members, you soon
learn to love documentation.
Lack of documentation costs. It costs in time, as new team members join a project, or existing
colleagues shift beyond their area of specialization. It costs in errors as coders fall into the traps that all
projects set. Code that should be marked private is called, argument variables are populated with the
wrong types, functionality that already exists is needlessly re-created.
Documentation is a hard habit to get into because you don’t feel the pain of neglecting it
straightaway. Documentation needn’t be difficult, though, if you work at it as you code. This process can
be significantly eased if you add your documentation in the source itself as you code. You can then run a
tool to extract the comments into neatly formatted web pages. This chapter is about just such a tool.
phpDocumentor is based on a Java tool called JavaDoc. Both systems extract special comments
from source code, building sophisticated application programming interface (API) documentation from
both the coder’s comments and the code constructs they find in the source.
Installation
The easiest way to install phpDocumentor is by using the PEAR command line interface.
pear upgrade PhpDocumentor
■
Note In order to install or upgrade a PEAR package on a Unix-like system, you usually need to run the
pear
command as the root user.
This will make a network connection (to ) and automatically either install or
update phpDocumentor on your system.
You can also download the package from SourceForge.net at
You will find zipped and tarballed packages here.
Once you have the package on your file system, you may be able to install it directly using PEAR if PHP
was compiled with zlib support.
pear install PhpDocumentor-1.4.3.tgz
Alternatively, you can uncompress the archive and work with phpDocumentor directly from the
distribution directory. The command line interface is handled by the file phpdoc, and you need to have
the library directory phpDocumentor in your include path.
tar -xvzf PhpDocumentor-1.4.3.tgz
cd PhpDocumentor-1.4.3
chmod 755 phpdoc
./phpdoc -h
Here, I unpacked and entered the distribution directory. I made the phpdoc script executable and
ran it with the -h flag, which calls up a usage message.
If you have any problems with installation, the phpDocumentor package includes a file named
INSTALL, which contains extensive instructions and troubleshooting hints.
Please purchase PDF Split-Merge on www.verypdf.com to remove this watermark.