Tài liệu Hướng dẫn-Exchange2007-phần 8 - Printing ppt
Bạn đang xem bản rút gọn của tài liệu. Xem và tải ngay bản đầy đủ của tài liệu tại đây (1.08 MB, 8 trang )
55
PRINTING
Chuẩn bị: Khởi động máy chọn Windows Server 2003 Enterprise (Chưa nâng cấp lên Domain Controller)
B 1. Mở Windows Explorer → Menu Tools → Folder
Options…
B 2. Tab View → Bỏ dấu check ở option
Automatically search for network folders and
printers → OK
B 3. Kiểm tra đường truyền bằng lệnh ping trong command line
B 4. Mở chương trình Local Security Policy: Start → Programs → Administrative Tools → Local Security
Policy
B 5. Cho phép user có password trắng được truy cập: Local Policies → Security Options → Double click vào
mục Accounts: Limit local account use of blank passwords to console logon only → chọn Disable → OK.
B 6. Cập nhật sự thay đổi policy bằng cách dùng lệnh: gpupdate /force trong command line
B 7. Tạo 2 user u1 password 123, u2 password 123: Trên màn hình desktop, click chuột phải vào My
Computer → Manage. Trong cửa sổ Windows Management: System Tools → Local Users and Groups →
Users → Click chuột phải vào Users → New User …
B 8. Tạo group Sep, add u1 vào group Sep
1. INSTALL & SHARE LOCAL PRINT DEVICE
B 1. Start → Settings → Printers and Faxes
Trong cửa sổ Printers and Faxes, double click Add
Printer
Trong hộp thoại Welcome to the Add Printer
Wizard → Next
B 2. Trong hộp thoại Local or Network Printer,
Chọn option Local printer attached to this
computer, Bỏ dấu check ở option Automatically
detect and install my Plug and Play printer → Next
56
B 3. Trong hộp thoại Select a Printer Port, chọn
option Use the following port → chọn port LPT1 →
Next
B 4. Trong hộp thoại Istall Printer Software, chọn
Manufacturer HP và Printers là HP 2000 → Next
B 5. Trong hộp thoại Name Your Printer, nhập
Printer name: HP2000 PCXX → Next
B 6. Trong hộp thoại Printer Sharing, nhập Share
name: HP2000PCXX → Next
B 7. Trong hộp thoại Location and Comment, nhập
Location: Lau 1 - Phong 101 và Comment: May in
P. KeToan → Next
B 8. Trong hộp thoại Print Test Page, chọn No →
Next → Finish
(Print device HP2000 PC17 đã được add vào)
2. INSTALL & SHARE NETWORK PRINT DEVICE
B 1. Start → Settings → Printers and Faxes
Trong cửa sổ Printers and Faxes, double click Add
Printer
Trong hộp thoại Welcome to the Add Printer
Wizard → Next
B 2. Trong hộp thoại Local or Network Printer,
Chọn option Local printer attached to this
computer, Bỏ dấu check ở option Automatically
detect and install my Plug and Play printer → Next
57
B 3. Trong hộp thoại Select a Printer Port, chọn
option Create a new port
→ chọn Standard TCP/IP port → Next
B 4. Trong hộp thoại Welcome to the Add Standard
TCP/IP Printer Port Wizard → Next
B 5. Trong hộp thoại Add Port, nhập địa chỉ IP của
print device: 192.168.2.254.(Địa chỉ có thể thay đổi
tùy theo máy in mạng) Windows sẽ tự động đặt tên
port (port name) → Next
B 6. Nếu có máy in mạng với IP đã được định sẵn như
ở bước 5 thì hệ thống sẽ tự nhận dạng loại card mạng
của máy in. Do bài tập này không có máy in nên ta
phải khai báo loại card. Trong hộp thoại Additional
Port Information Required, chọn Device Type -
Standard - Generic Network Card → Next
B 7. Trong hộp thoại Welcome to the Add Standard
TCP/IP Printer Port Wizard → Next Trong hộp
thoại Completing…, Kiểm tra các thông số và chọn
Back để điều chỉnh (nếu cần) → Finish
B 8. Trong hộp thoại Istall Printer Software, chọn
Manufacturer HP và Printers là HP 2100 → Next
B 9. Trong hộp thoại Name Your Printer, nhập
Printer name: HP2100 PCXX → Next
58
B 10. Trong hộp thoại Welcome to the Add
Standard TCP/IP Printer Port Wizard → Next
Trong hộp thoại Printer Sharing, nhập Share name:
HP2100PCXX → Next
B 11. Trong hộp thoại Welcome to the Add Standard
TCP/IP Printer Port Wizard → Next Trong hộp
thoại Location and Comment, nhập Location: Lau 2
- Phong 201 và Comment: May in P. NhanSu →
Next
B 11. Trong hộp thoại Print Test Page, chọn No →
Next → Finish
3. MAP SHARED PRINT DEVICE
B 1. Start → Settings → Printers and Faxes
Trong cửa sổ Printers and Faxes, double click Add
Printer
Trong hộp thoại Welcome to the Add Printer
Wizard → Next
B 2. Trong hộp thoại Local or Network Printer,
Chọn option A network printer or a printer
attached to another computer → Next
B 3. Trong hộp thoại Specify a Printer, chọn option
Connect to this printer (or to browse… → Next
B 4. Trong hộp thoại Browse for Printer, double click
vào WORKGROUP → double click vào PC muốn
kết nối → click vào print device muốn kết nối → Next
Trong hộp thoại cảnh báo → Yes
59
B 5. Trong hộp thoại Default Printer, chọn No →
Next
B 6. Trong hộp thoại Completing… → Finish
Print device HP2000 PC18 đã được add vào
4. PRINTING SECURITY
B 1. Mở Properties của máy in: Trong cửa sổ
Printers and Faxes, Click chuột phải vào máy in →
Properties
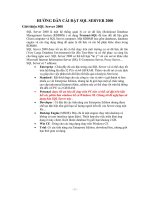
B 2. Trong cửa sổ Properrties chọn tab Security
Nhận xét: Group CREATOR OWNER có quyền Manage Documents, Group Everyone có quyền Print
B 3. Add group Sep vào → Phân quyền
cho group Sep: Print, Manage Printers và
Manage Documents → Apply → OK
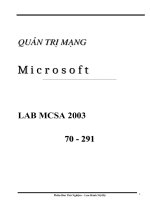
B 5. Sử dụng máy in ở chế độ Offline: Trong cửa sổ Printers
and Faxes, Click chuột phải vào máy in → Use Printer Offline.
(Icon máy in sẽ mờ đi)