Tài liệu Basic Configuration and Administration ppt
Bạn đang xem bản rút gọn của tài liệu. Xem và tải ngay bản đầy đủ của tài liệu tại đây (655.28 KB, 68 trang )
4
Basic
Configuration
and
Administration
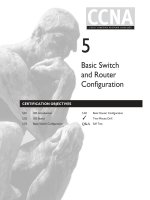
CERTIFICATION OBJECTIVES
4.01 Adding, Deleting, and Modifying
User Accounts
4.02 The Basic User Environment
4.03 Filesystem Configuration
4.04 Using the Red Hat Package Manager
4.05 Basic Networking
4.06 The Basic Boot Process
4.07 Virtual Consoles
4.08 Other Configuration Tools
4.09 Mounting Floppy Disks and
Removable Media
✓
Two-Minute Drill
Q&A Self Test
CertPrs8 / RHCE Red Hat Certified Engineer Linux Study Guide / Jang / 222485-1 / Chapter 4
Blind Folio 4:181
CertPrs8 / RHCE Red Hat Certified Engineer Linux Study Guide / Jang / 222485-1 / Chapter 4
Blind Folio 4:181
D:\omh\CertPrs8\485-1\ch04.vp
Wednesday, September 18, 2002 9:49:37 AM
Color profile: Generic CMYK printer profile
Composite Default screen
182
Chapter 4: Basic Configuration and Administration
CertPrs8 / RHCE Red Hat Certified Engineer Linux Study Guide / Jang / 222485-1 / Chapter 4
A
fter installation is complete on your Red Hat Linux system, you still have some work
to do to customize the system to meet your needs. User accounts need to be set up,
filesystems must be configured, and additional packages may need to be added
or removed.
This chapter will get you started with the basics that every Red Hat Linux
administrator should know. At the end of this chapter, you should know how to
manage user accounts and environments; configure and mount filesystems; use RPM
to manage packages; manage system daemons; and configure virtual consoles, keyboards,
and mice.
CERTIFICATION OBJECTIVE 4.01
Adding, Deleting, and Modifying User Accounts
The default Red Hat installation gives you just a single login account: root. You should
set up more accounts. Even if you’re going to be the only user on the system, it’s a
good idea to create at least one nonadministrative account to do your day-to-day work.
Then you can use the root account only when it’s necessary to administer the system.
Accounts can be added to Red Hat Linux systems using various utilities, including
the vi text editor (the manual method), the useradd command (the command line
method), and the Red Hat User Manager utility (the graphical method).
User Account Categories
Linux user accounts are of three basic types: administrative (root), regular, and service.
The account that you have to create when you install Linux is the root user account,
with administrative privileges to all services on your Linux computer. Crackers would
love a chance to take control of this account, for it would help them take full control
of your system.
Nevertheless, there are times when it is appropriate to log in as an administrator
(i.e., as the root user). Red Hat Linux builds in safeguards for root users. Run the
alias command. You’ll see entries such as:
alias rm='rm -i'
D:\omh\CertPrs8\485-1\ch04.vp
Wednesday, September 18, 2002 9:49:37 AM
Color profile: Generic CMYK printer profile
Composite Default screen
Adding, Deleting, and Modifying User Accounts
183
CertPrs8 / RHCE Red Hat Certified Engineer Linux Study Guide / Jang / 222485-1 / Chapter 4
which prompt for confirmation before the rm command deletes a file. Unfortunately,
a command such as rm -rf directoryname would supersede this safety setting.
In the world of Linux, hackers are good people who just want to improve
software. Crackers are people who are interested in breaking into computer
systems for malicious purposes.
Regular users have the necessary privileges to perform standard tasks on a Linux
computer. They can access programs such as word processors, databases, Web browsers.
They can store files in their own home directories. Since regular users do not normally
have administrative privileges, they cannot accidentally delete configuration files. You
can assign a regular account to most users, safe in the knowledge that they can’t disrupt
your system with the privileges that they have on that account.
Services such as Apache, Samba, mail, games, and printing have their own individual
service accounts. These accounts exist to allow each of these services to interact with
your computer. Normally, you won’t need to change any service account; but if you
see that someone has logged in through one of these accounts, be wary. Someone may
have broken into your system.
To review recent logins, run the utmpdump /var/log/wtmp | less command.
If the login is from a remote location, it will be associated with a specific IP
address.
Basic Command Line Tools
You have two basic ways of adding users through the command line interface. You
can do it directly by editing the /etc/passwd file in your favorite text editor. As discussed
in Chapter 1, the text editor of choice for most Linux administrators is vi. Open it
up, and then scroll to the bottom of /etc/passwd. You should see lines like the following:
mj:x:500:500:Michael Jang:/home/mj:/bin/bash
Each entry in /etc/passwd is delineated by a colon. The seven types of entries are
described in Table 4-1, using the example of the preceding line of code. When you
edit /etc/passwd, you can substitute the information of your choice. Just make sure
not to duplicate the username. There’s a standard series of files in the /etc/skel directory
that you can copy to the new user’s home directory to help set up a default environment.
The /etc/skel directory is covered in more detail later in this chapter.
Now that you’ve created a new user, you need to create a home directory for that user.
For example, if you’ve just created user mj, you need to create directory /home/mj. You’ll
D:\omh\CertPrs8\485-1\ch04.vp
Wednesday, September 18, 2002 9:49:37 AM
Color profile: Generic CMYK printer profile
Composite Default screen
184
Chapter 4: Basic Configuration and Administration
CertPrs8 / RHCE Red Hat Certified Engineer Linux Study Guide / Jang / 222485-1 / Chapter 4
also need to make sure that mj has ownership permissions on that directory and all of
the files that you’re going to put in that directory. Normally, every Linux user needs
configuration files. The files in the /etc/skel directory contain default configuration files.
Alternatively, you can automate this process with the useradd command. If you
wanted to add a new user named pm, you could just type useradd pm to add this
user to the /etc/passwd file. By default, it creates a home directory, /home/pm, adds
standard files from the /etc/skel directory, and assigns the default shell, /bin/bash. But
useradd is versatile. It includes a number of command options, shown in Table 4-2.
You can now use the passwd username command to assign a new password to
that user. For example, the passwd pm command lets you assign a new password
Field Purpose
mj The user logs in with this name. The login name should contain only
alphanumeric characters. It can also include hyphens (-) or underscores
(_). In almost all cases, the login name should not contain uppercase
letters. Although a login name can be up to 256 characters, you typically
want to keep it to 10 or less, for ease of account maintenance.
x The password. Don’t enter anything here. You can set this password
from the command line interface with the passwd username command.
If the entry in this field is “x,” the actual password is encrypted in /etc/
shadow. Otherwise, the encrypted password is shown here, with a group
of seemingly random letters and numbers.
500 The unique numeric user ID (UID) for that user. By default, Red Hat
Linux starts user IDs at 500.
500 The numeric group ID (GID) the user will belong to. By default, Red
Hat Linux creates a new group for every new user. If you want all your
users to be in the Users group (GID=100), enter 100 here.
Michael
Jang
You can enter the information of your choice in this field. While it’s helpful
to enter the full name of the user here, you can also enter other identifying
information such as the user’s telephone number, e-mail address, or physical
location. No entry is required.
/home/mj By default, Red Hat Linux places new home directories in /home/username.
/bin/bash By default, Red Hat Linux assigns the bash shell as the login shell for each
new user.
TABLE 4-1
/etc/passwd
Categories
D:\omh\CertPrs8\485-1\ch04.vp
Wednesday, September 18, 2002 9:49:37 AM
Color profile: Generic CMYK printer profile
Composite Default screen
Adding, Deleting, and Modifying User Accounts
185
CertPrs8 / RHCE Red Hat Certified Engineer Linux Study Guide / Jang / 222485-1 / Chapter 4
to user pm. You’re prompted to enter a password twice. While passwords based on
dictionary words or shorter than six characters are discouraged for security reasons,
they are legal, and such a password is accepted by the passwd command when you
type it in a second time.
If passwords are encrypted in /etc/shadow, as discussed in Table 4-1, then you’ll
also need to run the pwconv command to secure any passwords that you create for
new users.
Good passwords are important. Any cracker who may have tapped into the
communications channels on your network can try to match the password
of any of your users. If it’s a dictionary word or based on a simple pattern, a
password cracking program may be able to find that password in a matter of
minutes. In contrast, a more complex password such as Ila451MS (which could
stand for “I live at 451 Main Street”) may take hours for that same program
to crack.
The Red Hat User Manager
The Red Hat User Manager can be run only from the Linux graphical user interface
(GUI), also known as X or X11. If you have already configured X and are running a
graphical desktop, enter redhat-config-users from a command line interface. If your
username does not have root privileges, you’ll be prompted for a root password.
Figure 4-1 shows the Red Hat User Manager window.
Option Purpose
-u UID Overrides the default assigned UID, which is normally the number
in sequence after the one assigned to the newest user.
-g GID Overrides the default assigned GID, which normally corresponds to the UID.
-c info Enters the comment of your choice about the user, such as his or her name.
-d dir Overrides the default home directory for the user, /home/username.
-s shell Overrides the default shell for the user, /bin/bash.
TABLE 4-2
useradd
Command
Options
D:\omh\CertPrs8\485-1\ch04.vp
Wednesday, September 18, 2002 9:49:37 AM
Color profile: Generic CMYK printer profile
Composite Default screen
EXERCISE 4-1
Adding a User with the Red Hat User Manager
To add a user with the Red Hat User Manager:
1. Run redhat-config-users from a command line terminal such as Konsole or
gnome-terminal in a GUI.
2. Click the New User button, or click Action | New Users. (This notation
indicates you should click the Action button on the toolbar, then click New
Users in the pop-up menu that appears.) This will open the Create New User
window, as shown here:
Ill 4-1
186
Chapter 4: Basic Configuration and Administration
CertPrs8 / RHCE Red Hat Certified Engineer Linux Study Guide / Jang / 222485-1 / Chapter 4
FIGURE 4-1
The Red Hat
User Manager
D:\omh\CertPrs8\485-1\ch04.vp
Wednesday, September 18, 2002 9:49:38 AM
Color profile: Generic CMYK printer profile
Composite Default screen
Adding, Deleting, and Modifying User Accounts
187
CertPrs8 / RHCE Red Hat Certified Engineer Linux Study Guide / Jang / 222485-1 / Chapter 4
3. Complete the form. All entries are required, except Full Name. The entries
are fairly self-explanatory; see the previous sections for more information on
each field. The password should be at least six characters (you’ll get an error
message if it’s less than six characters) and should contain a mix of upper- and
lowercase letters, numbers, and symbols to keep it from being easily found by
one of the standard password cracking programs. Enter the identical password
in the Confirm Password field. Click OK when you are done.
4. When you have finished adding users, select Cancel to return to the Red Hat
User Manager.
User Account Management Tips
Although creating user accounts may seem to be a straightforward process, you have
a few things to watch out for:
■
Red Hat Linux by default configures individual private group IDs (GID) for
each user. As this provides additional security, this is also known as the Red Hat
User Private Group scheme. In the default Red Hat scenario, everyone has a
unique private GID, and nobody has access to other users’ home directories.
These users can still share access to special directories; see Chapter 11 for more
information.
D:\omh\CertPrs8\485-1\ch04.vp
Wednesday, September 18, 2002 9:49:38 AM
Color profile: Generic CMYK printer profile
Composite Default screen
188
Chapter 4: Basic Configuration and Administration
CertPrs8 / RHCE Red Hat Certified Engineer Linux Study Guide / Jang / 222485-1 / Chapter 4
■
If your configuration doesn’t require each user to have his or her own GID,
assign your users to the Users group, which is GID 100. There’s rarely a need
for each user to have an individual GID, and having most users assigned to the
Users group makes system administration easier.
■
Discourage the use of shared accounts, where several people use a single account.
Shared accounts are almost always unnecessary and are easily compromised.
■
If you’ll be using the Network File System (NFS), make sure all users have the
same UID on every system on the network. The Network Information System
(NIS) can provide centralized management of all user accounts for NFS across
all participating computers. This greatly simplifies account maintenance at the
expense of adding both administrative and network overhead.
The Red Hat standard where every user is a member of its own exclusive group
is known as the User Private Group scheme.
Deleting a User Account
Removing user accounts is as straightforward as adding them, with a few exceptions.
The simplest method is with the userdel command. By default, this command retains
files in the user’s home directory. Alternatively, the userdel -r username command
would remove all of these files.
Modifying a User Account
You may want to add some limitations to an individual user account. The easiest way
to illustrate these features is through the Red Hat User Manager. Start redhat-config-
users from a GUI text console, select a currently configured user, and then click
Action | Properties to open the User Properties dialog box. Click the Account Info
tab for the account expiration information shown in Figure 4-2.
As shown in Figure 4-3, you can set up temporary accounts that expire on a specific
date, or you can disable an account by locking it. Click the Password Info tab.
As shown in Figure 4-3, you can set several characteristics related to an individual
user’s password. Even when you set good passwords, frequent password changes can
help provide additional security. The categories shown in Figure 4-3 are self-explanatory.
Click the Groups tab.
Users can belong to more than one group in Linux. Under the Group properties
tab shown in Figure 4-4, you can assign the subject user to other groups. For example,
D:\omh\CertPrs8\485-1\ch04.vp
Wednesday, September 18, 2002 9:49:38 AM
Color profile: Generic CMYK printer profile
Composite Default screen
if you want to collect the files for a specific project together in a directory, you can
give access to these files to the group named project. You can then assign members of
that project team to the project group through the Groups tab.
You may not have access to a GUI during part of the RHCE exam. Therefore,
you need to know how to manage users independent of any tool such as
redhat-config-users.
Regular User Management Commands
While the redhat-config-users GUI utility is convenient, you still need to know how
to perform the associated administrative functions at the command line interface.
The other key commands that have not yet been addressed are usermod and chage.
Adding, Deleting, and Modifying User Accounts
189
CertPrs8 / RHCE Red Hat Certified Engineer Linux Study Guide / Jang / 222485-1 / Chapter 4
FIGURE 4-2
User Properties,
Account Info
FIGURE 4-3
User Properties,
Password Info
D:\omh\CertPrs8\485-1\ch04.vp
Wednesday, September 18, 2002 9:49:38 AM
Color profile: Generic CMYK printer profile
Composite Default screen
usermod
The usermod command modifies various settings in /etc/passwd. In addition, you can
use it to set an expiration date for an account or an additional group. For example,
the following command sets the account associated with user test1 to expire on June
8, 2003:
# /usr/sbin/usermod -e 2003-06-08 test1
The following command makes user test1 a member of the special group:
# /usr/sbin/usermod -G special test1
chage
You can use the chage command to manage the expiration date of a password. This
is all related to the /etc/shadow file; password age characteristics are part of each user
entry in this file. In order, the columns in /etc/shadow are shown in Table 4-3. The
associated switch is shown with the description. For example, if you wanted to make
user test1 keep a password for at least two days, use the chage test1 -m 2 command.
190
Chapter 4: Basic Configuration and Administration
CertPrs8 / RHCE Red Hat Certified Engineer Linux Study Guide / Jang / 222485-1 / Chapter 4
FIGURE 4-4
User Properties,
Groups
Column Description
1 User name
2 Encrypted password
3 Number of days of the last password change after 1/1/1970.
4 Minimum number of days which you must keep a password (-m)
TABLE 4-3
Entries in
/etc/shadow
D:\omh\CertPrs8\485-1\ch04.vp
Wednesday, September 18, 2002 9:49:38 AM
Color profile: Generic CMYK printer profile
Composite Default screen
CERTIFICATION OBJECTIVE 4.02
The Basic User Environment
Each user on your Red Hat Linux system has an environment when logged on to the
system. The environment defines where the system looks for programs to be executed,
what the login prompt looks like, what terminal type is being used, and more. This
section explains how default environments are configured.
Home Directories and /etc/skel
Red Hat Linux provides a set of standard templates for new users’ home directories
in /etc/skel.
Home Directories
The home directory is where users start when they first log on to a Red Hat Linux
system. For most normal users, this will be /home/username, where username is the
user’s login name. Users typically have write permission in their own home directory,
so they’re free to read and write their own files there. In Chapter 5, you’ll learn how
to configure disk quotas, so users don’t take more than their fair share of disk space.
/etc/skel
The /etc/skel directory contains default environment files for new accounts. The useradd
command and the Red Hat User Manager copy these files to the home directory when
a new account is created. Depending on the software installed, the files included in
/etc/skel and their purposes are listed in Table 4-4.
The Basic User Environment
191
CertPrs8 / RHCE Red Hat Certified Engineer Linux Study Guide / Jang / 222485-1 / Chapter 4
Column Description
5 Maximum number of days after which a password has to be changed (-M)
6 Number of days before password expiration - when a warning is given (-W)
7 Number of days after password expiration when an account is made inactive (-I)
8 Number of days after password expiration when an account is disabled (-E)
TABLE 4-3
Entries in
/etc/shadow
(continued)
D:\omh\CertPrs8\485-1\ch04.vp
Wednesday, September 18, 2002 9:49:38 AM
Color profile: Generic CMYK printer profile
Composite Default screen
192
Chapter 4: Basic Configuration and Administration
CertPrs8 / RHCE Red Hat Certified Engineer Linux Study Guide / Jang / 222485-1 / Chapter 4
As the system administrator, you can edit these files, or place your own customized
files in /etc/skel. When new users are created, these files are propagated to the new
users’ home directories. Additional entries are placed there by various programs during
installation, such as emacs and secure shell (ssh).
Window Manager Configuration File Locations
Red Hat Linux comes with several window managers. You will at some point want to
configure one or more of them for use on your system. Window manager configuration
files are stored in the /etc/X11/windowmanager directory, where windowmanager is
the name of the specific window manager. While this includes other window managers
such as twm and xdm, KDE configuration files are included in /etc/skel.
CERTIFICATION OBJECTIVE 4.03
Filesystem Configuration
There are as many, if not more, filesystem types as there are operating systems. Red Hat
Linux can understand many of these formats.
Filesystem Types
At the heart of every Red Hat Linux installation are the filesystems on which it relies.
Linux supports a rich variety of filesystem types. A sampling of these types is shown
in Table 4-5.
Files Purpose
.bashrc The basic bash configuration file. May contain a reference to the general
/etc/bashrc configuration file.
.bash_logout A file executed when you exit a bash shell.
.bash_profile Configures the bash startup environment, including the PATH.
.kde A directory that includes autostart settings for the K Desktop Environment.
.screenrc Customizes terminal settings such as messages and bells. Also configures
xterm.
TABLE 4-4
Default User
Configuration
Files in /etc/skel
D:\omh\CertPrs8\485-1\ch04.vp
Wednesday, September 18, 2002 9:49:39 AM
Color profile: Generic CMYK printer profile
Composite Default screen
Filesystem Configuration
193
CertPrs8 / RHCE Red Hat Certified Engineer Linux Study Guide / Jang / 222485-1 / Chapter 4
Filesystem Type Description
MS-DOS, VFAT,
and UMSDOS
These filesystems allow you to read MS-DOS-formatted filesystems.
MS-DOS lets you read pre–Windows 95 partitions, or regular
Windows partitions within the limits of short filenames. VFAT
lets you read Windows 95 and later partitions that are formatted
to this filesystem. UMSDOS allows you to run Linux from a DOS
partition (not currently supported by Red Hat).
ISO 9660 CDROM The standard filesystem for CD-ROMs. It is also known as the
High Sierra File System, or HSFS on other Unix systems.
Minix The standard filesystem for the Minix operating system. This is
the original default Linux filesystem. The current Linux standard
is ext3.
NTFS NTFS is the Microsoft Windows NT/2000/XP filesystem designed
for username / password security. Currently supported as a read-
only system.
OS/2 HPFS The standard for IBM’s OS/2 operating system.
/proc The /proc filesystem is a Linux virtual filesystem. Virtual means
that it doesn’t occupy real disk space. Instead, files are created
as needed. /proc is used to provide information on kernel
configuration and device status.
/dev/pts The /dev/pts filesystem is the Linux implementation of the
Open Group’s Unix98 PTY support.
ROM The ROM filesystem is a read-only filesystem, intended primarily
for initial RAM disks such as an installation boot floppy.
Second Extended
(ext2)
The basis for ext3, the standard Linux filesystem. The ext3
filesystem is essentially ext2 with journaling.
Third Extended
(ext3)
The standard Linux filesystem.
NFS The Network File System. This is the system most commonly
used to share files and printers between Linux and Unix computers.
SMB Server Message Block (SMB) is based on Microsoft and IBM
network protocols. Linux can use SMB to share files and printers
with Microsoft Windows operating systems.
NCP Netware Core Protocol (NCP) is the network filesystem used by
Novell, using the IPX/SPX protocol stack. NCP allows Linux to
use NCP as a client.
TABLE 4-5
Linux Filesystem
Types
D:\omh\CertPrs8\485-1\ch04.vp
Wednesday, September 18, 2002 9:49:39 AM
Color profile: Generic CMYK printer profile
Composite Default screen
If you have the kernel source RPMs loaded on your system, you can see which
filesystems any version or distribution of Linux currently supports. Navigate to
the /usr/src/linux-2.x.y directory (where x and y represent the actual version
number of your kernel. Run the make menuconfig command and use your arrow
keys to navigate to the filesystems section.
The Filesystem Table
Information about your local and remotely mounted filesystems is stored in /etc/fstab.
Each filesystem is described on a separate line. Each line is composed of multiple fields,
each separated by spaces or tabs. When your system boots, it processes each filesystem
in the order listed.
A sample /etc/fstab might look like the following:
LABEL=/ / ext3 defaults 1 1
LABEL=/boot /boot ext3 defaults 1 2
/dev/hda2 swap swap defaults 0 0
LABEL=/usr /usr ext3 defaults 1 2
LABEL=/tmp /tmp ext3 defaults 1 2
LABEL=/var /var ext3 defaults 1 2
LABEL=/home /home ext3 defaults 1 2
/dev/cdrom /mnt/cdrom iso9660 noauto,owner,kudzu,ro 0 0
none /proc proc defaults 0 0
Table 4-6 provides a description of each field, from left to right.
194
Chapter 4: Basic Configuration and Administration
CertPrs8 / RHCE Red Hat Certified Engineer Linux Study Guide / Jang / 222485-1 / Chapter 4
Field Name Description
Label Lists the device to be mounted.
Mount point Notes the directory where the filesystem will be mounted.
Filesystem Format Describes the filesystem type. Valid filesystem types include minix,
ext, ext2, ext3, msdos, vfat, iso9660, nfs, and swap. If you have
an unused partition, you can set this field to “ignore.”
Mount Options Covered in the following section.
Dump Value Either 0 or 1. A value of 1 means that the filesystem is automatically
saved to disk by the dump(8) command when you exit Linux.
Filesystem Check
Order
Determines the order that filesystems are checked during the boot
process by fsck(8). The root directory (/) filesystem should be set
to 1, and other local filesystems should be set to 2. Remote filesystems
should be set to 0, which means that they are not checked on boot.
TABLE 4-6
/etc/fstab Column
Descriptions from
Left to Right
D:\omh\CertPrs8\485-1\ch04.vp
Wednesday, September 18, 2002 9:49:39 AM
Color profile: Generic CMYK printer profile
Composite Default screen
Mount Options
Although “defaults” is the right mount option for most /etc/fstab filesystems, there
are other options, as listed in Table 4-7. If you want to use multiple options, separate
them by commas. Don’t use spaces between options.
The list in Table 4-7 is not comprehensive. Consult the mount(8) man page for
more information.
Filesystem Configuration
195
CertPrs8 / RHCE Red Hat Certified Engineer Linux Study Guide / Jang / 222485-1 / Chapter 4
Mount Option Description
async Data is read and written asynchronously.
atime Part of the defaults option. The inode associated with each file is
updated each time the file is accessed.
auto
The mount -a command mounts all of the filesystems with this option.
defaults Uses default mount options: rw, suid, dev, exec, auto, nouser,
and async.
dev Permits access to character devices such as terminals or consoles
and block devices such as drives.
exec Allows binaries (compiled programs) to be run on this filesystem.
noatime The inode associated with each file is not updated when accessed.
noauto Requires explicit mounting. Common option for CD and floppy
drives.
nodev Devices on this filesystem are not read or interpreted.
noexec Binaries (compiled programs) cannot be run on this filesystem
so mounted.
nosuid Disallows setuid or setgid permissions on this filesystem.
nouser Only root users are allowed to mount the specified filesystem.
remount Remounts a currently mounted filesystem. Also an option for
the mount command.
ro Mounts the filesystem as read-only.
rw Mounts the filesystem as read/write.
suid Allows setuid or setgid permissions on programs on this filesystem.
sync Reads and writes are done at the same speed (synchronously)
on this filesystem.
user Allows nonroot users to mount this filesystem. By default, this also
sets the noexec, nosuid, and nodev options.
TABLE 4-7
Linux /etc/fstab
Mount Options
D:\omh\CertPrs8\485-1\ch04.vp
Wednesday, September 18, 2002 9:49:39 AM
Color profile: Generic CMYK printer profile
Composite Default screen
CertPrs8 / RHCE Red Hat Certified Engineer Linux Study Guide / Jang / 222485-1 / Chapter 4
196
Chapter 4: Basic Configuration and Administration
CERTIFICATION OBJECTIVE 4.04
Using the Red Hat Package Manager
One of the major duties of a system administrator is software management. Applications
are upgraded. Kernels are patched. Without the right tools, it can be difficult to figure
out what software is on a system, what is the latest update, and what applications
depend on other software. Space is wasted on outdated files, because nobody knows
if they are important. Worse, you may install a new software package only to find it
has overwritten a crucial file from a currently installed package. The Red Hat Package
Manager (RPM) was designed to eliminate these problems. With RPM, software is
managed in discrete “packages,” where a package is a collection of the files required
for the software, along with instructions for adding, removing, and upgrading those
files. The RPM system also makes sure you never lose configuration files; key files
are backed up before being overwritten. This system also makes it easy to find the
currently installed version of any RPM-based application.
Another advantage of RPM is that a package can be specified just like an Internet
address, in Uniform Resource Locator (URL) format. For example, if the foo.rpm
package is on the /pub directory of the ftp.rpmdownloads.com FTP server, you can
download this file by specifying the file.
Assuming you’re connected to the Internet, the rpm command logs onto the FTP
server anonymously and downloads the file.
If the FTP server requires a username and password, you can use the following
format: ftp://username:password @hostname:port/path/to/remote/package/file.rpm, where
username and password are the username and password you need to log on to this
system, and port, if required, specifies a nonstandard port used on the remote FTP
server. Based on the preceding example, you could install the foo.rpm package with a
username of mjang and a password of Ila451MS with the following command:
rpm -i ftp://mjang:/pub/foo.rpm
What Is a Package?
In the generic sense, a package is a container. It includes the group of files needed to
install a specific program or application, which normally includes binaries, configuration,
and documentation files. It also includes instructions on how and where these files
D:\omh\CertPrs8\485-1\ch04.vp
Wednesday, September 18, 2002 9:49:39 AM
Color profile: Generic CMYK printer profile
Composite Default screen
should be installed and uninstalled. An RPM package name usually includes the version,
the release, and the architecture for which it was built. For example, the fictional
penguin-3.4.5-26.i386.rpm package is version 3.4.5, release 26. The “i386” indicates
that it is suitable for computers built to the Intel architecture.
Normally, you should be able to use the information in the /proc/cpuinfo file
to find the type of CPU on your system, such as i386, i586, and i686. Many
RPM packages are CPU specific. If in doubt, use packages with the i386 or
noarch labels, as they are most generic.
What Is RPM?
At the heart of this system is the RPM database. Among other things, this database
tracks the version and location of each file in each RPM. The RPM database also
maintains an MD5 checksum of each file. With the checksum, you can use the rpm
-V package command to see if any file from that RPM package has changed. The RPM
database makes adding, removing, and upgrading packages easy, because RPM knows
which files to handle, and where to put them.
RPM also manages conflicts between packages. For example, assume you have two
different packages that use configuration files with the same name. Call the original
configuration file /etc/someconfig. You’ve already installed package X. If you then
try to install package Y, RPM backs up the original /etc/someconfig before installing
package Y.
The key to this system is the rpm command. We’ll cover the four most common
modes associated with this command: query, install, upgrade, and remove. But first,
in this age of insecure downloads, you should know how to validate the signature
associated with an RPM, as well as verifying the files in a specific package.
Validating a Package Signature
RPM uses two methods of checking the integrity of a package: MD5 checksum and
GPG signature. MD5 alone is adequate for verifying that the file is intact (no data
was lost or corrupted while copying or downloading the file). GPG is used to establish
the authenticity of the file; it can be used to confirm, for example, that an RPM file
is indeed an official Red Hat RPM. Red Hat provides a GPG public key for its RPM
files; the key is located in the RPM-GPG-KEY file on your distribution CD or can
be downloaded from www.redhat.com/about/contact.html.
Using the Red Hat Package Manager
197
CertPrs8 / RHCE Red Hat Certified Engineer Linux Study Guide / Jang / 222485-1 / Chapter 4
D:\omh\CertPrs8\485-1\ch04.vp
Wednesday, September 18, 2002 9:49:39 AM
Color profile: Generic CMYK printer profile
Composite Default screen
To authenticate your RPMs using the GPG system, import the key file using the
command (assuming it’s a CD-based keyfile, mounted on the /mnt/cdrom directory):
# rpm import /mnt/cdrom/RPM_GPG_KEY
You can then verify both the integrity and the authenticity of an RPM with a command
like this (assuming you’re checking the integrity of an RPM on the standard directory
on a Red Hat installation CD):
# rpm checksig /mnt/cdrom/RedHat/RPMS/pkg-0.0.0-0.rpm
Verifying One or More Packages
Verifying an installed package compares information about that package with
information from the RPM database on your system, or the original package. Verify
does a check against the size, MD5 checksum, permissions, type, owner, and group
of each file in the package. Here are a few verify examples:
■
Verify all packages
# rpm verify -a
■
Verify all files within a package against an RPM file on a mounted CD-ROM
# rpm verify -p /mnt/cdrom/RedHat/RPMS/fileutils-4.0-1.i386.rpm
■
Verify a file associated with a particular package
# rpm verify file /bin/ls
If the files or packages you were verifying checked out okay, you will see no output;
otherwise, you’ll see what checks failed. The output will be a string of eight characters,
possibly with a “c” denoting configuration file, followed by the filename that failed.
Each character in the eight-character field contains the result of a particular test.
A “.” (period) indicates that test passed. The following example shows /bin/vi with
an incorrect group ID assignment:
# rpm verify file /bin/vi
G. /bin/vi
Table 4-8 lists the failure codes and their meanings.
198
Chapter 4: Basic Configuration and Administration
CertPrs8 / RHCE Red Hat Certified Engineer Linux Study Guide / Jang / 222485-1 / Chapter 4
D:\omh\CertPrs8\485-1\ch04.vp
Wednesday, September 18, 2002 9:49:39 AM
Color profile: Generic CMYK printer profile
Composite Default screen
Looking for the Right RPM
Sometimes you need a file or a command, and just don’t know what is the correct
package to install. Red Hat provides a database that can associate the right RPM package
with a specific file. Naturally, this database can be installed from the rpmdb-redhat-*
RPM. Once you install this RPM, you can find the RPM associated with any available
file from the Red Hat installation CDs. For example, if you’re looking for the package
associated with /etc/passwd, run the following command:
# rpm redhatprovides /etc/passwd
The redhatprovides feature is a recent update to the rpm command,
version 4.1, included with Red Hat Linux 8.0 and above.
Adding and Removing RPM Packages
RPM makes it easy to add and remove software packages to your system. It maintains
a database regarding the proper way to add, upgrade, and remove packages. This makes
it relatively simple to add and remove software with a single command.
Install Mode
The Install mode, as its name suggests, is used to install RPM packages on your system.
Installing a package is accomplished with the -i option.
# rpm -i penguin-3.4.5-26.i386.rpm
CertPrs8 / RHCE Red Hat Certified Engineer Linux Study Guide / Jang / 222485-1 / Chapter 4
Using the Red Hat Package Manager
199
Failure Code Meaning
5 MD5 checksum
S File size
L Symbolic link
T File modification time
D Device
U User
G Group
M Mode
TABLE 4-8
RPM verify
Error Codes
D:\omh\CertPrs8\485-1\ch04.vp
Wednesday, September 18, 2002 9:49:39 AM
Color profile: Generic CMYK printer profile
Composite Default screen
200
Chapter 4: Basic Configuration and Administration
CertPrs8 / RHCE Red Hat Certified Engineer Linux Study Guide / Jang / 222485-1 / Chapter 4
If the package is available on a remote FTP server, you could install it directly from
that server with a command like the following:
# rpm -i />Before installing the package, RPM performs several checks. First, it makes sure the
package you’re trying to install isn’t already installed—normally, RPM won’t let you
install a package on top of itself. It also checks to make sure you aren’t installing an
older version of the package. Next, RPM does a dependency check. Some programs
won’t work unless others are already installed. In this example, you’ve just downloaded
the latest RPM version of the Penguin utilities, and you now want to install it.
# rpm -i penguin-3.4.5-26.i386.rpm
failed dependencies:
iceberg >>= 7.1 is needed by penguin-3.26.i386.rpm
This error tells you that rpm did not install the Penguin package because it requires
the iceberg package, version 7.1 or later. You’ll have to find and install the iceberg
package, and any packages iceberg may require.
Finally, RPM checks to see if it would overwrite any configuration files when it
installs a package. RPM tries to make intelligent decisions about what to do in this
situation. If RPM chooses to replace an existing configuration file, it gives you a
warning like:
# rpm -i penguin-3.26.i386.rpm
warning: /etc/someconfig saved as /etc/someconfig.rpmsave
It’s up to you to look at both files and determine what, if any, modifications need
to be made.
If you’ve already customized a package and upgrade it with rpm, go to the
saved configuration file. Use it as a guide to change the settings in the new
configuration file. Since you may need to make different changes to the new
configuration file, you should test the result in every way that package may
be used in a production environment.
Upgrade Mode
The -U switch is used to upgrade existing packages. For example, if Penguin utilities,
version 3-4.5-25, is already installed, the following command:
# rpm -U penguin-3.26.i386.rpm
D:\omh\CertPrs8\485-1\ch04.vp
Wednesday, September 18, 2002 9:49:40 AM
Color profile: Generic CMYK printer profile
Composite Default screen
Using the Red Hat Package Manager
201
CertPrs8 / RHCE Red Hat Certified Engineer Linux Study Guide / Jang / 222485-1 / Chapter 4
will upgrade the old version of the package with the new one. In fact, if you’ve never
installed this package before, the -U switch works just like -i. The package is simply
installed for the first time.
Remove Mode
The rpm -e command removes a package from your system. But before removing a
package, RPM checks a few things first. It does a dependency check to make sure no
other packages need what you’re trying to remove. If it finds dependent packages,
rpm -e fails with an error message identifying these packages.
If you have modified any of the configuration files, RPM makes a copy of the file,
adds .rpmsave to the end of the filename, and then erases the original. Finally, after
removing all files from your system and the RPM database, it removes the package
name from the database.
Be very careful about which packages you remove from your system. Like
most Linux utilities, RPM may silently let you shoot yourself in the foot. For
example, if you were to remove the packages for /etc/passwd or the kernel,
that would devastate your system.
Adding Updates, Security Fixes, and Other Items
Red Hat Linux is constantly being updated. As bugs or security problems are found,
they are collected on Red Hat’s Errata Web page, currently located at www.redhat.com/
support/docs/errata.html. You should check this page regularly to ensure your system
is up to date.
EXERCISE 4-2
Updating from the Red Hat Errata Page
Here’s a good checklist to follow whenever you review the errata page:
1. Go to Find the General
Red Hat Linux Errata link for your distribution.
2. For the latest version of Red Hat Linux, the page includes links for security
alerts, bug fixes, and enhancements. The security alerts are especially important
if your system is on a network. Click the security alerts link.
D:\omh\CertPrs8\485-1\ch04.vp
Wednesday, September 18, 2002 9:49:40 AM
Color profile: Generic CMYK printer profile
Composite Default screen
3. You may not have installed some of the affected packages. Use the rpm -qi
packagename command to check. If you have installed an affected package
on your system, consider the recommended upgrade.
4. Before replacing an affected package, consider the ramifications. You may need
to bring the system down to single-user or perform a reboot, which can affect
other users who are connected to your system. If a production computer is
affected, you may want to test the changes on another computer first.
5. If you choose to make an upgrade, back up at least the relevant files on your
current system. Upgrades do fail on occasion.
6. When performing the upgrade, watch for configuration file warnings. If your
local configuration files are replaced with new files, you may need to change
the new configuration files to reflect your current settings.
7. Thoroughly test the new package. Make sure you have it configured correctly.
8. If a package is listed in the errata but not installed on your system, chances
are there’s no reason to put it on your system now. Read the detailed errata
entry for that package carefully, and only install it if needed.
Red Hat has now included an RH Network Software Manager service that you can
configure to check for revised packages, new packages, errata, and other information.
As of this writing, there are three levels of support: Demo (free), Basic, and
Enterprise. Needless to say, Red Hat provides additional services with paid
subscriptions. You may subscribe to any of these services by registering through
www.redhat.com/network.
Seeing What Packages Are Installed
Without RPM, you’d need to search around your filesystems to figure out whether
a particular software package is installed. RPM makes it easy for you to figure out what
RPM packages are installed and get information about those packages.
Query Mode
One of the strengths of RPM is that it can account for every package or application
file that was installed using an RPM file. With RPM’s query mode, you can learn if
202
Chapter 4: Basic Configuration and Administration
CertPrs8 / RHCE Red Hat Certified Engineer Linux Study Guide / Jang / 222485-1 / Chapter 4
D:\omh\CertPrs8\485-1\ch04.vp
Wednesday, September 18, 2002 9:49:40 AM
Color profile: Generic CMYK printer profile
Composite Default screen
Using the Red Hat Package Manager
203
CertPrs8 / RHCE Red Hat Certified Engineer Linux Study Guide / Jang / 222485-1 / Chapter 4
a specific package is installed or identify the files associated with a particular package.
If you use query mode to list the files in an RPM before installation, you can see if
any of these files might cause problems, such as by overwriting configuration files.
The -q switch is used to query packages. The rpm -q packagename command will
return the installed version of a specified package. For example, to find the version
number of an installed lynx text browser, run the following command:
# rpm -q lynx
lynx-2.8.5-6
If you want to see which installed package owns a file, use the -f modifier. Here we
want to identify the package that owns /etc/passwd:
# rpm -qf /etc/passwd
setup-2.5.16-1
Likewise, if you want to generate a list of files belonging to a certain package, use
the -l modifier.
# rpm -ql setup
/etc/bashrc
/etc/csh.cshrc
/etc/csh.login
/etc/exports
/etc/filesystems
/etc/group
/etc/gshadow
/etc/host.conf
/etc/hosts.allow
/etc/hosts.deny
/etc/inputrc
/etc/motd
/etc/passwd
/etc/printcap
/etc/profile
/etc/profile.d
/etc/protocols
/etc/securetty
/etc/services
/etc/shadow
/etc/shells
/usr/share/doc/setup-2.5.16
/usr/share/doc/setup-2.5.16/uidgid
/var/log/lastlog
D:\omh\CertPrs8\485-1\ch04.vp
Wednesday, September 18, 2002 9:49:40 AM
Color profile: Generic CMYK printer profile
Composite Default screen
204
Chapter 4: Basic Configuration and Administration
CertPrs8 / RHCE Red Hat Certified Engineer Linux Study Guide / Jang / 222485-1 / Chapter 4
One of the most common modifiers to -q is -a, a query for all installed packages on
your system. A default Workstation system has over 350 packages installed. Here’s
a truncated output:
# rpm -qa
ghostscript-fonts-5.50-6
libmng-1.0.4-1
libtiff-3.5.7-6
ncurses-5.2-28
arts-1.0.2-3
rpm404-python4.0.4-8x.26
sendmail-devel-8.12.5-5
It’s common to use the rpm -qa command as a searchable database. All you
need to do is pipe the output with a search term through grep. For example,
the rpm -qa | grep kde command makes it easy to identify all packages
related to the K Desktop Environment.
For even more information about a specific package, use the -i (information)
modifier. Table 4-9 lists some of the most important entries from the package output.
# rpm -qi passwd
Name : passwd Relocations: (not relocateable)
Version : 0.67 Vendor: Red Hat, Inc.
Release : 3 Build Date: Tue 28 May 2002 01:53:00 PM EST
Install date: Thu 30 Jul 2002 04:06:15: AM EDT Build Host:
daffy.perf.redhat.com
Group : System Environment/Base Source RPM: passwd-0.67-3.src.rpm
Size : 19016 License: BSD
Packager : Red Hat, Inc. < />Summary : The passwd utility for setting/changing passwords using PAM.
Description :
The passwd package contains a system utility (passwd) which sets
and/or changes passwords, using PAM (Pluggable Authentication
Modules).
To use passwd, you should have PAM installed on your system.
D:\omh\CertPrs8\485-1\ch04.vp
Wednesday, September 18, 2002 9:49:40 AM
Color profile: Generic CMYK printer profile
Composite Default screen
CertPrs8 / RHCE Red Hat Certified Engineer Linux Study Guide / Jang / 222485-1 / Chapter 4
Using the Red Hat Package Manager
205
Creating and Using Custom RPMs
A source RPM is, as the name indicates, a package of source code used to build
architecture-specific packages. Properly labeled source RPMs include the “src”
identifier as part of the filename, such as:
polarbear-2.07-2.src.rpm
Binary RPMs are built from source RPMs. The source RPM contains the source
code and specifications necessary to create the binary RPM.
For building RPMs from source, you can also install the rpm-build-* package
and then use the rpmbuild command. The same switches described in this
section will also work with that command. In fact, in future releases of Red
Hat Linux, the rpmbuild command may become the only way to build an
RPM from source code or a tarball.
Installing Source RPMs
Like normal RPMs, a source RPM (SRPM) is installed with the -i option. This
installs the contents of the SRPM within the /usr/src/redhat directory structure.
The /usr/src/redhat/ Directory Structure
Five subdirectories appear within the /usr/src/redhat directory structure, as described
in Table 4-10.
When you build an SRPM, you will build it within this structure. If you install
an SRPM, it will be extracted into this structure.
Tag Description
Name The name of the package.
Version The version of the package.
Release The number of times this package has been released using
the same version of the software.
Install Date When this package was installed on your system.
Group Your RPM database is divided into groups, which describe the
functionality of the software. Every time you install a package,
it will be grouped accordingly.
Size The total size in bytes of all the files in the package.
License The license under which the original software was released.
TABLE 4-9
RPM -qi Key
Information
Categories
D:\omh\CertPrs8\485-1\ch04.vp
Wednesday, September 18, 2002 9:49:40 AM
Color profile: Generic CMYK printer profile
Composite Default screen