Tài liệu Hướng dẫn cài đặt Red Hat Linux 9 Red Hat Linux x86 pptx
Bạn đang xem bản rút gọn của tài liệu. Xem và tải ngay bản đầy đủ của tài liệu tại đây (7.94 MB, 140 trang )
Red Hat Linux 9
Red Hat Linux x86 Installation
Guide
Red Hat Linux 9: Red Hat Linux x86 Installation Guide
Copyright © 2003 by Red Hat, Inc.
Red Hat, Inc.
1801 Varsity Drive
Raleigh NC 27606-2072 USA
Phone: +1 919 754 3700
Phone: 888 733 4281
Fax: +1 919 754 3701
PO Box 13588
Research Triangle Park NC 27709 USA
rhl-ig-x86(EN)-9-Print-RHI (2003-01-16T18:24-0400)
Copyright © 2003 by Red Hat, Inc. This material may be distributed only subject to the terms and conditions set forth in the
Open Publication License, V1.0 or later (the latest version is presently available at />Distribution of substantively modified versions of this document is prohibited without the explicit permission of the copyright
holder.
Distribution of the work or derivative of the work in any standard (paper) book form for commercial purposes is prohibited
unless prior permission is obtained from the copyright holder.
Red Hat, Red Hat Network, the Red Hat "Shadow Man" logo, RPM, Maximum RPM, the RPM logo, Linux Library,
PowerTools, Linux Undercover, RHmember, RHmember More, Rough Cuts, Rawhide and all Red Hat-based trademarks and
logos are trademarks or registered trademarks of Red Hat, Inc. in the United States and other countries.
Linux is a registered trademark of Linus Torvalds.
Motif and UNIX are registered trademarks of The Open Group.
Intel and Pentium are a registered trademarks of Intel Corporation. Itanium and Celeron are trademarks of Intel Corporation.
AMD, AMD Athlon, AMD Duron, and AMD K6 are trademarks of Advanced Micro Devices, Inc.
Netscape is a registered trademark of Netscape Communications Corporation in the United States and other countries.
Windows is a registered trademark of Microsoft Corporation.
SSH and Secure Shell are trademarks of SSH Communications Security, Inc.
FireWire is a trademark of Apple Computer Corporation.
All other trademarks and copyrights referred to are the property of their respective owners.
The GPG fingerprint of the key is:
CA 20 86 86 2B D6 9D FC 65 F6 EC C4 21 91 80 CD DB 42 A6 0E
Table of Contents
Introduction i
1. Document Conventions i
2. How to Use This Manual iii
2.1. We Need Feedback! iv
1. Steps to Get You Started 1
1.1. Do You Have the Right Components? 1
1.1.1. Where to Find Other Manuals 1
1.1.2. Registering Your Product 1
1.1.3. No Boxed Set? No Problem! 2
1.2. Is Your Hardware Compatible? 2
1.3. Do You Have Enough Disk Space? 2
1.3.1. Installation Disk Space Requirements 3
1.4. Can You Install Using the CD-ROM? 3
1.4.1. Alternative Boot Methods 4
1.4.2. Making an Installation Boot CD-ROM 5
1.4.3. Making an Installation Boot Diskette 6
1.5. Which Installation Class is Best For You? 7
1.5.1. Personal Desktop Installations 8
1.5.2. Workstation Installations 8
1.5.3. Server Installations 9
1.5.4. Custom Installations 10
1.5.5. Upgrading Your System 10
2. Hardware Information and System Requirements Tables 11
2.1. Learning About Your Hardware with Windows 11
2.2. Recording Your System’s Hardware 14
3. Installing Red Hat Linux 17
3.1. The Graphical Installation Program User Interface 17
3.1.1. A Note about Virtual Consoles 17
3.2. The Text Mode Installation Program User Interface 18
3.2.1. Using the Keyboard to Navigate 19
3.2.2. Displaying Online Help 20
3.3. Starting the Installation Program 20
3.3.1. Booting the Installation Program 20
3.4. Selecting an Installation Method 23
3.5. Installing from CD-ROM 23
3.5.1. What If the IDE CD-ROM Was Not Found? 24
3.6. Installing from a Hard Drive 24
3.7. Preparing for a Network Installation 25
3.7.1. Setting Up the Server 26
3.8. Installing via NFS 27
3.9. Installing via FTP 28
3.10. Installing via HTTP 29
3.11. Welcome to Red Hat Linux 30
3.12. Language Selection 30
3.13. Keyboard Configuration 30
3.14. Mouse Configuration 31
3.15. Choosing to Upgrade or Install 32
3.16. Installation Type 33
3.17. Disk Partitioning Setup 34
3.18. Automatic Partitioning 35
3.19. Partitioning Your System 36
3.19.1. Graphical Display of Hard Drive(s) 37
3.19.2. Disk Druid’s Buttons 37
3.19.3. Partition Fields 38
3.19.4. Recommended Partitioning Scheme 39
3.19.5. Adding Partitions 39
3.19.6. Editing Partitions 41
3.19.7. Deleting a Partition 41
3.20. Boot Loader Configuration 41
3.20.1. Advanced Boot Loader Configuration 43
3.20.2. Rescue Mode 44
3.20.3. Alternative Boot Loaders 45
3.20.4. SMP Motherboards, GRUB, and LILO 45
3.21. Network Configuration 46
3.22. Firewall Configuration 48
3.23. Language Support Selection 50
3.24. Time Zone Configuration 51
3.25. Set Root Password 52
3.26. Authentication Configuration 54
3.27. Package Group Selection 56
3.27.1. Selecting Individual Packages 57
3.27.2. Unresolved Dependencies 58
3.28. Preparing to Install 59
3.29. Installing Packages 60
3.30. Boot Diskette Creation 60
3.31. Video Card Configuration 61
3.32. X Configuration — Monitor and Customization 62
3.32.1. Configuring Your Monitor 62
3.32.2. Custom Configuration 63
3.33. Installation Complete 64
A. Upgrading Your Current System 67
A.1. What it Means to Upgrade 67
A.2. Upgrading Your System 67
A.3. Upgrading Your File System 68
A.4. Upgrade Boot Loader Configuration 69
A.4.1. Creating a New Boot Loader Configuration 69
A.4.2. Advanced Boot Loader Configuration 71
A.4.3. Rescue Mode 72
A.4.4. Alternative Boot Loaders 73
A.4.5. SMP Motherboards, GRUB, and LILO 73
A.5. Selecting Packages to Upgrade 74
A.5.1. Unresolved Dependencies 75
A.6. Upgrading Packages 76
A.7. Boot Diskette Creation 76
A.8. Upgrade Complete 77
B. Removing Red Hat Linux 79
C. Getting Technical Support 81
C.1. Remember to Sign Up 81
C.2. An Overview of Red Hat Support 81
C.3. Scope of Red Hat Support 82
C.4. How to Get Technical Support 83
C.4.1. Signing up for Technical Support 83
C.5. Questions for Technical Support 84
C.5.1. How to Send Support Questions 84
D. Troubleshooting Your Installation of Red Hat Linux 87
D.1. You are Unable to Boot Red Hat Linux 87
D.1.1. Are You Unable to Boot from the CD-ROM? 87
D.1.2. Are You Unable to Boot from a Boot Diskette? 87
D.1.3. Is Your System Displaying Signal 11 Errors? 88
D.2. Trouble Beginning the Installation 88
D.2.1. Is Your Mouse Not Detected? 88
D.2.2. Problems with Booting into the Graphical Installation 89
D.3. Trouble During the Installation 89
D.3.1. No devices found to install Red Hat Linux Error Message 89
D.3.2. Trouble with Partition Tables 89
D.3.3. Partition Creation Problems 90
D.3.4. Using Remaining Space 90
D.3.5. Other Partitioning Problems 90
D.3.6. Are You Seeing Python Errors? 90
D.4. Problems After Installation 91
D.4.1. Trouble With the Graphical GRUB Screen? 92
D.4.2. Trouble With the Graphical LILO Screen? 92
D.4.3. Booting into a Graphical Environment 92
D.4.4. Problems with Server Installations and X 93
D.4.5. Problems When You Try to Log In 93
D.4.6. Is Your RAM Not Being Recognized? 94
D.4.7. Your Printer Will Not Work 95
D.4.8. Problems with Sound Configuration 95
D.4.9. Apache-based httpd service/Sendmail Hangs During Startup 95
D.4.10. Trouble with NVIDIA chipset 96
E. An Introduction to Disk Partitions 97
E.1. Hard Disk Basic Concepts 97
E.1.1. It is Not What You Write, it is How You Write It 97
E.1.2. Partitions: Turning One Drive Into Many 99
E.1.3. Partitions within Partitions — An Overview of Extended Partitions 101
E.1.4. Making Room For Red Hat Linux 102
E.1.5. Partition Naming Scheme 106
E.1.6. Disk Partitions and Other Operating Systems 107
E.1.7. Disk Partitions and Mount Points 107
E.1.8. How Many Partitions? 108
E.1.9. One Last Wrinkle: Using GRUB or LILO 108
F. Driver Diskettes 111
F.1. Why Do I Need a Driver Diskette? 111
F.1.1. So What Is a Driver Diskette Anyway? 111
F.1.2. How Do I Obtain a Driver Diskette? 111
F.1.3. Using a Driver Diskette During Installation 112
G. Configuring a Dual-Boot System 113
G.1. Allocating Disk Space for Linux 114
G.1.1. Add a New Hard Drive 114
G.1.2. Use an Existing Hard Drive or Partition 115
G.1.3. Create a New Partition 115
G.2. Installing Red Hat Linux in a Dual-Boot Environment 115
G.2.1. Disk Partitioning 116
G.2.2. Configuring the Boot Loader 116
G.2.3. Post-Installation 116
G.3. Partitioning with parted 117
G.3.1. Partitioning a Windows System 117
H. Additional Boot Options 119
Index 123
Colophon 129
Introduction
Welcome to the Red Hat Linux x86 Installation Guide. This guide contains useful information to
assist you during the installation of Red Hat Linux 9. From fundamental concepts such as installation
preparation to the step-by-step installation procedure, this book will be a valuable resource as you
install Red Hat Linux.
This manual will walk you through a typical installation using the Red Hat Linux CD-ROMs. Once
you have completed the installation as outlined in this manual, you will have a fully functioning
system.
1. Document Conventions
When you read this manual, you will see that certain words are represented in different fonts, type-
faces, sizes, and weights. This highlighting is systematic; different words are represented in the same
style to indicate their inclusion in a specific category. The types of words that are represented this way
include the following:
command
Linux commands (and other operating system commands, when used) are represented this way.
This style should indicate to you that you can type the word or phrase on the command line
and press [Enter] to invoke a command. Sometimes a command contains words that would be
displayed in a different style on their own (such as filenames). In these cases, they are considered
to be part of the command, so the entire phrase will be displayed as a command. For example:
Use the cat testfile command to view the contents of a file, named testfile, in the current
working directory.
filename
Filenames, directory names, paths, and RPM package names are represented this way. This style
should indicate that a particular file or directory exists by that name on your Red Hat Linux
system. Examples:
The .bashrc file in your home directory contains bash shell definitions and aliases for your own
use.
The /etc/fstab file contains information about different system devices and filesystems.
Install the webalizer RPM if you want to use a Web server log file analysis program.
application
This style indicates that the program is an end-user application (as opposed to system software).
For example:
Use Mozilla to browse the Web.
[key]
A key on the keyboard is shown in this style. For example:
To use [Tab] completion, type in a character and then press the [Tab] key. Your terminal will
display the list of files in the directory that start with that letter.
[key]-[combination]
A combination of keystrokes is represented in this way. For example:
The [Ctrl]-[Alt]-[Backspace] key combination will exit your graphical session and return you to
the graphical login screen or the console.
ii Introduction
text found on a GUI interface
A title, word, or phrase found on a GUI interface screen or window will be shown in this style.
When you see text shown in this style, it is being used to identify a particular GUI screen or an
element on a GUI screen (such as text associated with a checkbox or field). Example:
Select the Require Password checkbox if you would like your screensaver to require a password
before stopping.
top level of a menu on a GUI screen or window
When you see a word in this style, it indicates that the word is the top level of a pulldown menu.
If you click on the word on the GUI screen, the rest of the menu should appear. For example:
Under File on a GNOME terminal, you will see the New Tab option that allows you to open
multiple shell prompts in the same window.
If you need to type in a sequence of commands from a GUI menu, they will be shown like the
following example:
Go to Main Menu Button (on the Panel) => Programming => Emacs to start the Emacs text
editor.
button on a GUI screen or window
This style indicates that the text will be found on a clickable button on a GUI screen. For example:
Click on the Back button to return to the webpage you last viewed.
computer output
When you see text in this style, it indicates text displayed by the computer on the command line.
You will see responses to commands you typed in, error messages, and interactive prompts for
your input during scripts or programs shown this way. For example:
Use the ls command to display the contents of a directory:
$ ls
Desktop about.html logs paulwesterberg.png
Mail backupfiles mail reports
The output returned in response to the command (in this case, the contents of the directory) is
shown in this style.
prompt
A prompt, which is a computer’s way of signifying that it is ready for you to input something,
will be shown in this style. Examples:
$
#
[stephen@maturin stephen]$
leopard login:
user input
Text that the user has to type, either on the command line, or into a text box on a GUI screen, is
displayed in this style. In the following example, text is displayed in this style:
To boot your system into the text based installation program, you will need to type in the text
command at the boot: prompt.
Additionally, we use several different strategies to draw your attention to certain pieces of information.
In order of how critical the information is to your system, these items will be marked as note, tip,
important, caution, or a warning. For example:
Introduction iii
Note
Remember that Linux is case sensitive. In other words, a rose is not a ROSE is not a rOsE.
Tip
The directory /usr/share/doc contains additional documentation for packages installed on your
system.
Important
If you modify the DHCP configuration file, the changes will not take effect until you restart the DHCP
daemon.
Caution
Do not perform routine tasks as root — use a regular user account unless you need to use the root
account for system administration tasks.
Warning
If you choose not to partition manually, a server installation will remove all existing partitions on all
installed hard drives. Do not choose this installation class unless you are sure you have no data you
need to save.
2. How to Use This Manual
This manual is ideal for users (both new and old) who want a quick and simple installation solution.
It will help you prepare your system and walk you through the installation of Red Hat Linux.
Note
If you currently use Red Hat Linux 6.2 (or greater), you can perform an upgrade. Skim Chapter 1 Steps
to Get You Started to review the basics, then read Chapter 3 Installing Red Hat Linux, following the
directions as you go. Once you have chosen to perform an upgrade in the installation program, refer
to Appendix A Upgrading Your Current System.
iv Introduction
If you are an experienced user who wants to perform a Red Hat Linux CD-ROM installation, and you
do not need a review of the basics, you can skip ahead to Chapter 3 Installing Red Hat Linux to begin
the installation process.
Tip
Refer to the Red Hat Frequently Asked Questions for answers to questions and problems that may
occur before, during, or after the installation. You will find the FAQ online at:
/>2.1. We Need Feedback!
If you spot a typo in the Red Hat Linux x86 Installation Guide, or if you have thought of a way to make
this manual better, we would love to hear from you! Please submit a report against the component rhl-
ig-x86 in Bugzilla at:
/>When submitting a bug report, be sure to mention the manual’s identifier:
rhl-ig-x86(EN)-9-Print-RHI (2003-01-16T18:24-0400)
If you have a suggestion for improving the documentation, try to be as specific as possible when de-
scribing it. If you have found an error, please include the section number and some of the surrounding
text so we can find it easily.
If you have a support question (for example, if you need help configuring X, or if you are not sure
how to partition your hard drive[s]), use the online support system by registering your product at:
/>Chapter 1.
Steps to Get You Started
Note
Although this manual reflects the most current information possible, you should read the Red Hat
Linux Release Notes for information that may not have been available prior to our documentation
being finalized. The Release Notes can be found on the Red Hat Linux CD #1 and online at:
/>1.1. Do You Have the Right Components?
If you have purchased a Red Hat Linux product from Red Hat, Inc., you are ready to go. However,
mistakes occasionally happen, so now is a good time to double-check the contents of your product.
A Registration Information card is included with your product. A list of the contents of your boxed
set version is on the back of the card. Read over the list and check to make sure that you have all of
the installation media (such as CD-ROMs) and manuals that are included with the version of Red Hat
Linux that you purchased.
If you have purchased a Red Hat Linux product from Red Hat (or one of our distributors), and you are
missing one or more of the items listed, please let us know. Contact information is also available on
the Registration Information card.
How to identify a Red Hat boxed set: The bottom of our box has an ISBN number next to one of the
bar codes. That ISBN number should be in this form:
1-58569-x-y
(The x and y will be unique numbers.)
Red Hat partners with companies (international and domestic) so that we can make Red Hat Linux
available to you in the most convenient form. Because of these partnerships, you might find that your
Red Hat Linux product may not have been actually produced by Red Hat.
If your product has a different ISBN number (or none at all), you must contact the company that
produced it. Normally, third-party producers include their logo and/or contact information on the
outside of their box; a Red Hat product lists only our name and contact information.
1.1.1. Where to Find Other Manuals
If your particular product did not include all of the printed Red Hat Linux manuals, you can find them
online or on the Red Hat Linux Documentation CD included with your Red Hat Linux product.
To find the manuals in both HTML and PDF formats online, go to:
/>2 Chapter 1. Steps to Get You Started
1.1.2. Registering Your Product
If you have purchased a Red Hat product, you should register it. Registration offers many useful
services, such as installation support, access to Red Hat Network, and more. To register your product,
go to:
/>You will find your Product ID on the Registration Information card in your Red Hat Linux product.
Once registered, you will have access to all the extras that Red Hat provides to its registered users.
For more information on registering and the scope of Red Hat’s technical support offerings, see Ap-
pendix C Getting Technical Support.
1.1.3. No Boxed Set? No Problem!
Of course, not everyone purchases a Red Hat Linux boxed set. It is entirely possible to install Red
Hat Linux using a CD created by another company, or even via FTP. In these cases, you may need to
create one or more diskettes to get started.
For information on downloading and installing Red Hat Linux, refer to:
/>For people installing Red Hat Linux from a CD-ROM not from Red Hat, you may need a boot diskette
(also referred to as a boot disk), and if you are using a PCMCIA device during the installation (such
as a laptop), a PCMCIA driver diskette. You may also be able to start the installation directly from
the CD-rom. We will discuss this in more detail when we outline the various installation methods. For
more information on making a boot CD-ROM, see Section 1.4.2 Making an Installation Boot CD-
ROM. For information on making diskettes, see Section 1.4.3 Making an Installation Boot Diskette.
1.2. Is Your Hardware Compatible?
Hardware compatibility is particularly important if you have an older system or a system that you
built yourself. Red Hat Linux 9 should be compatible with most hardware in systems that were factory
built within the last two years. However, hardware specifications change almost daily, so it is hard to
guarantee that your hardware will be 100% compatible.
The most recent list of supported hardware can be found at:
/>1.3. Do You Have Enough Disk Space?
Nearly every modern-day operating system (OS) uses disk partitions, and Red Hat Linux is no ex-
ception. When you install Red Hat Linux, you may have to work with disk partitions. If you have not
worked with disk partitions before (or need a quick review of the basic concepts), read Appendix E
An Introduction to Disk Partitions before proceeding.
If Red Hat Linux will share your system with another OS, you will need to make sure you have
enough available disk space on your hard drive(s) for this dual boot installation. Refer to Appendix G
Configuring a Dual-Boot System for instructions on creating a dual boot system.
Chapter 1. Steps to Get You Started 3
The disk space used by Red Hat Linux must be separate from the disk space used by other OSes you
may have installed on your system, such as Windows, OS/2, or even a different version of Linux. At
least two partitions (/ and swap) must be dedicated to Red Hat Linux.
Before you start the installation process, one of the following conditions must be met:
• Your computer must have enough unpartitioned
1
disk space for the installation of Red Hat Linux.
• You must have one or more partitions that may be deleted, thereby freeing up enough disk space to
install Red Hat Linux.
1.3.1. Installation Disk Space Requirements
Note
These recommendations are based on an installation that only installs one language (such as En-
glish). If you plan to install multiple languages to use on your system, you should increase the disk
space requirements.
These recommendations do not take into account additional space for your user data. You must have
additional space available if you plan to save any user data (personal files) to your system.
Personal Desktop
A personal desktop installation, including a graphical desktop environment, requires at least
1.7GB of free space. Choosing both the GNOME and KDE desktop environments requires at
least 1.8GB of free disk space.
Workstation
A workstation installation, including a graphical desktop environment and software development
tools, requires at least 2.1GB of free space. Choosing both the GNOME and KDE desktop envi-
ronments requires at least 2.2GB of free disk space.
Server
A server installation requires 850MB for a minimal installation without X (the graphical envi-
ronment), at least 1.5GB of free space if all package groups other than X are installed, and at
least 5.0GB to install all packages including the GNOME and KDE desktop environments.
Custom
A Custom installation requires 475MB for a minimal installation and at least 5.0GB of free space
if every package is selected.
If you are not sure that you meet these conditions, or if you want to know how to create free disk
space for your Red Hat Linux installation, refer to Appendix E An Introduction to Disk Partitions.
1. Unpartitioned disk space means that available disk space on the hard drive(s) you are installing to has not
been divided into sections for data. When you partition a disk, each partition will behave like a separate disk
drive.
4 Chapter 1. Steps to Get You Started
1.4. Can You Install Using the CD-ROM?
There are several methods that can be used to install Red Hat Linux.
Installing from a CD-ROM requires that you have purchased a Red Hat Linux 9 product, or you have
a Red Hat Linux CD-ROM, and you have a CD-ROM drive. Most new computers will allow booting
from the CD-ROM. If your system will support booting from the CD-ROM, it is an easy way to begin
a local CD-ROM installation.
Your BIOS may need to be changed to allow booting from your CD-ROM drive. For more information
about changing your BIOS, see Section 3.3.1 Booting the Installation Program.
1.4.1. Alternative Boot Methods
Boot CD-ROM
If you can boot using the CD-ROM drive, you can create your own CD-ROM to boot the in-
stallation program. This may be useful, for example, if you are performing an installation over a
network or from a hard drive. See Section 1.4.2 Making an Installation Boot CD-ROM for further
instructions.
If you choose to create a boot CD-ROM, it will not be necessary to create a driver diskette.
If you cannot boot from the CD-ROM drive, the following alternative boot method is available:
Boot Diskette
If you need a boot diskette
2
, you must create it. A boot diskette will be needed if you cannot boot
from the CD-ROM. It can be used to boot from a network, block, or PCMCIA device (you will
also need the corresponding driver diskette for your booting scenario).
The boot diskette image file, bootdisk.img, is located in the images directory on your Red
Hat Linux CD-ROM. Refer to Section 1.4.3 Making an Installation Boot Diskette, for more
information on making a boot diskette.
If you choose to create a boot diskette, you must also create the appropriate driver diskette if you
are installing over a network or from a hard drive.
Driver Diskettes
If you are performing anything other than a IDE CD-ROM or hard disk installation and are
using a boot diskette, you will need at least one driver diskette that you must make in advance.
You will be prompted by the installation program to insert the driver diskette at the correct time.
For more information on driver diskettes, refer to Appendix F Driver Diskettes.
During your installation of Red Hat Linux, the following driver diskettes may be required:
Network Device Drivers Diskette
If you need a network device drivers diskette to boot from a network, you must create it.
The network device driver diskette image file, drvnet.img, is located in the images/
directory on your Red Hat Linux CD-ROM. Refer to Section 1.4.3 Making an Installation
Boot Diskette or Appendix F Driver Diskettes, for more information on making a diskette.
2. A boot diskette can be a diskette you created to boot (or start) the installation program, or it can be a diskette
you create during the installation process that can later be used to boot the operating system. Normally, your
computer boots from a hard disk, but if the hard disk is damaged, you can boot the computer from a bootable
diskette.
Chapter 1. Steps to Get You Started 5
Block Device Drivers Diskette
If you need a block device driver diskette to boot from a block device (for example, a
SCSI CD-ROM drive), you must create it. The block device driver diskette image file,
drvblock.img, is located in the images/ directory on your Red Hat Linux CD-ROM. Re-
fer to Section 1.4.3 Making an Installation Boot Diskette or Appendix F Driver Diskettes,
for more information on making a diskette.
PCMCIA Device Drivers Diskette
You may need a PCMCIA device driver diskette if you are using a PCMCIA device to install
Red Hat Linux. If you need a PCMCIA device driver diskette, you must create it.
The following checklist can help you determine if you must create a PCMCIA device driver
diskette:
• You will install Red Hat Linux from a CD-ROM, and your CD-ROM drive is attached to
your computer through a PCMCIA card.
• You will use a PCMCIA network adapter during the installation.
The PCMCIA device driver diskette image file, pcmciadd.img, is located in the images/
directory on your Red Hat Linux CD-ROM. Refer to Section 1.4.3 Making an Installation
Boot Diskette or Appendix F Driver Diskettes, for more information on making a diskette.
Note
USB Diskette Drive — You can also boot the installation program using a boot diskette in a USB
diskette drive (if your system supports booting from a USB diskette drive).
1.4.2. Making an Installation Boot CD-ROM
isolinux is now used for booting the Red Hat Linux installation CD. To create your own CD-ROM to
boot the installation program, use the following instructions:
Copy the isolinux/ directory from the first Red Hat Linux CD-ROM into a temporary directory
(referred to here as
path-to-workspace ) using the following command:
cp -r path-to-cd /isolinux/ path-to-workspace
Change directories to the path-to-workspace directory you have created:
cd path-to-workspace
Make sure the files you have copied have appropriate permissions:
chmod u+w isolinux/*
Finally, issue the following command to create the ISO image file:
mkisofs -o file.iso -b isolinux.bin -c boot.cat -no-emul-boot \
-boot-load-size 4 -boot-info-table -R -J -v -T isolinux/
6 Chapter 1. Steps to Get You Started
Note
The above command was split into two lines for printing purposes only. When you execute this com-
mand, be sure to type it as a single command, all on the same line.
Burn the resulting ISO image (named file.iso and located in
path-to-workspace ) to a CD-
ROM as you normally would.
1.4.3. Making an Installation Boot Diskette
isolinux is now used for booting the Red Hat Linux installation CD. If you have problems booting
from the Red Hat Linux CD, you can write the images/bootdisk.img image to a diskette.
You may need to create a diskette from an image file; for example, you may need to use updated
diskette images obtained from the Red Hat Linux errata page:
/>An image file contains an exact copy (or image) of a diskette’s contents. Since a diskette contains file
system information in addition to the data contained in files, the contents of the image file are not
usable until they have been written to a diskette.
To start, you need a blank, formatted, high-density (1.44MB), 3.5-inch diskette. You need access to a
computer with a 3.5-inch diskette drive. The computer must be able to run either an MS-DOS program
or the dd utility found on most Linux-like operating systems.
The images/ directory on your Red Hat Linux CD-ROM contains boot images. Once you have
selected the proper image (bootdisk.img), transfer the image file onto a diskette using one of the
following methods.
1.4.3.1. Using the rawrite Utility
To make a diskette using MS-DOS, use the rawrite utility included on the Red Hat Linux CD-ROM
in the dosutils directory. First, label a blank, formatted 3.5-inch diskette appropriately (such as
"Boot Disk" or "Updates Disk"). Insert it into the diskette drive. Then, use the following commands
(assuming your CD-ROM is drive D:):
C:\
d:
D:\ cd \dosutils
D:\dosutils rawrite
Enter disk image source file name: \images\bootdisk.img
Enter target diskette drive: a:
Please insert a formatted diskette into drive A: and
press ENTER : [Enter]
D:\dosutils
First, rawrite asks you for the filename of a diskette image; enter the directory and name of the image
you wish to write (for example, \images\bootdisk.img). Then rawrite asks for a diskette
drive to write the image to; enter a:. Finally, rawrite asks for confirmation that a formatted diskette
is in the drive you have selected. After pressing [Enter] to confirm, rawrite copies the image file
onto the diskette. If you need to make another diskette, label that diskette, and run rawrite again,
specifying the appropriate image file.
Chapter 1. Steps to Get You Started 7
Note
The rawrite utility only accepts 8.3-type file names, such as filename.img
3
. If you
download an update image from named something similar to
update-anaconda-03292002.img, you must rename it as updates.img before you run rawrite.
1.4.3.2. Using the dd Command
To make a diskette under Linux (or any other Linux-like operating system), you must have permission
to write to the device representing a 3.5-inch diskette drive (known as /dev/fd0 under Linux).
First, label a blank, formatted diskette appropriately (such as "Boot Diskette" or "Updates Diskette").
Insert it into the diskette drive (but do not mount
4
the diskette). After mounting the Red Hat Linux
CD-ROM, change to the directory containing the desired image file, and use the following command
(changing the name of the image file and diskette device as appropriate):
dd if=bootdisk.img of=/dev/fd0 bs=1440k
To make another diskette, label that diskette, and run dd again, specifying the appropriate image file.
1.5. Which Installation Class is Best For You?
Usually, Red Hat Linux is installed on its own disk partition or set of partitions, or over another
installation of Linux.
Warning
Installing Red Hat Linux over another installation of Linux (including Red Hat Linux) does not preserve
any information (files or data) from a prior installation. Make sure you save any important files! To
preserve the current data on your existing system, you should back up your data and/or consider
performing an upgrade instead.
The following installation types are available:
Personal Desktop
A personal desktop installation is most appropriate if you are new to the world of Linux, and
would like to give it a try. This installation will create a system for your home, laptop, or desktop
use. A graphical environment will be installed.
3. The 8.3-type file name originates from the naming convention of eight characters, a period, and
three characters for a file name extension. This naming convention supports file names between 1 and
8 characters, which cannot have spaces, and may not contain ? or _ characters at the start of the
name.
4. When you mount a diskette or CD-ROM, you make that device’s contents available to you. See the Red Hat
Linux Getting Started Guide for more information.
8 Chapter 1. Steps to Get You Started
Workstation
A workstation installation is most appropriate if you would like a graphical desktop environment,
as well as software development tools.
Server
A server installation is most appropriate if you would like your system to function as a Linux-
based server, and you do not want to heavily customize your system configuration.
Custom
A custom installation allows you the greatest flexibility during your installation. You choose your
boot loader, which packages you want, and more. Custom installations are most appropriate for
those users more familiar with Red Hat Linux installations and for those afraid of losing complete
flexibility.
Upgrade
If you already have a version of Red Hat Linux (6.2 or greater) running on your system and
you want to quickly update to the latest packages and kernel version, then an upgrade is most
appropriate for you.
These classes give you the option of simplifying the installation process (with some potential for loss
of configuration flexibility), or retaining flexibility with a slightly more complex installation process.
Next, take a detailed look at each class, so you can see which one is right for you.
1.5.1. Personal Desktop Installations
Most suitable for new users, the personal desktop installation will install a graphical desktop environ-
ment (the X Window System) and create a system ideal for home or desktop use.
Below are the minimum recommended disk space requirements for a personal desktop installation
where only one language (such as English) will be installed.
• Personal Desktop: 1.7GB
• Personal Desktop choosing both GNOME and KDE: 1.8GB
If you plan to choose all package groups (for example, Office/Productivity is a group of packages), as
well as select additional individual packages, you may want to allow yourself 5.0GB or more of disk
space.
1.5.1.1. What a Personal Desktop Installation Will Do
If you choose automatic partitioning, a personal desktop installation will create the following parti-
tions:
• The size of the swap partition is determined by the amount of RAM in your system and the amount
of space available on your hard drive. For example, if you have 128MB of RAM then the swap
partition created can be 128MB – 256MB (twice your RAM), depending on how much disk space
is available.
• A 100MB partition mounted as /boot in which the Linux kernel and related files reside.
• A root partition mounted as / in which all other files are stored (the exact size of this partition is
dependent on your available disk space).
Chapter 1. Steps to Get You Started 9
1.5.2. Workstation Installations
The workstation installation will install a graphical desktop environment and the X Window System,
plus software development tools.
Below are the minimum recommended disk space requirements for a workstation installation where
only one language (such as English) will be installed.
• Workstation: 2.1GB
• Workstation choosing both GNOME and KDE: 2.2GB
If you plan to choose all package groups (for example, Office/Productivity is a group of packages), as
well as select additional individual packages, you may want to allow yourself 5.0GB or more of disk
space. If you provide this extra space, you will have room for additional data, if needed.
1.5.2.1. What a Workstation Installation Will Do
If you choose automatic partitioning, a workstation installation will create the following partitions:
• The size of the swap partition is determined by the amount of RAM in your system and the amount
of space available on your hard drive. For example, if you have 128MB of RAM then the swap
partition created can be 128MB - 256MB (twice your RAM), depending on how much disk space
is available.
• A 100MB partition mounted as /boot in which the Linux kernel and related files reside.
• A root partition mounted as / in which all other files are stored (the exact size of this partition is
dependent on your available disk space).
1.5.3. Server Installations
A server installation is most appropriate for you if you would like your system to function as a Linux-
based server, and you do not want to heavily customize your system configuration.
Below are the minimum recommended disk space requirements for a server installation where only
one language (such as English) will be installed.
• Server (minimum, no graphical interface): 850MB
• Server (choosing everything, no graphical interface): 1.5GB
• Server (choosing everything, including a graphical interface): 5.0GB
If you plan to choose all group packages, as well as select additional individual packages, you may
want to allow yourself 5.0GB or more of disk space.
During the server installation, the X Window System is not configured and no GUI will be loaded when
the system boots, unless you choose to install the appropriate packages during package selection.
1.5.3.1. What a Server Installation Will Do
• The size of the swap partition is determined by the amount of RAM in your system and the amount
of space available on your hard drive. For example, if you have 128MB of RAM then the swap
partition created can be 128MB - 256MB (twice your RAM), depending on how much disk space
is available.
• A 100MB partition mounted as /boot in which the Linux kernel and related files reside.
10 Chapter 1. Steps to Get You Started
• A root partition mounted as / in which all other files are stored (the exact size of this partition is
dependent on your available disk space).
This disk partitioning scheme results in a reasonably flexible file system configuration for most server
tasks.
1.5.4. Custom Installations
The custom installation allows you the most flexibility during your installation. The workstation and
server installations automatically go through the installation process for you and omit certain steps.
During a custom installation, you have complete control over the packages that are installed on your
system.
The recommended disk space requirements for a custom installation are as follows:
• Custom (minimum): 475MB
• Custom (choosing everything): 5.0GB
1.5.4.1. What a Custom Installation Will Do
As you might guess from the name, a custom installation puts the emphasis on flexibility. You have
complete control over which packages will be installed on your system.
If you choose automatic partitioning, a custom installation will create the following partitions:
• The size of the swap partition is determined by the amount of RAM in your system and the amount
of space available on your hard drive. For example, if you have 128MB of RAM then the swap
partition created can be 128MB - 256MB (twice your RAM), depending on how much disk space
is available.
• A 100MB partition mounted as /boot in which the Linux kernel and related files reside.
• A root partition mounted as / in which all other files are stored (the exact size of this partition is
dependent on your available disk space).
1.5.5. Upgrading Your System
Upgrading Red Hat Linux 6.2 (or greater) will not delete any existing data. The installation program
updates the modular kernel and all currently installed software packages. See Chapter 3 Installing Red
Hat Linux and Appendix A Upgrading Your Current System for instructions.
Chapter 2.
Hardware Information and System
Requirements Tables
This chapter provides instructions for learning about your hardware and a system requirements table
which will help you keep a record of your current system settings and requirements.
2.1. Learning About Your Hardware with Windows
If your computer is already running Windows 9x, you can use the following steps to get additional
configuration information:
Figure 2-1. Windows 9x System Properties
• In Windows, click on the My Computer icon using the secondary (normally the right) mouse
button. A pop-up menu should appear.
• Select Properties. The System Properties window should appear. Note the information listed un-
der Computer — in particular the amount of RAM listed.
• Click on the Device Manager tab. You will then see a graphical representation of your computer’s
hardware configuration. Make sure the View devices by type radio button is selected.
At this point, you can either double-click on the icons or single-click on the plus sign + to look at each
entry in more detail. Look under the following icons for more information:
12 Chapter 2. Hardware Information and System Requirements Tables
Figure 2-2. Windows 9x System Properties
• Disk drives — the type (IDE or SCSI) of hard drive will be found here. (IDE drives will normally
include the word "IDE," while SCSI drives will not.)
• Hard disk controllers — information about your hard drive controller.
• CDROM — information about any CD-ROM drives connected to your computer.
Note
In some cases, there may be no CD-ROM icon, yet your computer has a functioning CD-ROM
drive. This is normal, depending on how Windows was originally installed. In this case, you may
be able to learn additional information by looking at the CD-ROM driver loaded in your computer’s
config.sys file.
• Mouse — the type of mouse present on your computer.
• Display adapters — if you are interested in running the X Window System, you should write down
the information you find here.
• Sound, video and game controllers — if your computer has sound capabilities, you will find more
information about them here.
• Network adapters — information on your computer’s network card (if you have one).
• SCSI controllers — if your computer uses SCSI peripherals, you will find additional information
on the SCSI controller here.
This method is not a complete substitute for opening your computer’s case and physically examining
each component. However, in many cases it can provide sufficient information to continue with the
installation.
Note
This information can also be printed by clicking on the Print button. A second window will appear,
allowing you to choose the printer, as well as the type of report. The All Devices and System
Summary report type is the most complete.
Chapter 2. Hardware Information and System Requirements Tables 13
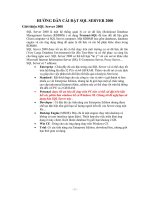
If your computer is already running Windows 2000, you can use the following steps to get additional
configuration information:
Figure 2-3. Windows 2000 System Properties
• In Windows, click on the My Computer icon using the secondary (normally the right) mouse
button. A pop-up menu should appear.
• Select Properties. The System Properties window should appear. Note the information listed un-
der Computer — in particular the amount of RAM listed.
• Click on the Hardware tab. You will then see your computer’s hardware configuration options.
Figure 2-4. Windows 2000 System Properties — Hardware
14 Chapter 2. Hardware Information and System Requirements Tables
• Click on the Device Manager button. You will then see a graphical representation of your com-
puter’s hardware configuration. Make sure the View devices by type radio button is selected.
At this point, you can either double-click on the icons or single-click on the plus sign + to look at each
entry in more detail. Look under the following icons for more information:
Figure 2-5. Windows 2000 System Properties
• Disk drives — the type (IDE or SCSI) of hard drive will be found here. (IDE drives will normally
include the word "IDE," while SCSI drives will not.)
• Hard disk controllers — information about your hard drive controller.
• CDROM — information about any CD-ROM drives connected to your computer.
• Mouse — the type of mouse present on your computer.
• Display adapters — if you are interested in running the X Window System, you should write down
the information you find here.
• Sound, video and game controllers — if your computer has sound capabilities, you will find more
information about them here.
• Network adapters — information on your computer’s network card (if you have one).
• SCSI controllers — if your computer uses SCSI peripherals, you will find additional information
on the SCSI controller here.
This method is not a complete substitute for opening your computer’s case and physically examining
each component. However, in many cases it can provide sufficient information to continue with the
installation.
2.2. Recording Your System’s Hardware
Enter information about your system in the table provided as a handy reference to help make your
Red Hat Linux installation go more smoothly.
hard drive(s): type, label,
size; ex: IDE hda=1.2 GB
Chapter 2. Hardware Information and System Requirements Tables 15
partitions: map of
partitions and mount
points; ex:
/dev/hda1=/home,
/dev/hda2=/ (fill this in
once you know where they
will reside)
memory: amount of RAM
installed on your system;
ex: 64 MB, 128 MB
CD-ROM: interface type;
ex: SCSI, IDE (ATAPI)
SCSI adapter: if present,
make and model number;
ex: BusLogic SCSI
Adapter, Adaptec
2940UW
network card: if present,
make and model number;
ex: Tulip, 3COM 3C590
mouse: type, protocol, and
number of buttons; ex:
generic 3 button PS/2
mouse, MouseMan 2
button serial mouse
monitor: make, model, and
manufacturer
specifications; ex:
Optiquest Q53, ViewSonic
G773
video card: make, model
number and size of
VRAM; ex: Creative Labs
Graphics Blaster 3D, 8MB
sound card: make, chipset
and model number; ex: S3
SonicVibes, Sound Blaster
32/64 AWE
IP, DHCP, and BOOTP
addresses: four numbers,
separated by dots; ex:
10.0.2.15
netmask: four numbers,
separated by dots; ex:
255.255.248.0