guitar
Bạn đang xem bản rút gọn của tài liệu. Xem và tải ngay bản đầy đủ của tài liệu tại đây (14.64 MB, 113 trang )
<span class='text_page_counter'>(1)</span>
<span class='text_page_counter'>(2)</span> You Can Teach Yourself Guitar is a new con0. cept in guitar literature. It is an excellent method designed for any student who wants to l earn the basics of playing the guitar. Upon completion of this method, the student will be well versed in a variety of keys and accompaniment styles. The guitar is truly a fun instrument. This text should open a world of creative possibilities to the guitar student.. A stereo cassette tape, compact disc, VHS video, and CD ROM of the music in this book are now available, The publisher strongly recommends the use of one of these resources along with the text to insure accuracy of interpretation and ease in learning.. 0 1989 BY MEL BAY PUBLICATIONS, INC., PACIFIC, MO 63069. ALL RIGHTS RESERVED. INTERNATIONAL COPYRIGHT SECURED. B.M.I. MADE AND PRINTED IN U.S.A.. Visit us on the Web at httpa/www.melbay.com - E-mail us at
<span class='text_page_counter'>(3)</span> TYPES OF GUITARS Classic. Arch-Top. Standard Folk. Jumbo Folk. Solid-Body Electric. 2. 12-String. Acoustic Electric.
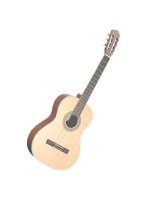
<span class='text_page_counter'>(4)</span> CLASSIC GUITAR-The classic guitar is characterized by the round sound hole, nylon or gut strings, and a rather wide neck. The reason for the wide neck is to allow the right-hand fingers to fit in between the strings for fingerstyle playing. The wood on a classic guitar is usually lighter than on a regular folk-style guitar in order to bring out the delicate tone of the nylon strings. Never put metal strings on a guitar made for nylon strings. The wood will not be able to stand the increased stress. We usually recommend starting on nylon strings, as they are easier (less painful) on the fingers. STANDARD FOLK GUITAR-This is a very widely used guitar today. It may be played with the fingers or with a pick. It is characterized by a round sound hole and a more narrow neck than is found on the "classic"-type guitars. The narrow neck is easier to finger barre or more complicated chords on. Ball-end nylon strings may usually be put on this type of guitar; however, since it is made for steel strings, it will not produce a tone with nylon comparable to a guitar made for nylon. It is a good rule to stick with whatever type of strings the guitar was originally made for (i.e., nylon or metal). This type of guitar puts out considerably more volume than a nylon-stringed or classical guitar. JUMBO FOLK GUITAR-This style of guitar is similar to the standard folk guitar except, of course, for the larger body. While the large body on this type is bulkier to handle, a fuller and deeper tone results from it. A fuller volume range can be obtained from this style of guitar than from a standard folk model. Some jumbo models come with a wide neck comparable to that found on a classic guitar. This is advantageous to the player who devotes most of his playing to fingerstyle. Standard folk guitars and jumbo folk guitars are sometimes referred to as "flat-top" guitars due to the flat surface on the face of the guitar (containing the round sound hole). TWELVE-STRING GUITAR-The 12-string guitar has a large body which is similar to a jumbo model. The neck is wider in order to comfortably fit all 12 strings. The guitar is played like a regular 6-string model since the strings are tuned to the same notes. On a 12-string guitar there are six sets of strings, two strings to a set. Each set is tuned to the corresponding set on a 6-string guitar; however, some sets may have an octave spread. While this style of guitar is excellent for folk and blues playing, it is bulkier and less mobile technically. It is not recommended, therefore, that a student begin with this type of guitar. ARCH-TOP-This type of guitar gets its name from the curved (arched) top on the instrument. Both the front and back of this type of guitar are arched. Modern arch-top guitars contain"F"-shaped sound holes. The curvature of the front and back lend a degree of mellowness to the sound. The"F" holes tend to project the sound for greater distances than a comparable round-hole model. Arch-top guitars find much usage as rhythm instruments in dance bands and in country music. Most folk and fingerstyle players prefer the immediate full spread of sound found on round-hole models. Arch-top guitars have metal strings. SOLID-BODY ELECTRIC This is the type of guitar found inmost of today's rock music. It is built for speed and amplification. The sound possibilities are endless, depending on the pick-up, tone, and amplifier combination chosen. It is usually cheaper and more practical to begin on a non-electric (acoustic) model. ACOUSTIC ELECTRIC-This type of guitar is also found in much of today's rock music. Again, the sound possibilities vary according to the electric components selected. Many jazz guitarists prefer an acoustic electric with a deep body. (Essentially this is an arch-top guitar with an electric pick-up mounted on it.) A mellow tone can result from this combination, but the type of electrical pick-up and amplifier influence this.. 3.
<span class='text_page_counter'>(5)</span> THE GUITAR AND ITS PARTS.
<span class='text_page_counter'>(6)</span> HOW TO BUY A GUITAR The type of guitar you buy depends to a degree on what style of music you wish to play. Generally, for purposes of beginning, we recommend a classic-model guitar (round hole with nylon strings). Usually the nylon strings are more comfortable for beginners' tender fingers. Be careful that the size of the guitar is neither too big and unwieldy nor too small. It should feel comfortable to you. WHERE TO BUY-Any reputable music merchant should handle a wide enough selection of guitars to choose from. We do advise you to choose a merchant who has the ability and facility to service your instrument. Adjustments and minor repairs are frequently necessary, so be sure your dealer can give you service. You might also inquire into renting an instrument, as many music merchants have very reasonable rental programs. Do make certain, however, that the rented instrument is comfortable to play. Finally, you might investigate what is available in the way of a used guitar. Many good buys are available in used instruments. Again, make certain that the guitar in question meets your needs as a beginner. You don't need the most expensive instrument to begin. WHAT TO LOOK FOR-The main requisite for a beginner's guitar is ease of playing. Make sure it is comfortable. If there are several models to choose from, listen to them and compare the tones. Most people prefer a guitar with a deeper and more mellow sound. Look out for neck warpage. Some guitars do have warped necks. Usually, if this is the case, the neck is bowed back and the strings half way down the neck are disproportionately high off the fingerboard. When a reverse warp is present the strings will at some point be too close to the fingerboard, and somewhere on up the fingerboard a buzz will occur. Look out also for a nut that is too high. (Refer back to the diagram showing the parts of the guitar.) When the nut is too high, the strings will be hard to press down in the first fret. This problem can be corrected easily by filing down the grooves holding the strings. The dealer should make this adjustment. Be careful that the strings are not lowered enough to cause a buzz. Most important of all, go to a reputable music merchant who stands behind and services the products he sells. CASES-Most guitars come in a vinyl bag, cardboard case, or plywood case. The case you buy should reflect the amount of protection you wish to give your instrument. The plywood case is the best; however, they are expensive and not necessary for some beginner models. Both the vinyl bag and the pressboard case do an adequate job. The price of the case should not exceed the value of your instrument. No case can work miracles. If you drop your guitar, regardless of the type of case, you are likely to crack it. Buy a case that will give you adequate protection from bumps, kicks, and moisture. With any instrument, a good case is a worthwhile investment.. 5.
<span class='text_page_counter'>(7)</span> CARE OF YOUR GUITAR The better your guitar, usually speaking, the older and more fragile are the woods. Try to keep your guitar from extreme temperature and sudden changes in temperature. Do not place it in the sun, by a heat vent or radiator, by an air conditioner, or leave it in the trunk of a car. Watch out for bumps, kicks, and dropping your guitar. If you use a strap to hold it, make certain that both the strap and the strap button to which it is attached are of sufficient strength. If you guitar needs a strap button, let your dealer install it for you. Be careful of buttons and belt buckles. They can destroy the back finish of a guitar. Make certain that the guitar has the proper strings. (Don't put metal strings on a guitar made to hold nylon!) Make sure that your instrument isn't tuned too high. If in doubt, tune it to an "in-tune" piano or go to your local music store and purchase a guitar pitch pipe. Finally, an occasional polishing will keep the finish on your instrument bright. Again, you can obtain guitar polish at your local music store.. STRINGS There are many types of strings on the market today; so many, in fact, that the beginning student may become quite confused by it all. Below we attempt to clarify some of the types and uses of strings. NYLON STRINGS-Nylon strings are found on classic guitars. This type of string has a soft, mellow tone and is easy on the fingers. This is a very good string with which to begin. Certain problems occur with tuning a new set of nylon strings. When they are new, they stretch quite a bit and therefore need frequent tuning. They settle down after a day or so. The tone of nylon strings is brought out best by thin, aged woods (usually rosewood back and sides and spruce top). Nylon strings lose some of their vibrance when put on a guitar made originally for metal strings. (The wood on this type of guitar is thicker and stronger to take the stress of metal strings.) BALL-END NYLON-These nylon strings have balls on the ends similar to those found on metal strings. They are usually a little heavier than regular nylon and can take vigorous strumming. They are frequently called "folk nylon," as they are the best type of nylon string for folk playing. The balls on the ends enable them to fit on a standard folk guitar, which holds the strings by means of pegs in the bridge. No nylon string will last long if attached to a metal tail piece. Usually the top three strings of ball-end nylon sets are black nylon, and the bottom three have a brass wrapping. MONEL-Monel string are steel strings. Metal strings have a much sharper and louder tone than nylon. Monel strings are steel gray in color. The thickness varies according to the type of set purchased. For beginners we recommend a medium light gauge set. This would have the following gauges per string: E or 1st-.010-.012 B or 2nd-.012-.016. G or 3rd-.020-.024 (wound) D or 4th-.026-.032. A or 5th-.038-.044 E or 6th-.048-.054. SILK-AND-STEEL--,Silk-and-steel sets are a very flexible metal compound. They are bright silver in color and have a softer tone than most other metal strings. They are excellent for fingerstyle playing. Also, they are usually easier on the fingers than some of the harder, more brittle types. If you are using metal strings and are experiencing sore fingers, you might try a set of silk-and-steel. Silk-and-steel sets will not pick up electrically and should not be used on electric guitars. 6.
<span class='text_page_counter'>(8)</span> STRINGS (CONT'D.) BRONZE-Bronze strings are made of a bronze alloy and have a rather pronounced, striking tone. They are excellent for folk and jumbo models needing volume and brilliance of sound. They come in light, medium, and heavy gauges. Usually the light gauges are preferable for a fingerstyle player, while the medium and heavy gauge sets lend themselves suitably to the "hard-strummin' pick player." Bronze strings are not for the solid-body electric guitar. BRASS-Brass strings are very similar to bronze sets in usage. The brass string is usually a little more brittle than the bronze string, and the tone is a little more sharp or harsh (depending upon your personal taste and interpretation). These strings also are not for the solid-body electric guitar. FLAT-POLISHED-Flat-polished strings are monel strings which have been ground so that the surface is smooth. (The little ridges are taken out.) These strings come for both acoustic and electric guitars. They have the advantage of being easier on the fingers. Technically, some guitarists claim greater left-hand velocity using a flat-polished string. These sets still retain the tonal quality of a standard, round-wound string. FLAT-WOUND-Flat-wound strings are for the electric guitar. They are wound flat (no ridges) and are made of some monel or nickel compound. They differ from flat-polished strings in that they are wound flat from the beginning. Flat-polished strings are round wound and then ground flat. Flatwound strings are very comfortable to the left hand and give a smooth bell-like tone when amplified. This string is preferred by many jazz guitarists. GENERAL COMMENTS-The string selected depends on the type of guitar you play, the style of music you prefer, the sound you want to create, and your preferences for comfort and ease of playing. As you can see, there are many variables; and it is a highly personal decision. Do not leave strings on your instrument too long. When a string gets old it sounds dead and loses its flexibility. Just how long to keep a set of strings depends on how much the instrument is played, the temperature and humidity, the actual physical chemistry of an individual's hand perspiration, and the quality of the set of strings. We are hesitant to give a standard rule for changing strings; however, beginning students probably can start looking and listening for wear at about five weeks. Again, when in doubt, ask your teacher. Strings can be purchased at any local music store.. 7.
<span class='text_page_counter'>(9)</span> HOW TO HOLD THE GUITAR. First, hold the guitar as shown in Figure 1. Next, bring it in close to the body as shown in Figure 2. Then, move your right hand as shown in the position in Figure 3. This will bring the guitar firmly against your body. The left hand is then moved, as shown in Figure 4, up into the area of first position. This is where the first finger is resting in the middle of the first fret. Finally, Figure 5 shows the right hand getting ready to strum the strings of the guitar.. 8.
<span class='text_page_counter'>(10)</span> LEFT HAND POSITION. THE LEFT HAND 0. Numbers for the left hand fingers will appear in chord diagrams throughout the book.. LEFT HAND POSITION. Fig. 8. Fig. 7. To begin with, keep the left elbow and wrist relaxed. Avoid positioning that strains and tightens your left wrist and elbow. The important thing to remember is to place the left hand so that the hand is arched and so that the fingers can fall straight down on the strings. Greater technique can be obtained by pressing down the strings with the tips of the fingers than with the fleshy part. 9.
<span class='text_page_counter'>(11)</span> EXPLANATION OF CHORD SYMBOLS. OPEN STRINGS.
<span class='text_page_counter'>(12)</span> TUNING THE GUITAR The six open strings of the guitar will be of the same pitch as the six notes shown in the illustration of the piano keyboard. Note that five of the strings are below the middle C of the piano keyboard.. ANOTHER METHOD OF TUNING. 1. Tune the 6th string in unison to the E or twelfth white key to the LEFT of MIDDLE C on the piano. 2. Place the finger behind the fifth fret of the 6th string. this will give you the tone or pitch of the 5th string. (A). 3. Place finger behind the fifth fret of the 5th string to get the pitch of the 4th string. (D) 4. Repeat same procedure to obtain the pitch of the 3rd string. (G). 5. Place finger behind the FOURTH FRET of the 3rd string to get the pitch of the 2nd string. (B) 6. Place finger behind the fifth fret of the 2nd string to get the pitch of the 1st string. (E). PITCH PIPES. ?itch pipes with instructions for their usage may be obtained at any music store. Each pipe will have the correct pitch of each guitar string and are recommended o be used when a piano is not available..
<span class='text_page_counter'>(13)</span> STRUMMING THE STRINGS RIGHT HAND PLACEMENT. At this point in the student's learning process we will be concentrating on coordinating chord fingering in the left hand with strumming motion in the right hand. We, therefore, recommend strumming with the thumb down across the strings. Later on we will introduce the possible use of a pick.. To strum the instrument, place the thumb by the sixth string. This is the largest of the six strings (figure 9). To strum down across the strings, bring the thumb down gently across all six strings. Do this a number of times until all of the strings sound at once. The strum should be even and the thumb should not rest too long on any one string. You should glide evenly across all six strings (figure 10).. REMEMBER The left hand should be positioned on the neck of the guitar so that the thumb rests comfortably in the middle of the back of the neck. This will require you to arch your hand somewhat. Look again at the( photos on page 9. By keeping the left hand thumb in the middle of the neck, and by learning to play ii this fashion from the beginning, your fingers will have the tendency to come down directly on top of the strings and avoid the problems of accidentally laying across the wrong strings when you finger notes an( chords. When you lay your fingers across the wrong string, you will accidentally deaden the sound of some of the notes. Proper positioning of the left hand will give you great freedom in fingering rapid passage: later on. Also, by placing the thumb in the middle of the neck, you are providing maximum strength it fingering difficult chords..
<span class='text_page_counter'>(14)</span> G CHORD-EZ FORM.
<span class='text_page_counter'>(15)</span> TIME SIGNATURES.
<span class='text_page_counter'>(16)</span>
<span class='text_page_counter'>(17)</span>
<span class='text_page_counter'>(18)</span>
<span class='text_page_counter'>(19)</span>
<span class='text_page_counter'>(20)</span>
<span class='text_page_counter'>(21)</span> THE FULL G CHORD If your "E-Z" form of the G chord is sounding clear, you are ready to try the full G chord. Note the change in fingering. Practice to make sure your fingers aren't touching and deadening the wrong strings.. Diamond will be bass note. Fourth finger is used on the top string because it will enable quicker transition to G7 and C chords. To play the full G chord-Make certain that your left-hand thumb is placed in the middle of the back of the neck. Bring your fingers directly down on the strings. Practice to make sure your fingers aren't touching and deadening the wrong strings.. THE FULL C CHORD. Remember that the three basic chords in the key of G are: G, C, and D7..
<span class='text_page_counter'>(22)</span>
<span class='text_page_counter'>(23)</span>
<span class='text_page_counter'>(24)</span>
<span class='text_page_counter'>(25)</span> DOWN-UP STRUM Up till now, we have only been strumming Down Across the strings. Now we will strum Down and Up.. Try to get a slightly "Swinging" feeling on the Down - Up strum with this song..
<span class='text_page_counter'>(26)</span>
<span class='text_page_counter'>(27)</span> THE "D7" CHORD. Make certain the tone produced is clear. Try to change from the G to D7 chord without looking at your hands..
<span class='text_page_counter'>(28)</span>
<span class='text_page_counter'>(29)</span>
<span class='text_page_counter'>(30)</span>
<span class='text_page_counter'>(31)</span>
<span class='text_page_counter'>(32)</span>
<span class='text_page_counter'>(33)</span> HOLDING THE PICK. Now is the time to introduce the use of the flat pick. Study the photograph carefully, make certain that the pick is not held too tightly. Practice strumming up and down with the flat pick in order to get the feel of it. (The student may continue to use his thumb at this point if so desired by the teacher.) Make careful note of the symbols used to denote down pick and tip pick. This will be used throughout as we learn to pick notes. Check your hand position. Do not hold the pick too tight!.
<span class='text_page_counter'>(34)</span>
<span class='text_page_counter'>(35)</span>
<span class='text_page_counter'>(36)</span>
<span class='text_page_counter'>(37)</span>
<span class='text_page_counter'>(38)</span>
<span class='text_page_counter'>(39)</span> THE KEY OF D The three basic chords in the key of D are: D, G, and A7..
<span class='text_page_counter'>(40)</span>
<span class='text_page_counter'>(41)</span>
<span class='text_page_counter'>(42)</span>
<span class='text_page_counter'>(43)</span>
<span class='text_page_counter'>(44)</span>
<span class='text_page_counter'>(45)</span>
<span class='text_page_counter'>(46)</span>
<span class='text_page_counter'>(47)</span>
<span class='text_page_counter'>(48)</span> THE KEY OF A The three basic chords in the key of A are: A, D, and E7..
<span class='text_page_counter'>(49)</span>
<span class='text_page_counter'>(50)</span>
<span class='text_page_counter'>(51)</span>
<span class='text_page_counter'>(52)</span>
<span class='text_page_counter'>(53)</span>
<span class='text_page_counter'>(54)</span> THE KEY OF E MINOR The three basic chords in the key of E minor are: Em, Am, and B7..
<span class='text_page_counter'>(55)</span>
<span class='text_page_counter'>(56)</span>
<span class='text_page_counter'>(57)</span>
<span class='text_page_counter'>(58)</span>
<span class='text_page_counter'>(59)</span>
<span class='text_page_counter'>(60)</span> THE KEY OF C The three basic chords in the key of C are: C, F, and G7..
<span class='text_page_counter'>(61)</span> The F Chord (Student plays the top 4 strings) To play the F chord - make sure your left hand thumb is on the center of the back of the neck. If you wrap your thumb around the neck so that it touches the 6th string, you will have problems fingering the F chord.. Building the F chord Play the following exercise until the tone sounds clear. You will start on the 1st fret and end on the 7th fret.. Now play this exercise from the 1st to the 7th fret until it sounds clear.. Play from 1st to 7th fret until it sounds clear..
<span class='text_page_counter'>(62)</span>
<span class='text_page_counter'>(63)</span>
<span class='text_page_counter'>(64)</span>
<span class='text_page_counter'>(65)</span>
<span class='text_page_counter'>(66)</span>
<span class='text_page_counter'>(67)</span>
<span class='text_page_counter'>(68)</span>
<span class='text_page_counter'>(69)</span> THE KEY OF E The three basic chords in the key of E are: E, A, and B7..
<span class='text_page_counter'>(70)</span>
<span class='text_page_counter'>(71)</span>
<span class='text_page_counter'>(72)</span>
<span class='text_page_counter'>(73)</span>
<span class='text_page_counter'>(74)</span>
<span class='text_page_counter'>(75)</span>
<span class='text_page_counter'>(76)</span>
<span class='text_page_counter'>(77)</span>
<span class='text_page_counter'>(78)</span> "BLUE NOTES" The circled notes below are notes that can be added to the chords to give them a more varied blues effect..
<span class='text_page_counter'>(79)</span>
<span class='text_page_counter'>(80)</span>
<span class='text_page_counter'>(81)</span>
<span class='text_page_counter'>(82)</span> B. lues Endings (Phrases or "Licks" Starting on Measure 11 of 12 Bar Blues). Single Note Finger Style Lick With this Ending Lick the player will play three triplets, plucking the notes with the Right Hand. The Fingering would be:.
<span class='text_page_counter'>(83)</span>
<span class='text_page_counter'>(84)</span> Shuffle Rhythm The Shuffle Rhythm was popularized by many of the early Rock Musicians. It adds a Boogie - Woogie type of feeling to the Blues..
<span class='text_page_counter'>(85)</span>
<span class='text_page_counter'>(86)</span> The Bend The Bend is a great Blues effect. It is achieved by pushing a string towards the next largest string. This alters the pitch of that particular note.. Once you have gained fluency in playing this Run going up, try playing it coming down..
<span class='text_page_counter'>(87)</span> THE CAPO. (pronounced kay-po ) Frequently a singer may want to sing a song in a different key from the one you know. In order to meet this demand you will have to raise or lower the key. The easiest way to raise the pitch of the instrument and thereby play in a higher key is by the use of a capo. Capos can be purchased at any music store and are either elastic or metal. While the metal capo is stronger, the elastic one is often less likely to scratch the neck of your guitar.. HOW TO USE THE CAPO The key you are playing in is raised 1/2 step each time you move the capo up one fret. As an example, play your E chord. Next place the capo on the first fret, move your hand up one fret, finger and play your E chord. It sounds higher, doesn't it! The most practical way of raising the pitch or key is by the use of barre chords. With barre chords your first finger lies across all six strings and serves as your capo. Capos enable the player to obtain the ringing sound of open strings in all keys. This is very useful to the folk and bluegrass performer..
<span class='text_page_counter'>(88)</span> THE KEY OF A MINOR The basic chords in the key of A minor are: Am, Dm, and E7..
<span class='text_page_counter'>(89)</span>
<span class='text_page_counter'>(90)</span>
<span class='text_page_counter'>(91)</span>
<span class='text_page_counter'>(92)</span>
<span class='text_page_counter'>(93)</span> ARPEGGIO PICKING (BROKEN CHORDS). Arpeggio style playing is especially beautiful when used as an accompaniment to a Ballad. Basically all the player does is to play the chord, a note at a time, starting from the bass note and moving up. The Thumb should rest on the Bass note of the Chord, the 1st Finger (i) on the 3rd string, the middle finger (m) on the 2nd string, and the Ring Finger (a) on the 1st string.. Hold a C Chord and Play: p - i - m - a. Check the Diagram to make certain your Right Hand Fingers are plucking the correct strings..
<span class='text_page_counter'>(94)</span>
<span class='text_page_counter'>(95)</span>
<span class='text_page_counter'>(96)</span>
<span class='text_page_counter'>(97)</span>
<span class='text_page_counter'>(98)</span>
<span class='text_page_counter'>(99)</span> ALTERNATE BASS. An interesting variation on the standard arpeggio picking is the use of alternate basses. With alternate basses the guitarist plays his arpeggio as usual; however, he plucks an alternate bass note with his thumb the second time that the arpeggio is played.. This form of the G7 chord lends itself exceptionally well to finger style playing. Try substituting it into songs in place of the standard G7 fingering..
<span class='text_page_counter'>(100)</span>
<span class='text_page_counter'>(101)</span>
<span class='text_page_counter'>(102)</span> 3/4 Arpeggio Strum You will remember that in 3/4 time you count 1-2-3, 1-2-3, etc. . The arpeggio pattern in time is most commonly p-i-m-a-m-a. You simply play the standard arpeggio (p-i-m-a) and repeat the last 2 notes (m - a )..
<span class='text_page_counter'>(103)</span>
<span class='text_page_counter'>(104)</span> Another 3/4 Strum Try playing the following song, Amazing Grace, with this finger pattern, (p-i-m-a-m-i). This arpeggio pattern merely has the effect of going up and coming down. It is particularly suitable for slow ballads and hymns..
<span class='text_page_counter'>(105)</span>
<span class='text_page_counter'>(106)</span>
<span class='text_page_counter'>(107)</span>
<span class='text_page_counter'>(108)</span>
<span class='text_page_counter'>(109)</span>
<span class='text_page_counter'>(110)</span> With this finger style effect the guitarist first plucks the bass note with the thumb. This is followed by the index finger, the middle and ring finger together, and back to the index finger. The important thing to remember is that the middle and ring fingers pluck together. Two notes should sound at once..
<span class='text_page_counter'>(111)</span>
<span class='text_page_counter'>(112)</span>
<span class='text_page_counter'>(113)</span>
<span class='text_page_counter'>(114)</span>