Tài liệu Beginning SQL Server Modeling- P11 docx
Bạn đang xem bản rút gọn của tài liệu. Xem và tải ngay bản đầy đủ của tài liệu tại đây (953.09 KB, 20 trang )
CHAPTER 7 SQL SERVER MODELING SERVICES – SECURITY
201
Figure 7-50. Granting the Select permission for each QC user
Testing
Now you should be in a position to test what data is exposed to each user. You can do this in the SQL
Server Modeling Command Prompt window by impersonating a user with the runas command. Bring up
the SQL Server Command Prompt window, and execute the following code:
runas /user:CarQC "sqlcmd.exe /y25"
The /y25 switch on the sqlcmd.exe command is required, and sets the display width for the
SQLCMD prompt window. The system will prompt for the CarQC user’s password, which should be the
same as the user name (see Figure 7-51). After that is accepted, a separate SQLCMD window will appear,
where you can run SQL queries as the CarQC user against the MfgComponents view.
Download from Wow! eBook <www.wowebook.com>
CHAPTER 7 SQL SERVER MODELING SERVICES – SECURITY
202
Figure 7-51. Using the runas command to impersonate the CarQC user opening a SQLCMD window
In the SQLCMD window that comes up, you’re now running as the CarQC user. Enter the following
SQL code (see Figure 7-52):
use Repository
go
The system should present the following message: Changed database context to 'Repository'.
Next, enter the following SQL commands:
select Name, Level, Folder from [MfgComponentModel].[MfgComponents]
go
Now you might expect to see a listing of only the Car line components, since it is the CarQC user
who entered the query. But instead, you get this: The SELECT permission was denied on the object
'ReadableFoldersView', database ' Repository', schema 'Repository.Item'. (shown in Figure 7-52).
Figure 7-52. Permission denied to ReadableFoldersView
I forgot (intentionally) to set up user access to ReadableFoldersView. I wanted you to see the type of
error message that occurs in this situation. SQL Server gives detailed error messages when a permissions
error occurs, so instead of seeing something like “Access denied – error code 229,” you see exactly what
permission is being denied, and what object, database, and schema are involved. Detailed error
messages can be helpful in diagnosing and fixing these kinds of problems, so it’s always good to take a
close look. (If you’re an experienced programmer, this hardly needs to be said.)
In this case, the user needs SELECT access to ReadableFoldersView because the code that defines the
MfgComponents updatable view used the system-provided ReadableFoldersView (refer to Figure 7-3, line
20) to determine which rows of the view can be exposed to the user.
Download from Wow! eBook <www.wowebook.com>
CHAPTER 7 SQL SERVER MODELING SERVICES – SECURITY
203
Let’s return to SSMS to fix this problem. In the Views section of the Repository database, right-click
on Repository/Views/Repository.Item.ReadableFoldersView and select the Properties option (see Figure
7-53).
Figure 7-53. Setting up to grant the QC users SELECT access to ReadableFoldersView
Use the same procedure you used previously (refer to Figure 7-50) to grant SELECT access to
ReadableFoldersView for the three QC users. Return to the SQLCMD window and hit the Up arrow twice
to bring back the SQL SELECT statement, and press Enter, then enter the go command. This time you
should see the data that’s available to the CarQC user (shown in Figure 7-54).
Download from Wow! eBook <www.wowebook.com>
CHAPTER 7 SQL SERVER MODELING SERVICES – SECURITY
204
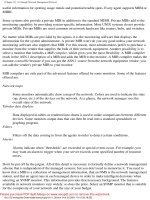
Figure 7-54. Data returned by the SELECT query entered by the CarQC user
The data returned is as you would expect, so let’s test to see if the permissions for the other two
users, ToasterQC and TopQC, are working. Close the SQLCMD window (since that window is running as
CarQC) and return to the SQL Command Prompt window. Press the Up arrow twice to return to the
previously entered runas command and change CarQC to ToasterQC, then press Enter to execute the
command (see Figure 7-55).
Figure 7-55. Setting up to run a SQLCMD window as theToasterQC user
When prompted for the password, enter ToasterQC (or whatever password you used for setting up
the ToasterQC login). In the new SQLCMD window, enter the usual preliminary lines to switch to the
Repository database, then the same query you used as the CarQC user (see Figure 7-56). This time,
running as the ToasterQC user, you should see only the MfgComponent entities for the Toaster
manufacturing line.
Figure 7-56. Data returned for theToasterQC user
Download from Wow! eBook <www.wowebook.com>
CHAPTER 7 SQL SERVER MODELING SERVICES – SECURITY
205
Finally, go through the same procedure for the TopQC user. Running as the TopQC user, you should
see the data for both the Car and the Toaster manufacturing lines (shown in Figure 7-57).
Figure 7-57. Data returned when running as theTopQC user
Summary
In this chapter, I’ve presented an exercise to illustrate how SQL Server Modeling Services provided by
the Repository and the BDL can be applied to provide fine-grained (row-level) security features in the
context of the SQL Server Modeling framework. One intent of this particular example was to show how
security services, using the folder pattern, could be used to constrain the visibility of certain data sets to
certain users. I also wanted to familiarize you with a range of tools (SSMS, several facets of Visual Studio,
Quadrant, the command prompt), services, and patterns that are available for building an application.
I applied several patterns, provided by the framework, to set up security features needed for a
hypothetical QC application. I used the folder pattern (introduced in Chapter 6) to partition the data
among a hierarchical set of folders according to manufacturing line and QC attributes, and then
restricted the exposure of this data to three test QC manager users in accordance with their respective
roles.
Besides the folder pattern, several other patterns were used in the course of implementing this
example:
• AddViewsInsteadOfTriggers: This pattern applies system-provided INSTEAD OF
triggers to intercept certain actions in a way that enforces constraints on what a
particular user can see or do.
• AddFolderForeignKey: This pattern facilitates the use of folders in types and
extents, and defines the foreign key of the folder attribute used in the
MfgComponent type.
• HasFolderAndAutoId: The MfgComponentsTable extent was redefined as a mix-in of
the system-defined HasFolderAndAutoId type and the MfgComponent domain type. I
also used HasFolderAndAutoId to help set up the use of folders in defining the
MfgComponent type and the MfgComponents updatable view.
The PatternApplication code was installed and used to set up the hooks enabling the use of these
patterns.
Download from Wow! eBook <www.wowebook.com>
Download from Wow! eBook <www.wowebook.com>
Download from Wow! eBook
<www.wowebook.com>
A P P E N D I X A
207
Intellipad Primer
Intellipad is a text editor created to support, in particular, developers writing models and languages
using Microsoft Oslo's M, and it's great for other text as well. It includes language services for M,
including syntax highlighting, error checking, semantic completions, and project compilation.
Intellipad is also designed to be customized by users and extended by developers. Extensibility is
achieved using named components. Features can easily be added or modified, giving an editing
experience that ranges from the simplicity of notepad to the power of rich language support. Intellipad
uses components defined in declarative markup to customize the user experience.
Intellipad contains a built-in Python interpreter. Users can customize, extend, and automate the
editor by writing Python scripts.
Intellipad Basics
This section covers the basic components and design features of Intellipad: buffers, views, modes, and
the mini-buffer. Understanding these aspects will make it easier to customize Intellipad or invoke
features that make it easier to perform certain tasks.
Buffers
Fundamentally, Intellipad is an editor for Unicode text. A buffer represents the data model for the text
being edited. Multiple buffers can be open in Intellipad simultaneously. Buffers can come from different
sources (such as a file system, debugger, the Web, and so on). The source of the buffer determines some
of the editing capabilities available. For example, some parts of a buffer may be read-only, preventing
the user from editing text in that location. Some buffers might be auto-generated, like a buffer
containing a list of compilation errors or a buffer reporting the results of a command.
Intellipad buffers can represent Unicode text from any source. Each buffer in Intellipad is identified
by its URI (Universal Resource Identified). When Intellipad is opening a buffer, it uses the URI scheme
(file://, transient://, etc.) to locate the appropriate buffer source to open the buffer and initialize its
data. To load Unicode text from a new URI scheme (e.g., http:// or ftp://), a developer would write a
buffer source component that provides support for that URI scheme.
Intellipad also provides buffer transforms that take as input a source buffer and render the output in
a different way. For example, if you opened this document in Intellipad using the Help menu, you will
see that the URI is IntellipadPrimer.ipadhelp | Rich Text. This indicates that a Rich Text transform
was applied to the source buffer, IntellipadPrimer.ipadhelp. This transform processes the text markup
and displays the text using different font faces, sizes, and weights. Note that the original buffer,
IntellipadPrimer.ipadhelp, is also open and displays the text in its raw form. Closing the source of a
transform closes the transform buffer as well.
Download from Wow! eBook <www.wowebook.com>
APPENDIX A INTELLIPAD PRIMER
208
Views
Intellipad supports splitting the editor window into multiple views to display multiple buffers at the
same time. Each view is capable of displaying any of the currently available buffers through a menu at
the top left of the view. Different views can also show the same buffer in different modes. The view that is
active determines which set of menu options appear at the top of Intellipad; different modes often have
different menu options.
You can create additional views by activating the view to be split, then choosing Split Vertically or
Split Horizontally from the View menu. You can also use CTRL+W,\ to create the vertical split and
CTRL+W,- to create the horizontal split. Some Intellipad commands also create new views.
Pull-down menus in the upper-left and upper-right corners of each view allow you to set the active
buffer and mode, respectively. If you have multiple views, changing the mode or the buffer of one view
does not affect the other views.
Modes
Intellipad enables language-specific support for buffers through modes. Modes isolate extension
components, allowing different behaviors when editing buffers that have different content types.
When a buffer is opened, Intellipad attempts to associate the file with a mode to provide features
like syntax highlighting, additional menu items, semantic completion, and other features. The way this
default mode is determined depends on the buffer and its source. For example, when loading file
buffers, the file extension is used. An http buffer source might use the mime type to determine the mode.
A pull-down menu in the upper-right corner of each buffer view indicates the current mode and can
be used to change the mode.
The same buffer can be opened in different views and have different modes applied in each view.
However, not all modes will be meaningful in every context.
The Mini-Buffer
Intellipad provides a way to execute quick, one-line functions through a special buffer called the mini-
buffer. It can be accessed by pressing CTRL+/ or choosing Toggle Mini-Buffer on the View menu. The
mini-buffer opens in a new split, in MiniBuffer Interactive mode. You can type Intellipad commands in
this editor, which stays open until you dismiss it. Use function key F1 or the Commands item on the
Help menu to view a list of the available mini-buffer commands.
Text typed into the mini-buffer is executed in the context of the Python script engine after first
loading a setup script that makes various Intellipad-related variables and modules available. The mini-
buffer setup script is located at
Components\Microsoft.Intellipad.Scripting\PrivateScripts\MiniBufferCommandSetup.py.
The script is executed automatically when Intellipad initializes the mini-buffer.
A user could type the following into the mini-buffer:
for x in range(1, 10): Test('')
This would run all unit tests 10 times (see Settings\CommandTests.py).
Some commands, such as Zoom and Find, operate on the view that was active prior to clicking in
the mini-buffer view. The active view is indicated by a blue highlight outline.
Download from Wow! eBook <www.wowebook.com>
APPENDIX A INTELLIPAD PRIMER
209
The mini-buffer can also be used to batch commands and issue them. These commands are
currently stored only for the Intellipad session; they will not be reloaded the next time Intellipad starts.
Take the following for example:
>>> def MyNewCommand():
Open('c:/foo.txt')
Zoom(2.0)
Find('<summary>')
>>> MyNewCommand()
>>>
Working with M in Intellipad
Intellipad has two major features that can help you develop M code: SQL Preview and the domain-
specific language (DSL) authoring configuration.
SQL Preview
Intellipad's SQL Preview allows you to easily see the SQL equivalent of M code as you create the code. To
access the SQL Preview feature, change the active view to M mode, click the M Mode menu entry, and
select T-SQL Preview. SQL Preview splits your active view into two views. The left view contains your M
code, while the right view displays the equivalent SQL.
Basic DSL Authoring Configuration
Intellipad's basic DSL authoring configuration allows you to create test input and see the output for a
domain-specific language grammar that you are developing, as you develop it. To create the basic DSL
authoring configuration, change your active view to DSL Grammar mode, click the DSL menu entry, and
select Split New Input and Output Views. Intellipad splits your active view vertically into three views.
The left view displays a new buffer whose mode is set to the name of your original DSL grammar buffer.
The middle view displays your DSL grammar. The right view displays the same buffer as the left view, but
its mode is set to M Graph mode. The left view acts as input data; you can edit text in the left view, and
its contents will be parsed in real time according to the grammar rules specified by your DSL grammar.
The results of the parsing are displayed in the right view. The displayed output is a textual representation
of an in-memory .NET Framework object model.
Customizing Intellipad
This section covers how Intellipad can be customized by changing or adding menus, colors, modes, and
commands.
Download from Wow! eBook <www.wowebook.com>
APPENDIX A INTELLIPAD PRIMER
210
Changing the Menus
Intellipad is designed so that you can add or remove menu options from the menu bar, as well as add or
remove items within each option. The file that controls Intellipad's menu settings is MenuBar.xcml,
installed in Microsoft Oslo\1.0\bin\Settings\VisualStudio. The top-level MenuItem Headers set the
options on the menu bar, while the children MenuItem Headers set the commands within each menu
option. The list of available commands can be found by pressing F1.
For example, to add the Zoom Down and Zoom Up commands to the menu under their own menu
option, you would add the following XML to MenuBar.xcml.
<MenuItem Header= '_Zoom Options'>
<MenuItem Header= 'Zoom _In' Command='{mis:NamedCommand Name =
Microsoft.Intellipad.ZoomUp}' />
<MenuItem Header= 'Zoom _Out' Command='{mis:NamedCommand Name =
Microsoft.Intellipad.ZoomDown}' />
</MenuItem>
Changing the Colors
The color scheme that Intellipad uses to display text can be customized as well. The file that controls
how Intellipad displays text is ClassificationFormats.xcml file, installed in Microsoft
Oslo\1.0\bin\Settings. Each ClassificationFormat controls the appearance of a different text type. The
text type's color is set by the Foreground attribute and is written in hexadecimal ARGB (Alpha-Red-
Green-Blue) notation. Not all color entries have an Alpha component; they are not required. To change
the color, change the RGB values that the text type uses.
For example, if you wanted to make all keywords appear in purple, you would change the Keyword
entry so it looks like this:
<act:Export Name='{}Microsoft.Intellipad.ClassificationFormat'>
<ls:ClassificationFormat Name='Keyword'
FontFamily='Consolas'
FontWeight='Bold'
Foreground='#FF800080' />
</act:Export>
Adding New Modes
You can create language modes for your custom DSL by compiling the grammars and placing the MX
files in the Intellipad Settings directory (installed in Microsoft Oslo\1.0\bin). To compile your grammar,
run the following from a command window:
<path to>\Microsoft Oslo\1.0\bin\m.exe <path to .mg file> [/o:<path to .mx output file>]
When you restart Intellipad, your new modes will appear in the mode selection drop-down list. To
automatically associate your mode with a file extension, add it to FileExtensions.xcml in the Settings
directory.
Download from Wow! eBook <www.wowebook.com>
APPENDIX A INTELLIPAD PRIMER
211
Customizing Commands
Almost all commands available in Intellipad have been written in Python using the object model
exposed by the application. The Python files are installed in the Settings directory.
Commands.py contains most of the commands for Intellipad. Configuration-specific commands
can be placed in configuration-specific subdirectories (e.g., VisualStudio).
A command definition consists of the following:
• An Executed function definition, which acts as the command handler and provides
the logic for the command.
• An optional CanExecute function definition, which determines when the
command is enabled (use if you are making your command available using menu
items).
To reload the Settings and have changes take effect, you must restart Intellipad.
Intellipad Components
The Intellipad customization and extensibility model is based on named components. Some
components are just data, providing configuration information like what color and font to use when
displaying keywords, mapping file extensions to modes, and the contents of the menu bar. Most
components of that nature are expressed declaratively. Other components provide more complex
functionality like commands, buffer modes, or editor behaviors. These components are either exposed
in script or compiled .NET assemblies.
Intellipad uses a catalog for locating and activating components. A catalog is a list of components
and associated metadata. Components can be located in compiled assemblies, Python scripts, and
declarative markup files.
At startup, a configuration file with a list of catalog sources is loaded and used to build the catalog.
By default, Intellipad looks for a file called ipad.m in the same directory as ipad.exe. See the “Command-
Line Options” section later in this Appendix for information on how to specify an alternative startup
configuration file. After it is first built, the catalog is cached to speed startup time and is updated when
sources change.
Commands are one of the most widely used components in Intellipad. Intellipad uses an input
system based on Windows Presentation Foundation (WPF) Commanding. Commands are delegates
exported as components that can then be executed when a menu item is selected or a key sequence is
pressed. Commands can also be run from script. Metadata attached to command components provides
information to the command system like the command's name, its default keystroke, and the editor
component the command is targeting (such as buffer, view, window, and so forth).
Compiled Components
Some Intellipad components are complex and benefit from being implemented in a .NET programming
language like C# or VB.NET. Classes, properties, and methods in an assembly are marked with custom
attributes to indicate what components they are exporting and also what components they depend on
(imports).
Download from Wow! eBook <www.wowebook.com>
APPENDIX A INTELLIPAD PRIMER
212
Declarative Components
XCML files provide a way of defining components declaratively using XAML markup.
Some example uses of XCML components are
• Define additional keyboard bindings and the command that they execute.
• Define the Intellipad menu bar and the command that each menu item invokes.
• Define syntax coloring and fonts for various text classifications.
• Define the set of text classifications and inheritance relationships.
• Map file extensions to Intellipad modes.
Script Components
The following code is an example of a command written in Python for copying the path of the current
file to the clipboard:
@Metadata.CommandExecuted('Microsoft.Intellipad.BufferView',
'Microsoft.Intellipad.CopyCurrentPathToClipboard', 'Ctrl+Shift+C')
def CopyCurrentPathToClipboard(target, sender, args):
path = sender.Buffer.Uri
data = path
if path.IsFile:
data = path.LocalPath
System.Windows.Clipboard.SetData(System.Windows.DataFormats.Text, data)
The preceding function has a Python decorator applied to it that exports it as a command
component. The parameters to the decorator define it to be a command called
'Microsoft.Intellipad.CopyCurrentPathToClipboard', targeting the currently active view, with
'Ctrl+Shift+C' as its shortcut key binding.
List of Available Modes
Each pane in Intellipad runs in a given mode. The default mode is called the standard mode, and works
more or less as a standard text editor. The other modes are specializations or enhancements built on top
of the standard mode to support a particular purpose or task, and are listed here:
• DSL Grammar mode: Provides support for authoring MGrammar. This includes
colorization, error marks for syntactically incorrect MGrammar, and the ability to
see how your grammar parses sample input.
• List mode: Used internally by certain Intellipad features to create a buffer showing
a list of items that can be clicked to navigate to the destination buffer.
• M mode: Provides support for developing M code. This includes colorization, error
marks for syntactically incorrect M, and the SQL Preview feature.
Download from Wow! eBook <www.wowebook.com>
APPENDIX A INTELLIPAD PRIMER
213
• Output mode: Used in conjunction with the DSL Grammar mode. It shows the
textual representation of a .NET Framework object model that is created when a
DSL grammar is used to parse sample input.
• Project mode: Provides support for project development and configuration. This
includes displaying errors in the error list if the content is not a syntactically valid
MSBuild file. A project can be displayed in its text (XML) form or in an overview
list. You can use the Project Toggle Project View menu item to switch back and
forth (or choose the desired buffer in the buffer list drop-down).
• Python mode: Provides support for Python development. This includes
colorization and error marks for syntactically incorrect Python. Code coverage is
also available if Intellipad is launched with the /coverage option.
• Rich Text mode: Used to display Intellipad help and the Intellipad primer. It is a
read-only mode that allows markup to drive classifications rather than language
services.
• SQL mode: Used in conjunction with M mode. It allows you to see the SQL
generated by M code.
• Standard mode: Enables basic text editing features. All other modes add to and
extend Standard mode capabilities.
Command-Line Options
The Intellipad executable (ipad.exe) can be invoked from the command prompt with a number of
optional command switches or flags. These are enumerated in the following list. Each switch is
designated with a forward slash (/) followed immediately by the name of the switch. The vertical bar (|)
or pipe symbol should be treated as an OR operator, so [/help|h|?] means that /help, /h, and /? will all
work for displaying the command line help text. In those cases where the flag is followed by a postfix + or
–, + turns the feature on, and – turns the feature off. Defaults are indicated for these switches in the list.
Usage:
ipad.exe [@argfile] [/help|h|?] [/script:value] [file] [/configuration|config|c:value]
[/buildcache[+|-]] [/coverage:[+|-]] [/crashrecovery[+|-]]
• @argfile: Instructs Intellipad to read command line arguments from the given file.
When used, it must be the first argument and subsequent arguments are ignored.
• /help[+|-]: Displays a message box with Intellipad's command line help text.
Default: False.
• /script:<filename>: Launches the specified script file after startup.
• file(s): Opens the listed file(s) when Intellipad launches. Filenames are not
prefixed with a forward slash (/).
• /configuration:file (or /config: or /c:): Specifies the startup configuration,
controlling which controls are loaded into Intellipad. Default: ipad.m.
Download from Wow! eBook <www.wowebook.com>
APPENDIX A INTELLIPAD PRIMER
214
• /buildcache[+|-]: Creates Intellipad cache files and exits. Adding, changing, or
removing component files invalidates the cache. Subsequent launches of
Intellipad are faster if the cache is still valid. Default: False.
• /coverage[+|-]: Enables the collection of statistics on what functions are called
during the execution of scripts in Intellipad. Default: False.
• /crashrecovery[+|-]: Attempts to allow user to save changed buffers when
Intellipad crashes. Default: True.
Download from Wow! eBook <www.wowebook.com>
A P P E N D I X B
215
Intellipad Mini-Buffer Commands
To use the mini-buffer commands, you must first open up the mini-buffer. Use View Minibuffer (or
Ctrl+/).
• Call(commandName, arguments=None): Executes an Intellipad command by
name.
• ClearMru(): Clears the list of most recently used files.
• CloseBuffer(bufferIndex): Closes an open buffer.
• Exit(): Exits Intellipad.
• Find(pattern): Find a string.
• FindInBuffers(pattern): Find a string in all open buffers.
• Goto(lineNumber): Goes to a line in the currently active buffer.
• Open(fileName): Opens a buffer in the active view.
• Replace(searchPattern, replacePattern): Replaces text in the active buffer.
• SetEncoding(encoding): Sets the encoding.
• SetMode(modeName): Changes the mode of the active view.
• SetTransform(transformName, parameters=None): Sets the transform for the
active view.
• Test(testName, repeat_count=1, fail_fast=False): Runs all tests with
names that start with the given test name.
• Zoom(scale): Changes the zoom level of the active view.
Download from Wow! eBook <www.wowebook.com>
Download from Wow! eBook <www.wowebook.com>
A P P E N D I X C
217
Intellipad Commands and Gestures
Command Key Combination Description
Microsoft.Intellipad.ActivateErrorListBuffer Ctrl+Shift+E Shows the error list buffer.
Microsoft.Intellipad.ActivateMiniBuffer None
Shows the mini-buffer
and makes it active.
Microsoft.Intellipad.ActivateOrOpenBuffer None
If the buffer is visible in a
view, this command
makes the view active.
Otherwise, it opens the
buffer in the currently
active view.
Microsoft.Intellipad.Backspace
Shift+Backspace |
Backspace
Microsoft.Intellipad.BuildProject Ctrl+Shift+B Builds the current project.
Microsoft.Intellipad.CallTestCommand
WithArg
None Test command
Microsoft.Intellipad.CallTestCommand
WithoutArg
None Test command
Microsoft.Intellipad.CloseBuffer Ctrl+F4 Closes a buffer.
Microsoft.Intellipad.CloseBufferView Ctrl+Shift+W
Closes a view. The buffer
remains open.
Microsoft.Intellipad.CopySelection Ctrl+C | Ctrl+Insert
Microsoft.Intellipad.CutSelection Ctrl+X | Shift+Delete
Microsoft.Intellipad.DebuggerContinue Ctrl+F5
Microsoft.Intellipad.DebuggerStart F5
Download from Wow! eBook <www.wowebook.com>
APPENDIX C INTELLIPAD COMMANDS AND GESTURES
218
Command Key Combination Description
Microsoft.Intellipad.DebuggerStepToken F10
Microsoft.Intellipad.DebuggerStop Shift+F5
Microsoft.Intellipad.DebuggerToggleInput
Breakpoint
F9
Microsoft.Intellipad.Delete Delete
Microsoft.Intellipad.DeleteWordToLeft Ctrl+Backspace
Microsoft.Intellipad.DeleteWordToRight Ctrl+Delete
Microsoft.Intellipad.DragDrop None
Handles files dragged into
Intellipad.
Microsoft.Intellipad.Escape Shift+Esc | Esc
Microsoft.Intellipad.Exit Alt+F4 Exits Intellipad.
Microsoft.Intellipad.ExpandBufferView
Horizontal
Ctrl+.
Expands the width of the
active view.
Microsoft.Intellipad.ExpandBufferView
Vertical
Ctrl+Shift+.
Expands the height of the
active view.
Microsoft.Intellipad.Find Ctrl+F
Opens the mini-buffer
and calls the Find
function.
Microsoft.Intellipad.FindInBuffers Ctrl+Shift+F Find in all open buffers
Microsoft.Intellipad.FindNext F3
Finds the next instance of
a string.
Microsoft.Intellipad.FindPrevious Shift+F3
Finds the previous
instance of a string.
Microsoft.Intellipad.FindSelectedNext Ctrl+F3
Finds the next instance of
the selected string.
Microsoft.Intellipad.FindSelectedPrevious Ctrl+Shift+F3
Finds the previous
instance of the selected
string.
Download from Wow! eBook <www.wowebook.com>
APPENDIX C INTELLIPAD COMMANDS AND GESTURES
219
Command Key Combination Description
Microsoft.Intellipad.FocusBufferMenu Ctrl+Alt+B
Sets keyboard focus on
the active view's Open
Buffers drop-down menu.
Microsoft.Intellipad.FocusBufferViewDown Alt+Down
Moves the view focus
down.
Microsoft.Intellipad.FocusBufferViewLeft Alt+Left
Moves the view focus to
the left.
Microsoft.Intellipad.FocusBufferViewNext F6
Moves the view focus to
the next view in the list of
open views (regardless of
position on screen).
Microsoft.Intellipad.FocusBufferViewPrevious Shift+F6
Moves the view focus to
the prior view in the list of
open views (regardless of
position on screen).
Microsoft.Intellipad.FocusBufferViewRight Alt+Right
Moves the view focus to
the right.
Microsoft.Intellipad.FocusBufferViewUp Alt+Up Moves the view focus up.
Microsoft.Intellipad.FocusModeMenu Ctrl+Alt+M
Sets keyboard focus on
the active view's Modes
drop-down menu.
Microsoft.Intellipad.Goto Ctrl+G
Opens the mini-buffer
and calls the Goto
function.
Microsoft.Intellipad.GrammarEditing
Environment
Ctrl+Shift+T
Opens a MG file in the
basic DSL authoring
configuration.
Microsoft.Intellipad.HelpCommands F1 Displays Intellipad help.
Microsoft.Intellipad.Indent Tab
Microsoft.Intellipad.InsertNewline Shift+Enter | Enter
Microsoft.Intellipad.MakeLowercase Ctrl+U
Microsoft.Intellipad.MakeUppercase Ctrl+Shift+U
Download from Wow! eBook <www.wowebook.com>
APPENDIX C INTELLIPAD COMMANDS AND GESTURES
220
Command Key Combination Description
Microsoft.Intellipad.MoveCurrentLineTo
BottomOfView
Alt+Home
Microsoft.Intellipad.MoveLineDown Down
Microsoft.Intellipad.MoveLineUp Up
Microsoft.Intellipad.MoveToEndOfDocument Ctrl+End
Microsoft.Intellipad.MoveToEndOfLine End
Microsoft.Intellipad.MoveToNextCharacter Right
Microsoft.Intellipad.MoveToNextWord Ctrl+Right
Microsoft.Intellipad.MoveToPreviousCharacter Left
Microsoft.Intellipad.MoveToPreviousWord Ctrl+Left
Microsoft.Intellipad.MoveToStartOfDocument Ctrl+Home
Microsoft.Intellipad.MoveToStartOfLine Home
Microsoft.Intellipad.NavigateToUri None
Opens the Uri given in
args, leaving the current
buffer visible.
Microsoft.Intellipad.New Ctrl+N
Opens a new untitled
buffer in the active view.
Microsoft.Intellipad.NewGrammarEditing
Environment
None
Opens a new MG file in
the basic DSL authoring
configuration.
Microsoft.Intellipad.NewProject Ctrl+Shift+N
Create a new CSharp
modeling project.
Microsoft.Intellipad.Open Ctrl+O
Opens a file in the active
view.
Microsoft.Intellipad.OpenMru None
Opens a buffer listed in
the most recently used
list.
Microsoft.Intellipad.OpenStartFiles None
Opens buffers specified
on the command line.
Download from Wow! eBook <www.wowebook.com>