Tài liệu Create a Point-and-Click SQL Server Query Tool for Users Using a Windows Form doc
Bạn đang xem bản rút gọn của tài liệu. Xem và tải ngay bản đầy đủ của tài liệu tại đây (36.77 KB, 9 trang )
8.3 Create a Point-and-Click SQL Server Query Tool for Users Using a Windows
Form
Clients usually want a means of querying the tables, but they do not necessarily know
how to create SQL statements. This example describes how to create a point-and-click
query interface using a Windows Form and display fields from individual tables as they
are chosen.
In just about every application you create, your clients need a means to view the data and
want to be able to create their own lists. However, most don't want to have to learn how
to create SQL statements. In this How-To, you will see a method for not only creating a
point-and-click query tool that will allow the users to examine all tables in the database,
but also for using the Windows Form in an application without modification.
Technique
To accomplish the task just presented, you will be using the OleDbCommand and
DataReader object. Along with these objects, you will be using some stored procedures
that SQL Server supplies. These stored procedures list the various objects within a SQL
Server database-in this case, Northwind's tables and columns.
You will take the elements returned in the DataReader object and load the Add method of
the ListBox object.
Steps
Open and run the VB.NET -Chapter 8 solution. From the main Windows Form, click on
the command button with the caption How-To 8.3. The first list box you see to the left is
populated with the tables from Northwind. Click on the Customer table, and you will see
the columns in the next list box labeled Columns. Click on the CompanyName and
ContactName, and you will see the SQL String text box filled in. After clicking on the
View button, the form will look like the one displayed in Figure 8.5.
1. Create a Windows Form. Then place the controls shown in Figure 8.5 with the
properties set forth in Table 8.4.
Table 8.4. Labels, ListBoxes, DataGrid, TextBox, and Command Button
Controls Property Settings
Object Property Setting
Label Name Label1
Text Tables
Label Name Label2
Text Columns
Label Name Label3
Text SQL String
Label Name Label4
Text Data Display
ListBox Name lstTables
ListBox Name lstColumns
SelectionMode MultiSimple
TextBox Name txtSQLString
MultiLine True
Button Name btnView
DataGrid Name dgDisplay
2. Tip
Notice that the lstTables list box only allows the user to pick one
table at a time, whereas lstColumns allows you to choose multiple
columns.
A great enhancement to this tool would be to allow the user to
select multiple tables and have the application figure out the
relation between tables.
3. In the class module for the form, add the following Private declaration just below
the line of code that reads Windows Form Designer generated code:
4. Dim mcnn As New OleDb.OleDbConnection(BuildCnnStr("(local)",
"Northwind"))
This line of code declares and assigns an OleDBConnection object that will be
used throughout the form.
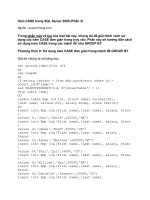
5. On the form, add the code in Listing 8.12 to the Load event. The first thing this
code routine does is create a new OleDbCommand called ocmdTables and assign
the built-in SQL Server stored procedure called sp_Tables. After establishing the
CommandType as being CommandType.StoredProcedure and then opening the
connection, the data reader called odrTables is created by calling the
ExecuteReader method off ocmdTables.
Listing 8.12 frmHowTo8_3.vb: Executing a SQL Server-Supplied Stored
Procedure That Lists the Tables in the Database
Private Sub frmHowTo3_8_Load(ByVal sender As System.Object, _
ByVal e As System.EventArgs) Handles MyBase.Load
' Create the connection and specify the stored procedure to use.
Dim ocmdTables As New OleDb.OleDbCommand("sp_Tables", mcnn)
Dim odrTables As OleDb.OleDbDataReader
Try
' Specify the type of command being performed
ocmdTables.CommandType = CommandType.StoredProcedure
mcnn.Open()
' Create the DataReader object
odrTables = ocmdTables.ExecuteReader()
' Loop through and add table-type object names
' to the lstTables list box.
Do While odrTables.Read
If odrTables.GetString(3) = "TABLE" Then
Me.lstTables.Items.Add(odrTables.GetString(2))
End If
Loop
mcnn.Close()
Catch excpData As Exception
MessageBox.Show("Error Occurred: " & excpData.Message)
End Try
End Sub
Next, the code loops though each of the items returned by the command. Those of
type TABLE are added to the lstTables items. Then the connection is closed.
As mentioned, you will see a comparison to the literal "TABLE." The reason for
this is that the fourth column returned is the same table type as the current table.
The other two types are SYSTEMTABLE and VIEW. To see the data returned by
the sp_tables stored procedure, open the Query Analyzer, located on the Start
menu, in Programs, Microsoft SQL Server. After opening up the Query Analyzer,
highlight the Northwind database, and then type execute sp_tables into the Query
Edit window and press F5 to execute the query. The results will be shown in the
bottom of the window. Page down through the data until you see some of the type
"TABLE" (see Figure 8.6).
Figure 8.6. Testing the built-in stored procedure called sp_tables.
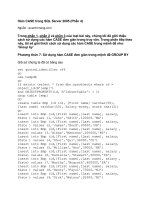
6. On lstTables, add the code in Listing 8.13 to the SelectedIndexChanged event.
This routine performs a similar feat to the previous routine in that it calls a built-in
stored procedure-in this case, sp_Columns. However, the next task in this step is to
pass a parameter, TableName, which is the table chosen in lstTables. After the
connection is opened, the data reader called odrColumns is loaded with the
ExecuteReader command. After the lstColumns.Items.Clear() method is called to
clear the list, the new columns are added to lstColumns Items collection. Last, the
connection is closed.
Listing 8.13 frmHowTo8_3.vb: Executing a SQL Server Built-In Stored
Procedure That Lists the Columns of a Supplied Table in the Database
Private Sub lstTables_SelectedIndexChanged(ByVal sender As System.Object,
ByVal e As System.EventArgs) Handles lstTables.SelectedIndexChanged
' Create the connection and specify the stored procedure to use.
Dim ocmdColumns As New OleDb.OleDbCommand("sp_Columns", mcnn)
Dim odrColumns As OleDb.OleDbDataReader
Try
' Specify the type of command being performed
ocmdColumns.CommandType = CommandType.StoredProcedure
ocmdColumns.Parameters.Add("@TableName", Me.lstTables.Text)
mcnn.Open()
' Create the DataReader object
odrColumns = ocmdColumns.ExecuteReader()
' Clear the current items in the list
Me.lstColumns.Items.Clear()
' Loop through and add table type object names
' to the lstTables list box.
Do While odrColumns.Read
Me.lstColumns.Items.Add(odrColumns.GetString(3))
Loop
mcnn.Close()
Catch excpData As Exception
MessageBox.Show("Error Occurred: " & excpData.Message)
End Try
End Sub
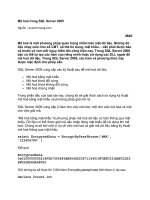
7. On lstColumns, add the code in Listing 8.14 to the SelectedIndexChanged event.
This routine iterates through the SelectedItems collection of the lstColumns
ListBox control, adding the chosen column names to a string variable called
strTemp. The length of the string is checked; if the length is greater than 0, the
Text property of txtSQLString is set to the following expression: "Select " &
strTemp & " From " & Me.lstTables.Text.
Listing 8.14 frmHowTo8_3.vb: Creating the SQL String
Private Sub lstColumns_SelectedIndexChanged(ByVal sender As System.Object,
ByVal e As System.EventArgs) Handles
lstColumns.SelectedIndexChanged
Dim strTemp As String
Dim intNumColumns As Integer
Dim oCurr As Object
' Cycle through each of the selected columns of the table chosen
' and combine them into a string.
For Each oCurr In Me.lstColumns.SelectedItems()
If Len(strTemp) > 0 Then
strTemp &= ", "
End If
strTemp &= oCurr
Next
' Take the string created and add it to the table
' name for a SQL String
' if columns are chosen.
If Len(strTemp) = 0 Then
Me.txtSQLString.Text = ""
Else
Me.txtSQLString.Text = "Select " & strTemp & " From " & _
Me.lstTables.Text
End If
End Sub
8. On btnView, add the code in Listing 8.15 to the Click event. This routine creates
the new data adapter called odaDisplay passes the Text property of txtSQLString,
and then fills the dtDisplay data table. dtDisplay is then set to the DataSource
property of the data grid called dgDisplay.
Listing 8.15 frmHowTo8_3.vb: Loading the DataGrid Control with the
Specified Data
Private Sub btnView_Click(ByVal sender As System.Object, _
ByVal e As System.EventArgs) Handles btnView.Click
Dim odaDisplay As OleDb.OleDbDataAdapter
Dim dtDisplay As New DataTable()
Try
' Take the txtSQLString text and create a data table; then set the
' data source of the data grid.
odaDisplay = New OleDb.OleDbDataAdapter(Me.txtSQLString.Text,
mcnn)
odaDisplay.Fill(dtDisplay)
Me.dgDisplay.DataSource = dtDisplay
Catch excData As Exception
MessageBox.Show(excData.Message)
End Try
End Sub
Figure 8.5. You can set the sorting of the data grid displayed here by clicking on the
desired column.
How It Works
When the form is opened, the lstTables ListBox control is loaded with the tables from the
Northwind database. When the user selects a table from the list, that table name is passed
to the stored procedure that lists the columns in a table located in the database specified
in the connection-in this case, Northwind. These columns are loaded into lstColumns.
The user can then click on multiple columns in lstColumns. The columns are then added
to the SQL Select string that is created and stored in txtSQLString. When the btnView
button is clicked, the string is passed to a DataAdapter control, filling a data table. The
data is then displayed when the data source of the DataGrid control is set to the data
table.
Comments
You can enhance this tool in a number of ways:
• Allow users to click on multiple tables and automatically create the join.
• Add a list of columns for the user to choose to use for criteria, and allow the user
to input the criteria.
• Use this tool as a base for editing or reporting the records that are returned.
• Let the users specify the sorting order using a combo box.
Tip
This last enhancement isn't necessary using the DataGrid control because
you can click on the column heading and have it sort the columns for
you.
The goal of this technique, as with others in this book, is to push you into thinking about
the possibilities of what you can accomplish with Visual Studio .NET and your
databases.