Tài liệu 3D Game Programming All in One- P13 docx
Bạn đang xem bản rút gọn của tài liệu. Xem và tải ngay bản đầy đủ của tài liệu tại đây (1.16 MB, 30 trang )
// First see if there is a callback installed that doesn't have a type;
// if so, that callback is always executed when a message arrives.
for (%i = 0; (%func = $MSGCB["", %i]) !$= ""; %i++) {
call(%func, %msgType, %msgString, %a1, %a2, %a3, %a4, %a5, %a6, %a7, %a8, %a9,
%a10);
}
// Next look for a callback for this particular type of ServerMessage.
if (%tag !$= "") {
for (%i = 0; (%func = $MSGCB[%tag, %i]) !$= ""; %i++) {
call(%func, %msgType, %msgString, %a1, %a2, %a3, %a4, %a5, %a6, %a7, %a8, %a9,
%a10);
}
}
}
function AddMessageCallback(%msgType, %func)
{
for (%i = 0; (%afunc = $MSGCB[%msgType, %i]) !$= ""; %i++) {
// If it already exists as a callback for this type,
// nothing to do.
if (%afunc $= %func) {
return;
}
}
// Set it up.
$MSGCB[%msgType, %i] = %func;
}
function DefaultMessageCallback(%msgType, %msgString, %a1, %a2, %a3, %a4, %a5, %a6, %a7,
%a8, %a9, %a10)
{
OnServerMessage(detag(%msgString));
}
AddMessageCallback("", DefaultMessageCallback);
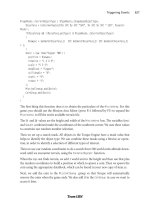
The first function,
ClientCmdChatMessage
, is for chat messages only and is invoked on the
client when the server uses the
CommandToClient
function with the message type
ChatMessage
.
Refer back to the server-side message module if you need to. The first parameter (
%sender
)
is the
GameConnection
object handle of the player that sent the chat message. The second
parameter (
%voice
) is an Audio Voice identifier string. Parameter three (
%pitch
) will also be
covered in the audio chapter later. Finally, the fourth parameter (
%msgString
) contains the
Selected Common Code Client Modules 267
Team LRN
Please purchase PDF Split-Merge on www.verypdf.com to remove this watermark.
actual chat message in a tagged string. The rest of the parameters are not actually acted on
so can be safely ignored for now. The parameters are passed on to the pseudo-handler
OnChatMessage
. It's called a pseudo-handler because the function that calls
OnChatMessage
is
not really calling out from the engine. However, it is useful to treat this operation as if a
callback message and handler were involved for conceptual reasons.
The next function,
ClientCmdServerMessage
, is used to deal with game event descriptions,
which may or may not include text messages. These can be sent using the message func-
tions in the server-side Message module. Those functions use
CommandToClient
with the
type
ServerMessage
, which invokes the function described next.
For
ServerMessage
messages, the client can install callbacks that will be run according to
the type of the message.
Obviously,
ClientCmdServerMessage
is more involved. After it uses the
GetWord
function to
extract the message type as the first text word from the string
%msgType
, it iterates through
the message callback array (
$MSGCB
) looking for any untyped callback functions and exe-
cutes them all. It then goes through the array again, looking for registered callback func-
tions with the same message type as the incoming message, executing any that it finds.
The next function,
addMessageCallback
, is used to register callback functions in the
$MSGCB
message callback array. This is not complex;
addMessageCallback
merely steps through the
array looking for the function to be registered. If it isn't there,
addMessageCallback
stores a
handle to the function in the next available slot.
The last function,
DefaultMessageCallback
, is supplied in order to provide an untyped mes-
sage to be registered. The registration takes place with the line after the function definition.
A Final Word
The common code base includes a ton of functions and methods. We have only touched
on about half of them here. I aimed to show you the most important modules and their
contents, and I think that's been accomplished nicely. For your browsing pleasure, Table
7.2 contains a reference to find all the functions in all common code modules.
Chapter 7
■
Common Scripts268
Team LRN
Please purchase PDF Split-Merge on www.verypdf.com to remove this watermark.
A Final Word 269
Table 7.2 Common Code Functions
Module Function
common/main.cs InitCommon
InitBaseClient
InitBaseServer
DisplayHelp
ParseArgs
OnStart
OnExit
common/client/actionMap.cs ActionMap::copyBind
ActionMap::blockBind
common/client/audio.cs OpenALInit
OpenALShutdown
common/client/canvas.cs InitCanvas
ResetCanvas
common/client/cursor.cs CursorOff
CursorOn
GuiCanvas::checkCursor
GuiCanvas::setContent
GuiCanvas::pushDialog
GuiCanvas::popDialog
GuiCanvas::popLayer
common/client/help.cs HelpDlg::onWake
HelpFileList::onSelect
GetHelp
ContextHelp
GuiControl::getHelpPage
GuiMLTextCtrl::onURL
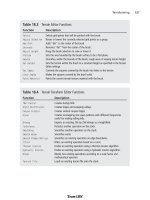
common/client/message.cs ClientCmdChatMessage
ClientCmdServerMessage
AddMessageCallback
DefaultMessageCallback
common/client/messageBox.cs MessageCallback
MBSetText
MessageBoxOK
MessageBoxOKDlg::onSleep
MessageBoxOKCancel
MessageBoxOKCancelDlg::onSleep
MessageBoxYesNo
MessageBoxYesNoDlg::onSleep
MessagePopup
CloseMessagePopup
continued
Team LRN
Please purchase PDF Split-Merge on www.verypdf.com to remove this watermark.
Chapter 7
■
Common Scripts270
common/client/metrics.cs FpsMetricsCallback
TerrainMetricsCallback
VideoMetricsCallback
InteriorMetricsCallback
TextureMetricsCallback
WaterMetricsCallback
TimeMetricsCallback
VehicleMetricsCallback
AudioMetricsCallback
DebugMetricsCallback
Metrics
common/client/mission.cs ClientCmdMissionStart
ClientCmdMissionEnd
common/client/missionDownload.cs ClientCmdMissionStartPhase1
OnDataBlockObjectReceived
ClientCmdMissionStartPhase2
OnGhostAlwaysStarted
OnGhostAlwaysObjectReceived
ClientCmdMissionStartPhase3
UpdateLightingProgress
SceneLightingComplete
common/client/recordings.cs RecordingsDlg::onWake
StartSelectedDemo
StartDemoRecord
StopDemoRecord
DemoPlaybackComplete
common/client/screenshot.cs FormatImageNumber
RecordMovie
MovieGrabScreen
StopMovie
DoScreenShot
common/server/audio.cs ServerPlay2D
ServerPlay3D
common/server/clientConnection.cs GameConnection::onConnectRequest
GameConnection::onConnect
GameConnection::setPlayerName
IsNameUnique
GameConnection::onDrop
GameConnection::startMission
GameConnection::endMission
GameConnection::syncClock
GameConnection::incScore
continued
Team LRN
Please purchase PDF Split-Merge on www.verypdf.com to remove this watermark.
A Final Word 271
common/server/commands.cs ServerCmdSAD
ServerCmdSADSetPassword
ServerCmdTeamMessageSent
ServerCmdMessageSent
common/server/game.cs OnServerCreated
OnServerDestroyed
OnMissionLoaded
OnMissionEnded
OnMissionReset
GameConnection::onClientEnterGame
GameConnection::onClientLeaveGame
CreateGame
DestroyGame
StartGame
EndGame
common/server/kickban.cs Kick
Ban
common/server/message.cs MessageClient
MessageTeam
MessageTeamExcept
MessageAll
MessageAllExcept
GameConnection::spamMessageTimeout
GameConnection::spamReset
SpamAlert
ChatMessageClient
ChatMessageTeam
ChatMessageAll
common/server/missionDownload.cs GameConnection::loadMission
ServerCmdMissionStartPhase1Ack
GameConnection::onDataBlocksDone
ServerCmdMissionStartPhase2Ack
GameConnection::clientWantsGhostAlwaysRetry
GameConnection::onGhostAlwaysFailed
GameConnection::onGhostAlwaysObjectsReceived
ServerCmdMissionStartPhase3Ack
common/server/missionInfo.cs ClearLoadInfo
BuildLoadInfo
DumpLoadInfo
SendLoadInfoToClient
LoadMission
LoadMissionStage2
EndMission
ResetMission
continued
Team LRN
Please purchase PDF Split-Merge on www.verypdf.com to remove this watermark.
Chapter 7
■
Common Scripts272
common/server/missionLoad.cs LoadMission
LoadMissionStage2
EndMission
ResetMission
common/server/server.cs PortInit
CreateServer
DestroyServer
ResetServerDefaults
AddToServerGuidList
RemoveFromServerGuidList
OnServerInfoQuery
common/ui/ConsoleDlg.gui ConsoleEntry::eval
ToggleConsole
common/ui/GuiEditorGui.gui GuiEditorStartCreate
GuiEditorCreate
GuiEditorSaveGui
GuiEditorSaveGuiCallback
GuiEdit
GuiEditorOpen
GuiEditorContentList::onSelect
GuiEditorClassPopup::onSelect
GuiEditorTreeView::onSelect
GuiEditorInspectApply
GuiEditor::onSelect
GuiEditorDeleteSelected
Inspect
InspectApply
InspectTreeView::onSelect
Tree
GuiInspector::toggleDynamicGroupScript
GuiInspector::toggleGroupScript
GuiInspector::setAllGroupStateScript
GuiInspector::addDynamicField
InspectAddFieldDlg::doAction
common/ui/LoadFileDlg.gui FillFileList
GetLoadFilename
common/ui/SaveFileDlg.gui GetSaveFilename
DoSACallback
SA_directoryList::onSelect
SA_filelist::onSelect
Team LRN
Please purchase PDF Split-Merge on www.verypdf.com to remove this watermark.
One last thing to remember about the common code: As chock-full of useful and impor-
tant functionality as it is, you don't need to use it to create a game with Torque. You'd be
nuts to throw it away, in my humble opinion. Nonetheless, you could create your own
script code base from the bottom up. One thing I hope this chapter has shown you is that
a huge pile of work has already been done for you. You just need to build on it.
Moving Right Along
In this chapter, we took a look at the capabilities available in the common code base so
that you will gain familiarity with how Torque scripts generally work. For the most part,
it is probably best to leave the common code alone. There may be times, however, when
you will want to tweak or adjust something in the common code, or add your own set of
features, and that's certainly reasonable. You will find that the features you want to reuse
are best added to the common code.
As you saw, much of the critical server-side common code is related to issues that deal
with loading mission files, datablocks, and other resources from the server to each client
as it connects.
In a complementary fashion, the client-side common code accepts the resources being sent
by the server, and uses them to prepare to display the new game environment to the user.
So, that's enough programming and code for a while. In the next few chapters, we get more
artistic, dealing with visual things. In the next chapter, we will take a look at textures, how
to make them and how to use them. We'll also learn a new tool we can use to create them.p
Moving Right Along 273
Team LRN
Please purchase PDF Split-Merge on www.verypdf.com to remove this watermark.
This page intentionally left blank
Team LRN
Please purchase PDF Split-Merge on www.verypdf.com to remove this watermark.
275
Introduction to
Textures
chapter 8
3
D computer games are intensely visual. In this chapter we begin to explore the cre-
ative process behind the textures that give 3D objects their pizzazz.
Using Textures
Textures are probably the unsung heroes of 3D gaming. It is difficult to overstate the
importance of textures. One of the most important uses of textures in a game is in creat-
ing and sustaining the ambience, or the look and feel of a game.
Textures also can be used to create apparent properties of objects, properties that the
object shape doesn't have—it just looks like it does. For example, blocky shapes with jut-
ting corners can appear to be smoothed by the careful application of an appropriate tex-
ture using a process called texture mapping.
Another way textures can be used is to create the illusion of substructure and detail. Figure
8.1 shows a castle with towers and walls that appear to be made of blocks of stone. The
stone blocks are merely components of the textures applied to the tower and wall objects.
There are no stone blocks actually modeled in that scene. The same goes for the appear-
ance of the wooden boards in the steps and other structures. The texture gives not only
the appearance of wood but the structure of individually nailed planks and boards. This
is a powerful tool, using textures to define substructures and detail.
This ability to create the illusion of structure can be refined and used in other ways. Figure
8.2 shows a mountainside scene with bare granite rock and icefalls. Again, textures were
created and applied with this appearance in mind. This technique greatly reduces the need
to create 3D models for the myriad of tiny objects, nooks, and crannies you're going to
Team LRN
Please purchase PDF Split-Merge on www.verypdf.com to remove this watermark.
encounter on an isolated and barren
mountain crag.
Textures appear in many guises in a
game. In Figure 8.3 two different tex-
tures are used to define the water near
the shoreline. A foamy texture is used
for the areas that splash against rock
and sand, and a more wavelike texture
is used for the deep water. In this
application the water block is a
dynamic object that has moving
waves. It ebbs and flows and splashes
against the shore. The water textures
are distorted and twisted in real time
to match the motion of the waves.
Another area in a game where textures
are used to enhance the ambience of a
game is when they are used to define
the appearance of the sky. Figure 8.4
shows cloud textures being used in a
skybox. The skybox is basically the
inside of a big six-sided box that sur-
rounds your scene. By applying spe-
cially distorted and treated textures to
the skybox, we can create the appear-
ance of an all-enveloping 360-degree
sky above the horizon.
We can use textures to enhance the
appearance of other objects in a scene.
For example, in Figure 8.5 we see a
number of coniferous trees on a hill-
side. By designing the ground texture
that occupies the terrain location of
the trees appropriately, we can achieve
the forest look we want without need-
ing to completely cover every inch of
ground with the tree objects. This is
helpful because the fewer objects we
need to use for such a purpose—
Chapter 8
■
Introduction to Textures276
Figure 8.1 Structure definition through using textures.
Figure 8.3 Shoreline foam and deepwater textures.
Figure 8.2 Rock and icefalls appearance on a
mountainside.
Team LRN
Please purchase PDF Split-Merge on www.verypdf.com to remove this watermark.
basically decoration—the more
objects that will be available for us to
use in other ways.
One of the most amazing uses of tex-
tures is when defining technological
items. Take the Tommy gun in Figure
8.6, for instance. There are only
about a dozen objects in that model,
and most of them are cubes, with a
couple of cylinders tossed in, as well
as two or three irregular shapes. Yet
by using an appropriately designed
texture, we can convey much greater
detail. The weapon is easily identifi-
able as a Thompson Submachine
Gun, circa 1944.
Following the theme of technological
detail, Figure 8.7 is another example.
This model of a Bell 47 Helicopter
(think M*A*S*H) shows two trick
uses of textures in one model. The
engine detail and the instrument
panel dials were created using textures
we've already seen. Now take a look at
the tail boom and the cockpit canopy.
The tail boom looks like it is made of
several dozen intersecting and over-
lapping metal bars; after all, you can
see right through it to the buildings
and ground in the background. But it
is actually a single elongated and
pinched box or cube with a single tex-
ture applied! The texture utilizes the
alpha channel to convey the trans-
parency information to the Torque
renderer. Cool, huh? Then there is the
canopy. It is semitransparent or mild-
ly translucent. You can obviously see
right through it, as you should when
looking through Perspex, but you can
Using Textures 277
Figure 8.4 Clouds in a skybox using textures.
Figure 8.5 Terrain accents.
Figure 8.6 Weapon detail using textures.
Team LRN
Please purchase PDF Split-Merge on www.verypdf.com to remove this watermark.
still make out the sense of a solid
glasslike surface.
Of course, technological features are
not the only things that can be
enhanced through textures. In Figure
8.8 the brawler about to enter the tav-
ern is attired in the latest stylish
leather brawling jacket. He is obvi-
ously somewhere around 40 years of
age, judging by his classic male-pat-
tern baldness, and the bat is a
Tubettiville slugger. Okay, okay, the
bat is a stretch, but if it were turned
over 180 degrees, you would be able
to see the Tubettiville logo, and then
you could tell! Also note the use of the
texture specifying the tavern name,
named in honor of a famous Delta
Force 2 player, Insomniac.
Look at the moon in Figure 8.9. Look
again, closer. Does it look familiar? It
should, because the moon texture in
that picture is an actual photograph of
the full moon, taken outside my house
with a digital camera and then used to
generate the moon texture. The rest of
the scene is generated using the
Torque Engine with appropriate
nighttime lighting parameters set.
I think by now you have a pretty good
idea why I say that textures are the
unsung heroes of 3D gaming. They
really make a huge difference by con-
veying not only the obvious visual
information, but also the subtle clues
and feelings that can turn a good game
into a great experience.
Chapter 8
■
Introduction to Textures278
Figure 8.7 Vehicle detail and structure.
Figure 8.8 Player clothing, skin, and other details.
Figure 8.9 Distant objects.
Team LRN
Please purchase PDF Split-Merge on www.verypdf.com to remove this watermark.
Paint Shop Pro
You are going to be creating your own textures as you travel through this book, and to do
that you'll need a good tool for texture and image manipulation. Well, the good folks at
JASC Software have graciously allowed us to include their great image processing tool,
Paint Shop Pro, on the companion CD for you to use.
I've been using Paint Shop Pro for about 10 years, I think. In the early days, I only used it
for converting file types, because that was about all it could do. Nowadays, though, it is a
fully featured image processing and image generation tool, with scanner support, special
effects and filters, image analysis statistics, and the whole nine yards.
First, you'll need to install Paint Shop Pro, if you haven't already run the Full Install from
the CD.
Installing Paint Shop Pro
If you want to install only Paint Shop Pro, do the following:
1. Browse to your CD in the \PSP folder.
2. Locate the Setup.exe file and double-click it to run it.
3. Click the Next button for the Welcome screen.
4. Follow the various screens, and take the default options for each one, unless you
know you have a specific reason to do otherwise.
Getting Started
To get this party rolling, we're going to just blast through and create a couple of textures that
you can use later for whatever grabs your fancy. We'll cover just the tools and steps we need
to get the job done. In a later section we'll cover the most common tools in more detail.
Creating a Texture
So, let's get down to brass tacks and create a texture from scratch. We'll create a wood tex-
ture using the built-in capabilities of Paint Shop Pro.
1. Launch Paint Shop Pro and select File, New.
2. A New Image dialog box opens up. Set the width and height dimensions to 128
pixels (see Figure 8.10) and click OK.
3. We now have a blank image to work with. Choose the menu item Effects, Texture
Effects, Texture, and the Texture dialog box will appear, as in Figure 8.11.
4. In the visual list at the lower part of the Texture dialog box, select Woodgrain.
You'll have to scroll down through the list to the bottom.
Paint Shop Pro 279
Team LRN
Please purchase PDF Split-Merge on www.verypdf.com to remove this watermark.
5. Click on the color box at center-right. You will
get a Color dialog box, as shown in Figure 8.12.
tip
Most of the image processing tools in Paint Shop
Pro have an Auto Proof button that looks like this:
If you are using something newer than an old Pentium 100
computer, you should probably have this button pressed. It
allows you to see the changes in your image as soon as you
make them, rather than waiting until you click the OK but-
ton to close whichever dialog box you are using.
6. Change the value in the R (for red) box to 139, in
the G (for green) box to 87, and in the B (for blue)
box to 15. The H (hue), S (saturation), and L
(light) boxes will automatically change to match.
7. Click OK to close the Color dialog box.
8. Change the other settings in the Texture
dialog box to match those in Table 8.1.
9. Click OK to close the Texture dialog
box.
10. Now you should have a bona fide
woodgrain texture, like the one shown
in Figure 8.13, that you can use for
things like walls, planks, ladders, the
wooden stock on a weapon, barrels, and
whatever else you can come up with.
Chapter 8
■
Introduction to Textures280
Figure 8.10 Creating a new blank
image.
Figure 8.11 Texture dialog box with
woodgrain texture.
Table 8.1 Texture Dialog Box
Settings
Attribute Value
Size 100
Smoothness 15
Depth 9
Ambience 0
Shininess 4
Angle 336
Intensity 50
Elevation 37
Team LRN
Please purchase PDF Split-Merge on www.verypdf.com to remove this watermark.
11. With this texture, you can experi-
ment with different image processing
effects and touchup tools in Paint
Shop Pro. Go ahead and give it a try.
Okay, that was so much fun, let's do anoth-
er. This time we are going to tweak an
image a bit searching for a specific look.
The next texture will be a sort of rough-
wall look that you might find on a painted
cement block, or maybe a freshly poured
sidewalk, or something like that. We'll call it
the sidewalk texture, for convenience.
1. If it isn't still open, launch Paint
Shop Pro.
2. Select File, New.
3. Set the width and height dimensions
to 128 pixels and click OK. (Take
another look at Figure 8.10 if you
need to refresh your memory.)
4. Select the menu item Effects, Texture
Effects, Texture, and the Texture dialog box will appear
again, just like before, as depicted in Figure 8.11.
5. This time we'll do something a bit different from the previ-
ous image. Locate the Texture frame at center-left. Click on
it to open a visual menu of textures, and choose Concrete.
You should get a texture like the one shown in the boxes in
the dialog box in Figure 8.14.
6. Click on the color box at center-right to get the Color dialog
box again.
7. Using Figure 8.15 as a guide, change the value in the R box to 218, in the G box to
181, and in the B box to 110.
8. Click OK to close the Color dialog box.
9. Change the other settings in the Texture dialog box to match those in Table 8.1.
10. Click OK to close the Texture dialog box. You should get a new texture like the one
shown in Figure 8.16.
Now this texture is quite a bit darker than I want it to be. I'm looking for a gray
with a hint of beige or tan color, so what we'll have to do is touch it up a bit. First,
we want to brighten the highlights and, at the same time, darken the shadows a bit.
Paint Shop Pro 281
Figure 8.12 Color dialog box for woodgrain.
Figure 8.13
Woodgrain texture.
Team LRN
Please purchase PDF Split-Merge on www.verypdf.com to remove this watermark.
To do this, we'll use the Highlight/
Midtone/Shadow tool.
11. Select Adjust, Brightness and Contrast,
Highlight/Midtone/Shadow. You'll get
the Highlight/Midtone/Shadow dialog
box shown in Figure 8.17. Change your
settings to match those in the figure.
As you can see with Figure 8.18, the tex-
ture details now stand out in relief quite
a bit more. This is goodness. However,
the color is way too rich, or vibrant, for
use as a sidewalk or wall texture, in my
humble opinion.
What we want to do now is tone down
the richness of the color. We can do that
by using the Hue/Saturation/Lightness
tool. Now, we could have done this part
using the Color tool when we created the
color. And I tried! But it wasn't close
enough, so using the Hue/Saturation/
Lightness tool allows us to tweak the
color in the direction we want.
12. Choose Adjust, Hue and Saturation,
Hue/Saturation/Lightness to get the
Hue/Saturation/Lightness dialog box, as
shown in Figure 8.19.
13. Set the Hue to 0, the Saturation to Ϫ70,
and the Lightness to 0, and then click OK.
This will take the edge off the richness of
the color quite a bit. If you look at Figure
8.20 and compare it with Figure 8.18,
you can see the difference. You can use
the Undo/Redo feature of Paint Shop Pro
to compare your own versions of these
images. Select the Edit, Undo and the
Edit, Redo menu items to switch back
and forth between the before and after
versions of your own creation.
Chapter 8
■
Introduction to Textures282
Figure 8.14 Texture dialog box with default
preset.
Figure 8.15 Color dialog box for sidewalk
texture.
Team LRN
Please purchase PDF Split-Merge on www.verypdf.com to remove this watermark.
Now that the color is where we want it, let's roughen it up a
bit. The texture is a bit too smooth, sort of like taffy. A side-
walk usually looks grainier. To do this, we'll add noise.
14. Choose Adjust, Add/Remove Noise, Add Noise. You'll get
the Add Noise dialog box, as shown in Figure 8.21.
15. Set the Noise value to 19 percent.
16. Select the Gaussian button.
17. Check the Monochrome box.
Compare Figure 8.22 with Figure
8.20, and you'll see the differ-
ence—the newly added roughness
to the surface.
You should now have two images open in
your Paint Shop Pro window: the first
one being the woodgrain texture, and the
other being the sidewalk texture. In the
next section you'll learn how to save
those images for later use.
Working with Files
We want to get those images saved with-
out any further ado, but first I want to
show you something. You're going to
launch the fps demo game that comes
with the Torque Engine.
Launching the fps Demo Game
1. Leave Paint Shop Pro running and task switch (Alt+Tab) to
the Windows desktop.
2. Using the Windows Explorer, browse into the C:\3DGPAi1
folder and then double-click on the fps demo shortcut.
3. When the GarageGames/Torque splash screen appears, click
on the Start Mission button.
4. When the Mission dialog box appears, clear the Multiplayer
check box.
5. Click on Scorched Planet to highlight that line.
6. Click on Launch Mission.
Paint Shop Pro 283
Figure 8.16 Initial
sidewalk texture.
Figure 8.18
Enhanced highlight
sidewalk texture.
Figure 8.17 Highlight/Midtone/Shadow dialog box.
Team LRN
Please purchase PDF Split-Merge on www.verypdf.com to remove this watermark.
When the game finishes loading you should
get a view pretty well identical to the one in
Figure 8.23, except it will be in color, of
course. The floor will be bright orange, and
the beams above you will be magenta. This
odd coloring is deliberate—you are going to
save your own textures in place of these two
textures; this will make it easy for you to see
if your changes have taken effect.
7. Resist the natural impulse to run around and
blow things up. Instead, press the Escape key
to exit the game (well, try to resist the natural
impulse to run around and blow things up,
anyway).
8. Click Quit.
Saving Texture Files
Okay, now that you have the "before" view
recorded in your mind, we'll finally get to saving
those images. Switch back to Paint Shop Pro now,
and follow this procedure to save your files:
1. Click on the woodgrain image to bring it to the front (making
it active).
2. Select File, Save As, and the Save As dialog box will appear.
3. In the Save As dialog box, make the type be JPG by scrolling
through the Save As Type list and selecting JPG – JIFF
Compliant.
4. Browse your way to C:\3DGPAi1\fps\data\interiors\evil1.
5. Name your file wood.jpg—the name must be exact.
6. Click OK.
7. You will get a dialog box that says "C:\3DGPAi1\fps\data\interiors\evil1\wood.jpg
already exists. Do you want to replace it?" Click Yes.
Repeat steps 1 to 7 for the sidewalk image, using the name drk_cem.jpg.
Now, task switch back to the desktop and run the fps demo game again, just as you did
before. When you spawn in the game you will now see the floor rendered with your new
texture and the overhead beams rendered with the woodgrain texture you created.
If either the floor or the beams look like they did in your "before" view, then you've
Chapter 8
■
Introduction to Textures284
Figure 8.19 Hue/Saturation/Lightness
dialog box.
Figure 8.20
Desaturated sidewalk
texture.
Team LRN
Please purchase PDF Split-Merge on www.verypdf.com to remove this watermark.
probably made an error in the file name or perhaps
saved them in the wrong folder. Double-check your
work, and everything should turn out fine.
Congratulations! Now you are an artist.
tip
The actual textures used for this platform object are
saved in the evil1 folder as Original wood.jpg for the
overhead beams and Original drk_cem.jpg for the floor.
You can use the originals to replace your own textures
if you want to see what they looked like.
PNG versus JPG
Paint Shop Pro supports many, many file types. If
you select File, Save As, you'll get the Save As dialog
box. If you click on the Save As Type combo box, you'll get a whop-
ping great hockey sock full of available file types. There are two of
particular interest to us: JPEG (Joint Photographic Experts Group)
and PNG (Portable Network Graphics). In Windows, the JPEG for-
mat file extension is "JPG"; this has more common usage than
"JPEG", so that's the term I will use.
When you save files in the JPG format, the images are compressed.
The type of compression used is called a lossy compression. This
means that the technique used to
squeeze the image information into
less space throws away some of the
information. This is not necessarily a
Bad Thing. The people who devised
the JPG format were pretty clever and
were able to specify rules that guide the
software in what to keep, what to
throw away, and how to modify the
information. So although there is loss
of information, the effect on the image
is pretty negligible in most cases.
But there is an effect. Try this little
experiment to see for yourself:
Paint Shop Pro 285
Figure 8.21 Add Noise dialog box.
Figure 8.22 Final
sidewalk texture.
Figure 8.23 Spawn view in the fps demo game.
Team LRN
Please purchase PDF Split-Merge on www.verypdf.com to remove this watermark.
1. Create a new document the same way you did earlier with the two textures.
2. Make sure you have your foreground color set to black in the Materials palette (see
Figure 8.24) and the background set to medium gray.
tip
To change the foreground color, find the Materials palette at
the right side, below the toolbars. There are two sets of
overlapping color squares: a large and a small. Locate the
upper-left large color square, which is called the Foreground
and Stroke Properties box. Click this square and a Color dia-
log box will open. Select black and then close the dialog box
by clicking OK.
The rectangle on the lower right is the Background and Fill
Properties. You change it in the same way.
If you can't find the Materials palette, choose View, Palettes,
Materials.
3. Choose Adjust, Add/Remove Noise, Add Noise to get to the Add Noise dialog box.
4. Select the Gaussian and Monochrome options.
5. On the right-hand side of the dialog box, set the Noise percentage to 60 percent.
6. Click OK, and the blank image will be filled with speckles and dots, similar to the
image shown in Figure 8.25.
7. Next, select the Preset Shape Tool, the third last icon on the
Tool palette.
8. Draw a shape in the middle of your image—any shape will
do. Figure 8.26 will give you an idea.
9. Now select File, Save As, and the Save As dialog box will
appear.
10. In the Save As dialog box, make the type be JPG by scrolling
through the Save As Type list and selecting JPG – JIFF
Compliant.
11. Give the file a name (I'll use "testing"), and save it wherever you can remember to
find it again. Make sure you use a unique name so that you don't overwrite an
existing file.
12. Click OK.
13. Now select File, Save As again, but this time select PNG format. This is an open
standard file format used in many parts of the computer industry.
14. Close both of your image windows.
Chapter 8
■
Introduction to Textures286
Figure 8.24 Materials palette.
Figure 8.25 Noise
image.
Team LRN
Please purchase PDF Split-Merge on www.verypdf.com to remove this watermark.
15. In the File menu, near the bottom is the Recent Files sub-
menu, which contains a list of the names of recently used
files. If you used the same file name that I did, you should
see testing.png and testing.jpg in the list. Open both of
them.
16. Use the Zoom tool, which is available via the top icon in
your Tool palette (see Figure 8.27). Click on the icon, then
select the Zoom tool from visual menu—the toolbar icon
will change to reflect the chosen tool. Next, click once in
each image to zoom it to a larger magnification. Right-click to zoom out again.
17. Compare the two images. You'll notice odd pixel artifacts around the lines of your
shape in the JPG version that don't exist in the PNG version. Those artifacts are a
result of the compression.
See Figure 8.28 for a zoomed view of
JPG image's artifacts in the upper
portion of the figure, compared to the
PNG image in the lower portion. The
arrows in the JPG version point to
some of the compression artifacts.
On top of all that, if you repeatedly
open and save JPG files, the distortion
will get worse each time you do it, as
data is lost in the compression each
time. You'll see it as a sort of smearing
of colors around edges, especially in
areas of high color contrast. It's simi-
lar to the messiness resulting from
photocopying photocopies of photocopies.
So, if JPG has these artifacts, why use it? Because with more com-
plex images, JPG files are usually smaller than PNG files. Go ahead
and try for yourself. Maybe use the one in your texture example
from earlier, like the sidewalk texture. When I save the final texture
as JPG, I get a file size of 6,493 bytes. As PNG, I get 19,882 bytes!
The smaller the texture files are, the more of them we can fit in a
given amount of memory, and the more textures we can fit in
memory, the richer the visual experience for our game.
Okay, so now you are wondering, why bother with the PNG file
type, right? Well, there is a good reason for using PNG files, of
Paint Shop Pro 287
Figure 8.27 Tool palette, with tool names.
Figure 8.26 Noise
image with shape.
Figure 8.28 Noise
image.
Team LRN
Please purchase PDF Split-Merge on www.verypdf.com to remove this watermark.
course. The PNG format supports a concept called alpha channels, and we will need to use
alpha channels for some of our game images. Not all of them, but a few. So the rule of
thumb will be to use JPG for all images except when we need to specify an alpha chan-
nel—then we use PNG.
Finally, here is an important workflow tip. Save all of your original image creations in the
Paint Shop Pro native format: PSPIMAGE. When you create and save your images in
PSPIMAGE format, it's a lot like having the original source code for a program. In
PSPIMAGE format you can edit any text you've created in vector mode, modify objects
and curves that are in vector format, move them around, and so on. You can then save
them in the game format you need, PNG or JPG, when you need to.
Bitmap versus Vector Images
Paint Shop Pro uses image graphics in two different and complementary ways: bitmap
graphics and vector graphics formats.
Bitmap images are also called raster images. Raster, the older term, is the pattern of lines
traced by rectilinear scanning in display systems. Although it is not exactly the same as a
bitmap image, it's the term that Paint Shop Pro uses to describe such images. In this book
I will use the term bitmap for such images, except when quoting Paint Shop Pro tools or
commands that use the word raster. Just remember that they essentially mean the same
thing in this context.
A bitmap image is composed of pixels laid out on a grid. Each pixel represents a color
value, one each for red, green, and blue. The weighting of each of these values determines
the color of each pixel. In most image processing tools, if you increase the magnification
of a bitmap image, you can see these pixels. They look like squares on the screen. A bitmap
object is a collection of these pixels. An object is stored as a group of pixels with the color
information about each pixel color. Pixels can be blended to create soft edges and smooth
transitions between objects. Photographic images are usually rendered as bitmap images
because the pixel format matches well to the way that photographs are made.
You should note that an image in bitmap format is resolution-dependent. You specify the
resolution and pixel dimensions when you create the image. If you later decide to increase
its size, you enlarge each pixel, which lowers the image quality.
A vector image is composed of procedural and mathematical instructions for drawing
the image. As you encountered in Chapter 3, a vector is basically a line that has definite
magnitude and direction. Vector objects in Paint Shop Pro are defined in a similar fash-
ion. Each object in a vector image is stored as a separate item with information about
its relative position in the image, its starting and ending points, and width, color, and
curve information. This makes the vector format useful for things like logos, text fonts,
and line drawings.
Chapter 8
■
Introduction to Textures288
Team LRN
Please purchase PDF Split-Merge on www.verypdf.com to remove this watermark.
An image in vector format does not depend on the resolution. It can be resized without
losing detail because it is stored as a set of instructions, not as a collection of pixels. Each
time you display an image, you re-create it.
Now a computer monitor uses pixels to display an image, and most printers convert pix-
els to ink dots. Because of this, vector images are converted into pixel format when dis-
played on the screen or printed. However, when you close the image files and save them,
they are saved in the vector format.
We will be doing most of our work with bitmap images. However, you may find that cer-
tain vector techniques can be used to create some image components, like curves and text.
We'll create them as vectors and then convert them when required. Some of the tools we'll
use allow you to create in either format. Most of the time we'll do it in the bitmap format
when we are using fancy effects tools.
Creating Alpha Channels
Okay, so you are now able to perform the most important texture imaging operations, cre-
ating one and saving it. The next most important operation is the creation of alpha chan-
nel transparent sections of an image. Remember the helicopter tail boom?
There are other uses for alpha transparency, of course. Bitmapped GUI buttons are can-
didates: You may want a button that does not have straight sides and square corners. You
can create irregular button shapes using transparent sections of your button image.
Another use for a bitmap with alpha transparency would be overlays on the GUI, such as
health bars, status displays, and weapons crosshairs.
Let's take a look at an example of a bitmap with transparency.
Launch the fps demo game the same way you did when testing your textures earlier, but
this time click the About button instead. You'll see the credits for the creation of the
Torque Engine, with the nice round GarageGames logo. Let's change it!
1. In Paint Shop Pro select File, Open. Browse your way to C:\3DGPAi1\fps\client\ui
and then find the file gglogo150.png and open it. We're going to work with this
file. The original version has already been backed up as Original gglogo150.png for
you, so don't worry about messing up the logo.
Notice that there is no background color for this image; the areas outside the logo
circle are filled with a gray-and-white checkerboard pattern. This pattern is the
default Paint Shop Pro transparency pattern. The appearance of this pattern means
that the alpha channel for the file has a value of 0 for each pixel of the image that
coincides with the transparency pattern.
Paint Shop Pro 289
Team LRN
Please purchase PDF Split-Merge on www.verypdf.com to remove this watermark.
2. Now choose the Freehand Selection tool. (Refer back to Figure 8.27—you want the
fifth tool icon from the top.) Click on the little black triangle to the right, and
choose the Freehand Selection tool from the icon menu.
3. Use the Freehand Selection tool to select an irregular shape in the gglogo150
image, such as shown in part A of Figure 8.29.
4. Delete the selected portion, leaving a cutout in the logo, as shown in part B of
Figure 8.29.
5. Now choose File, Save As to save your changes.
6. Launch the fps demo game and click on the About button.
You should now see that the nice round GG logo has a "hole" in it shaped like the selec-
tion you made, with the dialog box's gray background color showing through. Part C of
Figure 8.29 shows what it looks like. If the dialog box's background color had been blue,
that's the color you would see. Or if it had been some bitmap image, then parts of the
image would show through the logo. The areas in the logo that were covered by the trans-
parency pattern (as dictated by the alpha channel) are not drawn at all. Of course, your
shape is probably not identical to the cutout shape I made.
This process, when carried out with most programs other than Paint Shop Pro, or even
with some older versions of PSP, is a fairly complex activity. With PSP 8 it's pretty well a
nonevent!
Paint Shop Pro Features
I won't cover all of the features that Paint Shop
Pro offers—and there are just a ton of them.
What I'll do is cover those that I use the most
when creating textures for games and present
some of the most useful options and capabili-
ties for those features.
Materials Palette
In Paint Shop Pro a material is a combination
of color, gradient, pattern, and texture. The
Materials palette provides a way to edit those
attributes of either a foreground or back-
ground material.
The Materials palette is normally found docked
on the right side, just below the toolbars.
On the Materials palette (see Figure 8.30), you
will find the Colors tab and the Swatches tab.
Chapter 8
■
Introduction to Textures290
Figure 8.29 Creating an alpha channel
selection.
Team LRN
Please purchase PDF Split-Merge on www.verypdf.com to remove this watermark.
The Colors tab is used to select either the foreground or the background color for the
material. Simply move your cursor over the Colors tab body, and the cursor will change
to the eyedropper icon. Set the foreground color by left-clicking on a color, and set the
background by right-clicking on a color.
Swatches are custom materials you have created and saved for later use.
To the right of the tabs are the Foreground Properties and Background Properties boxes.
When you choose a color from the Colors tab, the chosen color appears in the appropri-
ate properties box. The upper-left properties box is for the foreground and stroke prop-
erties, and the lower-right one is for the background and fill.
Below each properties box are three buttons. From left to right these are the Style button,
the Texture button, and the Transparent button.
■
Style button. Indicates whether the color box is showing a color, gradient, or pattern.
■
Texture button. Indicates whether a texture will be applied to the color.
■
Transparent button. Indicates whether this color type (foreground or back-
ground) will be transparent.
To the right of the Foreground Properties and Background Properties boxes are the much
smaller Foreground Color and Background Color boxes. Like the properties boxes, these
reflect the current active colors. However, when you click in these boxes, you get a simple
Color Selection dialog box and not the more complex Materials dialog box.
The All Tools check box allows you to indicate that the materials properties you have set
apply globally to every drawing tool. When this
option is not chosen, you will have to change the
settings for each drawing tool you use.
If the Materials palette is not visible, choose View,
Palettes, Materials to make it visible.
Layers
You can create four types of layers in Paint Shop
Pro: raster layers, vector layers, mask layers, and
adjustment layers. Raster layers are Paint Shop
Pro's name for layers that contain pixel informa-
tion (bitmaps). You can probably guess that vector
layers contain instructions for drawing vector
lines, shapes, and text. Vector layers can be added
to images of any color depth, but not so with raster
layers. Mask layers contain mask information, such
Paint Shop Pro 291
Figure 8.30 The Materials palette.
Team LRN
Please purchase PDF Split-Merge on www.verypdf.com to remove this watermark.