Tài liệu Flash Builder 4 and Flex 4 Bible- P9 ppt
Bạn đang xem bản rút gọn của tài liệu. Xem và tải ngay bản đầy đủ của tài liệu tại đây (736.07 KB, 50 trang )
371
CHAPTER
Controlling
Animation and
Working with Drag
and Drop
IN THIS CHAPTER
Declaring effects in MXML
Instantiating and playing
effects with ActionScript
Using tweening and masking
effects
Using composite effects
Implementing drag-and-drop
interfaces
F
lash Player was originally created as a platform for presenting anima-
tion over the Web. Future Splash Animator, the original ancestor of
the Flash authoring environment and Flash Player, was a Java-based
software product that was integrated into the browser in much the same
manner as Flash Player is today.
Millions of Flash developers worldwide create compelling content designed
for presentation in a Web application. Animation and related visual wizardry
is the most common goal, and the most common result, of documents devel-
oped in the Flash authoring environment and distributed through Flash
Player.
Animation in Flash depends largely on use of the timeline: a visual interface
that enables the developer to create animations frame by frame or through a
process known as tweening. Flex application developers don’t have the time-
line available to them. In fact, one of Macromedia’s most important motiva-
tions in creating Flex was to free developers with a coding background from
having to work with the timeline at all. But a Flex application is still distrib-
uted and viewed through Flash Player. So when it’s time to move objects
around the screen, a Flex developer needs code-based approaches to make it
happen.
In this chapter, I describe the use of effects to create animation in a Flex
application. I also describe how to implement drag-and-drop interfaces to
create an intuitive way to move data around an application.
On the Web
To use the sample code for this chapter, import the chapter12.fxp Flex
project archive from the Web site files into your Flash Builder workspace.
n
18_488959-ch12.indd 37118_488959-ch12.indd 371 3/5/10 2:27 PM3/5/10 2:27 PM
Please purchase PDF Split-Merge on www.verypdf.com to remove this watermark.
Part II: Designing Flex Applications
372
Using Effects
An effect is an ActionScript class that defines changes in a visual component’s position, visibility,
scaling, and other properties over a period of time. The Flex framework includes many pre-built
effect classes that can be applied to visual components and played with explicit ActionScript state-
ments or upon certain built-in effect triggers.
New Feature
The Flex 4 SDK includes a new set of effect classes that have the advantage of working on both Flex components
and on primitive vector graphics defined with the new FXG syntax supported in MXML. These effect classes are
members of the
spark.effects package and can be used to animate both new Spark components and the
older MX components. The older effect classes, which are members of the
mx.effects package, are still
included with the Flex 4 SDK.
n
Most pre-built effect classes in the Flex framework define changes to visual properties of control.
The following new Spark effects cause changes to one or more of a visual component’s properties
over a period of time:
l
Animate. Changes any arbitrary set of properties.
l
AnimateColor. Changes a color property from a starting to an ending color.
l
AnimateFilter. Changes properties of one of the filter classes defined in the spark.
filters
package, including DropShadowFilter, GlowFilter, BlurFilter, and
ShaderFilter.
l
AnimateShaderTransition. Performs an animation between two bitmaps using a
pixel-shader program based on Flash Player’s Pixel Bender technology. You can provide
your own shader program or use one of those provided by this effect’s subclasses,
CrossFade and Wipe.
l
AnimateTransform. Combines multiple transform animations, such as translation,
scale and rotation, into a parallel effect.
l
CrossFade. Performs a crossfade between two components or graphics. This class is
extended from
AnimateShaderTransition and is designed to be used in transitions
rather than played directly.
l
Fade. Changes the alpha property of a component to affect transparency.
l
Move. Changes the component’s x and y properties to modify the object’s relative
position within its container.
l
Move3D. Changes the component’s x, y, and z properties to modify the object’s relative
position within its container and its relative depth.
l
Resize. Changes the component’s width and height.
l
Rotate. Rotates a component. You can control the angle of rotation.
l
Rotate3D. Rotates a component in three dimensions. You can control the angle of
rotation and its 3D orientation.
18_488959-ch12.indd 37218_488959-ch12.indd 372 3/5/10 2:27 PM3/5/10 2:27 PM
Please purchase PDF Split-Merge on www.verypdf.com to remove this watermark.
Chapter 12: Controlling Animation and Working with Drag and Drop
373
l
Scale. Changes a component’s relative size around its center, using scaleX and
scaleY properties.
l
Scale3D. Changes a component’s relative size around its center, adding 3D functionality.
l
Wipe. Reveals one component or graphic and hides another, performing the transforma-
tion in one of four directions (right, left, up, or down). This class is extended from
AnimateShaderTransition and is designed to be used in transitions rather than
played directly.
The following MX effects are retained from the Flex 3 SDK, and have not been rewritten in the new
Spark framework. You can still use them to animate MX components but can’t apply them directly
to Spark components or MXML graphics:
l
Iris. Uses a rectangular mask to reveal or hide an object. Unlike the Zoom effect, this
does not change the component’s dimensions.
l
WipeLeft, WipeRight, WipeUp, and WipeDown. Uses a mask to reveal or hide an
object in the indicated direction.
l
Zoom. Changes the scale of a component, zooming into and out of a component’s center
point.
Tip
Some MX effects that haven’t been rewritten can be emulated with the new Spark effects. For example, you
can achieve the same result as the MX
Blur and Glow effects with the Spark AnimateFilter effect.
n
The following MX effects are nonvisual but are played with the same sort of code as the visual
effect classes:
l
Pause. Creates a delay between multiple effects controlled in a Sequence (explained
later in this chapter).
l
SoundEffect. Plays an MP3 file. The MP3 file can be embedded or can be loaded at
runtime.
Declaring and playing effect classes
You play effects either in a view state transition or by calling an effect object’s play() method.
Caution
The older Flex 3 effects support an architecture known as a trigger, which plays an effect in reaction to a
specific event. This code, for example, would cause an object to fade in and out in reaction to having its
visible property set to true or false:
<mx:Image source=”assets/flower1.jpg”
showEffect=”{myMXEffect}” hideEffect=”{myMXEffect}”/>
If you try to use this syntax with Spark effects, the results are inconsistent. Adobe recommends that Spark
effects be called directly from ActionScript code or in the context of a view state transition.
n
18_488959-ch12.indd 37318_488959-ch12.indd 373 3/5/10 2:27 PM3/5/10 2:27 PM
Please purchase PDF Split-Merge on www.verypdf.com to remove this watermark.
Part II: Designing Flex Applications
374
To get started with an effect, declare an instance of the desired effect class in either MXML or
ActionScript code. This instance of the Spark
Fade class will cause its target object to fade from
transparent to opaque over the course of 2000 milliseconds (2 seconds):
<fx:Declarations>
<s:Fade id=”myFade” duration=”2000”
alphaFrom=”0” alphaTo=”1”/>
</fx:Declarations>
New Feature
As with all nonvisual objects, MXML declarations of effect objects must be wrapped in the
<fx:Declarations> element in Flex 4.
n
Because an effect’s duration is measured in milliseconds, a duration of 2000 means that the
effect takes 2 seconds to play. The
duration property’s default value is 500 milliseconds, so the
custom
Fade effect plays much more slowly than the default.
To play the effect, call the effect object’s
play() method and pass an array containing references
to all objects that should be affected:
myFade.play([myImage])
Note
Each effect class in the Flex framework has an equivalent instance class. For example, the Fade class is matched
by a
FadeInstance class. The instance class is used internally by the framework to create new instances of the
effect each time it’s played. You should never declare the effect instance classes directly though.
n
Listing 12.1 shows a complete application that declares two Fade objects. The Button compo-
nents play the effects when clicked, causing the
BitmapImage to fade in and out.
LISTING 12.1
Playing simple effects
<?xml version=”1.0” encoding=”utf-8”?>
<s:Application xmlns:fx=”
xmlns:s=”library://ns.adobe.com/flex/spark”>
<fx:Declarations>
<s:Fade id=”fadeIn” alphaFrom=”0” alphaTo=”1”/>
<s:Fade id=”fadeOut” alphaFrom=”1” alphaTo=”0”/>
</fx:Declarations>
<s:BitmapImage id=”myImage” source=”@Embed(‘assets/flower1.jpg’)”
x=”140” y=”90”/>
<s:Button x=”140” y=”338” label=”Show Image”
click=”fadeIn.play([myImage])”/>
<s:Button x=”374” y=”338” label=”Hide Image”
click=”fadeOut.play([myImage])”/>
</s:Application>
18_488959-ch12.indd 37418_488959-ch12.indd 374 3/5/10 2:27 PM3/5/10 2:27 PM
Please purchase PDF Split-Merge on www.verypdf.com to remove this watermark.
Chapter 12: Controlling Animation and Working with Drag and Drop
375
On the Web
The code in Listing 12.1 is available in the Web site files as PlayingEffects.mxml in the chapter12
project.
n
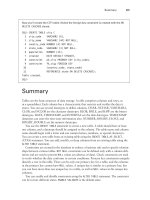
Figure 12.1 shows the resulting application in the process of fading from visible to invisible.
Tip
You can still use the MX effects to animate Spark components by wrapping the Spark component in an MX
container. For example, the
WipeLeft, WipeRight, WipeUp, WipeDown, Iris, and certain other effects
haven’t been rewritten in Spark at this point. The following code wraps a Spark
Button in a MX Box con-
tainer, and then applies the MX
WipeRight effect to the containing Box:
<fx:Declarations>
<mx:WipeRight id=”wipe” />
</fx:Declarations>
<mx:Box id=”box” label=”MX Box”>
<s:Button id=”btn”
label=”Spark Button”
click=”wipe.play([box])”/>
</mx:Box>
n
FIGURE 12.1
A Fade effect in progress
Declaring effects in ActionScript
You can explicitly construct and play an effect with ActionScript code with these steps:
1. Declare an instance of an effect class as a variable.
2. Set the effect variable’s target property to refer to the component you want to animate.
18_488959-ch12.indd 37518_488959-ch12.indd 375 3/5/10 2:27 PM3/5/10 2:27 PM
Please purchase PDF Split-Merge on www.verypdf.com to remove this watermark.
Part II: Designing Flex Applications
376
3. Set other properties to modify the effect’s behavior.
4. Call the effect class’s play() method.
The application in Listing 12.2 creates and plays customized
Fade effects to handle the hiding and
showing of a visual component.
LISTING 12.2
Defining and playing an effect with ActionScript
<?xml version=”1.0” encoding=”utf-8”?>
<s:Application xmlns:fx=”
xmlns:s=”library://ns.adobe.com/flex/spark”
xmlns:mx=”library://ns.adobe.com/flex/mx”>
<fx:Script>
<![CDATA[
import spark.effects.Fade;
private function showImage():void
{
var myFade:Fade = new Fade();
myFade.target = myImage;
myFade.alphaFrom = 0;
myFade.alphaTo = 1;
myFade.play();
}
private function hideImage():void
{
var myFade:Fade = new Fade();
myFade.target = myImage;
myFade.alphaFrom = 1;
myFade.alphaTo = 0;
myFade.play();
}
]]>
</fx:Script>
<s:BitmapImage id=”myImage” source=”@Embed(‘assets/flower1.jpg’)”
x=”150” y=”100”/>
<s:Button x=”150” y=”375” label=”Show Image” click=”showImage()”/>
<s:Button x=”374” y=”375” label=”Hide Image” click=”hideImage()”/>
</s:Application>
On the Web
The code in Listing 12.2 is available in the Web site files as PlayEffectWithAS.mxml in the chapter12
project.
n
18_488959-ch12.indd 37618_488959-ch12.indd 376 3/5/10 2:27 PM3/5/10 2:27 PM
Please purchase PDF Split-Merge on www.verypdf.com to remove this watermark.
Chapter 12: Controlling Animation and Working with Drag and Drop
377
Tip
Effect classes also have a targets property that takes an array of visual components. When you call the effect
class’s
play() method, the framework constructs one internal instance of the effect class for each target
object and then plays them all simultaneously.
n
Using the new Spark effects
In this section I describe the most commonly used new Spark effects.
Note
I do not describe the older MX effects extensively in this book. For more information on these older effect
classes, see the previous edition of this book, Flex 3 Bible (Wiley, 2008).
n
Using the Animate effect
Flex 4 has a new effect class named Animate that enables you to modify any number of proper-
ties, with any data types, over a period of time.
New Feature
The new Animate effect is designed to replace the Flex 3 AnimateProperty effect. In contrast to
AnimateProperty, which only worked with numeric properties, Animate can be used with properties that
use any data type.
n
You declare an instance of Animate with a motionPaths property consisting of an Array of
MotionPath instances. Each MotionPath object animates a single property, and includes a
keyframes property that in turn is an array of Keyframe instances. Each Keyframe defines a
moment in
time, set in milliseconds, and a new value for the named property.
The following
Animate object has a single MotionPath that moves an object across the screen
from left to right over the course of five seconds:
<s:Animate id=”myAnimation”>
<s:motionPaths>
<s:MotionPath property=”x”>
<s:keyframes>
<s:Keyframe time=”0” value=”0”/>
<s:Keyframe time=”5000” value=”800”/>
</s:keyframes>
</s:MotionPath>
</s:motionPaths>
</Animate>
Tip
You can simplify declarations of a MotionPath object by using its subclass SimpleMotionPath. This class
takes only
property and value settings and can be used when you don’t need to control animation over
multiple keyframes.
n
18_488959-ch12.indd 37718_488959-ch12.indd 377 3/5/10 2:27 PM3/5/10 2:27 PM
Please purchase PDF Split-Merge on www.verypdf.com to remove this watermark.
Part II: Designing Flex Applications
378
The application in Listing 12.3 causes a BitmapImage to change from so small that it’s invisible
to full size, and simultaneously move to a new position when the user clicks the button. Notice
that the
Image object’s scaleX and scaleY properties are initially set to 0 to make it invisible.
LISTING 12.3
Customizing animation with the Animate effect
<?xml version=”1.0” encoding=”utf-8”?>
<s:Application xmlns:fx=”
xmlns:s=”library://ns.adobe.com/flex/spark”
xmlns:mx=”library://ns.adobe.com/flex/mx”>
<fx:Declarations>
<s:Animate id=”myAnimation”>
<s:motionPaths>
<s:MotionPath property=”x”>
<s:keyframes>
<s:Keyframe time=”0” value=”0”/>
<s:Keyframe time=”1000” value=”{myButton.x-myImage.width-10}”/>
</s:keyframes>
</s:MotionPath>
<s:MotionPath property=”y”>
<s:keyframes>
<s:Keyframe time=”0” value=”0”/>
<s:Keyframe time=”1000” value=”{myButton.y-myImage.height-10}”/>
</s:keyframes>
</s:MotionPath>
<s:MotionPath property=”scaleX”>
<s:keyframes>
<s:Keyframe time=”0” value=”0”/>
<s:Keyframe time=”1000” value=”1”/>
</s:keyframes>
</s:MotionPath>
<s:MotionPath property=”scaleY”>
<s:keyframes>
<s:Keyframe time=”0” value=”0”/>
<s:Keyframe time=”1000” value=”1”/>
</s:keyframes>
</s:MotionPath>
</s:motionPaths>
</s:Animate>
</fx:Declarations>
<s:BitmapImage id=”myImage” source=”@Embed(‘assets/flower1.jpg’)”
scaleX=”0” scaleY=”0”/>
<s:Button id=”myButton” label=”Play Animation”
click=”myAnimation.play([myImage])”
bottom=”20” right=”20”/>
</s:Application>
18_488959-ch12.indd 37818_488959-ch12.indd 378 3/5/10 2:27 PM3/5/10 2:27 PM
Please purchase PDF Split-Merge on www.verypdf.com to remove this watermark.
Chapter 12: Controlling Animation and Working with Drag and Drop
379
On the Web
The code in Listing 12.3 is available in the Web site files as AnimateDemo.mxml in the chapter12 project.
n
Figure 12.2 shows the resulting animation.
FIGURE 12.2
An Animate effect in progress
Resulting animation
Using the Fade effect
The Fade effect, as used in Listing 12.2, changes a component’s transparency over time. It sup-
ports properties of
alphaFrom and alphaTo that can be used to control the direction and level
of change in the component’s visibility. The default values for these properties are
0 and 1, applied
to hide or show the target component.
The
Fade class implements a tweening effect that modifies the component’s transparency level
over a period of time. Whatever color or image is “behind” the target component shows through as
its transparency level is changed.
Cross-Reference
The application in Listing 12.1 illustrates a good example of the Fade effect.
n
Using the Move and Move3D effects
The Move and Move3D classes implement tweening effects that do what they say: they move the
component on the screen to and from specific pixel positions over a period of time. The
Move
effect supports properties of
xFrom, xTo, yFrom, and yTo that define the component’s position
18_488959-ch12.indd 37918_488959-ch12.indd 379 3/5/10 2:27 PM3/5/10 2:27 PM
Please purchase PDF Split-Merge on www.verypdf.com to remove this watermark.
Part II: Designing Flex Applications
380
at the beginning and end of the effect. The Move3D class is derived from Move and shares its
properties, and adds
zFrom and zTo properties to affect the object’s relative z-order. For both
effects, the object’s intermediate positions are then recalculated over the period of time defined by
the effect’s
duration property.
Note
The Move effect also supports properties names xBy and yBy that enable you to move an object a certain
number of horizontal and vertical pixels from its current position. The
Move3D effect supports a zBy property
that does the same thing for z-order.
n
When using the Move effect to show and hide controls, you typically create two instances of the
effect. The first, with coordinates placing the target object on screen, shows the object. The second,
with coordinates set to negative values or values greater than the width of the application or other
container, hides the object. Each defines specific starting and ending coordinates and is played
with the
play() method or in the context of a view state transition.
Caution
A Move effect’s target component should always be nested in a Group or other container with basic layout. If
the target component is nested in a container with vertical or horizontal layout and the container’s dimensions
change at runtime, the component’s position is recalculated based on the container’s layout rules.
n
The application in Listing 12.4 defines two Move effects that show and hide a target component by
moving it on and off the application stage. Notice that the component’s positions at the start and
end of the effect are either defined as specific coordinates or calculated based on the target compo-
nent’s dimensions.
LISTING 12.4
Using the Move effect
<?xml version=”1.0” encoding=”utf-8”?>
<s:Application xmlns:fx=”
xmlns:s=”library://ns.adobe.com/flex/spark”
xmlns:mx=”library://ns.adobe.com/flex/mx”>
<fx:Declarations>
<s:Move id=”moveOn”
xFrom=”{0-myImage.width}” xTo=”150”
yFrom=”{0-myImage.height}” yTo=”100”
duration=”2000”/>
<s:Move id=”moveOff”
xTo=”{0-myImage.width}” xFrom=”150”
yTo=”{0-myImage.height}” yFrom=”100”
duration=”2000”/>
</fx:Declarations>
<s:BitmapImage id=”myImage” source=”@Embed(‘assets/flower1.jpg’)”
x=”150” y=”100” />
<s:Button x=”150” y=”375” label=”Show Image”
18_488959-ch12.indd 38018_488959-ch12.indd 380 3/5/10 2:27 PM3/5/10 2:27 PM
Please purchase PDF Split-Merge on www.verypdf.com to remove this watermark.
Chapter 12: Controlling Animation and Working with Drag and Drop
381
click=”moveOn.play([myImage])”/>
<s:Button x=”374” y=”375” label=”Hide Image”
click=”moveOff.play([myImage])”/>
</s:Application>
On the Web
The code in Listing 12.4 is available in the Web site files as MoveDemo.mxml in the chapter12 project.
n
The Move3D effect can be used to combine vertical and horizontal movement with changes to the
object’s relative z-order or can be used to shrink and grow an object. The application in Listing
12.5 uses two
Move3D instances to grow and shrink an object. It has the same visual result as the
Flex 3 Zoom effect.
LISTING 12.5
Using the Move3D effect
<?xml version=”1.0” encoding=”utf-8”?>
<s:Application xmlns:fx=”
xmlns:s=”library://ns.adobe.com/flex/spark”
xmlns:mx=”library://ns.adobe.com/flex/mx”>
<fx:Declarations>
<s:Move3D id=”bigger” zBy=”-10000”/>
<s:Move3D id=”smaller” zBy=”10000”/>
</fx:Declarations>
<s:BitmapImage id=”myImage” source=”@Embed(‘assets/flower1.jpg’)”/>
<s:Button x=”150” y=”375” label=”Show Image”
click=”bigger.play([myImage])”/>
<s:Button x=”374” y=”375” label=”Hide Image”
click=”smaller.play([myImage])”/>
</s:Application>
On the Web
The code in Listing 12.5 is available in the Web site files as Move3DDemo.mxml in the chapter12 project.
n
Using the Rotate and Rotate3D effects
The Rotate and Rotate3D effects do what they say: they rotate an object in either two or three
dimensions.
The Rotate effect supports
angleFrom, angleTo, and angleBy properties to control the
direction and amount of rotation in two dimensions. It also includes a
Boolean autoCenter
Transform
property that, when set to true, changes the rotation axis from the object’s top-left
corner to its center.
18_488959-ch12.indd 38118_488959-ch12.indd 381 3/5/10 2:27 PM3/5/10 2:27 PM
Please purchase PDF Split-Merge on www.verypdf.com to remove this watermark.
Part II: Designing Flex Applications
382
The application in Listing 12.6 rotates an object once in a clockwise direction.
LISTING 12.6
Using the Rotate effect
<?xml version=”1.0” encoding=”utf-8”?>
<s:Application xmlns:fx=”
xmlns:s=”library://ns.adobe.com/flex/spark”
xmlns:mx=”library://ns.adobe.com/flex/mx”>
<fx:Declarations>
<s:Rotate id=”myRotate” angleBy=”360” autoCenterTransform=”true”/>
</fx:Declarations>
<s:BitmapImage id=”myImage” source=”@Embed(‘assets/flower1.jpg’)”
x=”150” y=”100” />
<s:Button x=”270” y=”349” label=”Rotate”
click=”myRotate.play([myImage])”/>
</s:Application>
On the Web
The code in Listing 12.6 is available in the Web site files as RotateDemo.mxml in the chapter12 project.
n
The Rotate3D effect takes advantage of Flash Player 10’s 3D capabilities and enables you to
program multidimensional visual effects. It supports
angleXFrom, angleXTo, angleYFrom,
angleYTo, angleZFrom, and angleZTo properties to control each dimension individually. As
with the
Rotate effect, it supports a Boolean autoCenterTransform property that, when set
to
true, changes the rotation axis from the object’s top-left corner to its center.
The application in Listing 12.7 rotates an object 360 degrees on all three axes over the course of
two seconds.
LISTING 12.7
Using the Rotate3D effect
<?xml version=”1.0” encoding=”utf-8”?>
<s:Application xmlns:fx=”
xmlns:s=”library://ns.adobe.com/flex/spark”
xmlns:mx=”library://ns.adobe.com/flex/mx”>
<fx:Declarations>
<s:Rotate3D id=”myRotate”
angleXFrom=”0” angleXTo=”360”
angleYFrom=”0” angleYTo=”360”
angleZFrom=”0” angleZTo=”360”
18_488959-ch12.indd 38218_488959-ch12.indd 382 3/5/10 2:27 PM3/5/10 2:27 PM
Please purchase PDF Split-Merge on www.verypdf.com to remove this watermark.
Chapter 12: Controlling Animation and Working with Drag and Drop
383
autoCenterTransform=”true”
duration=”2000”/>
</fx:Declarations>
<s:BitmapImage id=”myImage” source=”@Embed(‘assets/flower1.jpg’)”
x=”150” y=”100” />
<s:Button x=”270” y=”349” label=”Rotate”
click=”myRotate.play([myImage])”/>
</s:Application>
On the Web
The code in Listing 12.7 is available in the Web site files as Rotate3DDemo.mxml in the chapter12 project.
n
Figure 12.3 shows the resulting visual display with the object being rotated in all three dimensions.
FIGURE 12.3
An object being rotated in three dimensions
Using composite effects
A composite effect plays two or more effects either simultaneously or consecutively. The Flex
framework has two composite effects:
l
The Parallel effect. This effect plays two or more effects at the same time.
l
The Sequence effect. This effect plays two or more effects consecutively, with each
effect starting after the previous effect has finished.
Both
Parallel and Sequence effects can be declared in either MXML or ActionScript and can
nest as many child effects, simple or composite, as you need to get the desired visual result.
18_488959-ch12.indd 38318_488959-ch12.indd 383 3/5/10 2:27 PM3/5/10 2:27 PM
Please purchase PDF Split-Merge on www.verypdf.com to remove this watermark.
Part II: Designing Flex Applications
384
Using Parallel effects
To create a Parallel effect in MXML, declare an <mx:Parallel> tag set and assign a unique
id. Then, within the tag set, nest two or more effects that you want to play simultaneously:
<s:Parallel id=”myParallelEffect”>
effect 1
effect 2
etc
</s:Parallel>
The effects defined with the <s:Parallel> tag set don’t need unique id properties because the
entire effect is played either through association with a target component trigger or by an explicit
call to the
Parallel class’s play() method.
The application in Listing 12.8 defines
Parallel effects that include Move and Rotate nested
effects. The visual result is an object that appears to roll on and off the application stage. Notice
that the
Rotate effect in the second Parallel has its angleFrom set to 360 and angleTo set
to
0. The result is a counterclockwise rotation.
LISTING 12.8
Using a Parallel effect
<?xml version=”1.0” encoding=”utf-8”?>
<s:Application xmlns:fx=”
xmlns:s=”library://ns.adobe.com/flex/spark”
xmlns:mx=”library://ns.adobe.com/flex/mx” >
<fx:Declarations>
<s:Parallel id=”moveOn” target=”{imageWrapper}”>
<s:Move
xFrom=”{0-imageWrapper.width}” xTo=”150”
yFrom=”100” yTo=”100”/>
<s:Rotate angleFrom=”0” angleTo=”360”/>
</s:Parallel>
<s:Parallel id=”moveOff” target=”{imageWrapper}”>
<s:Move
xTo=”{0-imageWrapper.width}” xFrom=”150”
yFrom=”100” yTo=”100”/>
<s:Rotate angleFrom=”360” angleTo=”0”/>
</s:Parallel>
</fx:Declarations>
<s:Group id=”imageWrapper” x=”150” y=”100”
showEffect=”{moveOn}” hideEffect=”{moveOff}”>
<s:BitmapImage source=”@Embed(‘assets/flower1.jpg’)” />
</s:Group>
<s:Button x=”150” y=”375” label=”Show Image”
click=”moveOn.play()”/>
18_488959-ch12.indd 38418_488959-ch12.indd 384 3/5/10 2:27 PM3/5/10 2:27 PM
Please purchase PDF Split-Merge on www.verypdf.com to remove this watermark.
Chapter 12: Controlling Animation and Working with Drag and Drop
385
<s:Button x=”374” y=”375” label=”Hide Image”
click=”moveOff.play()”/>
</s:Application>
On the Web
The code in Listing 12.8 is available in the Web site files as ParallelDemo.mxml in the chapter12 project.
n
Tip
The Parallel and Sequence effects are part of the older MX effects system and can’t operate directly on a
Spark primitive object such as
BitmapImage. The applications in Listing 12.8 and Listing 12.9 solve this by
wrapping the
BitmapImage inside a Spark Group, which automatically sizes itself to contain and display the
image. Because
Group is derived from UIComponent, it can be animated by the MX effect.
n
Note
The Parallel, Sequence, and Pause classes are members of the mx.effects package. As a convenience,
the Flex 4 MXML compiler allows you to refer to them with either the MX or Spark namespace prefixes. In the
codes samples in this chapter, I use the Spark namespace prefix, as in
<s:Parallel/>, but the underlying
ActionScript class is the same as if I used
<mx:Parallel/>.
n
Using Sequence effects
The Sequence effect plays two or more nested effects consecutively. In this code, a Sequence
wraps two
Move effects. The first nested effect moves the target object horizontally, and the second
moves it vertically:
<s:Sequence id=”moveOn” target=”{myImage}”>
<s:Move
xFrom=”{0-myImage.width}” xTo=”150”
yFrom=”0” yTo=”0”/>
<s:Move yTo=”100”/>
</s:Sequence>
Sometimes when using a Sequence, you want to create a delay between effects. The Pause effect
is designed explicitly for this purpose: You add a
Pause between other nested effects with a dura-
tion indicating how long the delay should be in milliseconds. This version of the
Sequence plays
the same set of
Move effects, but it adds a one-second delay between them:
<s:Sequence id=”moveOn” target=”{myImage}”>
<s:Move
xFrom=”{0-myImage.width}” xTo=”150”
yFrom=”0” yTo=”0”/>
<s:Pause duration=”1000”/>
<s:Move yTo=”100”/>
</s:Sequence>
18_488959-ch12.indd 38518_488959-ch12.indd 385 3/5/10 2:27 PM3/5/10 2:27 PM
Please purchase PDF Split-Merge on www.verypdf.com to remove this watermark.
Part II: Designing Flex Applications
386
A Sequence effect can nest any number of child effects, enabling you to choreograph objects on
the screen in sometimes elaborate ways. The application in Listing 12.9 causes an image to
“bounce” across the screen with multiple
Move effects nested within a Sequence. Notice that the
Sequence effect handles its effectEnd event by placing the image back in its original starting
position.
LISTING 12.9
An application with a Sequence effect
<?xml version=”1.0” encoding=”utf-8”?>
<s:Application xmlns:fx=”
xmlns:s=”library://ns.adobe.com/flex/spark”
xmlns:mx=”library://ns.adobe.com/flex/mx” >
<fx:Script>
<![CDATA[
[Bindable]
private var stageWidth:Number;
[Bindable]
private var stageHeight:Number;
private function bounce():void
{
stageHeight = stage.height;
stageWidth = stage.width;
trace(stageHeight + “, “ + stageWidth);
bouncingBall.play();
}
private function replaceBall():void
{
myImage.x = 0;
myImage.y = 0;
}
]]>
</fx:Script>
<fx:Declarations>
<s:Sequence id=”bouncingBall” target=”{myImage}”
effectEnd=”replaceBall()”>
<s:Move xTo=”{stageWidth/5}” yTo=”{stageHeight-myImage.height}”/>
<s:Move xTo=”{stageWidth/5*2}” yTo=”{stageHeight-myImage.height*4}”/>
<s:Move xTo=”{stageWidth/5*3}” yTo=”{stageHeight-myImage.height}”/>
<s:Move xTo=”{stageWidth/5*4}” yTo=”{stageHeight-myImage.height*3}”/>
<s:Move xTo=”{stageWidth}” yTo=”{stageHeight-myImage.height}”/>
</s:Sequence>
</fx:Declarations>
<s:BitmapImage id=”myImage” source=”@Embed(‘assets/ball.png’)”/>
<s:Button label=”Bounce Ball” click=”bounce()” right=”10” bottom=”10”/>
</s:Application>
18_488959-ch12.indd 38618_488959-ch12.indd 386 3/5/10 2:27 PM3/5/10 2:27 PM
Please purchase PDF Split-Merge on www.verypdf.com to remove this watermark.
Chapter 12: Controlling Animation and Working with Drag and Drop
387
On the Web
The code in Listing 12.9 is available in the Web site files as SequenceDemo.mxml in the chapter12 project.
n
Using easing classes
An easing class enables you to modify the behavior of an event that transforms a component on the
screen. By default, an effect transforms an object with a linear timeline. For example, a
Move effect
changes an object’s position on the screen with constant speed and motion. An easing class enables
you to redefine the object’s movement mathematically and modify its rate of change so that, for
example, it appears to speed up as it moves closer to its endpoint.
The Flex SDK includes a set of easing objects in the
spark.effects.easing package, each of
which modifies the rate of object transformation in a different way. The
Sine class, for example, can
be used with a
Move effect to cause the object to decelerate as it reaches its destination.
You use easing classes by creating an instance of the desired class and assigning it to the effect’s
easer property. You can either use the pre-built easing classes in the Flex SDK or you can define
and use your own custom classes.
To use a pre-built easing class, declare an instance of the class in the
<fx:Declarations> sec-
tion of the MXML document. This declares an instance of the
Bounce class:
<s:Bounce id=”myBounce”/>
Then assign the easing object to the easer property of the effect class:
<s:Move id=”myMove”
yFrom=”20” yTo=”748”
duration=”2000”
easer=”{myBounce}”/>
The application in Listing 12.10 uses the Bounce easer class to cause the BitmapImage control
to bounce as it drops onto a platform (created as an FXG graphic).
LISTING 12.10
Using an easing class
<?xml version=”1.0” encoding=”utf-8”?>
<s:Application xmlns:fx=”
xmlns:s=”library://ns.adobe.com/flex/spark”
xmlns:mx=”library://ns.adobe.com/flex/mx”>
<fx:Script>
<![CDATA[
protected function button1_clickHandler(event:MouseEvent):void
{
myMove.yTo=platform.y-myImage.height;
continued
18_488959-ch12.indd 38718_488959-ch12.indd 387 3/5/10 2:27 PM3/5/10 2:27 PM
Please purchase PDF Split-Merge on www.verypdf.com to remove this watermark.
Part II: Designing Flex Applications
388
LISTING 12.10
(continued)
myMove.play([myImage])
}
]]>
</fx:Script>
<fx:Declarations>
<s:Bounce id=”myBounce”/>
<s:Move id=”myMove”
yFrom=”20” yTo=”748”
duration=”2000”
easer=”{myBounce}”/>
</fx:Declarations>
<s:BitmapImage id=”myImage” source=”@Embed(‘assets/ball.png’)”
horizontalCenter=”0” y=”20”/>
<mx:Button label=”Bounce Ball”
click=”button1_clickHandler(event)”
right=”10” bottom=”10”/>
<s:Rect id=”platform” width=”200” height=”75”
horizontalCenter=”0” bottom=”0”>
<s:fill>
<mx:SolidColor color=”#666666”/>
</s:fill>
</s:Rect>
</s:Application>
On the Web
The code in Listing 12.10 is available in the Web site files as EasingDemo.mxml in the chapter12 project.
n
Using Drag-and-Drop Operations
Drag-and-drop interfaces enable users to give instructions to an application with simple mouse
gestures. Pointing to an object that a person wants to manipulate is the most human of gestures,
and grabbing and moving an object to change its current state is how we interact with the physical
world in nearly every waking minute. The mouse turns that intuitive action into a computer
instruction that graphical applications can interpret as needed.
Drag-and-drop operations can be created to visually represent various software operations:
l
Selecting data
l
Moving data from one location to another
l
Deleting data
l
Managing data relationships
l
Modifying structures of information
18_488959-ch12.indd 38818_488959-ch12.indd 388 3/5/10 2:27 PM3/5/10 2:27 PM
Please purchase PDF Split-Merge on www.verypdf.com to remove this watermark.
Chapter 12: Controlling Animation and Working with Drag and Drop
389
As the designer and developer of a Flex application, you must select or create the drag-and-drop
architecture that makes your interface the easiest to use.
Flex applications can implement drag-and-drop operations with two different approaches:
l
The MX and Spark List controls and the MX DataGrid have built-in drag-and-drop
capability.
l
All visual controls can participate in drag-and-drop operations through a set of classes and
events specifically designed for this purpose.
Note
Desktop applications deployed with Adobe AIR support native drag-and-drop, which enables the application
user to move data, file references, and binary objects between Flex applications and other native applications
with drag-and-drop gestures.
n
Implementing drag-and-drop with List controls
All the MX and Spark List controls in the Flex SDK have built-in support for drag-and-drop
operations. These controls include:
l
List (both the MX and Spark versions)
l
ComboBox
l
DataGrid
l
TitleList
l
HorizontalList
l
Tree
Each control supports a set of properties that turn on and control drag-and-drop operations:
l
dragEnabled. This Boolean property, when set to true, enables a user to select one
or more items from a
List control and drag it or them (and underlying data) to another
visual control in the application.
l
dragMoveEnabled. This Boolean property, when set to true along with dragEnabled,
causes items dragged from a
List control be removed from the initiating control’s data
provider. This property also enables users to reorder data in a control’s
dataProvider if
the control’s
dropEnabled property is set to true.
l
dropEnabled. This Boolean property, when set to true, enables a List control to
accept a drop operation. When the user completes the operation, the target object adds
the operation’s underlying data to its data provider. If the initiating object’s
drag-
MoveEnabled
property is set to true, the items that were dropped in the target object
are removed from the initiating object’s data source; otherwise, the initiating object’s data
provider is left in its current state.
18_488959-ch12.indd 38918_488959-ch12.indd 389 3/5/10 2:27 PM3/5/10 2:27 PM
Please purchase PDF Split-Merge on www.verypdf.com to remove this watermark.
Part II: Designing Flex Applications
390
Caution
Setting dragMoveEnabled to true without also setting dragEnabled to true has no effect on the appli-
cation. You must set
dragEnabled to true to initiate a List-based drag-and-drop operation.
n
The following code creates a List control and a DataGrid control. The List control can initiate
a drag-and-drop operation, and the
DataGrid can accept the dropped data:
<s:List dataProvider=”{myData}” dragEnabled=”true”/>
<mx:DataGrid dropEnabled=”true”>
Because the DataGrid control’s dragMoveEnabled property isn’t set to true, any objects
dragged to the
DataGrid are still displayed in the List after the operation is completed.
The application in Listing 12.11 uses
List and DataGrid controls. Notice these features of the
sample application:
l
As the List row is dragged, an image of the row is generated and displayed as a
visual indicator that the drag-and-drop operation is active. This image is known as the
drag proxy.
l
The drag proxy initially includes a white X in a red circle, indicating that the
operation can’t be completed yet. When the cursor moves over the target control with
dropEnabled set to true, the white X and red circle disappear, indicating to the user
that the operation can be completed.
l
The DataGrid control’s dragMoveEnabled property is set to true, so the data is
added to the DataGrid and removed from the initiating List when the operation is
completed.
LISTING 12.11
Using a List-based drag-and-drop operation
<?xml version=”1.0” encoding=”utf-8”?>
<s:Application xmlns:fx=”
xmlns:s=”library://ns.adobe.com/flex/spark”
xmlns:mx=”library://ns.adobe.com/flex/mx”
xmlns:views=”views.*”>
<s:layout>
<s:VerticalLayout horizontalAlign=”center” paddingTop=”20”/>
</s:layout>
<fx:Script>
<![CDATA[
import utilities.FormatUtilities;
]]>
</fx:Script>
<fx:Declarations>
<s:ArrayCollection id=”acBooks” source=”{bookModel.book}”/>
<fx:Model id=”bookModel” source=”model/books.xml”/>
</fx:Declarations>
18_488959-ch12.indd 39018_488959-ch12.indd 390 3/5/10 2:27 PM3/5/10 2:27 PM
Please purchase PDF Split-Merge on www.verypdf.com to remove this watermark.
Chapter 12: Controlling Animation and Working with Drag and Drop
391
<fx:Style source=”assets/styles.css”/>
<views:Header width=”{content.width}”/>
<s:HGroup id=”content”>
<s:Panel id=”catalogPanel” title=”Catalog”>
<s:List dataProvider=”{acBooks}” labelField=”title”
height=”300” width=”200”
dragEnabled=”true”
dragMoveEnabled=”true”/>
</s:Panel>
<s:Panel title=”Shopping Cart” height=”{catalogPanel.height}”
width=”100%”>
<mx:DataGrid id=”cart” width=”100%” height=”100%” dropEnabled=”true”>
<mx:columns>
<mx:DataGridColumn dataField=”title” headerText=”Title”
width=”300”/>
<mx:DataGridColumn dataField=”price” headerText=”Price”
labelFunction=”FormatUtilities.currencyFormat”
textAlign=”right”/>
</mx:columns>
</mx:DataGrid>
</s:Panel>
</s:HGroup>
</s:Application>
</s:Application>
On the Web
The code in Listing 12.11 is available in the Web site files as ListDragAndDrop.mxml in the chapter12
project.
n
Figure 12.4 shows the drag-and-drop operation in action.
Implementing custom drag-and-drop operations
You also can implement drag-and-drop operations manually using a set of classes and events spe-
cifically designed for the purpose. The most critical tools for this job are these ActionScript classes:
l
DragSource. This class contains data and formatting information and serves a messaging
envelope containing the data you want to move.
l
DragManager. This class initiates and manages drag-and-drop operations containing
whatever data you want the user to move in the application.
Initiating a drag-and-drop operation
The DragSource and DragManager classes are members, respectively, of the mx.core and
mx.managers packages and must be imported before use:
import mx.core.DragSource;
import mx.managers.DragManager;
18_488959-ch12.indd 39118_488959-ch12.indd 391 3/5/10 2:27 PM3/5/10 2:27 PM
Please purchase PDF Split-Merge on www.verypdf.com to remove this watermark.
Part II: Designing Flex Applications
392
FIGURE 12.4
When a user drags an object into a List control that has dropEnabled set to true, the placement of
the data in the target control’s data provider is indicated by a horizontal line that appears near the mouse
cursor’s location.
Note
Custom drag-and-drop operations can be initiated upon any mouse event; they are typically initiated upon a
mouseDown event (which indicates that the user has pressed the mouse button but hasn’t yet released it).
n
To initiate a custom drag-and-drop operation, follow these steps:
1. Create an instance of the DragSource class with its no-arguments constructor method.
2. Populate the DragSource class with data by calling its addData() method.
3. Call the static method DragManager.doDrag() to start the drag-and-drop operation.
In the following code, a
mouseDown event on a DataGroup control is handled with a call to a
custom method that will initiate the drag-and-drop operation:
<s:DataGroup id=”myDataGroup”
width=”600”
dataProvider=”{acBooks}”
itemRenderer=”views.BookRenderer”
mouseDown=”initiateDrag(event)”>
The custom initiateDrag() method starts by creating a DragSource object and filling it with
data with a call to the
addData() method. DragSource.addData() has two required arguments:
l
A reference to the data that’s being moved
l
A string that identifies the format of the data
18_488959-ch12.indd 39218_488959-ch12.indd 392 3/5/10 2:27 PM3/5/10 2:27 PM
Please purchase PDF Split-Merge on www.verypdf.com to remove this watermark.
Chapter 12: Controlling Animation and Working with Drag and Drop
393
Note
When you initiate a drag-and-drop operation with a List control with dragEnabled set to true, the name
of the
format is always items.
n
In the following method, the expression event.target.data returns a reference to the initiat-
ing object’s underlying data.
Note
The code in the initiateDrag() function is wrapped in a conditional block that checks to be sure the
mouseDown event was handled for the DataGroup control’s item renderer, rather than for any of the visual
objects inside the group.
n
The bookItem format is an arbitrary string that identifies the type of data being moved. The
doDrag() method receives three required arguments: a reference to the visual component that
initiated the operation, the
DragSource object containing the data, and a reference to the
MouseEvent object that was passed into the current method:
private function initiateDrag(event:MouseEvent):void
{
if (event.target is ItemRenderer)
{
var source:DragSource = new DragSource();
var itemData:Object = event.target.data;
source.addData(itemData,”bookItem”);
DragManager.doDrag(event.target as UIComponent, source, event,
bookProxy, 20, 20, 1);
}
}
Tip
You can call the DragSource class’s addData() method multiple times to pass data in as many formats as
you need. This is analogous to a clipboard operation, where data might be shared between applications in mul-
tiple formats through a copy-and-paste operation, but only formats that are common to the source and the tar-
get applications are used at any given time.
n
Creating a proxy image
A proxy image is displayed during a drag-and-drop operation as a visual indicator of the type or
content of the data being moved. When you initiate drag-and-drop with List controls, the drag
proxy image is created dynamically from the current screen display. For custom drag-and-drop
operations, you’re responsible for providing the drag proxy image.
Note
If you don’t provide a drag proxy image for a custom drag operation, a blank, partially transparent rectangle is
created by the framework of the same shape and dimension as the object that initiates the operation. While
this can work okay, the visual result is bland and uninformative.
n
18_488959-ch12.indd 39318_488959-ch12.indd 393 3/5/10 2:27 PM3/5/10 2:27 PM
Please purchase PDF Split-Merge on www.verypdf.com to remove this watermark.
Part II: Designing Flex Applications
394
Drag proxy images should be embedded in the application for the best possible performance.
Follow these two steps for this part of the process:
1. Embed a graphic using the [Embed] metadata tag, and assign it a Class variable
name.
2. Instantiate a BitMapAsset object wrapped around a new instance of the embedded
image Class.
Note
A class used as a proxy image must implement the IFlexDisplayObject interface. Classes that can be used
for this purpose include
BitmapAsset, ButtonAsset, MovieClipAsset, MovieClipLoaderAsset,
ProgrammaticSkin, SpriteAsset, SystemManager, TextFieldAsset, and UIComponent.
n
The following code embeds an image and wraps it in a BitMapAsset object that’s suitable for use
as a proxy image:
[Embed(source=”assets/book.png”)]
private var bookImage:Class;
private var bookProxy:BitmapAsset = BitmapAsset(new bookImage());
You cast the instance of the proxy image class as BitMapAsset to fulfill the requirement that the
proxy image object implements
IFlexDisplayObject interface.
To use the proxy image in a drag-and-drop operation, pass the proxy object as the fourth argument
in the call to
DragManager.doDrag():
DragManager.doDrag(event.target as UIComponent, source,
event, bookProxy);
You also can control the position of the drag proxy image relative to the cursor position and the
image’s level of transparency. The
doDrag() method’s fifth and sixth arguments, xOffset and
yOffset, determine the image’s horizontal and vertical relative position, and the seventh argu-
ment,
imageAlpha, determines the amount of transparency. This code uses the same proxy
image but ensures that it’s fully opaque and positioned to the top and left of the cursor:
DragManager.doDrag(event.target as UIComponent, source, event,
bookProxy, 20, 20, 1);
Note
Positive offset values for the proxy image place the image above and to the left of the cursor, while negative
values place it below and to the right.
n
Handling the dragEnter event
A target control, located where the data will be dropped, detects a drag-and-drop operation by
listening for the
dragEnter event. When the mouse cursor moves over the target object, this
18_488959-ch12.indd 39418_488959-ch12.indd 394 3/5/10 2:27 PM3/5/10 2:27 PM
Please purchase PDF Split-Merge on www.verypdf.com to remove this watermark.
Chapter 12: Controlling Animation and Working with Drag and Drop
395
event generates a DragEvent object. The DragEvent class has a dragSource property that
references the
DragSource object that contains the operation’s underlying data.
The first step in handling the
dragEnter event is to determine whether the operation contains data
in a format you can deal with in the current context. You do this by calling the
DragSource class’s
hasFormat() method and passing in a format string you can handle. If the selected format exists in
the drag source, you then accept the operation by calling
DragManager.acceptDragDrop()
and passing in a reference to the object that accepts the operation.
This code detects a particular drag format and accepts the operation:
private function dragEnterHandler(event:DragEvent):void
{
if (event.dragSource.hasFormat(“bookItem”))
{
DragManager.acceptDragDrop(event.target as UIComponent);
}
}
When you call acceptDragDrop(), the red icon with the white X on the proxy image disap-
pears, indicating to the user that the data is ready to be dropped.
Handling the dragDrop event
When the user drops the data over an object that has already accepted the operation (as described
in the preceding section), the object dispatches a
dragDrop event. This event also generates a
DragEvent object. In addition to the dragSource property described previously, this object
also has a
dragInitiator property that references the object that initiated the operation.
The
DragSource class has a method named dataForFormat(). To retrieve data that should be
acted upon, call the method and pass in the format of the data you want:
var dragData:Object = event.dragSource.dataForFormat(“bookItem”);
After you have a reference to the dropped data, you can manipulate it in a database, move it to
other data buckets in the application, or simply remove it. The following code handles the drag-
and-drop operation by first getting references to data through the initiating object’s underlying
data object and then removing the underlying data from the
DataGroup control’s data provider:
private function dragDropHandler(event:DragEvent):void
{
var dragData:Object = event.dragSource.dataForFormat(“bookItem”);
var itemIndex:int = acBooks.getItemIndex(dragData);
var bookTitle:String = dragData.title;
acBooks.removeItemAt(itemIndex);
Alert.show(“Book deleted: “ + bookTitle, “Deleted!”);
}
The application in Listing 12.12 uses a custom drag-and-drop operation to enable a user to delete
data using a trash can icon.
18_488959-ch12.indd 39518_488959-ch12.indd 395 3/5/10 2:27 PM3/5/10 2:27 PM
Please purchase PDF Split-Merge on www.verypdf.com to remove this watermark.