Tài liệu Getting Started with MakerBot pptx
Bạn đang xem bản rút gọn của tài liệu. Xem và tải ngay bản đầy đủ của tài liệu tại đây (25.69 MB, 227 trang )
www.it-ebooks.info
www.it-ebooks.info
Getting
Started with
MakerBot
Bre Pettis, Anna Kaziunas
France, and Jay Shergill
www.it-ebooks.info
ISBN: 978-1-449-33865-7
LSI
Getting Started with MakerBot
by Bre Pettis, Anna Kaziunas France, and Jay Shergill
Copyright © 2013 Bre Pettis. All rights reserved.
Printed in the United States of America.
Published by O’Reilly Media, Inc., 1005 Gravenstein Highway North, Sebastopol, CA 95472.
O’Reilly books may be purchased for educational, business, or sales promotional use. Online
editions are also available for most titles (). For more infor-
mation, contact our corporate/institutional sales department: 800-998-9938 or
Editor: Brian Jepson
Production Editor: Kristen Borg
Technical Editors: Jenny Lawton, Anthony Moschella, and Justin Day
Cover Designer: Randy Comer
Interior Designer: Ron Bilodeau and Edie Freedman
Illustrator: Marc de Vinck
December 2012:
First Edition
Revision History for the First Edition:
2012-12-07 First release
See for release details.
Nutshell Handbook, the Nutshell Handbook logo, and the O’Reilly logo are registered trade-
marks of O’Reilly Media, Inc. and related trade dress are trademarks of O’Reilly Media, Inc.
Many of the designations used by manufacturers and sellers to distinguish their products
are claimed as trademarks. Where those designations appear in this book, and O’Reilly Me-
dia, Inc., was aware of a trademark claim, the designations have been printed in caps or initial
caps.
While every precaution has been taken in the preparation of this book, the publisher and
authors assume no responsibility for errors or omissions, or for damages resulting from the
use of the information contained herein.
www.it-ebooks.info
Contents
Preface. . . . . . . . . . . . . . . . . . . . . . . . . . . . . . . . . . . . . . . . . . . . . . . . . . . . . . . . . . . vii
1/Introduction. . . . . . . . . . . . . . . . . . . . . . . . . . . . . . . . . . . . . . . . . . . . . . . . . . . . . 1
How Does a MakerBot Work?. . . . . . . . . . . . . . . . . . . . . . . . . . . . . . . . . . . . . . . . . 1
The MakerBot Cupcake CNC, Thing-O-Matic, and Replicator Series. . . . . . . . . . 2
What Can a MakerBot Make?. . . . . . . . . . . . . . . . . . . . . . . . . . . . . . . . . . . . . . . . . 3
2/
The House That MakerBot Built. . . . . . . . . . . . . . . . . . . . . . . . . . . . . . . . . . . . . 5
Make a Better Mousetrap: Inventing Things with a MakerBot. . . . . . . . . . . . . . . . 6
No, Really, Make a Better Mousetrap. . . . . . . . . . . . . . . . . . . . . . . . . . . . . . . . . 7
With This Thing, I Thee…. . . . . . . . . . . . . . . . . . . . . . . . . . . . . . . . . . . . . . . . . . . 8
MakerBot in the Bathroom. . . . . . . . . . . . . . . . . . . . . . . . . . . . . . . . . . . . . . . . . 9
MakerBot in the Kitchen. . . . . . . . . . . . . . . . . . . . . . . . . . . . . . . . . . . . . . . . . . 10
Close the Door/Open the Door. . . . . . . . . . . . . . . . . . . . . . . . . . . . . . . . . . . . . 12
Project Shellter. . . . . . . . . . . . . . . . . . . . . . . . . . . . . . . . . . . . . . . . . . . . . . . . . 14
Your MakerBot-Enabled Closeup. . . . . . . . . . . . . . . . . . . . . . . . . . . . . . . . . . . 15
Bounce Back From a Bear Attack. . . . . . . . . . . . . . . . . . . . . . . . . . . . . . . . . . . 18
Moving Physical Objects into the Thingiverse. . . . . . . . . . . . . . . . . . . . . . . . . . . 19
What Will You Make?. . . . . . . . . . . . . . . . . . . . . . . . . . . . . . . . . . . . . . . . . . . . . . . 20
3/
Growing Up with MakerBot. . . . . . . . . . . . . . . . . . . . . . . . . . . . . . . . . . . . . . . 23
MakerBot Heroes. . . . . . . . . . . . . . . . . . . . . . . . . . . . . . . . . . . . . . . . . . . . . . . . . . 23
MakerBots in the Classroom. . . . . . . . . . . . . . . . . . . . . . . . . . . . . . . . . . . . . . . 28
Middle School Technology Club MakerBot Build. . . . . . . . . . . . . . . . . . . . . . . 30
First MakerBot Projects for Kids. . . . . . . . . . . . . . . . . . . . . . . . . . . . . . . . . . . . . . 30
4/
Before You Get a MakerBot. . . . . . . . . . . . . . . . . . . . . . . . . . . . . . . . . . . . . . . . 33
Think About What You Will Replicate. . . . . . . . . . . . . . . . . . . . . . . . . . . . . . . . . . 33
Connect with the MakerBot Community. . . . . . . . . . . . . . . . . . . . . . . . . . . . . . . 35
Become Familiar with the Necessary Software. . . . . . . . . . . . . . . . . . . . . . . . 35
Prepare Your Home. . . . . . . . . . . . . . . . . . . . . . . . . . . . . . . . . . . . . . . . . . . . . . . . 36
Prepare an Area for Your Bot. . . . . . . . . . . . . . . . . . . . . . . . . . . . . . . . . . . . . . . 36
iii
www.it-ebooks.info
Social Implications. . . . . . . . . . . . . . . . . . . . . . . . . . . . . . . . . . . . . . . . . . . . . . 36
5/Meet the MakerBot Replicator 2. . . . . . . . . . . . . . . . . . . . . . . . . . . . . . . . . . . . 39
Capabilities. . . . . . . . . . . . . . . . . . . . . . . . . . . . . . . . . . . . . . . . . . . . . . . . . . . . . . 39
Facts and Figures. . . . . . . . . . . . . . . . . . . . . . . . . . . . . . . . . . . . . . . . . . . . . . . . . . 39
The Frame. . . . . . . . . . . . . . . . . . . . . . . . . . . . . . . . . . . . . . . . . . . . . . . . . . . . . . . 42
The Gantry. . . . . . . . . . . . . . . . . . . . . . . . . . . . . . . . . . . . . . . . . . . . . . . . . . . . . 44
The Extruder. . . . . . . . . . . . . . . . . . . . . . . . . . . . . . . . . . . . . . . . . . . . . . . . . . . . . 46
The Electronics. . . . . . . . . . . . . . . . . . . . . . . . . . . . . . . . . . . . . . . . . . . . . . . . . . . 46
Evolution of the MakerBot Design. . . . . . . . . . . . . . . . . . . . . . . . . . . . . . . . . . . 47
6/Getting Started Printing. . . . . . . . . . . . . . . . . . . . . . . . . . . . . . . . . . . . . . . . . . 49
The LCD Panel. . . . . . . . . . . . . . . . . . . . . . . . . . . . . . . . . . . . . . . . . . . . . . . . . . . . 50
Leveling Your Build Platform. . . . . . . . . . . . . . . . . . . . . . . . . . . . . . . . . . . . . . . . . 51
The Leveling Process. . . . . . . . . . . . . . . . . . . . . . . . . . . . . . . . . . . . . . . . . . . . . 52
Loading Filament into the Extruder. . . . . . . . . . . . . . . . . . . . . . . . . . . . . . . . . . . . 54
Your First Prints. . . . . . . . . . . . . . . . . . . . . . . . . . . . . . . . . . . . . . . . . . . . . . . . . . . 61
Making from MakerWare. . . . . . . . . . . . . . . . . . . . . . . . . . . . . . . . . . . . . . . . . . . . 62
Installing MakerWare. . . . . . . . . . . . . . . . . . . . . . . . . . . . . . . . . . . . . . . . . . . . . 62
Thingiverse to Thing. . . . . . . . . . . . . . . . . . . . . . . . . . . . . . . . . . . . . . . . . . . . . 63
Making the Object in MakerWare. . . . . . . . . . . . . . . . . . . . . . . . . . . . . . . . . . . 66
Advanced Settings. . . . . . . . . . . . . . . . . . . . . . . . . . . . . . . . . . . . . . . . . . . . . . . 70
Troubleshooting. . . . . . . . . . . . . . . . . . . . . . . . . . . . . . . . . . . . . . . . . . . . . . . . . . . 72
Maintenance. . . . . . . . . . . . . . . . . . . . . . . . . . . . . . . . . . . . . . . . . . . . . . . . . . . . . 73
7/
Your First 10 Things to MakerBot. . . . . . . . . . . . . . . . . . . . . . . . . . . . . . . . . . 75
Hello, World. . . . . . . . . . . . . . . . . . . . . . . . . . . . . . . . . . . . . . . . . . . . . . . . . . . . . . 75
Getting a Little More Fancy. . . . . . . . . . . . . . . . . . . . . . . . . . . . . . . . . . . . . . . . . . 76
Something Tall. . . . . . . . . . . . . . . . . . . . . . . . . . . . . . . . . . . . . . . . . . . . . . . . . . . . 76
A Little Something for Your Bot. . . . . . . . . . . . . . . . . . . . . . . . . . . . . . . . . . . . . . . 77
Multi-Part Printing, Part 1. . . . . . . . . . . . . . . . . . . . . . . . . . . . . . . . . . . . . . . . . . . 78
Multi-Part Printing, Part 2. . . . . . . . . . . . . . . . . . . . . . . . . . . . . . . . . . . . . . . . . . . 78
Overhangs. . . . . . . . . . . . . . . . . . . . . . . . . . . . . . . . . . . . . . . . . . . . . . . . . . . . . . . 79
Your Own Personal Army. . . . . . . . . . . . . . . . . . . . . . . . . . . . . . . . . . . . . . . . . . . . 80
A Parametric Model. . . . . . . . . . . . . . . . . . . . . . . . . . . . . . . . . . . . . . . . . . . . . . . . 80
Art. . . . . . . . . . . . . . . . . . . . . . . . . . . . . . . . . . . . . . . . . . . . . . . . . . . . . . . . . . . . . 81
You’re Ready to Create. . . . . . . . . . . . . . . . . . . . . . . . . . . . . . . . . . . . . . . . . . . . . 82
8/
Designing for the MakerBot. . . . . . . . . . . . . . . . . . . . . . . . . . . . . . . . . . . . . . . 83
General Design Considerations. . . . . . . . . . . . . . . . . . . . . . . . . . . . . . . . . . . . . . . 83
Equipment Capabilities. . . . . . . . . . . . . . . . . . . . . . . . . . . . . . . . . . . . . . . . . . . 83
iv Contents
www.it-ebooks.info
Overhangs. . . . . . . . . . . . . . . . . . . . . . . . . . . . . . . . . . . . . . . . . . . . . . . . . . . . . 84
Water Tight. . . . . . . . . . . . . . . . . . . . . . . . . . . . . . . . . . . . . . . . . . . . . . . . . . . . 86
Corner Warping. . . . . . . . . . . . . . . . . . . . . . . . . . . . . . . . . . . . . . . . . . . . . . . . . 86
Friction Fit and Moving Parts. . . . . . . . . . . . . . . . . . . . . . . . . . . . . . . . . . . . . . . 86
Designing a Part to Be Dimensionally Accurate. . . . . . . . . . . . . . . . . . . . . . . . 87
Surface Finishing. . . . . . . . . . . . . . . . . . . . . . . . . . . . . . . . . . . . . . . . . . . . . . . . 87
How Large? Thinking Outside the Bot. . . . . . . . . . . . . . . . . . . . . . . . . . . . . . . . 88
Material Strength. . . . . . . . . . . . . . . . . . . . . . . . . . . . . . . . . . . . . . . . . . . . . . . . 89
Sizing and Scaling Models. . . . . . . . . . . . . . . . . . . . . . . . . . . . . . . . . . . . . . . . . 89
3DTin. . . . . . . . . . . . . . . . . . . . . . . . . . . . . . . . . . . . . . . . . . . . . . . . . . . . . . . . . . . 90
Tinkercad. . . . . . . . . . . . . . . . . . . . . . . . . . . . . . . . . . . . . . . . . . . . . . . . . . . . . . . . 96
Autodesk 123D. . . . . . . . . . . . . . . . . . . . . . . . . . . . . . . . . . . . . . . . . . . . . . . . . . 110
SketchUp. . . . . . . . . . . . . . . . . . . . . . . . . . . . . . . . . . . . . . . . . . . . . . . . . . . . . . . 117
Exporting STL Files from SketchUp. . . . . . . . . . . . . . . . . . . . . . . . . . . . . . . . 128
Installing SketchUp to DXF or STL via the Command Line. . . . . . . . . . . . . . . 130
Going Beyond. . . . . . . . . . . . . . . . . . . . . . . . . . . . . . . . . . . . . . . . . . . . . . . . . . . 131
9/Scanning in 3D. . . . . . . . . . . . . . . . . . . . . . . . . . . . . . . . . . . . . . . . . . . . . . . . . 133
What is 3D Scanning?. . . . . . . . . . . . . . . . . . . . . . . . . . . . . . . . . . . . . . . . . . . . . 133
Limitations. . . . . . . . . . . . . . . . . . . . . . . . . . . . . . . . . . . . . . . . . . . . . . . . . . . . 135
123D Catch. . . . . . . . . . . . . . . . . . . . . . . . . . . . . . . . . . . . . . . . . . . . . . . . . . . . . 136
123D Catch Tips. . . . . . . . . . . . . . . . . . . . . . . . . . . . . . . . . . . . . . . . . . . . . . . . 137
Taking Photos with 123D Catch. . . . . . . . . . . . . . . . . . . . . . . . . . . . . . . . . . . . 138
Uploading Your Photos to the Cloud. . . . . . . . . . . . . . . . . . . . . . . . . . . . . . . . 142
Downloading Your Mesh. . . . . . . . . . . . . . . . . . . . . . . . . . . . . . . . . . . . . . . . . 144
ReconstructMe. . . . . . . . . . . . . . . . . . . . . . . . . . . . . . . . . . . . . . . . . . . . . . . . . . 146
Installing ReconstructMe. . . . . . . . . . . . . . . . . . . . . . . . . . . . . . . . . . . . . . . . 147
Tips for Reconstructing Yourself (Or Someone Else). . . . . . . . . . . . . . . . . . . 148
Cleaning and Repairing Scans for 3D Printing. . . . . . . . . . . . . . . . . . . . . . . . . . 150
netfabb. . . . . . . . . . . . . . . . . . . . . . . . . . . . . . . . . . . . . . . . . . . . . . . . . . . . . . . 151
Autodesk MeshMixer. . . . . . . . . . . . . . . . . . . . . . . . . . . . . . . . . . . . . . . . . . . . 151
Meshlab. . . . . . . . . . . . . . . . . . . . . . . . . . . . . . . . . . . . . . . . . . . . . . . . . . . . . . 152
Pleasant3D. . . . . . . . . . . . . . . . . . . . . . . . . . . . . . . . . . . . . . . . . . . . . . . . . . . 152
Repairing Most Scans. . . . . . . . . . . . . . . . . . . . . . . . . . . . . . . . . . . . . . . . . . . . . 153
Repair and Clean Up in netfabb. . . . . . . . . . . . . . . . . . . . . . . . . . . . . . . . . . . . 153
Smoothing Out the Surface of Meshes. . . . . . . . . . . . . . . . . . . . . . . . . . . . . . 158
Removing Bumps and Blobs with MeshMixer. . . . . . . . . . . . . . . . . . . . . . . . . 160
Final Cleanup/Repair in netfabb. . . . . . . . . . . . . . . . . . . . . . . . . . . . . . . . . . . 160
Print Your Model. . . . . . . . . . . . . . . . . . . . . . . . . . . . . . . . . . . . . . . . . . . . . . . 160
Repairing Relief Scans by Capping. . . . . . . . . . . . . . . . . . . . . . . . . . . . . . . . . . . 161
Contents v
www.it-ebooks.info
Fixing Holes, Non-Manifold Areas and Disconnected Components. . . . . . . . 161
To Close Large Areas of Missing Mesh. . . . . . . . . . . . . . . . . . . . . . . . . . . . . . 166
Scan Your World. . . . . . . . . . . . . . . . . . . . . . . . . . . . . . . . . . . . . . . . . . . . . . . . . . 174
10/Becoming Part of the Thingiverse Community. . . . . . . . . . . . . . . . . . . . . . 175
What is Thingiverse?. . . . . . . . . . . . . . . . . . . . . . . . . . . . . . . . . . . . . . . . . . . . . . 175
Becoming a User of Thingiverse. . . . . . . . . . . . . . . . . . . . . . . . . . . . . . . . . . . . . 176
User Profiles. . . . . . . . . . . . . . . . . . . . . . . . . . . . . . . . . . . . . . . . . . . . . . . . . . . . 176
Finding Things. . . . . . . . . . . . . . . . . . . . . . . . . . . . . . . . . . . . . . . . . . . . . . . . . . . 177
Things. . . . . . . . . . . . . . . . . . . . . . . . . . . . . . . . . . . . . . . . . . . . . . . . . . . . . . . . . 177
Uploading a Thing. . . . . . . . . . . . . . . . . . . . . . . . . . . . . . . . . . . . . . . . . . . . . . . . 179
Upload the First File. . . . . . . . . . . . . . . . . . . . . . . . . . . . . . . . . . . . . . . . . . . . . 179
Enter the Details. . . . . . . . . . . . . . . . . . . . . . . . . . . . . . . . . . . . . . . . . . . . . . . 180
Add Other Files to Your Thing. . . . . . . . . . . . . . . . . . . . . . . . . . . . . . . . . . . . . 180
Add Tags and Ancestry. . . . . . . . . . . . . . . . . . . . . . . . . . . . . . . . . . . . . . . . . . 181
Publish Your Thing. . . . . . . . . . . . . . . . . . . . . . . . . . . . . . . . . . . . . . . . . . . . . . 182
Dashboard. . . . . . . . . . . . . . . . . . . . . . . . . . . . . . . . . . . . . . . . . . . . . . . . . . . . . . 183
Tips and Tricks. . . . . . . . . . . . . . . . . . . . . . . . . . . . . . . . . . . . . . . . . . . . . . . . . . . 184
Use Collections. . . . . . . . . . . . . . . . . . . . . . . . . . . . . . . . . . . . . . . . . . . . . . . . 185
Take Good Photos. . . . . . . . . . . . . . . . . . . . . . . . . . . . . . . . . . . . . . . . . . . . . . 185
Write Good Descriptions and Instructions. . . . . . . . . . . . . . . . . . . . . . . . . . . 185
Derivative Works. . . . . . . . . . . . . . . . . . . . . . . . . . . . . . . . . . . . . . . . . . . . . . . 185
A/ Suggested Reading and Resources. . . . . . . . . . . . . . . . . . . . . . . . . . . . . . . . 187
B/ Glossary. . . . . . . . . . . . . . . . . . . . . . . . . . . . . . . . . . . . . . . . . . . . . . . . . . . . . . . 189
C/ OpenSCAD. . . . . . . . . . . . . . . . . . . . . . . . . . . . . . . . . . . . . . . . . . . . . . . . . . . . . 193
vi Contents
www.it-ebooks.info
Preface
Welcome to Getting Started with MakerBot. If you picked up this book, you’re
either thinking of getting your hands on a MakerBot, or you just got one.
Either way, this book is here to get you up and running as quickly as possible.
In this book, you’ll learn how to prepare for your MakerBot’s arrival, what to
do when it arrives, and how to find, design, and make amazing things on it.
What Is a MakerBot?
A MakerBot is a robot that makes things. Right now, MakerBot Industries is
making desktop 3D printers that you can use to make anything. As it turns
out, this can be pretty handy since most people need something pretty reg-
ularly—a replacement something that’s no longer made, something fun to
play with, or something you could buy at the store but which you’d rather
make yourself.
A MakerBot Operator is at the cutting edge of personal fabrication technol-
ogy. Having a MakerBot gives anyone a superpower to replicate anything in
the world right in front of them.
Your MakerBot is a present-making machine—you’ll never have to worry
about buying gifts for anyone again because with your MakerBot you can just
make them. It’s also a fixing machine, which comes in handy when something
that you’ve bought gets broken. If the knob on your dishwasher, stove, or
radio breaks, it’s not a big deal anymore, now it’s just another opportunity to
show off your mastery of the MakerBot. Amaze your friends when you rep-
licate a replacement in less time than it would take you to go buy it at the
store! With a MakerBot, you can be a hero to your family by using your Mak-
erBot to solve household challenges that range from building new coat hooks
to making a bathtub stopper.
Like a kitten watching a goldfish bowl, you’ll stare for hours at your MakerBot
as it obeys your every command and makes you objects of your dreams and
the practical things you need. Bring it out into public and folks will gather
round to stare at it hypnotically like a campfire.
You’ll be able to replicate any of the thousands of objects on Thingiverse.com
that have been created and shared by designers all over the world. Before
long, you will even get the bug to design your own things and share them for
vii
www.it-ebooks.info
others to use, too. Your brainchild may have children of its own - through the
philosophy of sharing, open licenses, and derivative works. Someone might
like your idea, think of an improvement and make it and take a picture to show
you how your thing has a new life of its own!
How This Book Is Organized
This book is divided into the following chapters:
Chapter 1
Explains how a MakerBot works, what kind of materials you can use with
it, and what kind of things it can make.
Chapter 2
A tour of some of the many things you can download from Thingiverse
and make on your MakerBot.
Chapter 3
If you’re a kid, have a kid in your life, or just like to act like a kid once in a
while, this chapter will show you how a MakerBot can create useful and
enjoyable things for kids of all ages.
Chapter 4
This chapter helps you get your home and yourself ready for the arrival
of your MakerBot.
Chapter 5
An overview of the Replicator 2, MakerBot’s state-of-the-art desktop
printer.
Chapter 6
In this chapter, you’ll learn how to set things up and make your first thing.
Chapter 7
After you’ve made a test thing or two, it’s time to make some of the things
you can get from Thingiverse. This chapter gives you ten things you can
make to show off the capabilities of your MakerBot.
Chapter 8
You could probably print things from Thingiverse all day and never get
bored. But the day will come when you’ll be inspired to design something
of your own. This chapter covers some of the great design tools out there
—many of them free—and shows you how to design things.
Chapter 9
Designing things can be a lot of fun, but how about scanning something
from the real world? How about scanning it with an inexpensive cam-
eraphone or Microsoft Kinect? This chapter shows you how.
viii Preface
www.it-ebooks.info
Chapter 10
Throughout the book, you’ve seen things from Thingiverse. But after
you’ve learned to scan and design things of your own, why not share
them? Learn all about the Thingiverse community in this chapter.
Appendix A
This appendix features some suggested resources to expand your mind
and horizons.
Appendix B
Nothing like a good glossary to keep all the terms straight!
Appendix C
This appendix features OpenSCAD, a modeling program aimed at pro-
grammers.
Conventions Used in This Book
The following typographical conventions are used in this book:
Italic
Indicates new terms, URLs, email addresses, filenames, and file exten-
sions.
Constant width
Used for program listings, as well as within paragraphs to refer to pro-
gram elements such as variable or function names, databases, data
types, environment variables, statements, and keywords.
Constant width bold
Shows commands or other text that should be typed literally by the user.
Constant width italic
Shows text that should be replaced with user-supplied values or by val-
ues determined by context.
This icon signifies a tip, suggestion, or general note.
This icon indicates a warning or caution.
Using Code Examples
This book is here to help you get your job done. In general, you may use the
code in this book in your programs and documentation. You do not need to
Preface ix
www.it-ebooks.info
contact us for permission unless you’re reproducing a significant portion of
the code. For example, writing a program that uses several chunks of code
from this book does not require permission. Selling or distributing a CD-ROM
of examples from O’Reilly books does require permission. Answering a ques-
tion by citing this book and quoting example code does not require permis-
sion. Incorporating a significant amount of example code from this book into
your product’s documentation does require permission.
We appreciate, but do not require, attribution. An attribution usually includes
the title, author, publisher, and ISBN. For example: “Getting Started with
MakerBot by Bre Pettis, Anna Kaziunas France, and Jay Shergill (O’Reilly).
Copyright 2013, 978-1-4493-3865-7.”
If you feel your use of code examples falls outside fair use or the permission
given here, feel free to contact us at
Safari® Books Online
Safari Books Online is an on-demand digital library that lets
you easily search over 7,500 technology and creative refer-
ence books and videos to find the answers you need quickly.
With a subscription, you can read any page and watch any video from our
library online. Read books on your cell phone and mobile devices. Access new
titles before they are available for print, get exclusive access to manuscripts
in development, and post feedback for the authors. Copy and paste code
samples, organize your favorites, download chapters, bookmark key sec-
tions, create notes, print out pages, and benefit from tons of other time-
saving features.
O’Reilly Media has uploaded this book to the Safari Books Online service. To
have full digital access to this book and others on similar topics from O’Reilly
and other publishers, sign up for free at .
How to Contact Us
Please address comments and questions concerning this book to the pub-
lisher:
MAKE
1005 Gravenstein Highway North
Sebastopol, CA 95472
800-998-9938 (in the United States or Canada)
707-829-0515 (international or local)
707-829-0104 (fax)
x Preface
www.it-ebooks.info
MAKE unites, inspires, informs, and entertains a growing community of re-
sourceful people who undertake amazing projects in their backyards, base-
ments, and garages. MAKE celebrates your right to tweak, hack, and bend
any technology to your will. The MAKE audience continues to be a growing
culture and community that believes in bettering ourselves, our environ-
ment, our educational system—our entire world. This is much more than an
audience, it’s a worldwide movement that Make is leading—we call it the
Maker Movement.
For more information about MAKE, visit us online:
MAKE magazine: />Maker Faire:
Makezine.com:
Maker Shed: />We have a web page for this book, where we list errata, examples, and any
additional information. You can access this page at:
/>To comment or ask technical questions about this book, send email to:
For more information about our books, courses, conferences, and news, see
our website at .
Find us on Facebook: />Follow us on Twitter: />Watch us on YouTube: />Acknowledgments for Bre Pettis
I couldn’t have done this without my partner, Kio Stark, and amazing daugh-
ter, Nika. Huge thanks to Jenny Lawton, Anthony Moschella, and Justin Day
from MakerBot. Everyone at MakerBot and everyone in the MakerBot com-
munity have rallied to make MakerBot the leader of the next Industrial Rev-
olution and we couldn’t have done this without each and every one of you.
Acknowledgments for Anna Kaziunas
France
I would like to thank Tony Buser for all of his contributions to the 3D printing
community. Tony’s documentation on 3D scanning with ReconstructMe and
cleaning up scans for printing has opened up a whole world of possibilities
for me and countless others. I would also like to thank Liz Arum and Jon
Santiago for creating the MakerBot curriculum which was used as a starting
Preface xi
www.it-ebooks.info
point for some of the tutorials in this book. I would like to thank my co-author,
Bre Pettis, whose hardware donations have changed my life. I would like to
thank my editor, Brian Jepson for his guidance and support. Lastly, I wish to
thank the 3D printing community as a whole. Everyone who shares their
knowledge through the Thingiverse, Google Groups, mailing lists and indi-
vidual blogs everywhere.
Acknowledgments for Jay Shergill
(MakerBlock)
First, I would like to thank the founders of MakerBot for making 3D printing
user friendly and accessible. In particular, I’d like to thank Bre Pettis for in-
viting me to write for MakerBot and being a sounding board for ideas. Writing
and sharing about the things I love to do has been the best job ever. I’m
grateful to our editor Brian Jepson for his experience and guidance.
I would also like to thank my parents for being great teachers and giving for
me every opportunity. I’m continually thankful to my wonderful wife for her
encouragement, collaboration, and unwavering support - especially when I
was blogging, writing, experimenting, printing, or just doing everything at
once.
Finally, a very special thank you to my favorite maker and tinkerer, my daugh-
ter, for being a constant source of wonder, surprise, and inspiration.
xii Preface
www.it-ebooks.info
1/Introduction
In which the reader shall learn about the
implications and responsibilities that come
with being the Operator and Caretaker for a
MakerBot and shall be introduced to robots of
great power and promise.
How Does a MakerBot Work?
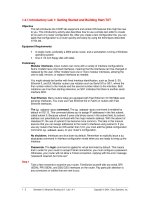
All MakerBot prints start with a digital design—a 3D model of your object.
Software takes that model and slices it up into layers a fraction of a millimeter
thick. When it’s time to print, a MakerBot works by laying down layers of
plastic. Each layer is precisely drawn by the machine using molten plastic. It
cools immediately, and in the process of cooling down transforms from a
molten liquid into a solid model! Figure 1-1 shows the original MakerBot Rep-
licator.
MakerBots print in thermoplastics—either ABS (the same stuff Legos are
made of) or PLA (a biodegradable substance made from starchy foodstuffs).
A thermoplastic is a material that softens and becomes pliable above a cer-
tain temperature and then returns to its solid form as it cools. The thermo-
plastic printing material—also called filament—starts out on a reel like spa-
ghetti or very thick fishing line. When you’re printing, a very precise motor
drives that raw filament through an extruder, a very tiny nozzle that gets hot
enough to melt it. What comes out the other end is molten plastic that looks
like super fine angel hair spaghetti, which quickly cools and turns into what-
ever it is you’re printing.
As it prints, the MakerBot draws a “picture” in two dimensions with this small
bead of plastic. When it’s done drawing each two-dimensional layer, it moves
up a fraction of a millimeter and draws another picture right on top of the
first one. Just like that, your object gets built, one layer of plastic at a time,
until it gets presented to you as a solid finished object.
1
www.it-ebooks.info
Figure 1-1. Diagram of a MakerBot
The MakerBot Cupcake CNC, Thing-O-
Matic, and Replicator Series
MakerBot Industries has just announced its fourth generation desktop 3D
printer, the MakerBot Replicator 2. This printer is a PLA-only printer and can
make things that are 11.2 x 6 x 6.1 inches in size. That’s big enough to make
a good sized shoe!
MakerBot launched their company with the Cupcake CNC in 2009 which
made things that were about 4x4x4 inches and then in 2010 they launched
the MakerBot Thing-O-Matic which could make things approximately 5x5x5
inches. In 2012, the MakerBot Replicator was released with the option of
having two nozzles so you can make things in two colors. It can make things
that are about 6x6x9 inches or roughly the size of a loaf of bread.
2 Getting Started with MakerBot
www.it-ebooks.info
MakerBot Plastics: ABS and PLA
ABS (Acrylonitrile Butadiene Styrene) is the same thermoplastic that Legos
are made of. It starts to soften around 105° C. It’s the “classic” plastic. If you
look around your house, you’ll find lots of products made from ABS, including
kids’ toys, sports equipment, and even things like Big Wheels. Most of the
interior of cars is made from ABS these days, too. ABS is a wonderful material
and when it’s in its goo-like state it flows easily through the extruder’s nozzle,
which makes it perfect for injection molding and 3D printing.
PLA stands for polylactic acid and is made from plant starches, usually corn
in the USA and potatoes in Europe. Because it’s made from biological mate-
rials rather than petroleum, it can decompose in a suitable compost bin or
facility, which makes it a more environmentally friendly plastic. It also smells
like waffles when you make things with it. PLA melts at a slightly higher tem-
perature than ABS, around 150° C.
The MakerBot Replicator 2 is designed to print in PLA only, but older models
(the original Replicator, Thing-O-Matic, and Cupcake CNC) can handle ABS
well.
What Can a MakerBot Make?
With a MakerBot, you can make anything. While there is a limitation on the
size of things that you can make, if you want to make something bigger than
the build volume, you can make it in multiple parts and glue them together.
I find there to be a number of parallels between using a MakerBot desk-
top 3D printer and one of my other hobbies, origami. A few years ago,
Robert Lang, an engineer and modern origami designer, presented a
complete algorithm that solves for an origami base that can have any
number of desired flaps of any length, that could be then folded into
anything from a single square of paper. In essence, Mr. Lang’s research
has demonstrated that a sophisticated origami folder could fold abso-
lutely anything from just one single sufficiently large square of paper.
A MakerBot provides an operator with an extra dimension beyond a
simple two-dimensional sheet of paper, while removing the skill require-
ment from the equation. You can make a complicated plastic structure
with a MakerBot just as quickly and easily as you can a solid cube—using
the same volume of plastic.
It stands to reason that if anything is possible in a single sheet of square
paper, at least that much is possible with a machine that can build things
in three dimensions.
— MakerBlock
Introduction 3
www.it-ebooks.info
How Did MakerBot begin?
In 2007 Bre Pettis and Zach Smith helped organize the NYC Resistor hack-
erspace in Brooklyn, NY to create a place for hackers, makers, and like-
minded tinkerers. Armed with a great space and a shopful of tools, it wasn’t
long before the two friends got involved with the open-source RepRap
project.
A RepRap is a self-replicating machine. The RepRap Project is an open source
community project intended to spread the idea of home manufacturing to
the masses. It was among the first home 3D printers. It’s a machine that’s
designed from as many off-the-shelf parts as possible. And it’s also designed
to make parts to make more of itself. This may boggle the mind and conjure
images from Terminator movies, but the fact is, these robots are cute and
thankfully, they don’t have artificial intelligence.
It took a lot of trial and error to get their RepRap to work for even a few mi-
nutes. They thought they could design a machine that is more reliable and
wouldn’t just be focused on making parts for more 3D printers, but that could
make anything.
In January of 2009 Adam Mayer, a programmer and another member of NYC
Resistor got involved in the project. The trio quit their jobs, acquired the do-
main name “makerbot.com” and Makerbot was born. They started proto-
typing a machine using mainly off the shelf parts and the tools they had at
hand, including NYC Resistor’s 35 watt laser cutter.
In those early months, they worked at NYC Resistor and often stayed up for
days at a time, creating prototype after prototype. After many late ramen-
and caffeine-fueled nights, their first machine, the “Cupcake CNC” came to
life. They wanted to launch at SXSW, and got the first prototype actually
working at 8am on March 9, 2009 just two hours before their flight. With their
“trusty” prototype, they printed dodecahedron-shaped shotglasses at vari-
ous bars around Austin for as many geeks as possible. It wasn’t long before
the orders for CupCake kits started rolling in.
4 Getting Started with MakerBot
www.it-ebooks.info
2/The House That
MakerBot Built
In which this universal tool grants new eyes to
see your world, the power to make almost any-
thing, and the ability to solve problems that
couldn’t be solved before.
When you have a Makerbot, you start looking at things—and if you want them,
you think about making them with your MakerBot instead of buying them.
When things break, you could start stressing out about where you’ll find a
replacement part, but when you have a MakerBot, you start thinking about
how you can make your own part to fix it.
In our consumer-focused, disposable world, a MakerBot is a revitalizing force
for all your broken things. Having a MakerBot allows you to make things in-
stead of buying them—and in a consumer-focused world, that’s a super
power worthy of a superhero!
Besides fixing things and creating them from scratch, you can invent new
things and develop alternative solutions to problems. With the cost of fila-
ment so low, the cost of failure is low and that means that it’s not going to
cost you very much to try out an idea; if it doesn’t work, you can adjust the
design and try it again and again. This ability to iterate is a powerful force in
the universe and it makes you unstoppable. So many people try something
and if it doesn’t work, they give up. With the ability to iterate and make things
over and over again, you can become an unstoppable force of iteration and
invention—and you’ll try and try again.
While the replicating possibilities for a MakerBot are infinite, the most com-
mon kinds of uses seem to fall into just a few categories:
5
www.it-ebooks.info
MakerBots can be used to create a permanent drop-in replacement for bro-
ken, missing, or worn out parts
These kinds of fixes actually save things from filling up landfills. Often,
just being able to create a part in your home saves more time and money
than would be consumed by driving to the hardware store to purchase
it. Being able to create a direct replacement part allows for a permanent
fix that might otherwise be “MacGyvered” to into working condition with
duct tape, zip ties, or super glue. While duct tape, zip ties, and super glue
will forever be perfectly acceptable ways to fix things, they are all tem-
porary and potentially unsightly hacks. For example, if the knob on your
stove breaks, it may prove impossible to get a replacement, but it’s easy
to MakerBot a new knob and keep your stove instead of having to throw
it out because you can’t buy a knob. (You probably wouldn’t do that;
you’d get some duct tape or attach a pair of vise grips to the metal rod,
but you get the idea.)
MakerBots can be used to customize or add functionality to existing objects
Some designers have thought of ways to use their MakerBots to repur-
pose disposable products into newly functional objects. For example,
consider the bottle watering cap ( />9535). With it, you can turn a disposable bottle into a watering can. The
hockey stick pen cap ( lets
you turn an ordinary writing instrument into a miniature piece of sports
equipment.
The “Nickel for Scale” project ( lets you take
a photo of something you want to attach a replicatable object to (with a
nickel in the photo for scale), and adjusts the size so it will fit.
Inventing Your Own Things
This is where the infinite possibilities begin. We’ll talk about this in the
next section.
Make a Better Mousetrap: Inventing
Things with a MakerBot
MakerBots can be used to invent things! By creating something entirely new
to the universe that has never existed outside your imagination, you’ll get the
rush of being an inventor.
When you have a MakerBot you can make things in minutes that may take
other people weeks to make. Need a bottle opener but the store is closed?
No problem, download the model from Thingiverse and print it out. You can
modify it to have your name on it, change the shape to look cooler to you, or
think up some other way to improve it or customize it. Nobody with a Mak-
erBot will ever have to buy a bottle opener again!
6 Getting Started with MakerBot
www.it-ebooks.info
No, Really, Make a Better Mousetrap
Building a better mousetrap is a classic story of innovation. Cathal Garvey
had a problem: he had a mouse living with him in his home in Ireland. He’d
just gotten 5 fresh pounds of ABS plastic for his MakerBot and he wanted to
find a way to catch the mouse without killing it. He made a blog post (http://
blog.makerbot.com/2010/03/01/cathal-garveys-mousetrap-design-
challenge/) that quickly made its way around the Internet with a request to
follow the age old tradition of building a better mousetrap. His criteria was
that the mousetrap had to be a “live” trap so that the mouse wouldn’t be
killed.
Within a day, there were 9 designs on Thingiverse tagged “mousetrap” and
within a few weeks, more were added. Whose freshly invented mousetrap
would meet the challenge?
Thingiverse user 2RobotGuy came up with a solution that used the power of
gravity to spring the trap and keep the mouse in a bent tube that looked like
a bent toilet paper tube with caps on the ends (see er
bot.com/2010/03/24/youtube-tilt-n-trap-first-working-3d-printed-
mousetrap/2/), shown in Figure 2-1. In captivity, he shows undeniable video
footage of catching a mouse in his trap: />Figure 2-1. Mouse vs. MakerBot
The House That MakerBot Built 7
www.it-ebooks.info
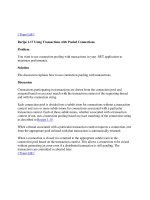
With This Thing, I Thee…
Sometimes you need something special (Figure 2-2) for a special someone
and there isn’t time to go shopping, buy something, or have something made
for you.
This happened to Thingiverse user Fynflood (see er
bot.com/blog/2009/10/06/makerbot-love/). It was Friday and Fynflood
was leaving with his sweetheart to go to Iceland the next day and he had just
realized that Iceland would be the perfect time and place to propose. With
just hours to spare, he went to Hive 76, his local hackerspace, where they had
just set up a MakerBot. At Hive 76, Fynflood got some help to model a ring
and he made it. In Iceland, he gave her the box and she opened it up, saw the
ring and said “yes!”
And that’s not all. There are more stories—from />blog/2011/08/08/makerbotted-engagement-rings/.
Astera Schneeweisz was ready to propose to her sweetheart. Here’s her
story:
I talked Marius into remotely making two rings for me just in time to
propose to Joernchen on July 15th. Well… he said yes! \o/ And he’s
wearing the ring all day, though he actually never liked rings at all. ABS
is just awesome for engagement rings!
Robert Carlsen also made the leap:
Kara doesn’t wear much jewelry and we don’t support the diamond
trade. I still wanted to give her a personal, meaningful symbol of the
engagement.
I had heard of other folks making rings (even an engagement ring) on
Thingiverse – I’m not pretending to be incredibly original with this. How-
ever, I did design Kara’s ring with CAD software (open source of course
– QCad / OpenSCAD) and replicated it on my MakerBot Cupcake
#2943. I wasn’t sure of her ring size, so I made several sizes of the band
in black ABS plastic. The “stone” was made separately in orange ABS
and glued into the setting. I also made a threaded box available on Thin-
giverse and scaled to just fit the ring.
For the actual proposal, Kara had never seen the Pacific Ocean, but had
grown up spending summers in Ocean City, NJ. We’ve also spent a lot
of time at the shore together. After dating for a decade, standing ankle
deep in the ocean with Haystack Rock in the background, it felt right to
propose at that moment – she accepted and I presented her the box
with the ring – which she loves….and here we are :-)
8 Getting Started with MakerBot
www.it-ebooks.info
Figure 2-2. A print
ed ring
MakerBot in the Bathroom
Sometimes buying a replacement part just isn’t good enough. The store may
not pick up the phone, have what you need in stock, or maybe not even have
enough of just one item. In many cases, the cost of just driving to the store
for parts might be more expensive than the parts themselves. That’s where
this story begins; with a man in desperate need of a shower.
At Marty writes:
It’s a story that can happen to anyone. You move to a new town and leave
your shower curtain behind. ‘No problem,’ you think, ‘I’ll just pick up a
new liner at the pharmacy down the street.’ So, you trek to the local
pharmacy and find the shower curtain liner you were looking for, only to
discover that they are out of rings, hooks, or anything made for holding
up a shower curtain! Facing down defeat and the very real possibility
that you will have to take a dirty, inefficient bath, you come to a stunning
realization: You’re a MakerBot owner. You live for these moments.
Marty quickly drafted a design (Figure 2-3) in OpenSCAD and replicated
enough shower curtain rings to ensure a trouble free shower experience.
Figure 2-3. Mart
y’s curtain rings
The House That MakerBot Built 9
www.it-ebooks.info
At MakerBot, we couldn’t be happier to help you make the world a cleaner
place. If you happen to be moving to a new place, you may be surprised at
the things already available on Thingiverse for improving your new home.
MakerBot in the Kitchen
Once you have a MakerBot, you may find yourself looking at the world
through “MakerBot goggles.” Everything you look at gets analyzed for over-
hangs to see if will fit inside the build envelope of the MakerBot, could be
replicated in parts, or how it could be made more awesome. From then on,
you can add it to your mental file under “never have to buy one of those
again!”
Sometimes it’s not even possible to obtain a replacement part. You can’t
find replacement latches for the single-pane windows in my 1970s
home. No one makes them, no one carries them. Before owning a Mak-
erBot, my options were to live without latches, cobble together some-
thing ugly, or just replace the entire window. Not surprisingly, the op-
tions of “living with it,” “an ugly fix,” or “replacing the whole thing” are
rarely conducive to marital bliss. Fortunately for me, the best option of
“making a new part” dovetailed quite nicely with my desire to buy a
MakerBot.
The first few days of owning a MakerBot involved me asking for lists of
things I could fix, running around the house measuring things, designing
parts, and then replicating and installing them as quickly as I could. The
most fun part of this process was being able to measure and design
parts as my MakerBot hummed in the background replicating little
household fixes.
— MakerBlock
Thingiverse user Zaggo needed to fix a light in his kitchen. The light was under
his cabinets and over his counter and was attached with a bracket that had
broken. He was able to design a new part in 15 minutes, replicate it in 20
minutes, and had his light fixed in just under an hour (ngi
verse.com/thing:995). His bracket is shown in Figure 2-4.
Figure 2-4. Zaggo’s light bracket
10 Getting Started with MakerBot
www.it-ebooks.info
Here’s how PolygonPusher found a way to hang pots and pans:
In this project I build a set of shelves for hanging pots and pans in my
kitchen. For that, I needed 27 hooks. In my local hardware store I did not
find any suitable hooks so I decided to design and make my own! :-) This
also saved me some money since a simple hook in the store costs $4 a
piece, making the total $108!” ( />11882)
Figure 2-5. PolygonPusher’s hooks
The House That MakerBot Built 11
www.it-ebooks.info