Tài liệu Windows 7 Media Center Customization Handbook: Customize and Enhance W7MC pot
Bạn đang xem bản rút gọn của tài liệu. Xem và tải ngay bản đầy đủ của tài liệu tại đây (5.49 MB, 20 trang )
W7MC Customization Handbook — Windows Guides —
1
Windows 7 Media Center Customization Handbook
Customize and Enhance W7MC
RSVR85
Rich Robinson — Microsoft MVP
W7MC Customization Handbook — Windows Guides —
1
© 2009 Windows Guides | mintywhite.com. All rights reserved.
Windows 7 Media Center Customization Handbook
If this guide is distributed it is furnished under license and may be used or copied only in accordance with
the terms of such license. Except as permitted by any such license, no part of this guide may be
reproduced. This guide may be stored in a retrieval system, or transmitted, in any form or by any means,
electronic, mechanical, recording, or otherwise. Please note that the content in this guide is protected
under copyright law.
Mintywhite will not be responsible for damages to your computer, software, or data resulting from use of
information contained in this document.
The content of this guide is furnished for informational use only, is subject to change without notice, and
should not be construed as a commitment by Windows Guides. Neither Windows Guides nor Microsoft
Corp. assume responsibility or liability for any errors or inaccuracies that may appear in the informational
content contained in this guide nor for any damages resulting from use of the information contained
herein.
Please remember that existing artwork or images that you may want to include in your project may be
protected under copyright law. The unauthorized incorporation of such material into your new work could
be a violation of the rights of the copyright owner. Please be sure to obtain any permission required from
the copyright owner.
mintywhite, Windows Guides, and the Windows Guides logo are trademarks of mintywhite.com
Microsoft, Windows and Office are trademarks of Microsoft Corporation. All other trademarks are the
property of their respective owners.
About the Authors
RSVR85 is a tech enthusiast with a passion for tweaking and
improving PCs. RSVR85 is a moderator in
Windows Forums and
a writer for
Windows Guides.
Rich Robinson is the author and creator of Windows Guides,
Windows Forums, and MyWindowsPC. Rich is a
Microsoft MVP in
the Desktop Experience category and authored Windows 7 –The
Pocket Guide, Windows Vista – The Pocket Guide, Windows
Vista – Customization Manual, the PC Security Handbook, and
the PC Maintenance handbook.
Download more free books.
Contents
Introduction 2
Notational Conventions 2
Customization 101 2
Required Downloads 3
Movie Organization 4
Join Two-Part Movies 5
Get MetaData for Your Movies 5
Configure Media Browser 9
Set up Actor Images 10
Add Media Browser to W7MC Start Menu 11
Change Media Browser Icon in Startup Menu 14
Add Custom Genre Icons to Media Browser 15
Speed Up Media Browser Using USB Flash Drive 15
Hide the Default Movie Strip 17
Change W7MC Background 18
What Next? 19
About this Handbook 19
W7MC Customization Handbook — Windows Guides —
2
Introduction
This handbook is compiled from numerous Windows Media
Center tutorials written on mintywhite.com. Changes to system
protected files are required to accomplish the entirety of the
guide and should be approached cautiously.
I strongly recommend you backup any system files you intend
on changing to a "backup" folder for later restoration.
Throughout this handbook, I'll refer to methods used for .avi
movie files. Where amendments to the guide are needed for
other movie files, this icon will be displayed.
The purpose of this handbook is not to define the ultimate
solution; its purpose is to give you simple, unbiased advice on
what I’ve found to be the best options out there. If you have
any questions about PC customization or PCs in general, you
can head to
Windows Forums where you’ll find friendly,
knowledgeable members who are happy to assist in your
learning. If you disagree with anything in this handbook, please
join us also and share your solutions.
It is not necessary to complete the handbook from start to
finish. Please read through the contents page and decide what
you want to do with your Windows Media Center.
Please note: Windows Media Center is available in the Home
Premium, Professional, and Ultimate editions of Windows 7.
Notational Conventions
In this handbook, I use these notational conventions:
Italic:
Text from the current dialogue you are working with.
Bold: the name of a keyboard key.
Italic bold:
something you type as shown, e.g.,
regedit
. Unless
otherwise specified, you can use uppercase or lowercase
letters.
Click: move the cursor to the referenced item and press the left
mouse button.
Press: press a keyboard key.
Select: choose from a list.
Blue Links: Links to external websites.
Customization 101
Many terms in this handbook may be new to you; I make every
effort to explain things in a simple manner that is easy to
digest. Before we begin with solutions, I present some key
terms and phrases that will assist you as you work your way
through the rest of this handbook. These phrases are
commonly used in conversation and in online discussion
forums, but it’s hard to know exactly what they mean.
Uninstall – To remove a program from your computer so that it
no longer occupies space on your hard drive and cannot be
used anymore. Uninstallation includes deletion of program
files, registry entries, associations, supporting libraries, user
data, plugins, extensions, and other features specific to a
program.
Registry – A control center for your computer. Windows
settings, individual program settings, and other important
configuration information are stored here.
Now you have your jargon set straight, you can begin
customizing Windows 7 Media Center.
W7MC Customization Handbook — Windows Guides —
3
A Taster of Things to Come!
Here's a few screenshots of Windows 7 Media Center to “wet
your whistle.”
Required Downloads
Before we start with this guide, you'll need to start a few
downloads.
1.
Media Browser - Media Browser (MB) is a free media
aggregator plug-in for Media Centre that takes your recorded,
digital, or ripped media and presents it in a simple, easy to use
interface. This really is the best plug-in for W7MC (in my
opinion).
2.
Restorator 2007 (Free Version) - Restorator is an award-
winning utility to edit windows resources in applications and
their components, e.g. files with .exe, .dll, .res, .rc, .dcr,
extensions
3.
XML Notepad 2007 - XML Notepad 2007 provides a simple
intuitive user interface for browsing and editing XML
W7MC Customization Handbook — Windows Guides —
4
documents. Notepad can be used as an alternative but I
definitely recommend XML Notepad for the job.
4.
meta <browser/> - meta<browser/> is an all-in-one
solution to retrieve metadata for Movies and TV shows through
the available APIs of themoviedb.org (TMDb) and thetvdb.com
(TVDb).
5.
WMCCC - This wizard can create new custom start menu
strips for Windows Media Centre (Vista/Windows7) and
populate them with registered extra programs. It's also
possible to delete the strips.
6.
Hide Strips - Hide Media Center Menu Strips has the ability
to hide native & custom strips in the start menu area of W7MC.
Note that this program hides them and does not delete them.
7.
OABSoftware MCE Mail - With MCE Mail you can read your e-
mails and write e-mails to others, on your Media Centre TV.
MCE Mail supports POP3 servers for receiving e-mails and SMTP
servers for sending e-mails.
8.
Mencoder - With mencoder you can join two-part movies
using a simple command line.
9.
This Batch File - Rich wrote this batch file for us. If you have
your movie files 'loose' then this file will put each movie into a
folder and rename the folder according to the movies name.
Please view the README file included in the zip file.
Movie Organization
First things first, let’s organise our movies. You’re going to
need to have your movie collection regimented if this guide is
to succeed. You can do it manually, or use
this batch file. Either
way, each movie must be in its own folder.
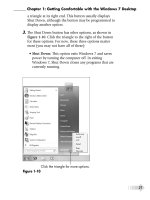
So, the movie,
Get Smart (2008)
for example would need to
look like:
J:\DVD\Comedy\Get Smart (2008)\Get Smart (2008).avi
I’ve found through trial and error that always stating the year in
brackets (parenthesis) after the movie title helps metadata
grabbers do the job efficiently.
You’ll need to organise every single movie you want included in
Media Browser (MB) in this way. If you have a large movie
collection, it’s also worth putting the movie folders into genre
categories.
W7MC Customization Handbook — Windows Guides —
5
Join Two-Part Movies
If you have two part movie, you should join them as one. Grab
the copy of Mencoder you downloaded earlier.
Copy
mencoder.exe
into the folder with the movies you wish to
‘join’. Make sure that each part of the movie is correctly
labelled “1” & “2”. Open a command prompt window in that
folder (Shift & Right Click on
the movie folder.)
Type this command into the command prompt and press enter;
mencoder -oac copy -ovc copy -noodml -o “joined.avi” “1.avi”
“2.avi”
Get MetaData for Your Movies
There are a lot of tools out there for grabbing MetaData for
movies. My favourite is meta<browser/>. Using
meta<browser/> can take some getting used to and you’ll
probably have to practice a little with it, the results are most
definitely worth it though. meta<browser/> will download
multiple DVD covers, backdrops, banners, episode thumbs,
ratings, synopsis and actor images. You name it,
meta<browser/> has it covered.
To get started, open up meta<browser/> and click
Options
, at
the bottom left of the window.
W7MC Customization Handbook — Windows Guides —
6
Click
Add a new location
at the top right of the new window &
choose your movie folder. Be sure to press Enter after each
choice. Click
Save
when all of the movie folders you need have
been added.
Under
Search options
you can set which folders and which file
extensions are valid.
It's recommended to have the
FileSystemWatcher
checked
on
under
Folder Monitoring
for file systems Windows 2000 and
above.
To start acquiring actor images, we must setup a temporary
folder for them.
Create a folder anywhere you like named
ImagesByName
. Copy
the path of the
ImagesByName
folder into the
ImagesByName
folder location field in meta<browser/>. This temporary folder
will remain so until Media Browser is installed. If you move the
temporary
ImagesByname
folder, make sure you update the
location field in meta<browser/> options.
Be sure to click
Save
after any changes.
At the bottom of the main windows click
Refresh List
and your
movies will start to populate in the left hand pane.
Entries marked red have missing or incomplete MetaData
information.
W7MC Customization Handbook — Windows Guides —
7
Click on a movie you want to process and click on
Fetch Movie
MetaData
. meta<browser/> will then begin to download all the
information you need. You can choose from multiple
backdrops, banners & DVD covers.
W7MC Customization Handbook — Windows Guides —
8
W7MC Customization Handbook — Windows Guides —
9
Click
Save MetaData
when you're happy with the MetaData.
Your film folder should look something similar to this once
you’ve downloaded and saved the changes. (You may have to
show hidden files/folders.)
To show hidden files and folders:
1. Open
Windows Explorer
(Winkey+E.)
2.
Press ALT, click
Tools > Folder Options.
3. Click the
View
tab.
4. Scroll down and select
Show hidden files and folders
.
As previously mentioned, meta <browser/> is a little tricky to
get to grips with at first; I advise starting with small folders or
individual movies. If you find you’ve messed up, don’t panic!
Go to the movie folder on your HDD, delete everything apart
from the actual movie and try again.
There are several ways to process your movies and get
MetaData with meta<browser/>. I’m giving the simplest
example. You may wish to experiment, by copying a folder of
movies to a different location and running through
meta<browser/> to practice its different functions and find
which way suits you best
Configure Media Browser
Now all of your movies have the correct MetaData and are
nicely organised, it's time for the good bits!
I'll assume you already have Media Browser (MB for short from
now on!) downloaded and already installed.
1. Start the
Media Browser Configuration Wizard
.
2. Click
advanced
to open all of the extra option tabs.
3. Click
Add
to start browsing for folders to add to MB.
After you’ve added your first folder, you’ll see that you can
specify more than one location for that particular media. e.g.
I’ve chosen my DVD collection which is on
H:\
I may have
another folder on
C:\
that I also want to add to
DVD
to MB.
Treat this as you would the new library function in Windows 7.
W7MC Customization Handbook — Windows Guides —
10
Once you have all of your folders added, you’ll probably want
to apply images to them. Go
here for an excellent collection of
Movie Genre icons.
deviantart.com is also one of my favourite
places to visit for icons.
Click on the folder you wish to change, click on
Change Image
,
navigate to the image of your choice and click
Open
.
MB will automatically save any changes made to the
configuration wizard.
Media Browser supports podcasts, multiple plugins, the ability
to play a movie from a mounted ISO, and additions of media
types for external players. Have a play around with the display
tab in particular.
Set up Actor Images
By default, MB doesn't add an
ImagesByName
folder to its
directory (in
C:\ProgramData
). Remember that temporary folder
you created earlier? We're going to need it now. Make sure that
hidden file and folders are set to
show
before you go any
further.
Navigate to:
C:\ProgramData\MediaBrowser
(or type
%programdata%\MediaBrowser
into any Explorer
window)
W7MC Customization Handbook — Windows Guides —
11
and move the temporary
ImagesByName
folder to the MB
folder.
Be sure to update this location in the options menu in
meta<browser/>
Double check the
ImagesByName
folder by going through a few
folders inside and making sure that the actors name is the
folder name and the actor image inside is name folder.
Add Media Browser to W7MC Start Menu
If the MB icon doesn't appear in a new strip in the start menu in
Media Centre
, (with some builds of MB it doesn't) you'll have to
create a new strip. To do this, run the WMCCC program
mentioned in
Required Downloads and click on
Create a new
start menu strip > Next
.
Name and Title your custom strip. You won’t be able to name it
Movies
; WMCCC returns an error if this is attempted.
Click
Next.
W7MC Customization Handbook — Windows Guides —
12
Select
media browser
from the list of available programs and
click
Next
.
If you add more than one program to the strip, set the program
order and click
Next
.
W7MC Customization Handbook — Windows Guides —
13
If you have more than one strip already installed, choose the
start menu strip order and hit
Next
.
Click
Finish
to… well you know!
W7MC Customization Handbook — Windows Guides —
14
Change Media Browser Icon in Startup Menu
This is a good one for those of you who aren’t too keen on
MB’s default icon.
We’re going to change it to the default movie icon that W7MC
displays. You can of course change the icon to whatever you
like.
Locate
ehres.dll
located in:
C:\Windows\ehome
(or type
%windir%\ehome
into any
Windows
Explorer
window.)
When you have found it, take ownership of it, make a copy of it
to the desktop and rename it
ehres BACKUP.dll
.
Place the backup in your backup folder.
Next, is to open
ehres.dll
with Restorator 2007.
In the left hand pane, expand
RCData
and find
STARTMENU.QUICKLINK.MOVIES.FOCUS.PNG
you should see the
same icon as I have below
.
Right click on
STARTMENU.QUICKLINK.MOVIES.FOCUS.PNG
, go
to
Extract… > Extract as
“STARTMENU.QUICKLINK.MOVIES.FOCUS.PNG”
and save the
image to desktop.
Now we have our default movie image extracted and saved to
desktop. Navigate to:
C:\Program Files\MediaBrowser\MediaBrowser
(or type
%programfiles%\MediaBrowser\MediaBrowser
in
any
Windows Explorer
window)
Locate the PNG image called
Application
and rename it
Application BACKUP
. Move the backup PNG into your backup
folder you created earlier.
Finally, move the extracted default WMC movie icon from the
desktop and into:
C:\Program Files\MediaBrowser\MediaBrowser
and rename it Application.
W7MC Customization Handbook — Windows Guides —
15
Add Custom Genre Icons to Media Browser
Earlier on I spoke about how important it was to organise your
movies. If you have a large collection of movies, it's also worth
putting them into genre categories. Here you'll learn how to
add custom icons to those genres in MB.
All we have to do is mod the
ImagesByName
folder slightly.
Open up an Explorer Window and navigate to
C:\ProgramData\MediaBrowser\ImagesByName
(or type
%programdata%\MediaBrowser\ImagesByName
in
any Windows Explorer window).
Create a new folder in
ImagesByName
and name it the title of
your genre. (i.e.
Action
,
Comedy
)
Put your genre icon into the folder and name it folder. (not
folder.jpg, just folder)
That's it!
Speed Up Media Browser Using USB Flash Drive
I find that MB can take a while to load all of the DVD covers &
backdrops for the entire movie library.
Using a USB Flash Drive should eliminate this problem as
they’re generally a lot quicker than your hard drive. Anything
W7MC Customization Handbook — Windows Guides —
16
that’s considered fast enough for
ReadyBoost
should suffice for
this.
Start by formatting your USB Flash Drive to
FAT32
. (You can do
this by right clicking the USB Drive and clicking
Format
Choose
FAT32
from the File System drop down menu in the
next window.)
You need to make sure that
Hidden Files & Folders
are set to
show.
Then navigate to
C:\ProgramData
(or type
%programdata%
into any Explorer window)
Cut or Copy the
MediaBrowser
folder to your Flash Drive.
Delete
MediaBrowser
from
C:\ProgramData
if you copied.
Open a command prompt (WinKey+R >
cmd
) and type these
commands in, hitting enter after each one;
cd C:\ProgramData
(Change C:\ to your ProgramData drive)
mklink /j MediaBrowser X:\MediaBrowser
(Change X to your
Flash drive)
W7MC Customization Handbook — Windows Guides —
17
You’ll see a message after it’s finished;
Junction created for
MediaBrowser <<===>> X:\MediaBrowser
Close the command prompt.
If you navigate back to
C:\ProgramData
you’ll see that a
MediaBrowser folder is present with a shortcut overlay arrow on
it. Don’t delete this folder.
Hide the Default Movie Strip
Now you have MB installed and probably fell in love with it,
there's little need for the default movie strip in W7MC. Here
you'll learn how to hide the default strip so you just have the
MB strip!
Install and run the
Hide Strips
program (#6. Required
Downloads)
Make sure you open up under the
Per User tab.
Uncheck Movies and whatever else you want to hide. Click
Save
.
Then move across to the
All Users
tab.
Uncheck the same options as last time. You’ll notice under All
Users your custom strip can be seen. Click
Save
&
Exit
when
you’re finished.
W7MC Customization Handbook — Windows Guides —
18
Using this program does not delete the strip, it hides it. To
show the default strip re-check movies.
Change W7MC Background
One of the most obvious changes you’ll notice from "A Taster
Of Things To Come" is the changes in the background W7MC
displays.
Rich has made a huge
collection of wallpapers. Have a browse
through them and pick new wallpaper for Media Centre.
Go here to convert your jpg images into png (png must be used
for this guide)
First up you’ll need to
take ownership of
ehres.dll
under
C:\Windows\ehome
(or type
%windir%\ehome
in any Explorer
window)
Open up
ehres.dll
in Restorator 2007, in the left pane navigate
to;
RCData\COMMON.ANIMATED.BACKGROUND.PNG
In the right pane you'll see the default background W7MC
displays.
Right click on
COMMON.ANIMATED.BACKGROUND.PNG
and go
to
extract…>extract as
“COMMON.ANIMATED.BACKGROUND.PNG”
W7MC Customization Handbook — Windows Guides —
19
Save the .png to the desktop.
Right click
COMMON.ANIMATED.BACKGROUND.PNG
again, but
this time, go to
Assign…>Assign To…
Choose your preferred background which must be .png. Any
resolution should be OK.
Save
ehres.dll
and close Restorator.
Now when you open up W7MC your new background should be
displayed!!
What Next?
Now you’ve read this book, I recommend you ensure you’ve
made changes to ensure your system is optimized. Refer to this
book frequently for reminders of what to do when cleaning
your PC; you will soon find PC optimization is a habit and you
are familiar enough with it to help friends and family with their
PCs. After you’ve done this, I encourage you to visit
Windows
Guides and learn other ways to improve your PC.
About this Handbook
This handbook is delivered free by Windows Guides.
RSVR85 is a moderator in
Windows Forums and a writer for
Windows Guides.
Rich Robinson is a
Microsoft MVP in the Desktop Experience
category; this book is not affiliated with Microsoft.
Get more
books.