Microsoft Word 2010 Level 3 potx
Bạn đang xem bản rút gọn của tài liệu. Xem và tải ngay bản đầy đủ của tài liệu tại đây (9.43 MB, 185 trang )
Microsoft Word 2010
Level 3
www.ddls.com.au
1800 U LEARN (1800 853 276)
Sydney Melbourne Brisbane
Thakral House Level 3, Dimension Data Building Level 8,
Level 10, 301 George Street 11-17 Dorcas Street 201 Charlotte Street
Sydney NSW 2000 South Melbourne VIC 3205 Brisbane QLD 4000
Canberra Adelaide Perth
Level 10, ACTewAGL House Level 4, Level 7,
221 London Circuit 139 Frome Street 553 Hay Street
Canberra ACT 2600 Adelaide SA 5000 Perth WA 6000
MICROSOFT WORD 2010
LEVEL 3
. . . . . . . . . . . . . . . . . . . . . . . . . . . . . . . . . . . . . . . .
ISBN 978-1-921721-48-9
Copyright 2010 Melbourne
by Watsonia Software Pty Ltd (ABN 64 060 335 748)
Published by Watsonia Publishing
47 Greenaway Street
Bulleen Vic Australia 3105
Telephone: (61 3) 9851 4000
Facsimile: (61 3) 9851 4001
Web site: www.watsoniapublishing.com
Product Code INF1012
First published: September 2010; Revised November 2010
. . . . . . . . . . . . . . . . . . . . . . . . . . . . . . . . . . . . . . . .
Production Acknowledgments
This course is the result of team collaboration.
However, several individuals need to be singled out
for acknowledgement including Natalie Ford, Lisa
Charlesworth, Marie Krupa (proofing), and Ron Krupa
(course assembly and publishing).
Trademark Acknowledgments
All terms mentioned in this manual that are known to be trademarks
or service marks have been appropriately acknowledged or
capitalised. Watsonia Software cannot attest to the accuracy of this
information. Use of a term in this manual should not be regarded as
affecting the validity of any trademark or service mark.
Screen Shots © 1983-2010 Microsoft. All rights reserved.
Disclaimer
Every effort has been made to provide accurate and complete
information. However, Watsonia Software assumes no responsibility
for any direct, indirect, incidental, or consequential damages arising
from the use of information in this document. Data and case study
examples are intended to be fictional. Any resemblance to real
persons or companies is coincidental.
Copyright Notice
This publication is protected in accordance with the provisions of the
Copyright Act. Apart from permissions expressed in the Copyright
Act pertaining to copying for study, review, or research, no part of
this publication may be reproduced in any form, or stored in a
database or retrieval system, or transmitted or distributed in any
form by any means, electronic, mechanical photocopying, recording,
or otherwise without written permission from Watsonia Software Pty
Ltd.
Microsoft Word 2010 - Level 3
© Watsonia Publishing - i - Read Me Preface
READ ME FIRST
1
4
In case you're not familiar with the terminology,
Read Me First is quite often the name given to a
computer file that contains important information
for people to know prior to using an application.
This section contains some important information to
help you use this book so we thought we'd start
with a Read Me First section.
Who this course is for
Microsoft Word 2010 Level 3 is designed for users who are keen to
extend their understanding and knowledge of Word beyond creating basic
documents.
What skills and knowledge
you will acquire
The skills and knowledge acquired in this course are sufficient to be able
to use and operate the software at an advanced level especially as it
relates to creating more complex documents and also automating
document procedures.
What you'll need to know
before beginning this
course
This course assumes an understanding of the topics and concepts
covered in Levels 1 and 2. It would also be beneficial to have a general
understanding of personal computers and the Windows operating system
environment.
The objectives of this guide…
At the completion of this course you should be able to:
• apply various page layout techniques
• save a document as a PDF and view it in a PDF reader
• customise mail merges
• insert and work with text boxes
• create and work with SmartArt
• create and use building blocks
• create, use and delete bookmarks
• create and work with a table of contents in a document
• create and work with an index in a document
• create and use interactive fields.
• create and work with master documents
• create and remove several forms of protection for your document
• create and work with electronic forms in Word
• create and work with macros
• insert content from other sources
What you get in a Chapter
Each of the chapters is comprised of a summary page listing the topics
covered in that chapter. The chapter then consists of single-page topic
sheets pertaining to the theme of the chapter.
What you'll need to have
before commencing this
course
Many of the topics in Microsoft Word 2010 Level 3 require you to open
an existing file with data in it. These files can be downloaded free of
charge from our web site at www.watsoniapublishing.com. Simply follow
the student files link on the home page. You will need the product code
for this course which is INF1012.
As you work through this
guide…
It is strongly recommended that you close all open files, if any, prior to
commencing each new chapter in this learning guide. Each chapter,
where relevant, has its own set of course files and any from a previous
chapter are no longer required.
Where to from here
Have a look at the next page which explains how a topic page works,
ensure that you have access to the exercise files (see above), and you're
ready to make a start.
www.spotlighttraining.com
Loughborough University IT Services
University of St Andrews
Oxford Brookes University – Computer Services
Dimension Data Learning Solutions 2011
Microsoft Word 2010 - Level 3
© Watsonia Publishing - ii - How To Preface
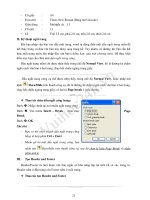
WORKING WITH TOPIC SHEETS
The majority of this book comprises single-page
topic sheets. There are two types of topic sheets:
task and reference. The layout of both is similar
– an overview at the top, detail in the centre and
additional reference (optional) material at the
bottom. Task sheets contain a Try This Yourself
step-by-step exercise panel in the detail area as
shown below.
Topic name
General topic overview provides an introduction to the topic
Try This Yourself (Task-based topic sheets) is a detailed step-by-step practice
exercise for you to work through. In Reference topic sheets this is usually replaced
by a box with reference information.
In Task topic sheets screen shots and graphics provide a visual clue as to what
will happen when you work through the Try This Yourself practice exercise. In
Reference topic sheets the screen shots and graphics are used to visually
represent information and concepts.
The For Your Reference (optional) element provides a quick summary of the steps
required to perform a task. These usually only appear in Task-based topic sheets.
The Handy To Know (optional) element provides additional information such as
alternate ways of accomplishing a task or further information providing handy tips.
1
2
3
4
5
6
www.spotlighttraining.com
Loughborough University IT Services
University of St Andrews
Oxford Brookes University – Computer Services
Dimension Data Learning Solutions 2011
Microsoft Word 2010 - Level 3
CONTENTS
© Watsonia Publishing - iii - Contents
Chapter 1: Page Techniques 1
Inserting A Cover Page 2
Inserting A Blank Cover Page 3
Inserting A Watermark 4
Creating A Watermark 5
Removing A Watermark 6
Applying Page Colours 7
Applying A Page Border 8
Applying Lines To A Page 9
Chapter 2: Saving To PDF 11
Understanding PDF 12
Saving A Document As A PDF 13
Viewing A PDF File 14
Chapter 3: Mail Merge Techniques 15
Running A Saved Merge 16
Excluding Recipients 17
Filtering Recipients 18
Sorting Recipients 19
Selecting Another Data Source 20
Applying An If…Then…Else… Rule 21
Applying A Fill-In Rule 22
Chapter 4: Text Boxes 23
Understanding Text Boxes 24
Inserting A Preformatted Text Box 25
Typing Text Into A Text Box 26
Positioning A Text Box 27
Resizing A Text Box 28
Deleting A Text Box 29
Drawing A Text Box 30
Formatting A Text Box 31
Chapter 5: SmartArt 33
Understanding SmartArt 34
Inserting A SmartArt Graphic 35
Inserting Text 36
Adding Shapes Below 37
Adding Shapes Above 38
Adding Shapes Before And After 39
Adding An Assistant 40
Promoting And Demoting Positions 41
Switching Right To Left 42
Positioning SmartArt 43
Resizing SmartArt 44
Applying A Different Layout 45
Applying A Colour Scheme 46
Applying A SmartArt Style 47
Deleting SmartArt Shapes 48
www.spotlighttraining.com
Loughborough University IT Services
University of St Andrews
Oxford Brookes University – Computer Services
Dimension Data Learning Solutions 2011
Microsoft Word 2010 - Level 3
CONTENTS
© Watsonia Publishing - iv - Contents
Chapter 6: Building Blocks 49
Understanding Building Blocks 50
Inserting A Building Block 51
Creating Building Blocks 52
Saving Building Blocks 53
Inserting Quick Parts 54
Editing Building Blocks 55
Deleting Building Blocks 56
Saving Building Blocks To A Template 57
AutoText Versus Quick Parts 58
Chapter 7: Bookmarks 59
Creating Bookmarks 60
Navigating With Bookmarks 61
Deleting Bookmarks 62
Chapter 8: Table Of Contents 63
Understanding Tables Of Contents 64
Inserting A Built-In Table Of Contents 65
Navigating With A Table Of Contents 66
Updating Page Numbers 67
Updating A Table Of Contents 68
Customising A Table Of Contents 69
Formatting A Table Of Contents 70
Chapter 9: Indexing 71
Understanding Indexing 72
Marking Index Entries 73
Creating An AutoMark File 74
Marking Index Entries With An AutoMark File 75
Removing Marked Entries 76
Generating An Index 77
Modifying The Index Format 78
Updating An Index 79
Chapter 10: Fields 81
Understanding Fields 82
The Field Dialog Box 83
Inserting A Document Information Field 84
Setting Field Properties 85
Showing And Hiding Field Codes 86
Showing And Hiding Field Shading 87
Inserting Formula Fields 88
Inserting A Date And Time Field 89
Updating Fields Automatically When Printing 90
Locking And Unlocking Fields 91
Applying A Number Format 92
www.spotlighttraining.com
Loughborough University IT Services
University of St Andrews
Oxford Brookes University – Computer Services
Dimension Data Learning Solutions 2011
Microsoft Word 2010 - Level 3
CONTENTS
© Watsonia Publishing - v - Contents
Chapter 11: Interactive Fields 93
Understanding Interactive Fields 94
Inserting a FILLIN Field 95
Typing Fields Codes 96
Activating Interactive Fields 97
Inserting An ASK Field 98
Using REF To Display Bookmarks 99
Activating Fields Automatically 100
Chapter 12: Master Documents 101
Understanding Master Documents 102
Creating A Master Document 103
Creating Subdocuments 104
Working With Master Documents 105
Inserting Subdocuments 106
Formatting A Master Document 107
Editing Subdocuments 108
Merging Subdocuments 109
Splitting Subdocuments 110
Deleting Subdocuments 111
Building A Table Of Content 112
Printing A Master Document 113
Why Master Documents Are Misunderstood 114
Chapter 13: Tracking Changes 115
Understanding Tracking Changes 116
Enabling And Disabling Tracked Changes 117
Changing Tracking Options 118
Showing Revisions In Balloons 119
Showing Revisions Inline 120
Showing And Hiding Revisions 121
Showing Specific Types Of Revisions 122
Showing And Hiding The Reviewing Pane 123
Accepting And Rejecting Changes 124
Chapter 14: Protecting Documents 125
Understanding Document Protection 126
Making A Document Read-Only 127
Working With A Read-Only Document 128
Restricting Formatting 129
Working With Formatting Restrictions 130
Restricting Editing 131
Making Exceptions 132
Stopping Document Protection 133
www.spotlighttraining.com
Loughborough University IT Services
University of St Andrews
Oxford Brookes University – Computer Services
Dimension Data Learning Solutions 2011
Microsoft Word 2010 - Level 3
CONTENTS
© Watsonia Publishing - vi - Contents
Chapter 15: Electronic Forms 135
Understanding Electronic Forms In Word 136
Creating A Form 137
Understanding Content Controls 138
Displaying The Developer Tab 139
Inserting Text Controls 140
Setting Content Control Properties 141
Inserting The Date Picker Control 142
Inserting Prompt Text 143
Inserting Formulas 144
Inserting A Combo Box Control 145
Inserting A Drop-Down List Control 146
Protecting And Saving The Form 147
Completing An Electronic Form 148
Editing A Protected Form 149
Deleting A Content Control 150
Chapter 16: Macros 151
Understanding Macros In Word 152
Setting Macro Security 153
Saving A Document As Macro-Enabled 154
Recording A Macro 155
Running A Macro 156
Assigning A Macro To The Toolbar 157
Assigning A Keyboard Shortcut To A Macro 158
Editing A Macro 159
Deleting A Macro 160
Creating A MacroButton Field 161
Copying A Macro 162
Tips For Developing Macros 163
Chapter 17: Importing 165
Understanding Importing 166
Importing Text 167
Importing Excel Data 168
Importing Linked Excel Data 169
Importing And Embedding Excel Data 170
Modifying Embedded Excel Data 171
Concluding Remarks 173
www.spotlighttraining.com
Loughborough University IT Services
University of St Andrews
Oxford Brookes University – Computer Services
Dimension Data Learning Solutions 2011
Microsoft Word 2010 - Level 3
© Watsonia Publishing Page 1 Page Techniques
CHAPTER 1 PAGE TECHNIQUES
Once you have written and formatted your document, you may
consider adding some finishing touches to the overall page layout,
such as cover pages, watermarks, page borders, and the like.
This chapter will step you through some of the page layout
techniques that you can apply to your documents in Word.
In this session you will:
learn how to insert a cover page
learn how to insert a blank cover page
learn how to insert a watermark
learn how to create a watermark
learn how to remove a watermark
learn how to apply page colours
learn how to apply page borders
learn how to apply lines to a page.
INFOCUS
WPL_W816
www.spotlighttraining.com
Loughborough University IT Services
University of St Andrews
Oxford Brookes University – Computer Services
Dimension Data Learning Solutions 2011
Microsoft Word 2010 - Level 3
© Watsonia Publishing Page 2 Page Techniques
INSERTING A COVER PAGE
Try This Yourself:
Open
File
Before starting this exercise you
MUST open the file W816 Page
Techniques_1.docx
Click on the Insert tab, then click on
Cover Page
in the Pages group
to display the Cover Pages gallery
Click on Cubicles to insert the cover
page at the start of the document
Cover pages are always inserted at
the start of the document no matter
where the cursor is positioned
Click in Type the company name
and type Alpheius Global
Enterprises
Click in Type the document title and
type The Economics of Installing
Solar Panels
Click in Type the document subtitle
and type For All AGE Operations,
and then type 2010 for Year
Click on Author below the document
subtitle, then click on the blue Author
tab and press
. Click outside the
selection to see the result
Let’s remove the original title now that
you have added the cover page
Scroll to the next page, select the text
The Economics of Installing Solar
Panels for All AGE Operations and
press
Save the document
For Your Reference…
To insert a cover page:
1. Click on the Insert tab, then click on Cover
Page
in the Pages group
2. Click on the desired cover page option
3. Replace the sample text with your own
Handy to Know…
• If you insert a second cover page in a
document, it will replace the first cover page.
• You can download more cover page designs
from Office Online. Click on Cover Page in
the Pages group and select More Cover
Pages from Office Online. Select a cover
page to apply to the document.
2
6
Microsoft Word 2010 includes 19 cover page
designs that you can apply to long documents,
such as annual reports, reports, white papers and
the like. You simply choose the desired cover
from the Cover Page gallery and replace the
sample text with your own. Cover pages are part of
the Building Block gallery.
www.spotlighttraining.com
Loughborough University IT Services
University of St Andrews
Oxford Brookes University – Computer Services
Dimension Data Learning Solutions 2011
Microsoft Word 2010 - Level 3
© Watsonia Publishing Page 3 Page Techniques
INSERTING A BLANK COVER PAGE
Try This Yourself:
Same
File
Continue using the previous file with
this exercise, or open the file W816
Page Techniques_2.docx
Click on the Insert tab, then click on
Cover Page
in the Pages
group and select Remove Current
Cover Page
The cover page will be deleted so
you can now insert a blank page to
replace it
Ensure that the cursor is positioned
to the left of Introduction, then
click on Blank Page
in the
Pages group to insert a blank page
A blank page will always be
inserted immediately before the
cursor
Press + to position the
cursor at the top of the new page,
then type The Economics of
Installing Solar Panels, press
and type For All AGE Operations
Click in the first heading, then click
on the Home tab and then click on
Title in the Styles group to apply
this style to the heading
Click in the subheading, then click
on the Home tab and then click on
Subtitle in the Styles group to
apply this style to the heading
Save and close the document
For Your Reference…
To insert a blank cover page:
1. Press
+ to position the cursor
2. Click on the Insert tab, then click on Cover
Page
in the Pages group
3. Type and format the details for the cover
page
Handy to Know…
• You can save a customised cover page in
the Cover Pages gallery. To do this, select
the entire contents of your cover page, click
on Cover Page
on the Insert tab and
select Save Selection to Cover Page
Gallery. Type a Name and Description if
required and then click on [OK].
3
Rather than using one of the predesigned cover
pages from the Cover Pages gallery, you can
create your own cover page by inserting a blank
cover page. After positioning the cursor at the
top of the document, you can insert a new blank
page at the start of the document. From then on the
design, formatting and layout of your cover sheet is
all up to you.
5
www.spotlighttraining.com
Loughborough University IT Services
University of St Andrews
Oxford Brookes University – Computer Services
Dimension Data Learning Solutions 2011
Microsoft Word 2010 - Level 3
© Watsonia Publishing Page 4 Page Techniques
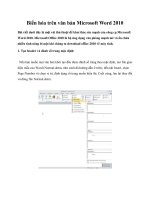
INSERTING A WATERMARK
Try This Yourself:
Open
File
Before starting this exercise you
MUST open the file W816 Page
Techniques_3.docx
Double-click in the blank header
area at the top of the page to
activate the header
Watermarks are stored in the same
layer as headers and footers
Click on Different First Page in the
Options group to remove the tick
When you insert a cover page,
Word turns on the Different First
Page option to ensure that the
formatting on the cover page is not
applied to subsequent pages. So, if
you left the option as is, the
watermark would appear on the first
page only. By removing the tick you
can allow the watermark to appear
on all pages
Double-click in the document area
or press
to close the header
Click on the Page Layout tab, then
click on Watermark
in the
Page Background group to display
the Watermarks gallery
Click on DRAFT 2 under
Disclaimers
DRAFT will now appear on all
pages in the document…
Save and close the document
For Your Reference…
To insert a watermark:
1. Click on the Page Layout tab, then click on
Watermark
in the Page Background
group
2. Click on the desired watermark
Handy to Know…
• You can restrict the appearance of
watermarks to specific pages by creating
sections. Replace the page breaks with next
page section breaks then insert the
watermark in the section where you want it to
appear.
1
5
A watermark is text or a picture that is applied to
the page background and sits behind the content
in a document. One of the most common reasons
for inserting a watermark is to highlight the status
of a document, such as being a draft only, or to
show that a document is confidential. Text-based
watermarks are so common that Word has included
them in the Watermarks gallery.
www.spotlighttraining.com
Loughborough University IT Services
University of St Andrews
Oxford Brookes University – Computer Services
Dimension Data Learning Solutions 2011
Microsoft Word 2010 - Level 3
© Watsonia Publishing Page 5 Page Techniques
CREATING A WATERMARK
Try This Yourself:
Open
File
Before starting this exercise you
MUST open the file W816 Page
Techniques_4.docx
Press to move the cursor down
a line, click on the Page Layout
tab, then click on Watermark
in the Page Background group
and select Custom Watermark to
display the Printed Watermark
dialog box
Click on Text watermark, then
double-click in Text and type First
Draft
Click on the drop arrow for Font
and select Franklin Gothic
Medium
Click on the drop arrow for Size
and select 96
If you leave this field set to Auto,
Word will use the largest size while
ensuring that the text remains
within the page margins
Click on the drop arrow for
Colour and select Aqua, Accent 5
(row 1, column 9)
Click on Horizontal in Layout, then
click on [OK]
The custom watermark will appear
on every page in the document…
Save the document
For Your Reference…
To create a watermark:
1. Click on the Page Layout tab, then click on
Watermark
in the Page Background
group and select Custom Watermark
2. Complete the options as required
3. Click on [OK]
Handy to Know…
• You can customise existing watermarks in
the Watermarks gallery. To do this, click on
Watermarks in the Page Background group
on the Page Layout tab, right-click on an
existing watermark and select Edit
Properties. Make the required changes and
then click on [OK].
1
6
Rather than choosing a watermark from the
Watermarks gallery, you can create your own
watermark using custom text. Using the Printed
Watermark dialog box, you can also format the
watermark text, such as changing the font, font size
and colour, or you can select an image to be
inserted as a picture watermark.
www.spotlighttraining.com
Loughborough University IT Services
University of St Andrews
Oxford Brookes University – Computer Services
Dimension Data Learning Solutions 2011
Microsoft Word 2010 - Level 3
© Watsonia Publishing Page 6 Page Techniques
REMOVING A WATERMARK
Try This Yourself:
Same
File
Continue using the previous
file with this exercise, or open
the file W816 Page
Techniques_5.docx
Click on the Page Layout tab,
then click on Watermark
in the Page Background
group to display the
Watermarks gallery
Currently, the watermark
appears on every page in the
document
Select Remove Watermark
And voilá, it’s gone
Scroll through the document to
check that it has been
removed from each page
Save the document
For Your Reference…
To remove a watermark:
1. Click on the Page Layout tab, then click on
Watermark
in the Page Background
group
2. Select Remove Watermark
Handy to Know…
• Before removing a custom watermark, you
can save it to the Watermarks gallery.
Double-click in the header area, click on the
watermark, click on Quick Parts
and
select Save Selection to Quick Part
Gallery. Type a Name and select
Watermarks in Gallery.
2
It is just as easy to remove a watermark as it is to
add one! It may be necessary to remove the
watermark from a document once you have
distributed your document and received
feedback, comments and the like. You would
remove the watermark when preparing the final
version of the document.
www.spotlighttraining.com
Loughborough University IT Services
University of St Andrews
Oxford Brookes University – Computer Services
Dimension Data Learning Solutions 2011
Microsoft Word 2010 - Level 3
© Watsonia Publishing Page 7 Page Techniques
APPLYING PAGE COLOURS
Try This Yourself:
Same
File
Continue using the previous file
with this exercise, or open the file
W816 Page Techniques_6.docx
Click on the Page Layout tab, then
click on Page Colour
in the
Page Background group to
display the Page Colour palette
Point to the various colour options
to see them applied temporarily to
the document in Live Preview
To apply a colour you simply click
on it. But let’s do something more
interesting
Select Fill Effects to open the Fill
Effects dialog box, then ensure
that the Gradient tab is open
Click on Two colours, then select
Olive Green, Accent 3, Lighter
80% (row 2, column 7) in Colour 1
and select Olive Green, Accent 3,
Lighter 40% (row 4, column 7) in
Colour 2
Click on Diagonal up under
Shading styles and click on the
top right Variant thumbnail
Click on [OK] to apply this gradient
to the document
Save the document
For Your Reference…
To apply page colours:
1. Click on the Page Layout tab, then click on
Page Colour
2. Click on a colour or click on Fill Effects to
apply a gradient, texture, pattern or picture to
the background
Handy to Know…
• Unfortunately you cannot apply page colour
to a single page in your document. If you
want to do this, one way to work around this
is to draw a rectangle that covers the entire
page and then arrange the rectangle to sit
behind the text.
1
3
You can make a document, such as an annual
report, booklet, cover page, flyer, brochure and
the like more appealing by applying colour to the
page background. Word provides a range of tools
to apply solid colours, gradients, patterns, textures,
effects or even pictures to the background of the
page.
6
www.spotlighttraining.com
Loughborough University IT Services
University of St Andrews
Oxford Brookes University – Computer Services
Dimension Data Learning Solutions 2011
Microsoft Word 2010 - Level 3
© Watsonia Publishing Page 8 Page Techniques
APPLYING A PAGE BORDER
Try This Yourself:
Same
File
Continue using the previous file
with this exercise, or open the
file W816 Page
Techniques_7.docx
Click on the Page Layout tab,
then click on Page Borders
in the Page Background group
to display the Borders and
Shading dialog box
Click on Shadow for Setting
then ensure that the top
unbroken line is selected under
Style
Click on the drop arrow for
Colour and select Dark Blue,
Text 2 (row 1, column 4)
Click on the drop arrow for
Width and select 1½ pt
Click on the drop arrow for
Apply to and select This
section − All except first page
Click on [OK] to apply the
borders, then scroll through the
document to check that the
borders appear on all pages
except for the first
Save the document
For Your Reference…
To apply a page border:
1. Click on the Page Layout tab, then click on
Page Borders
in the Page Background
group
2. Set the options as desired
3. Click on [OK]
Handy to Know…
• To specify the exact position of a page
border, click on [Options] in the Borders
and Shading dialog box to open the
Borders and Shading Options dialog box.
Specify the Margins and the point from
which they are to be Measured from.
1
6
Applying page borders can enhance the look and
feel of a page or document. Although it may not
always be appropriate to apply page borders to a
business document, you might consider applying
a border to a cover page, flyer, brochure, notices,
newsletters or any single-page document. Word
provides many different page border styles to suit
the purpose of your document.
www.spotlighttraining.com
Loughborough University IT Services
University of St Andrews
Oxford Brookes University – Computer Services
Dimension Data Learning Solutions 2011
Microsoft Word 2010 - Level 3
© Watsonia Publishing Page 9 Page Techniques
APPLYING LINES TO A PAGE
Try This Yourself:
Same
File
Continue using the previous
file with this exercise, or open
the file W816 Page
Techniques_8.docx
Click on Page Borders in
the Page Background group
to display the Borders and
Shading dialog box
Let’s apply a border at the top
and bottom of all pages,
except for the first
Click on None under Setting
to clear the current borders,
then click on Custom
Click on the drop arrow for
Width and select 2 ¼ pt
Click on Top border in
Preview to insert a border at
the top of the page
Click on Bottom border in
Preview to insert a border at
the bottom of the page
Click on [OK] to apply the lines
to the top and bottom edges of
the page, then scroll through
the document to check that the
top and bottom borders appear
on all pages except the first
Save and close the document
For Your Reference…
To apply lines to a page:
1. Click on Page Borders
2. Click on Custom under Settings
3. Select the Style, Colour and Width
4. Click on the desired locations in Preview,
then click on [OK]
Handy to Know…
• Lines are not just for the page! You can also
apply lines and borders to headings and text.
To apply a line to a heading, for example,
click in the heading then click on Page
Borders. Click on the relevant border setting
in Preview, such as Top border, then click
on [OK].
1
6
Using the Preview area of the Borders and
Shading dialog box, you can apply lines to any
one or more of the four sides of a page. All you
need to do is to specify the settings for the line,
such as the style and width, and then either click on
the appropriate border location in Preview or click
on the corresponding border tool; clicking either
toggles the borders on and off.
www.spotlighttraining.com
Loughborough University IT Services
University of St Andrews
Oxford Brookes University – Computer Services
Dimension Data Learning Solutions 2011
Microsoft Word 2010 - Level 3
© Watsonia Publishing Page 10 Page Techniques
NOTES:
1
4
www.spotlighttraining.com
Loughborough University IT Services
University of St Andrews
Oxford Brookes University – Computer Services
Dimension Data Learning Solutions 2011
Microsoft Word 2010 - Level 3
© Watsonia Publishing Page 11 Saving To PDF
CHAPTER 2 SAVING TO PDF
PDF (Portable Document Format) is a universal file format that
can be viewed by anyone, even if they don’t have the software that
created the file. You can save your Word documents as PDF files.
This enables you to distribute, upload or share your document with
anyone who has a PDF reader (such as Adobe Reader) installed on
their computer. Saving a document as a PDF also ensure that any
formatting and layout are preserved, and can significantly reduce
file size. As such, PDF has become the standard file format for
document distribution, particularly when making documents
available for download from the internet.
In this session you will:
gain an understanding of PDF
learn how to save a document as PDF
learn how to view a PDF.
INFOCUS
WPL_W874
www.spotlighttraining.com
Loughborough University IT Services
University of St Andrews
Oxford Brookes University – Computer Services
Dimension Data Learning Solutions 2011
Microsoft Word 2010 - Level 3
© Watsonia Publishing Page 12 Saving To PDF
UNDERSTANDING PDF
One of the great frustrations of computing is
receiving a file and not being able to view or print
it because you have neither the program that
created it nor a program to convert it. Or, the size
of the file is too large to send by email. To enable
files to be shared with anyone, you can save them
as PDF for anyone to view, in exactly the format
and layout you intended, by using a PDF reader.
What Is PDF?
PDF, or Portable Document Format, is a universal file format developed by Adobe Systems for the
purpose of creating a file format that could be viewed by anyone with Adobe Acrobat or Adobe
Reader installed, regardless of whether they had the actual software installed that was used to
create that file, and regardless of whether it was created on a PC or a Mac.
A PDF file will preserve all elements of the document in its entirety in a manageable file size. Save a
document as a PDF file if it is intended for others to view or download from the internet, for example.
PDF has become the standard universal file format for the following reasons.
• Reduces file size: PDF files are generally significantly smaller in file size than the original file.
• Easy to view: Anyone who has the free Adobe Reader installed on their computer can view a
PDF file. PDF files can be shared, viewed, navigated and printed exactly as intended.
• Complete file: PDF files contains all fonts and images so what you see is what you get.
• Easy to save: You can save a document as a PDF by selecting PDF from the Save as Type
menu in the Save As dialog box.
• Requirements: some organisations, such as commercial printers, specify that you send artwork
and the like in PDF format. This way, the printer (and you) can be sure that what you see is what
you get.
Because data in PDF files cannot be easily changed, PDF is the standard for the secure and reliable
distribution and exchange of electronic documents and forms worldwide. This file format is also ideal
for documents that will be reproduced using commercial printing methods.
Viewing PDF Files
To open and view PDF files (and to complete the exercises in this chapter), you must have the free
Adobe Reader or Adobe Acrobat installed. To check whether you currently have this installed on
your computer, click on Start > All Programs and see whether Adobe Reader is listed. Otherwise,
click on the Start > Control Panel, then click on Programs and click on Programs and Features to
view a list of installed programs.
If you do not have Adobe Reader installed, visit Adobe’s website at www.adobe.com, click on the
link for Get Adobe Reader, and follow the prompts to download and install.
www.spotlighttraining.com
Loughborough University IT Services
University of St Andrews
Oxford Brookes University – Computer Services
Dimension Data Learning Solutions 2011
Microsoft Word 2010 - Level 3
© Watsonia Publishing Page 13 Saving To PDF
SAVING A DOCUMENT AS A PDF
Try This Yourself:
Open
File
Before starting this exercise you
MUST open the file W874 Saving
To PDF_1.docx
Click on the File tab, then click on
Save As to open the Save As
dialog box
Type My PDF in File name,
navigate to the course files folder,
click on the drop arrow
for
Save as type and select PDF
(*.pdf)
Ensure that Open file after
publishing is selected
This means that the file will open
in Reader once you click on
[Save]. If your computer doesn’t
have Adobe Reader installed, this
option will not be available
Ensure that Standard
(publishing online and printing)
is selected in Optimise for
This option will result in a
document with a high print
quality. Select Minimum size
(publishing online) if print quality
is less important than file size
Click on [Save]
The document will be saved as a
PDF and will open in Reader for
you to view
Click on Close to close
Adobe Reader, then save and
close the document
For Your Reference…
To save a document as a PDF:
1. Click on the File tab, then click on Save As
2. Type a File name, navigate to the desired
folder, then click on the drop arrow for Save
as type and select PDF (*.pdf)
3. Select the settings and click on [Save]
Handy to Know…
• You can save only part of your document as
a PDF. To do this, click on [Options] in the
Publish as PDF dialog box and select the
Page range. You can also save a selection
by selecting the desired content before
opening the Publish as PDF dialog box and
then clicking on Selection in Page range.
4
5
If you want to share your document with others,
such as on the internet, and you want to ensure
that it can be viewed by anyone but cannot be
changed, saving your document in PDF may be
the ideal solution. During the save, you can instruct
Word to either optimise the resultant file for normal
use, such as printing, or to ensure that its file size
is as small as possible for Web use.
www.spotlighttraining.com
Loughborough University IT Services
University of St Andrews
Oxford Brookes University – Computer Services
Dimension Data Learning Solutions 2011
Microsoft Word 2010 - Level 3
© Watsonia Publishing Page 14 Saving To PDF
VIEWING A PDF FILE
Try This Yourself:
Open
File
Before starting this exercise
make sure you are viewing the
desktop
Click on Start > All Programs
> Adobe Reader
The blank Adobe Reader
window will open…
Select File > Open to open the
Open dialog box
Navigate to the Course Files
for Word 2010 folder in Look
in
Click on W874 Saving To
PDF_2.pdf then click on
[Open]
Click on Pages in the
panel on the left to open the
Navigation panel
Thumbnails representing the
pages in the document will
appear in this panel. You can
click on them to display the
respective page’s detail in the
document panel on the right…
Click on Close to close the
document and Reader
For Your Reference…
To view a PDF in Adobe Reader:
1. Click on Start > All Programs > Adobe
Reader
2. Select File > Open
3. Navigate to the desired Look in folder
4. Double-click on the file to open
Handy to Know…
• When viewing a PDF document in a PDF
reader, you cannot make any changes to the
document. You must make changes to the
original document using the application in
which you created the PDF, such as
Microsoft Word, and then resave the altered
file as a PDF.
4
5
You can only open and view a PDF file if you
have a PDF reader, such as Adobe Reader or
Adobe Acrobat, installed on your computer.
Conversely, there are many PDF readers
available to download from the internet for free
also, if you prefer. In this exercise, you will open a
PDF file in Adobe Reader so that you can view
and work with a PDF document.
www.spotlighttraining.com
Loughborough University IT Services
University of St Andrews
Oxford Brookes University – Computer Services
Dimension Data Learning Solutions 2011
Microsoft Word 2010 - Level 3
© Watsonia Publishing Page 15 Mail Merge Techniques
CHAPTER 3 MAIL MERGE TECHNIQUES
Word allows you to customise your mail merges by filtering and
sorting recipients, as well as creating and applying rules that
instruct Word what data to insert in specific fields when certain
conditions have been met. If you spend a lot of time preparing and
processing mail outs and the like, then these features could prove a
valuable time-saver.
In this session you will:
learn how to run a saved merge
learn how to exclude recipients from a mail merge
learn how to filter recipients
learn how to sort recipient records
learn how select another data source
learn how to apply an If Then Else rule
learn how to apply a Fill-In rule.
INFOCUS
WPL_W827
www.spotlighttraining.com
Loughborough University IT Services
University of St Andrews
Oxford Brookes University – Computer Services
Dimension Data Learning Solutions 2011
Microsoft Word 2010 - Level 3
© Watsonia Publishing Page 16 Mail Merge Techniques
RUNNING A SAVED MERGE
Try This Yourself:
Before starting this exercise
ensure that Word is open
Open the file W827 Merging
Techniques_1.docx from the
course files folder
Because this file is an existing
merge document, you will be
presented with a message box
asking whether or not you
want to have data placed in
the document from the
attached data source
Click on [Yes] to open the
merge document
Now, to complete the merge
Click on the Mailings tab, then
click on Finish & Merge
in the Finish group and select
Edit Individual Documents to
open the Merge to New
Document dialog box
Ensure that All is selected,
then click on [OK] to create
the merge letters
Scroll through some of the
letters (there should be 45
letters), then close the form
letters without saving and
leave the mail merge
document open
For Your Reference…
To run a saved merge:
1. Open the merge main document
2. Click on [Yes] to place the data from the
attached data source into the merge
document
3. Click on Finish & Merge
on the
Mailings tab
Handy to Know…
• If you click on [No] at the SQL command
prompt when opening an existing merge
document, the document will open without
the data source attached. You cannot
perform a merge unless you attach a data
source, so make sure you attach another
data source.
1
3
When you create a mail merge document and
have linked the data source to the main
document, you don’t have to complete the merge
process before closing the document. Instead,
you can save the main document, and Word will
automatically retain the data source and field
information. You can then resume the mail merge
at a later date as required.
4
www.spotlighttraining.com
Loughborough University IT Services
University of St Andrews
Oxford Brookes University – Computer Services
Dimension Data Learning Solutions 2011
Microsoft Word 2010 - Level 3
© Watsonia Publishing Page 17 Mail Merge Techniques
EXCLUDING RECIPIENTS
Try This Yourself:
Continue using the previous file
with this exercise
Click on the Mailings tab, then
click on Edit Recipient List
in the Start Mail Merge group to
open the Mail Merge
Recipients dialog box
A tick beside the recipient’s
name indicates they will be
included in the mail merge
Click on the check boxes to
remove the tick for the following
Surnames:
Jennings, Foreman, Billings,
Marsh, Richardson, Young,
Oakley
Click on [OK] to close the Mail
Merge Recipients dialog box
Click on Finish & Merge
and select Edit Individual
Documents to open the Merge
to New Document dialog box
Ensure that All is selected, then
click on [OK] to create the
merge letters
In this case ‘All’ does not really
mean all recipients; rather it
means all selected recipients…
Scroll through some of the
letters (there should be 38
letters), then close the form
letters without saving
For Your Reference…
To select recipients:
1. Click on Edit Recipient List
in the Start
Mail Merge group on the Mailings tab
2. Remove the tick for the records that are not
to be included in the merge
3. Click on [OK] then finish the merge
Handy to Know…
• If you want to exclude more recipients than
you want to include, click on the tick in the
Header row in the Mail Merge Recipients
dialog box. This will remove all ticks, and
then you can tick to select recipients to
include, then click on [OK].
1
2
If you use the same data source to perform mail
merges for various documents, you may find at
times that you don’t want a merge document to
be sent to all of the recipients. Instead you can
select to exclude recipients from the mail merge.
By default, all recipients are included in the mail
merge, but you can easily exclude recipients in the
Mail Merge Recipients dialog box.
www.spotlighttraining.com
Loughborough University IT Services
University of St Andrews
Oxford Brookes University – Computer Services
Dimension Data Learning Solutions 2011