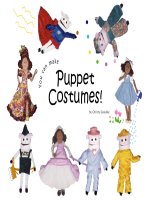
You can make Puppet Costumes! pot
Bạn đang xem bản rút gọn của tài liệu. Xem và tải ngay bản đầy đủ của tài liệu tại đây (5.65 MB, 132 trang )
Y
o
u
c
a
n
m
a
k
e
Puppet
Costumes!
by Christy GraunkeLibrary of Congress Catalog Card Number 99-90682
ISBN 0-9673222-0-0
Graunke, Christy
You can make Puppet Costumes!
Illustrated; includes index (hooray!)
1. Puppetry 2. Costumes 3. Sewing 4. Theatre, performing arts
No puppets were harmed in the making of this book (although they did become better dressed!)
© 1999 Christy Graunke
✏
Laboriously printed in the United States of America
✏
Please respect copyright laws
Published by Christyworks!
❦
❦
1
What’s inside?
What’s inside?What’s inside?
What’s inside?
Sleeves 47 Shirts & robes
53
Suits & coats 60 Vests 67 Cinderella’s sack
dresses 72
Skirts 77
Dresses &
jumpers 82
Pants 88 Capes 98 Hats 101 Shoes &
accessories 109
What if… 116
Cover story 118
Index 122
First things first:
of characters &
costumes 2
Choosing fabric
8
Basic sewing
steps 14
Nifty safety pin
trick 29
Zippers,
buttons, & more
30
Easy pattern
making 37
2
First things first:
First things first:First things first:
First things first:
of characters & costumes
of characters & costumesof characters & costumes
of characters & costumes
Creating characters through costumes
Creating characters through costumesCreating characters through costumes
Creating characters through costumes
Costumes enliven and impress, entertain and inform. They help the audience tell
the good guys from the bad guys, the Cinderella in rags from the Cinderella in
magical riches. They can turn the same puppet into a dancer, a firefighter, a
milkmaid, a princess, or a clown. Making a costume is a lot like making a whole
new puppet. And that’s exciting!
You don’t need to sew perfectly to create recognizable characters through costumes,
but you do need a willingness to experiment and an idea of what you want your
costumes to look like. Before you get started, you also need to consider your type
of puppet, type of theatre, and your stage setup.
Types of puppets
Types of puppetsTypes of puppets
Types of puppets
Puppets come in all different shapes, sizes, and styles, but you can use the same
techniques to costume just about any body. From a costuming standpoint, the
most important thing all puppets share is movement. Your puppet should move as
easily in its costumes as a human actor would, since puppets depend on motion for
a successful performance. Of course, different kinds of puppets move in different
ways, so it helps to know a little bit about your particular type of puppet.
First things first: of characters & costumes
3
Hand puppets
Hand puppetsHand puppets
Hand puppets
Most hand puppets have a tube-shaped body that’s
simple to costume, but (on the other hand) can also
present a real challenge. The shape (or lack thereof)
works fine for t-shirts, but how can you make elegant
outfits for a body that looks like a steam rolled salami?
Fortunately, there are some simple
techniques that won’t leave you
(or your hand puppet) feeling flat.
✄
Use contrasting fabrics rather
than one solid color to give the
costume some depth and shape
✄
Create a waistline using a skirt
(page 77), belt (page 113), or
pants, even if your puppet
doesn’t have legs (page 96)
✄
If applicable, put the waistline
higher up than it would be for a
full-bodied puppet
✄
Use shaping on sleeves and skirt
waists, like the gathering
technique shown on page 22
Perhaps most importantly, don’t make the costume
too tight fitting since this only emphasizes your puppet’s
flat figure. Both the hand puppet (Teddy) and the
marionette (Ginger Sweets) on the covers of this book
have flat, tube-shaped bodies, but as the pictures show,
you can costume just about anything if you put your
hands to it.
Although many hand
puppets move mainly at
the mouth, you need to
make sure your puppet’s
arms can move freely as
well. Don’t be afraid to
spend a lot of time in
the “Sleeves” chapter
until they fit just right.
Once you have the
sleeves made, make sure to adjust the length
(as on page 59) to allow for movement.
NOTE: For sock and other
soft-bodied puppets, you
may need to stuff the body
before costuming so that
your puppet’s body becomes
approximately the same size
as when your arm is inside.
First things first: of characters & costumes
4
Marionettes
MarionettesMarionettes
Marionettes
Some marionettes have extremely
shapely figures while others have
loosely connected stick-like
bodies that provide very little
shape at all. For shapely puppets,
you either need to make your
costumes very loose or shape
them up by following the
directions in the “Easy pattern
making” chapter.
For stickly marionettes, you may
want to wrap your puppet with a
few layers of paper towels before costuming to help you
make the clothes fit more loosely. (Make sure to leave
the joints uncovered so you can test your puppet’s
movement.) This helps “flesh out” your puppet’s clothes
and gives your puppet more room to move around.
No matter what type of marionette you have, you
need to make sure that the strings can move freely
since marionettes depend on a complete range of body
movements for performance.
Many performers restring their
marionettes after costuming, using
a needle to poke the strings through
the fabric. If that’s not practical for
your puppet, you may need to make
small holes in the costume for the
strings to go through (using the
hand made buttonhole technique
from page 34). Make sure to
position the holes for the “up”
movements of the strings.
Rod puppets
Rod puppetsRod puppets
Rod puppets
Some rod puppets have a shape
and movement similar to hand
puppets, while others are more like
marionettes. Take a look at both of
the previous sections to see which
parts apply to your rod puppet.
First things first: of characters & costumes
5
Ventriloquist characters
Ventriloquist charactersVentriloquist characters
Ventriloquist characters
Since many ventriloquist
characters have the same
shape as hand puppets,
they have many of the
same costuming issues
(see page 3). In general,
ventriloquist characters
move around a lot less
than other puppets since
they tend to stick close to
their performers, but their
costumes still need to
allow them to be flexible,
especially for arm movement.
Finger puppets
Finger puppetsFinger puppets
Finger puppets
Many finger puppets are so small
and so simple they may best be
costumed with pieces of felt and
glue. For others, the techniques
in this book may work just fine,
but you’ll have to be awfully
good at making tiny seams!
Shadow puppets
Shadow puppetsShadow puppets
Shadow puppets
I would say most of the techniques
in this book don’t apply to shadow
puppets at all (since they’re usually
cut from cardboard, wood, or leather),
but I’m sure you could make them
work if you really wanted to…
Dolls & stuffed animals
Dolls & stuffed animalsDolls & stuffed animals
Dolls & stuffed animals
Dolls are not puppets. Puppets are not dolls. But both
can be characters, and you can use a lot of the same
techniques to costume just about anything. Unlike
puppets, most dolls don’t “work for a living” by putting
on shows, but “play” dolls can get just as much hard use
and require just as much flexibility.
First things first: of characters & costumes
6
Types of theatres
Types of theatresTypes of theatres
Types of theatres
Your costuming needs depend not only on what kind
of puppets you have, but on what kind of performance
group you belong to.
In a puppet ministry, for example, you may have one
or two full productions a year and spend the rest of
the time putting on small skits. You need a collection
of various wardrobe essentials that you can throw
together at a moment’s notice. When you make a
costume, try to think of ways to make the parts more
versatile, like leaving the blouse and skirt separate or
finishing the outfit with a hat (see page 101). If you look
at the covers of this book, you can see that many of the
pants, capes, shirts, suits and even dresses are reused for
more than one outfit. (See the “Cover story” on
page 118 for details.)
If you belong to a professional theatre or traveling
troupe, you need to look not only at the individual
costumes, but at the wardrobe as a whole. Do the
costumes complement each other or help distinguish
one character from another? Although you may be
concentrating on one show at a time, it’s always nice
to be able to reuse (parts of) costumes for later shows.
In a solo act (like many ventriloquists have), your
puppets may not need a lot of different outfits, but
their costumes need to suit their personalities exactly
since costumes help create their character.
No matter what kind of theatre you work in or what
kind of puppet you have, you need to make sure that
your puppets are well covered for performances.
See page 109 for details.
First things first: of characters & costumes
7
On stage
On stageOn stage
On stage
Unless you perform in television
or video, your puppet costumes
will probably be seen from at least
several feet away, possibly under
bright lights. This has a big impact
on how you need to make and
decorate them. I’ve seen costumes
that look downright hideous when
viewed close up, yet give just the right sparkle on stage.
In the ideal setup, you’d be
able to test your costumes
in the actual stage and
lighting you’re going to use
for performance. In the real
world, that’s not always
possible. One trick I’ve
learned from making the
covers of this book is to take snapshots.
The flash of a camera can mimic the bright lights
and distance of a stage, and this helps you see if
your costume’s fine details might get lost during
performances. You might even say this helps you adjust
your costumes until they’re picture perfect…
Caring for your costumes
Caring for your costumesCaring for your costumes
Caring for your costumes
I know it’s tempting to just toss
everything in a heap after a
gruelling performance, but after
all the hard work you put into
your puppet costumes, it’s nice to
be able to use them over and over
again. You should be able to
machine wash most costumes unless you’ve done a lot
of hand sewing (like beadwork) or used delicate fabrics.
Any costume worthy of the name should be able to
tolerate gentle hand washing.
To store costumes, the plastic zipper bags that blankets
and sheets come in (or even large ziplock bags) work
very well since they keep dust and must out and all the
pieces in. Just make sure the costumes are nicely folded
(to prevent awkward wrinkles) and all the fasteners are
closed (so they don’t snag on things and tear off). If you
pack your costumes in a trunk or cabinet, put the items
that don’t handle squashing well (like hats) on top.
A little TLC and your costumes can last for years
of performances.
8
Choosing fabric
Choosing fabricChoosing fabric
Choosing fabric
The most important choice
The most important choiceThe most important choice
The most important choice
Take a closer look at the costumes on the covers of this book and you
can see that many of them are pretty much the same except for the fabric.
In the Wizard of Oz scene on the back cover, for instance, the Scarecrow,
Tin Woodsman, and Cowardly Lion outfits all came from the same basic
pattern (except for the hats), yet their overall appearance is strikingly different.
You really don’t need a lot of pattern styles to achieve variety since fabrics can
do that for you.
Even more importantly, the kind of fabric you choose helps bring out the
character you want to create. Imagine a jester dressed in all plain brown fabric,
or a detective coat in wild, dazzling colors. Would anybody recognize them?
Matching characters and fabric is undeniably one of the most important
costuming tasks.
Can you guess?
What material is the white
ruffled skirt of the Bo Peep,
Ginger Rogers, bridal, and
princess costumes made out of?
Dryer sheets! That’s right, over
150 used dryer sheets sewn
together. (And that’s not even
counting the sleeves and hats.)
Even though used dryer sheets
aren’t usually considered fabric,
they are surprisingly easy to work
with and very light weight.
(Always a consideration when
your arm has to hold that
costume up!) How’s that for
getting something out of nothing?
Choosing fabric
9
What to look for
What to look forWhat to look for
What to look for
To help you pick out the right fabrics for your costumes,
I’ve boiled down what I consider to be the key factors
when choosing fabric.
1. Color & pattern — look for
colors that complement your
puppet’s skin and hair tones, yet
contrast enough to be seen from a
distance. (You can even take your
puppets to the fabric store to help
you pick out!) The colors you use
should also complement your
puppet’s personality and
character. Soft pastels work well
for milder characters (like the Bo
Peep and Dutch girl outfits on
the front cover), while flashy or
vivid colors work better for others.
You can also decide whether you want fabric with a
preprinted pattern (like the tiger stripes and disco
print on the inside front cover). Watch out for
patterns that have to be carefully lined up (such as
pronounced stripes) or are so large they look odd
when cut into puppet-sized clothes (see page 46).
A small, random pattern is usually the easiest kind
to work with.
2. Thickness — if your hand shows through the fabric
when you hold it up to the light, it may be too thin
for a costume, particularly if it’s light colored and
your puppet has dark skin. (This is often a problem
with very cheap cottons and with sheer, fancy
fabrics.) At the same time, try to avoid fabric that’s
exceptionally bulky (like sweatshirt material or polar
fleece) unless bulk is what the costume calls for, since
these can be difficult to work with and often add
unnecessary weight to the costume.
3. Readiness to ravel & wrinkle — few fabrics are more
frustrating to work with than those that fall apart or
wad themselves up before you even try to sew them.
Look carefully at the cut edge of the fabric to check
for signs of raveling and loose strings. Almost all
fabrics ravel a bit, but if a fabric looks as if it’s rapidly
growing its own hair, steer clear. To test for wrinkling
problems, try squeezing a fistful of fabric in your
hand and then letting go.
4. Shine — many costumes, from princess robes and
ball gowns to Tin Woodsman outfits and suits of
armor, depend on catching the light during a
performance. If you can, try to consider what kind of
lighting your costume might be subjected to when
choosing shiny fabric.
Choosing fabric
10
5. Swooshiness — if you are making a long, full robe or
skirt, try unrolling a bit of fabric and holding it up to
see how it hangs. Some fabrics are naturally stiffer
than others and insist on making awkward points
rather than soft folds. Others drape down beautifully.
This is isn’t a concern for many costume parts (like
close-fitting shirts), but can make or break the
dramatic effect of a wide ballroom gown.
6. Stretchiness — a useful quality for making pullover
shirts and human-hands sleeves. Very stretchy fabrics
usually require some kind of interfacing along the
seams (see page 23).
7. Price — even if most of your
fabric comes from sale tables or
neighbor’s scraps (as mine does
to this day), you can still pick
the right fabric for the costume
if you consider the other factors.
At the same time, I strongly
caution against making a
decision based solely on price, since I have (on several
occasions) ended up making the same costume twice
when the first fabric didn’t hold out.
Types to choose from
Types to choose fromTypes to choose from
Types to choose from
Since fabrics masquerade under many different labels,
it’s always a good idea to look at the end of the bolt to
see exactly what kind of fiber a fabric comes from.
Many of the most familiar fabrics (including calico,
corduroy, gingham, felt, fleece, seersucker, muslin,
denim, velvet, and velour) come from cotton, while
many others (satin, jacquard, taffeta, and chiffon) are
usually made from polyester. Understanding the
available materials can help you predict how the fabric
will work for your costume.
Choosing fabric
11
✄
Cotton — cotton fabrics are generally easy to work
with, come in a wide variety of colors and patterns
(calicos often work well), are readily available, and
usually not too expensive. On the down side, some
cotton fabrics wrinkle or ravel too much, or are
simply too thin. To avoid this, you can try cotton-
polyester blends, which often provide the best of
both fabrics.
✄
Polyester — if you
immediately think leisure
suits, take a look in your
local fabric store and think
again. Polyester comes in an
incredible variety of styles,
colors, textures, and
brilliance. Some costumers
despise synthetics as second-
class, but for those who want
fabulous results on budget,
polyester can’t be beat.
Because polyester fiber
creates a lot of different
kinds of fabric, each behaves in its own special way.
Most are exceptionally easy to work with (since they
tend to lie flat and don’t ravel much), but be sure to
apply the fabric tests described earlier in this chapter
before picking one out.
✄
Nylon — notorious for its role in
stockings and panty hose, nylon also
works for capes, raincoats, and other
slick clothing. Since nylon that’s not
“rip-stop” tends to ravel horrendously, polyester-
nylon blends can make good substitutes.
✄
Rayon — I have been quite wary of using rayon ever
since the day I wore a knee-length rayon skirt to an
interview and it wrinkled so badly I had to wear a
coat all day to keep my underwear from showing.
At any rate, I highly recommend squeezing a fistful
or two to examine for wrinkling before buying.
✄
Muslin — a coarse, whitish cotton cloth used mainly
for making patterns, trial runs, dolls, and quilt
backings, muslin has a reputation for being cheap
(and that’s why people use it). But don’t ignore the
regular cottons and cotton-poly blends—you can
often find something of finer quality (and in more
color choices) that’s just as inexpensive.
✄
Stretch-knits — can be made of many fabrics but
usually come from cotton. You can easily identify
them by seeing how much they stretch. For tips on
working with stretchy fabrics, see page 23.
Choosing fabric
12
✄
Felt & flannel — if you need a
fabric that never ravels, felt or
flannel may be a good choice.
Flannel works better for clothing
(because of its softness), while felt’s
stiffness makes it excellent for hats.
✄
Fleece & polar fleece — non-raveling but often
bulky, these work well for soft, fuzzy costumes.
✄
Fake fur — when using fake fur, try to cut only
the backing, not the fur. Some people do this with
a razor blade; others work carefully with a scissors.
Fake fur can be great for trimming muffs and winter
coats, but may be too thick for an entire costume.
✄
Satin — if you ever see two fabrics you like, one
marked satin and one marked polyester, don’t be
fooled. Most satin is made from polyester. (The really
fine stuff comes from silk.) The word “satin,” like
many fabric terms, refers to the weaving method, not
the type of material.
✄
Acetate — okay, not all satins come from polyester.
Acetate ones don’t usually iron quite as nicely, but
they sew together just fine. Make sure to use a press
cloth when ironing them (see page 20) since they
tend to water-stain easily.
✄
Jacquard — a fancy term for satin (usually polyester)
with a pattern woven into it.
✄
Tissue lamé — temptingly glitzy, fabulously shiny,
dazzlingly colorful, and (to top it off) inexpensive.
The downside? About half of it may ravel away to
nothing before you get a chance to use it. (I even had
one costume ravel apart right through the seams!) If
you use lamé, buy a lot more than you’ll think you
need and leave extra seam allowance. There are
creative ways to alleviate raveling (see “Special
techniques for raveling fabrics” on page 23), but for
your first few projects, you should definitely try
something less troublesome.
✄
Silk — I don’t think I’ve ever
actually used silk, but you
might try it if you have a
special project in mind. Just
be sure to use an extra fine
needle in your sewing
machine—some silks are so
fine they must be sewn by
hand. (You might also need
extra delicate silk pins.) If
silk’s not in your budget, look
for a good polyester satin.
They can be just as shiny and
smooth, but with a significantly smaller price tag!
Choosing fabric
13
✄
Velvet & velour — thick and luxurious looking,
these cotton fabrics work great for royal robes,
dresses, and even stage curtains. Velour is often
cheaper and easier to work with than velvet, and a
close cousin, panaleur, outshines them both.
More on buying fabric
More on buying fabricMore on buying fabric
More on buying fabric
Most fabric is sold by the yard (or
eigths of a yard) from large cardboard
bolts 44-45” or 60” wide. Check the
end of the bolt for important
information like the fabric type, price,
and any special washing instructions.
(You probably want to avoid the “dry clean only” ones.)
Make sure to check out the remnant or discount tables
too. Since most puppets are smaller than people, you
don’t usually need a lot of fabric to costume them.
When fabric stores have leftover pieces of fabric that
aren’t much use for human clothes, they usually sell
them at very decent markdowns. Make sure to ask for a
further discount if the fabric is damaged. You can usually
cut around small holes and imperfections, but major
defects are never a bargain.
Once you get your fabric home, it’s a good idea to
wash and dry it before you start using it, since fabrics
may shrink or bleed the first time. If necessary, trim off
any raveling threads and iron the fabric using the
guidelines on page 20.
For tips on using your fabric, see the “Cutting out
fabric” section on page 45.
14
Basic sewing steps
Basic sewing stepsBasic sewing steps
Basic sewing steps
You can sew (and still have fingers left!)
You can sew (and still have fingers left!)You can sew (and still have fingers left!)
You can sew (and still have fingers left!)
You don’t need to sew perfectly to create great costumes, but it sure helps to
know the basics. If you haven’t done much sewing before, don’t worry! This
chapter can help you get started.
Essential equipment
Essential equipmentEssential equipment
Essential equipment
Although you can sew with just a needle and thread, I highly recommend
having access to tools like these:
✄
Seam ripper (an absolute must for removing stray stitches and icky seams)
✄
Measuring tape (the soft, flexible kind works best)
✄
Sharp scissors, preferably used only for sewing (paper dulls scissors rapidly)
✄
Straight pins, small to medium sized
✄
Sturdy thread (very cheap thread tends to break and jam your machine)
Words to know
✁ right side — your fabric’s
best looking side
✁ seam allowance — distance
between seam and edge of
fabric (usually 1/4”)
✁ presser foot — part of sewing
machine that holds fabric in
place while the “feed dogs”
pull it through (must be
lowered in order to sew)
✁ seam ripper — the most
important sewing tool!
Basic sewing steps
15
✄
Cardboard measuring mat (not absolutely essential,
but very handy)
✄
Iron (and a place to iron—you can buy very small
ironing boards that work on any flat surface)
✄
Sewing machine (as discussed below)
Sewing machines
Sewing machinesSewing machines
Sewing machines
Unless you’re an expert handsewer, I recommend getting
a sewing machine. They’re fast, they do a good job, and
they’re easy to use. You don’t need anything fancy—as
long as it does straight stitching of adjustable lengths and
runs decently, it’ll do. Decorative stitches and zig-zags
can be useful but they’re not necessary. Many sewing
machine stores sell inexpensive used models, and you can
always trade up if you ever want a better machine. Be
careful, however, about getting a machine that betrays
you at every other stitch. The machine should run
smoothly and without jamming, producing steady, even
stitches. Run a test scrap and scrutinize the stitches
carefully to make sure they’re all the same length.
Since every machine is different, you need to check the
manual to see how to wind bobbins and thread it. Most
machines have a veritable gauntlet of gadgets (mine has
seven) the thread must pass through before reaching the
needle. If yours doesn’t come with a manual and you’ve
gotten tangled up trying, ask the people where you
bought it or the people at your local fabric store for help.
Basic sewing steps
16
IMPORTANT first steps
IMPORTANT first stepsIMPORTANT first steps
IMPORTANT first steps
As a general rule, you need to sew your fabric right sides
together. The right side is the one you want facing out
when the costume is finished. It’s usually brighter, shinier,
more finely printed, or just plain better looking than its
opposite, the wrong side. (If try as you may, you can’t tell
the difference between sides, you’re probably pretty safe in
assuming it doesn’t matter for that particular fabric.) By
sewing fabric right sides together, you can turn the pieces
right side out when you’re done sewing, leaving the
stitching and untidy ends inside the costume where they
won’t show.
The distance between the stitches and the edge of the fabric
is called seam allowance. One fourth of an inch (1/4”) is the
standard seam allowance for all the costumes in this book, and
for most small costumes in general (5/8” is standard for
human-sized clothes). This not only affects how far from the
edge you sew, but the way you cut your fabric. You always
need to make sure each of your costume pieces includes an
extra 1/4” all the way around to get eaten up by the seam
allowance. Having a sufficient amount of seam allowance is critical to the
longevity of your costumes, since seams sewn too close to the edge are not only
difficult to create, but liable to come apart at the most inconvenient moments.
Last of all, there’s very little sewing that can’t be redone. Keep your seam ripper
handy and try it again (and again). So watch your fingers and start stitching!
When your machine wants to
quit working before you do
✁ Rethread the machine
completely (top and bottom)
✁ Look for anything in the
bobbin area that may be
jamming things up. Broken
needles, pins, and even lint
build-up can prevent smooth
operation. (Because of this, try
to avoid sewing over pins
whenever you can.) Then
rethread the machine.
✁ Replace the needle and
rethread the machine
If all else fails, start looking for
repair shops. (I can usually get my
10-year-old machine to behave
just by waving a trade-in coupon
in front of it a few times.) A
reputable, friendly repair shop is
an absolutely invaluable resource
(if you have the good fortune to
find one). Did I mention you
should rethread the machine?
Basic sewing steps
17
Start stitching!
Start stitching!Start stitching!
Start stitching!
Since straight seams are the easiest to sew…
1. Get a fabric scrap (or a paper towel) and fold it in half right sides together.
2. Place your scrap in the machine so that the unfolded edges
line up with the edge of the presser foot (this creates
approximately 1/4” seam allowance).
3. Turn the wheel on the side of your machine towards you
to lower the needle into the scrap.
4. Next, put the presser foot down (there’s usually a little lever for this). The
presser foot must be down whenever you stitch. This allows the material to
automatically feed through evenly—you should never have to push it. You
only need to gently guide it through.
5. Press the foot pedal to stitch forward a few stitches, then stop.
6. Press the “reverse” level or button to stitch backwards a
few stitches. This is the machine equivalent of tying a knot
and will hold your stitches in place.
Key to illustrations
✁ foot up, needle up
✁ foot up, needle down
✁ foot down, needle up
✁ foot down, needle down
Some machines come with several
changeable feet, each with a
different purpose. A zipper foot
is one of the most common (and
most useful)! I still don’t know
what most of the feet on my
machine are for, so don’t worry if
you don’t have a lot of them.
Basic sewing steps
18
7. Continue stitching forward until you get to the end
of the fabric. Reverse for a few stitches again, then
stitch forward off the end of the fabric.
8. Raise the needle to its highest position. This prevents
it from becoming unthreaded.
9. Raise the presser foot and remove the fabric from
your machine.
10.Cut off the extra threads hanging from the fabric so
they don’t get in the way later.
You did it! Look at that lovely seam! Turn your scrap
right side out to admire it fully. If you can do that (plus a
few more tricks explained shortly), you can sew the
costumes in this book!
If your seams don’t come out right (and this happens to
everyone, beginner or expert), you can always use a seam
ripper to tear them out and try again. That’s the beauty
of sewing.
Up (and down) on the corner
Up (and down) on the cornerUp (and down) on the corner
Up (and down) on the corner
Of course, you would have a difficult time costuming if
you could only sew straight seams.
1. When you come within 1/4” of a sharp turn, lower
the needle into the fabric, then raise the presser foot.
Basic sewing steps
19
2. Pivot the fabric to the left. Since you have the needle
lowered, you won’t lose your place in the stitching.
3. Line the fabric up with the edge of the presser foot
again, then lower the presser foot.
4. Continue stitching merrily as usual!
Rounding curves
Rounding curvesRounding curves
Rounding curves
Approach curves slowly and watch your fingers. For
gentle curves, that’s all the advice you need. For more
rambunctious curves, you need to make lots of little
stops and pivots (not huge changes in direction). (You
may also want to shorten the stitch length.)
Whenever you feel the fabric becoming hard to steer,
lower the needle, raise the foot, pivot the fabric just a
little, then lower the presser foot again and continue
sewing. Keep repeating this until you’re back on the
straight away.
Once you’ve completed your
curved seam, you may need to snip
the seam allowance here and there
to make the costume easier to turn
right side out (just be careful not to snip the seam…)
Basic sewing steps
20
Pressing matters
Pressing mattersPressing matters
Pressing matters
Once you’ve sewn your seams, it’s generally a good idea to iron them flat (but
please don’t try it with a paper towel, okay?) This helps the costume look and
hang dramatically better. Some people like to iron their seam allowance to one
side; others insist you must spread the seam open and iron it flat. Some fabrics
naturally iron better than others, so my advice is do whatever your fabric wants
to do. If it wants to lay to one side, iron it to that side. If it doesn’t mind being
ironed open, iron it open.
Beyond that, the key to good ironing (and good costuming) is to iron early and
iron often. Don’t wait until you’ve finished the costume. Instead, iron each
seam or part that needs ironing as you go.
For many fabrics, you may need to spritz the costume with a bit of water from
a spray bottle to get it completely smooth. For delicate fabrics, you can put a
damp press cloth (like a cotton handkerchief) on top of the fabric to protect it
from heat and water stains.
How hot?
Generally speaking, synthetic
fabrics (like nylons and polyesters)
don’t tolerate heat as well as
fabrics made from natural fibers
(like linens, cottons, and silks).
Most irons these days come
marked according to types of
fabric rather than temperature,
but if you’re not sure which
setting to use, try ironing a scrap
of the fabric first. If you can get a
nice crease without scorching the
fabric, it’s just right. Wait for
the iron to get hot before you
start pressing!
Basic sewing steps
21
Hemming
HemmingHemming
Hemming
Hems give edges (like necklines and the ends of sleeves and pant legs) a smooth,
completed appearance. They also keep the fabric from raveling.
To make a hem:
1. Turn the edge under 1/4” (toward the inside
of the costume). For curved edges, you may
need to snip the fabric here and there as on
page 19.
2. Iron the turned-under edge flat.
3. Turn the edge under another 1/4” (this encases
the ends of the fabric and keeps them from
raveling) and iron again if necessary.
4. Pin the folded-under edge to the fabric to hold
it in place. Remove the pins as you stitch along
the edge.
NOTE: For a softer hem, you may want to stitch
the edge by hand using the whip stitch from page 26. To keep the stitches from
showing on the outside, carefully poke the needle through just a few threads
of fabric.
In stitches
For most sewing, a medium
length straight stitch works best.
If you use special stitch, set your
machine back to normal as soon
as you’re done so you won’t
surprise yourself the next time
you sew.
✁ Zig-zag
These can slow
down raveling along the edges
of seams (see page 23).
✁ Decorative
Nice, but not
necessary. I like to use scallop
stitches for decorative hems.
✄
Basting
A longer length straight stitch,
basting is faster and easier to
tear out than normal stitching.
You may want to baste tricky
seams first. If it works well
with basting, then stitch it!
Basting can also create
gathering (see page 22).