Planning a deck
Bạn đang xem bản rút gọn của tài liệu. Xem và tải ngay bản đầy đủ của tài liệu tại đây (101.19 KB, 4 trang )
P
lanning a Deck
OVERVIEW
Introduction
Once you have decided you can no longer live without a deck in your backyard, your first step is to start the
planning process. The planning process is simple, fun, and can be done in a relatively short period of time.
Whether you plan on hiring a contractor or building the deck yourself, the planning process will help you
determine exactly what you want and what deck features you can use most effectively. All you need are some
simple drawing tools and a good idea of how you want to use your new deck.
As any architect will tell you, the best way to plan the construction of any building, object or space is to follow
these basic steps: CREATE A PROJECT PROGRAM which will include all desired elements and uses; understand
and sketch your EXISTING CONDITIONS; develop a SCHEMATIC DESIGN diagram based on your requirements
showing program elements; DEVELOP THE DESIGN into an actual sketch or plan using correct dimensions and
scale; create a CONSTRUCTION DOCUMENT to build from including structure and materials.
If you plan on hiring a contractor, they will develop the construction document based on your design. If you plan
to build the deck, you will need to determine specific structural information to complete the construction
document.
• Beginner - 3 to 4 hours
• Intermediate - 2 to 3 hours
• Advanced - 1 to 2 hours
Check for deck building codes in your area before you start the planning process. This
will save you from having to redesign your deck if your first choice fails to meet code.
Many design professionals will take small pieces of paper or "post-it" notes and cut out
furniture and elements to the correct scale, then move them around on the paper. This helps in planning size
and space.
If you plan on hiring a contractor to build your deck, your local building department should
have a list of approved contractors that you can contact.
STEPS
1.
Step 1 - Create a project program
Write down all the things that you want to do with your deck and prioritize
them. Some examples: Will you be cooking on the deck - how big is your
grill?
2.
Or will you have a dive platform into the pool? Why not a bench to dry off?
Will you be eat dinner on the deck? How big is the table and how many
chairs do you have? Account for room to scoot and the number of people
that might use this deck at one time. How about parties?
3.
You will need to have steps for easy access to the yard or garage, so
account for those as well. Also think about if you want your deck in the
shade or sun. and where trellis or existing trees are located.
4.
Do you want a Jacuzzi? If not now, you might in 3 years. Once you have a
rough idea of how many people will use the deck, how you will furnish it and
what built-in features you want, you are ready to start sketching.
5.
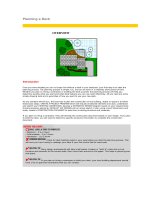
Step 2 - Account for the existing conditions in your yard. (Figure 5)
Using your tape measure and graph paper, measure and sketch the
structure and adjacent landmarks that your deck will be attached to and be
surrounded by. This is really easier than it sounds. Use a ruler or straight
edge and make a simple diagram (bird's eye view) of the surrounding
structures and landmarks that are close enough to be relevant including
driveways and landscaping. Be sure to measure the distances between these
objects and draw them correctly.
a.
Each square on your ¼" graph paper can represent one foot. If
your structure will not fit on one length of paper, either tape two
pages together or have each square represent two feet.
b. Be sure to show door and window locations on adjacent structures.
This has an obvious impact on access and sight lines.
c.
Shade, sunlight and wind protection can be important factors when
designing outside space. Adjacent trees should be shown on the
plan. Show both the trunk and the "drip line" which designates is
the outside edge of the branches above.
6.
Step 3 - Create a schematic design (Figure 6 & 7)
Once you have the existing conditions correctly drawn to scale, your sketch
will help you make some initial decisions about deck size and constraints.
The yard, driveway, house and landscaping will act as important elements in
your design.
a.
Make several copies of your sketch showing existing conditions and
use this as a template for the planning process. You'll go through a
few of these before you are done.
b.
Begin creating cartoon like diagrams of the different functions and
elements on your template. Show all desired elements in your
initial sketches including picnic table(s), barbecue grille, benches,
railings and steps.
c.
If you are brainstorming multiple design options, let your
imagination go to work and draw as many ideas as you can.
Sometimes your best design doesn't appear until your 3rd or 4th
version.
7.
Step 4 - Development your design (Figure 8)
Once you have established a design diagram or deck shape you like, a final
draft with correct dimensions needs to be drawn. You will now need to
consider a third dimension. Access to the deck from the yard or building is
seldom from the same level (or elevation as we say in the business).
a.
Your first step is to layout to scale the shape of your deck. Do this
on your template using the ¼" squares.
b.
Measure the vertical distance from the building access (or highest
point) to the ground access (or lowest point). This dimension
divided by 6" will give the approximate number of steps required
on your deck.
c.
Place the steps at desired locations making the run (or tread)
approximately 12" or any length you desire. Remember that you
can place steps on the edge or middle of your deck.
d.
Indicate railings and benches along the perimeters. Railings should
be used wherever the deck exceeds 18" in height off the ground.
8.
Step 5 - Construction drawing (Figures 9 & 10)
A construction drawing has many purposes. It acts as a guide showing you
how to build your deck. It helps you order the correct materials for the
project. Depending on your city of municipality, you may also be required to
submit these drawings for a construction permit. Many cities require the
following items be submitted before they will grant you a building permit:
a.
A photo of the part of the house you are attaching too.
b.
A site plan of the lot showing all structures including drives with
the deck indicated.
c.
An enlarged floor plan of the new deck
d. An elevation of the deck and attached structure. (An elevation is a
drawing of the side or face of the structure).
e.
There is usually a small examination fee to be submitted with your
application. A construction drawing typically consists of what is
required to actually construct your structure. It should indicate
actual dimensions and materials. Think about what size of each
element you will use. Think about how much concrete to set your
support posts. How many galvanized nails you'll need. An effective
construction plan has a COMPLETE material list. If you hire a
contractor, he is responsible for the permit and providing the city
with whatever is required. Be sure to attach your final planning
sketch to your written agreement with your contractor. You want to
make sure he builds exactly what you've designed.
Materials Needed
•
Tape measure
•
Graph paper (1/4" squares are preferable)
•
Ruler or straight edge
•
Pencils, markers or crayons
•
"Post-It" notes